How to View a Course
This guide will walk you through the process of navigating through the LMS to view a specific course.
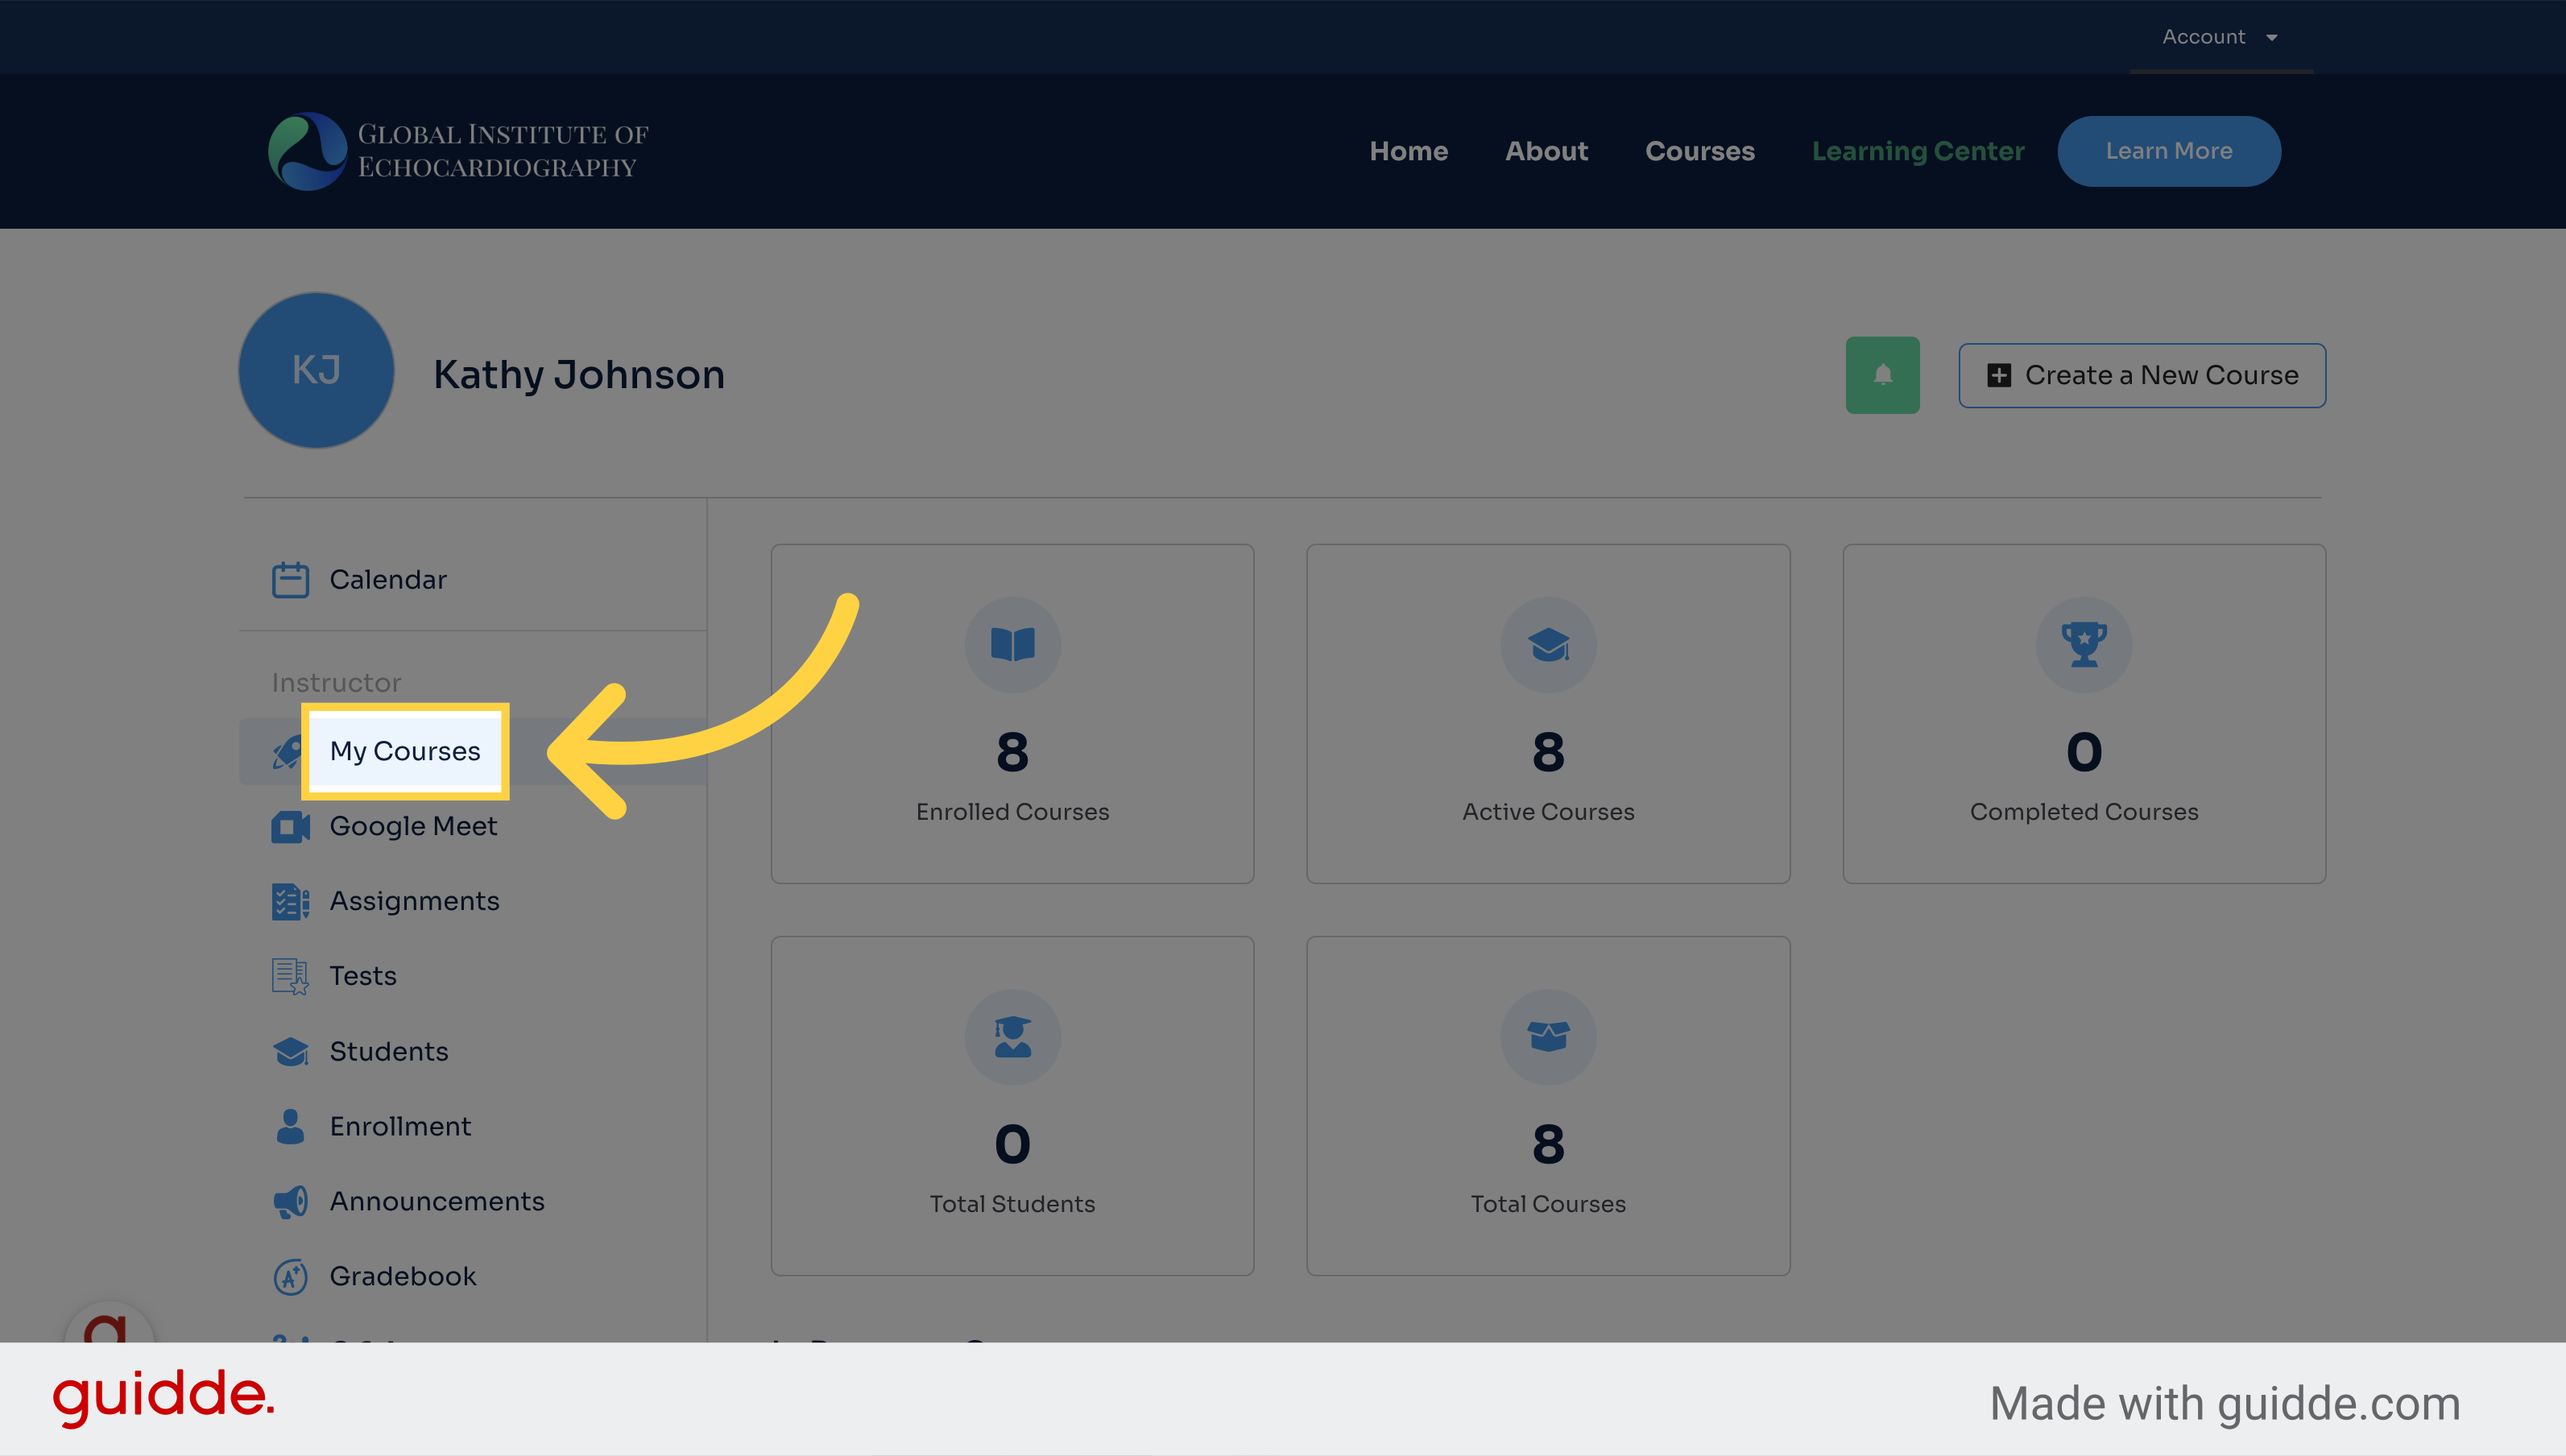
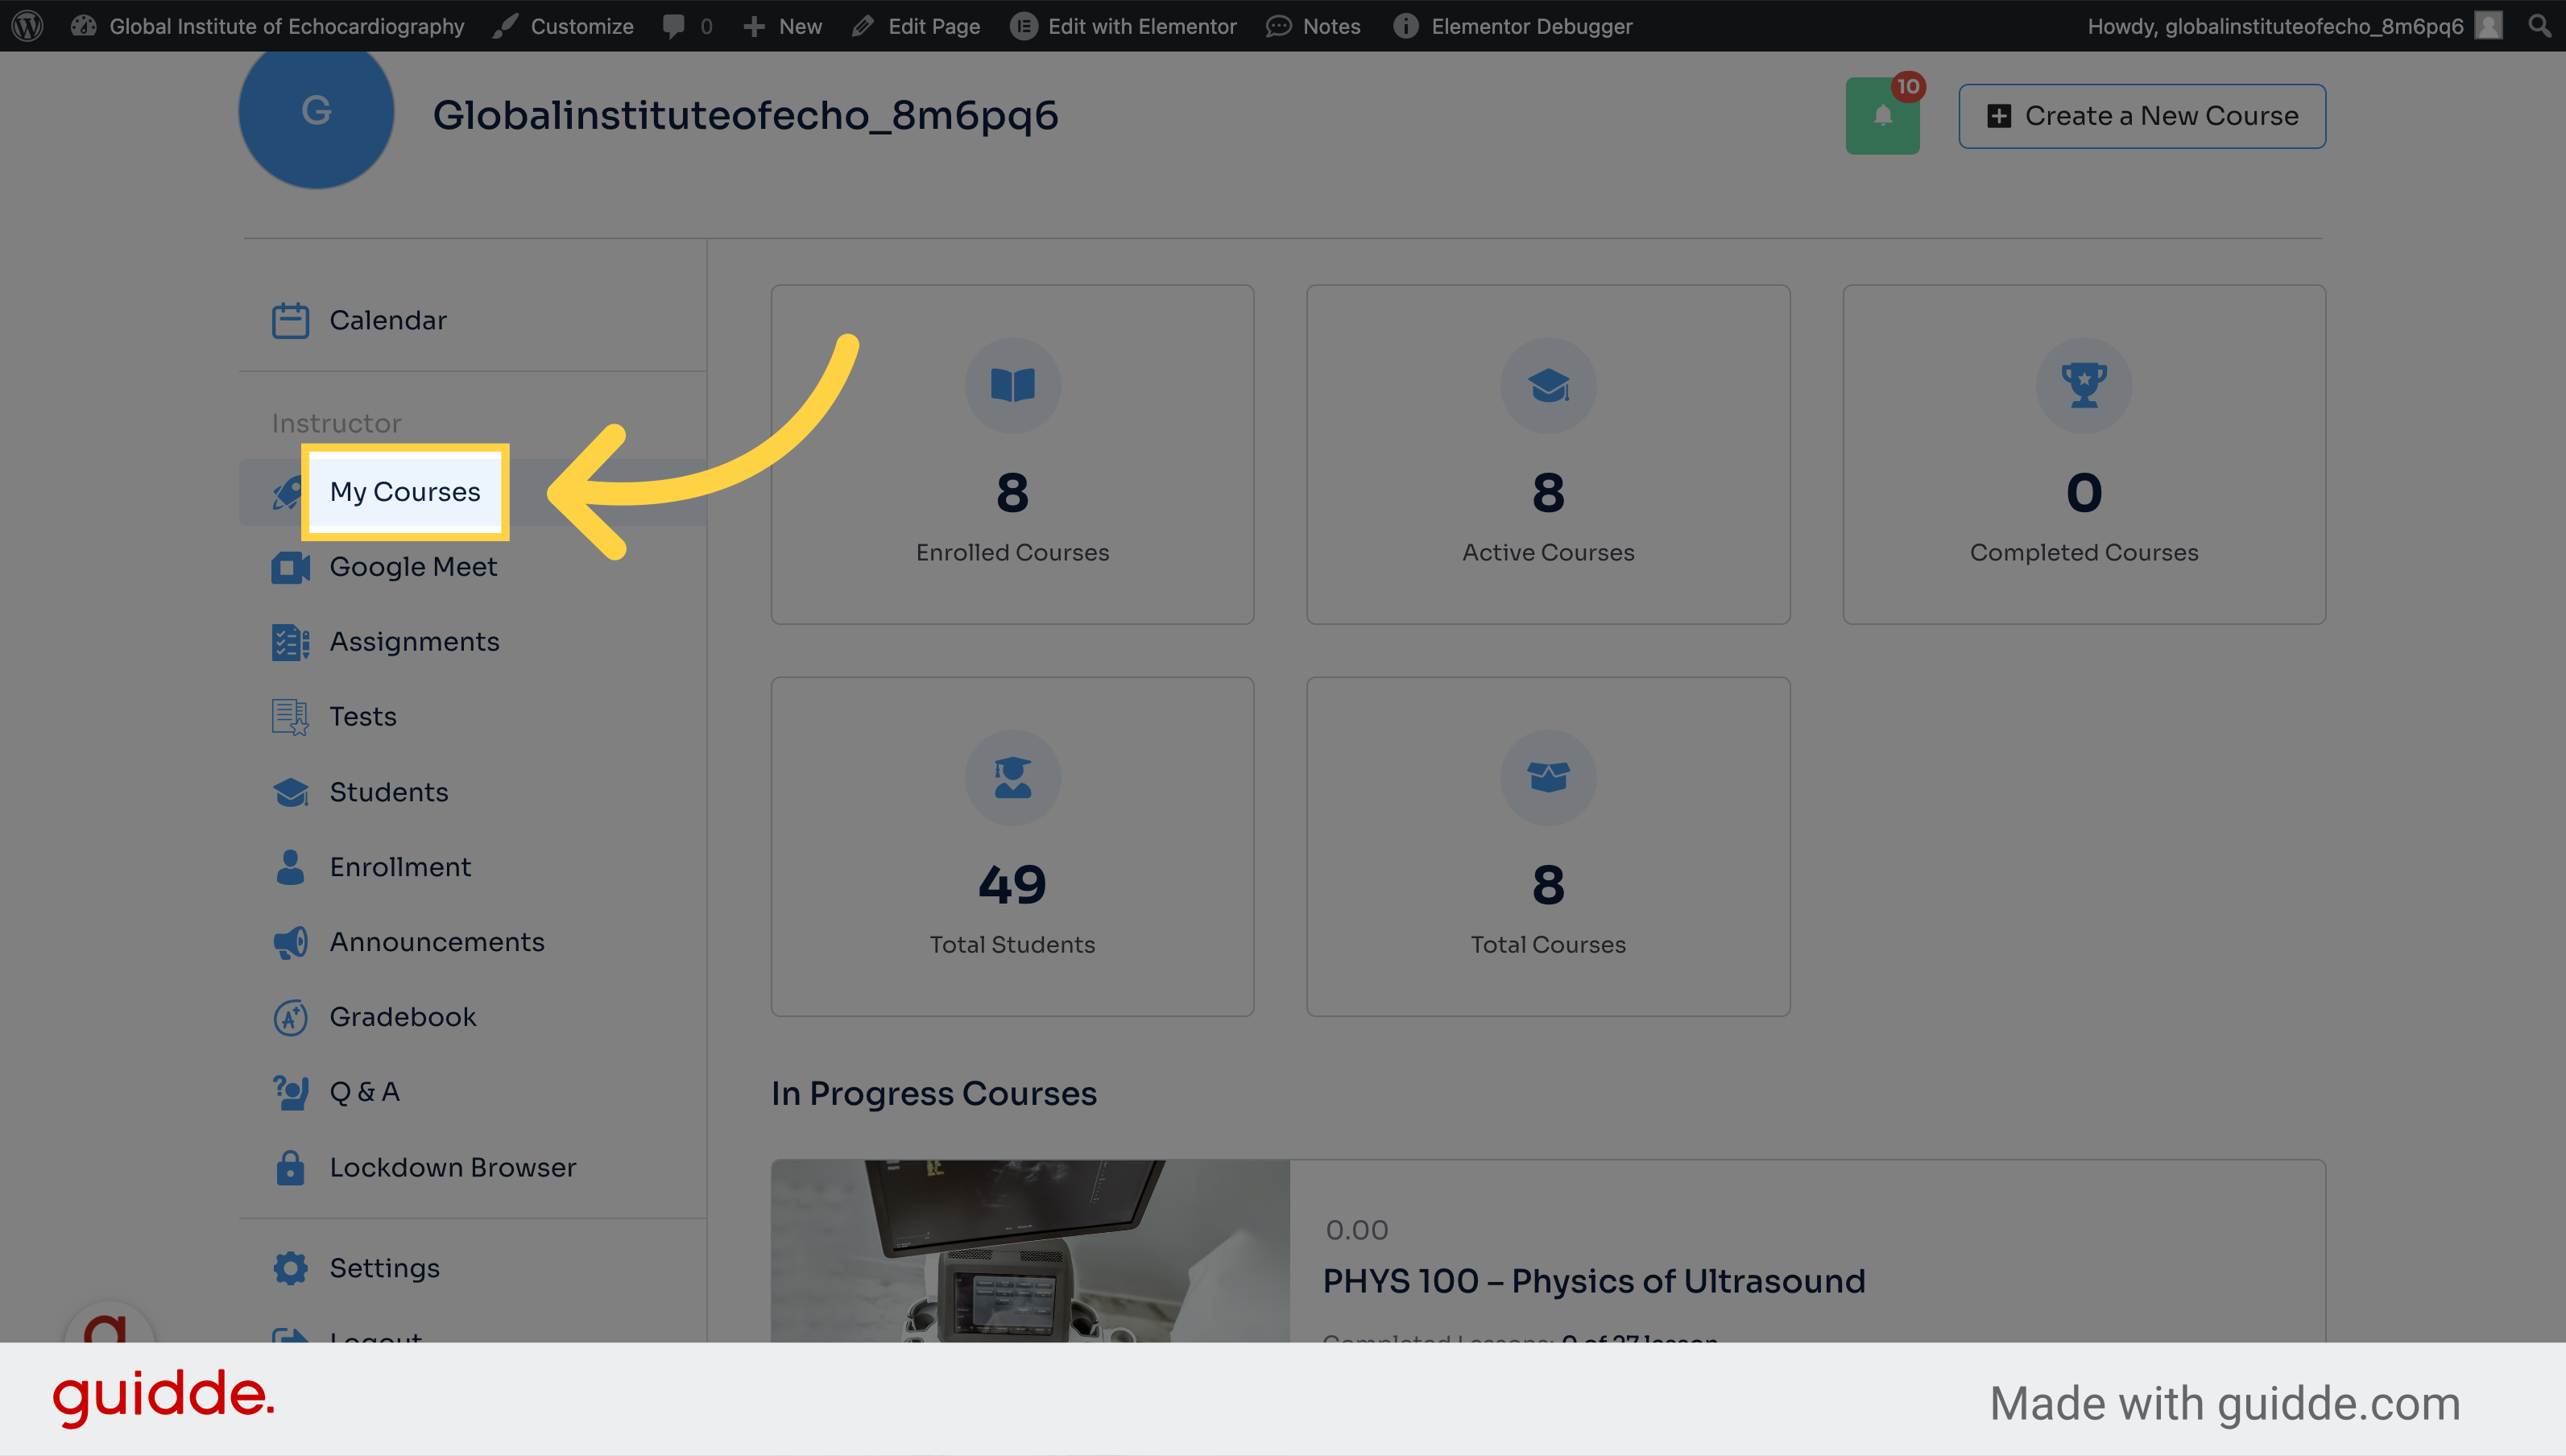
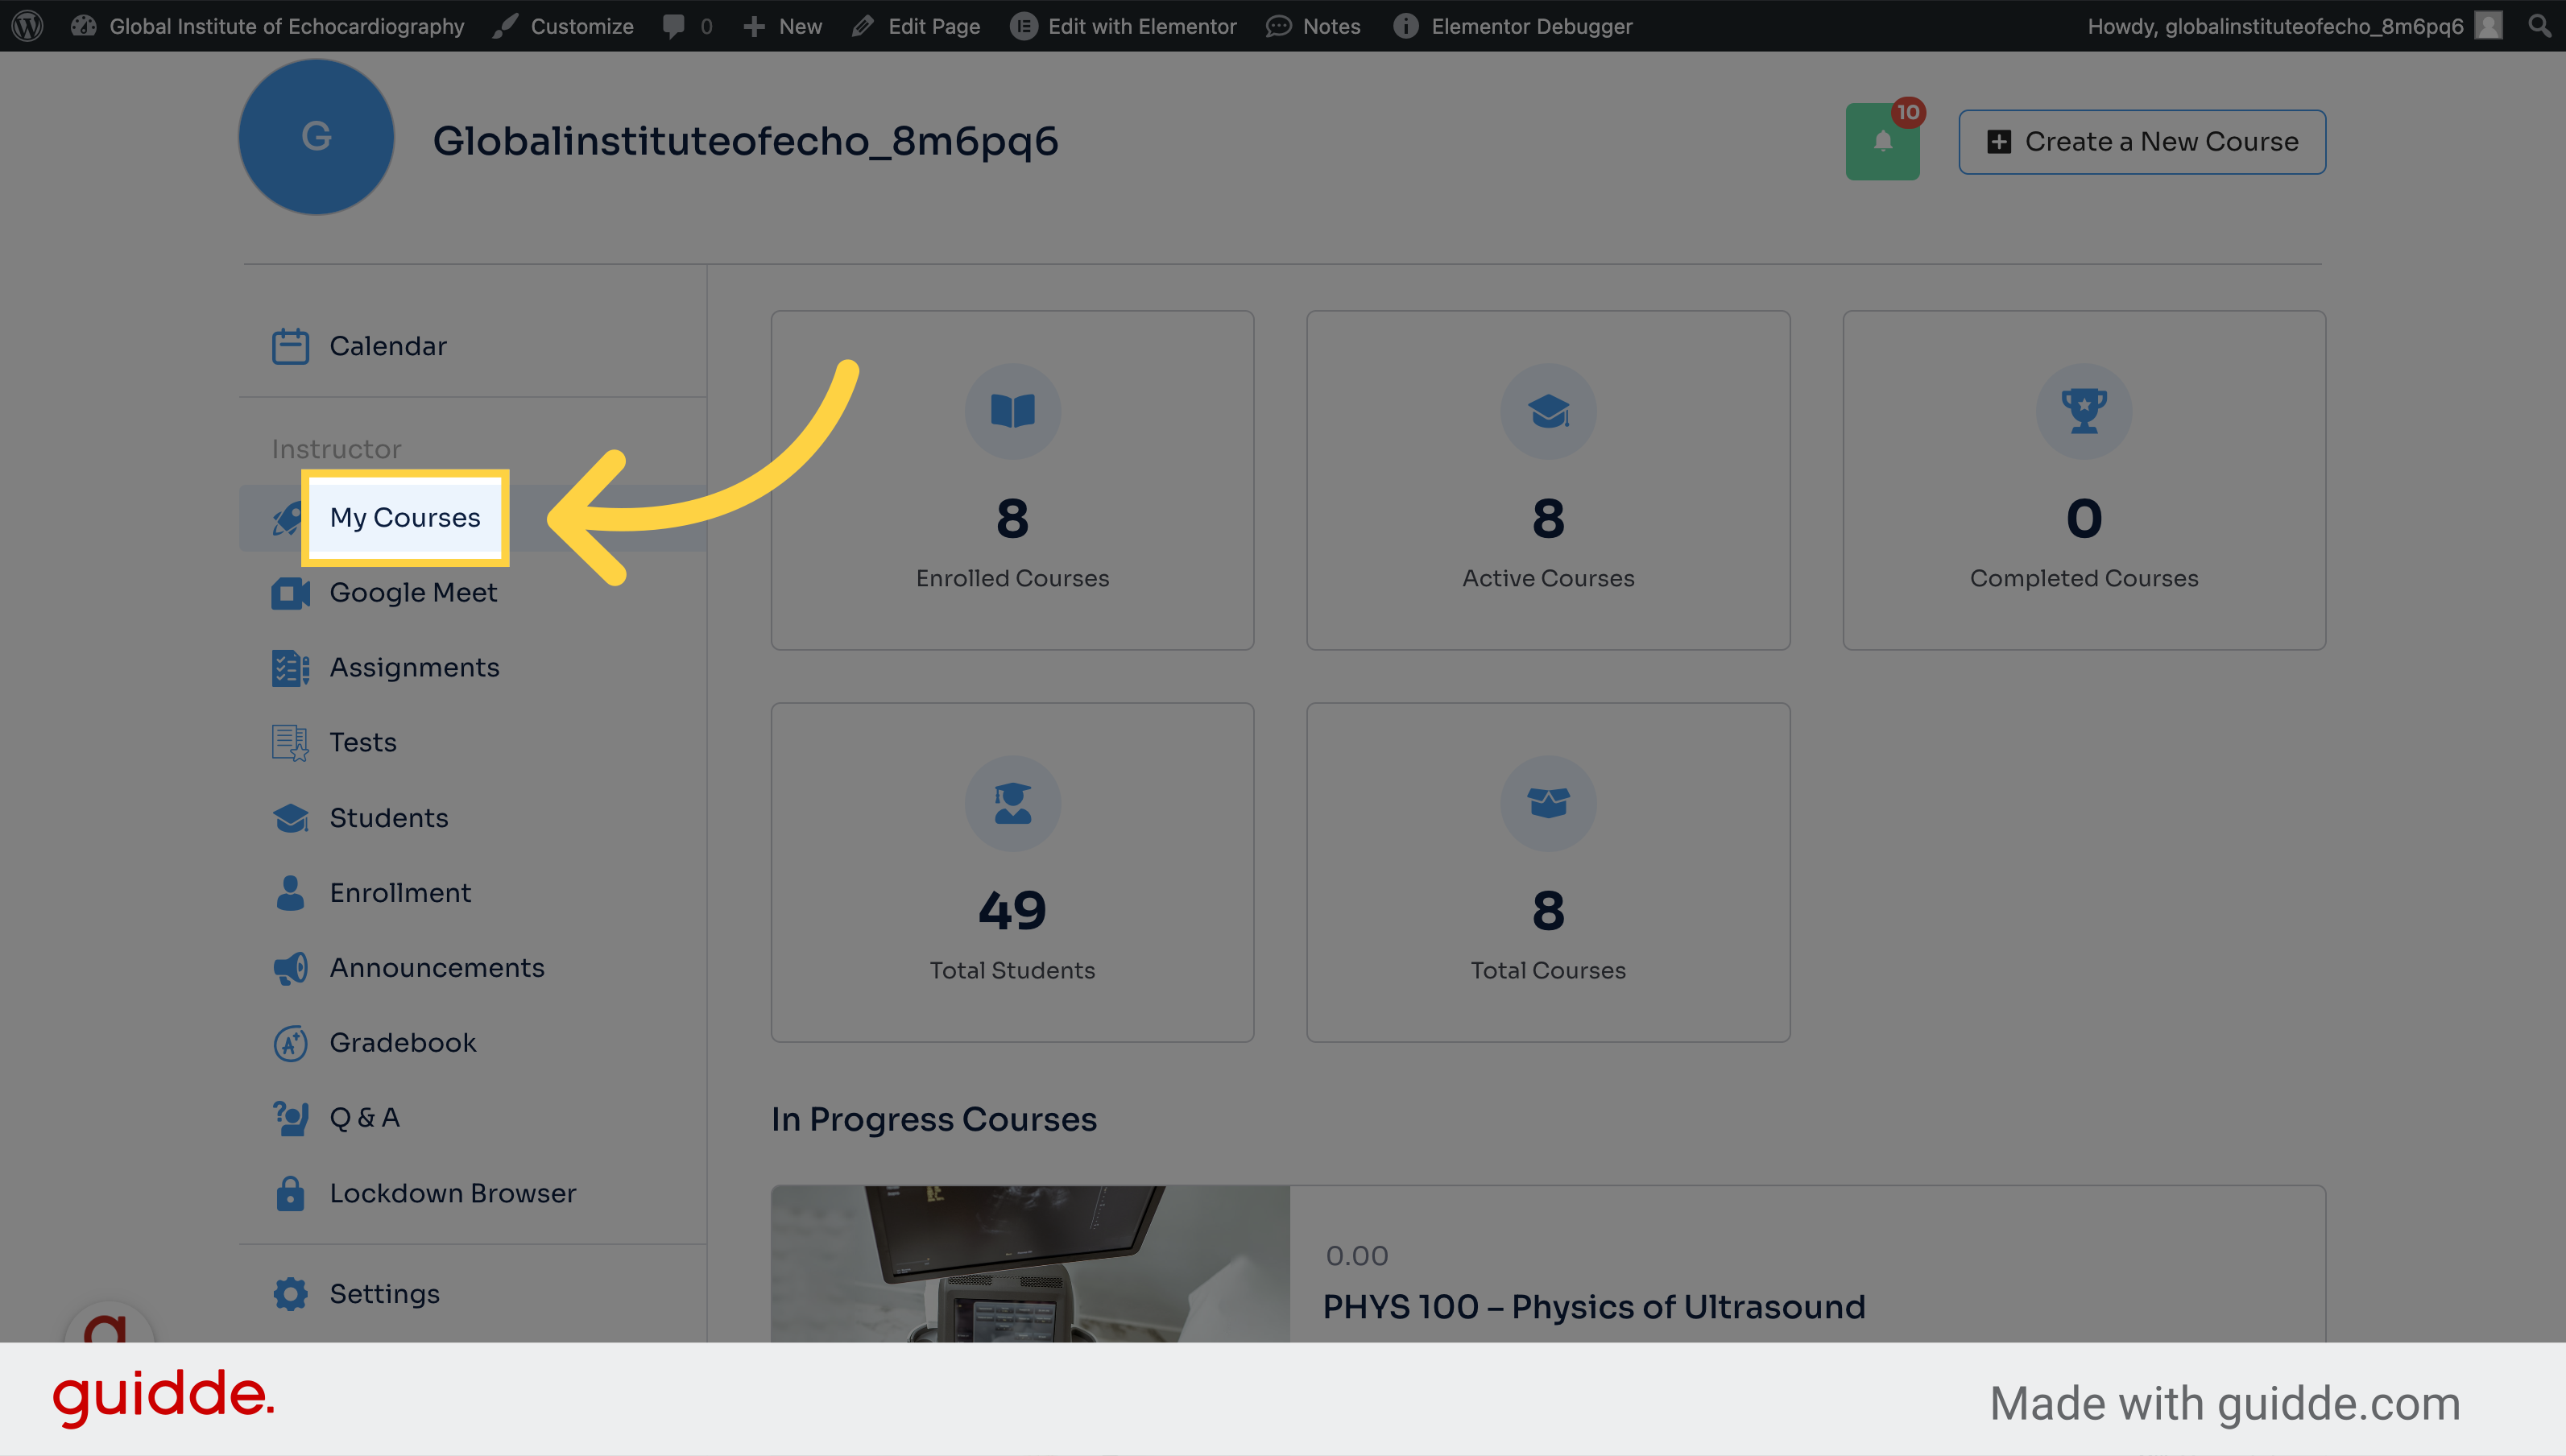
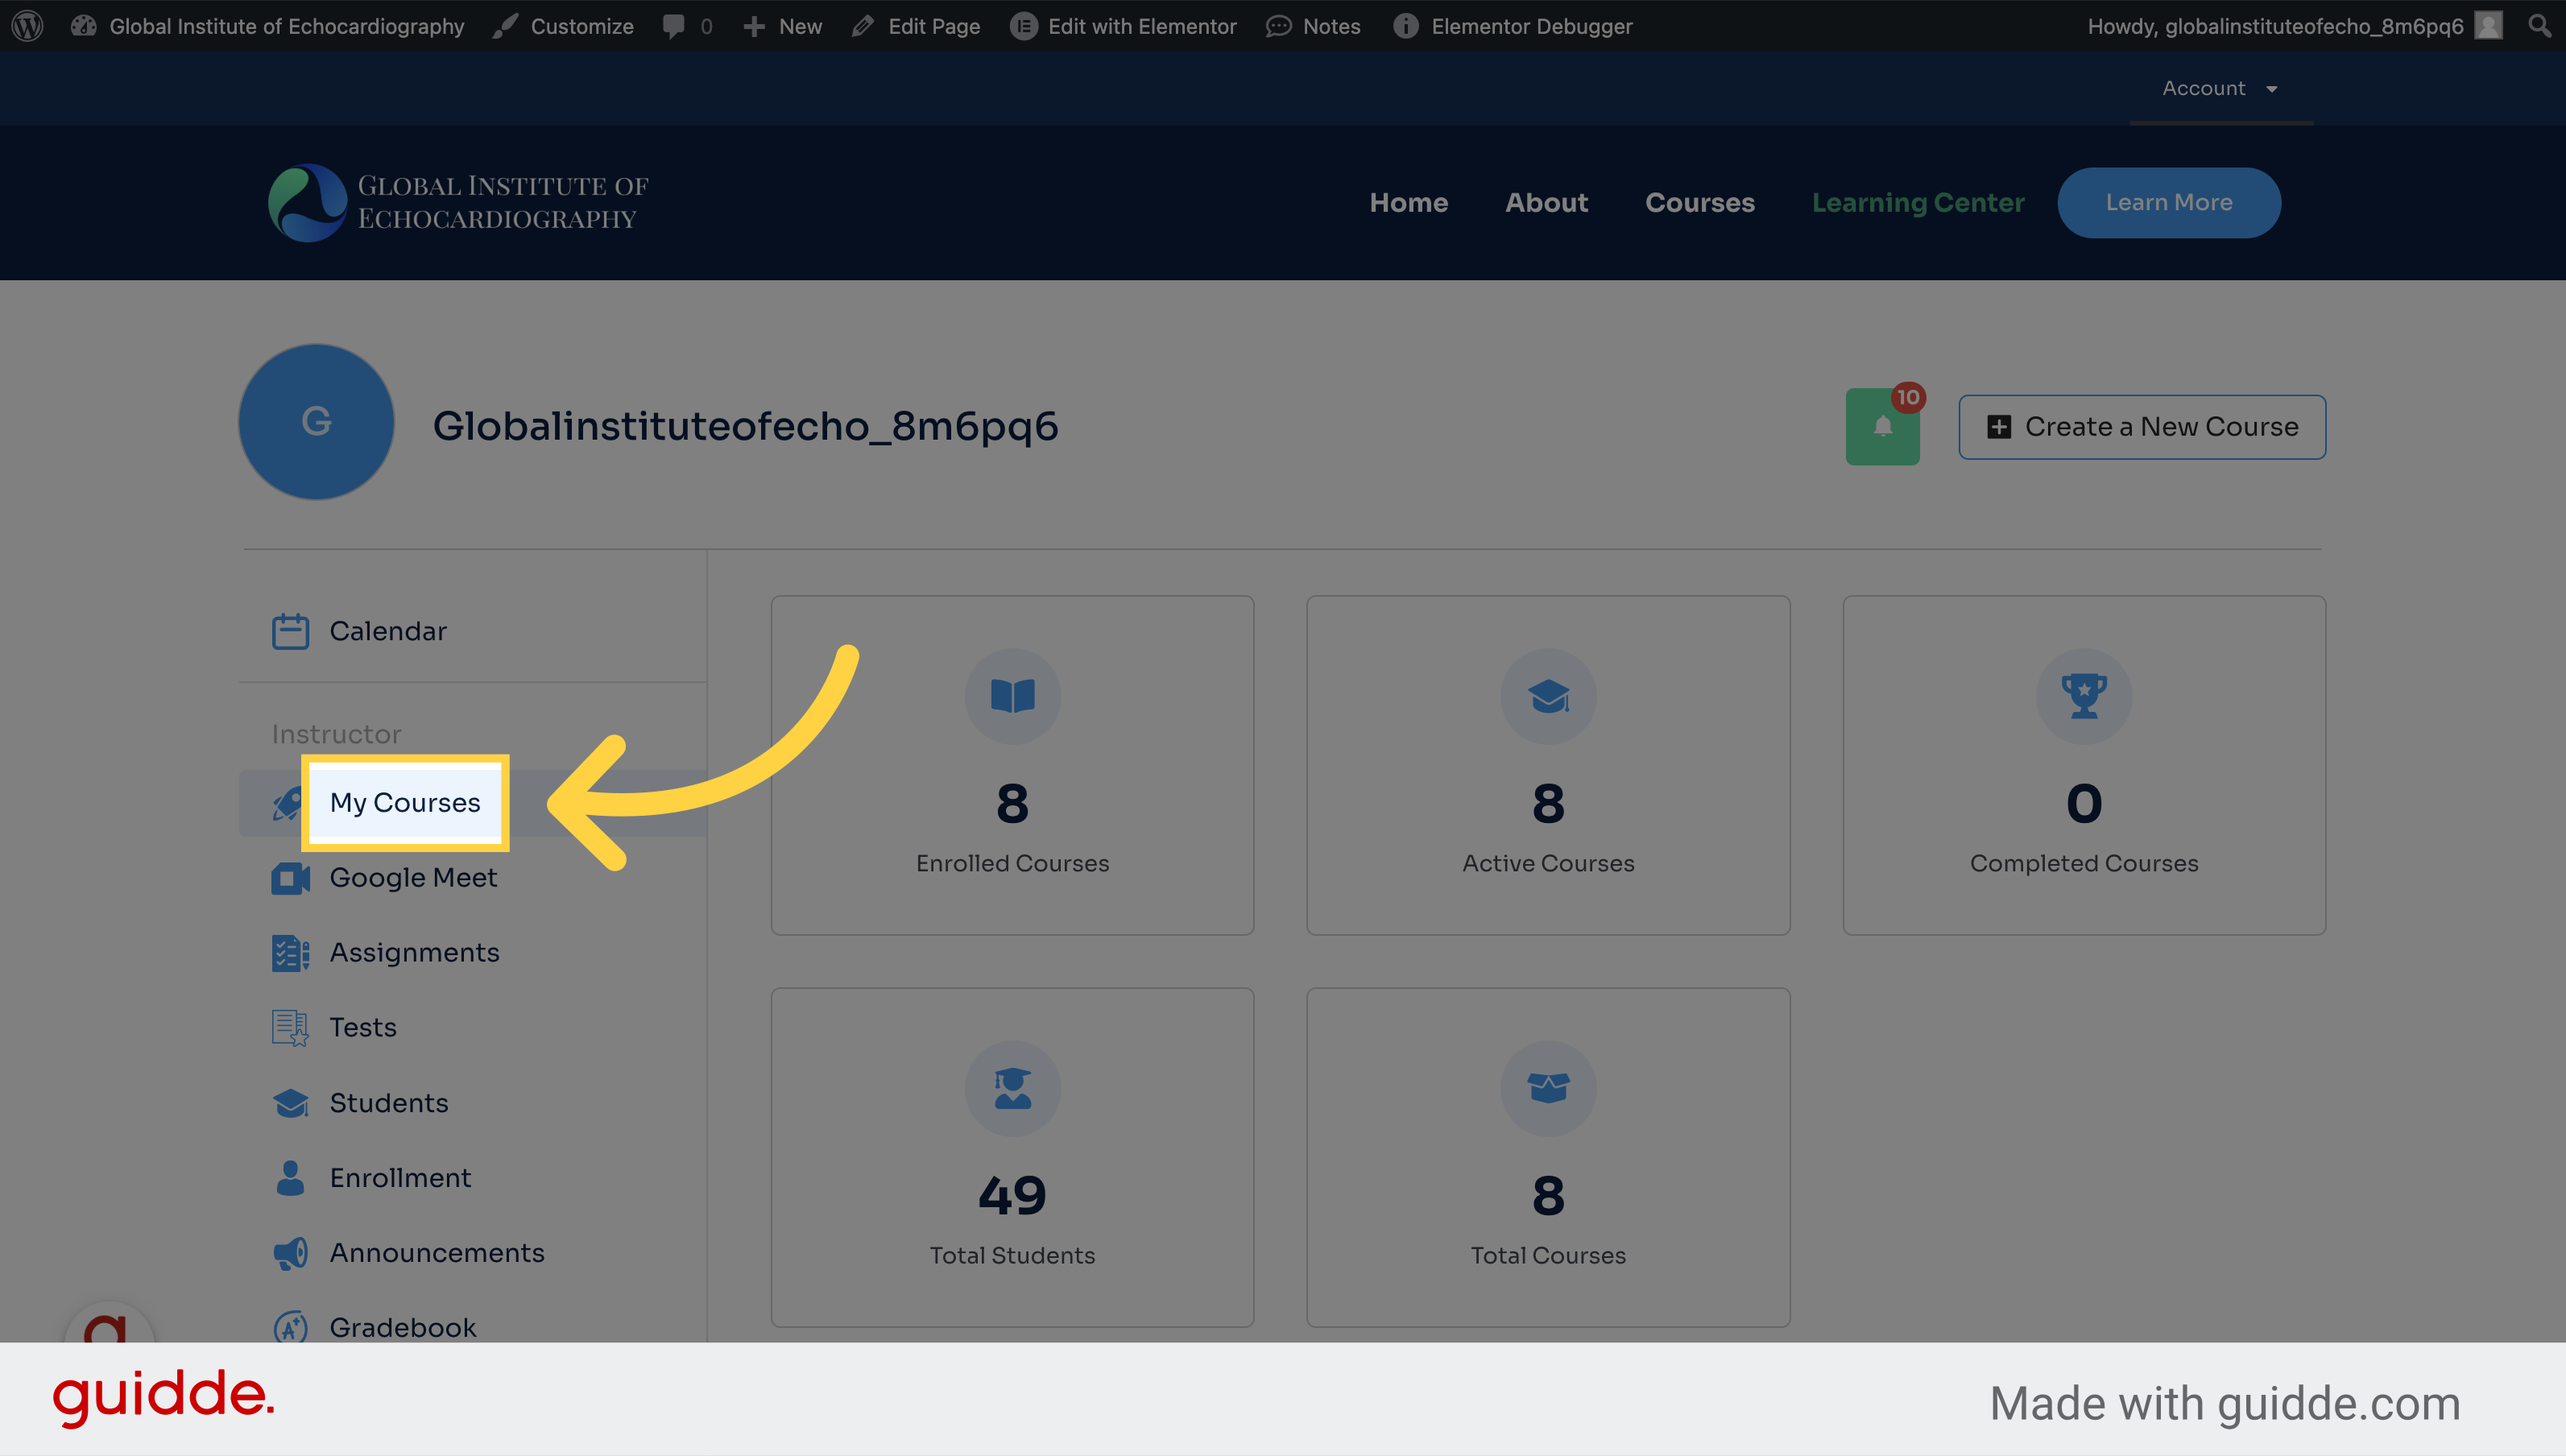
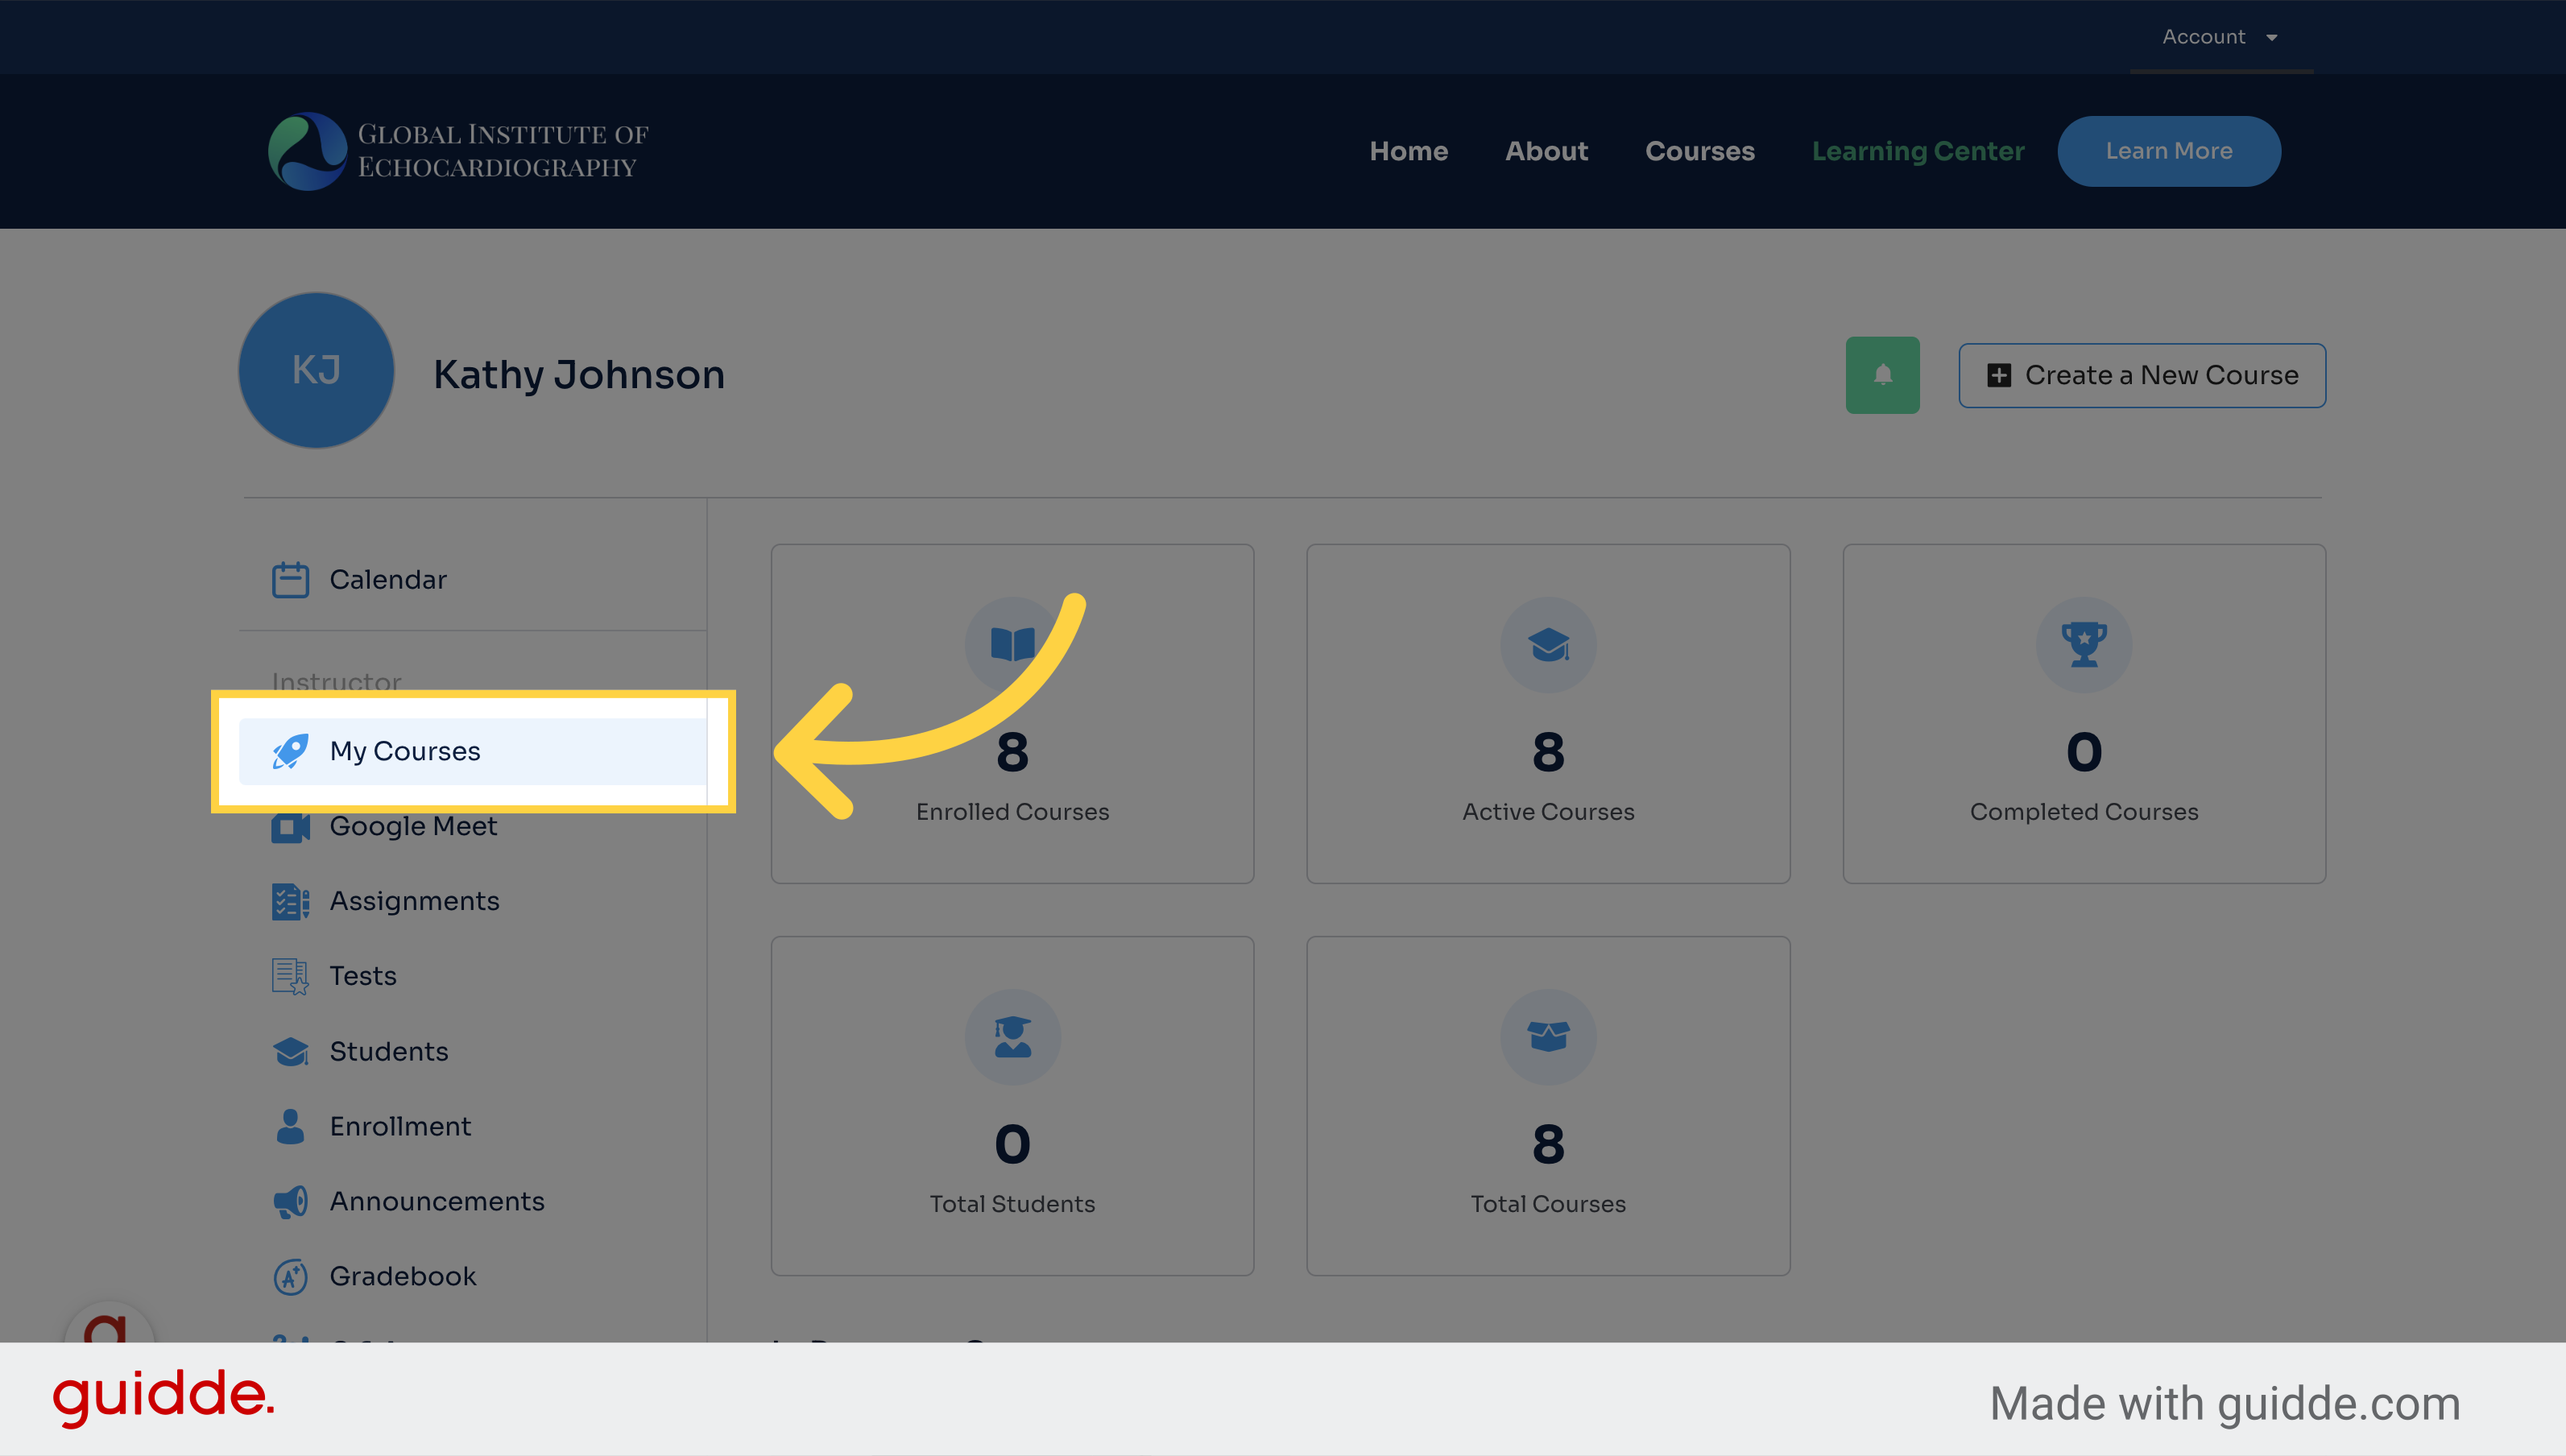
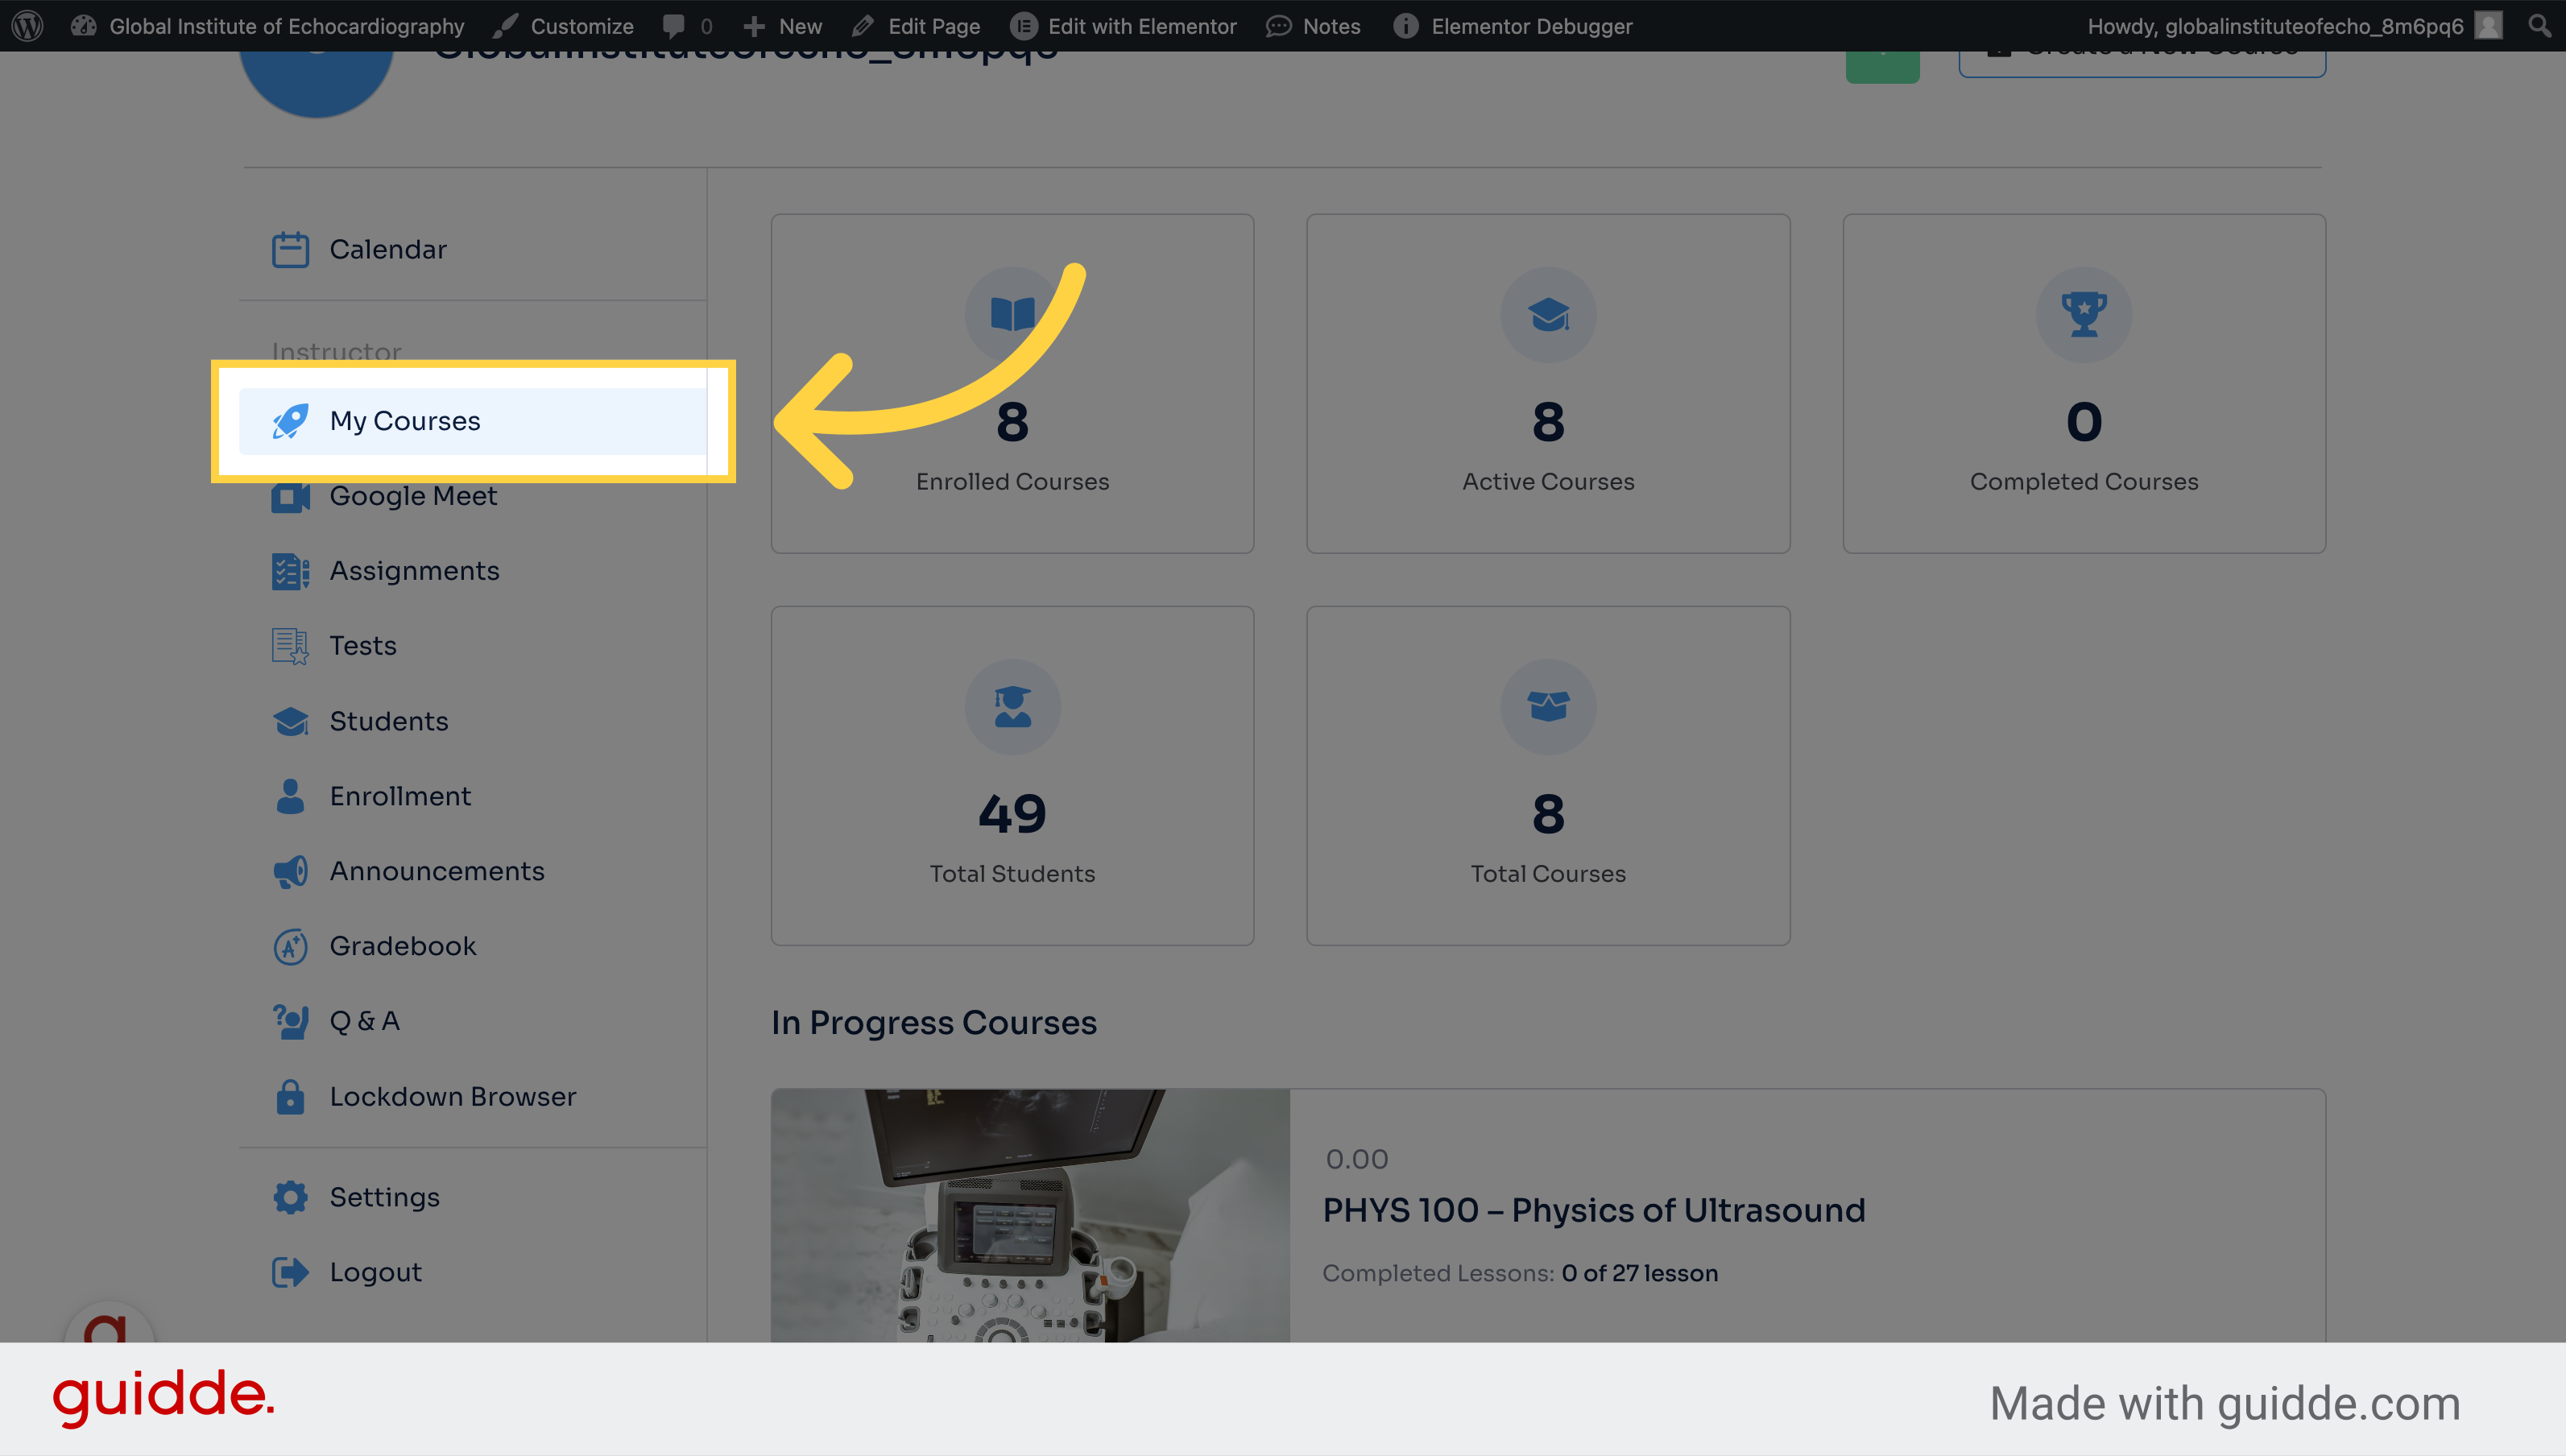
1. Click "My Courses"
Access your courses by clicking on "My Courses.
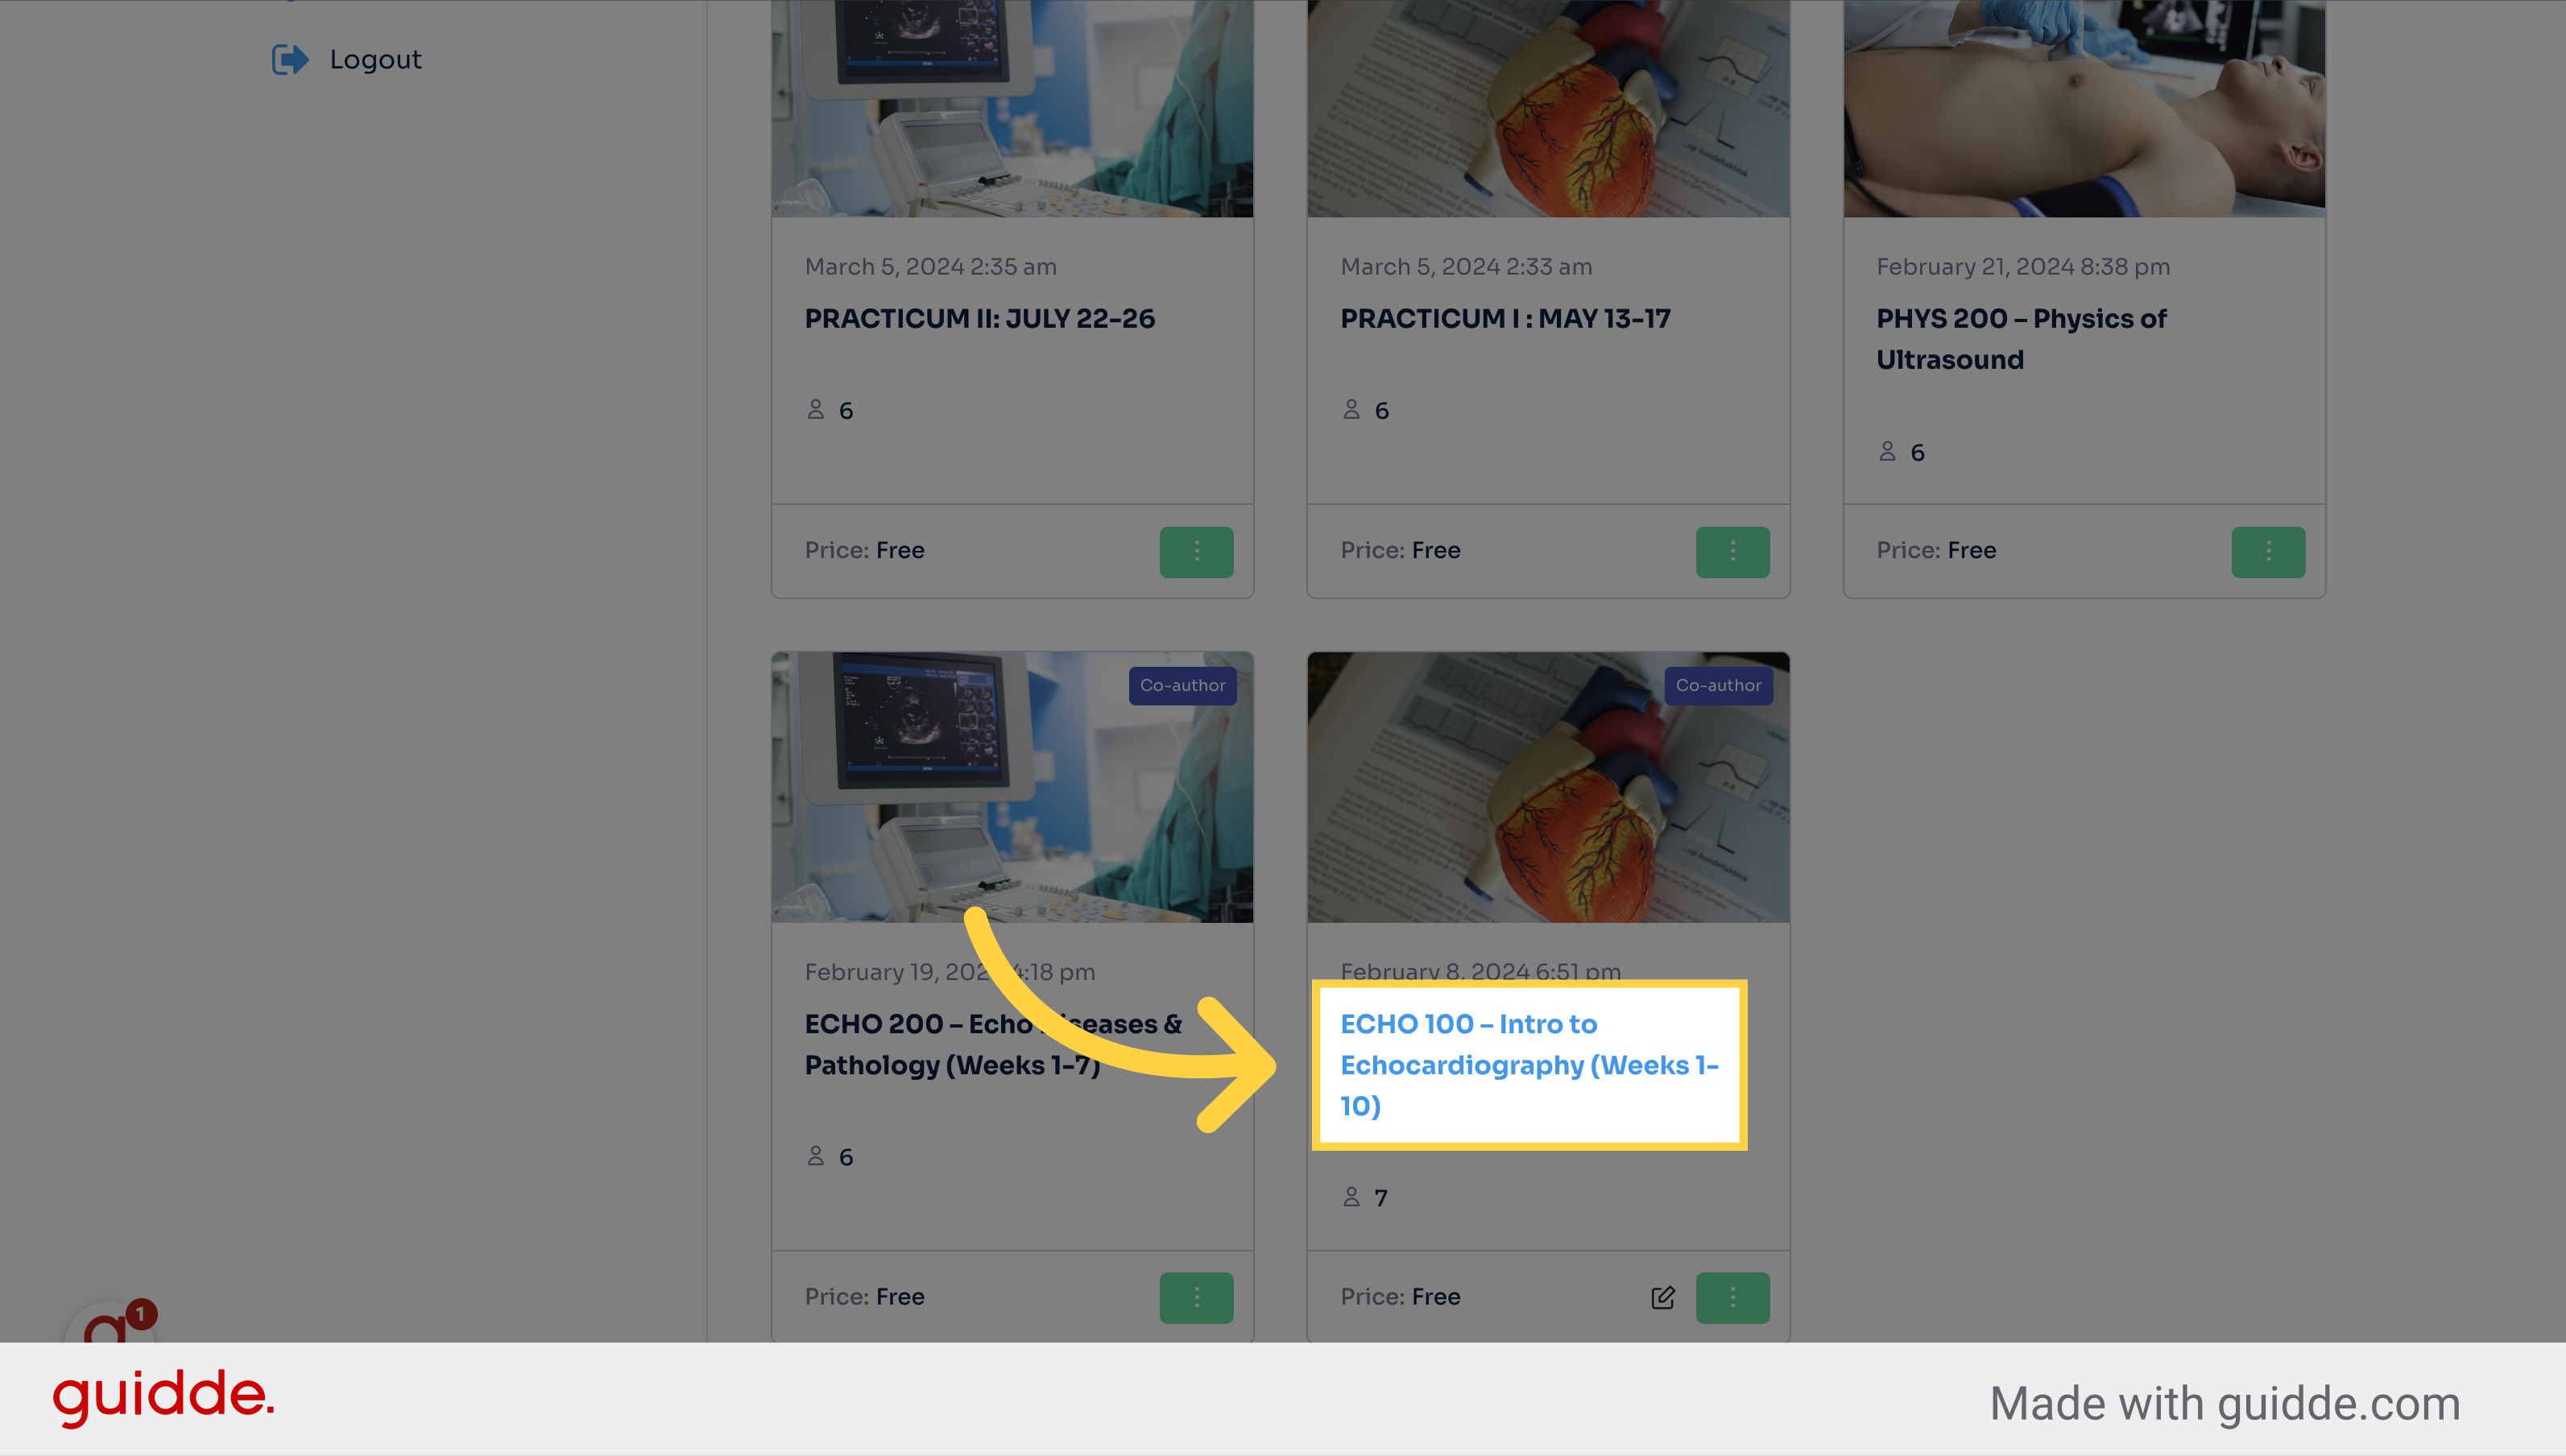
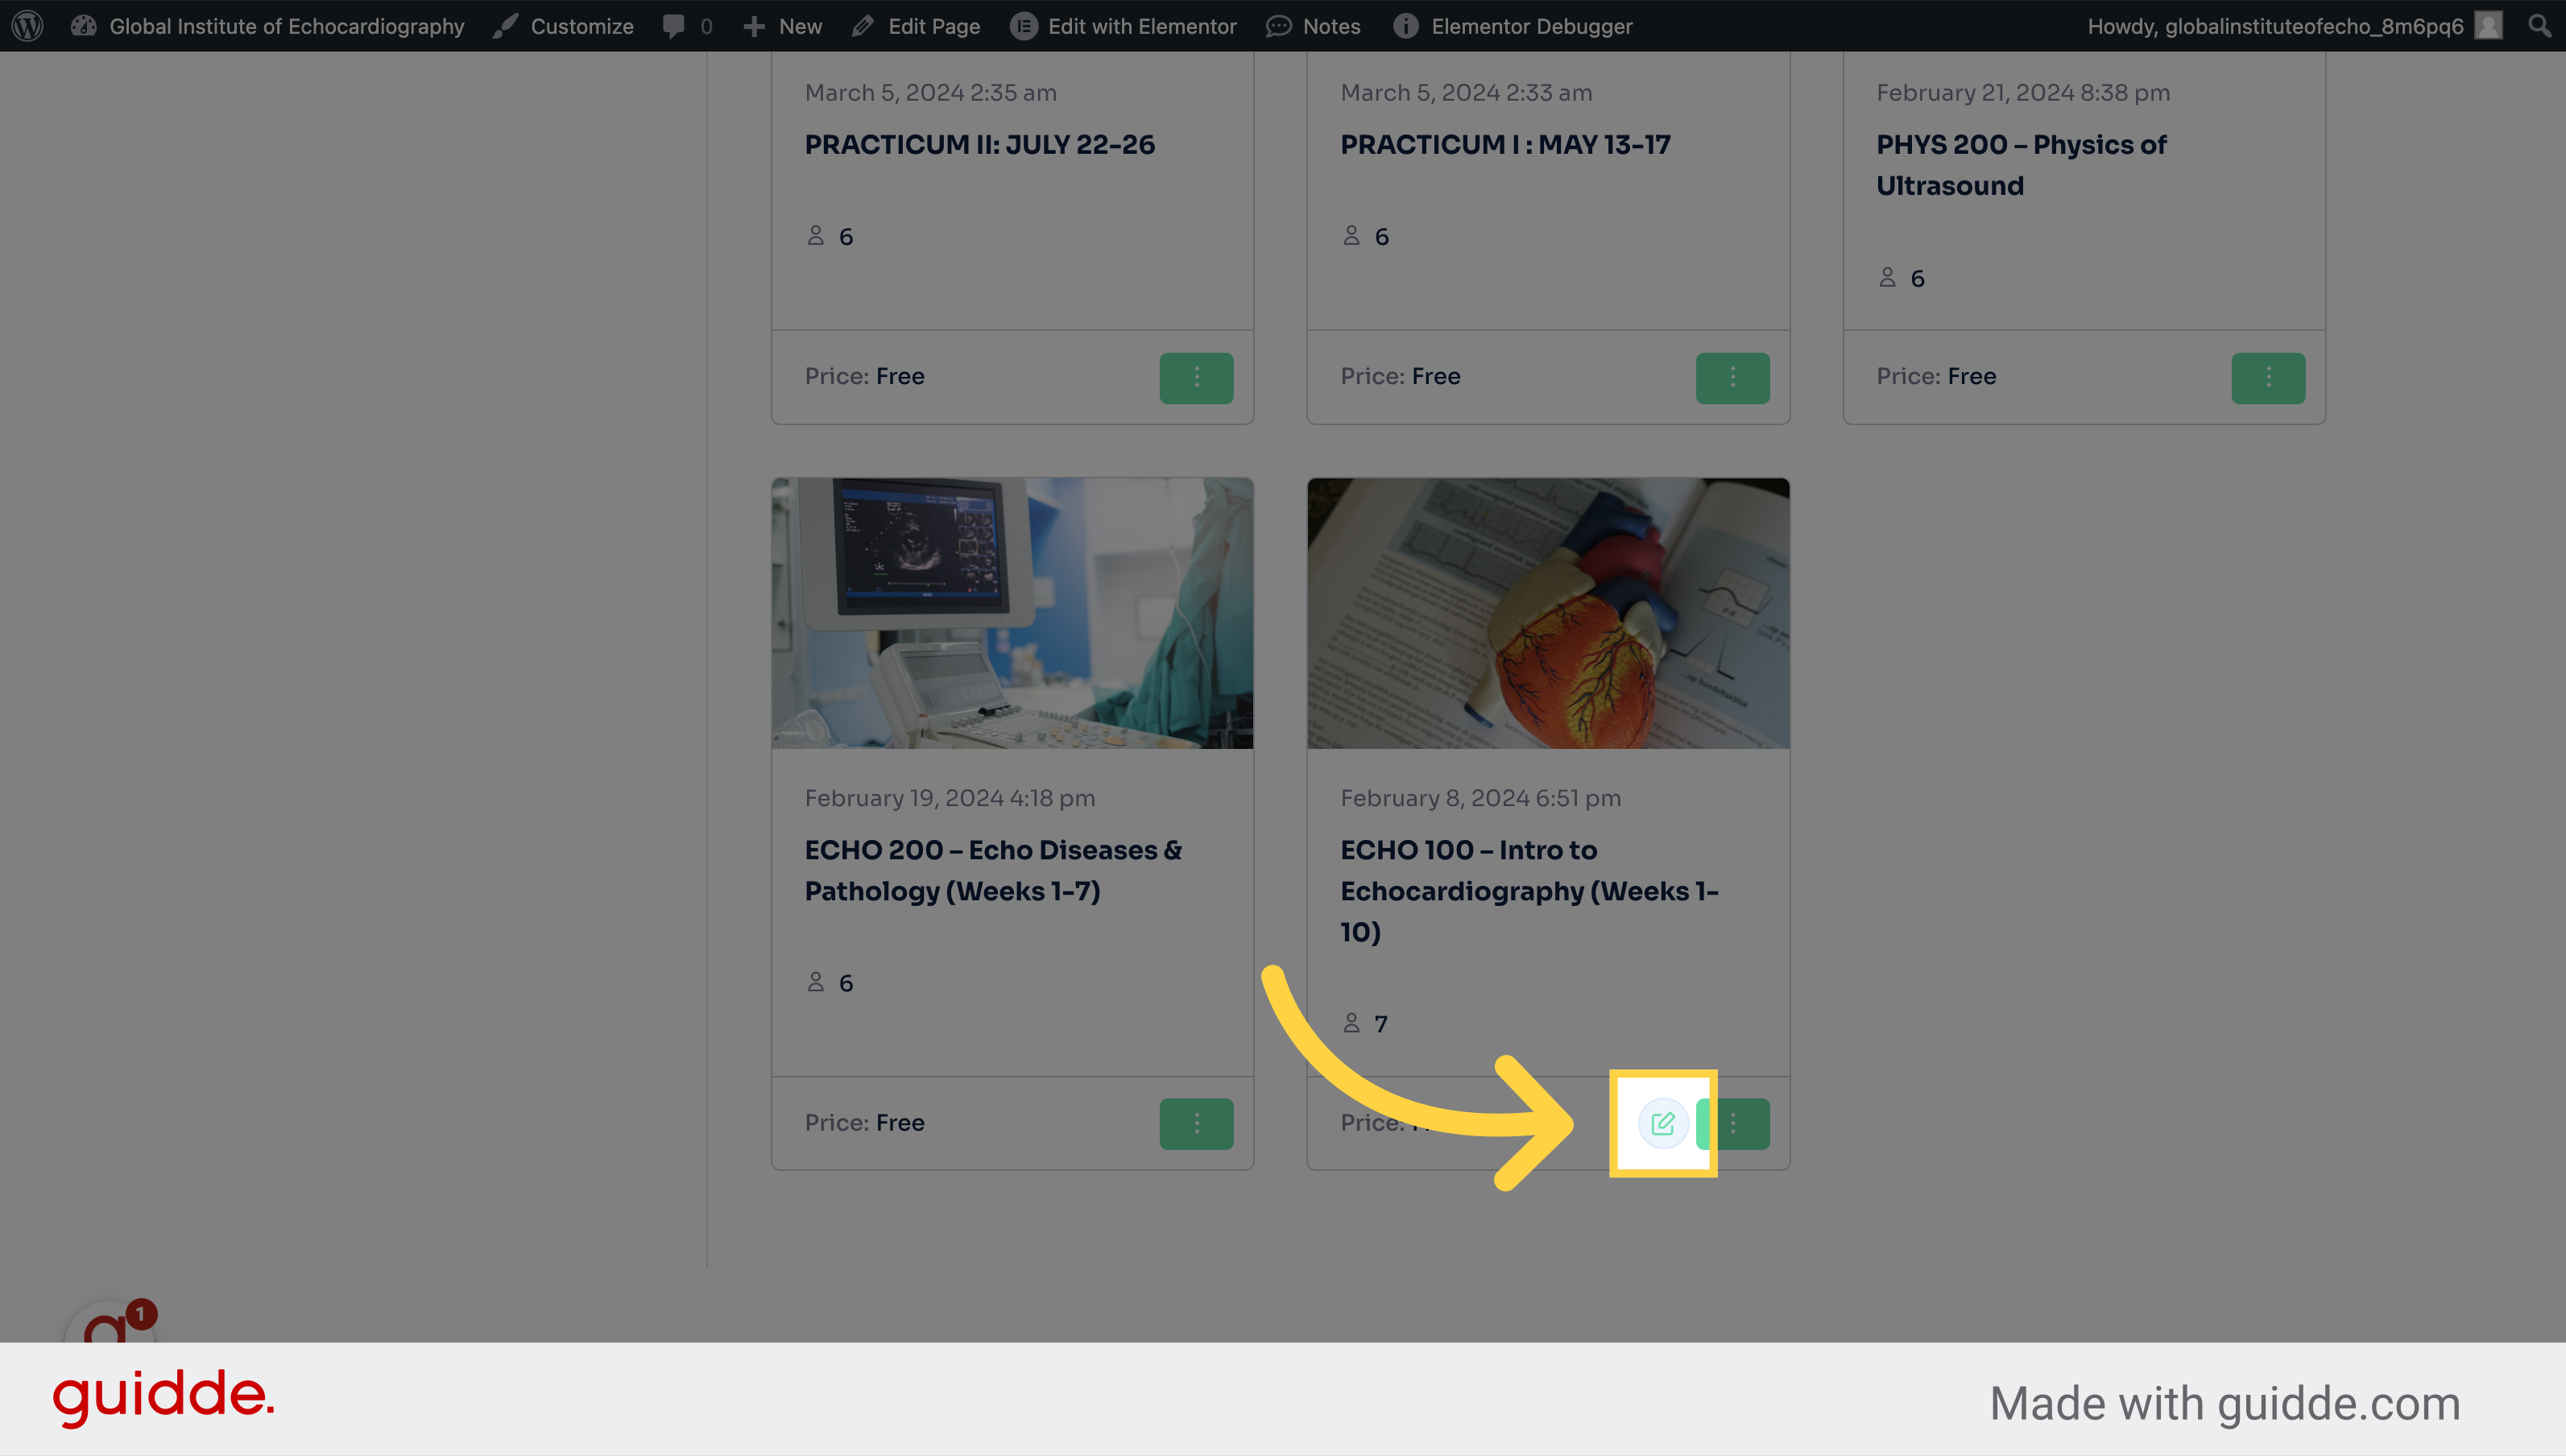
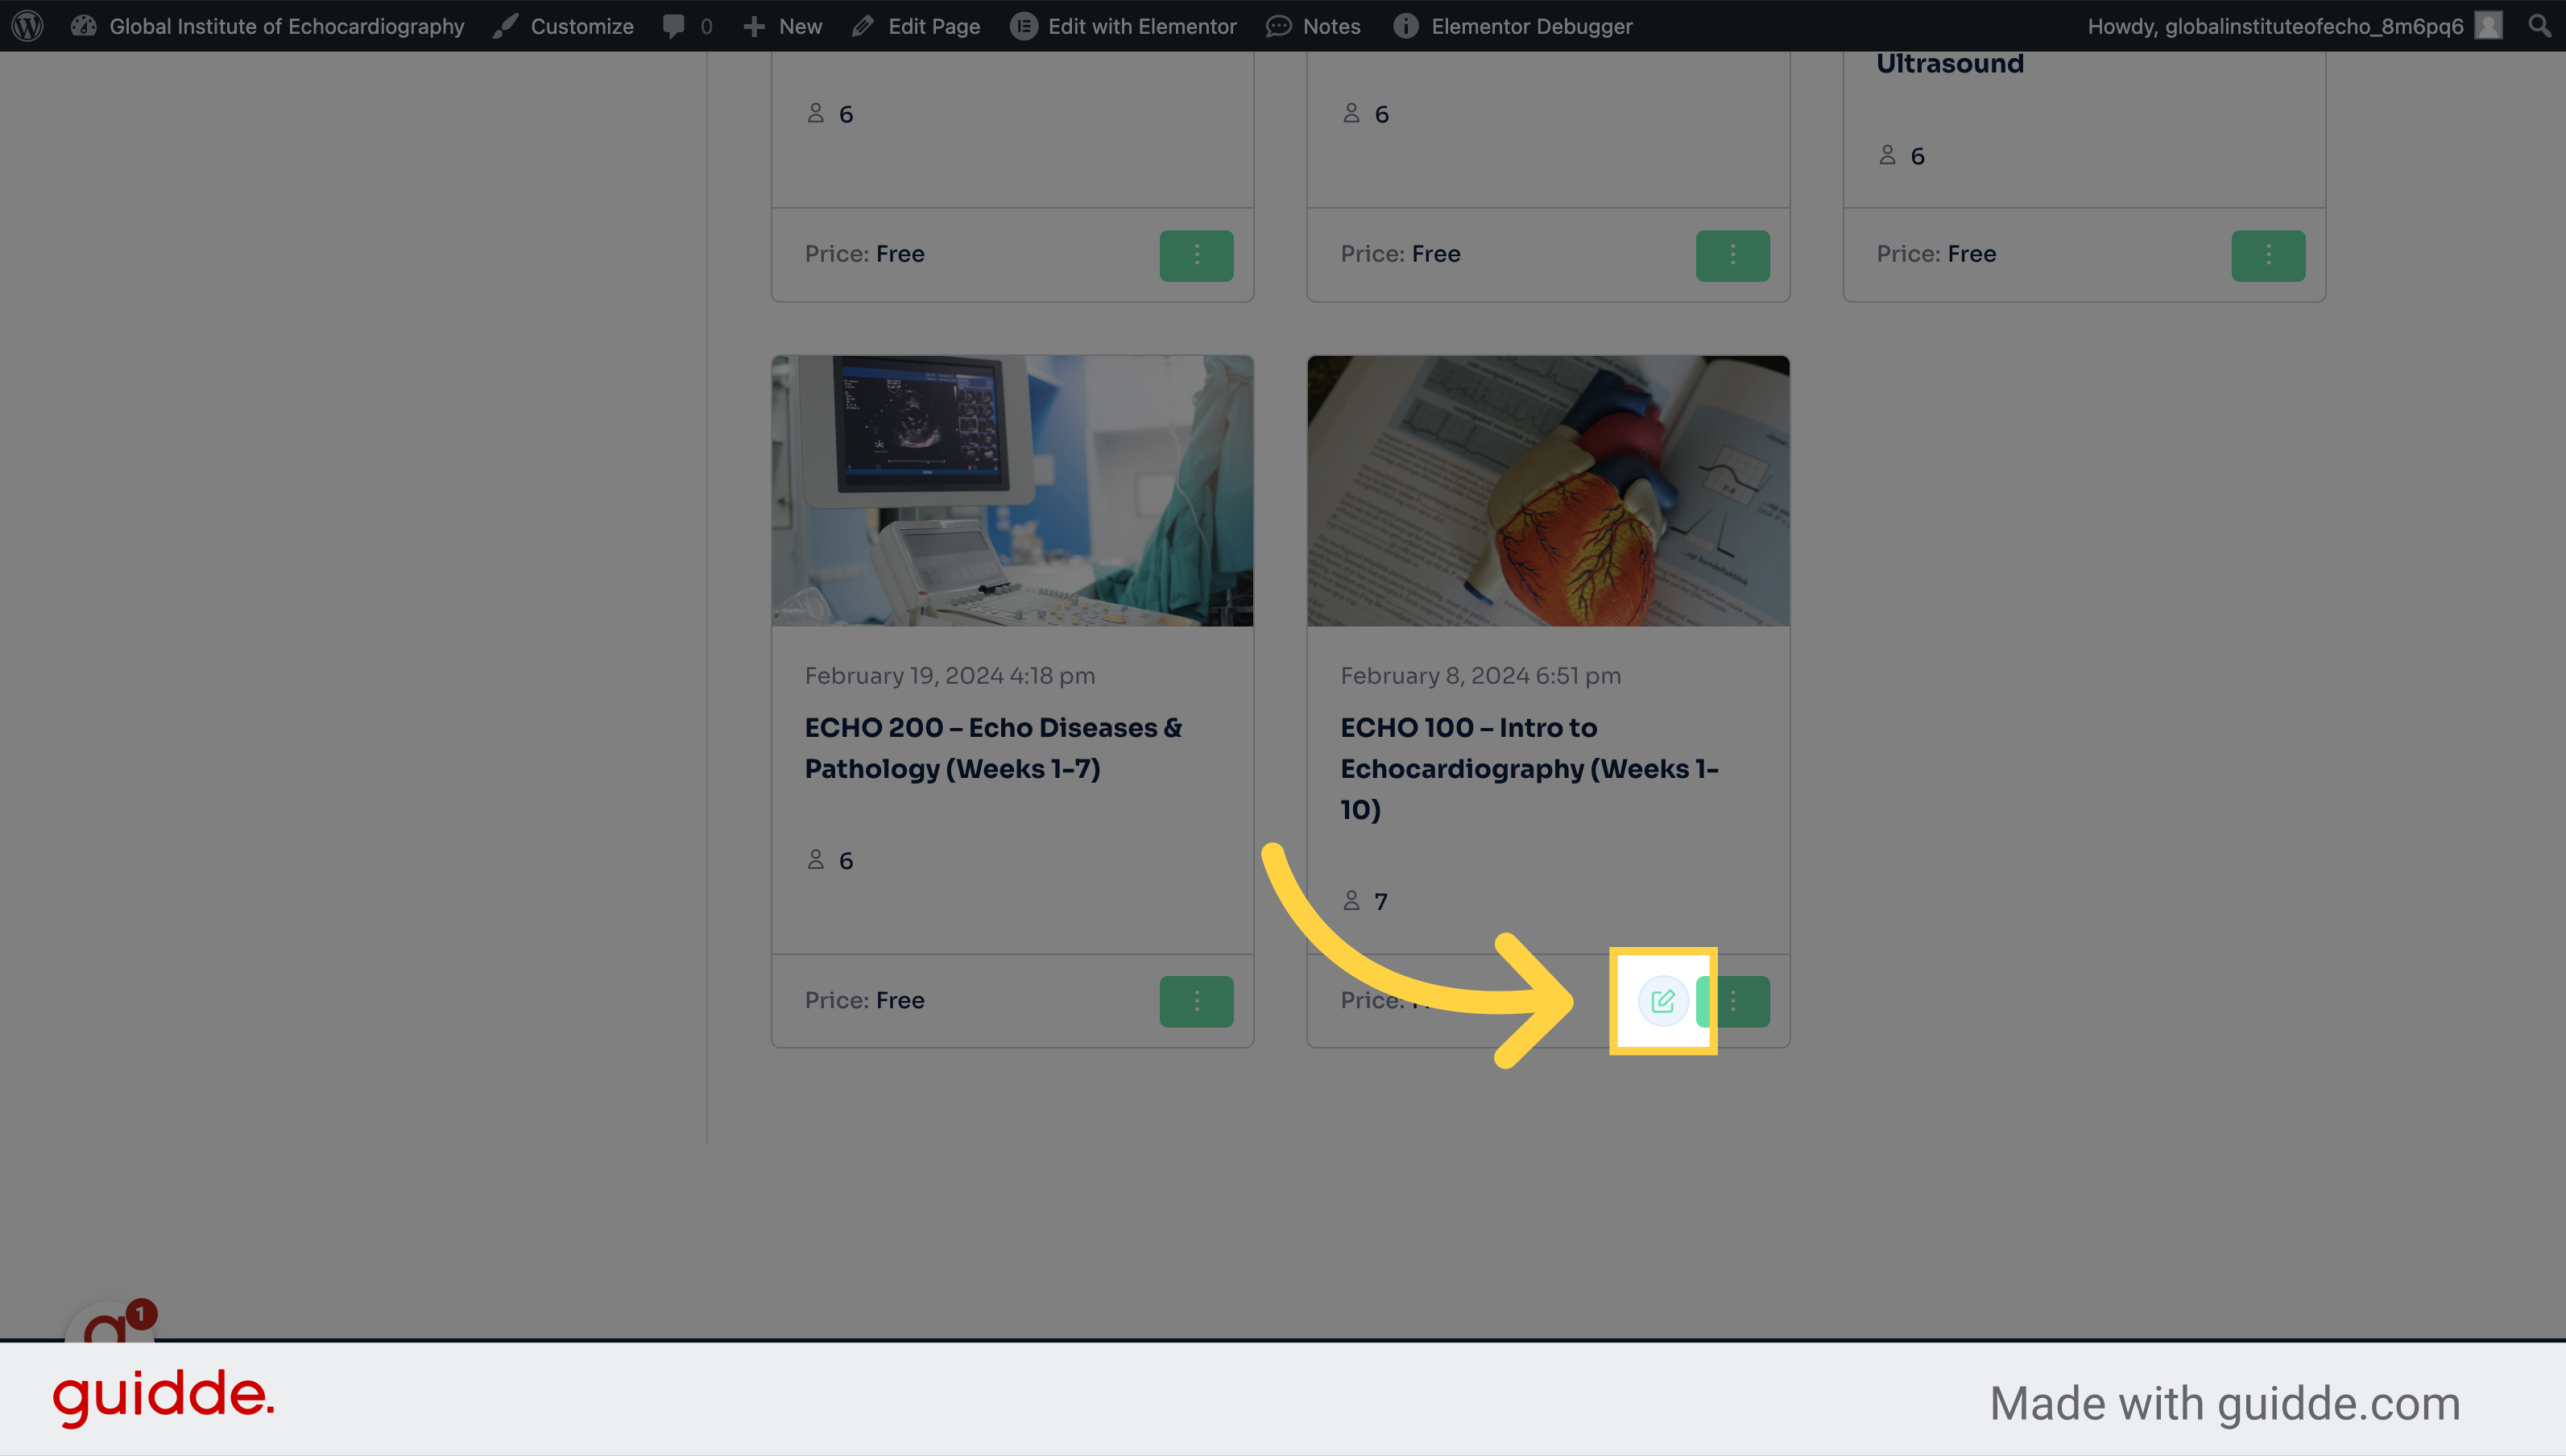
2. Click the course you want to enter
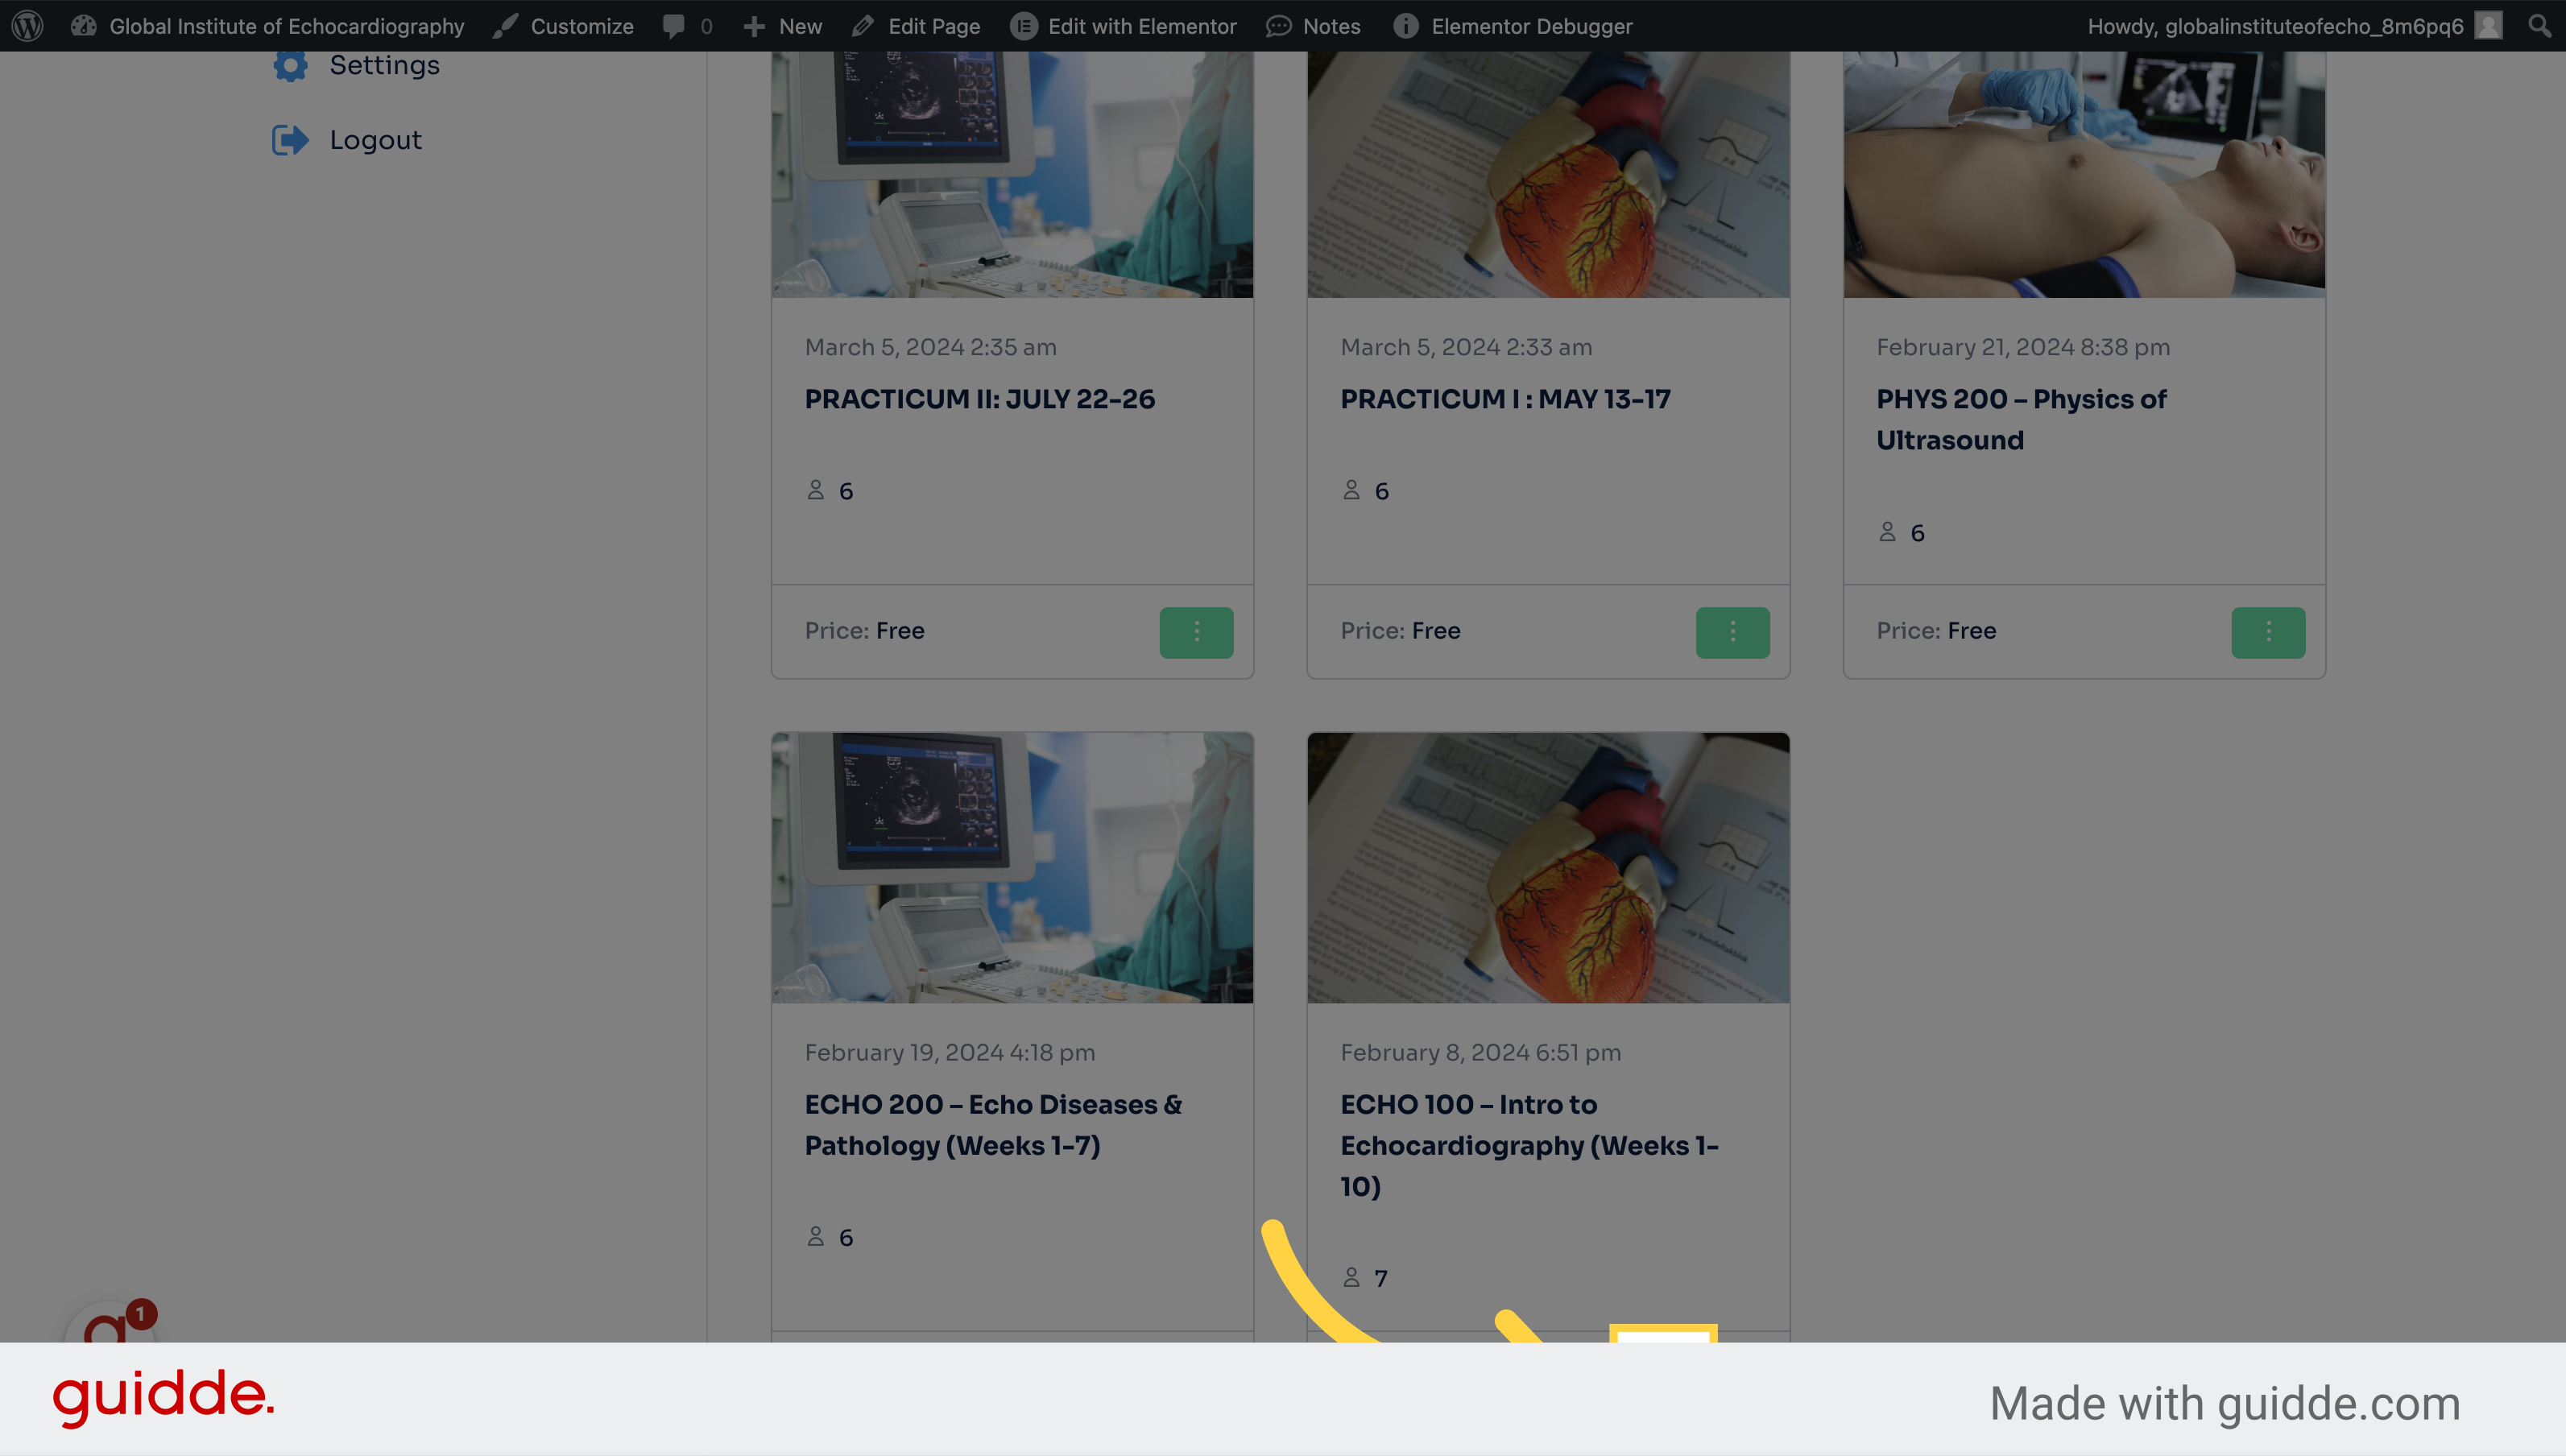
Select the specific course titled "ECHO 100 – Intro to Echocardiography (Weeks 1-10).
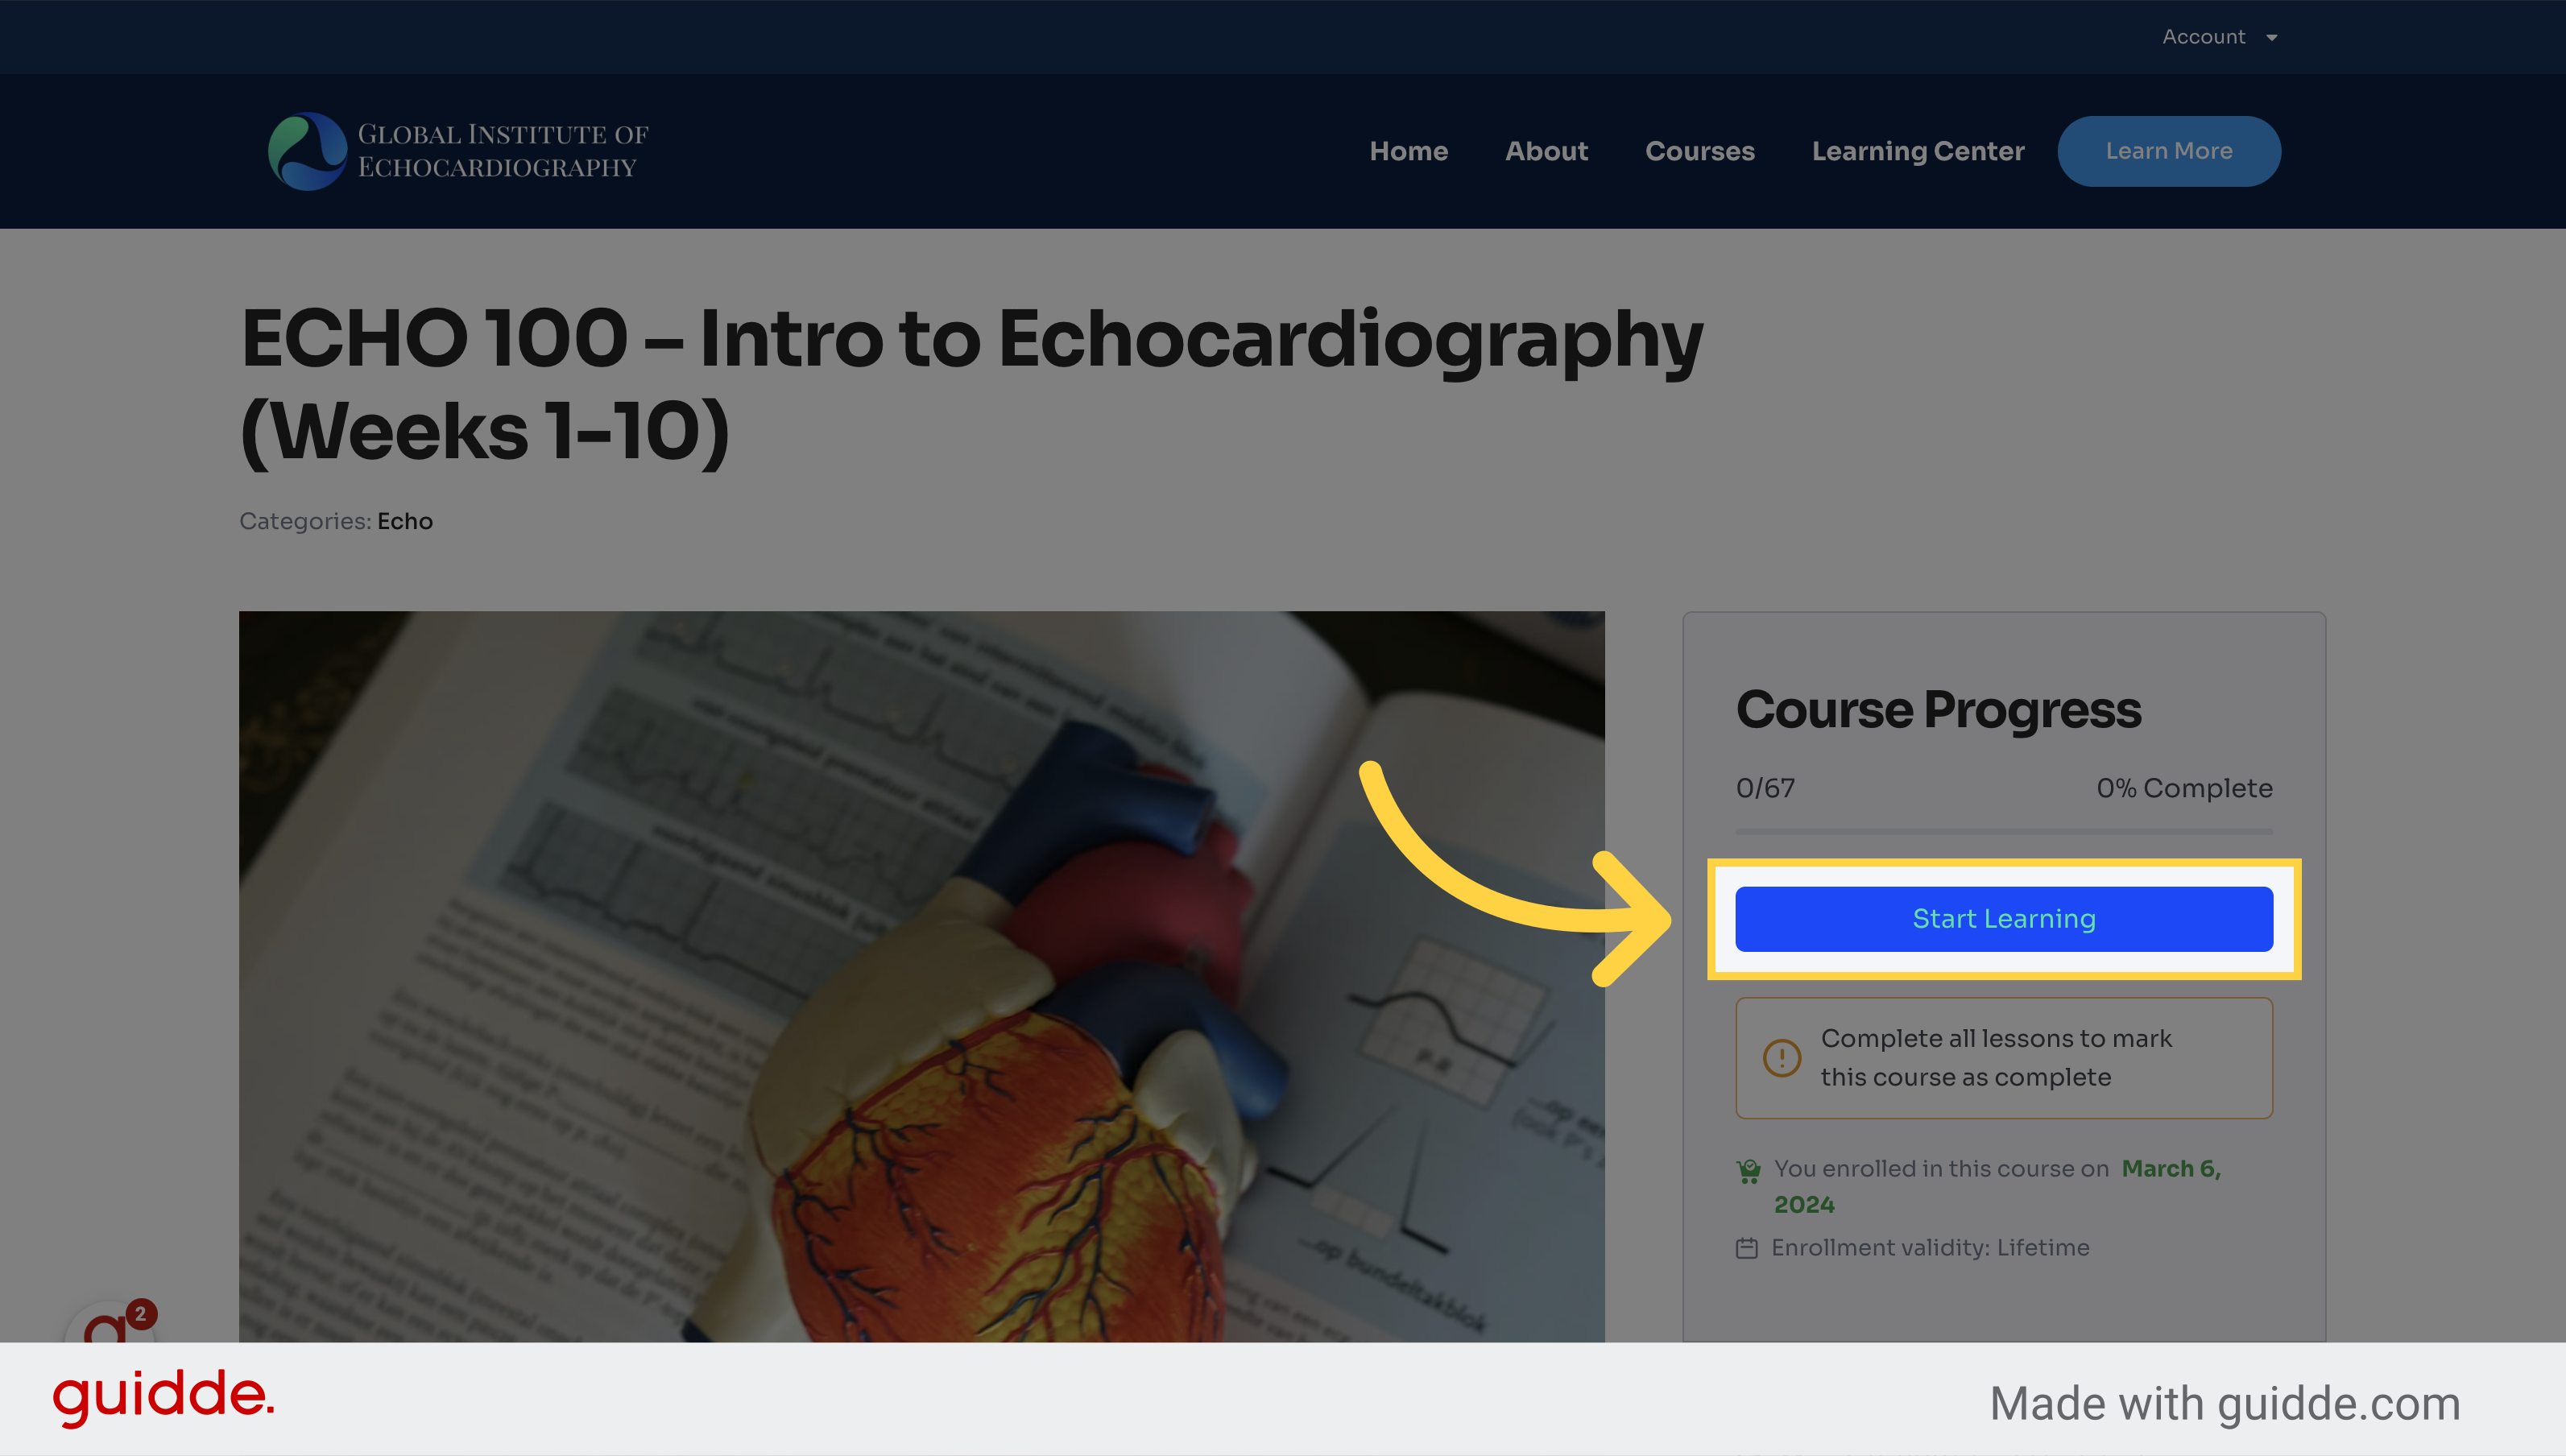
3. Click "Start Learning"
Initiate the learning process by clicking on "Start Learning.
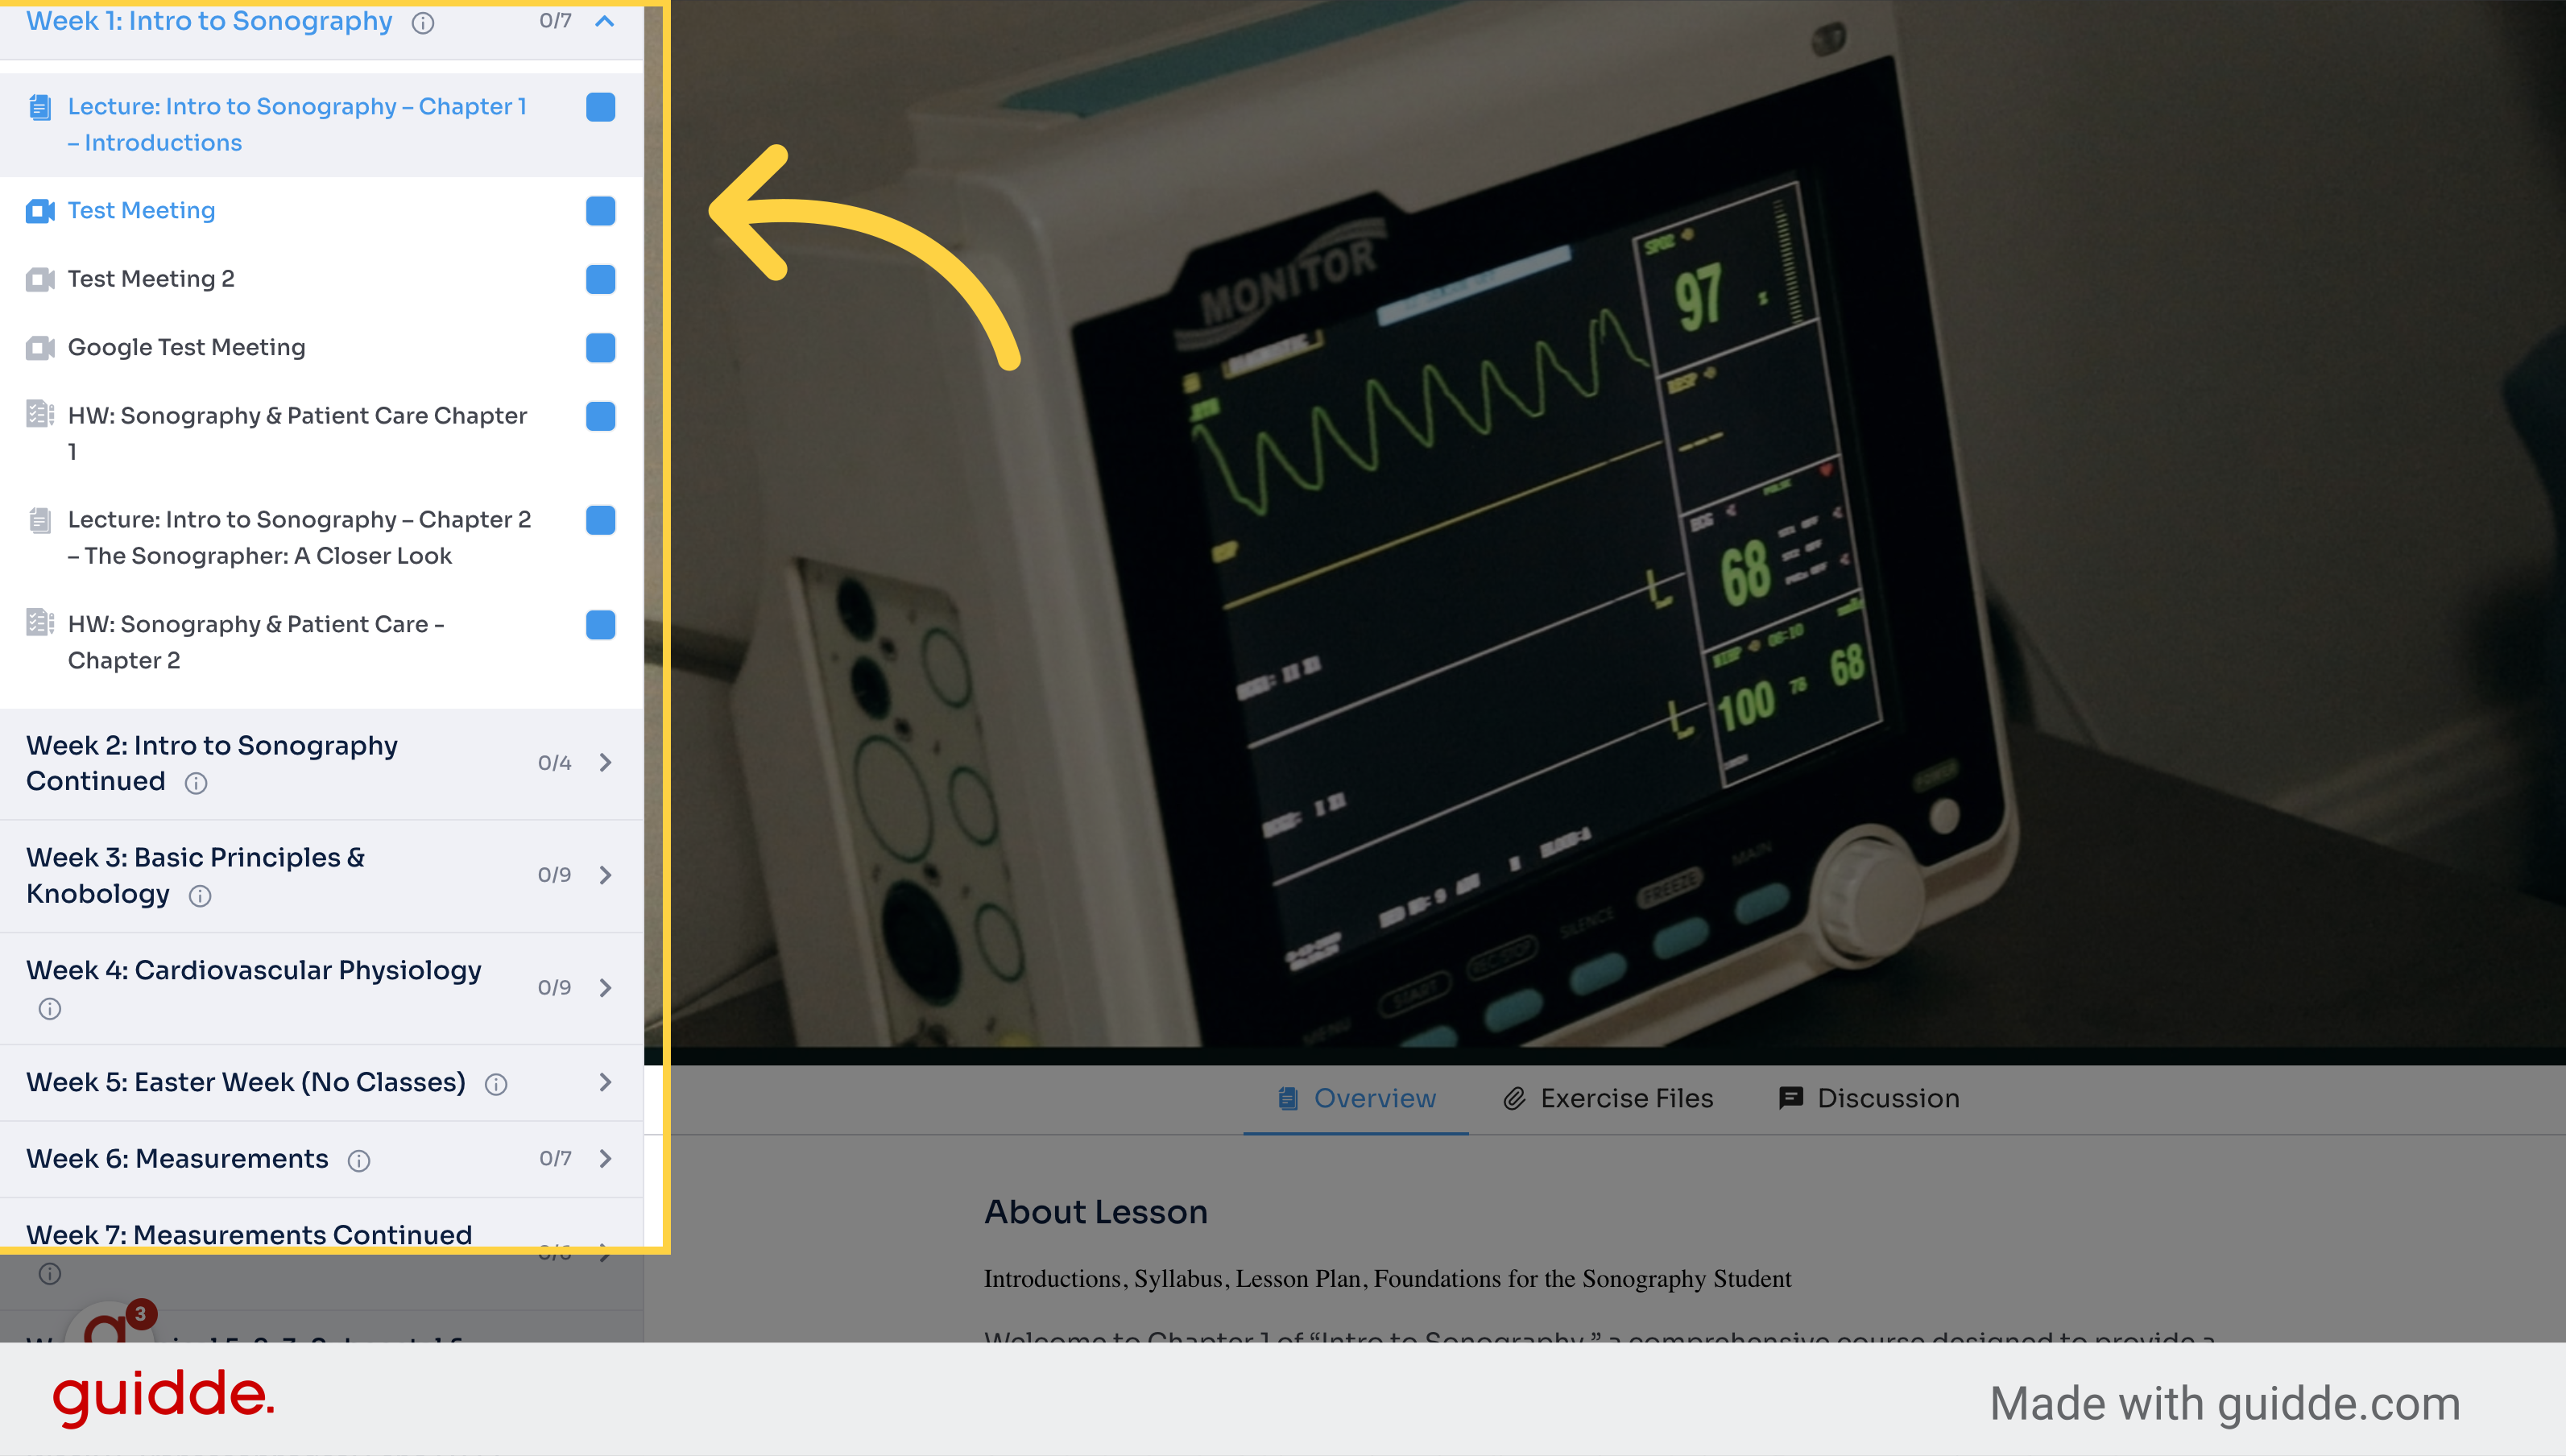
4. Click from the sidebar to enter a lesson, assignment, quiz, and more
Join a test meeting by clicking on "Test Meeting.
5. Click "Discussion" within a Lesson / Lecture to view the Discussion
Engage in discussions by clicking on "Discussion.

This guide covered accessing courses, starting the learning process, joining meetings, viewing lectures, and engaging in discussions in Verdigris-staging for efficient employee training.
How to Edit / Add a Course
This guide will walk you through editing a course in the LMS platform. Each step provides detailed instructions to manage course content, attachments, instructors, and more efficiently.
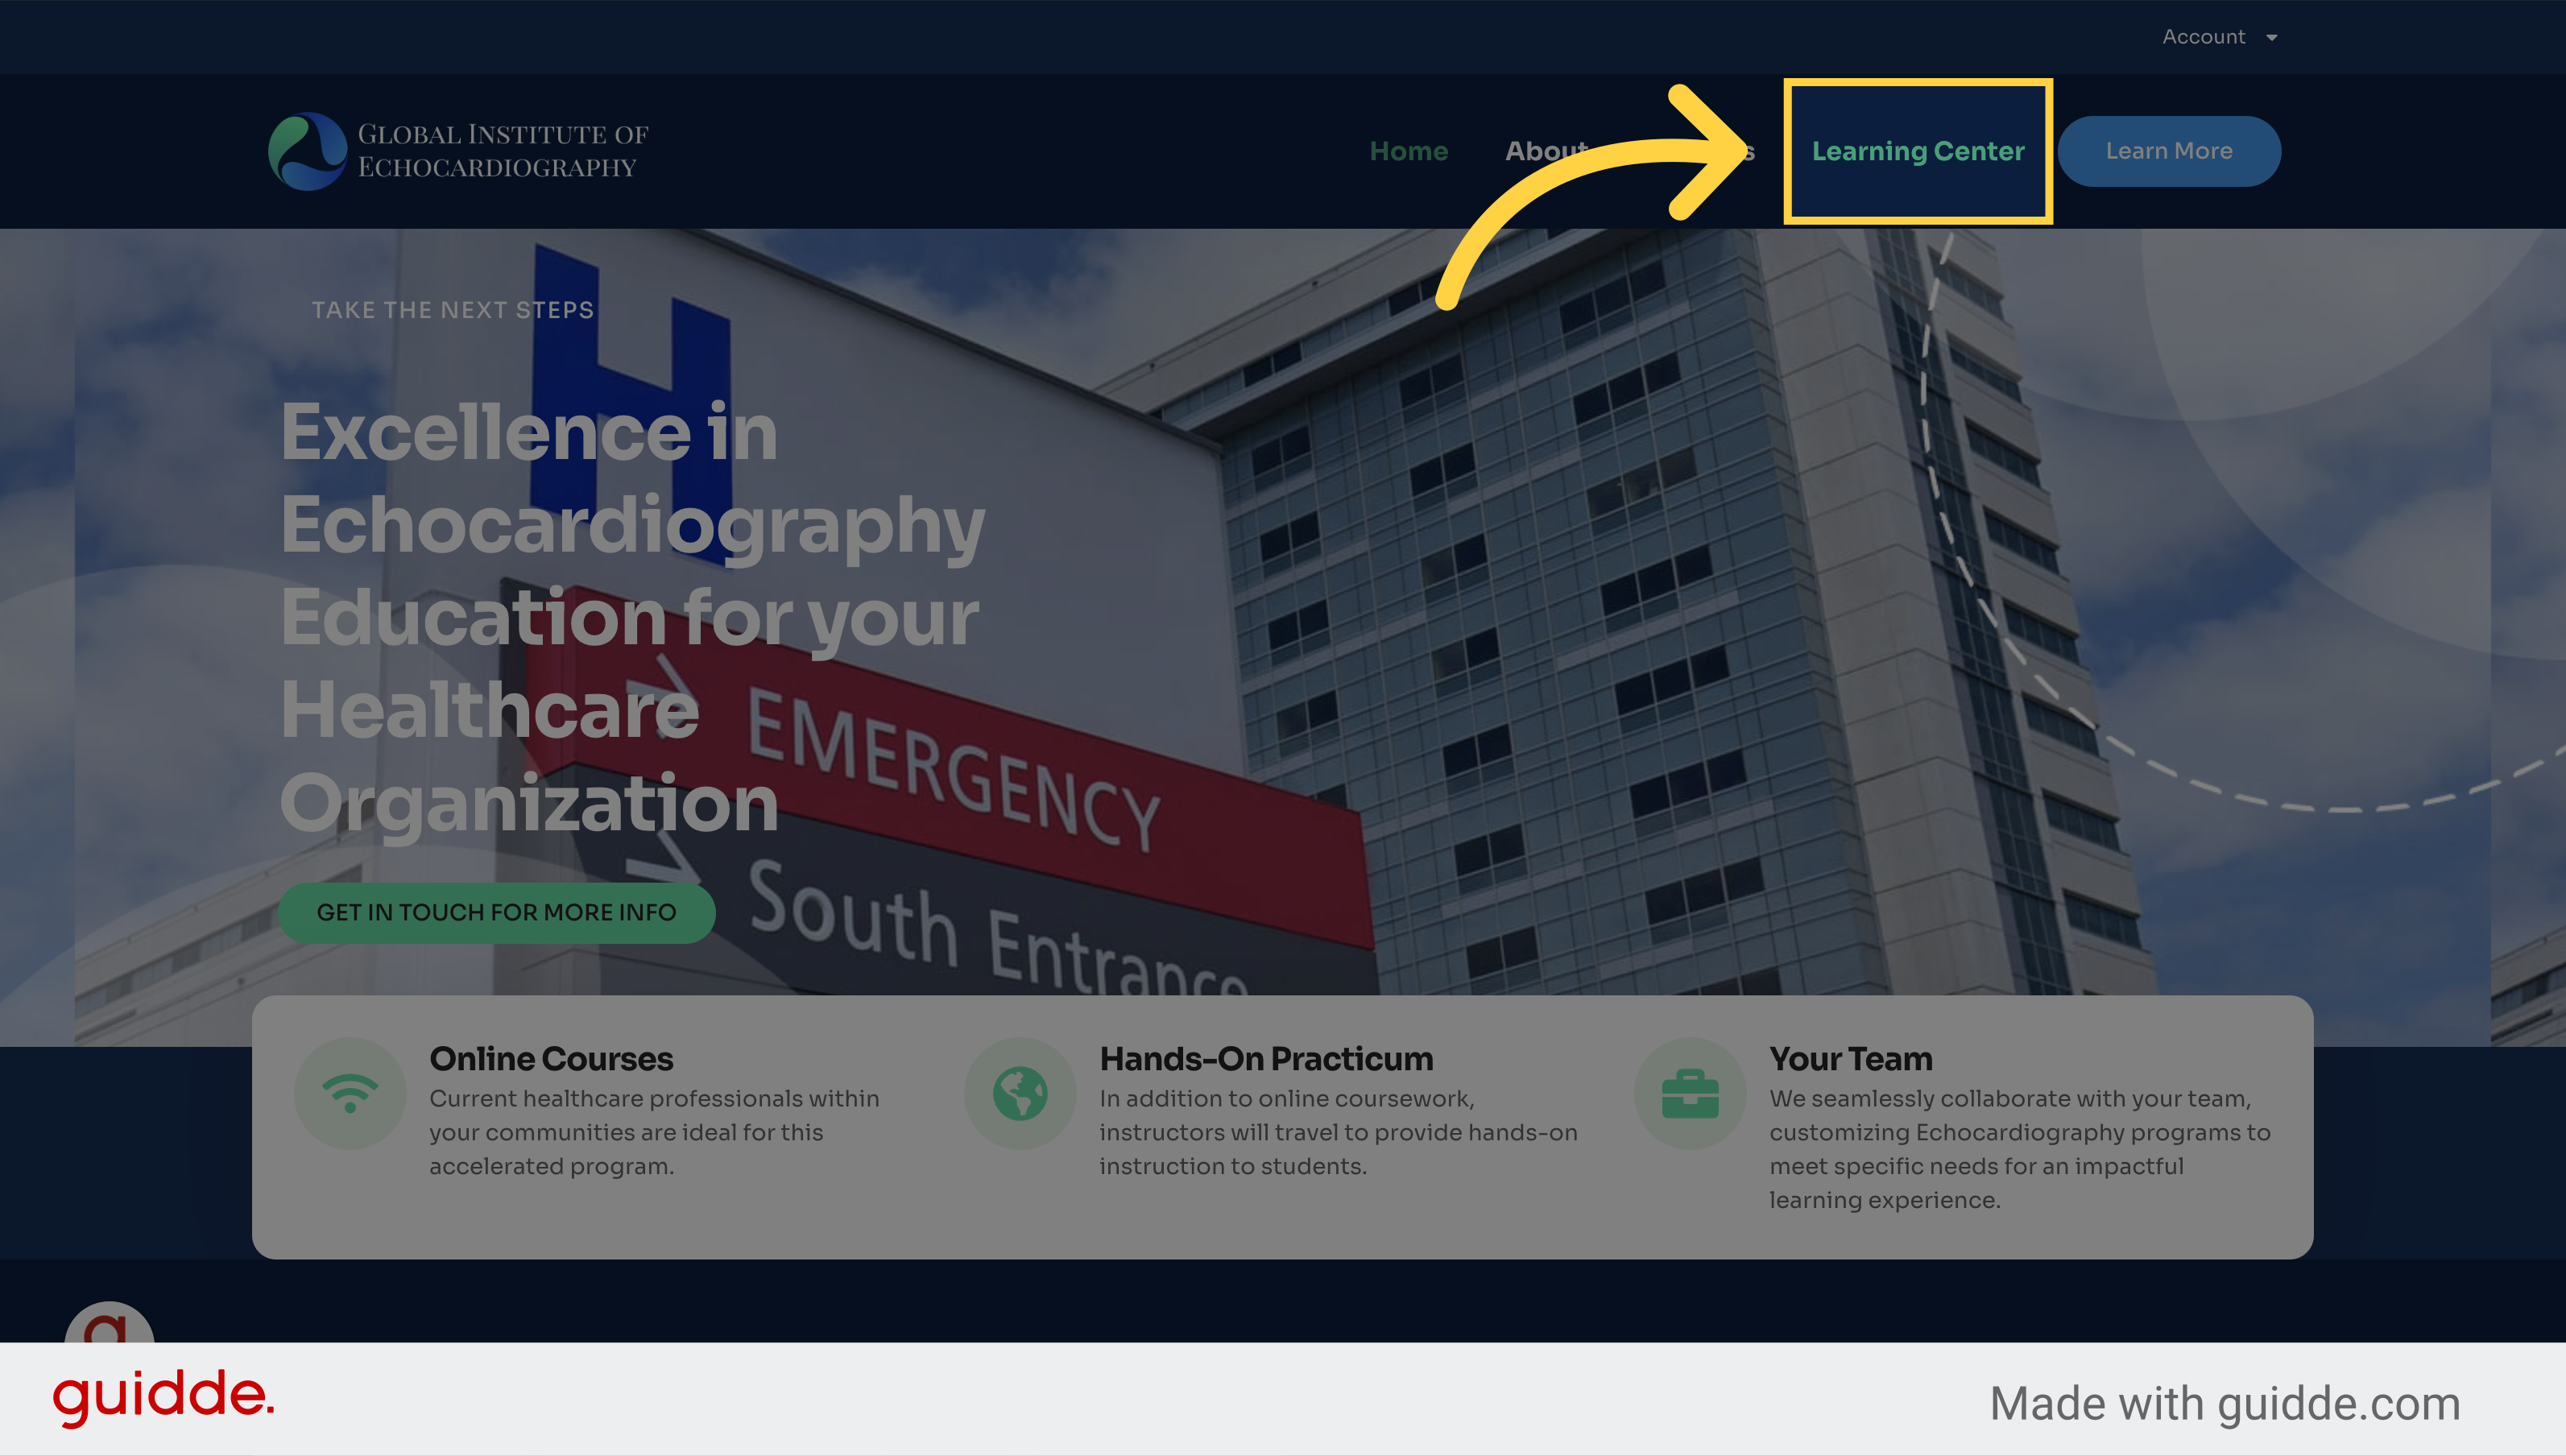
1. Click "Learning Center"
Access the Learning Center for courses.
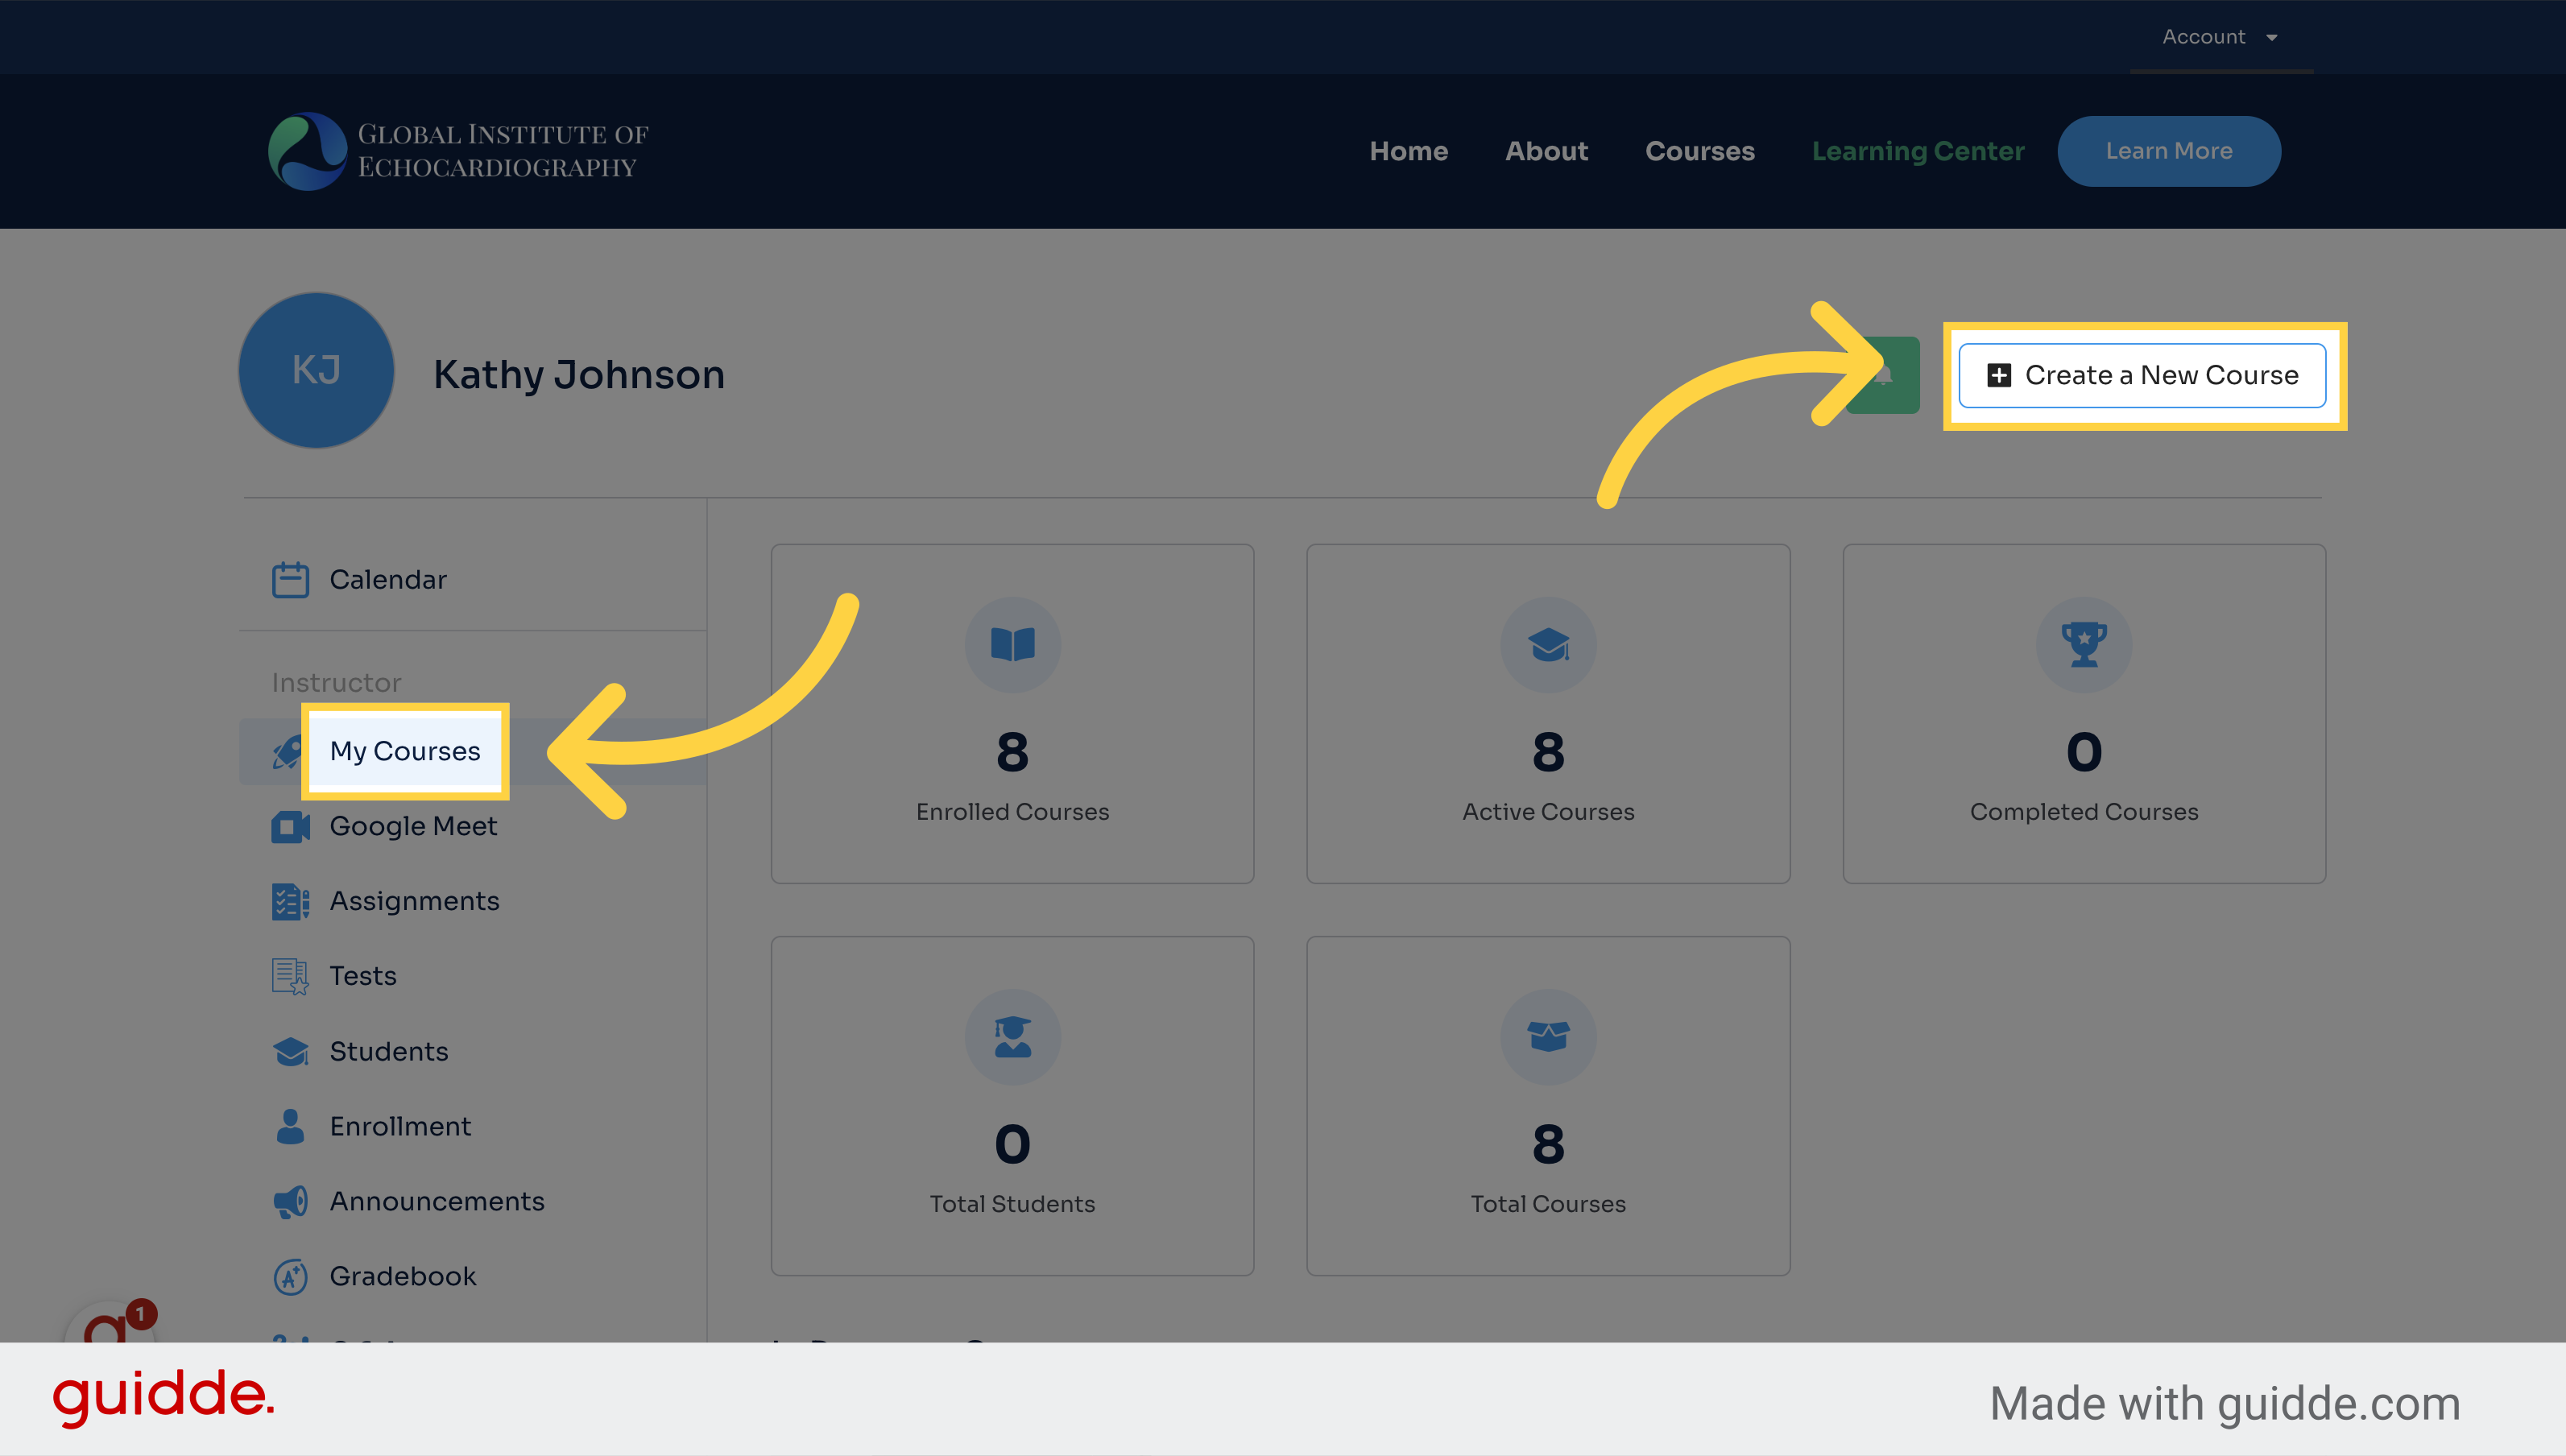
2. Click "My Courses" or "Create a New Course"
Navigate to your enrolled courses.
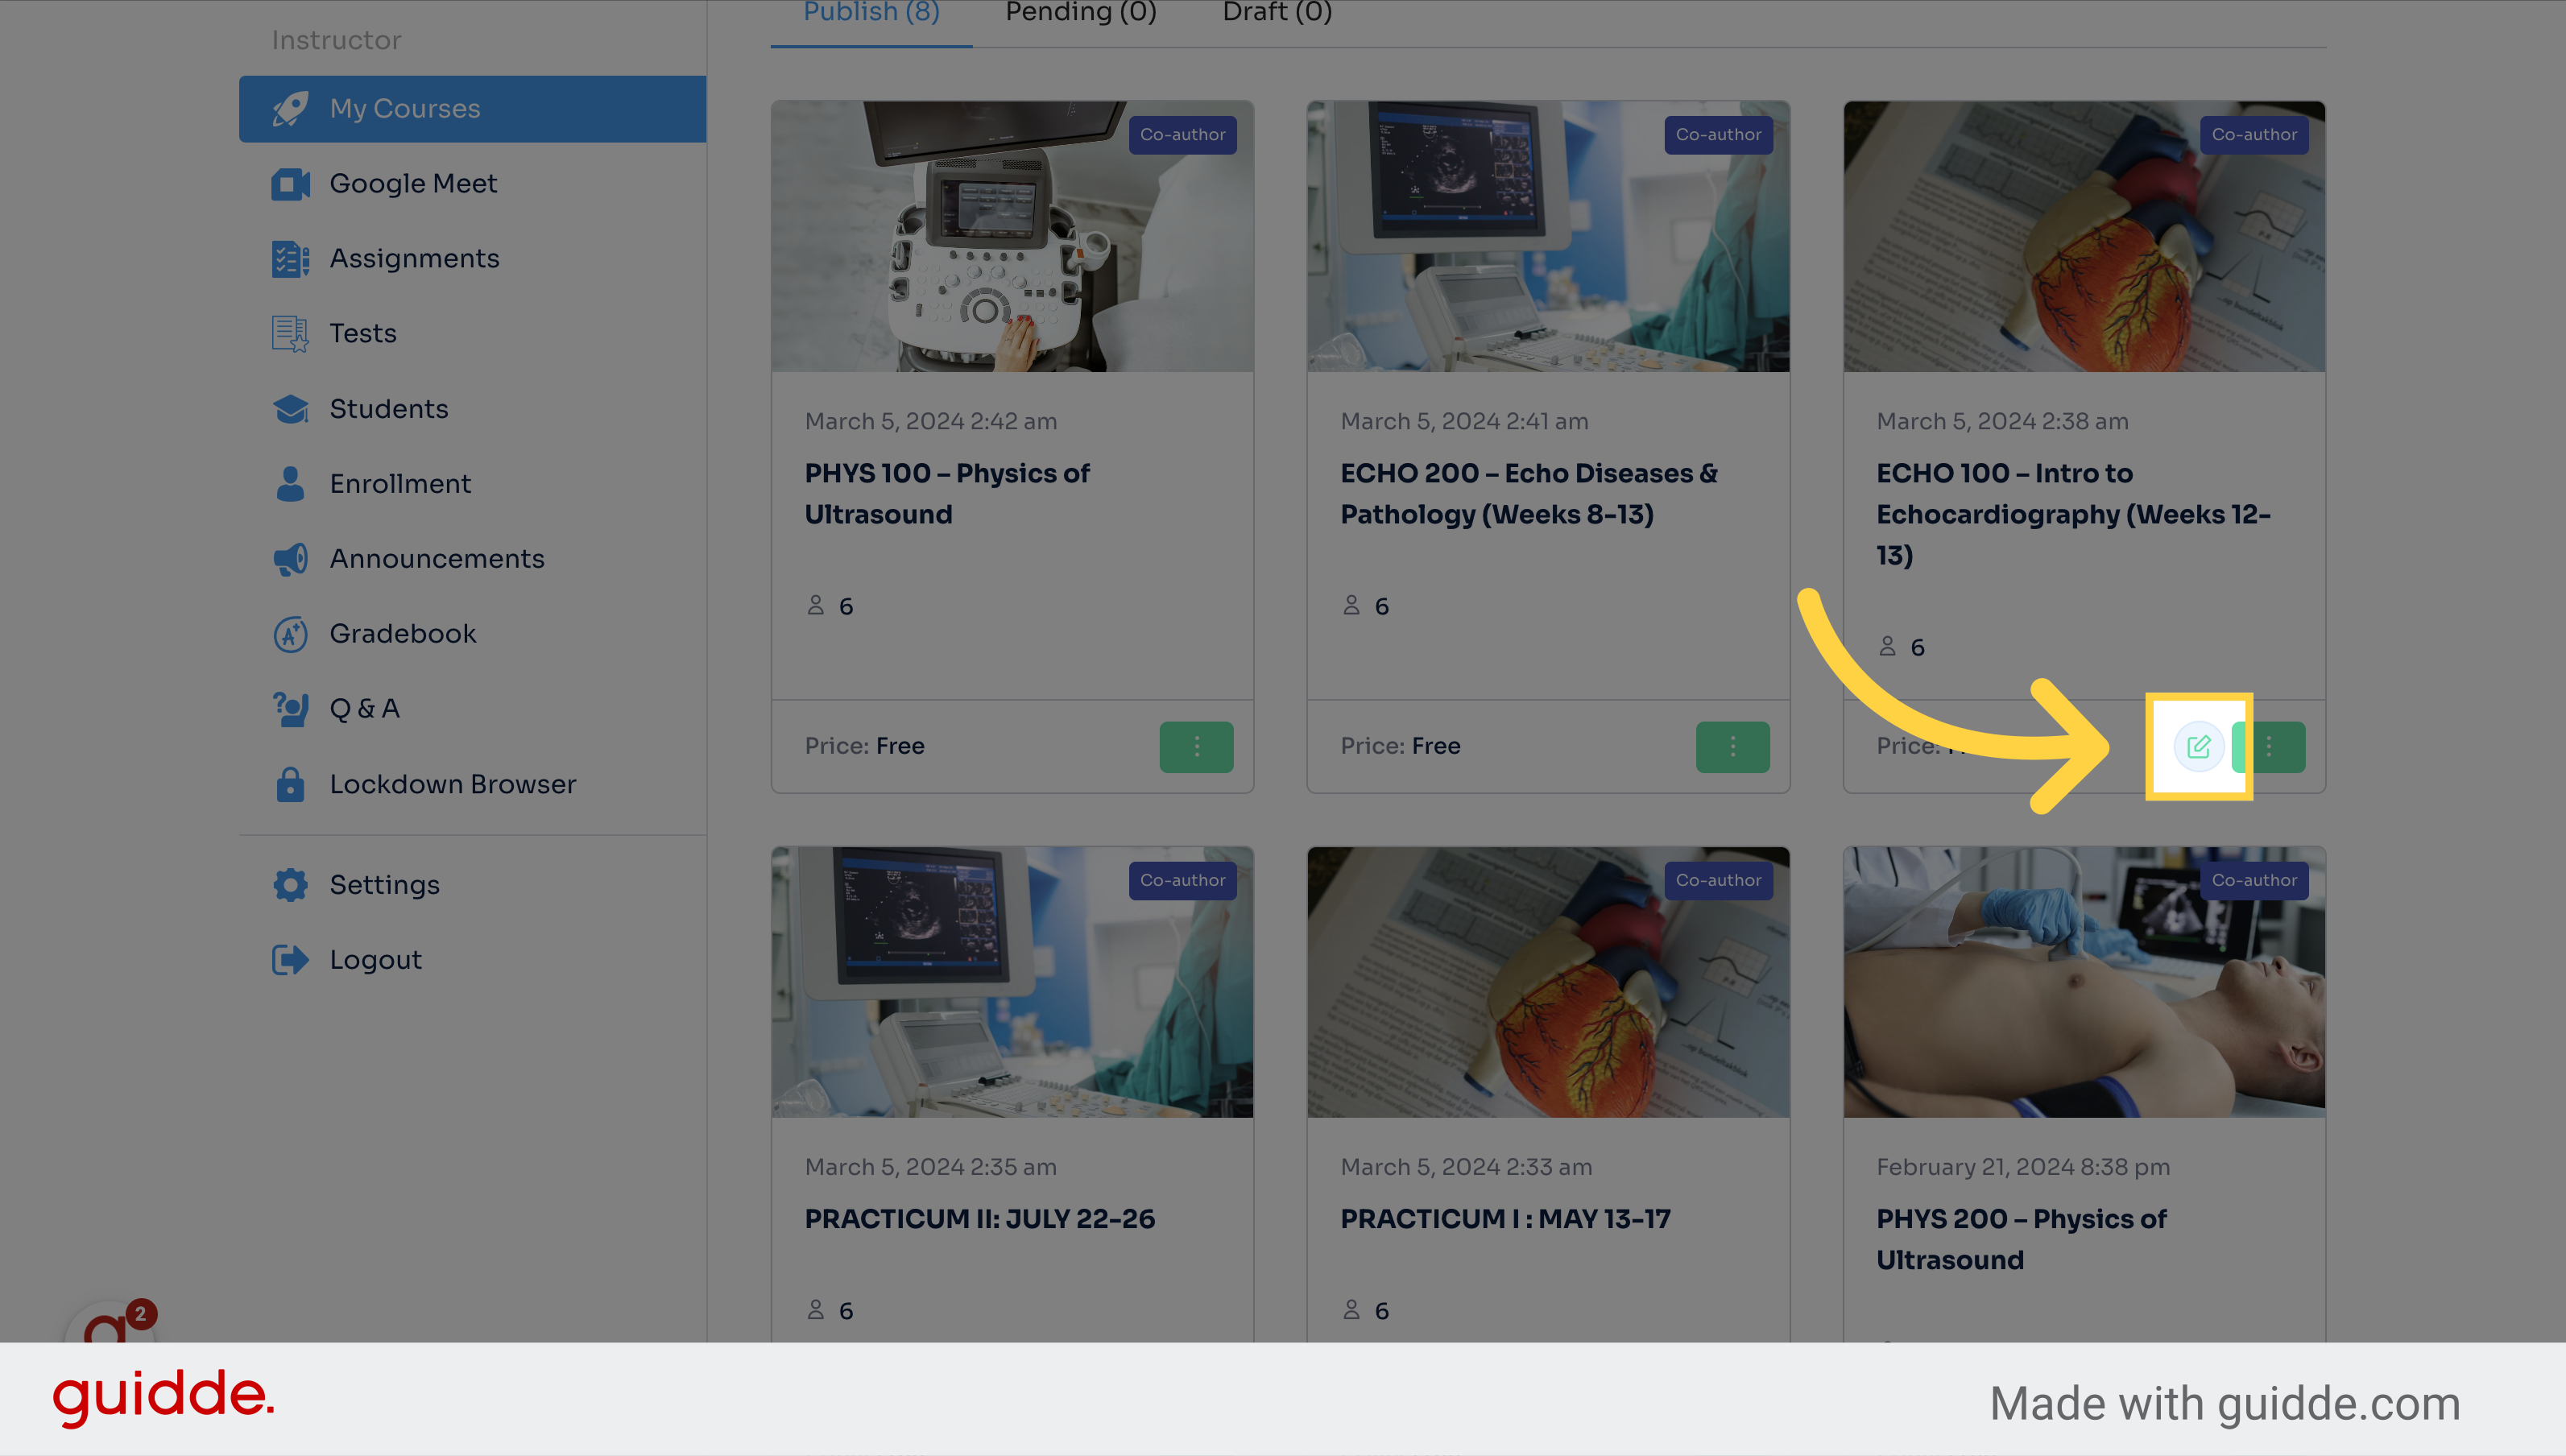
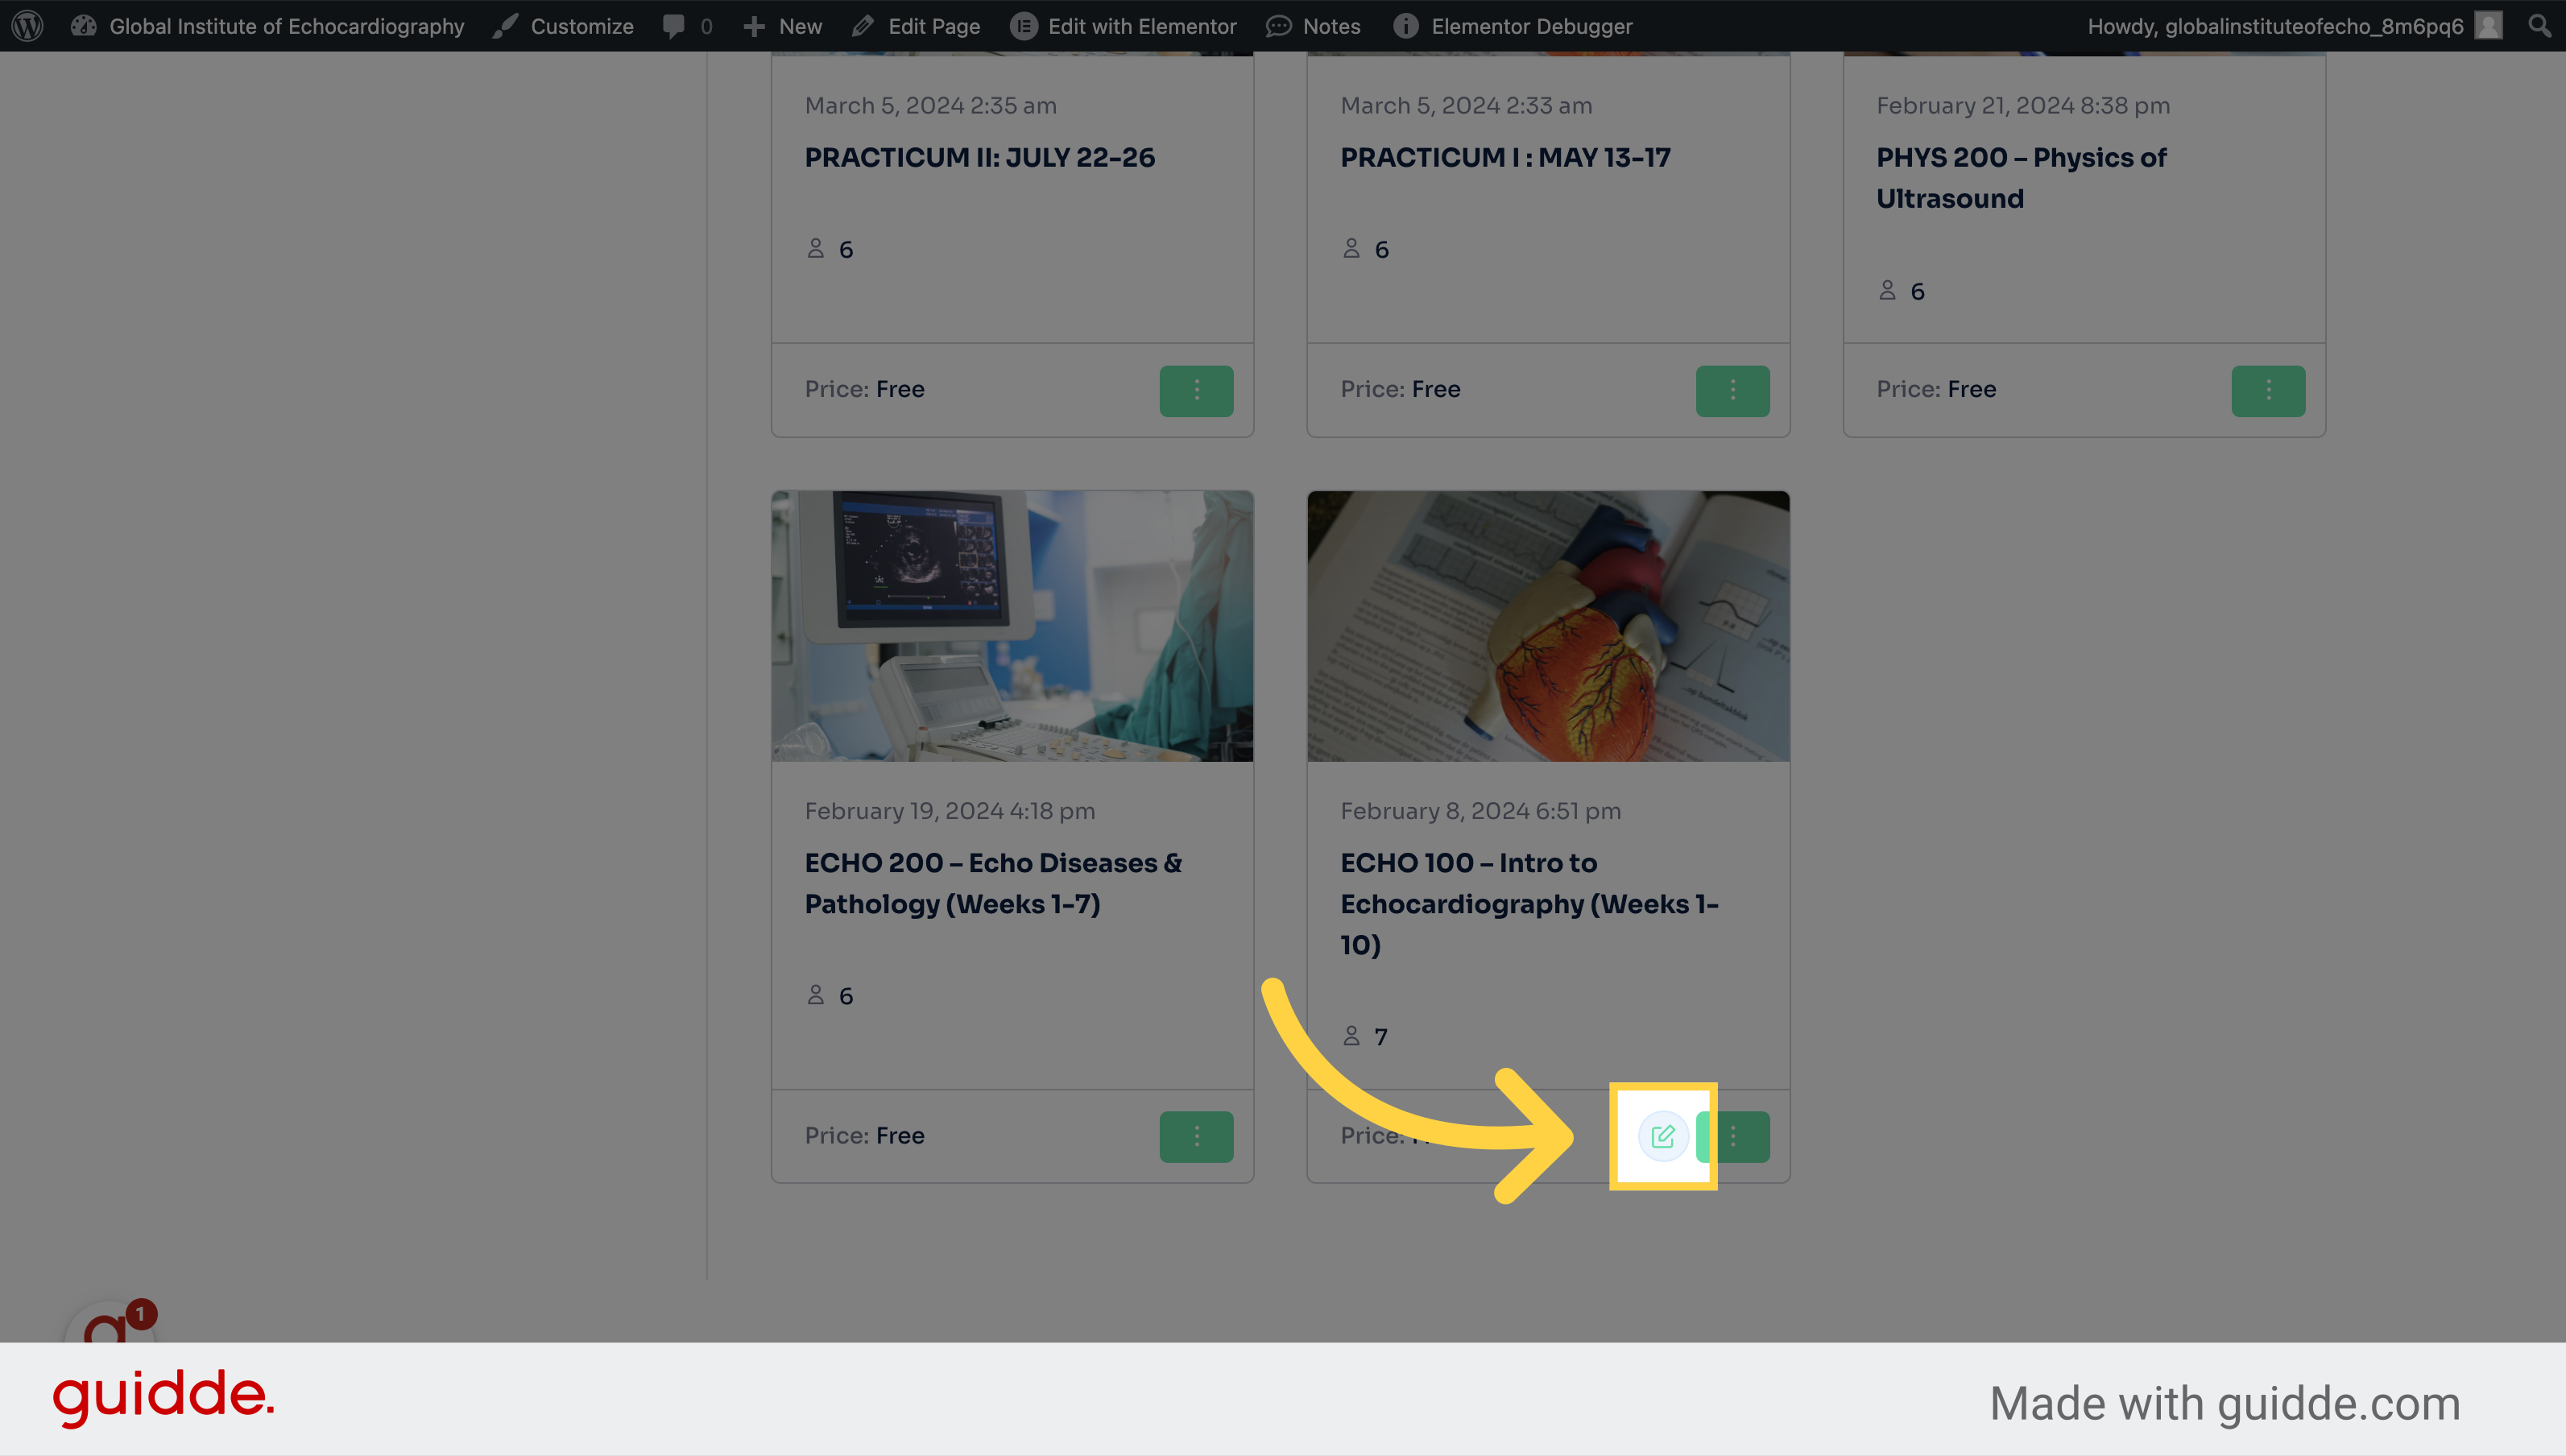
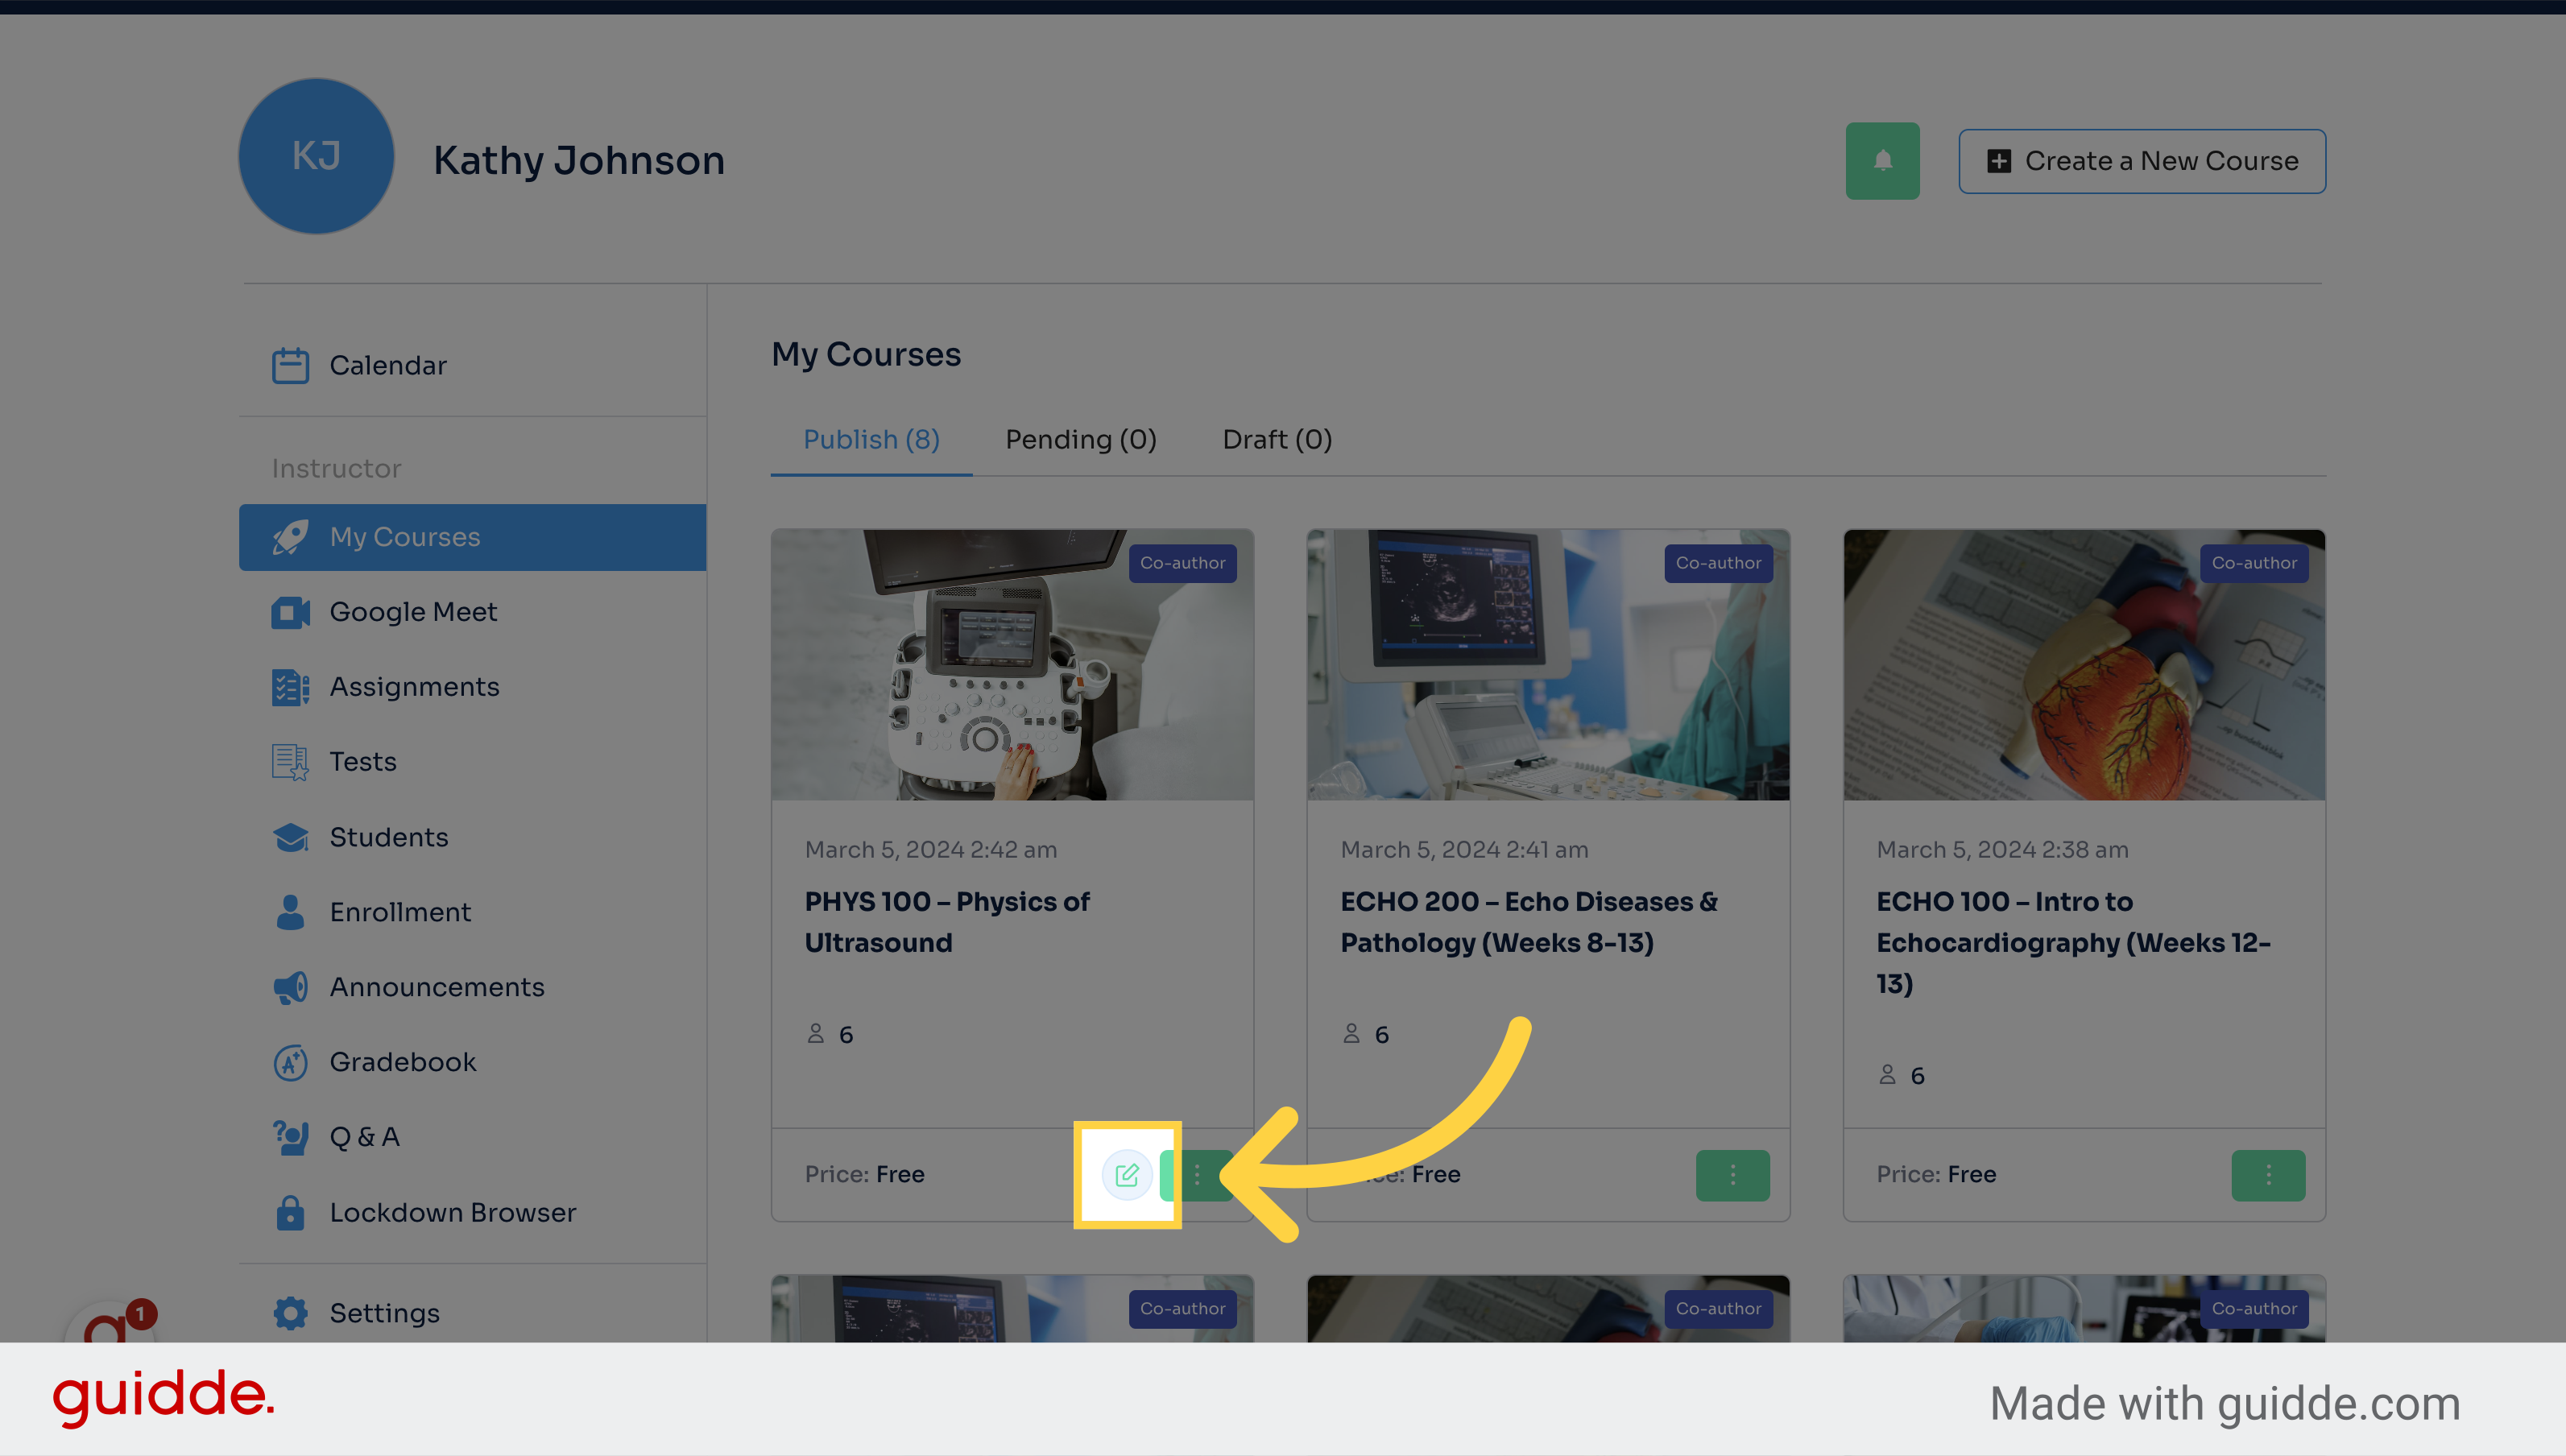
3. Click here to edit
Click here
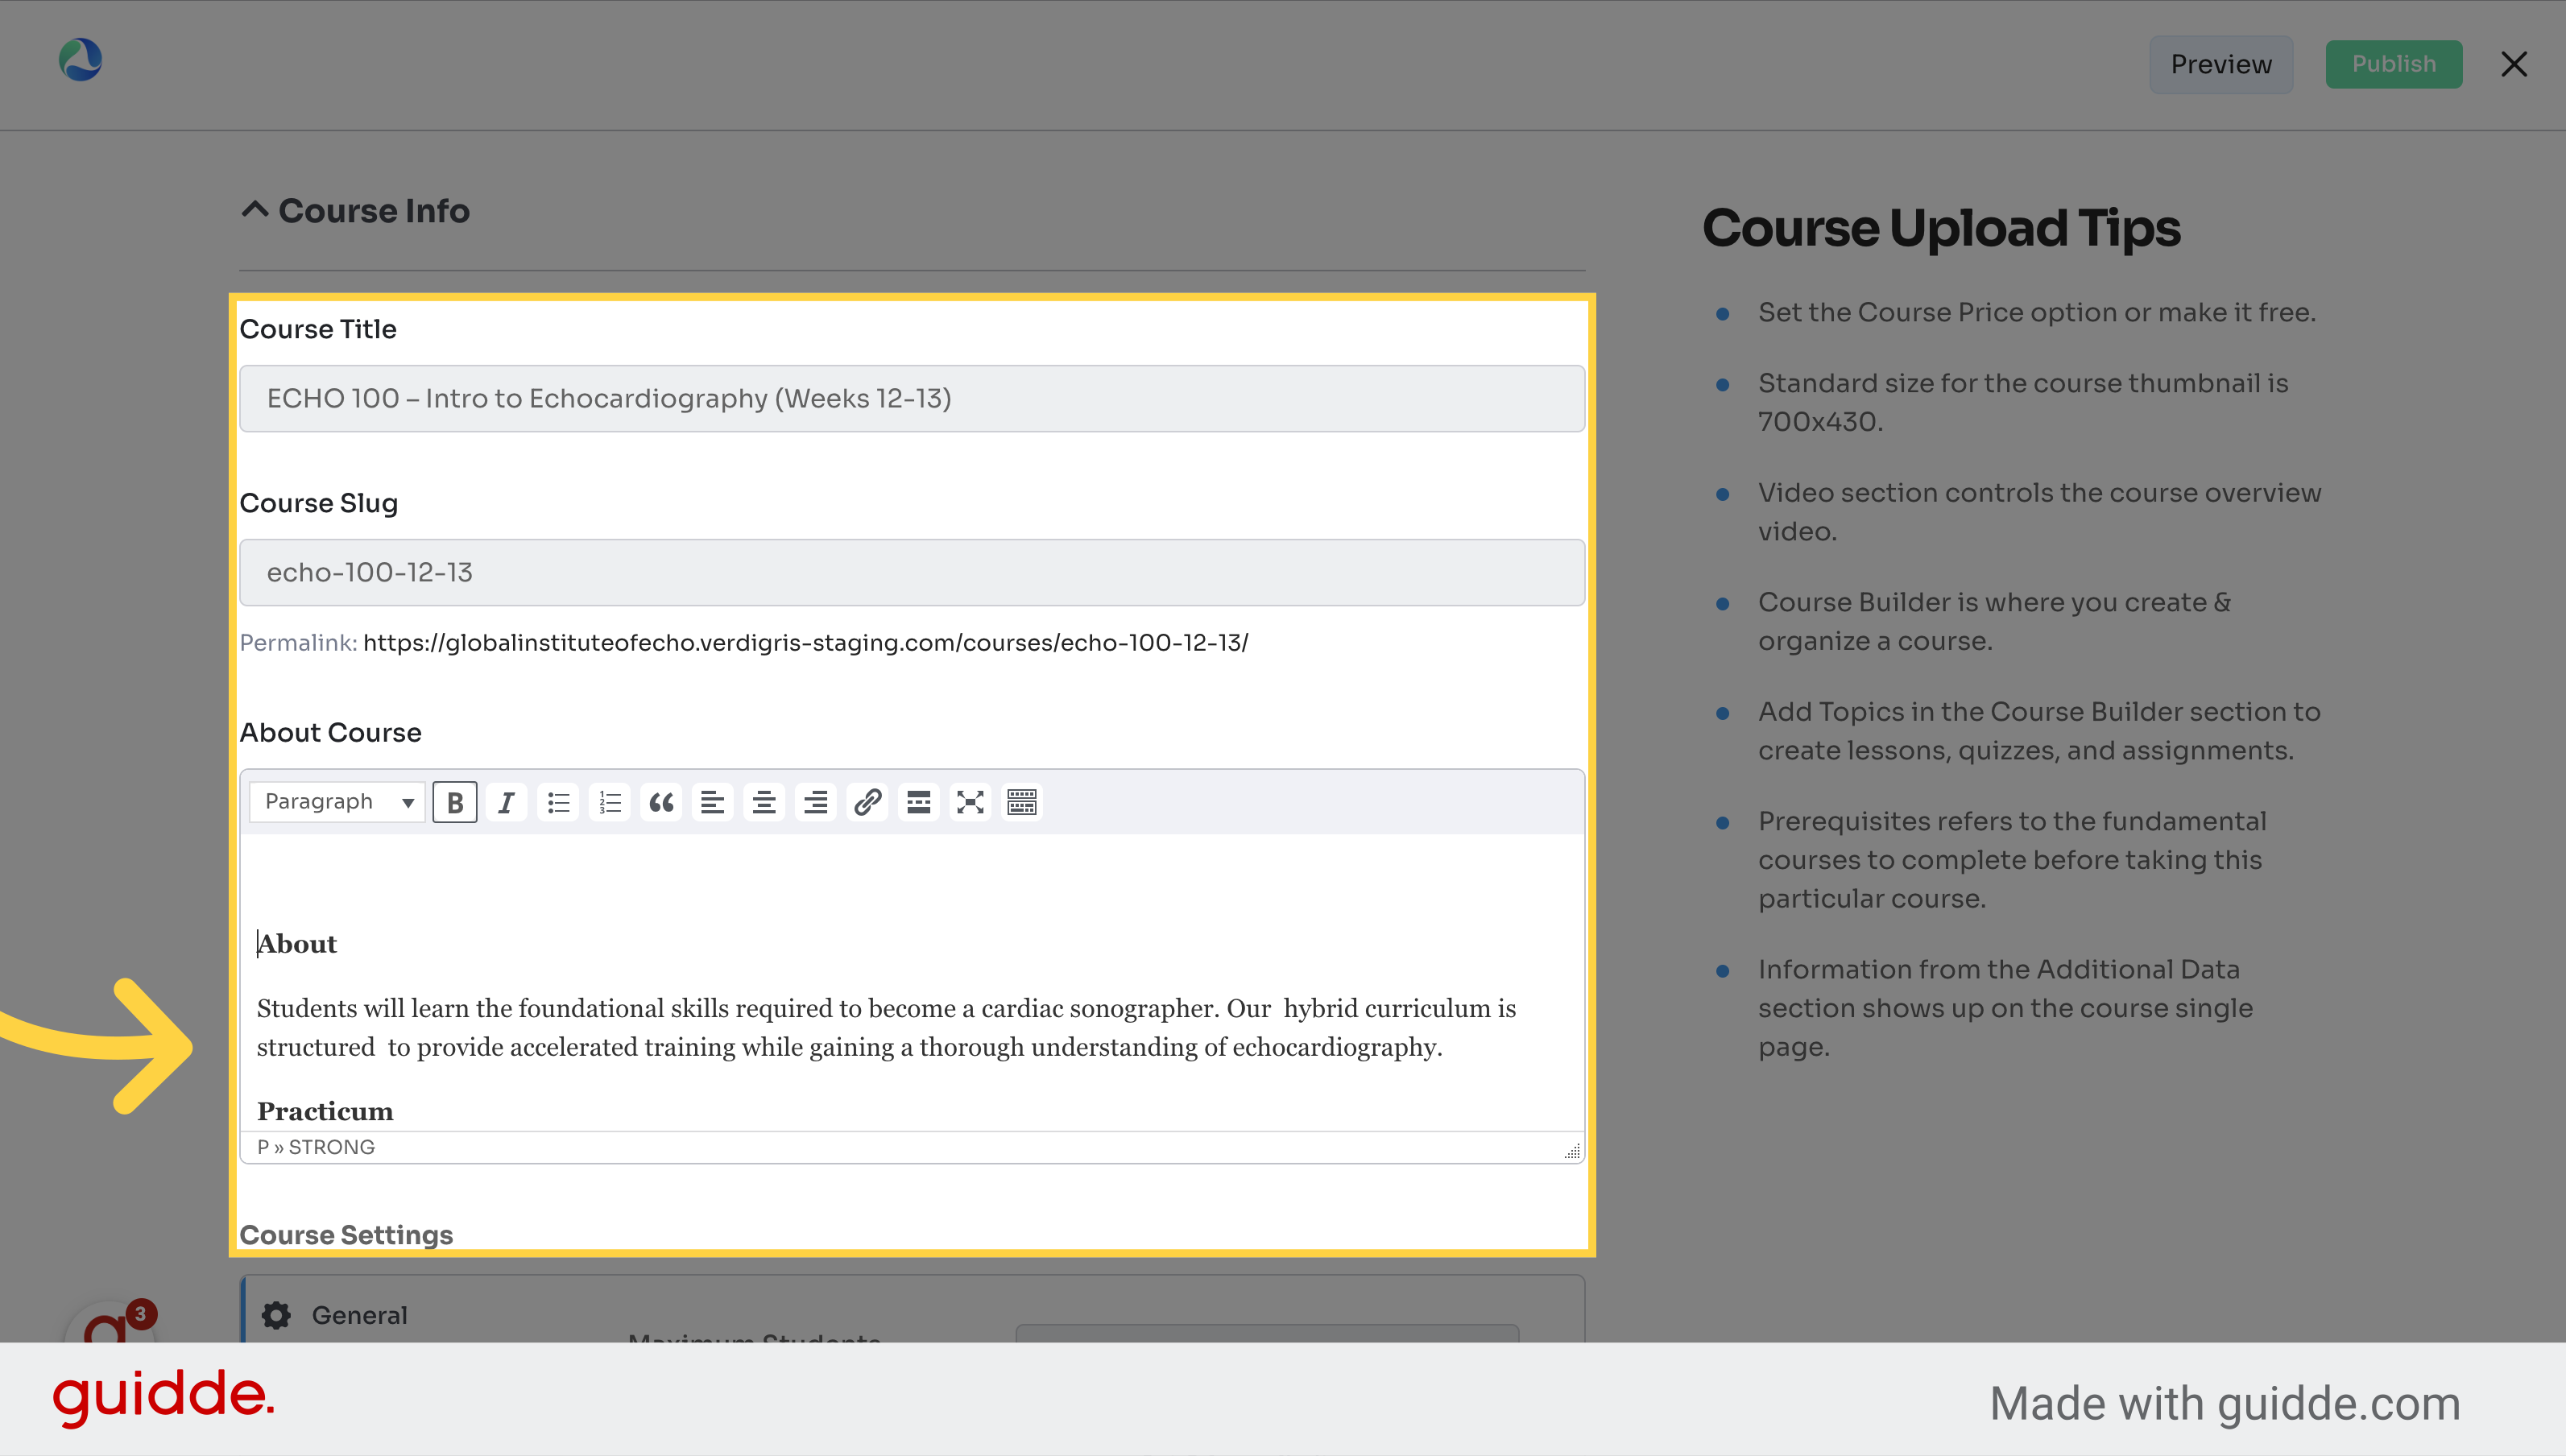
4. Click to edit
View detailed course information.
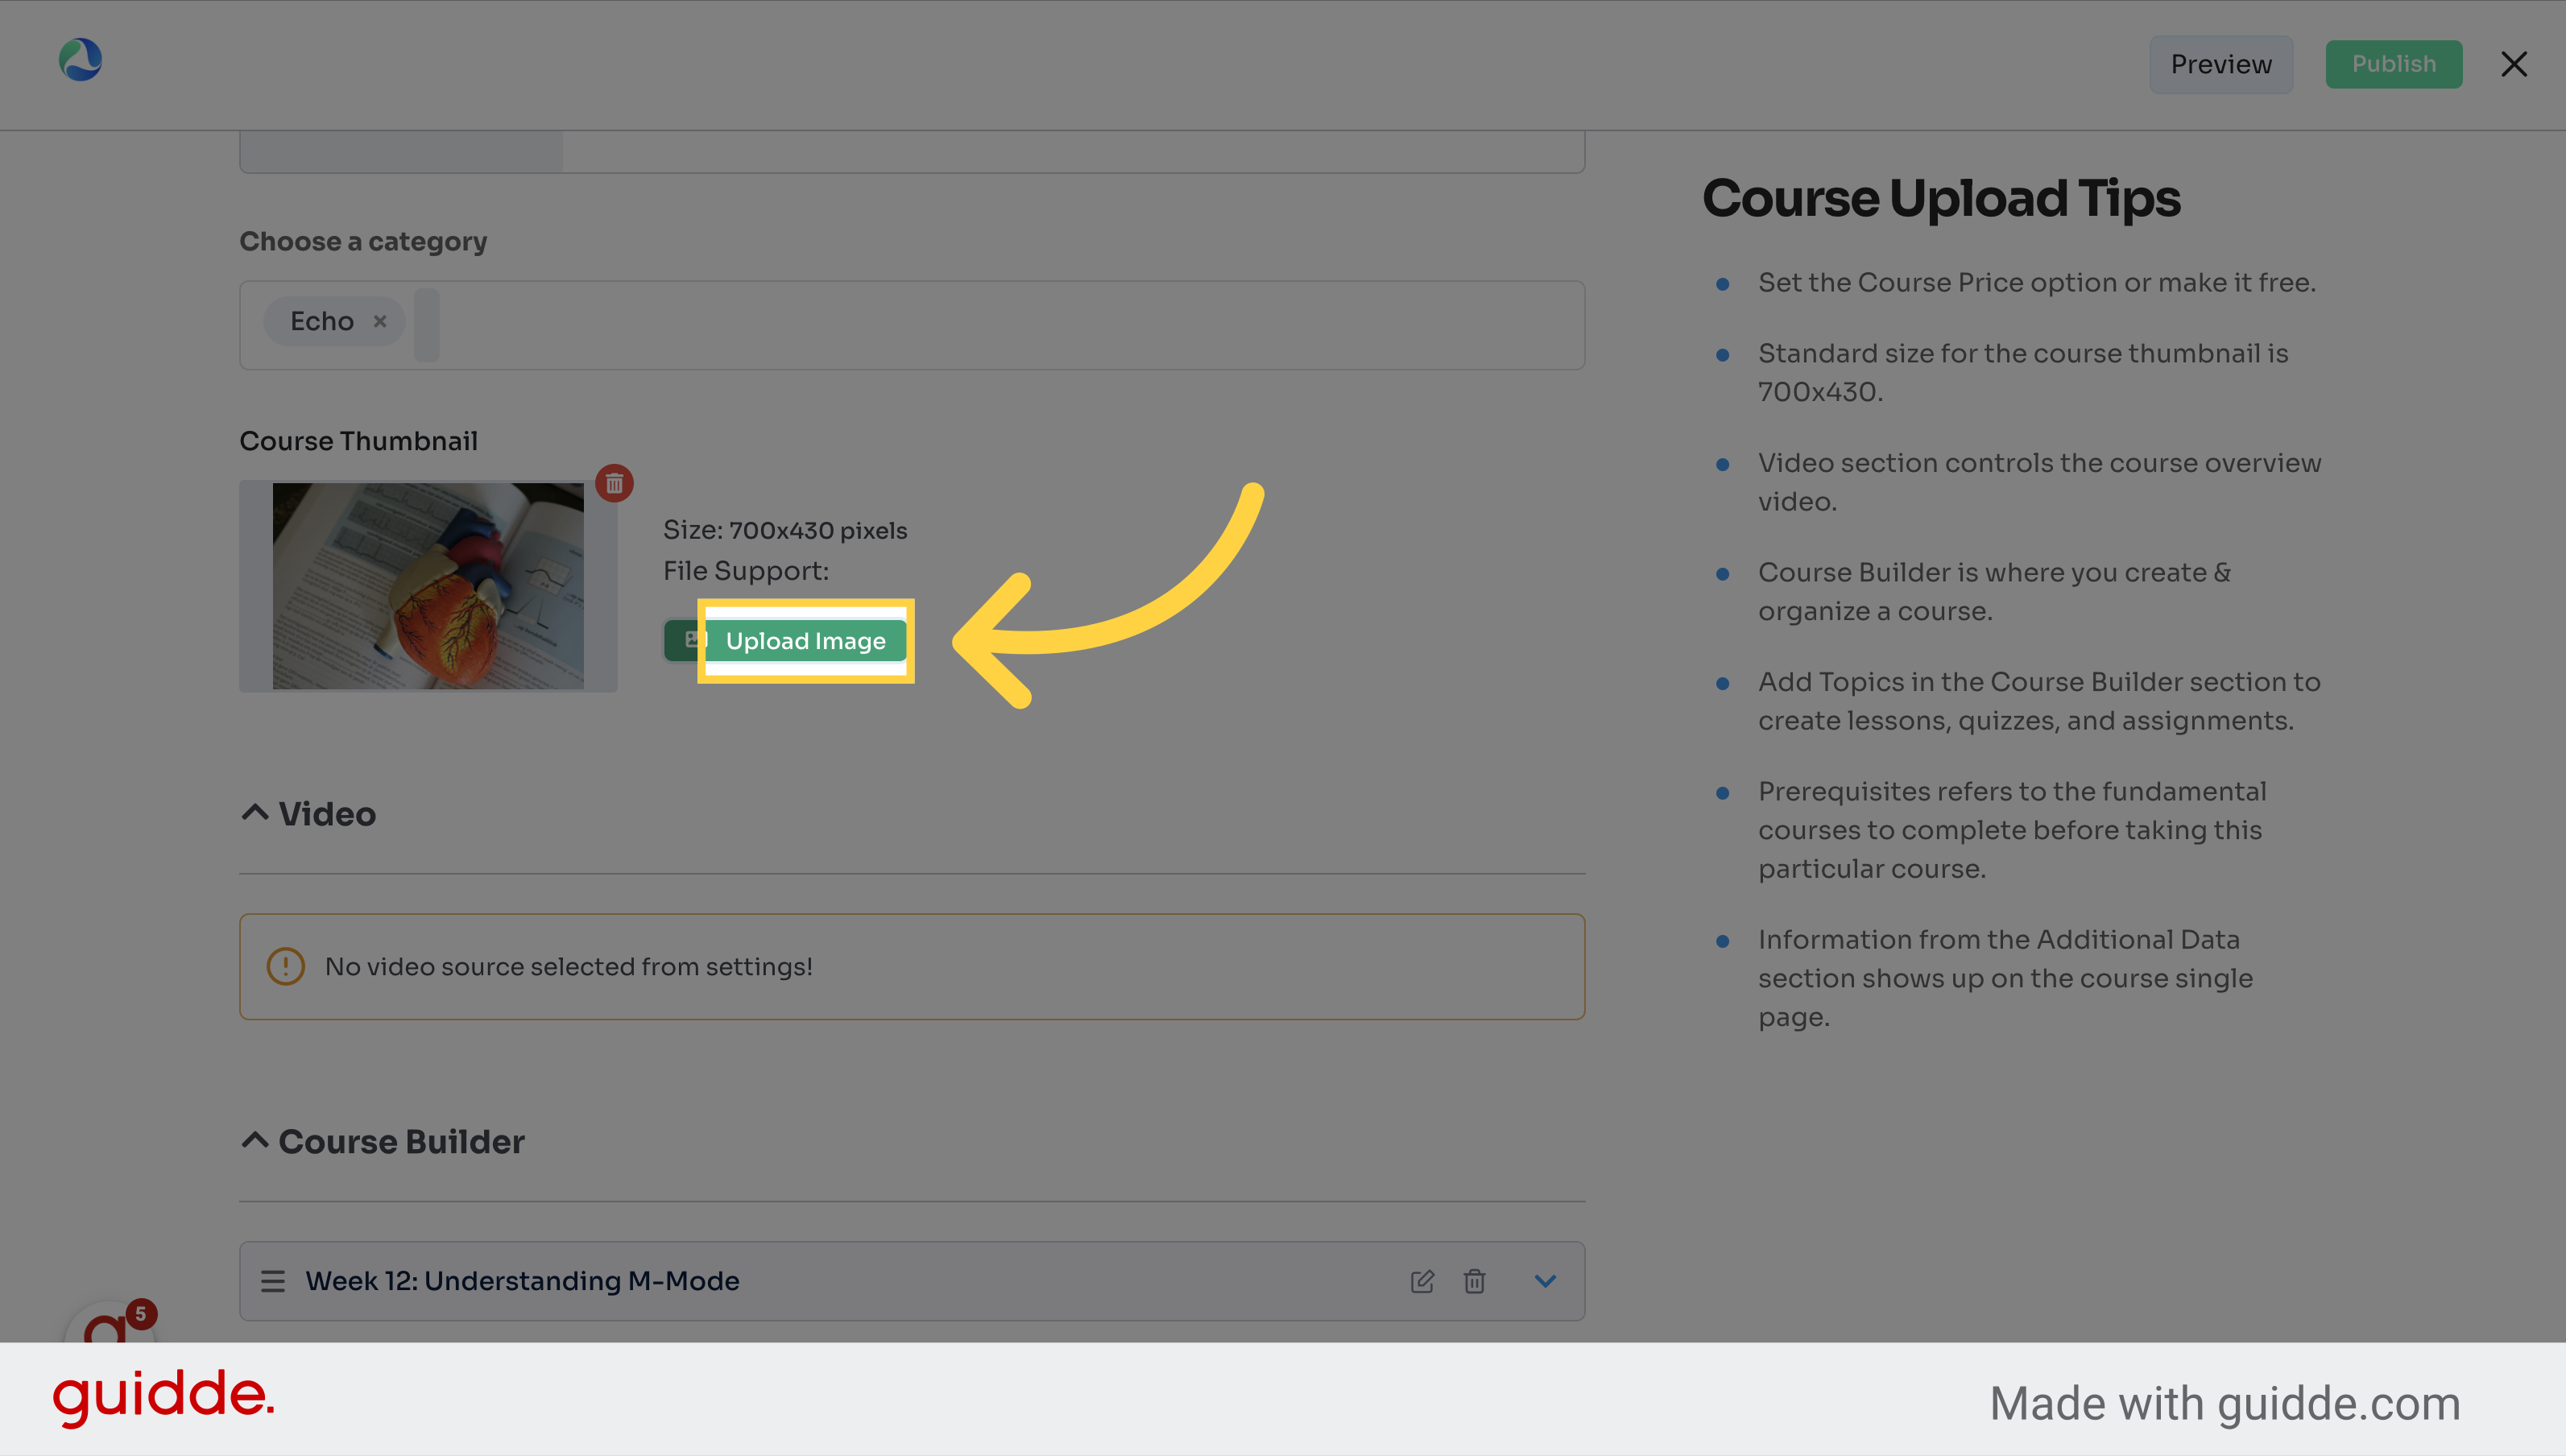
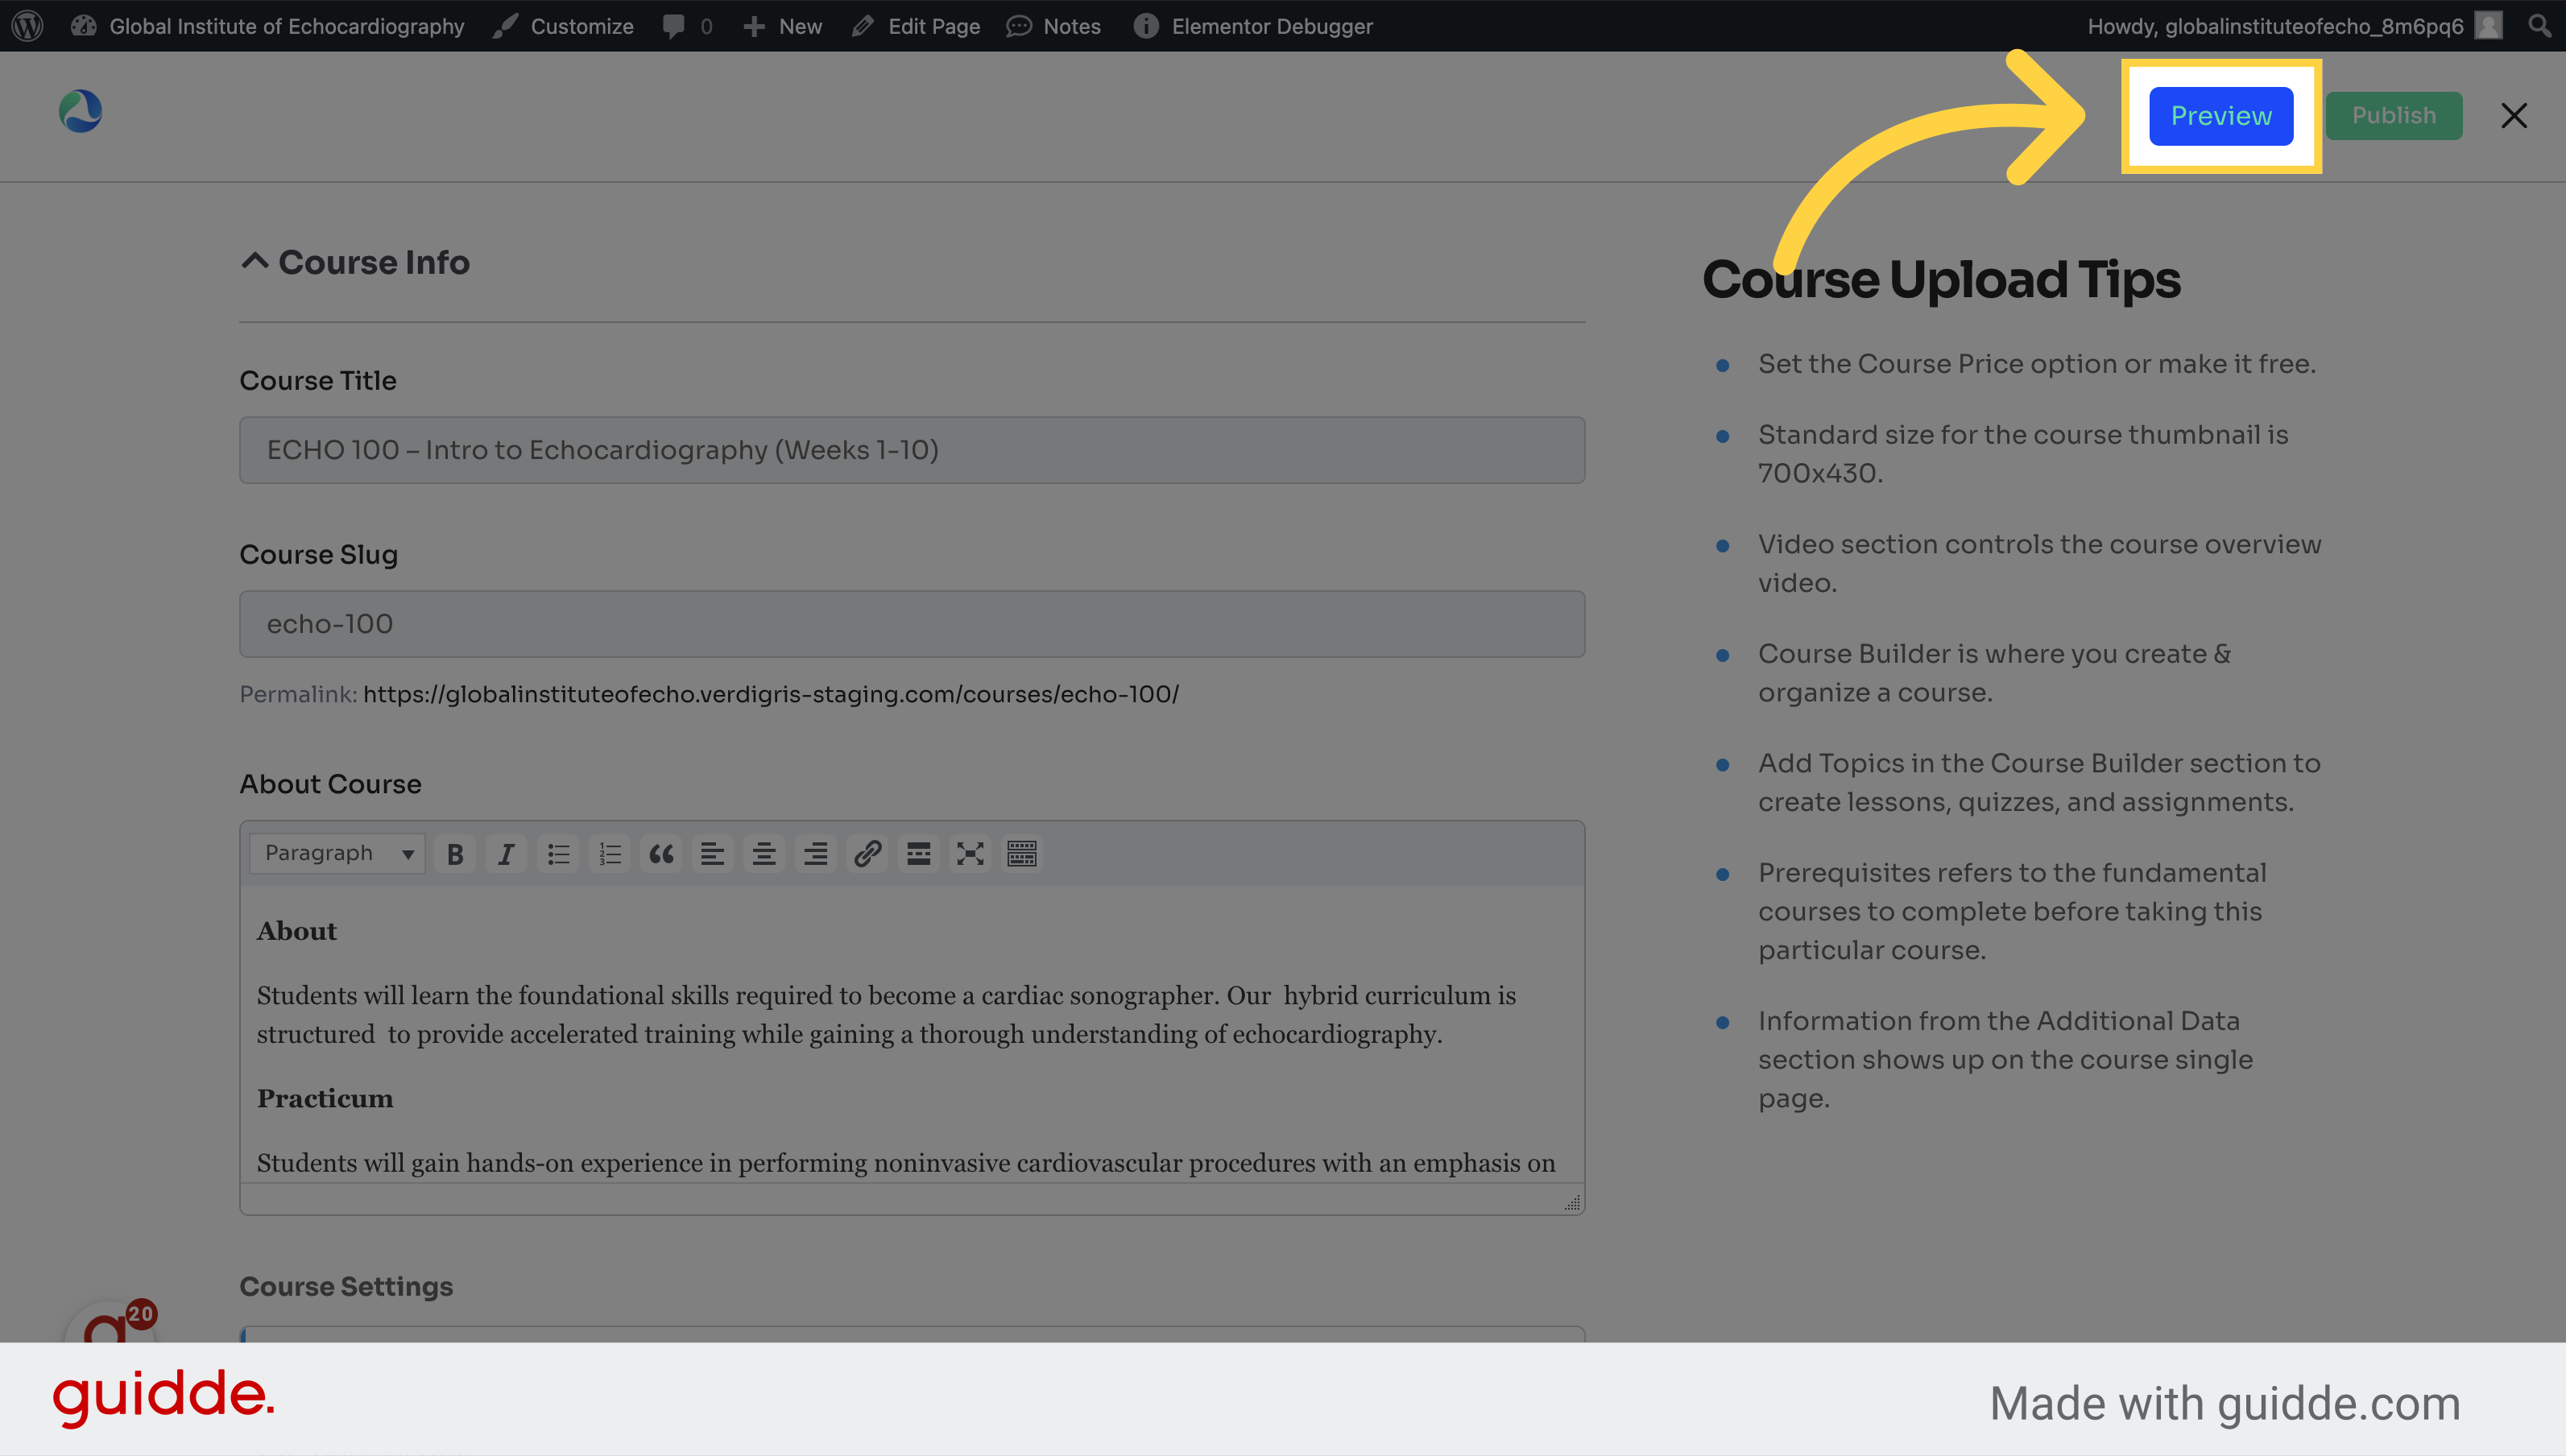
5. Click "Upload Image"
Add an image to the course.
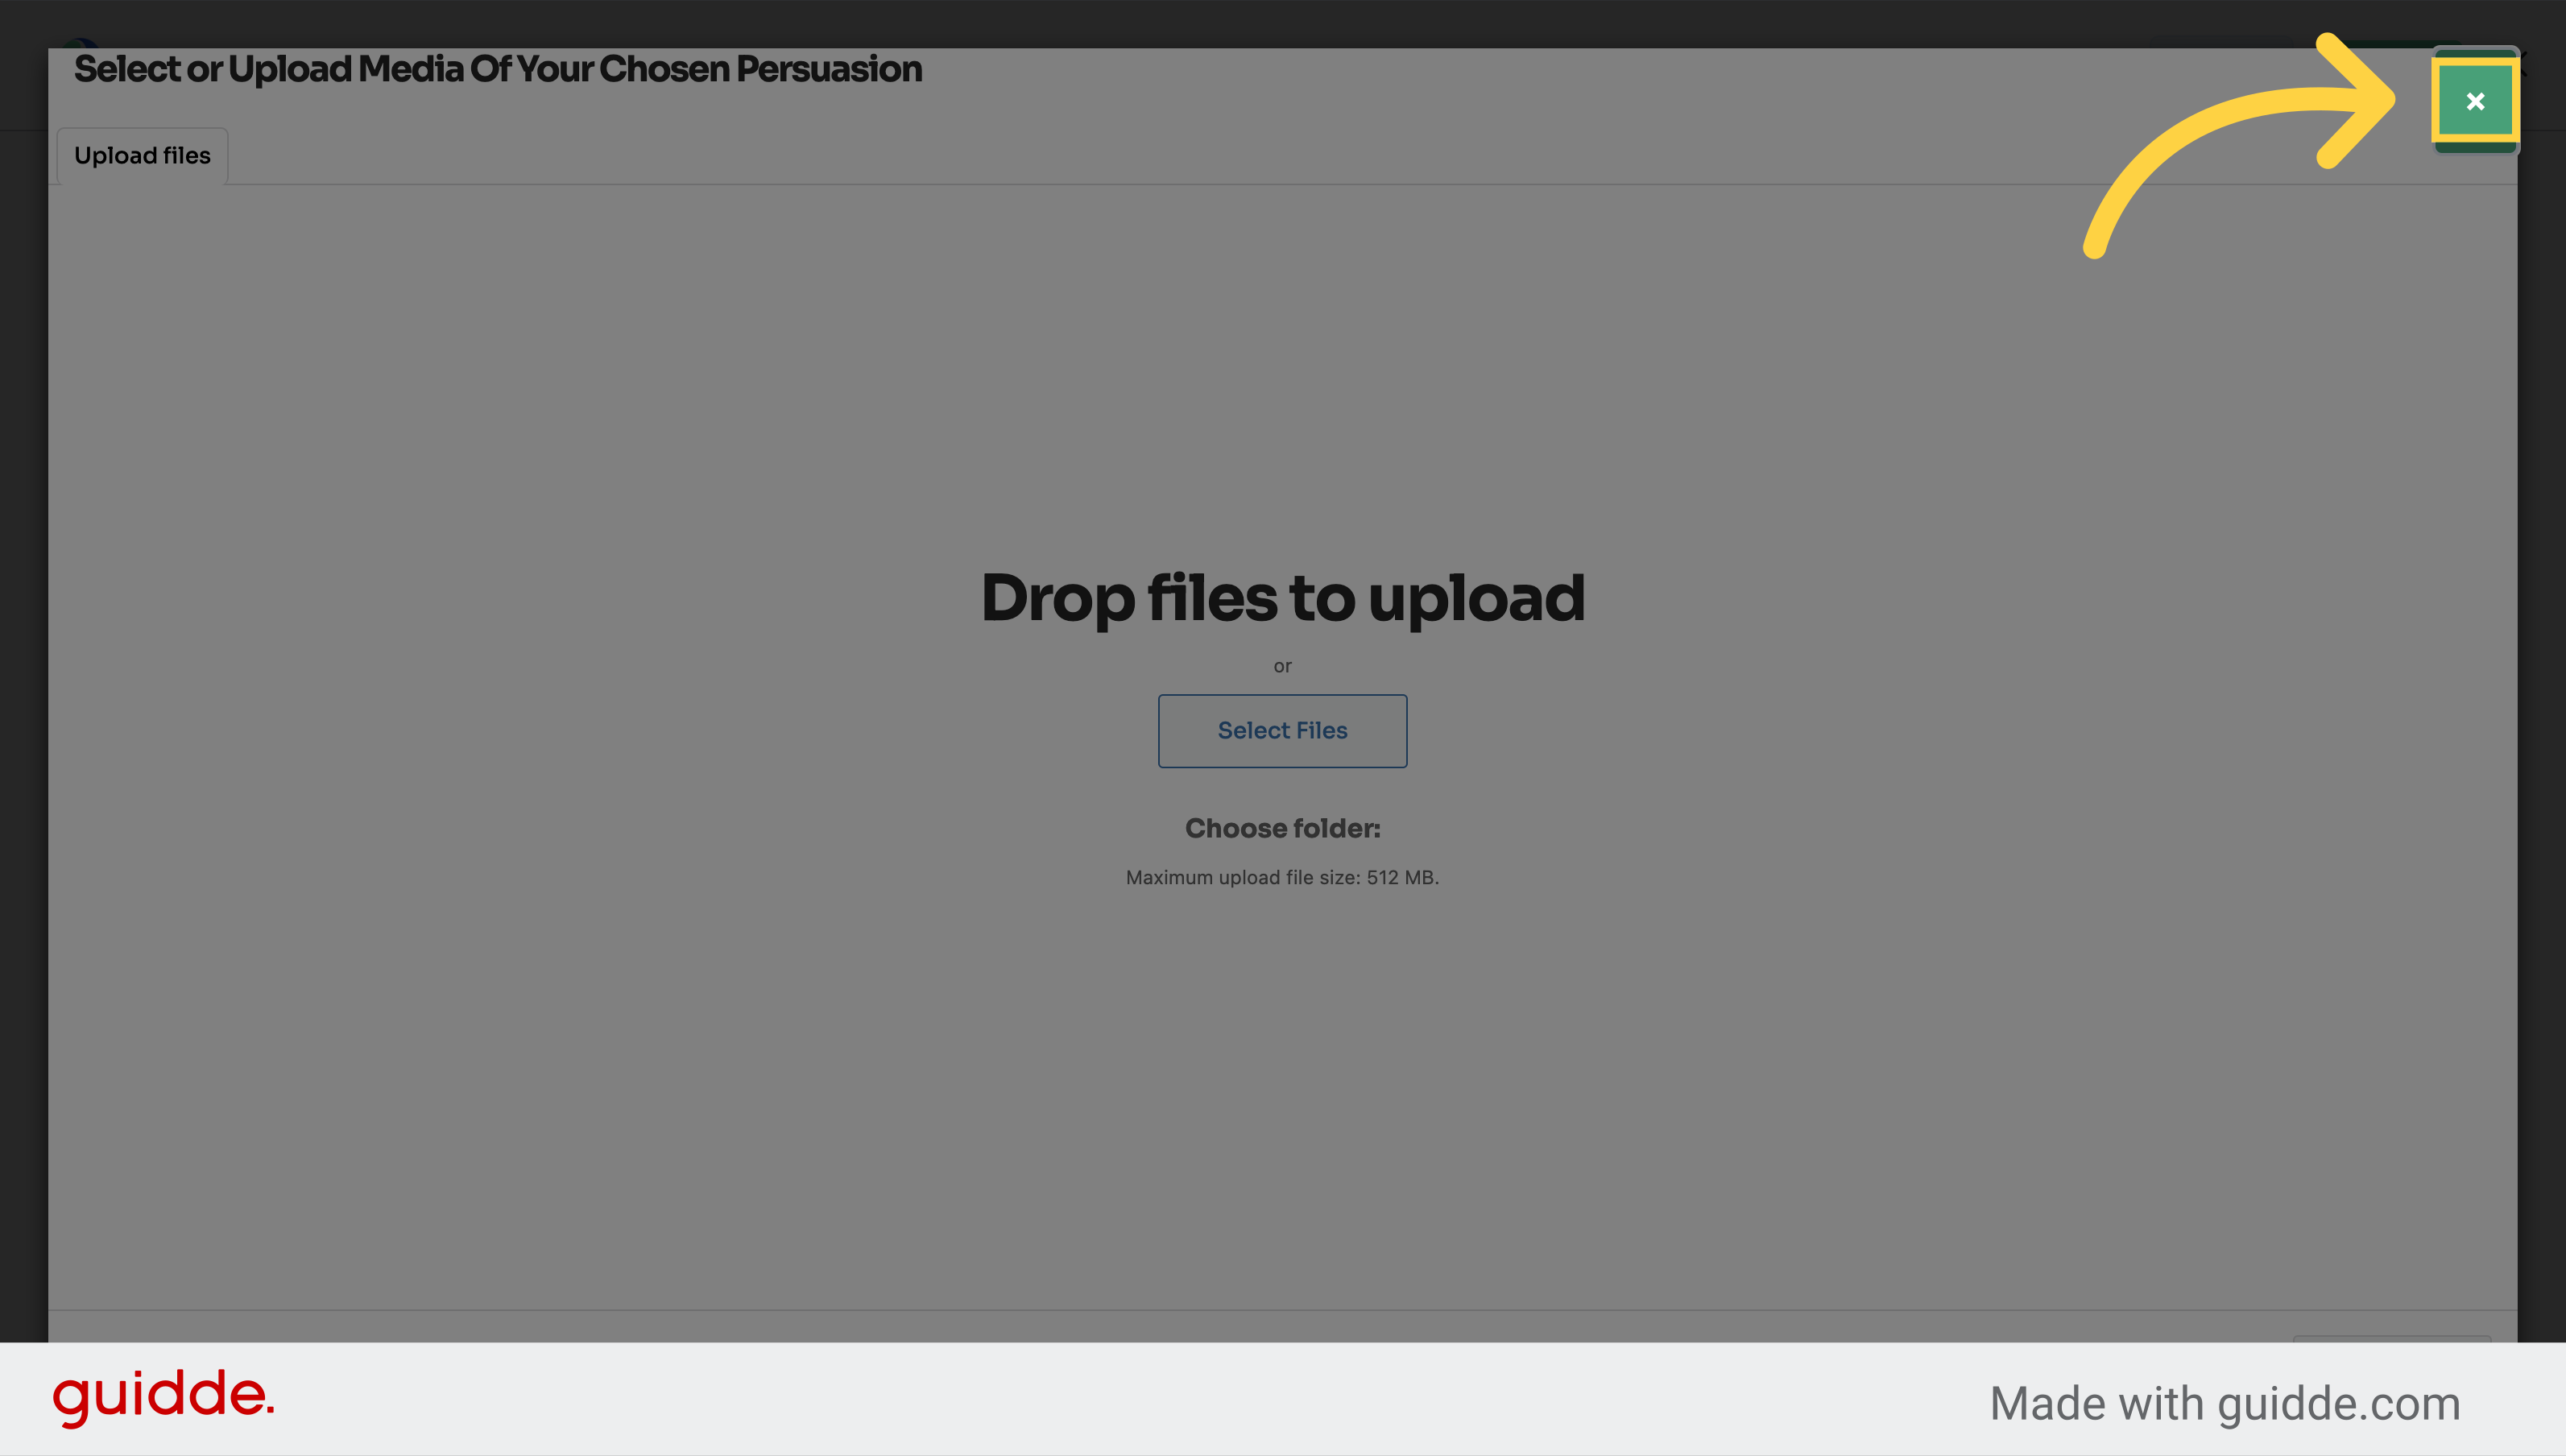
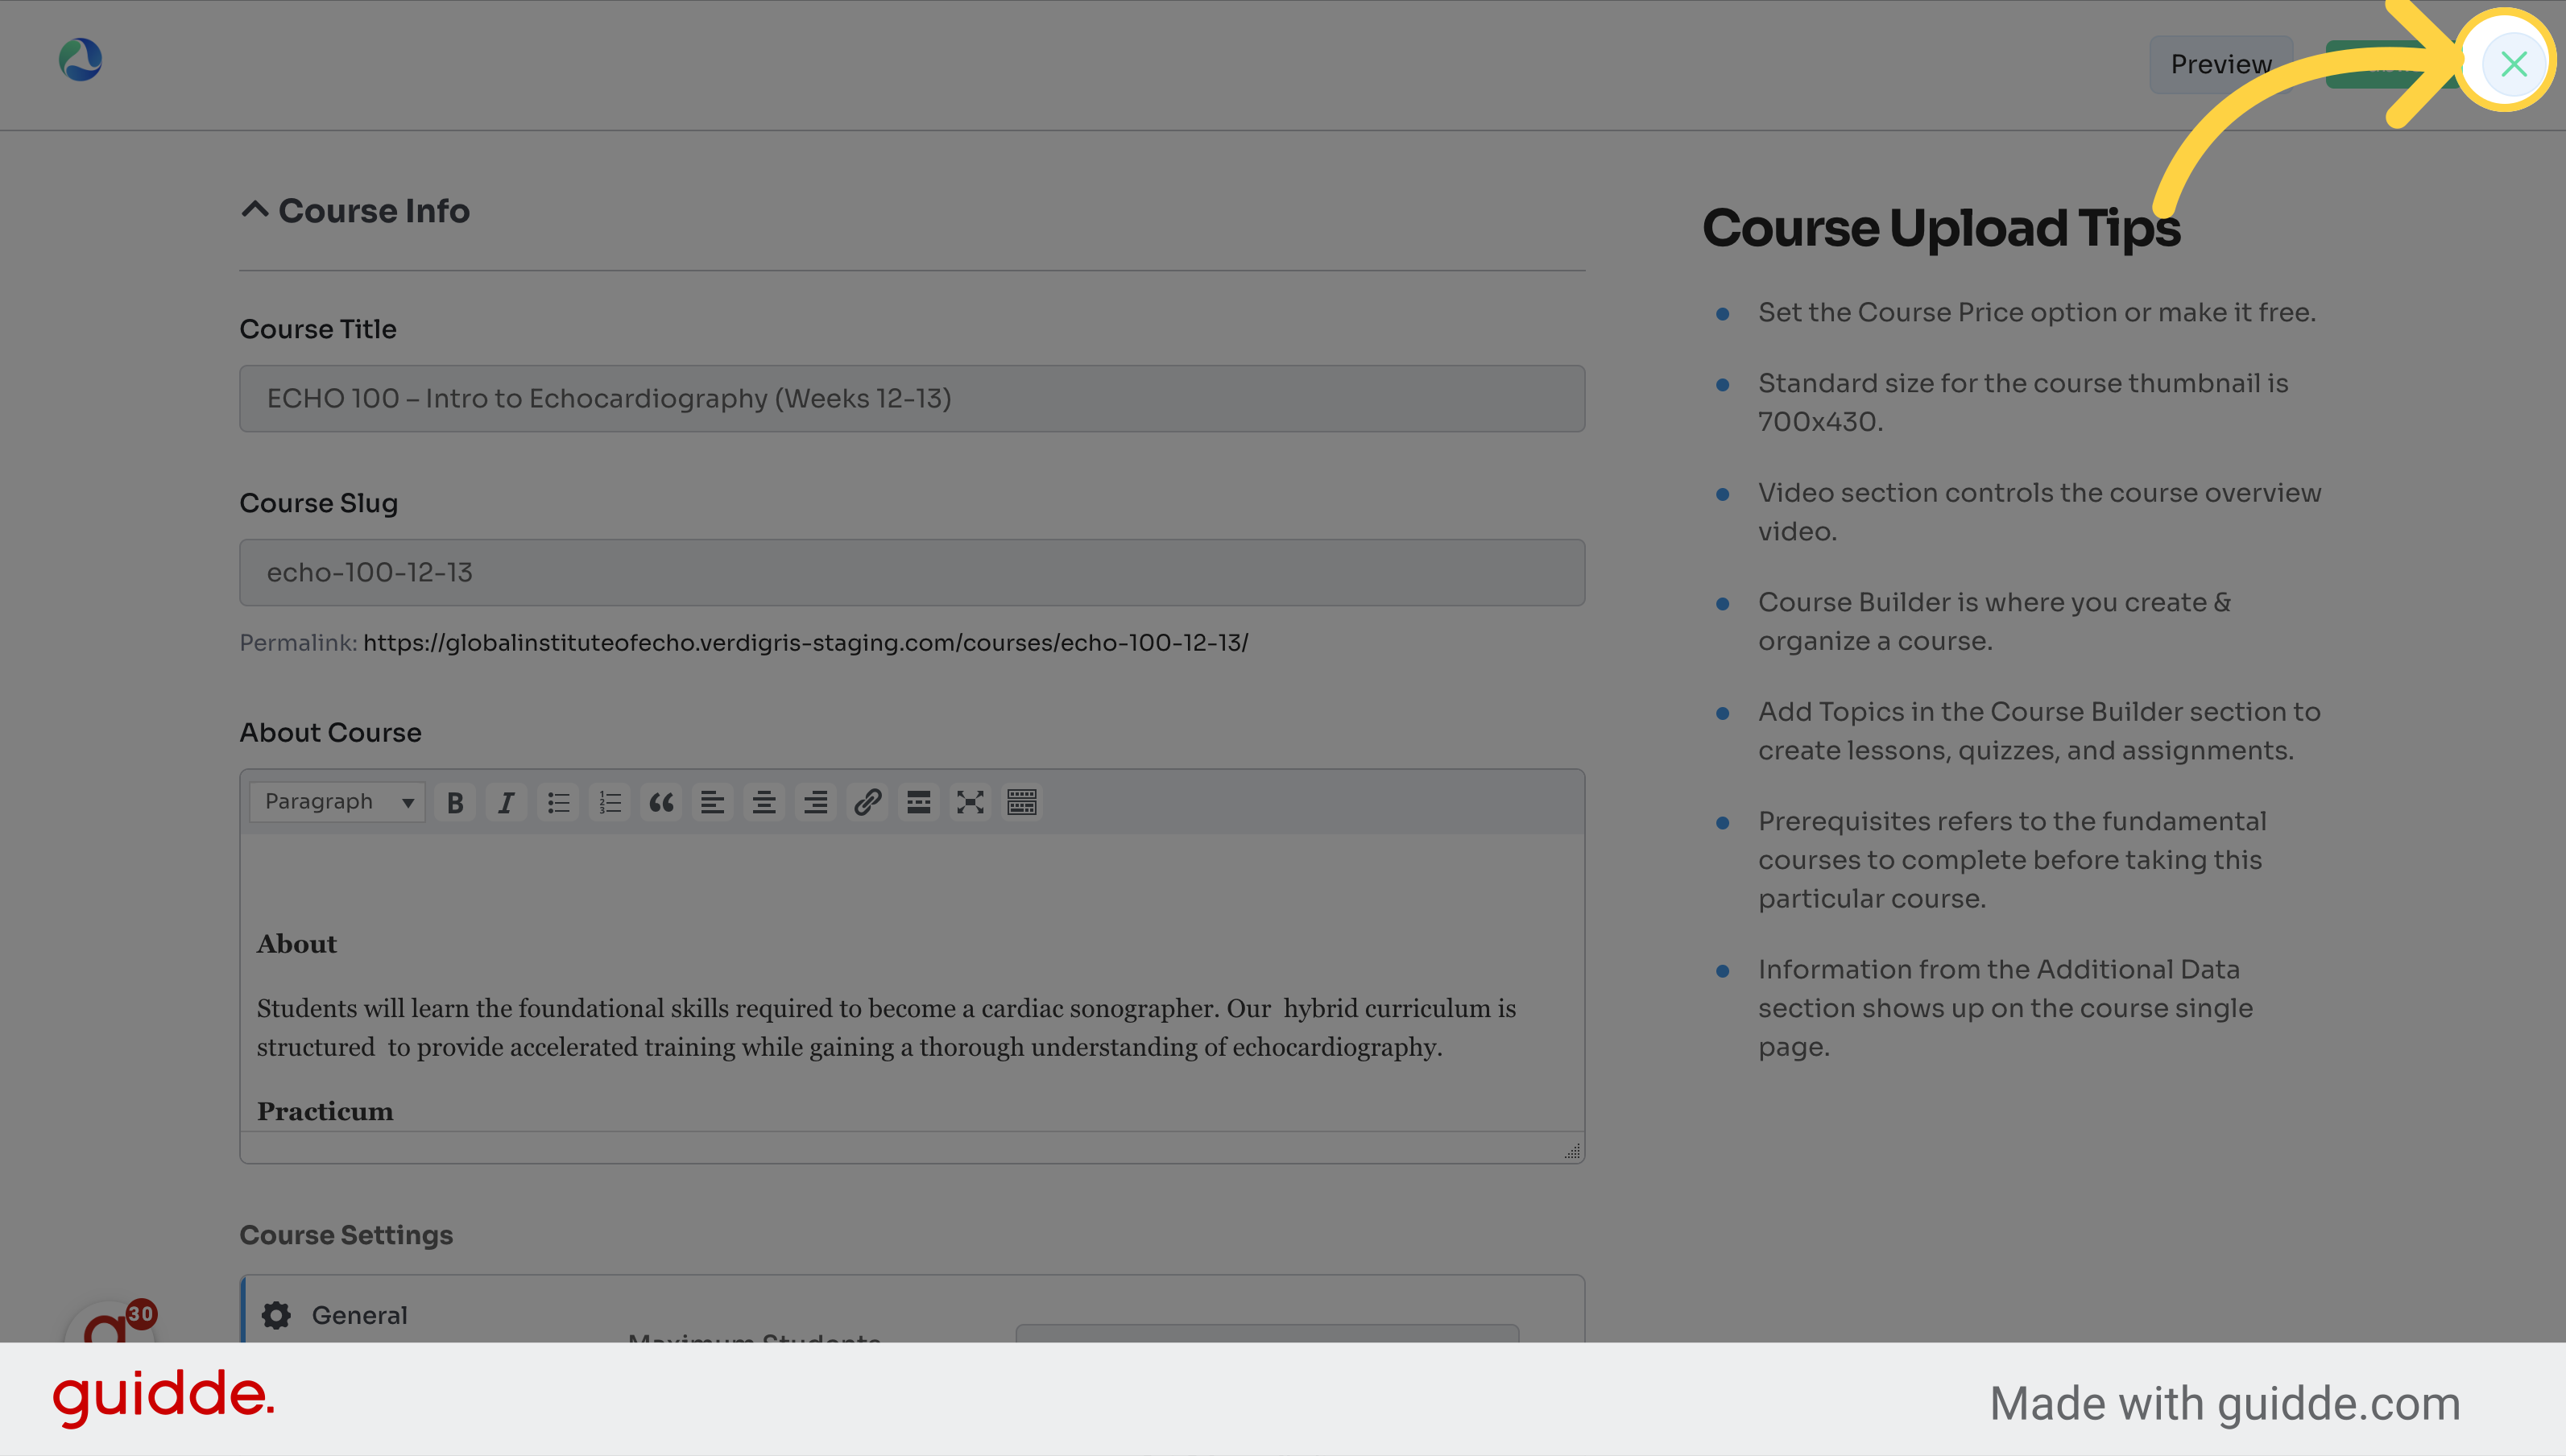
6. Click "Close dialog"
Close the dialog box.
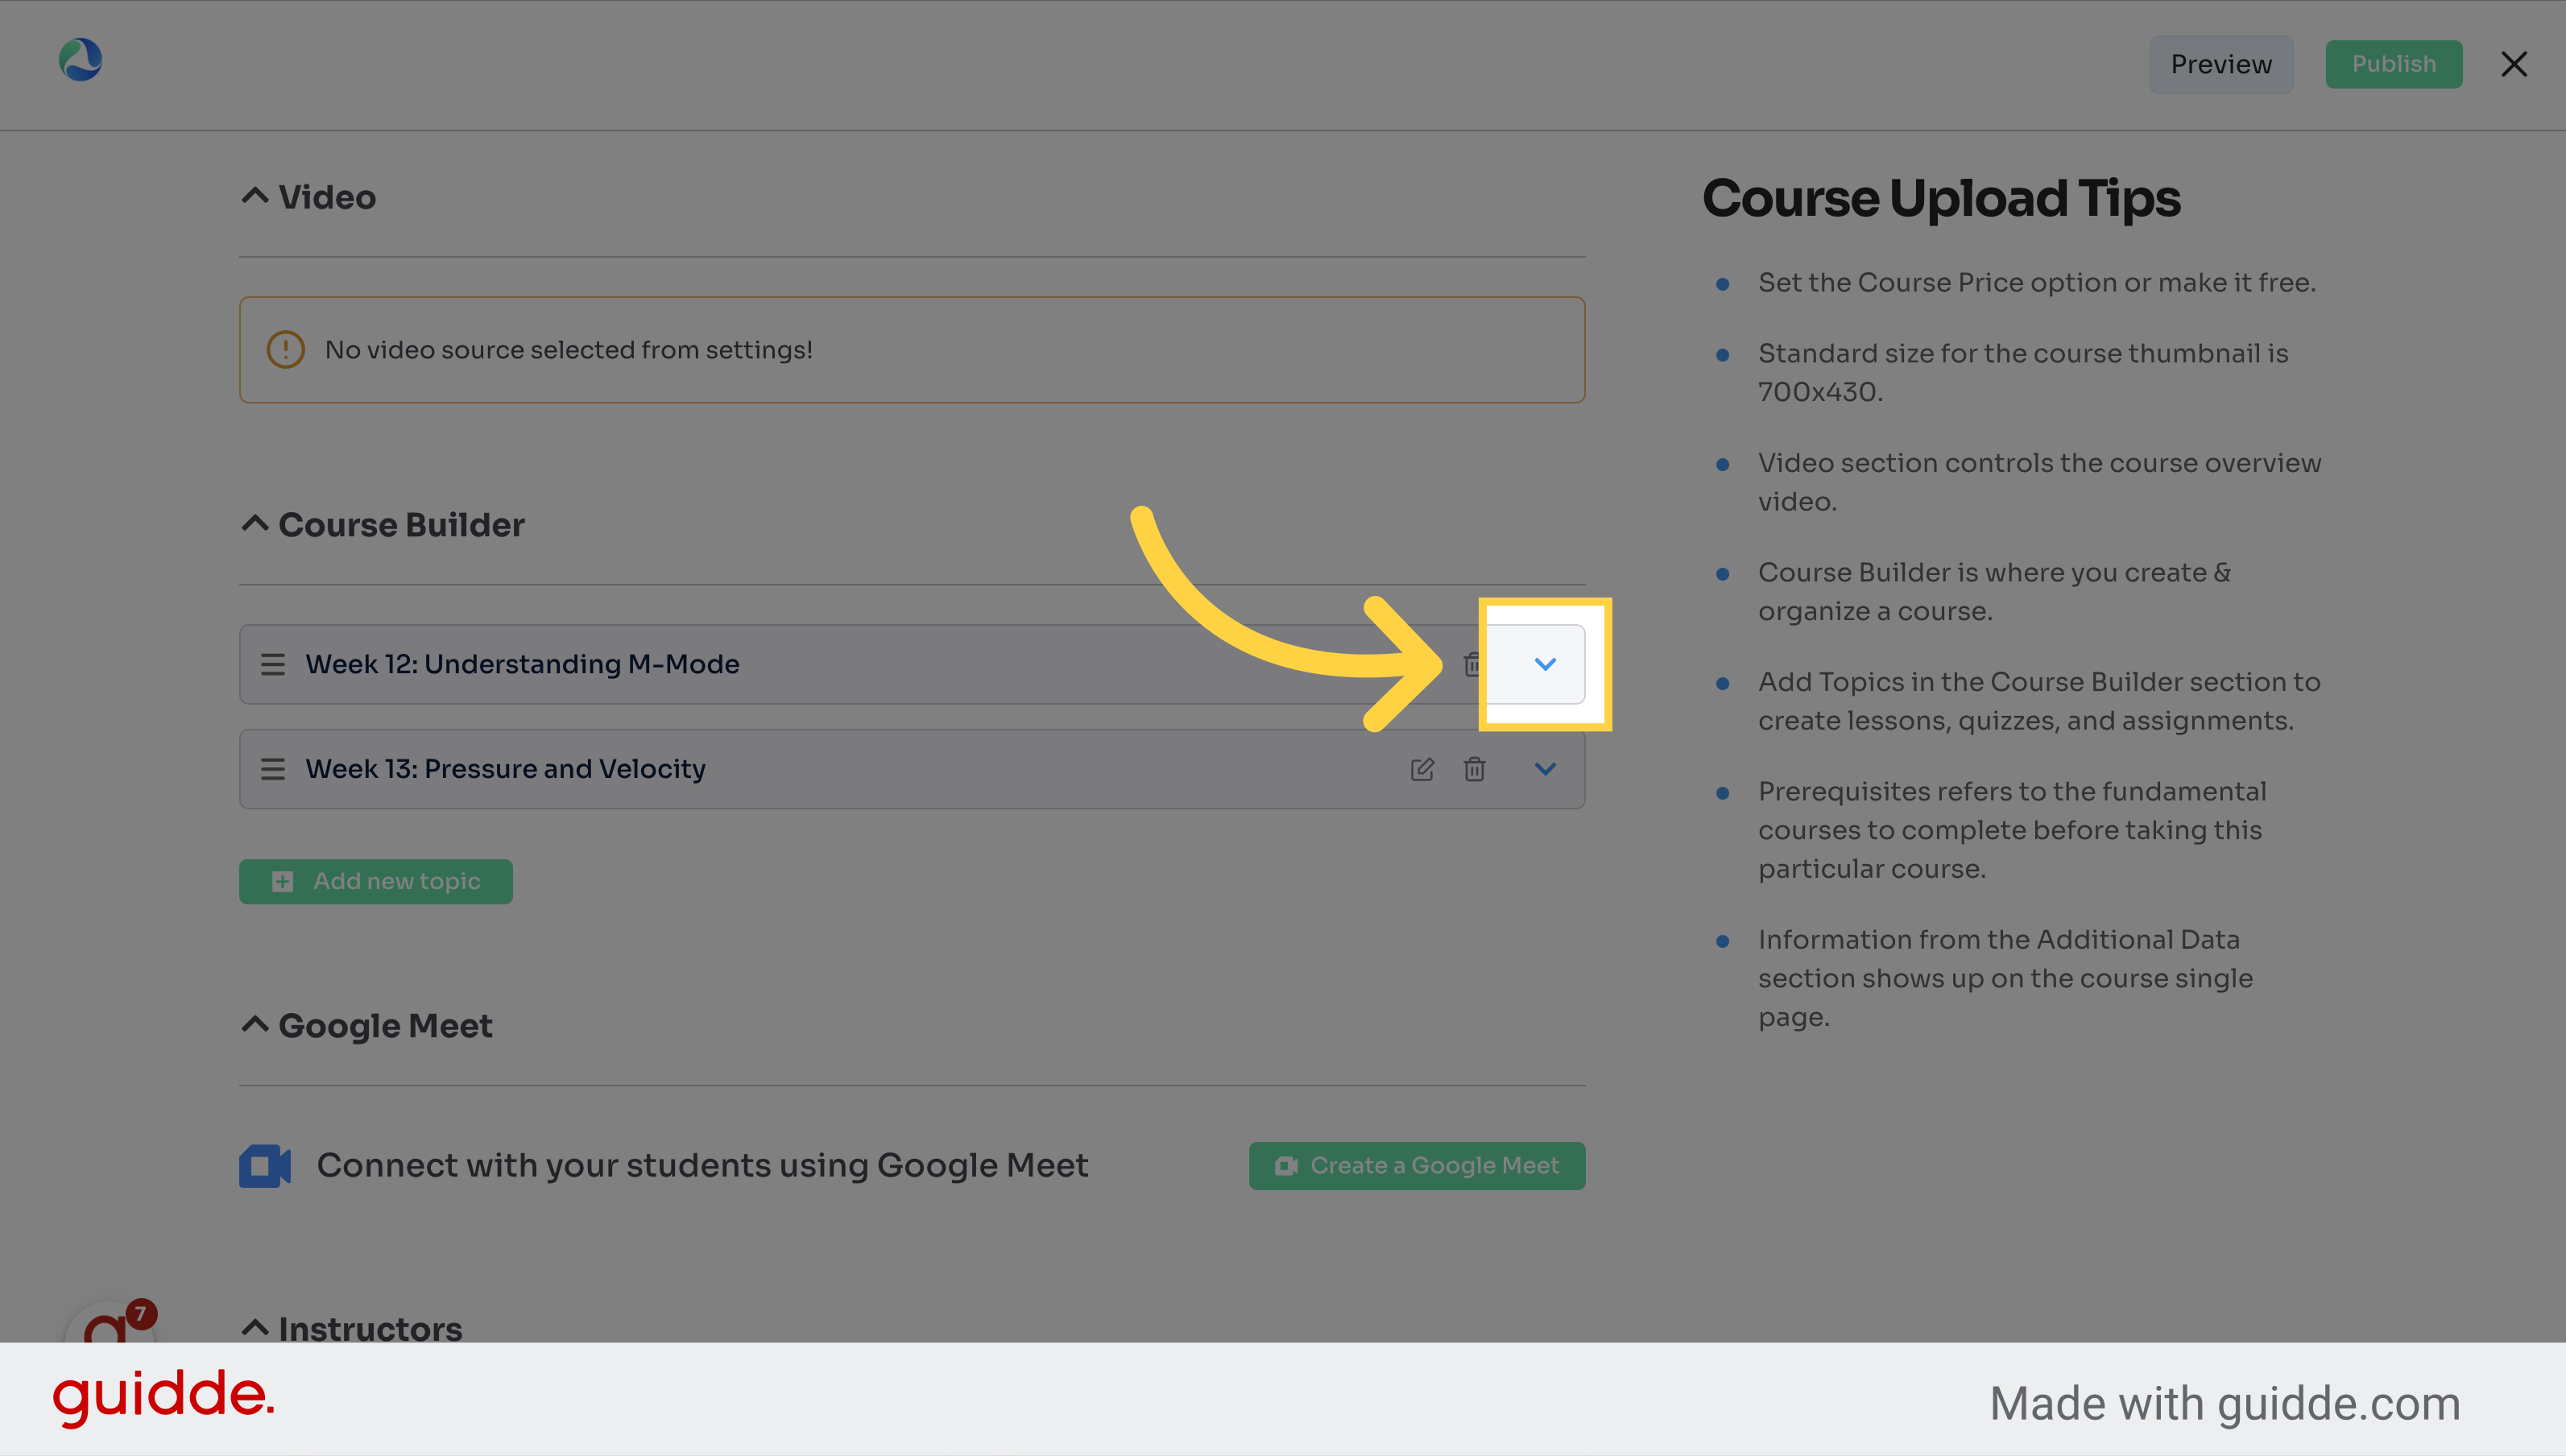
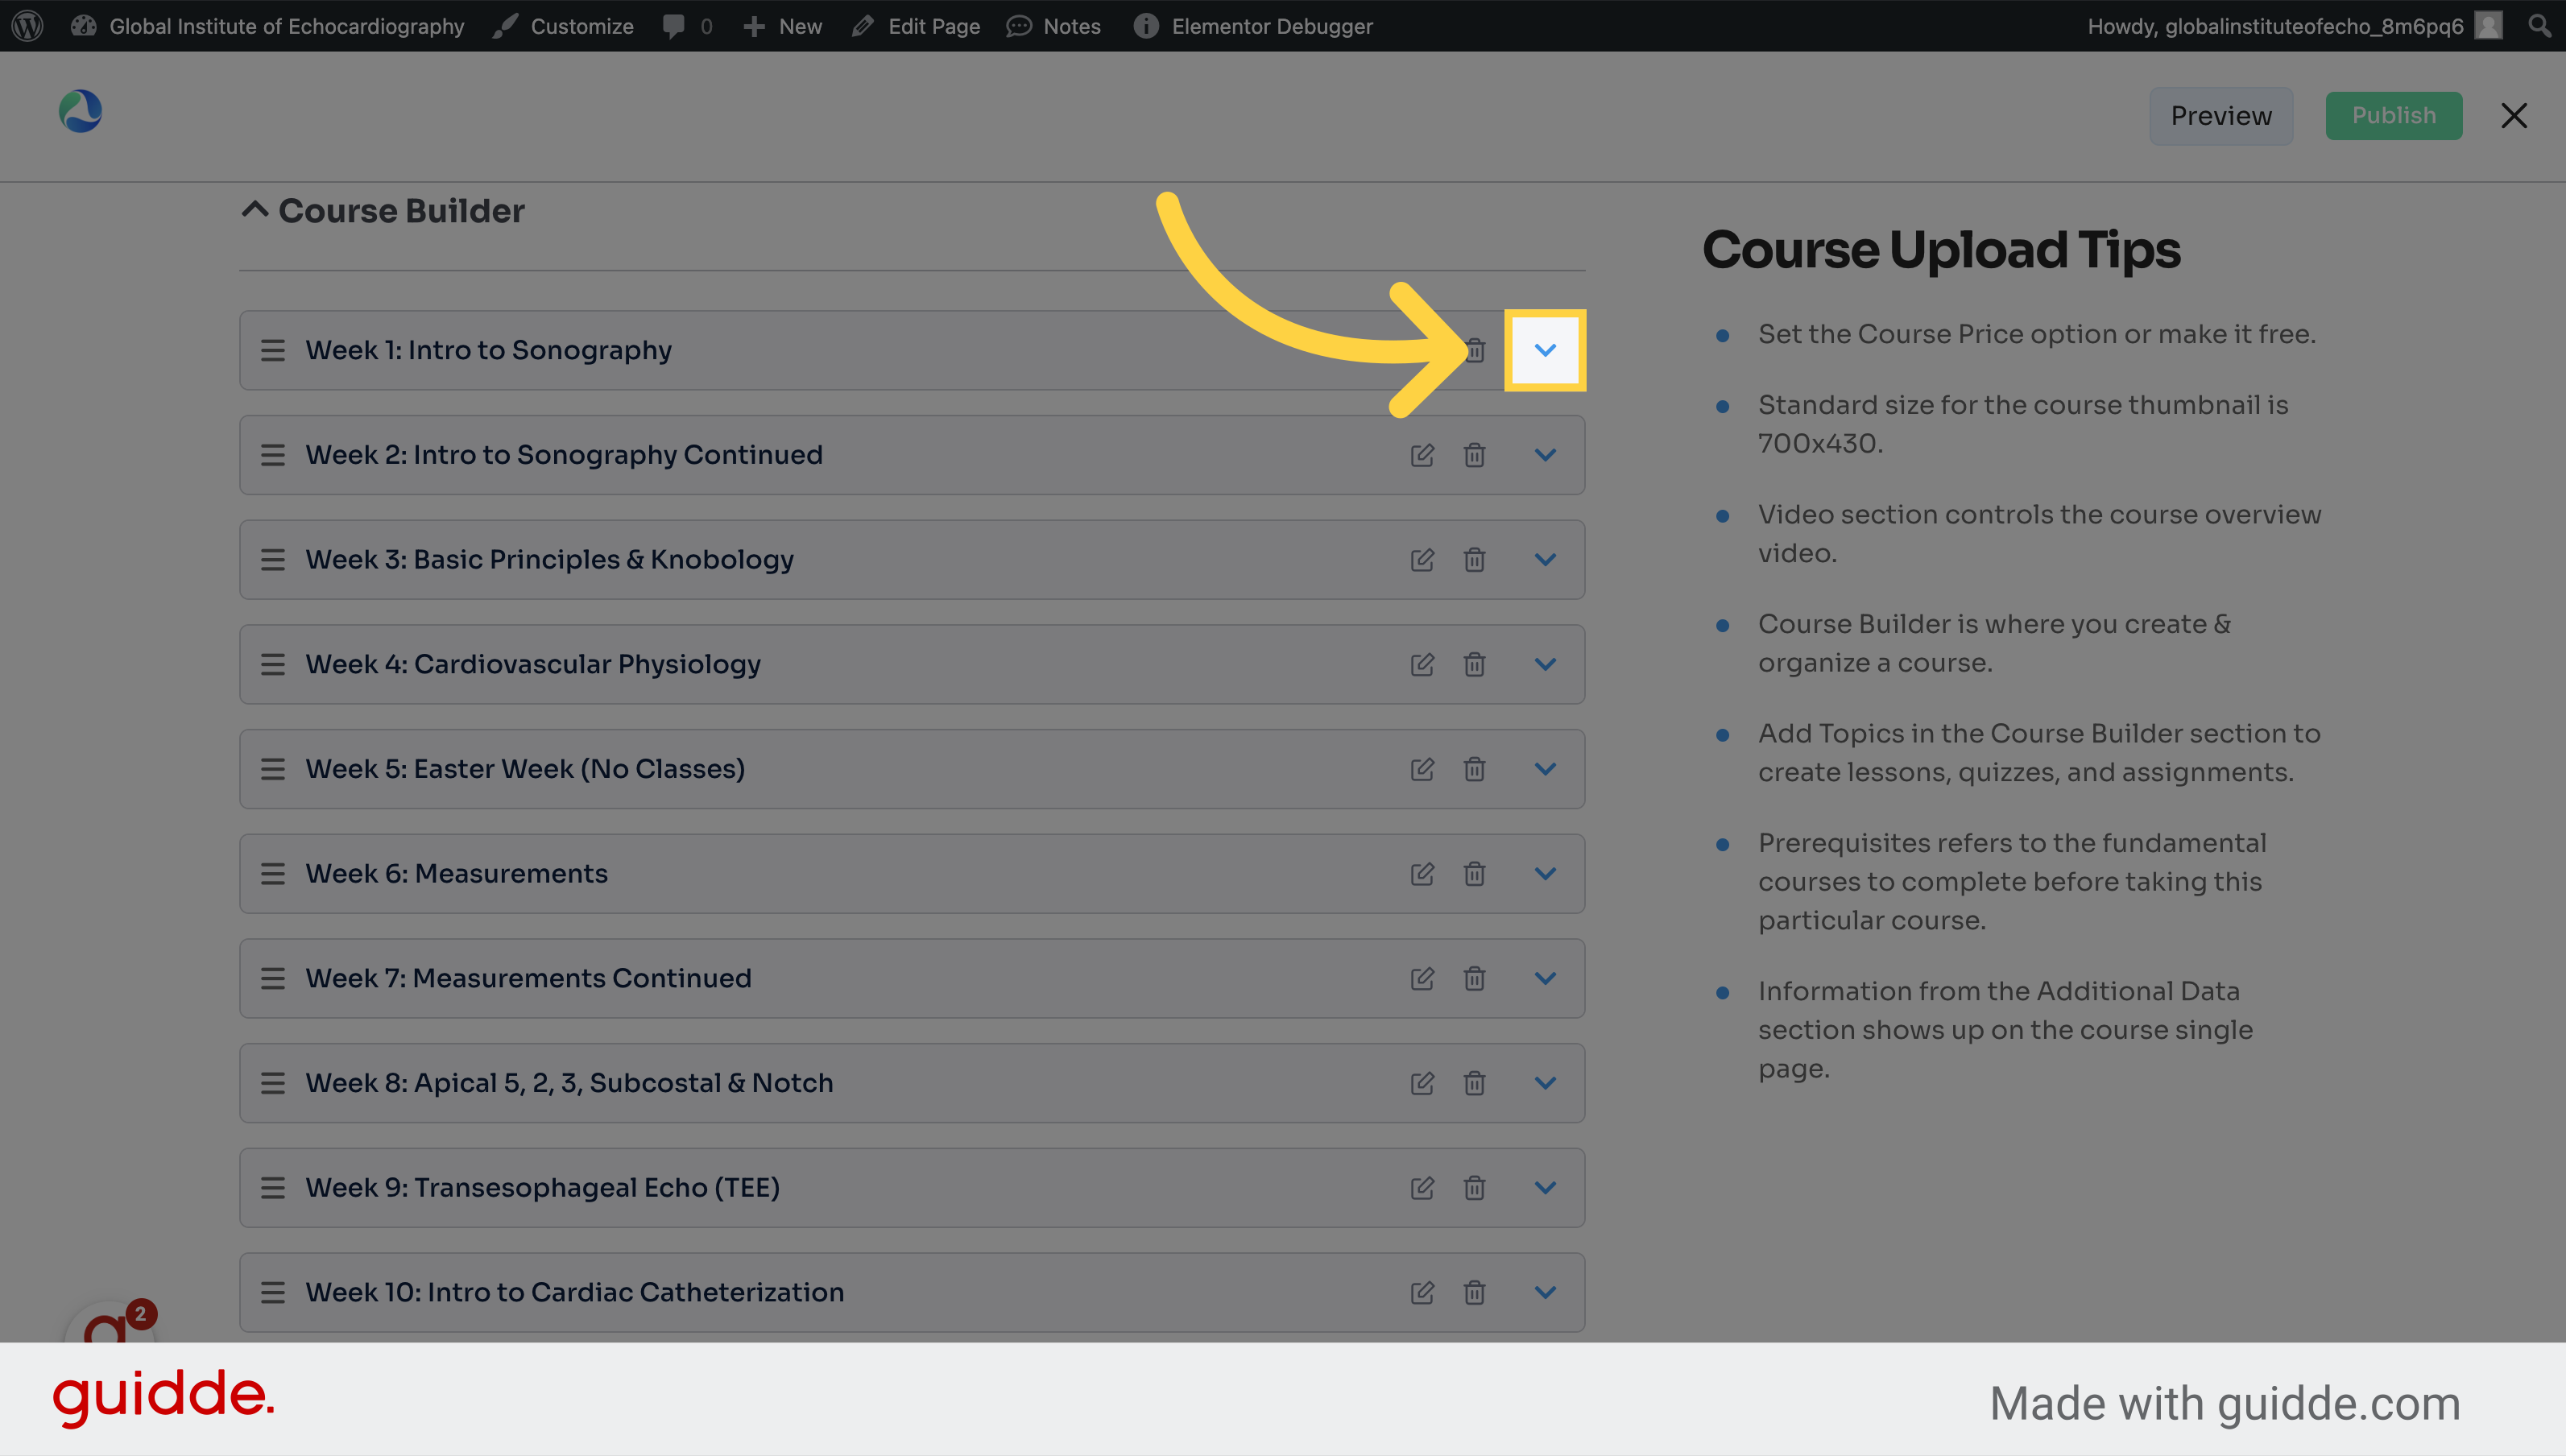
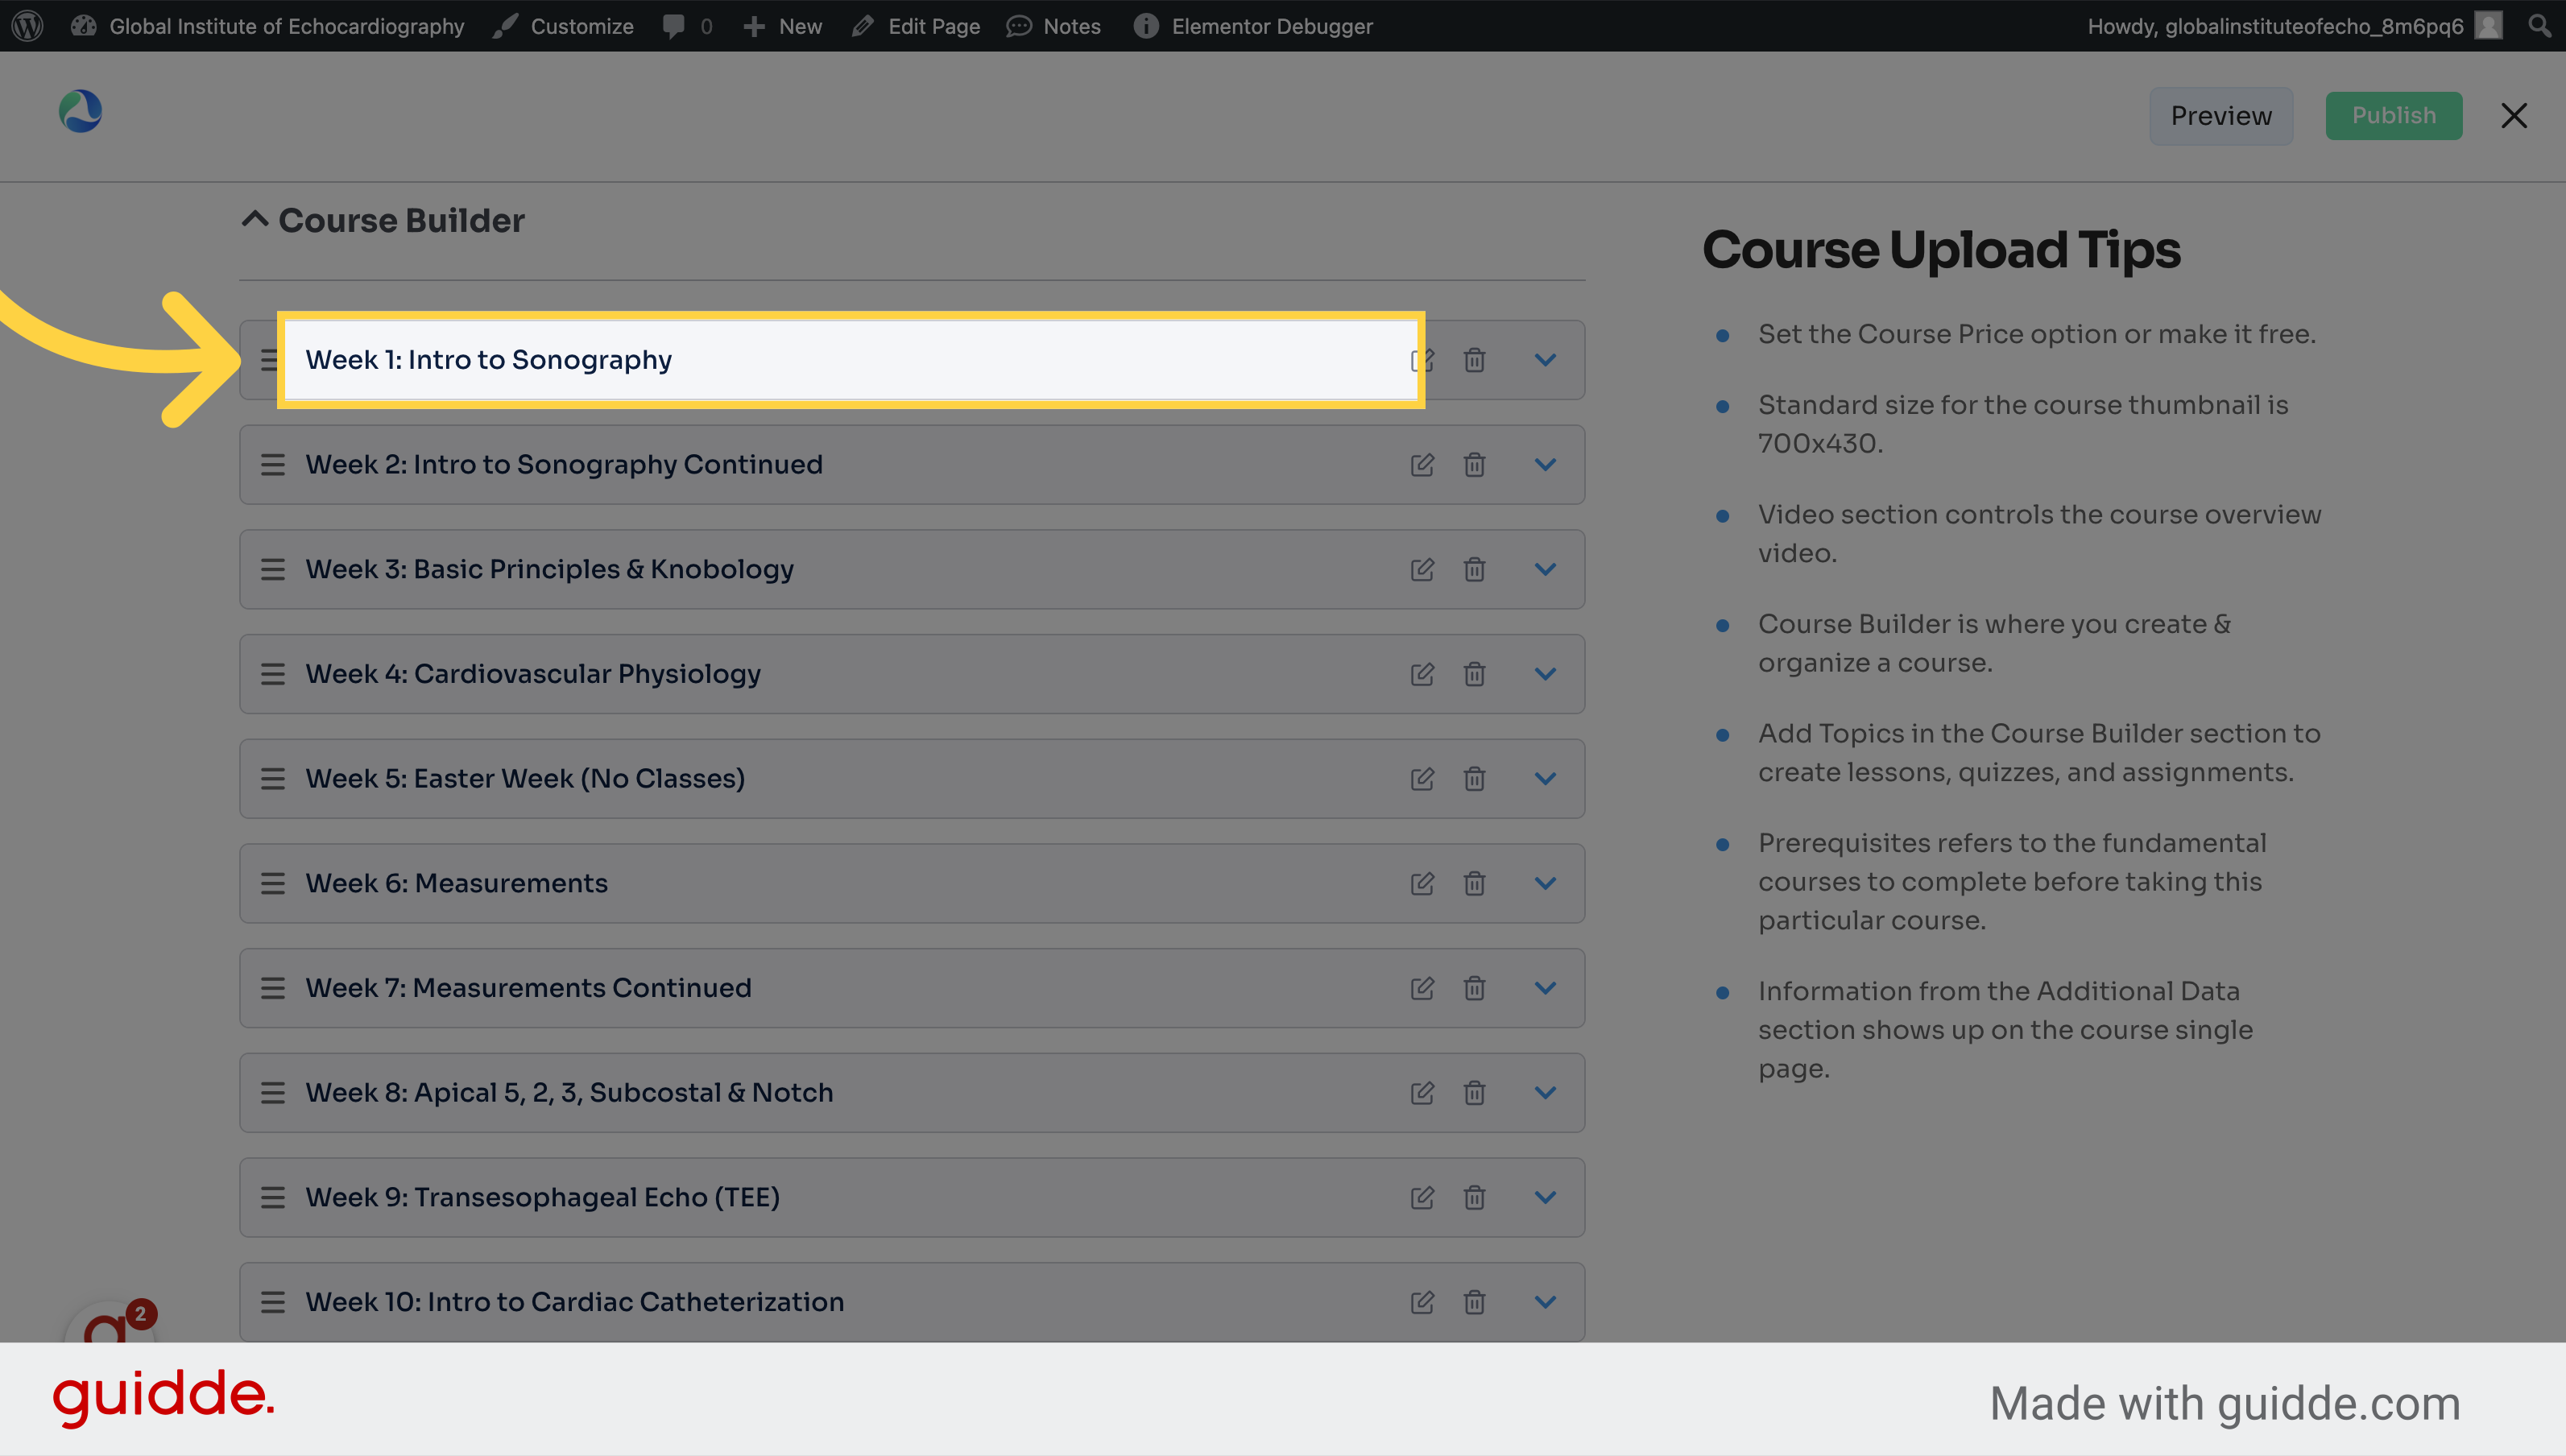
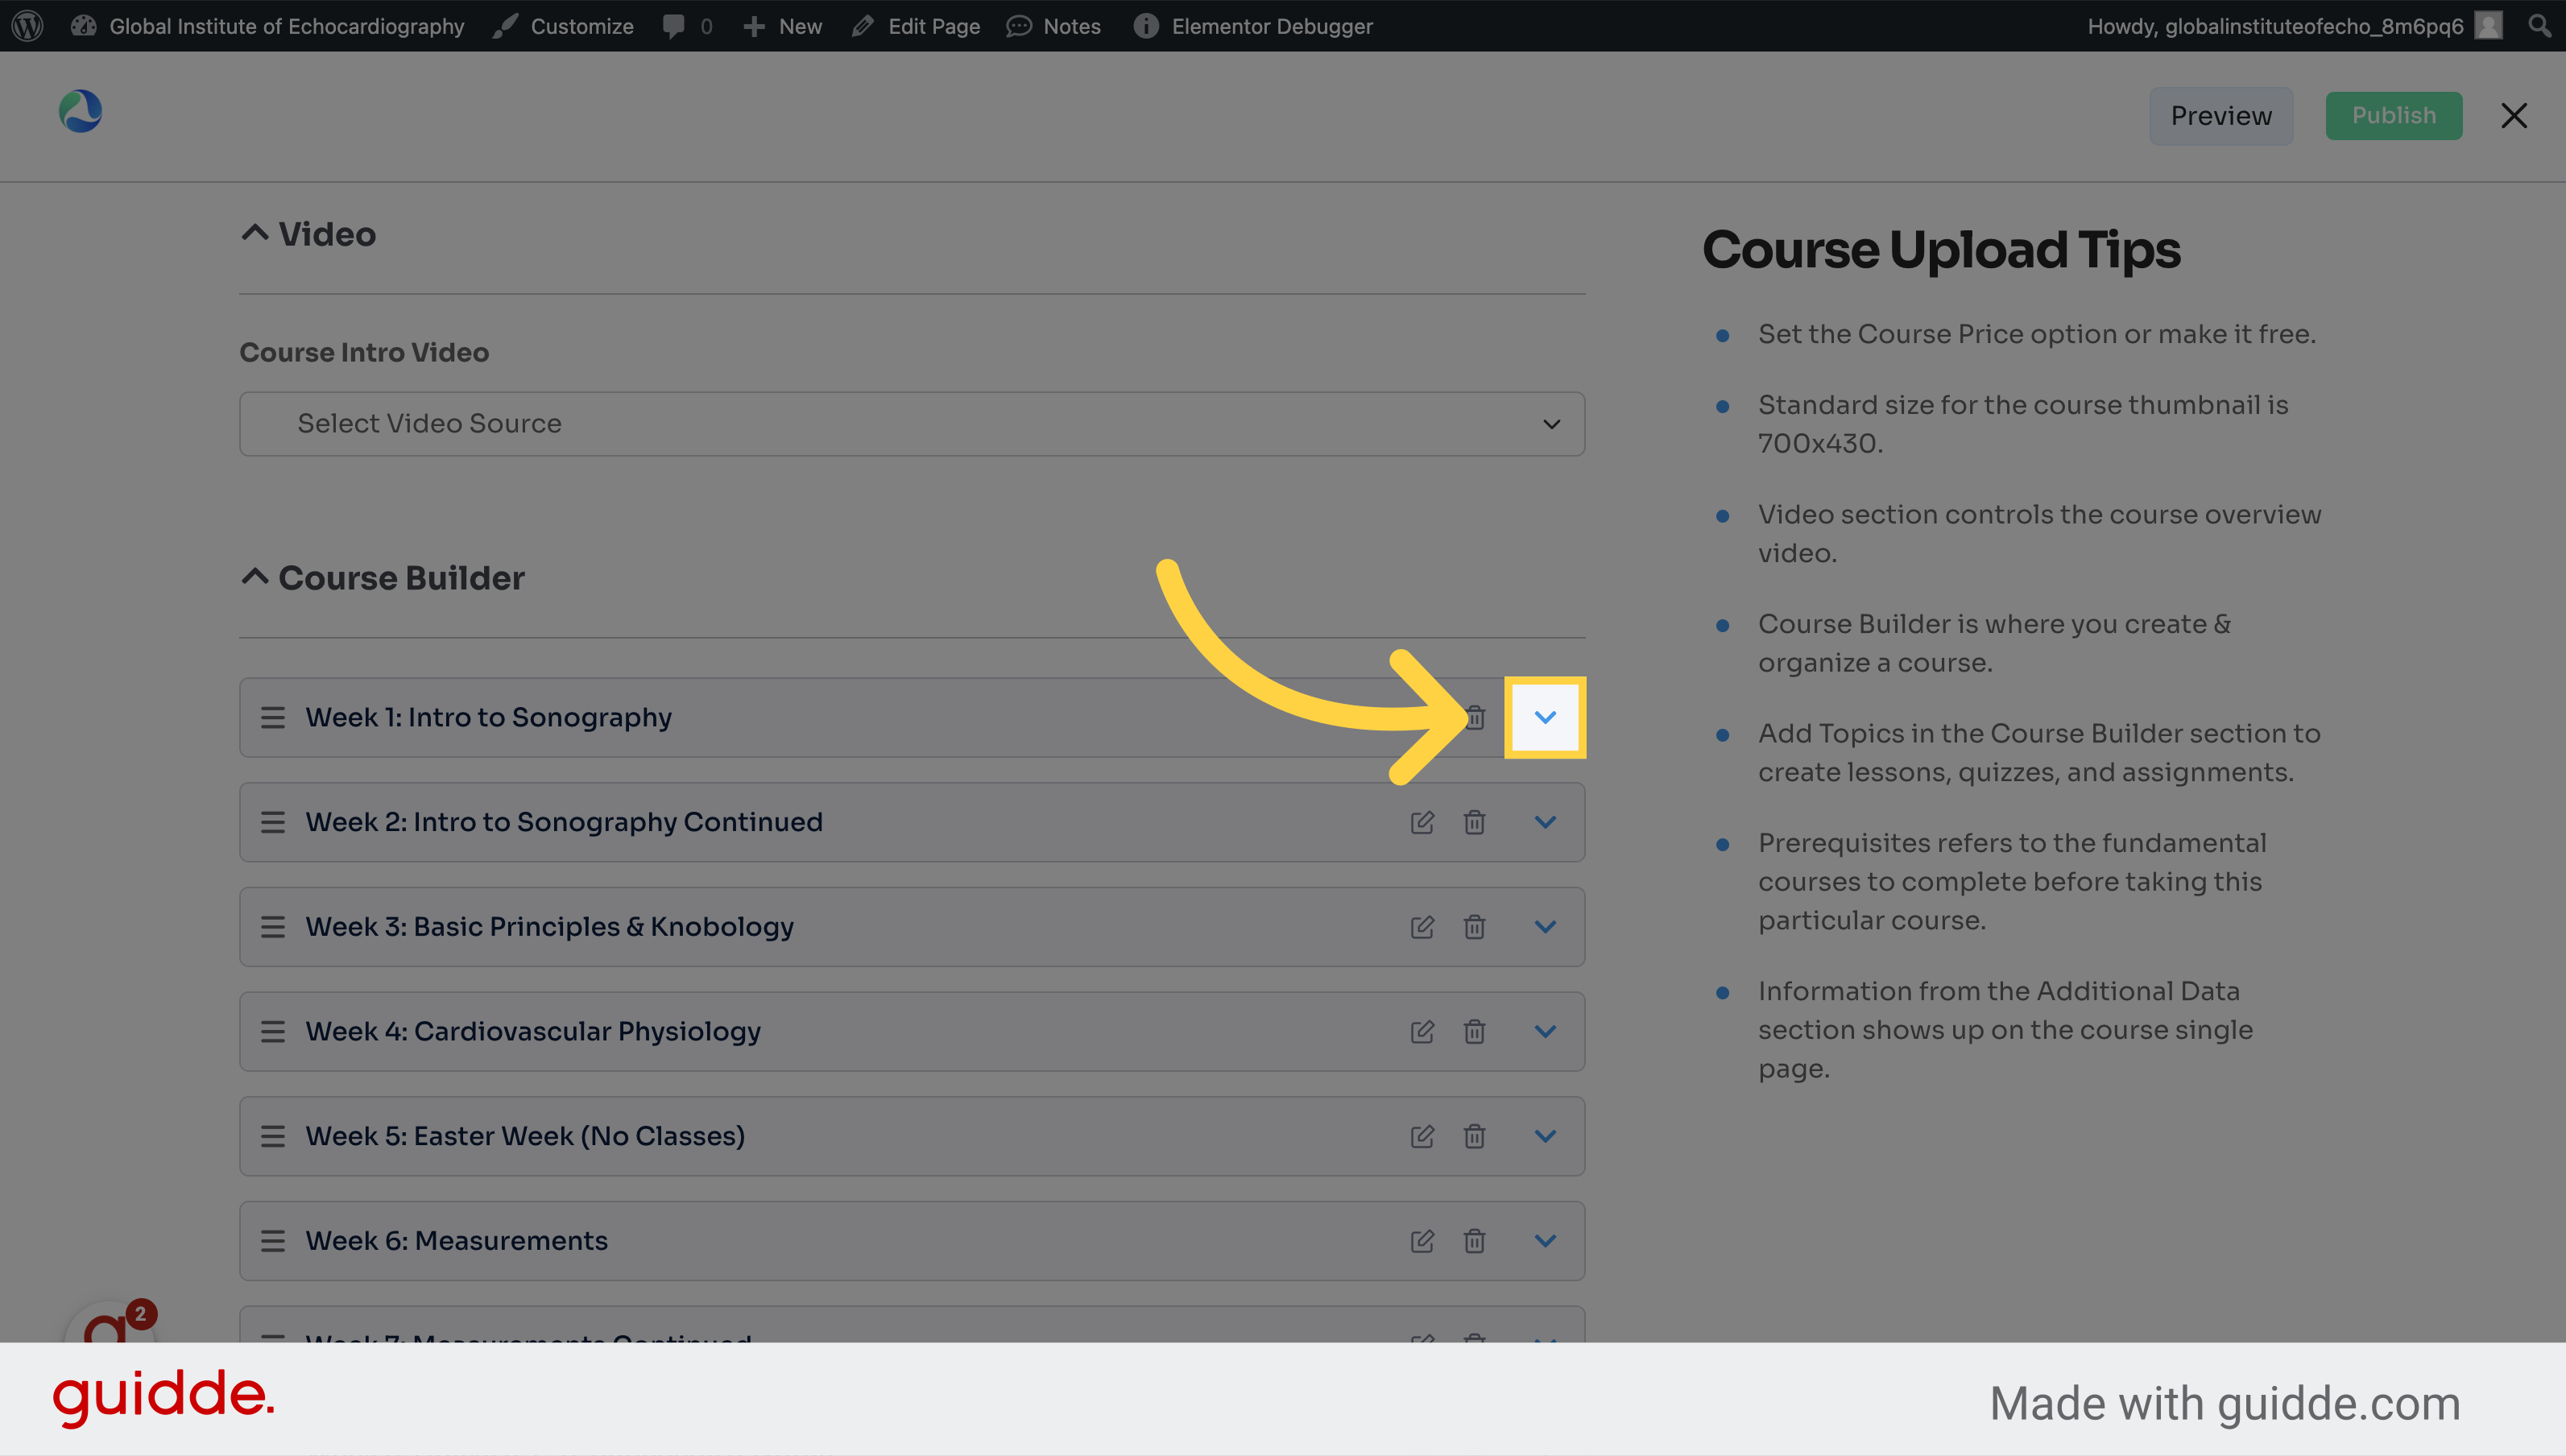
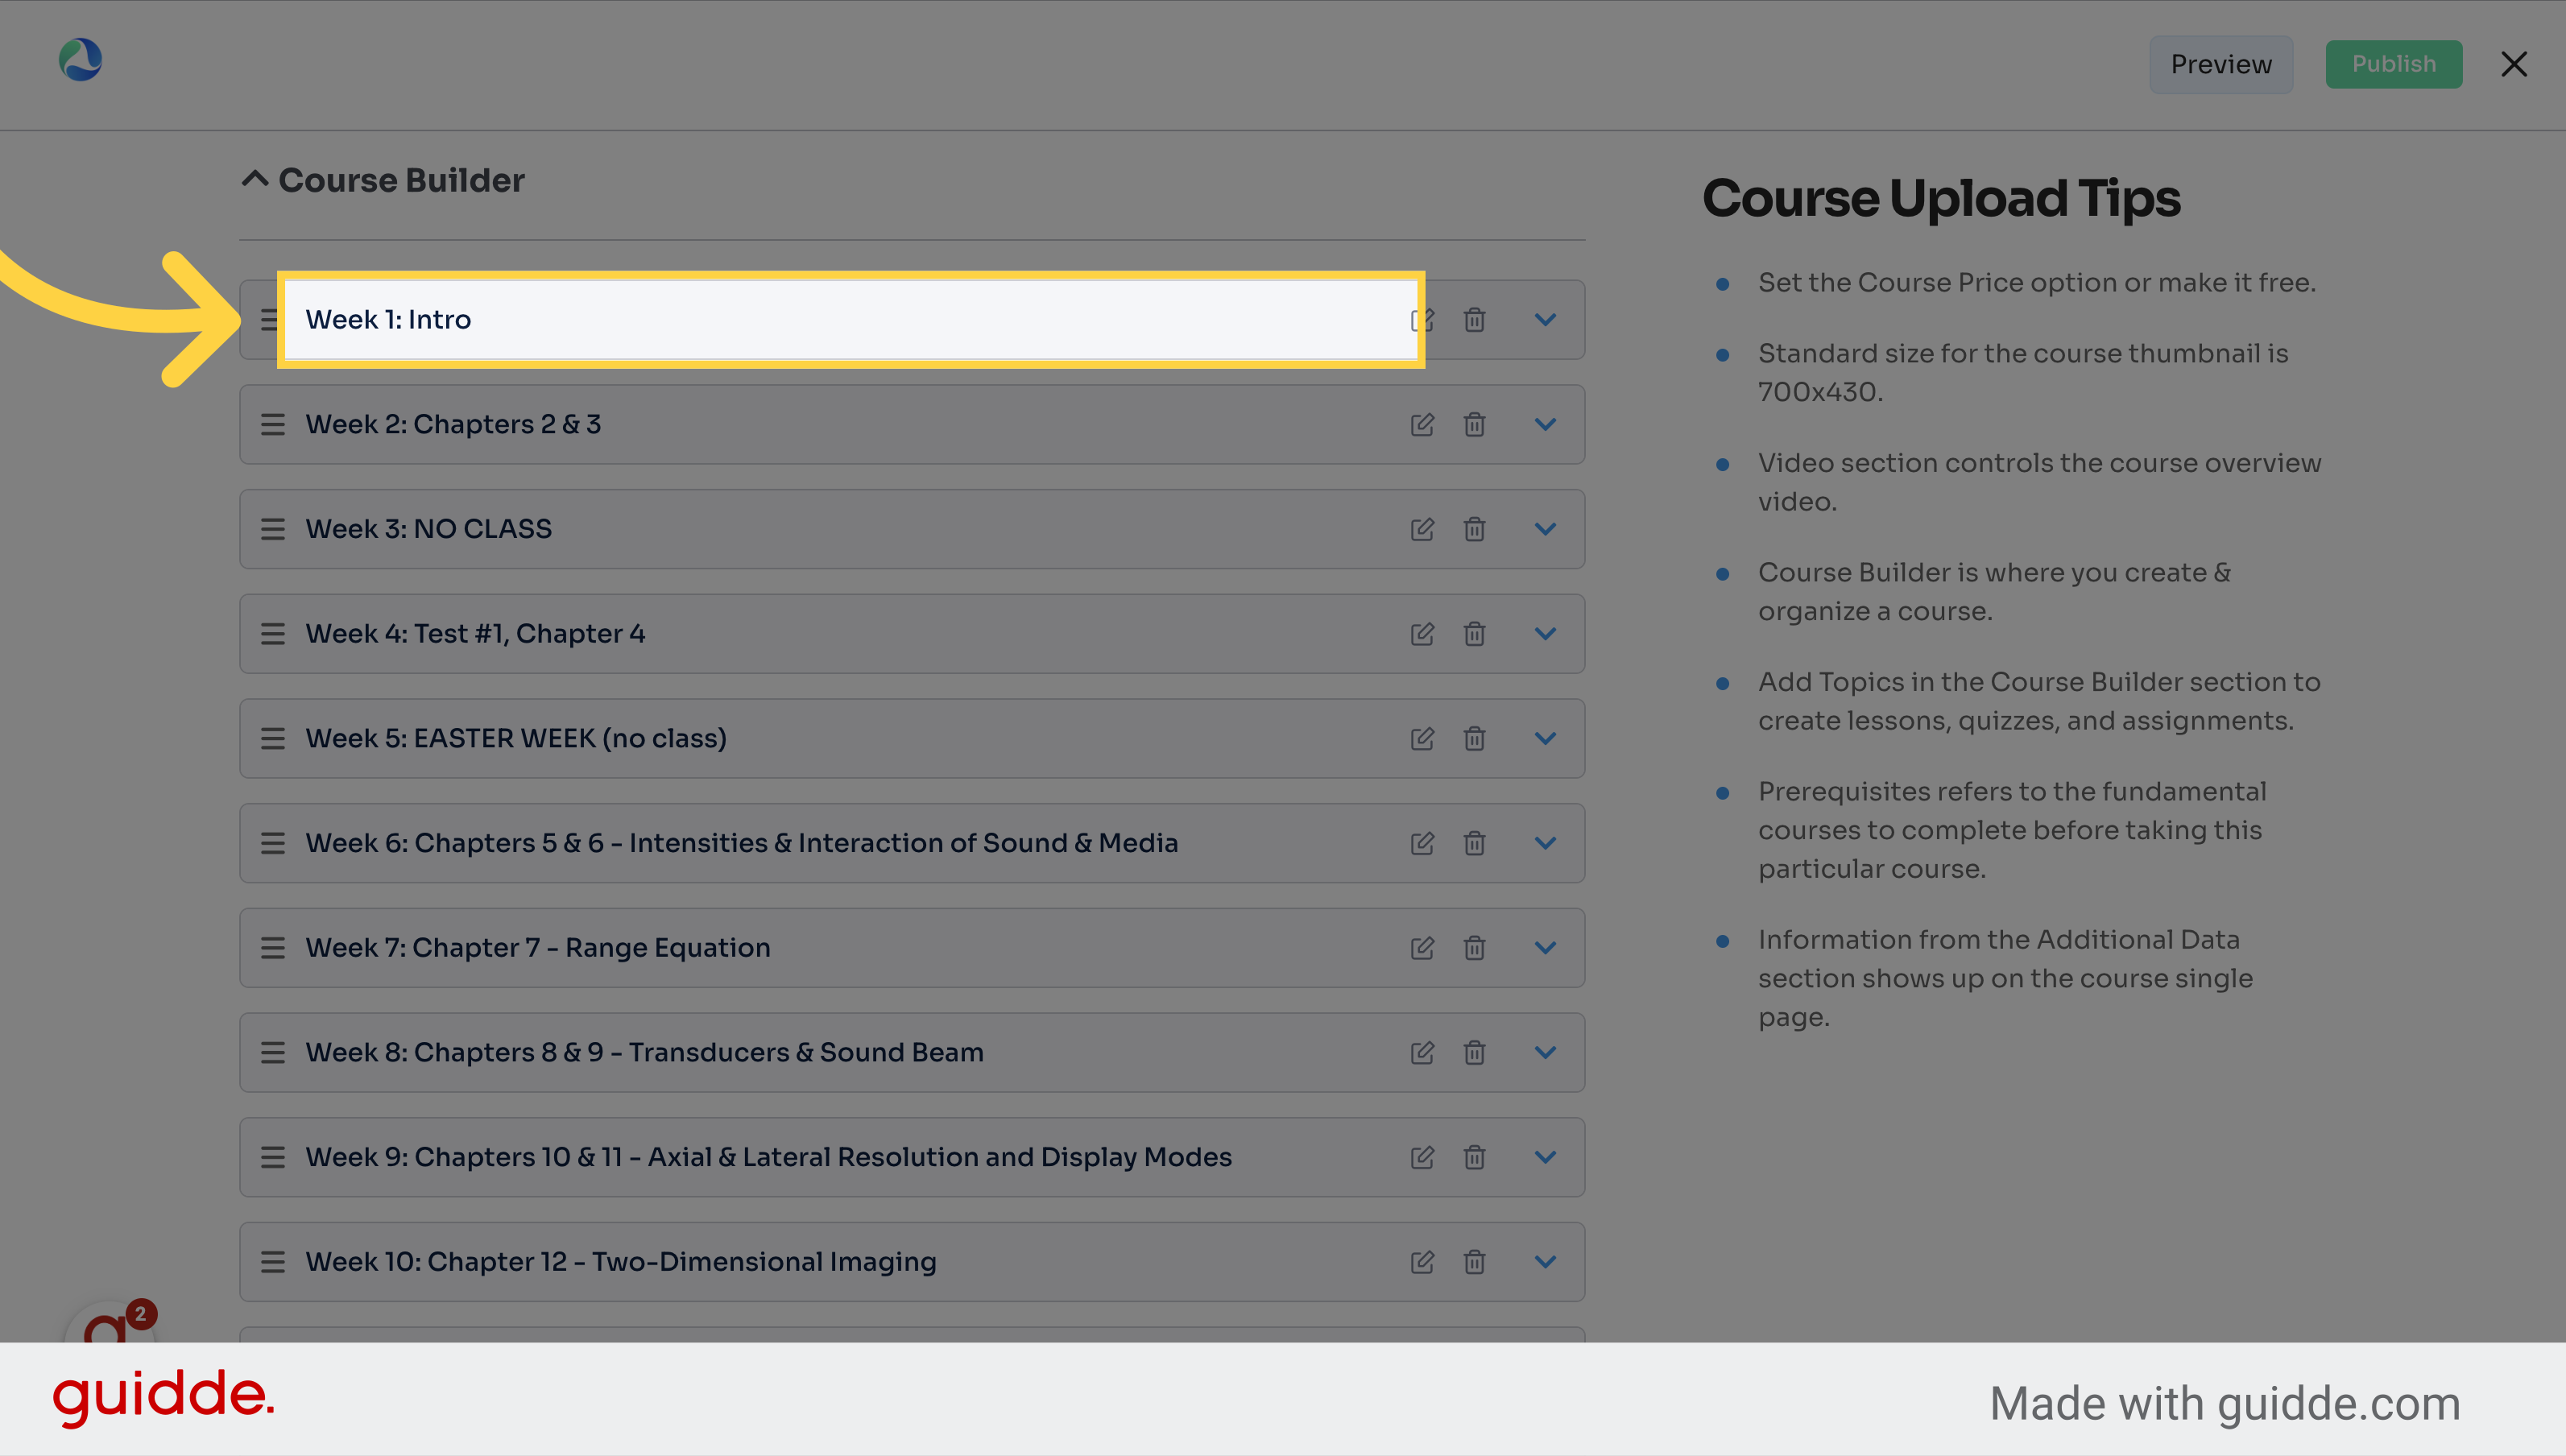
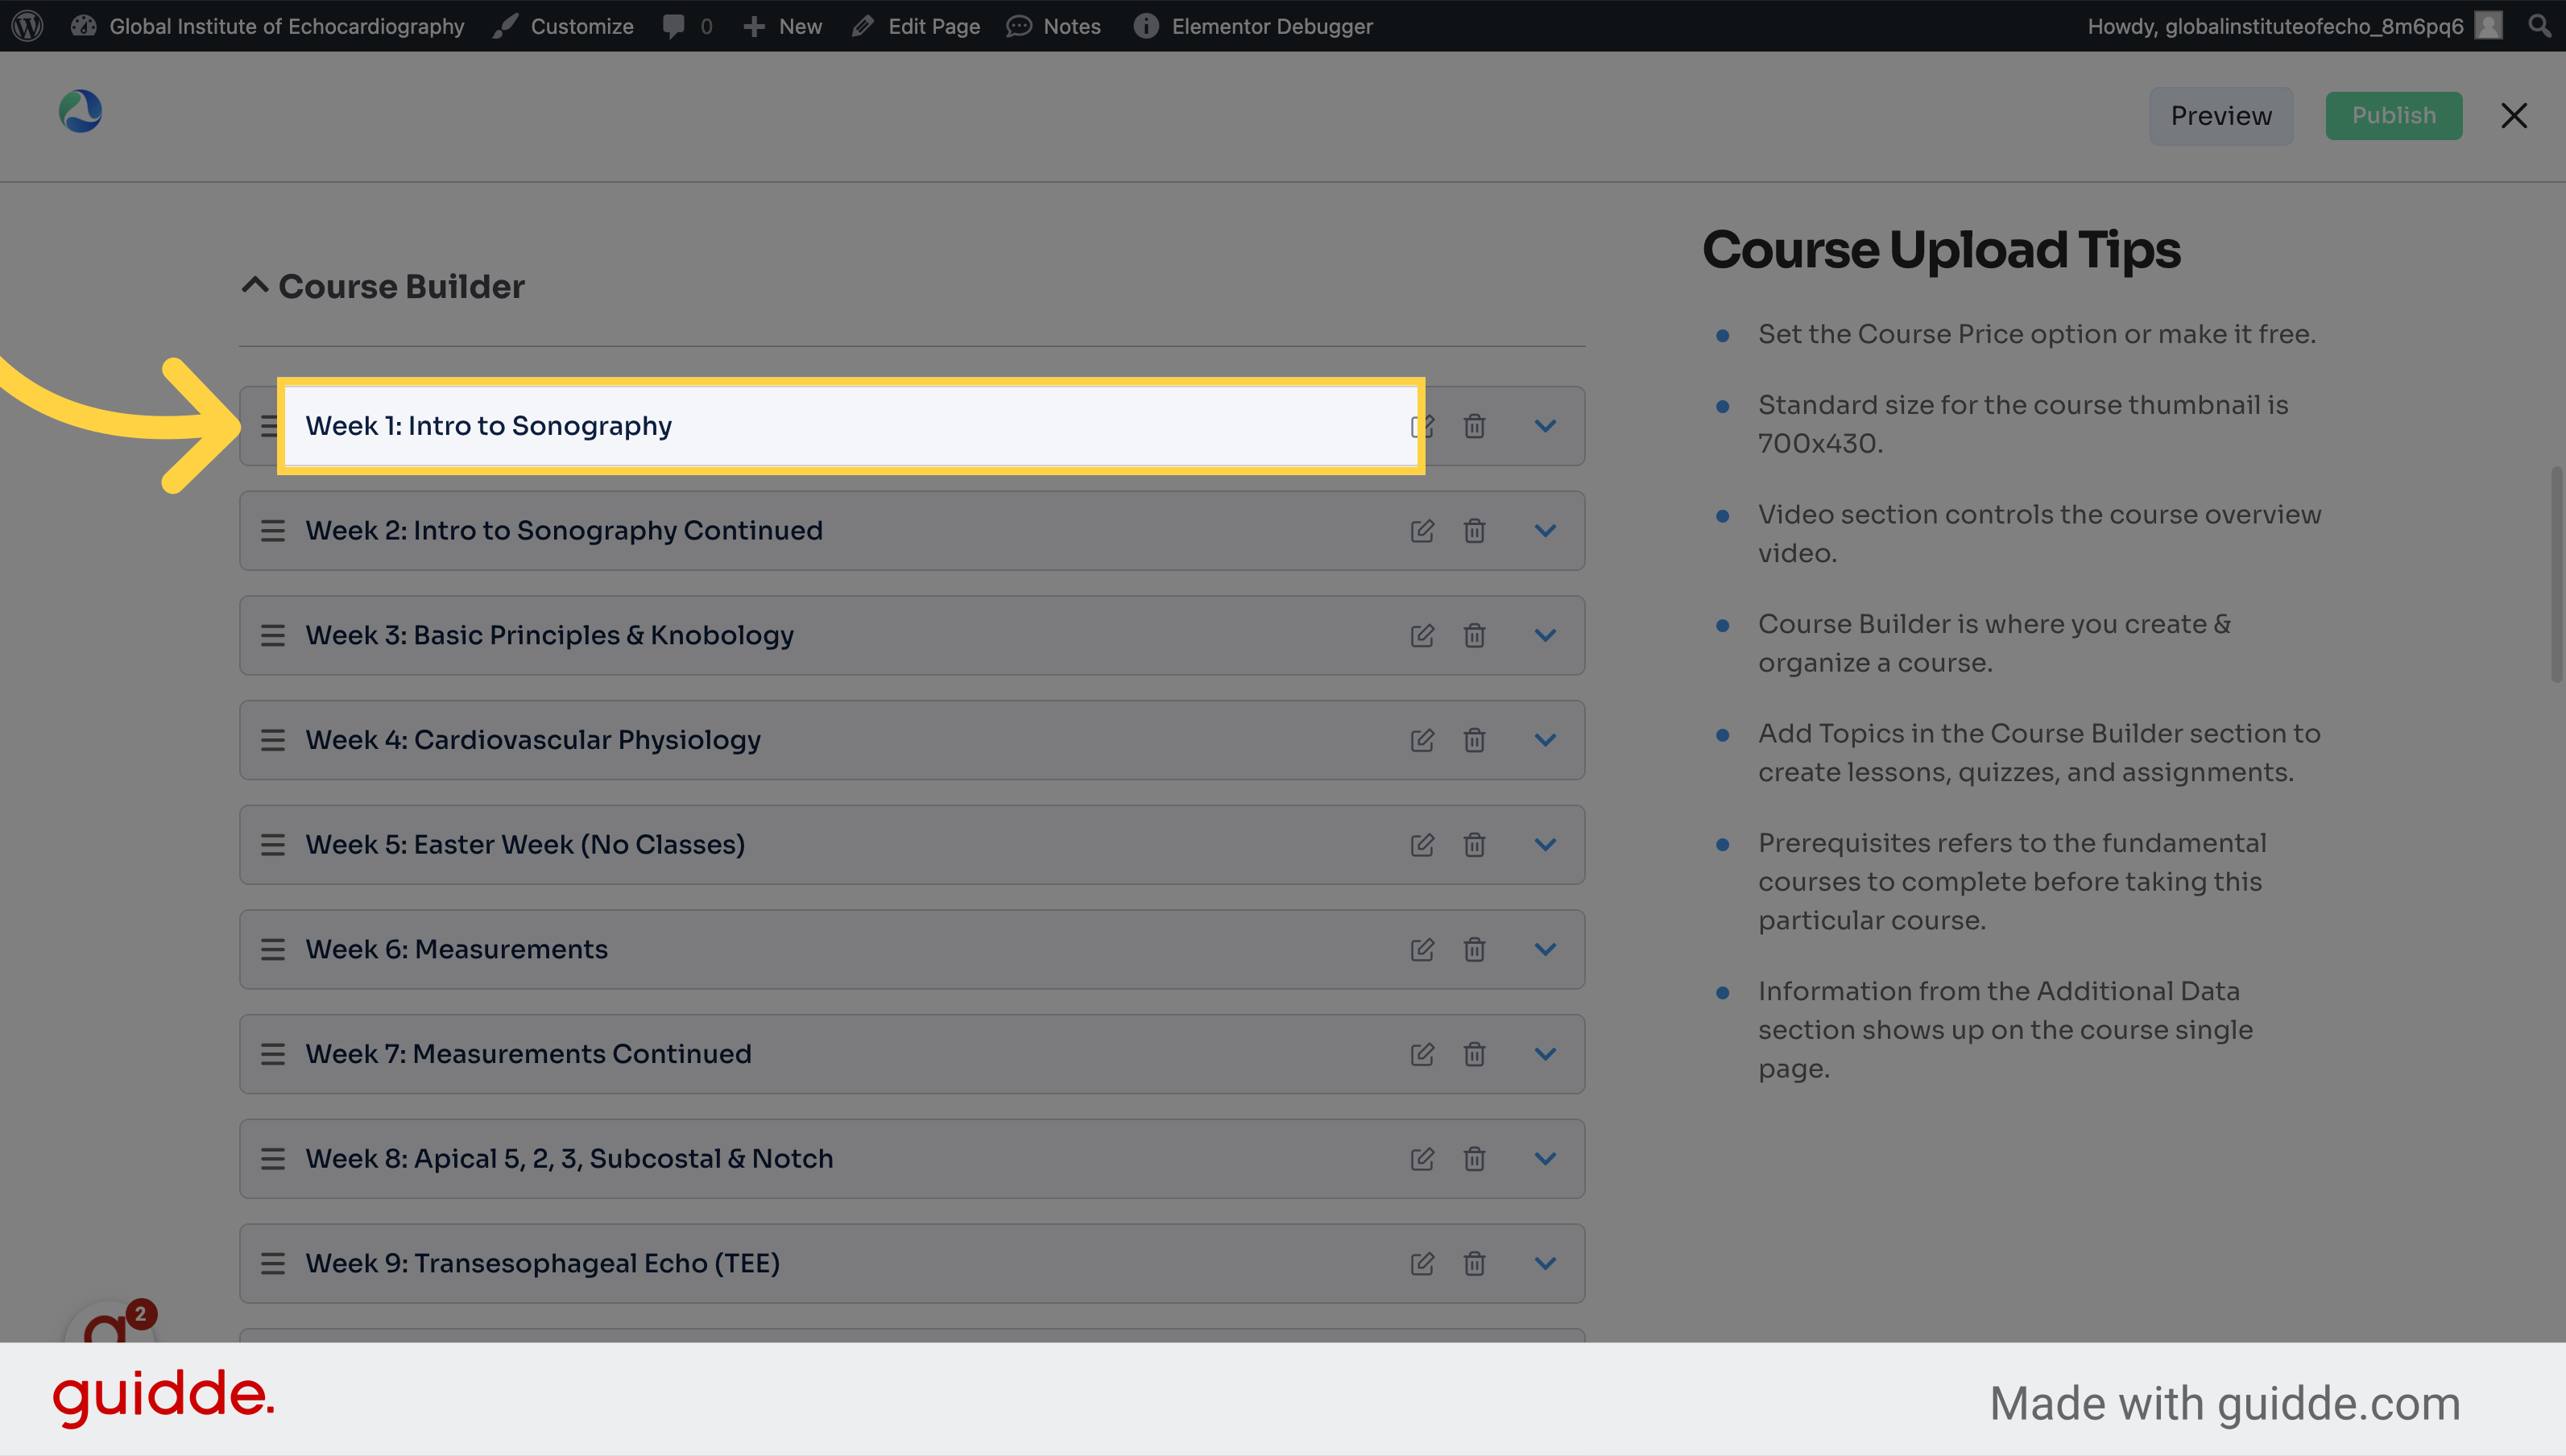
7. Click here to edit topics
Click the selected option
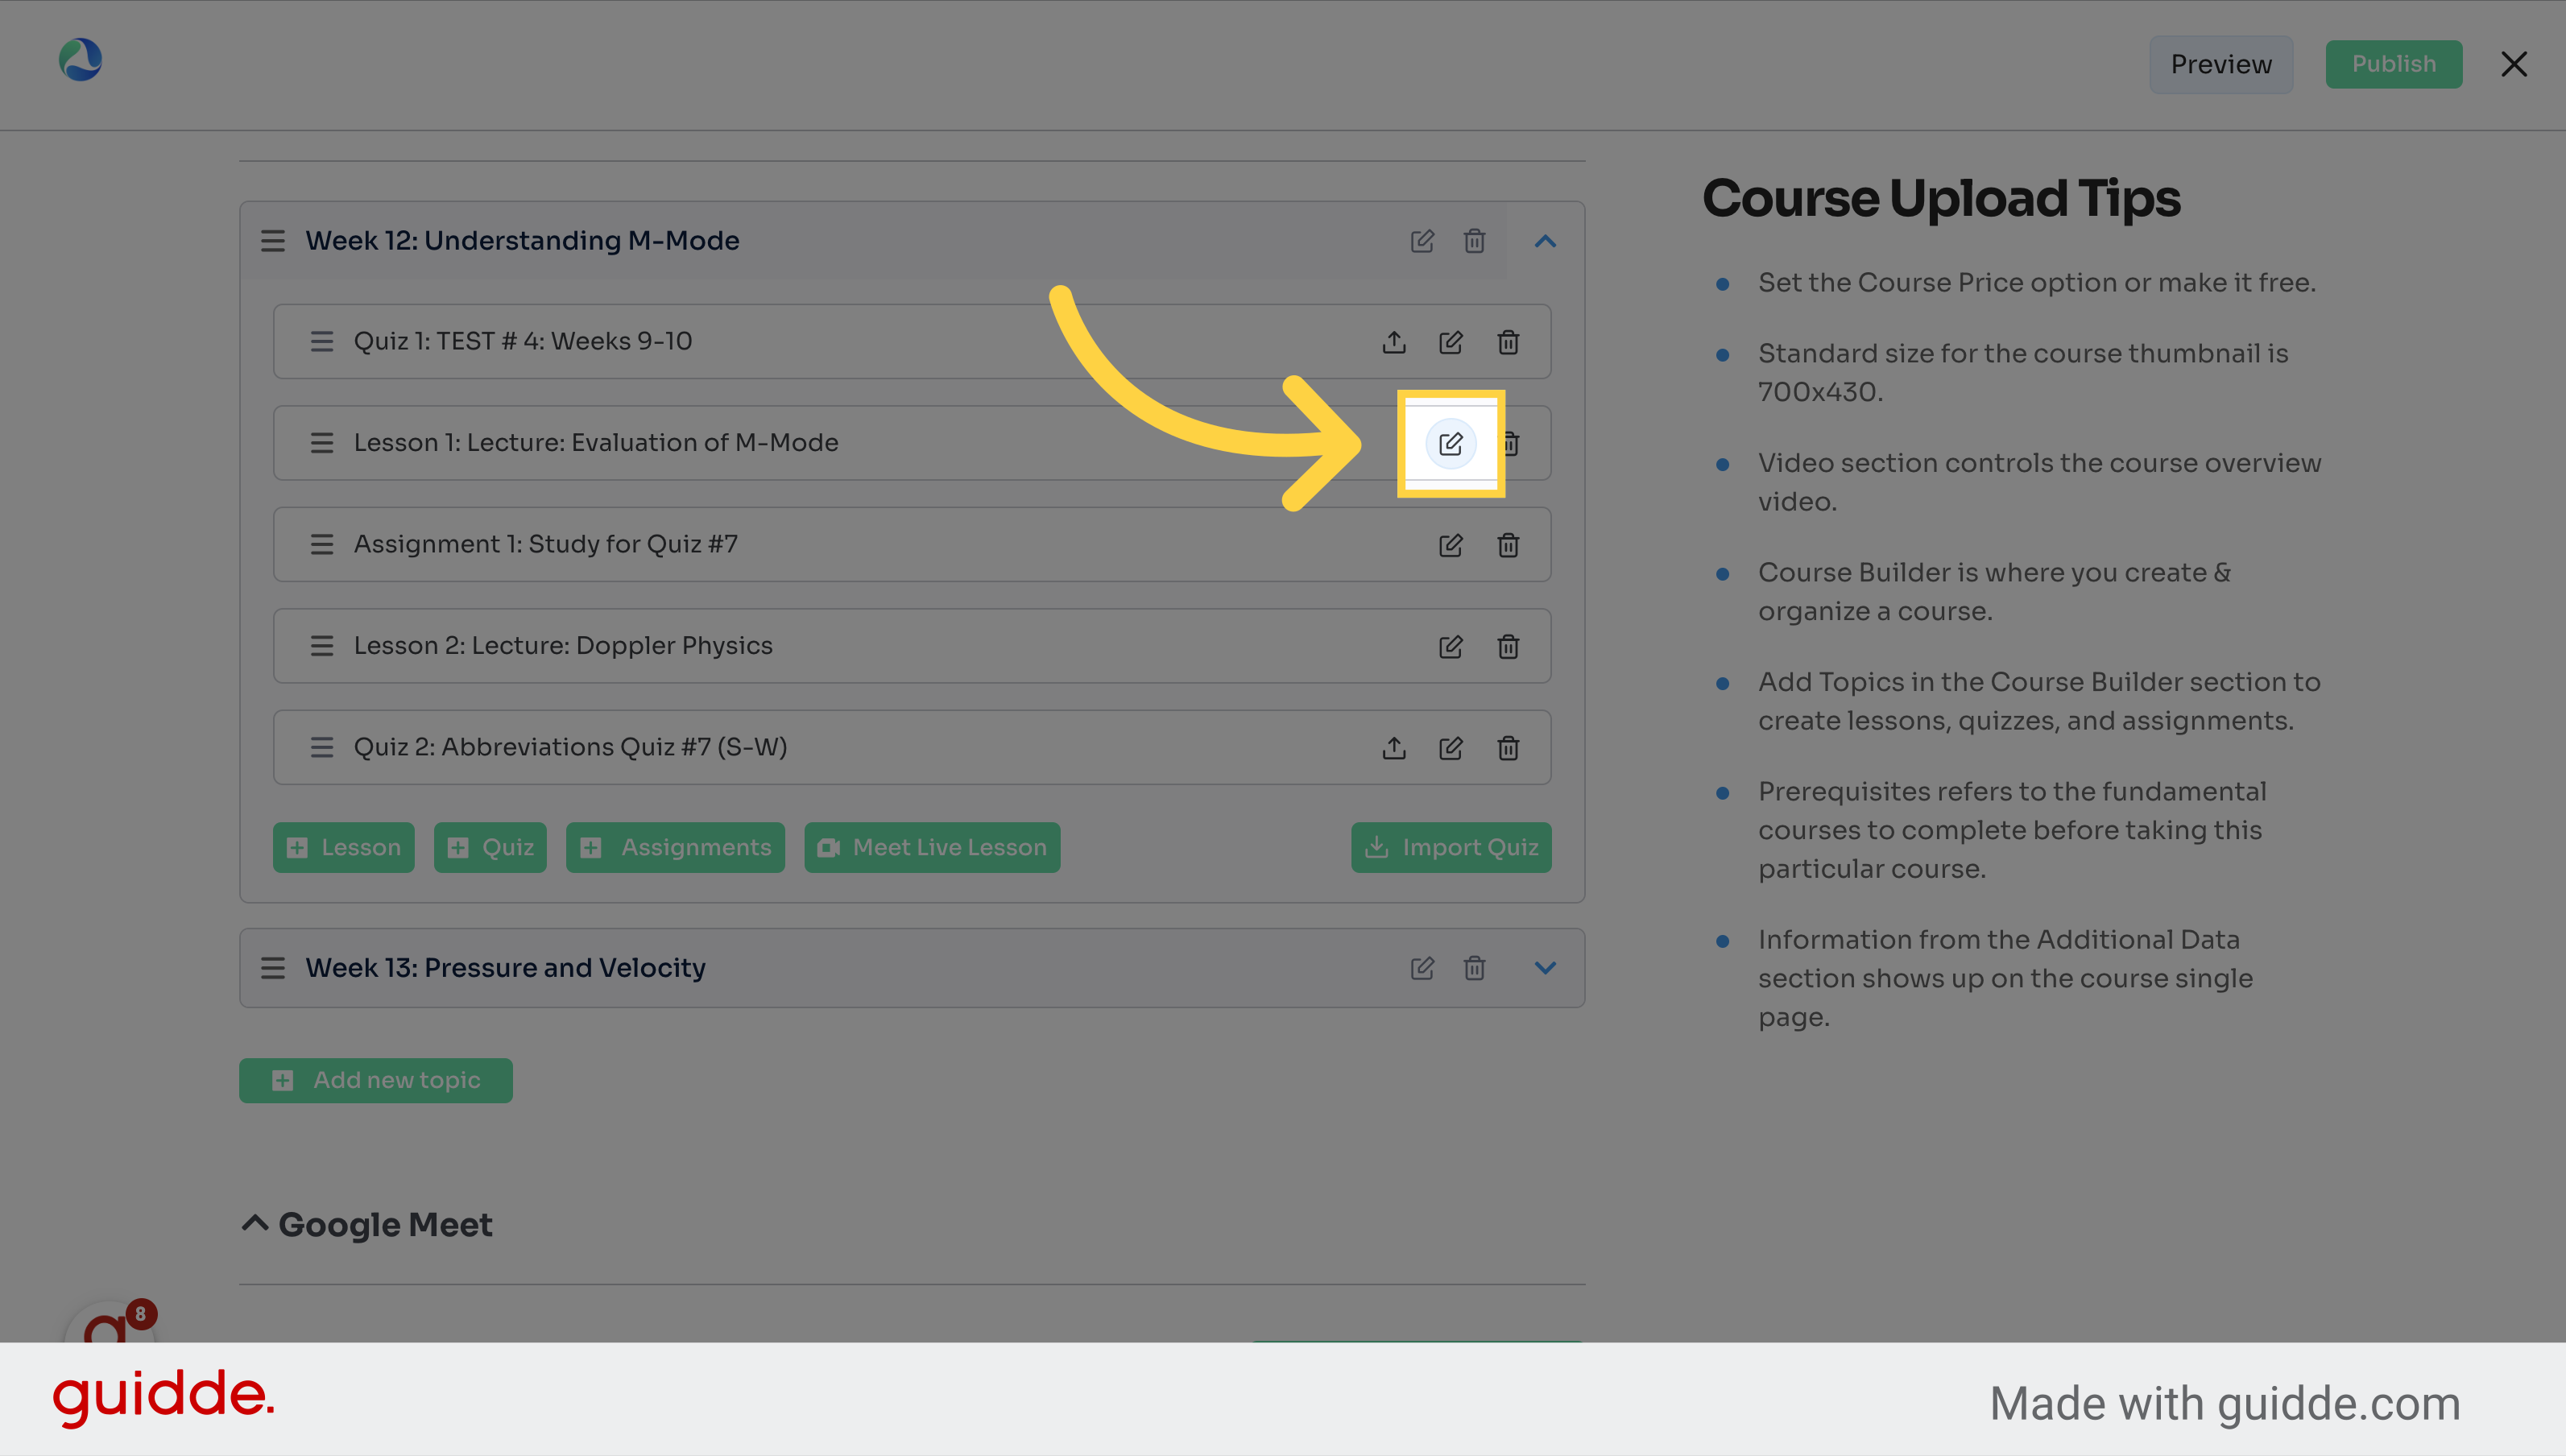
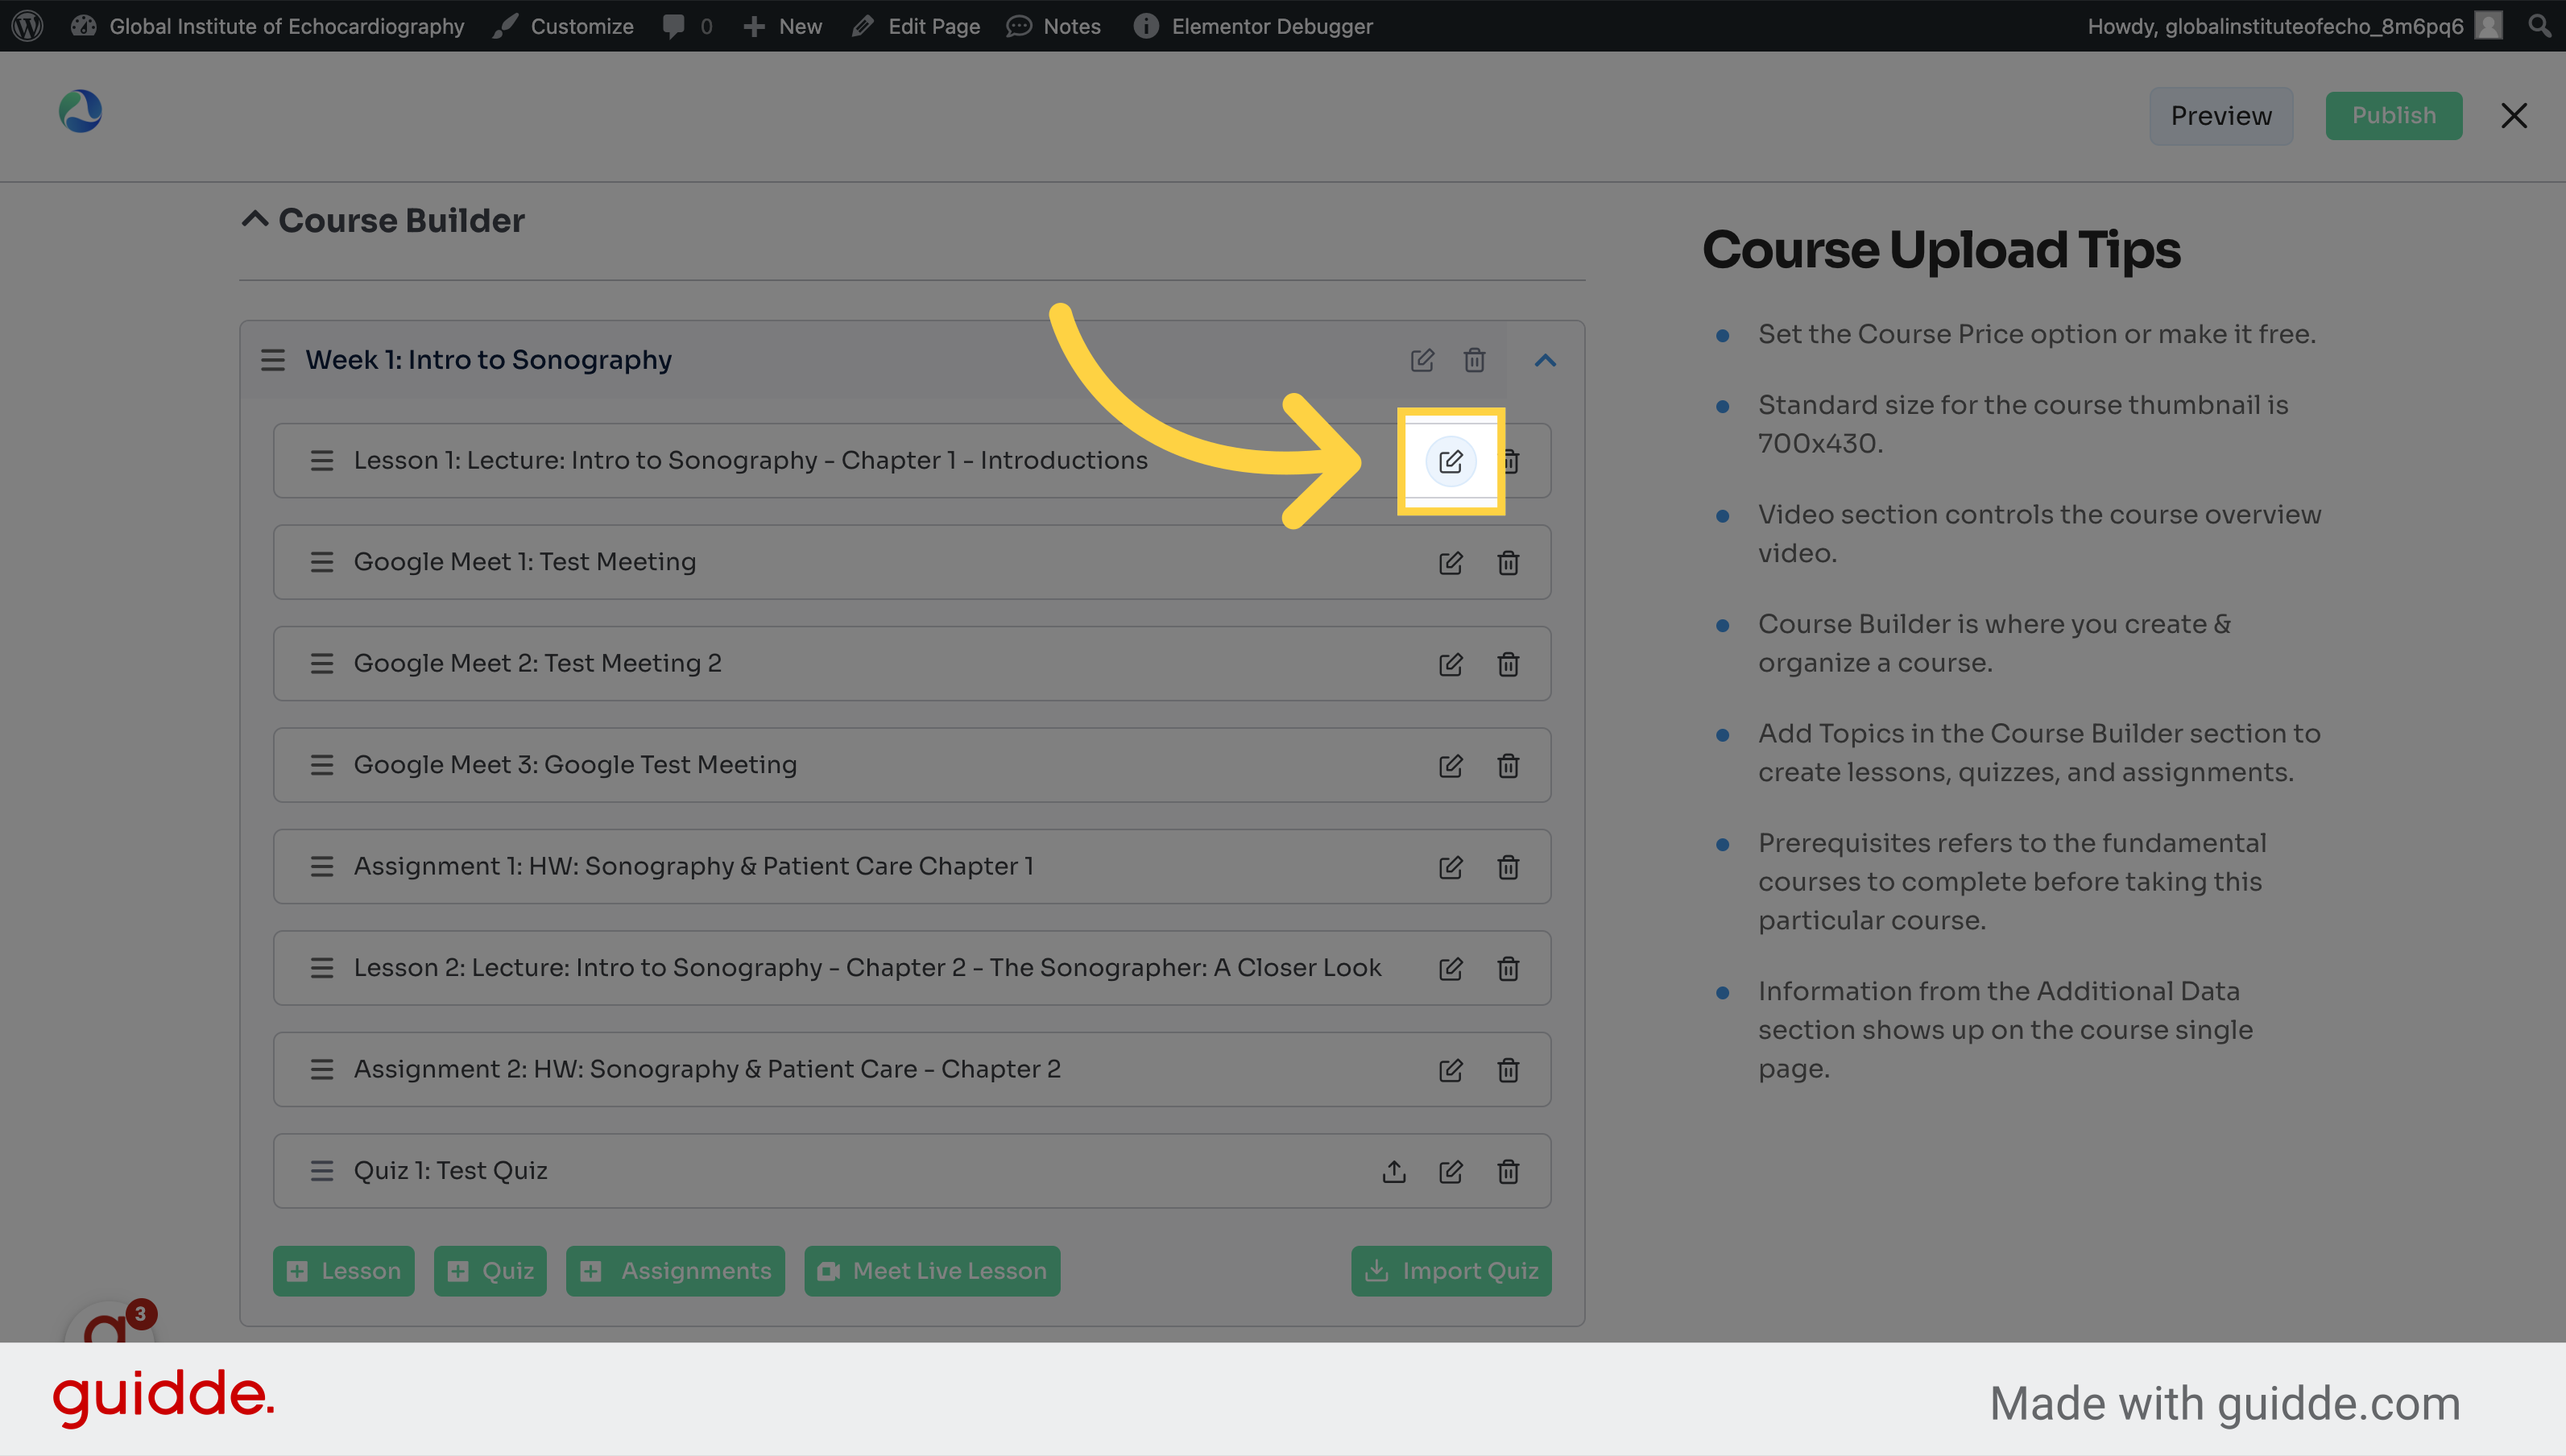
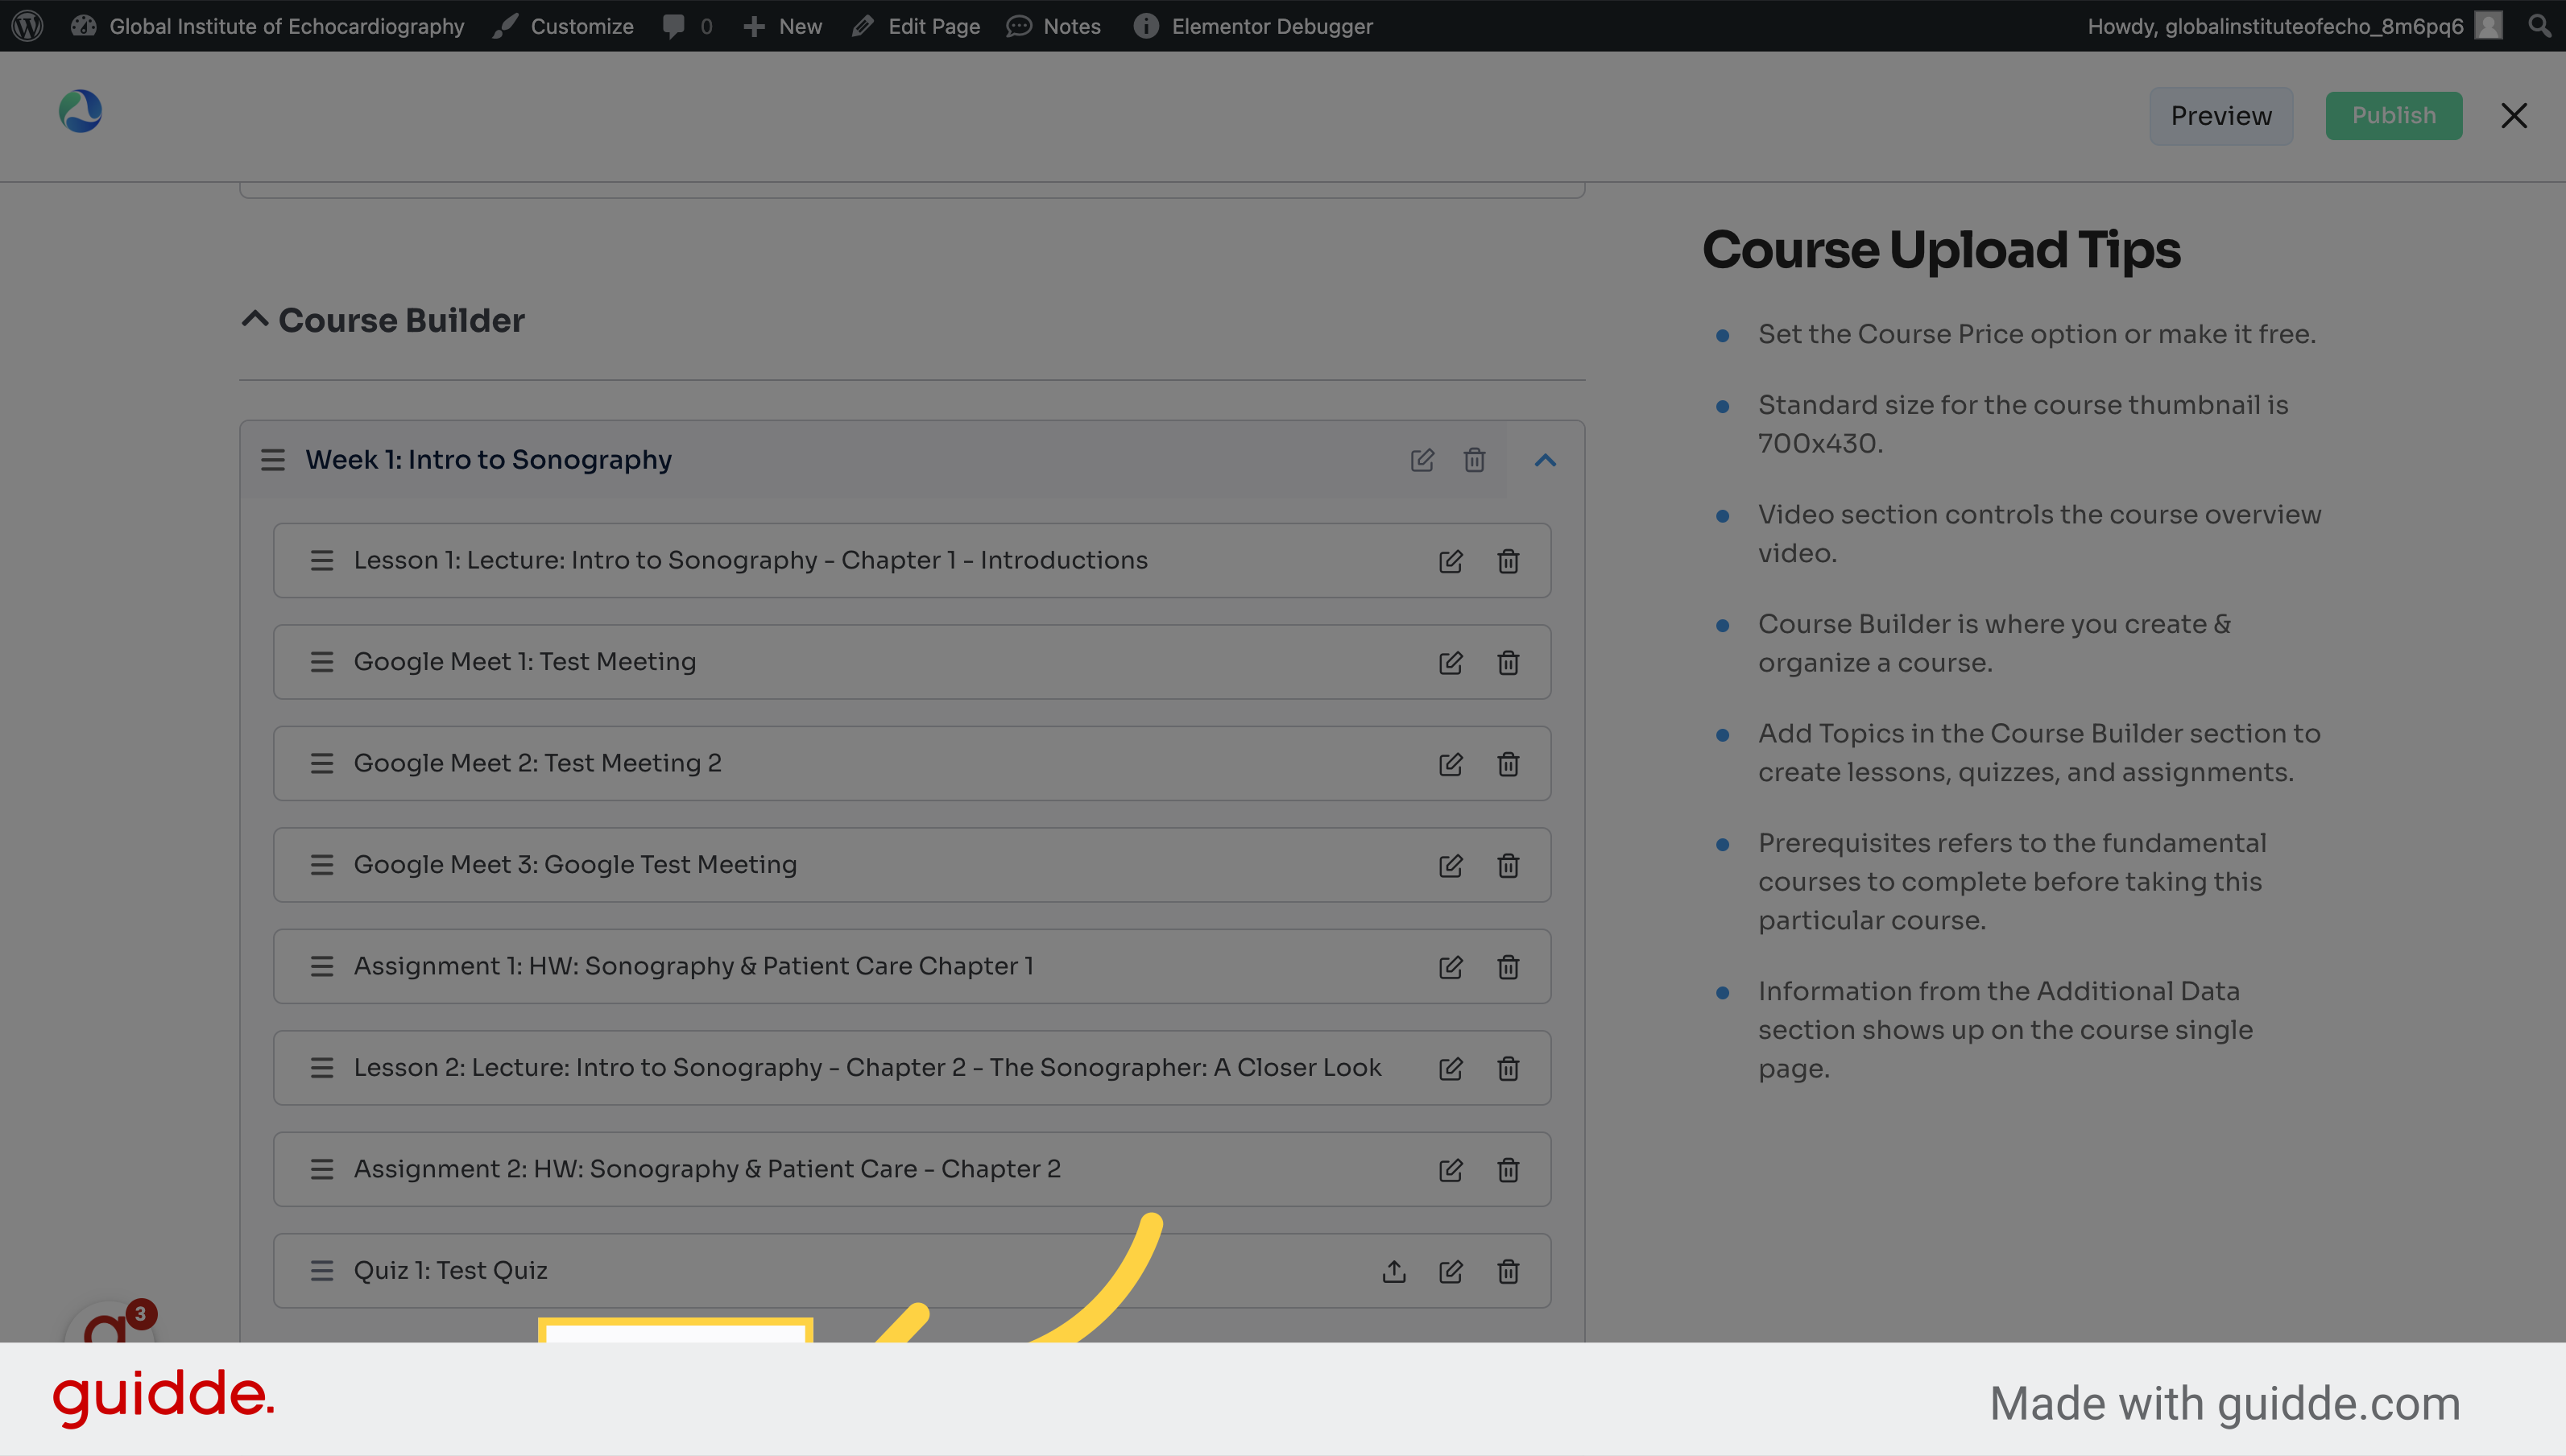
8. Click here inside the topic
Select this field
9. Edit the content
Navigate to this section
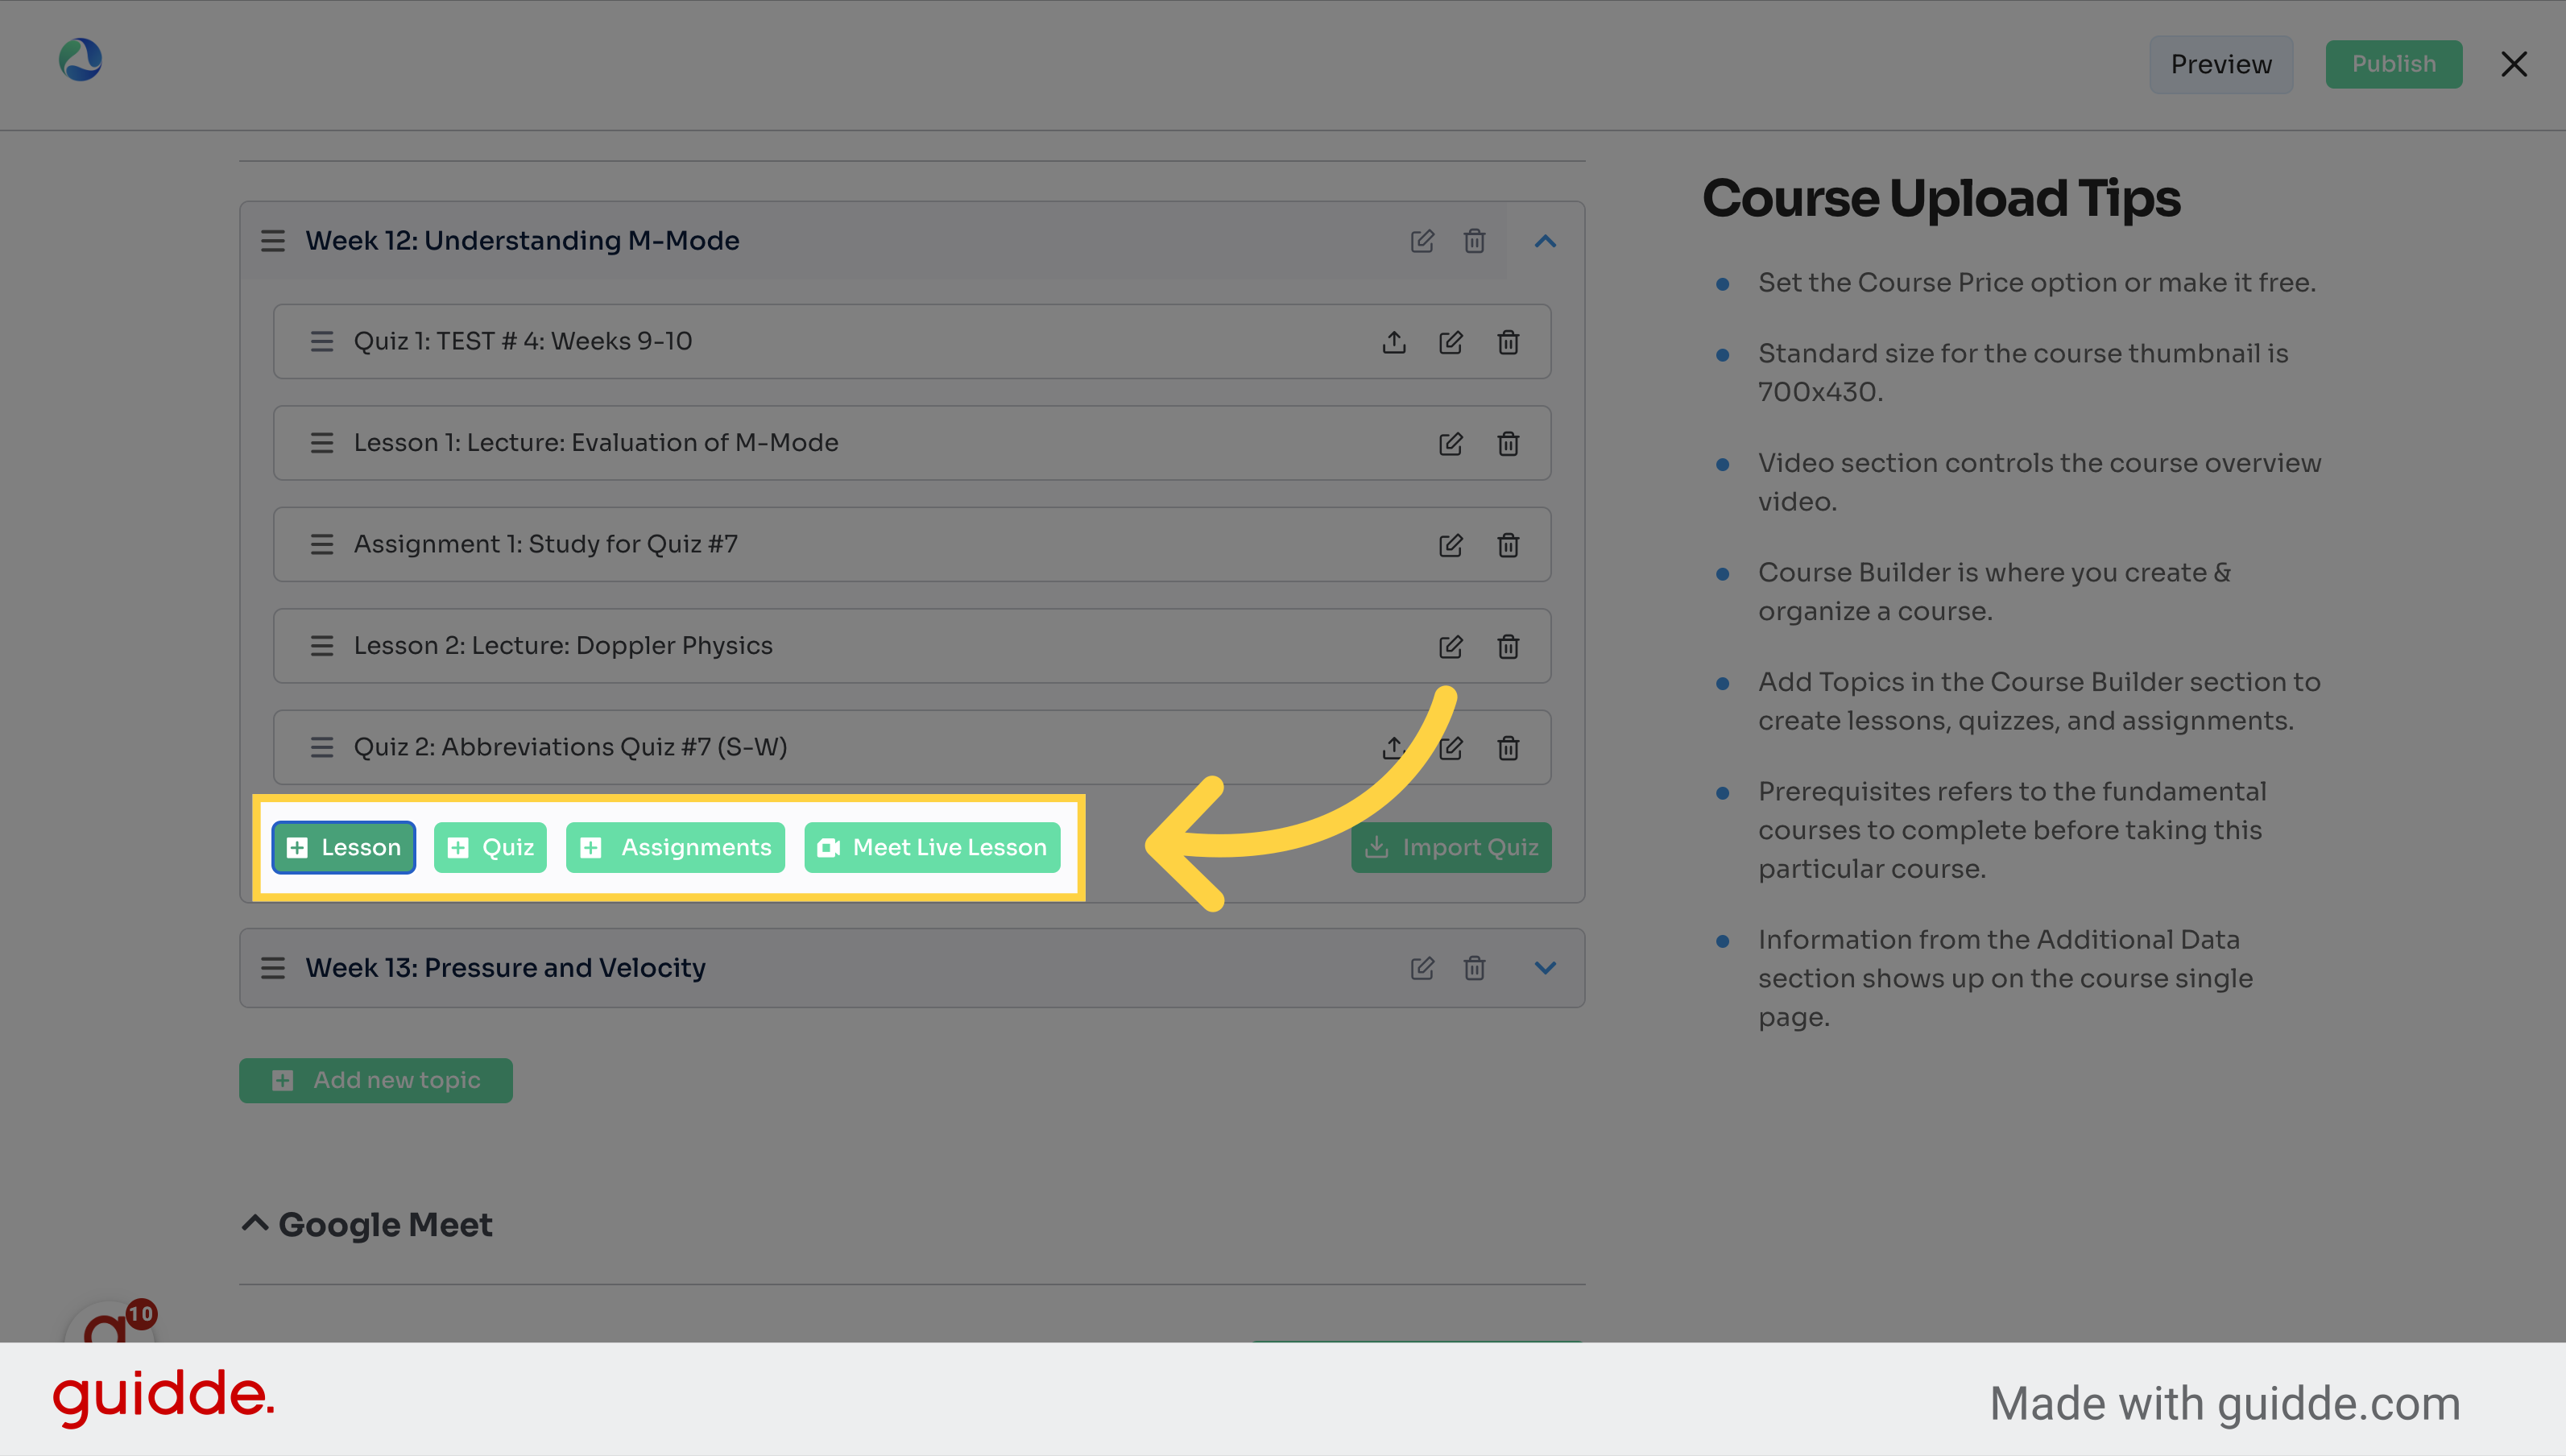
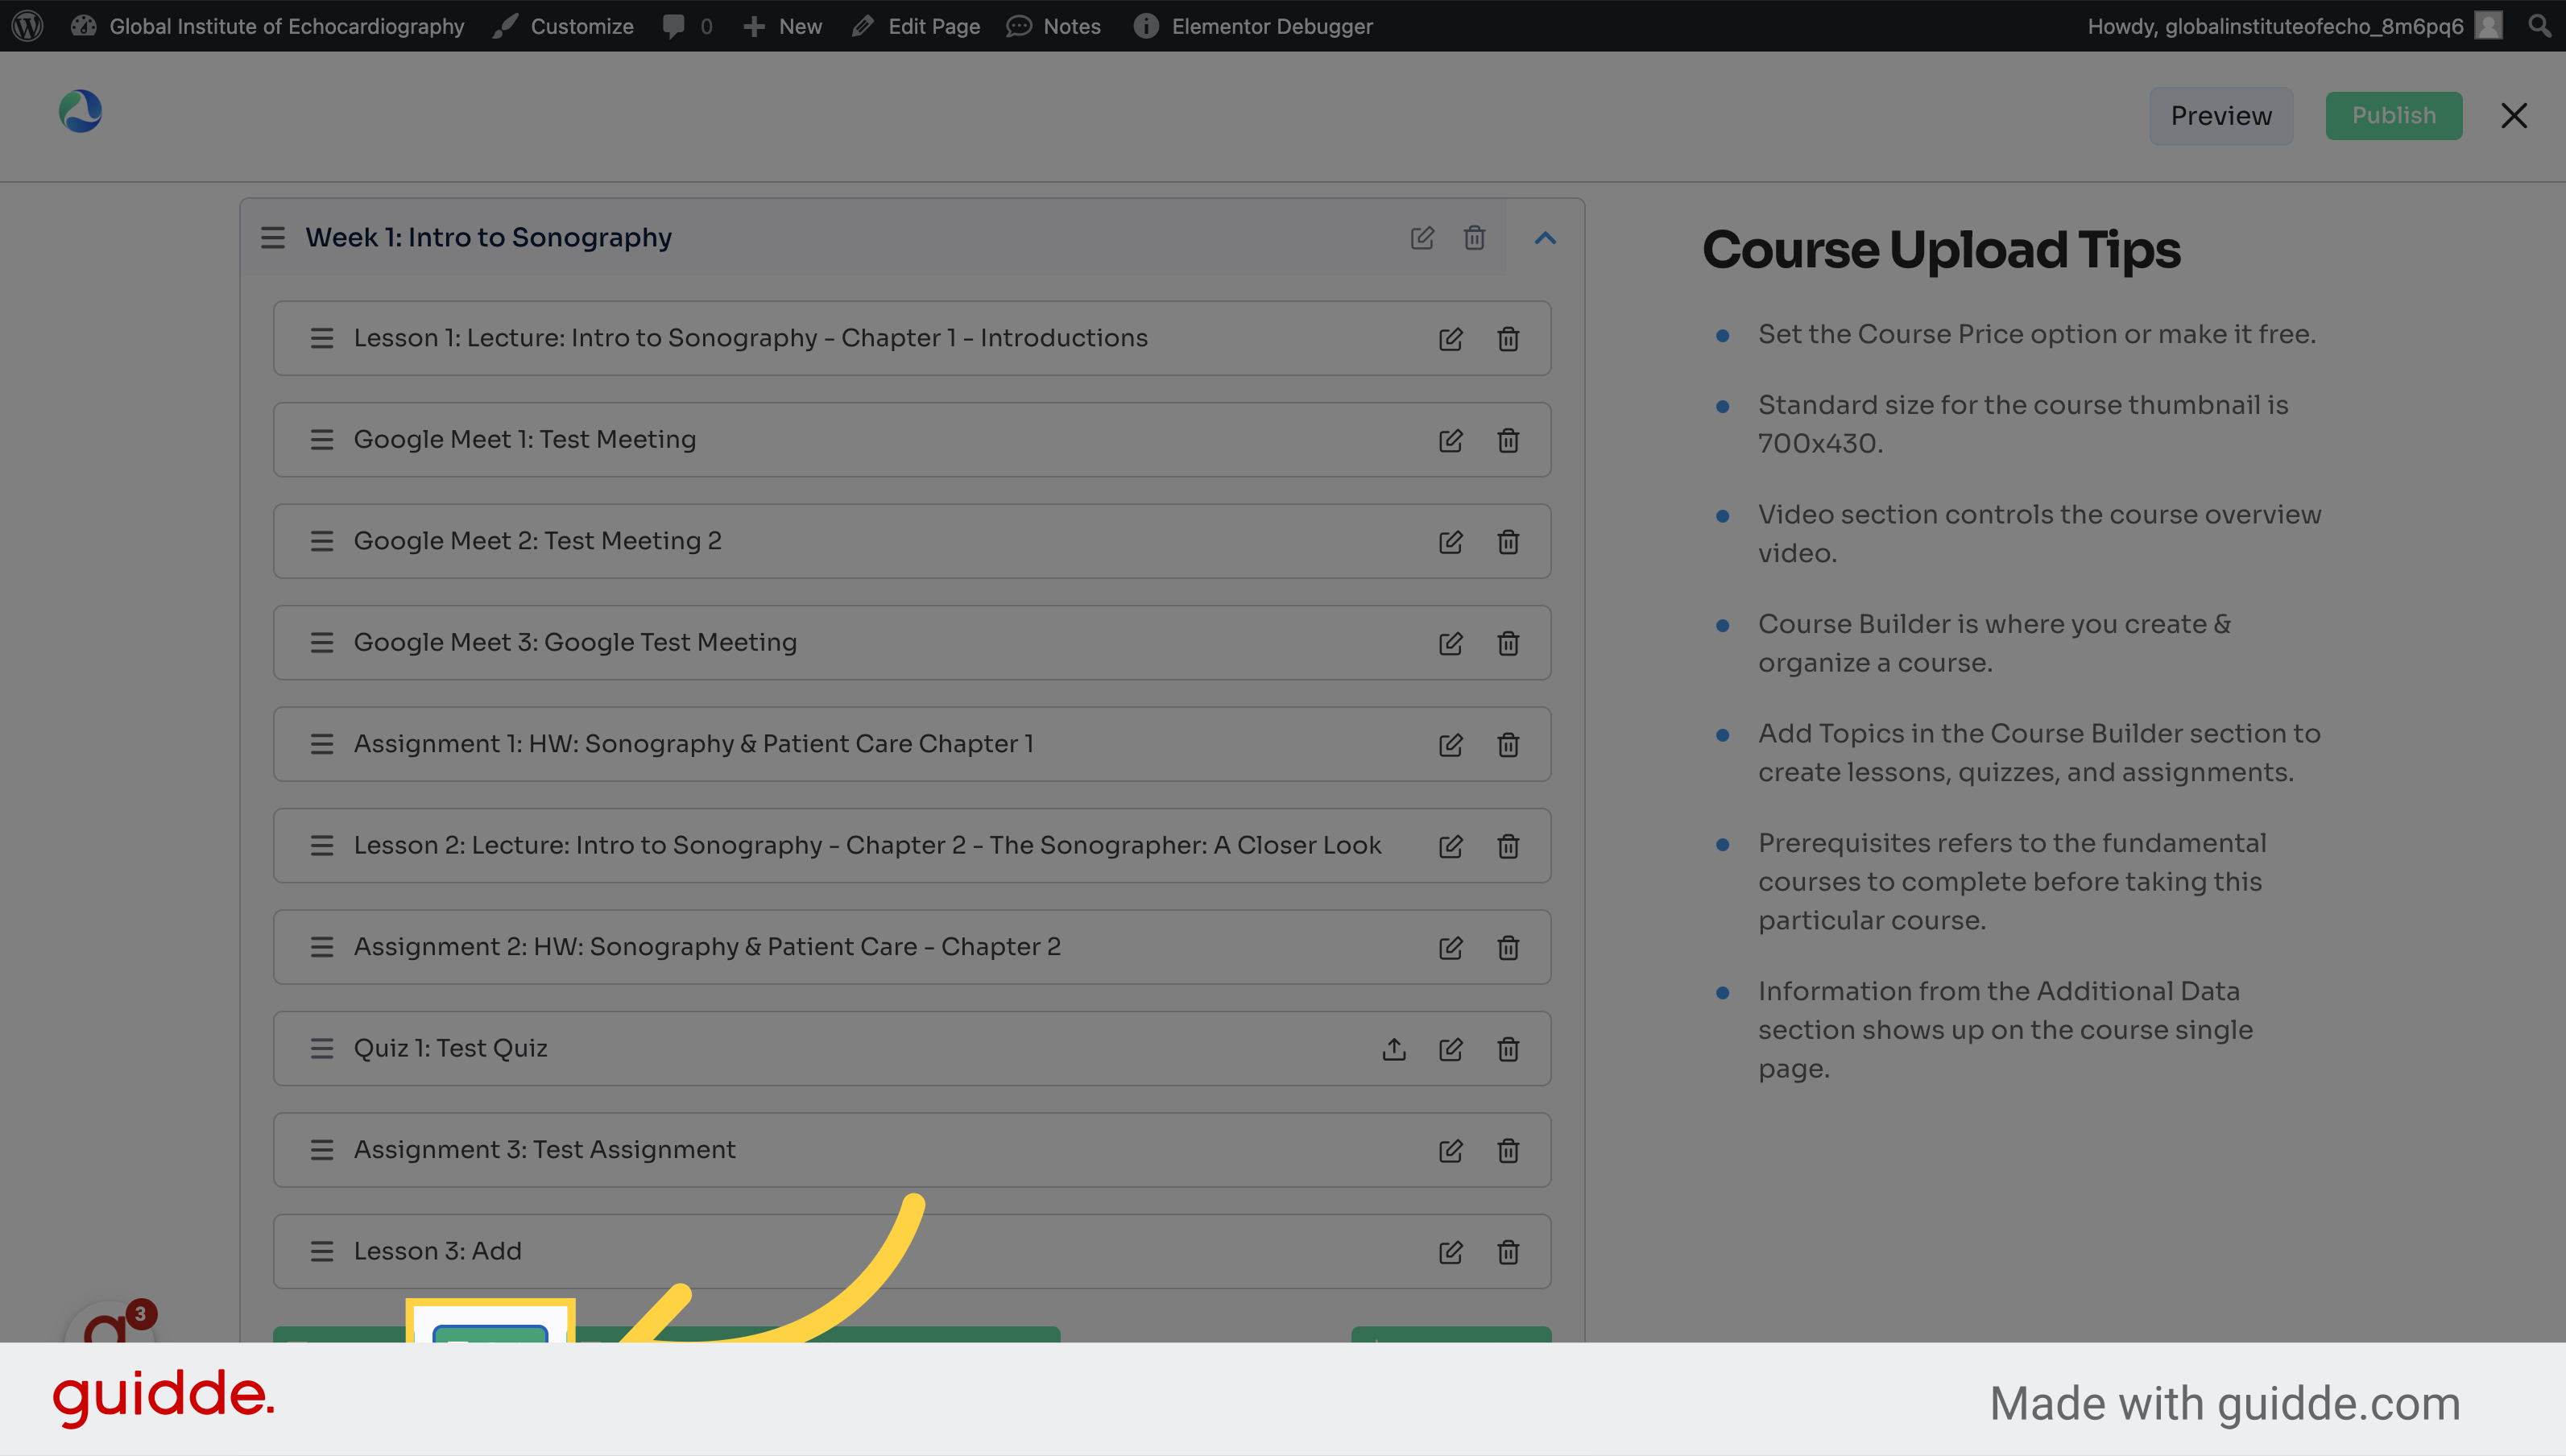
10. Click to add lesson, quiz, assignment, or Google Meet
Access the lesson section.
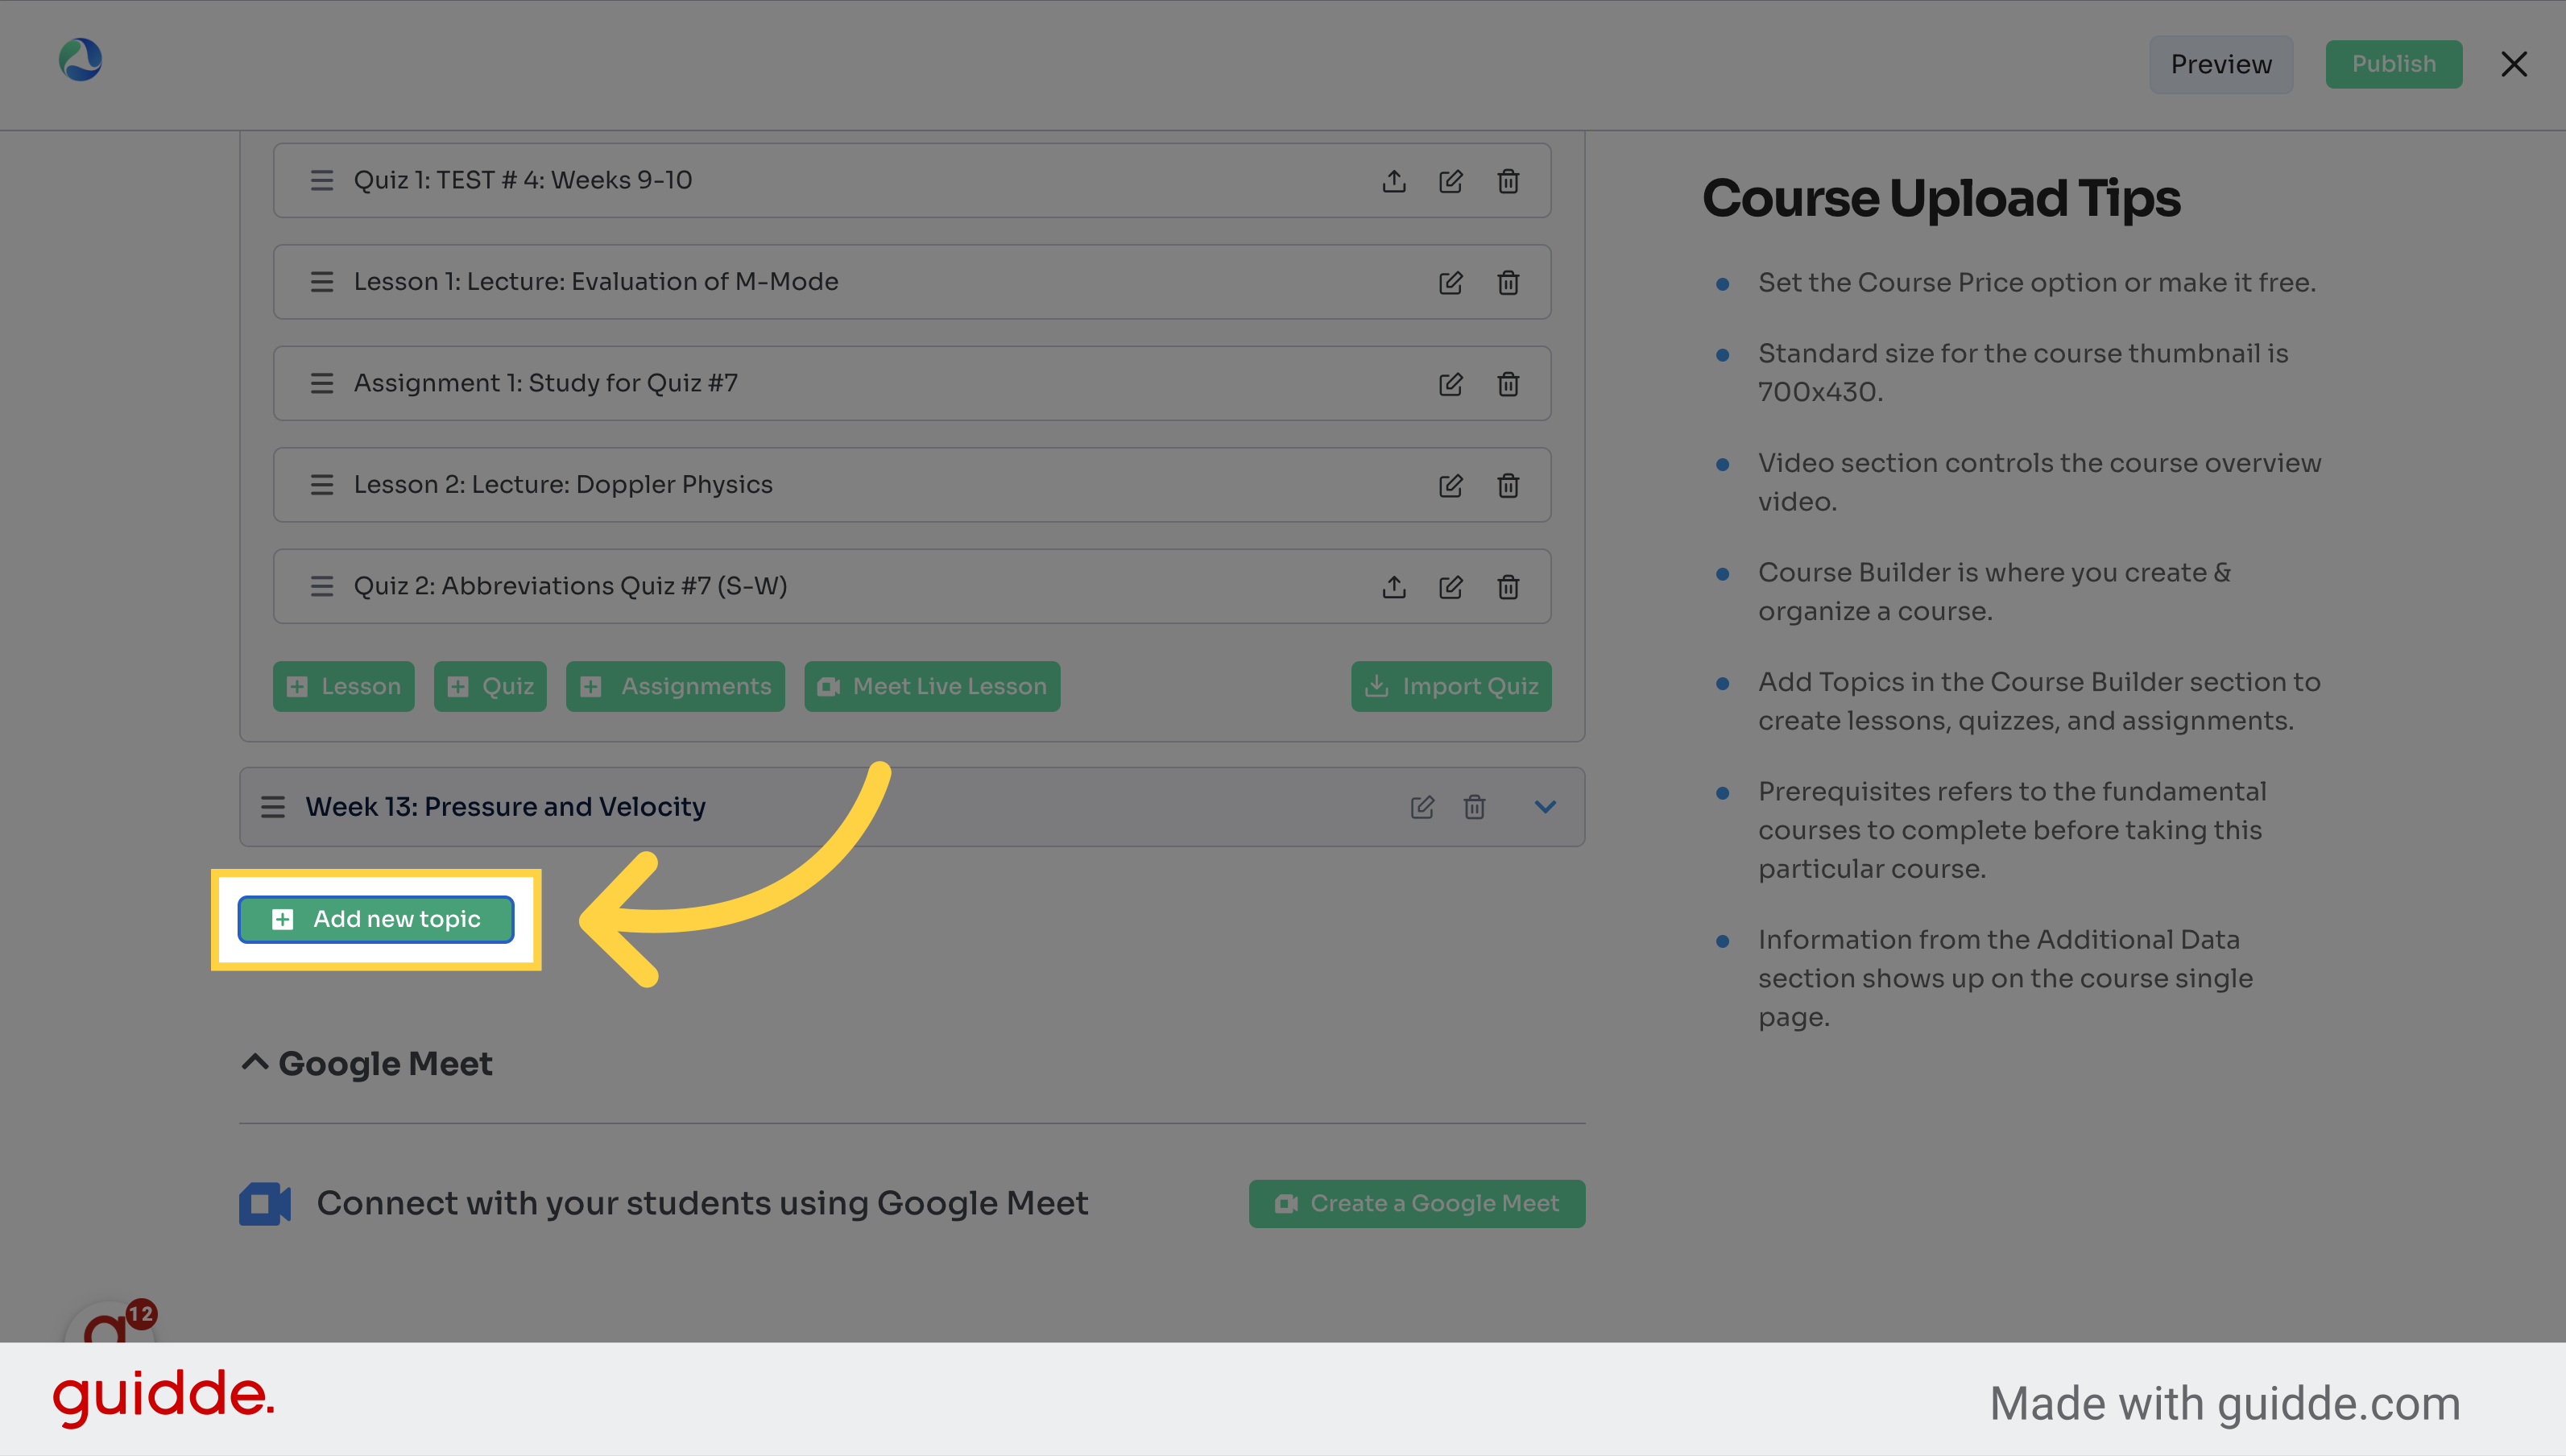
11. Click "Add new topic"
Add a new topic to the course.
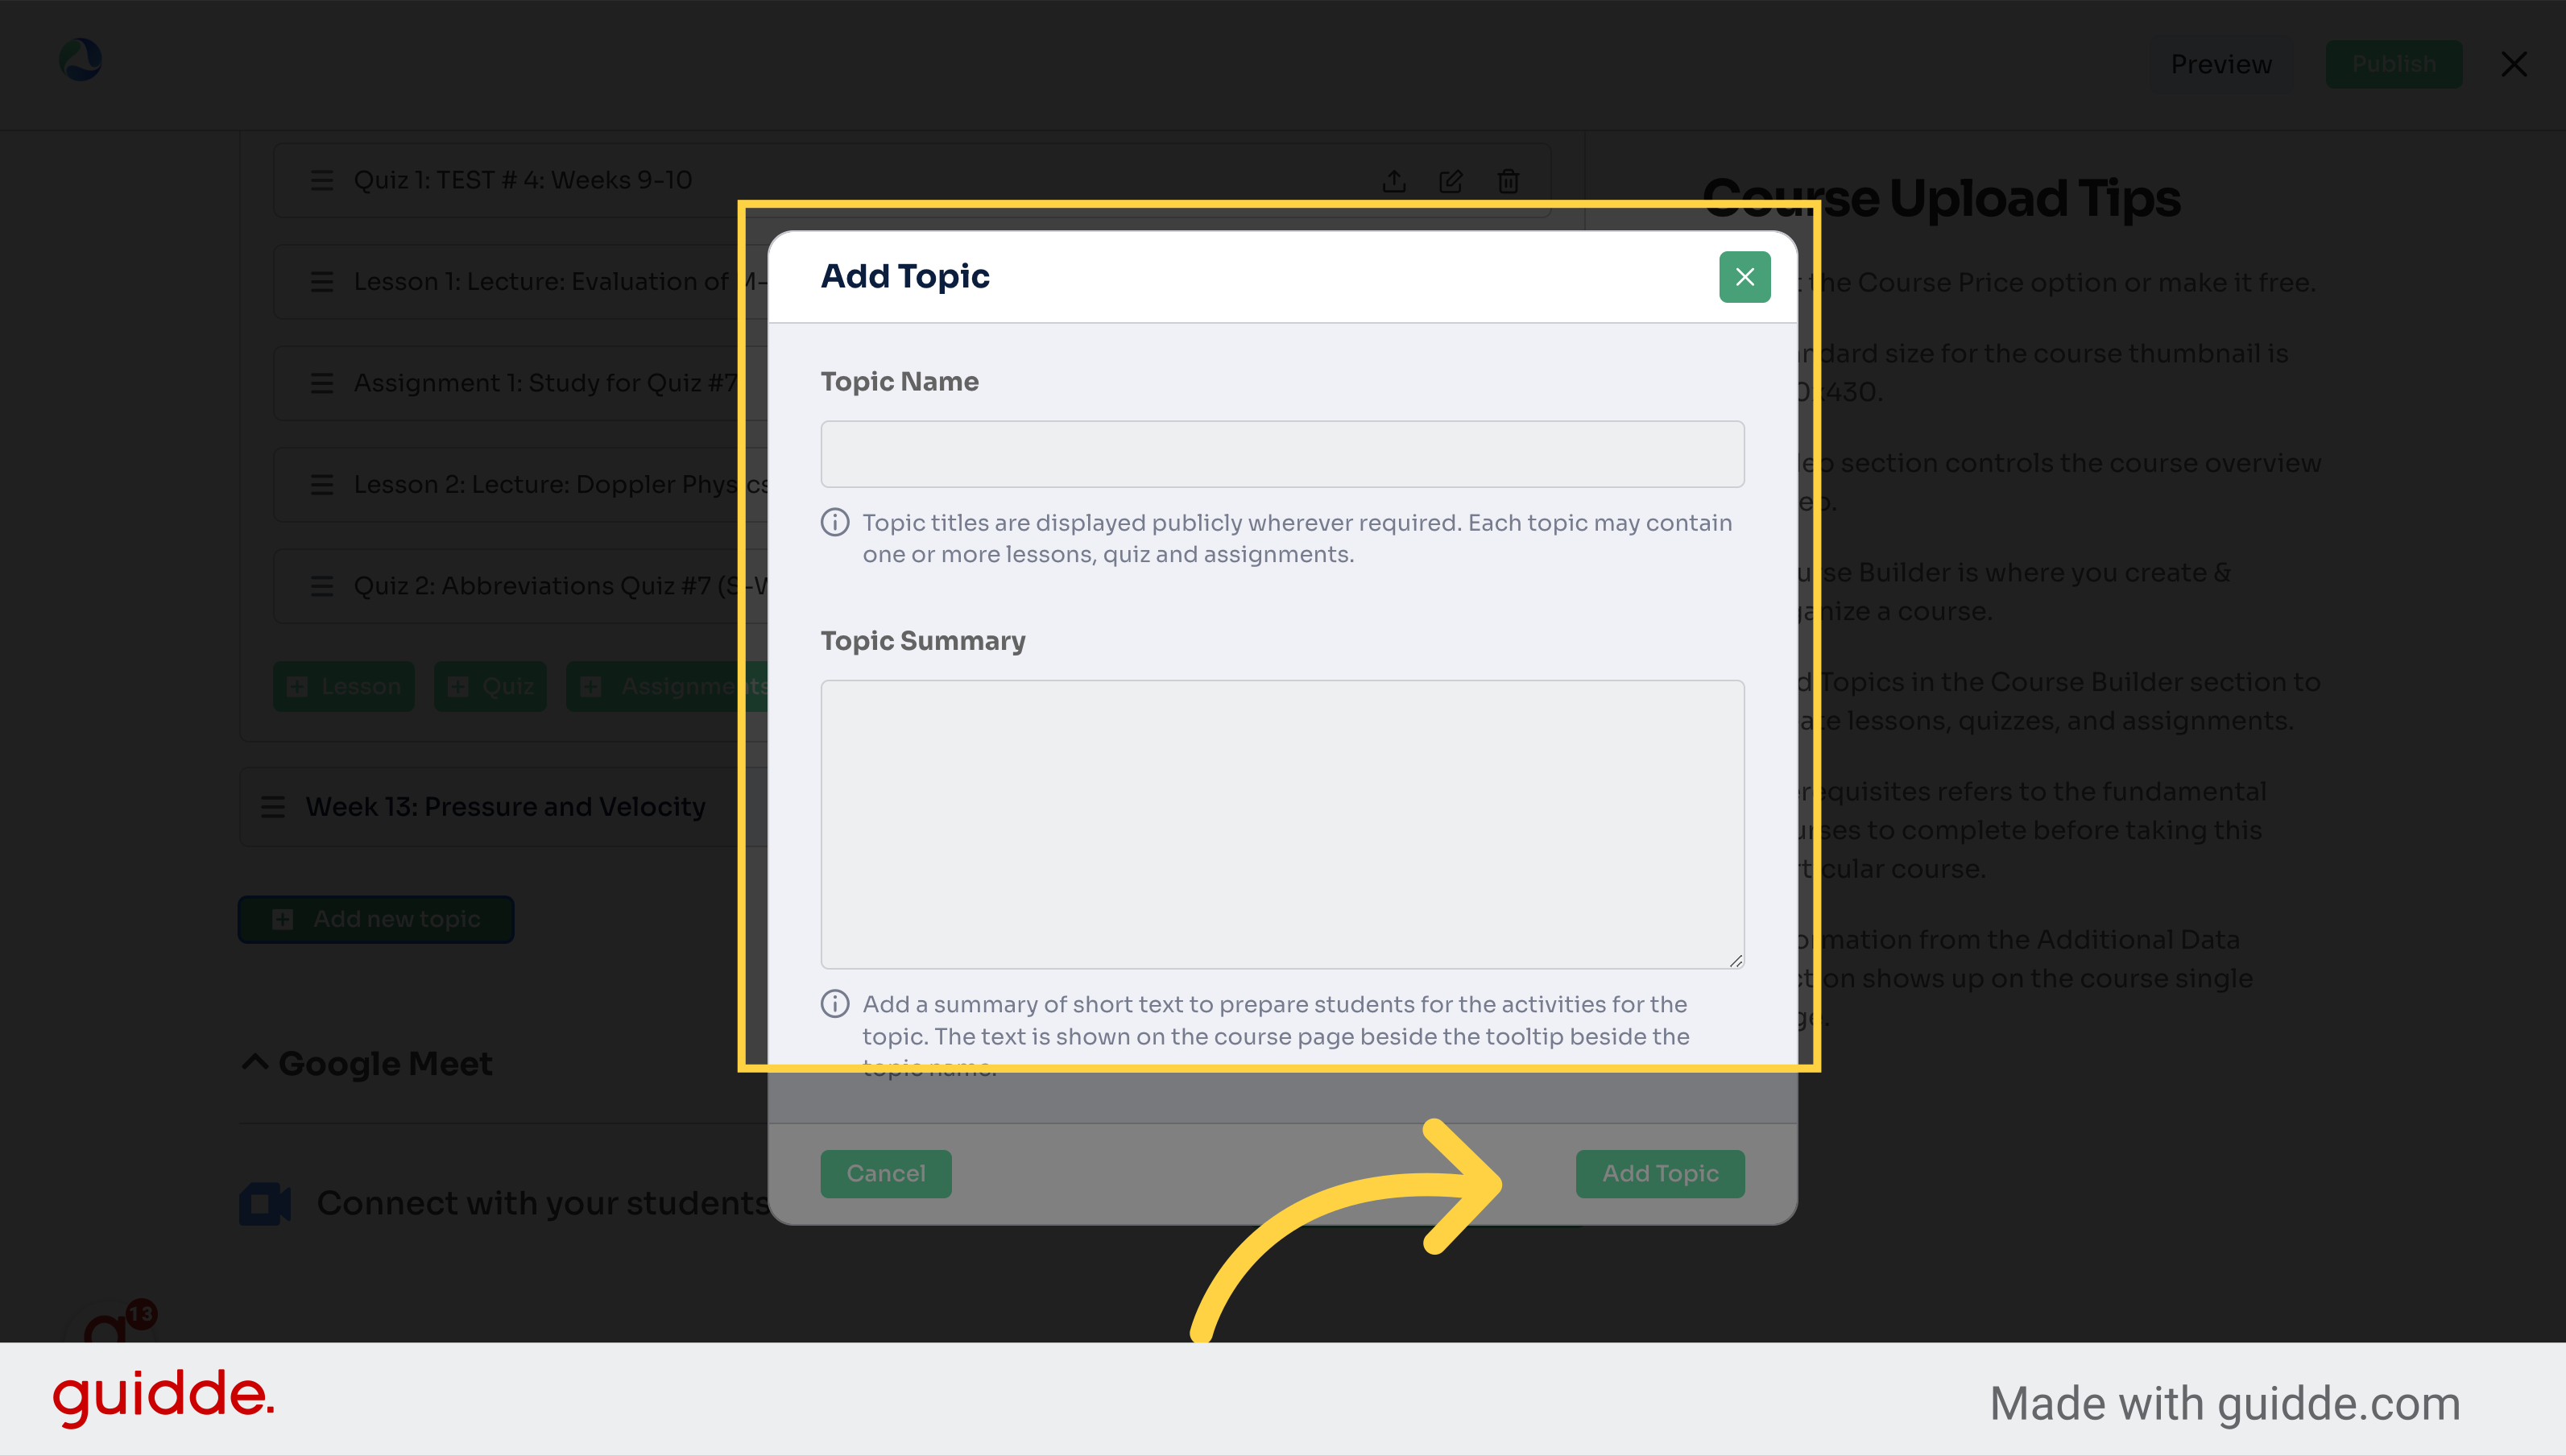
12. Edit the info and click 'Add Topic'
Navigate here
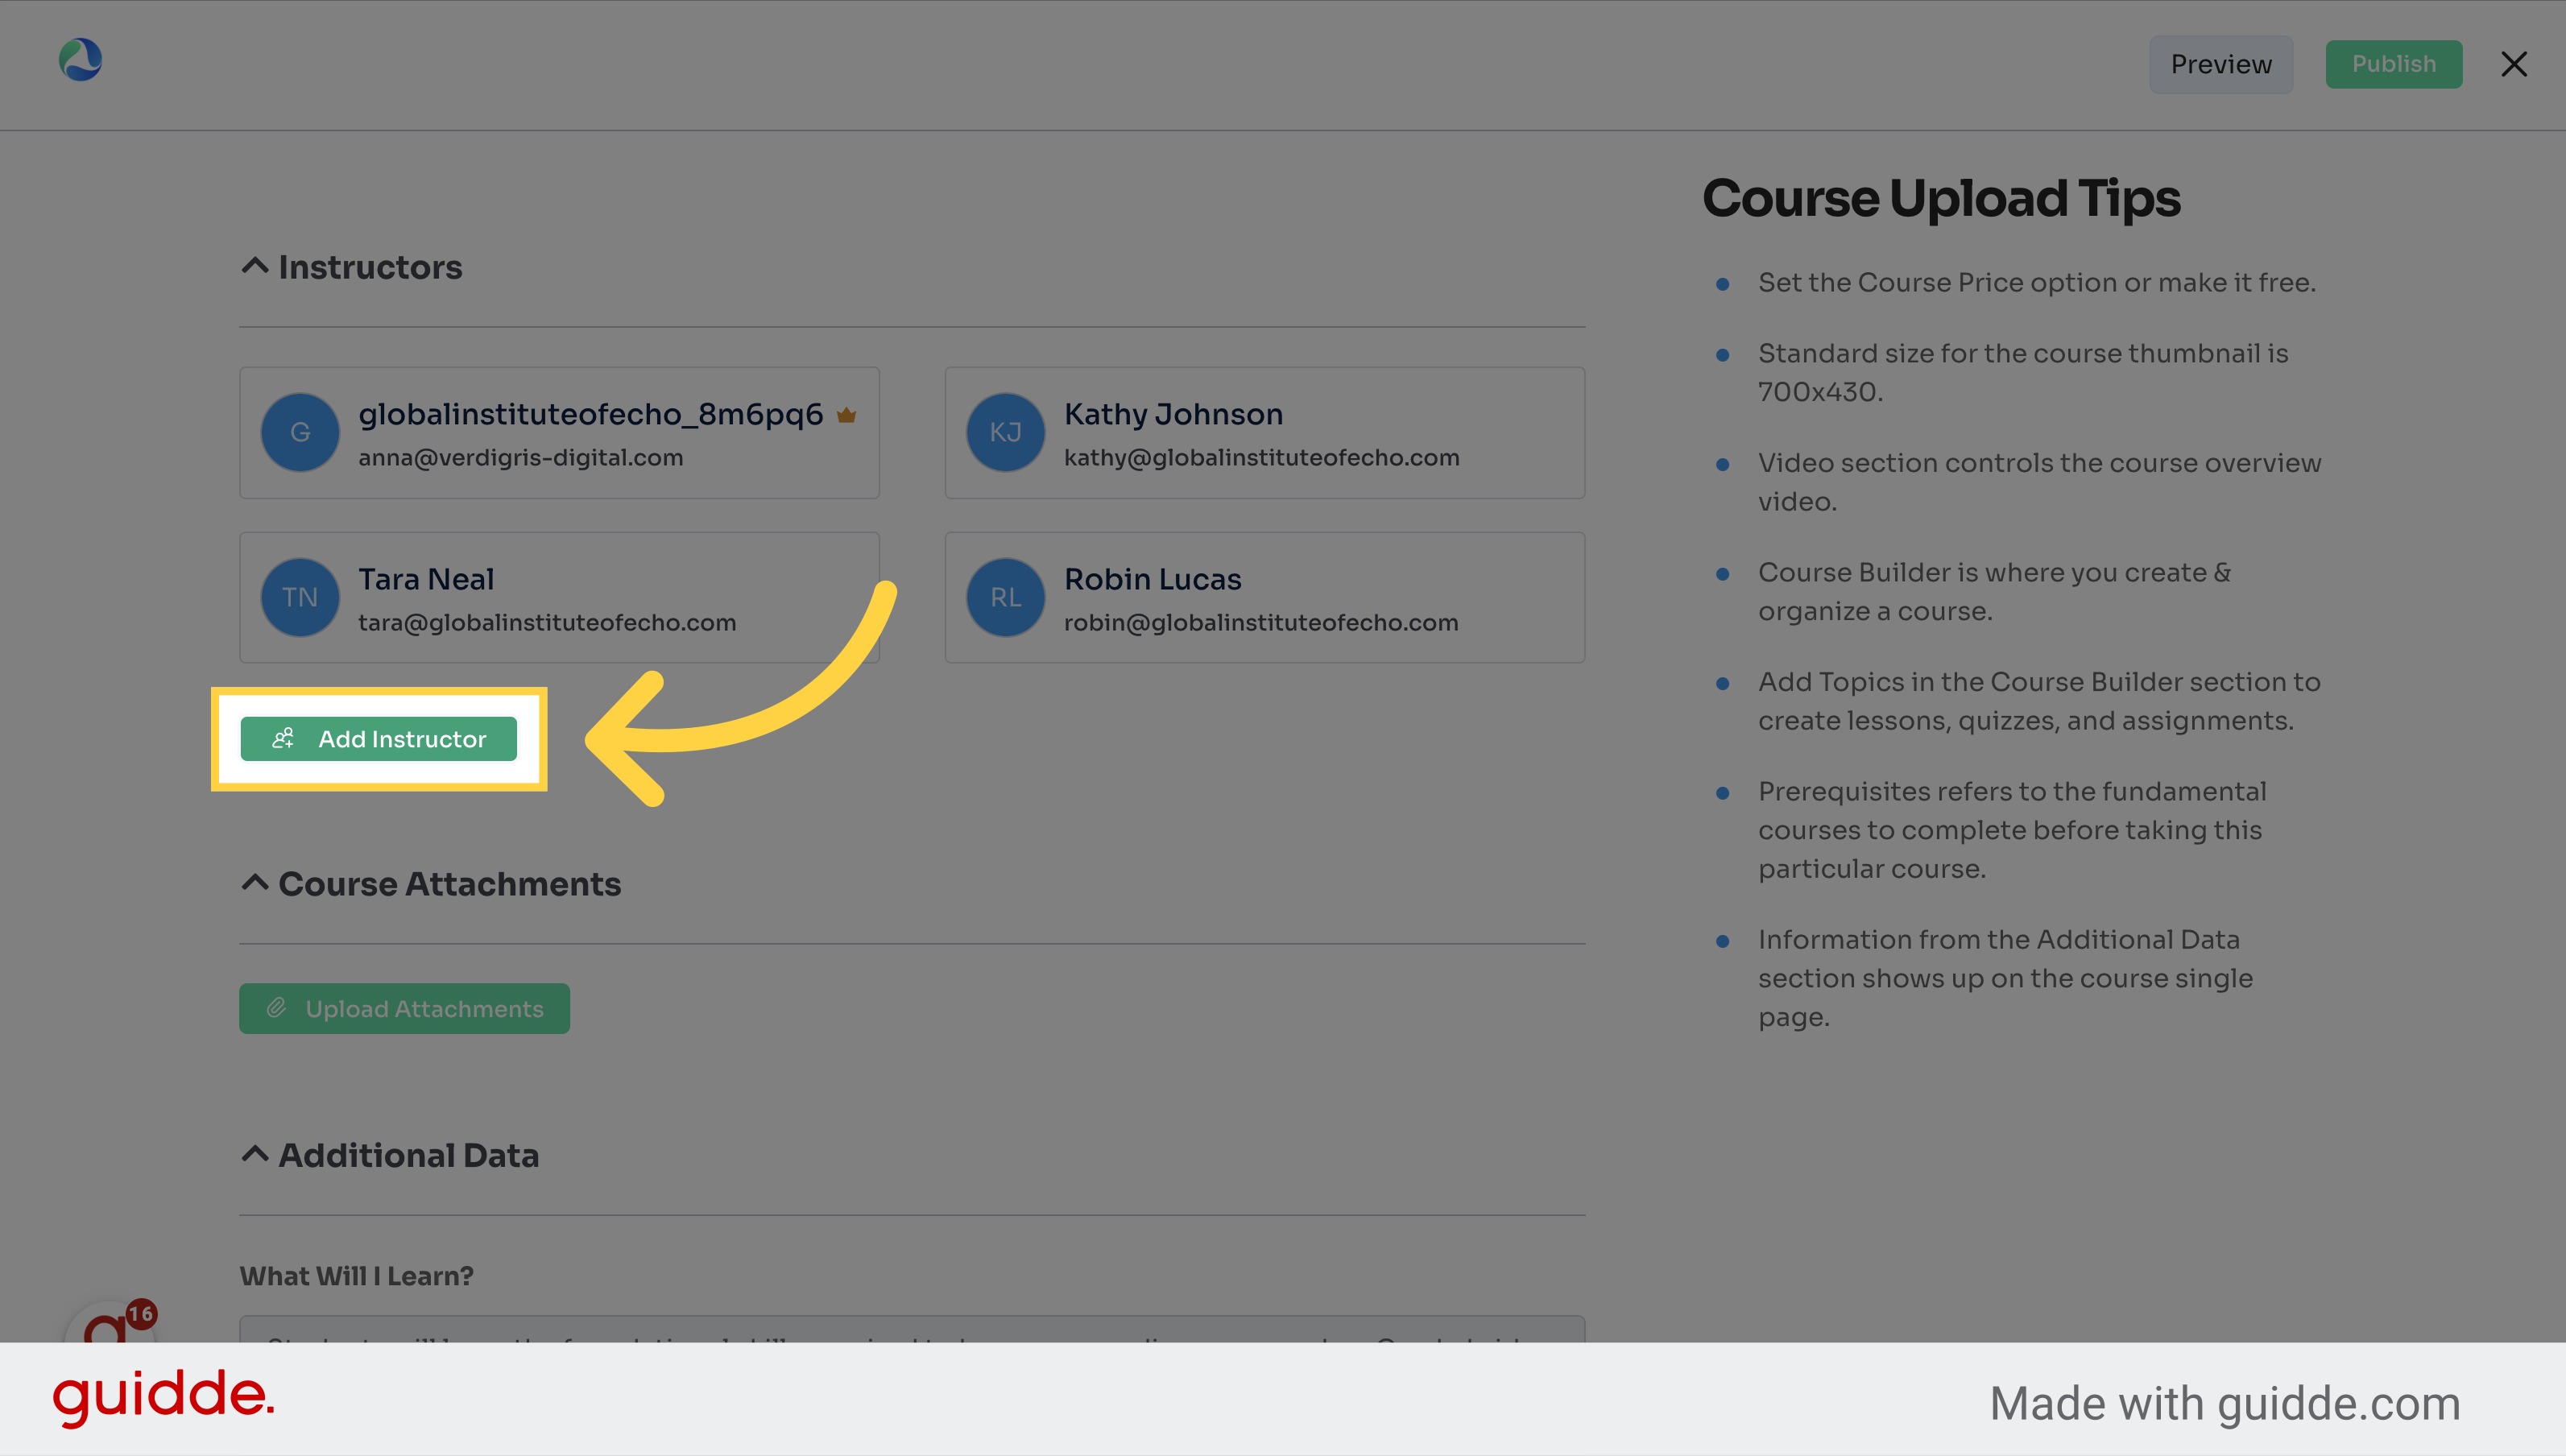
13. Click "Add Instructor" to add another instructor
Assign an instructor to the course.
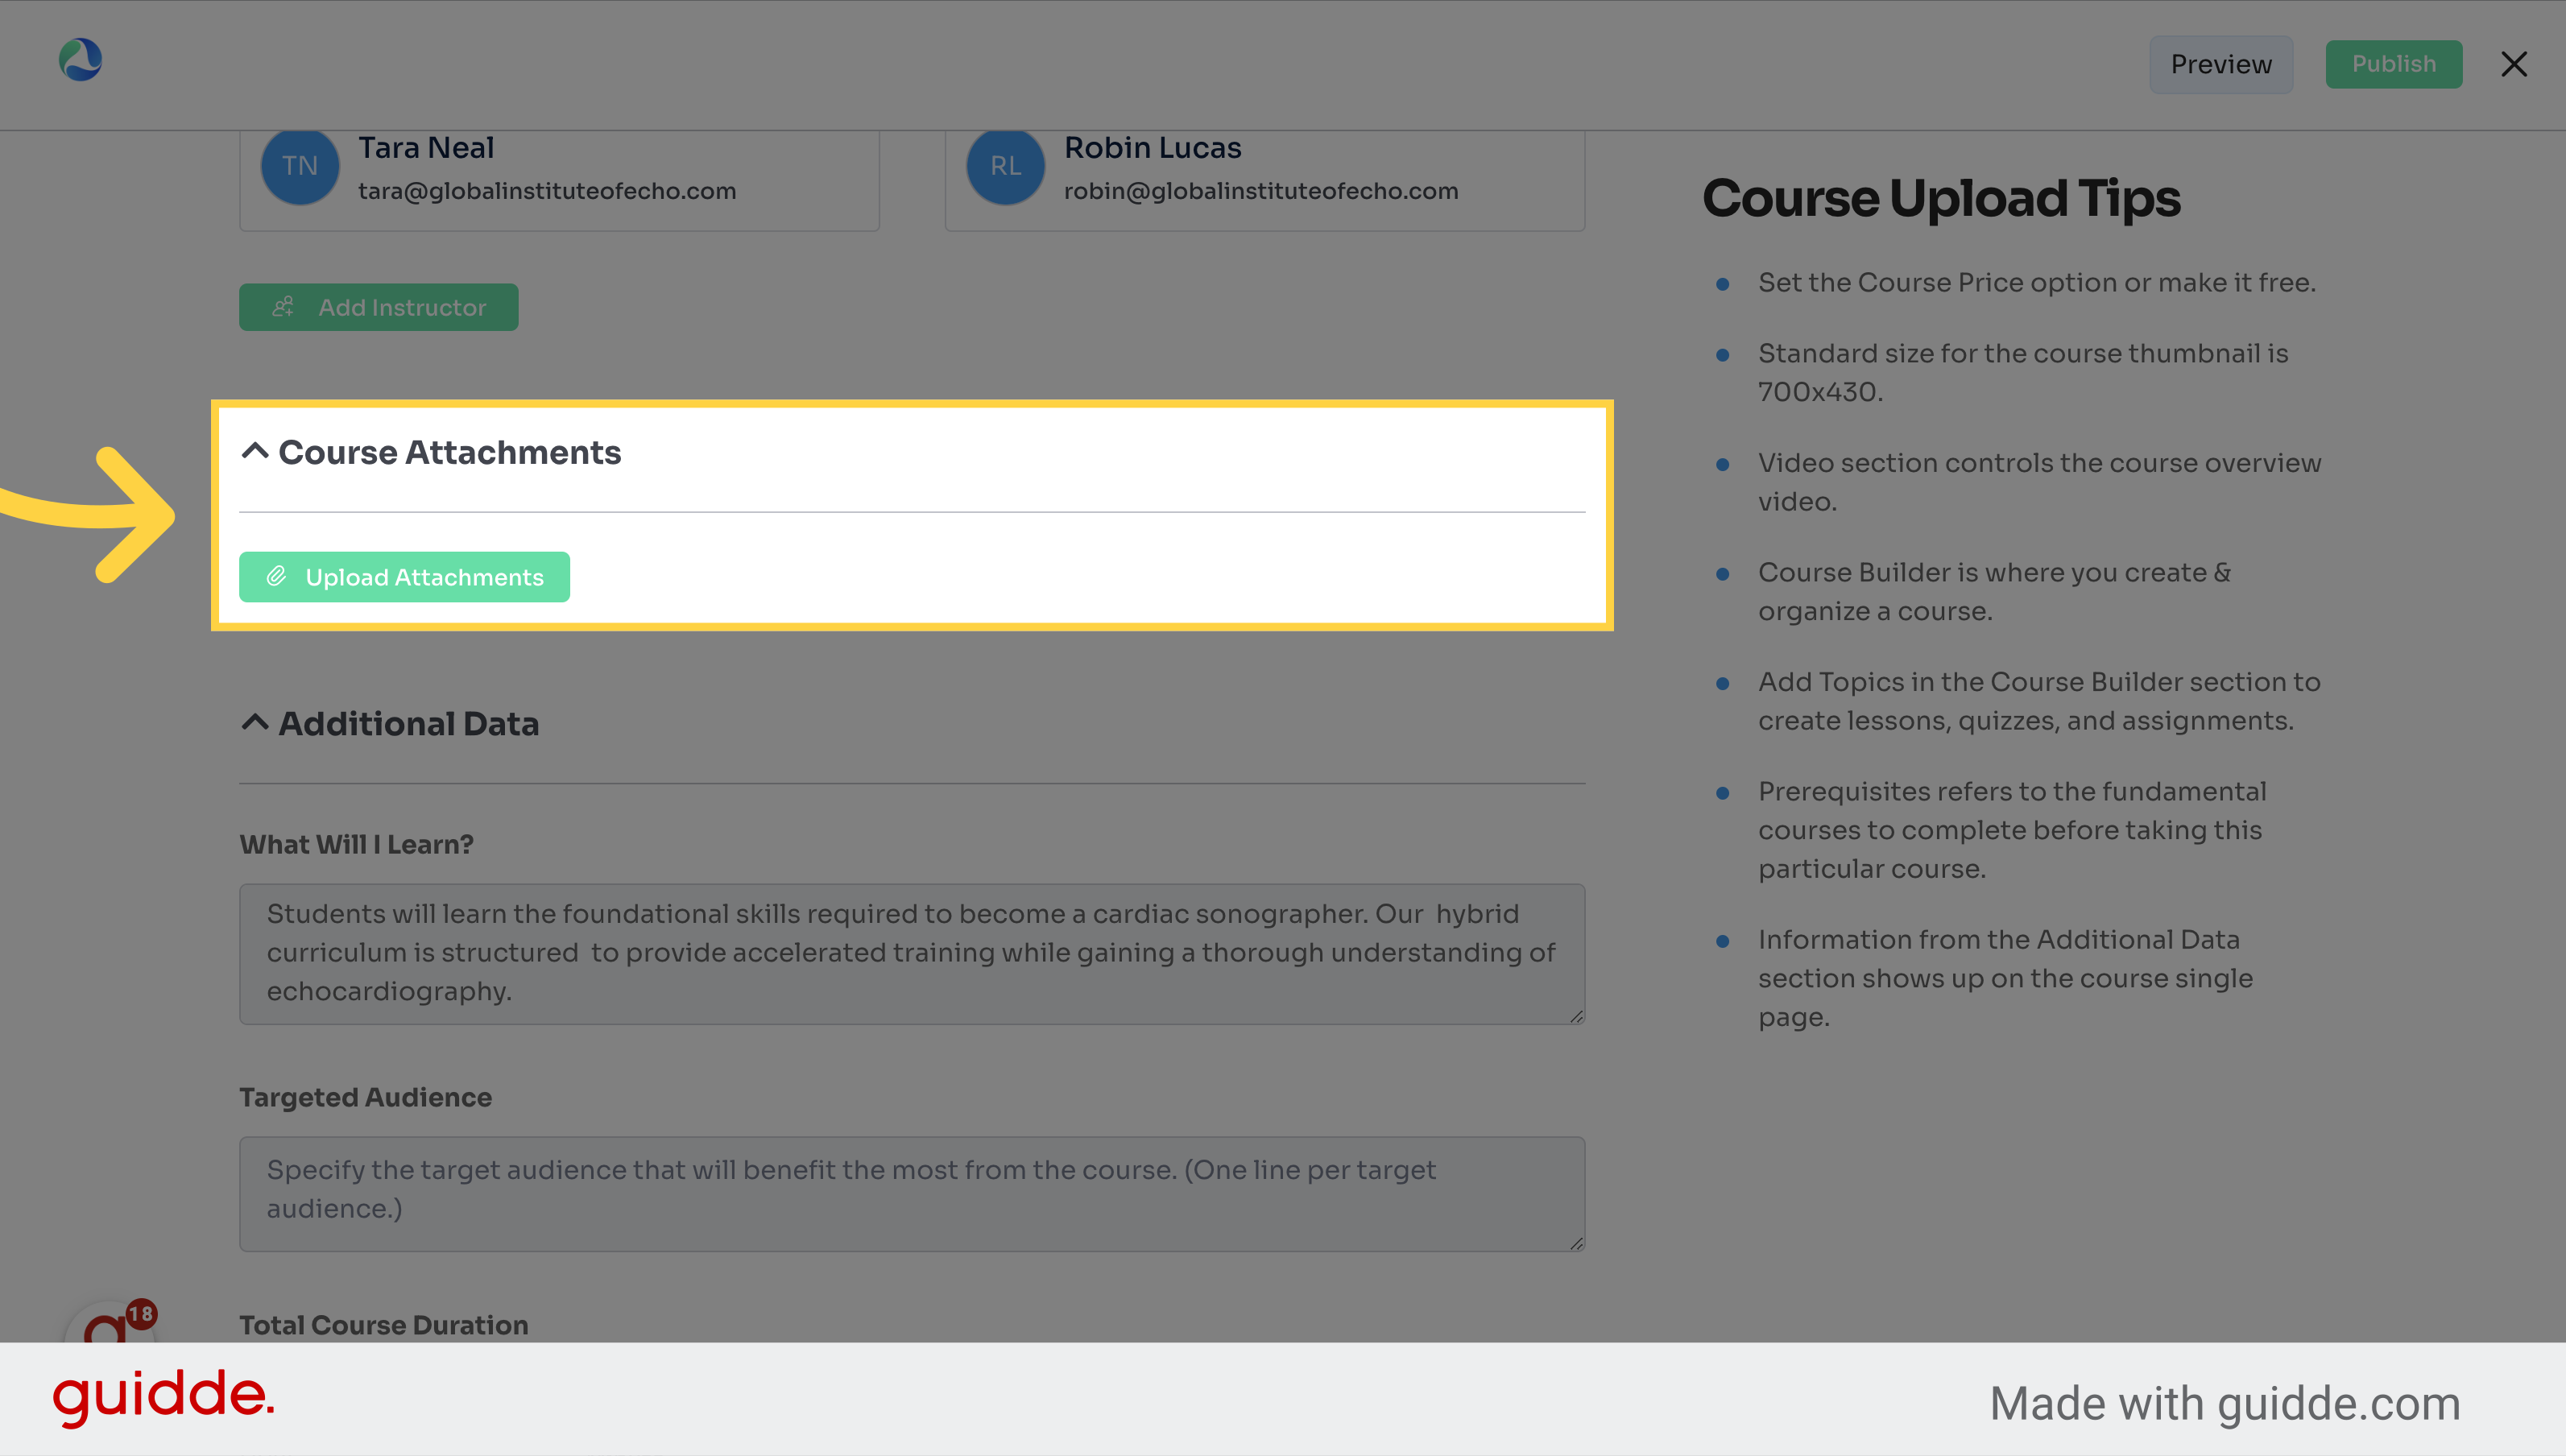
14. Click Course Attachments to add general course attachments. Lectures should be added to the individual Lectures within the Course Topics
Manage course attachments.
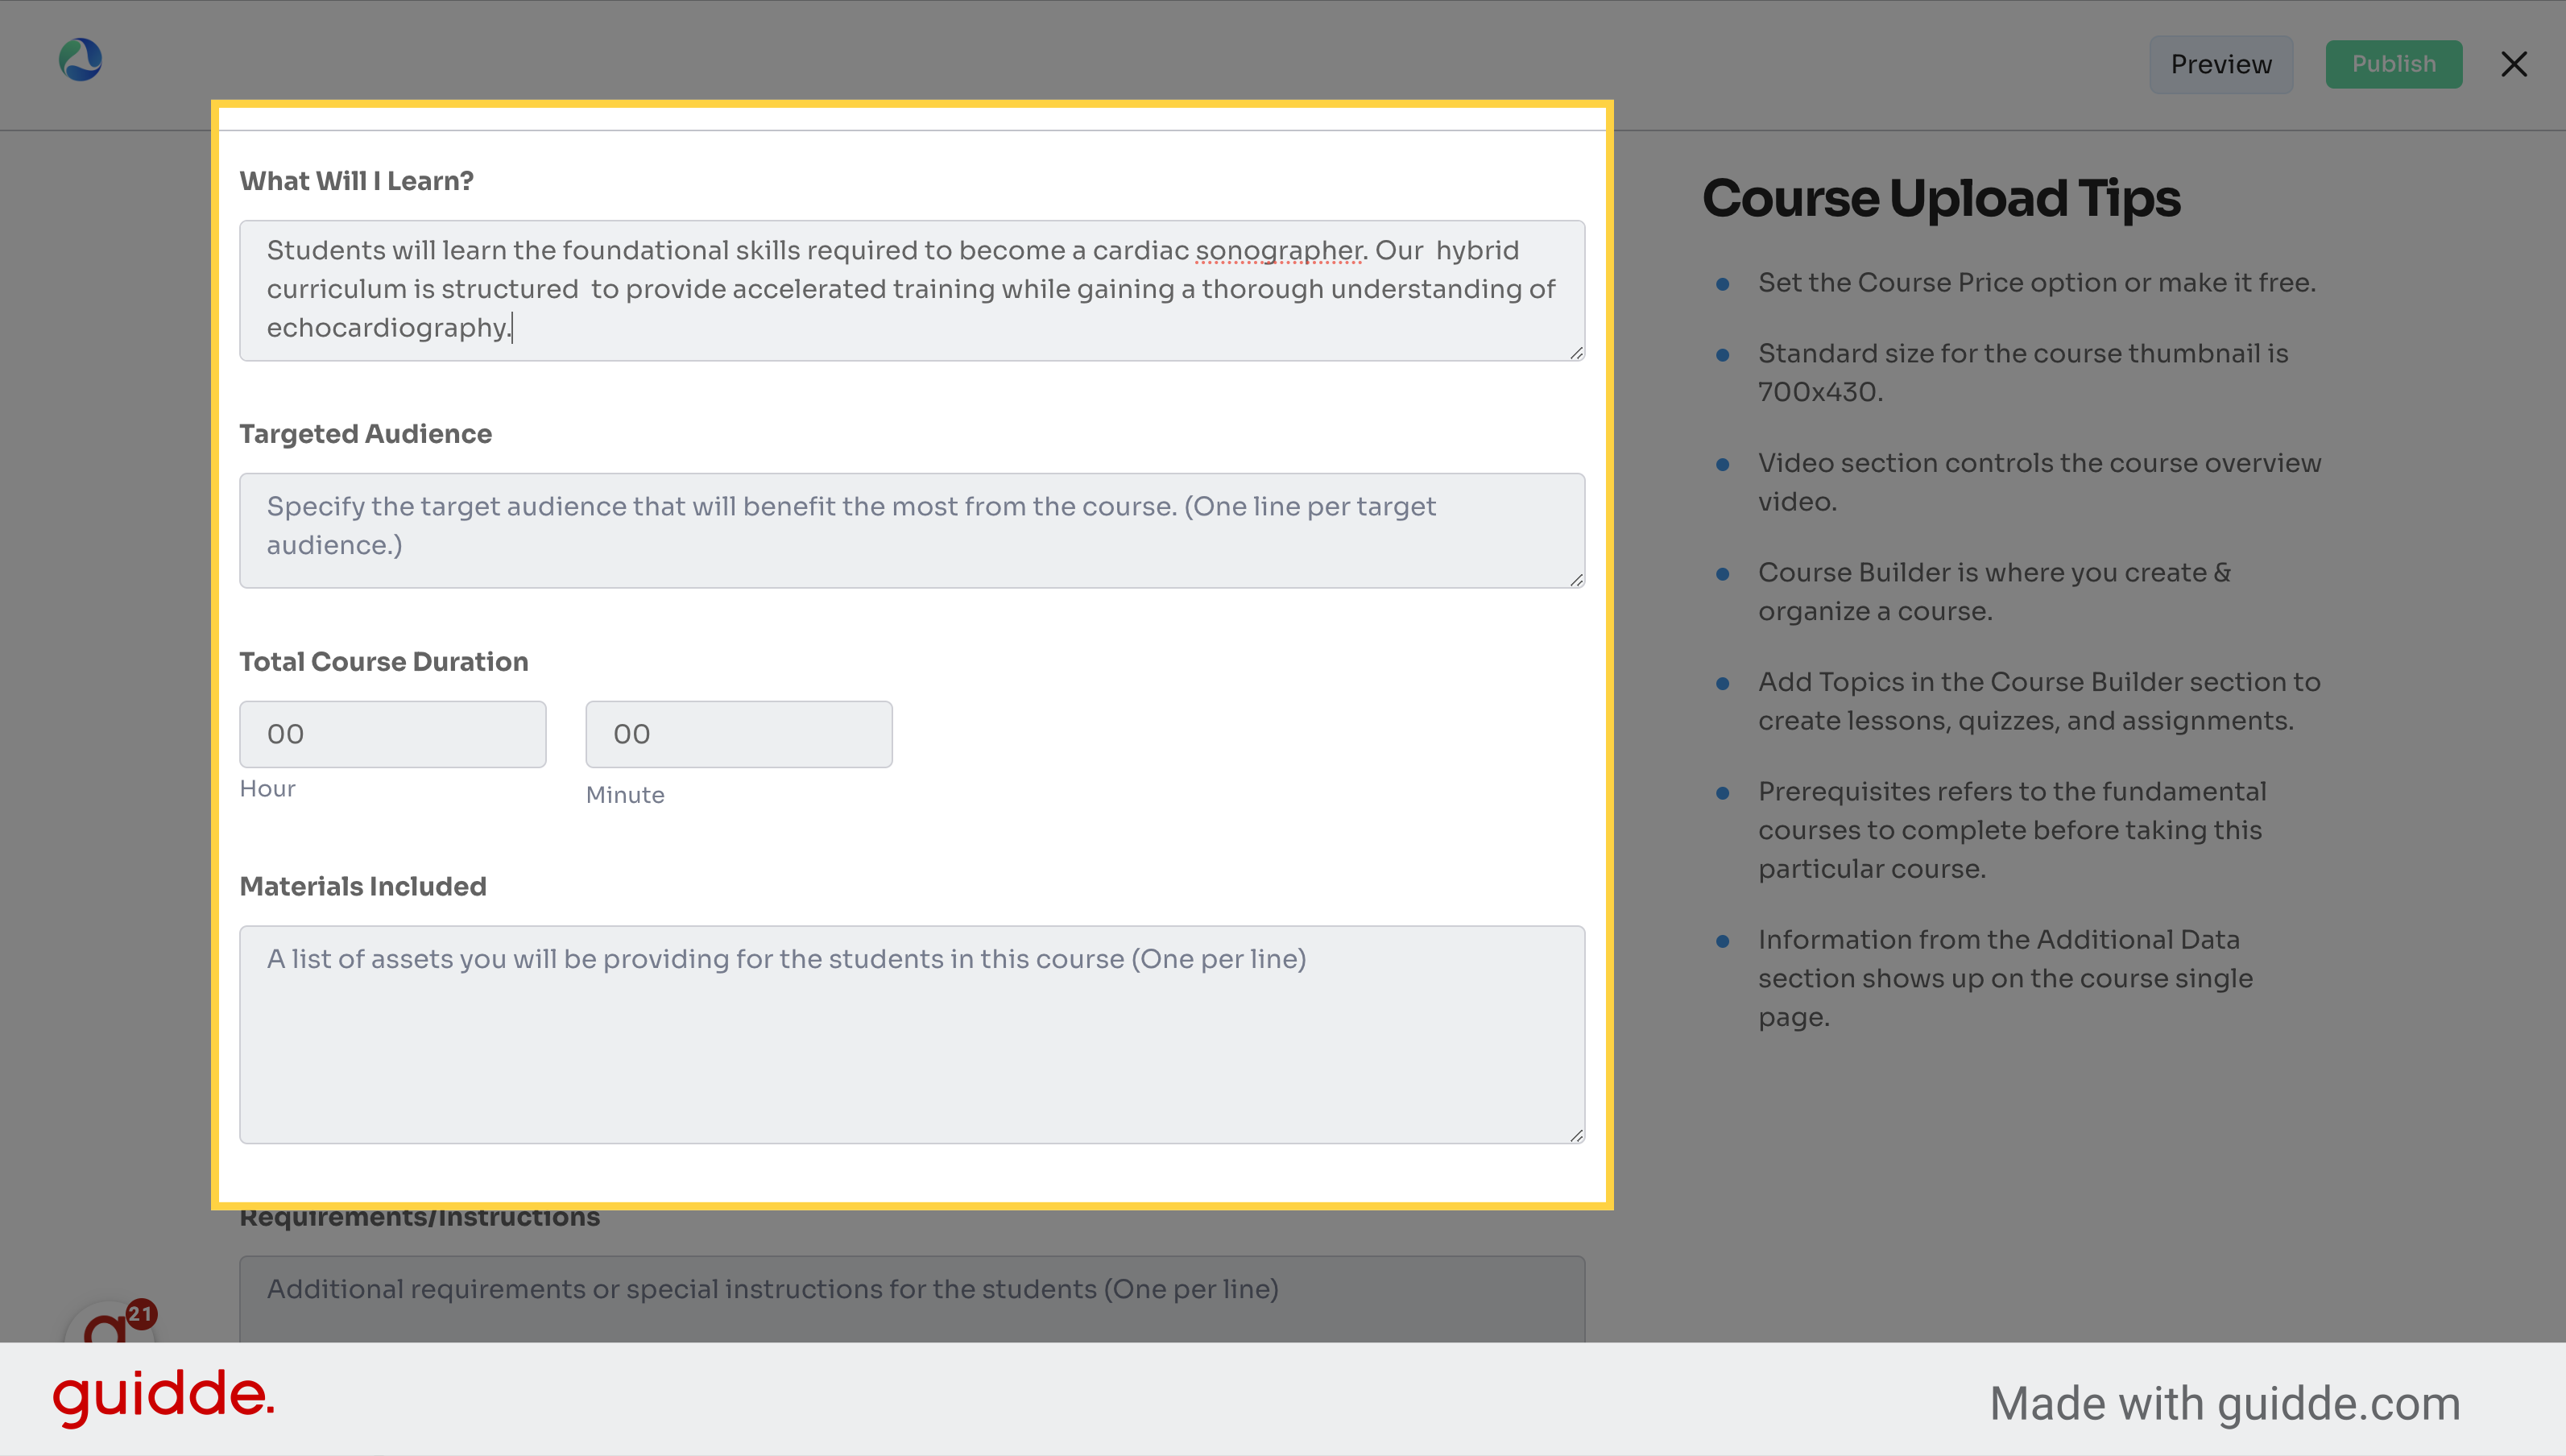
15. Continue scrolling to further edit
View detailed course information.
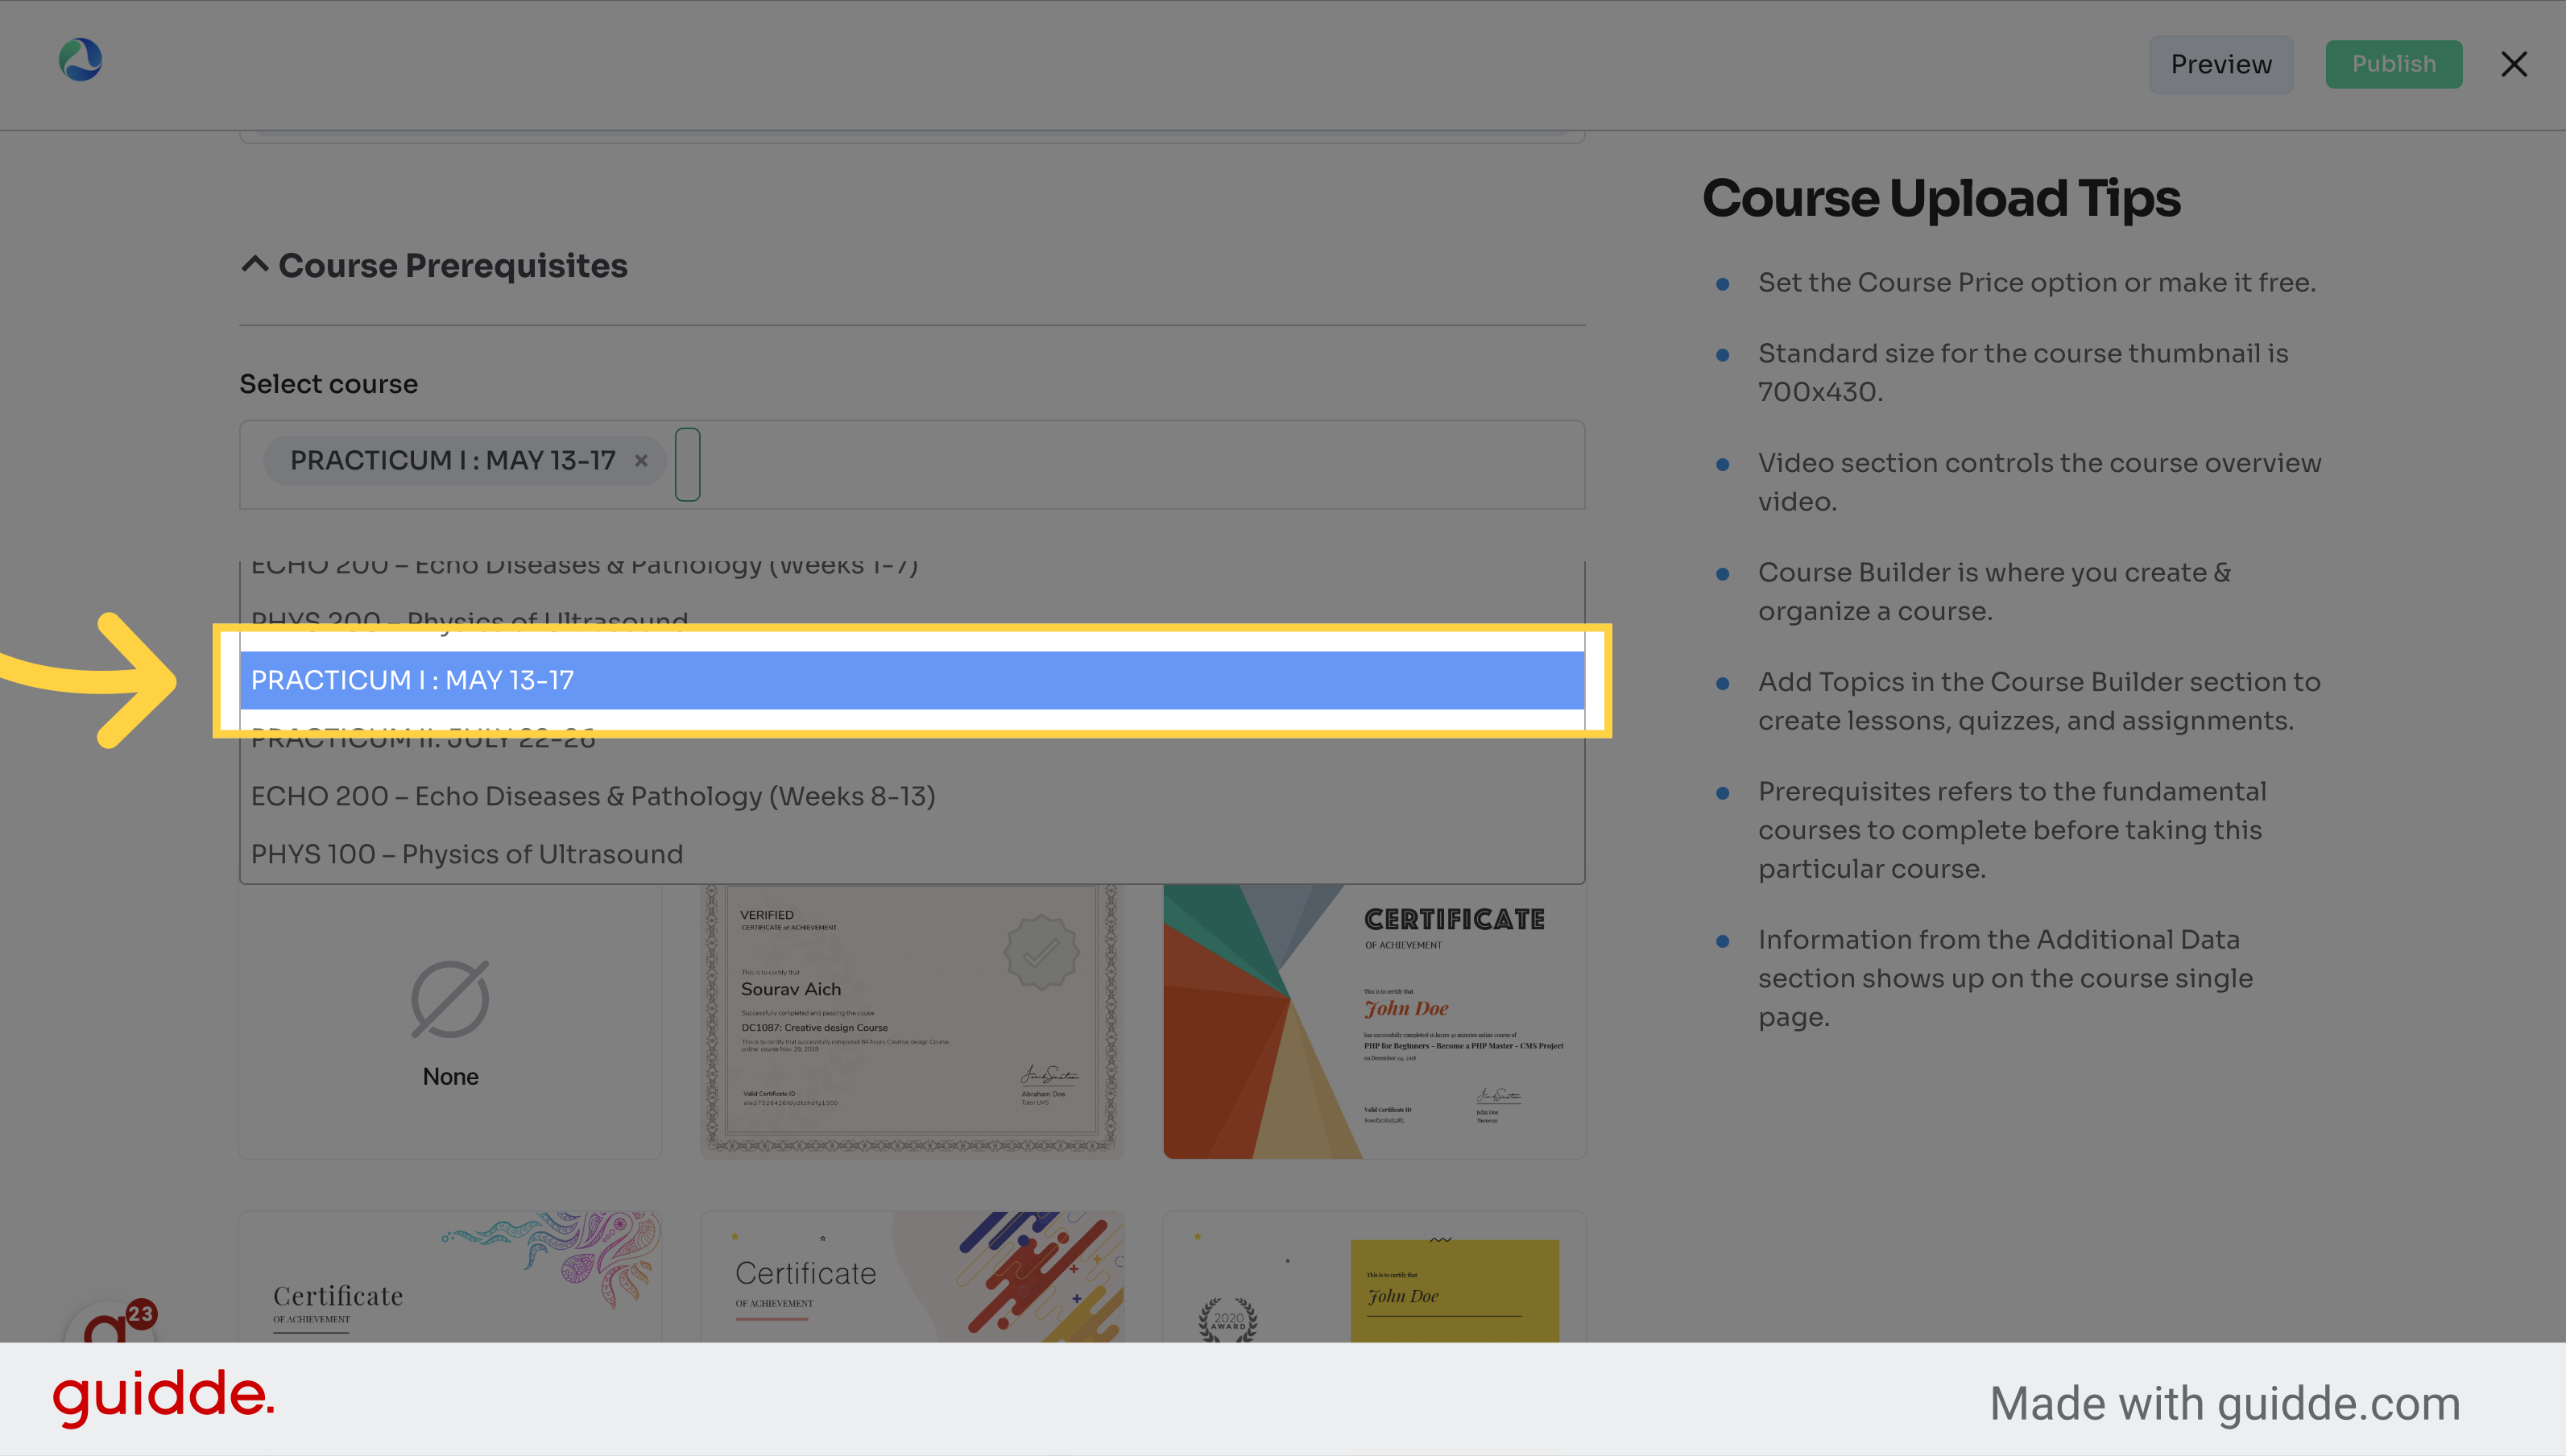
16. Enter Course Prerequisites here
Access specific course section.
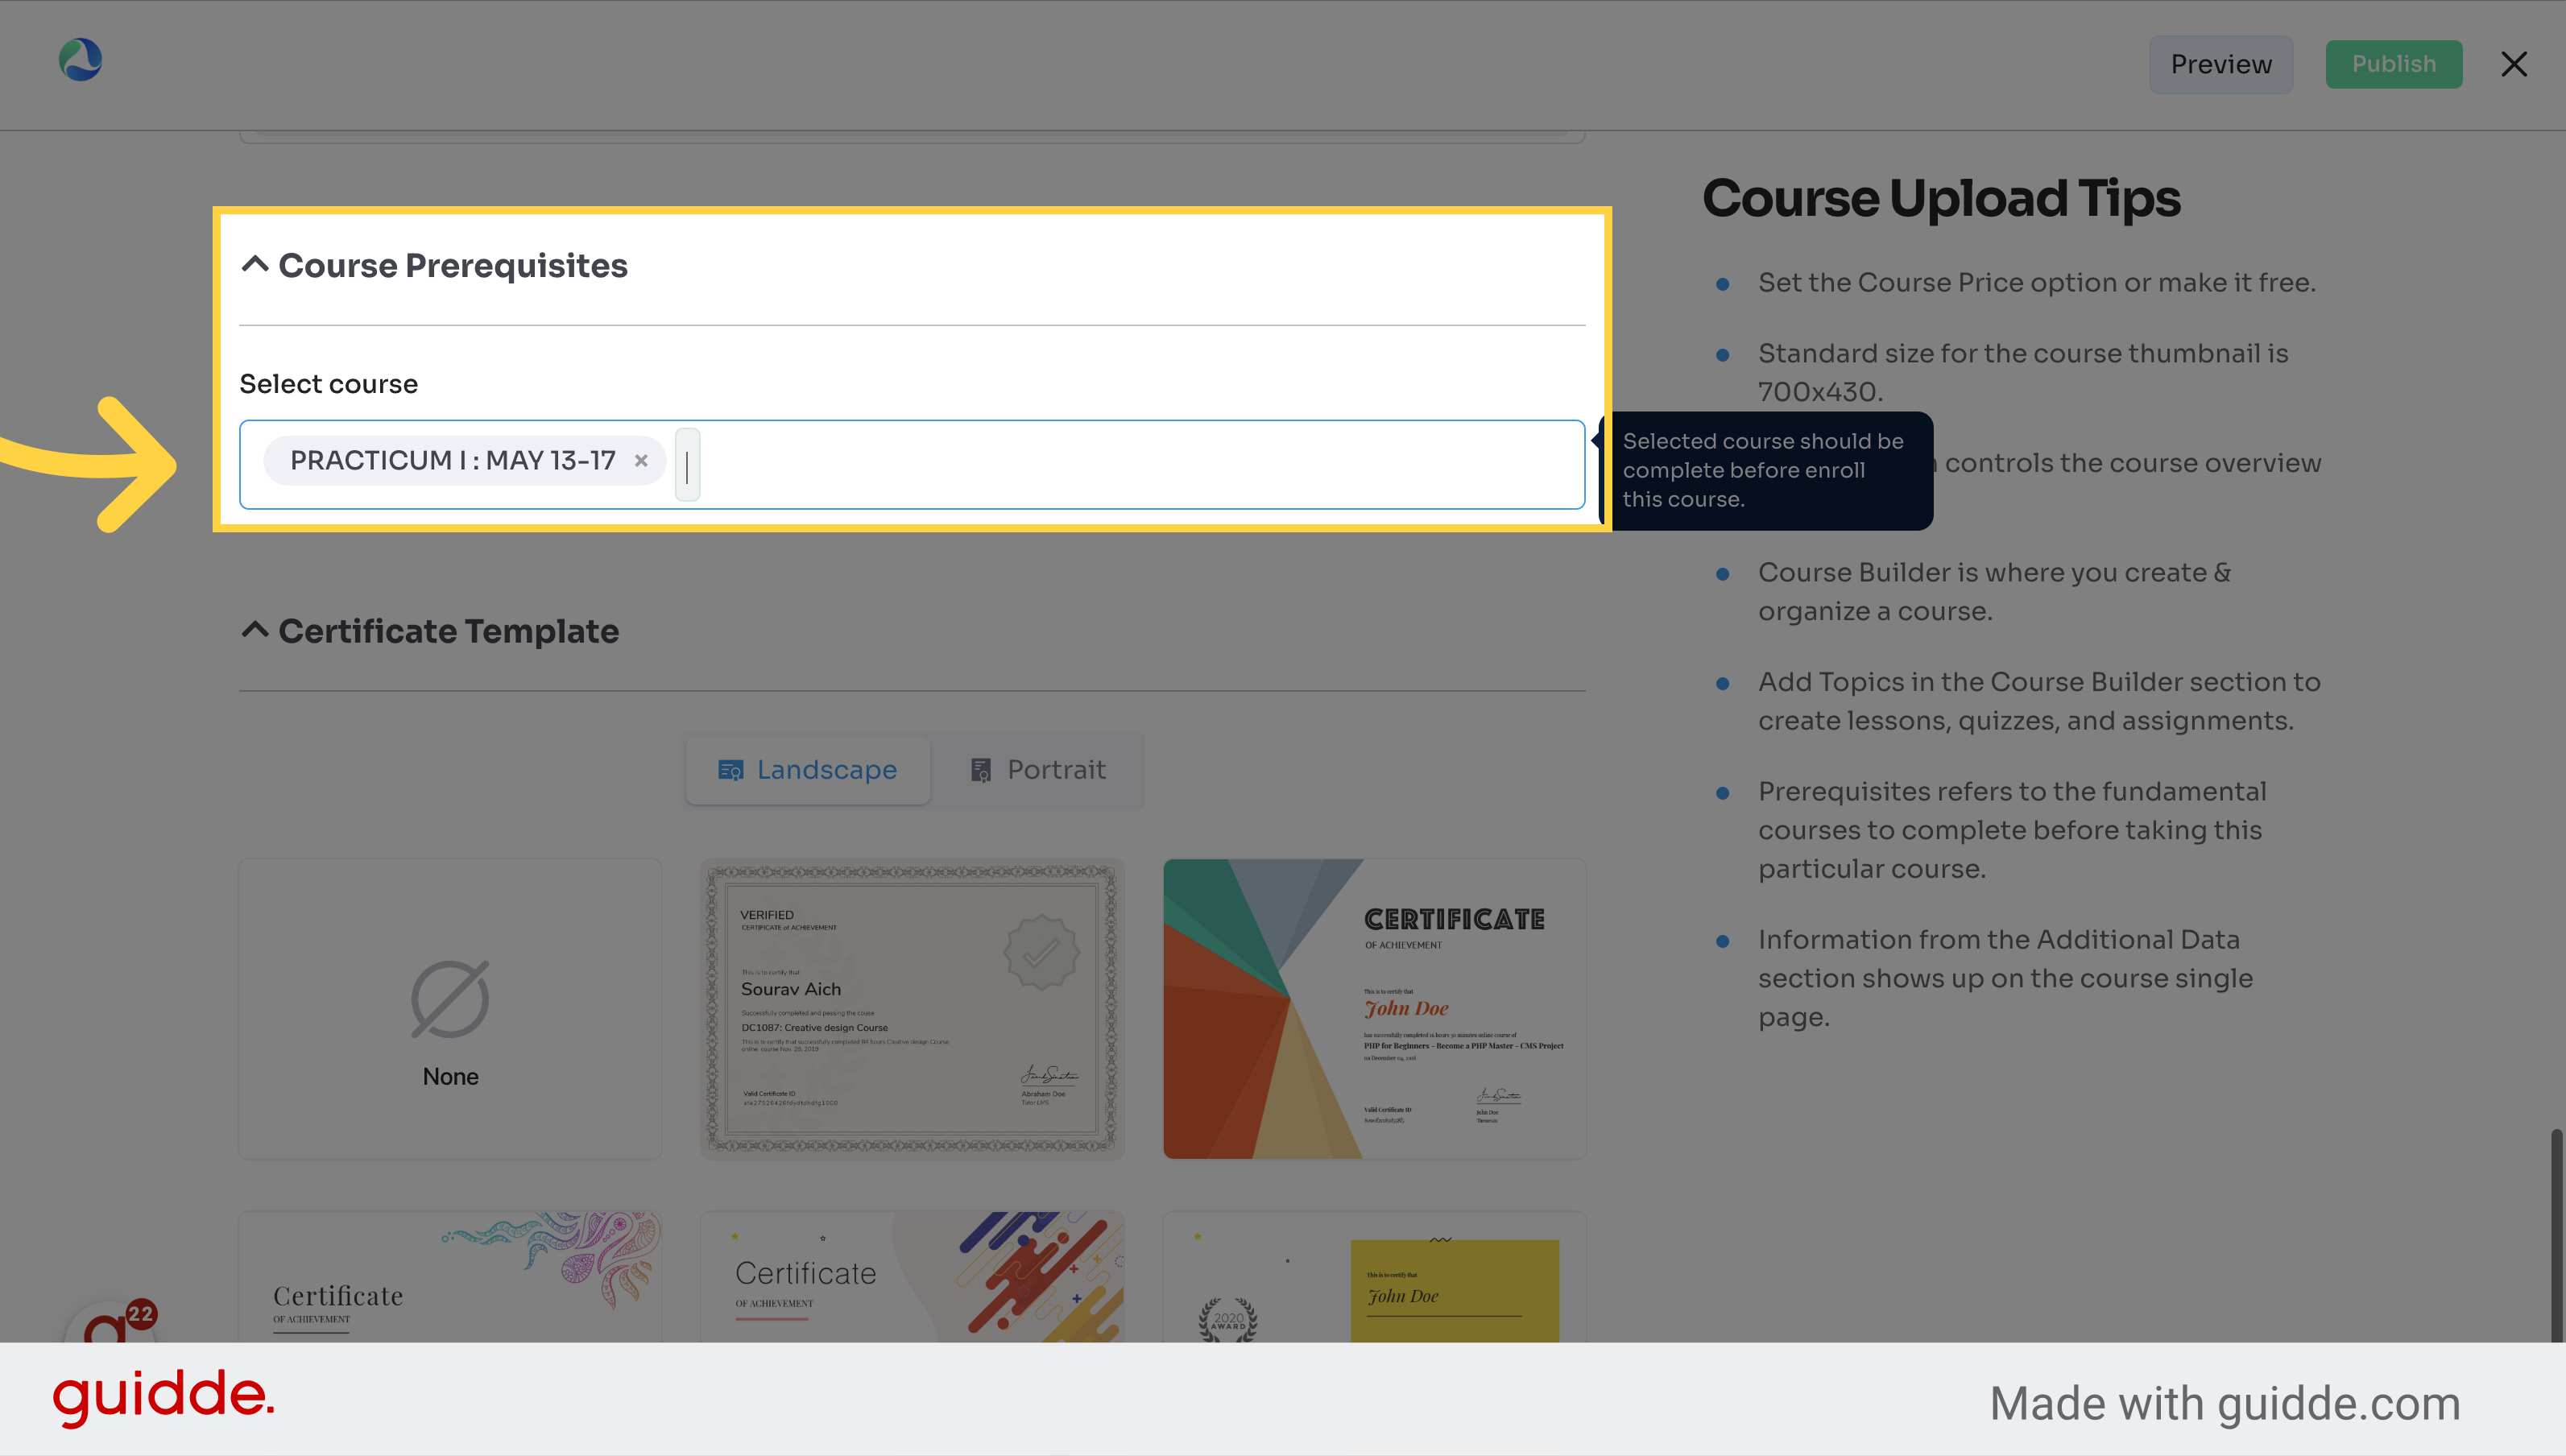
17. Select or type from the list
View details of the course section.
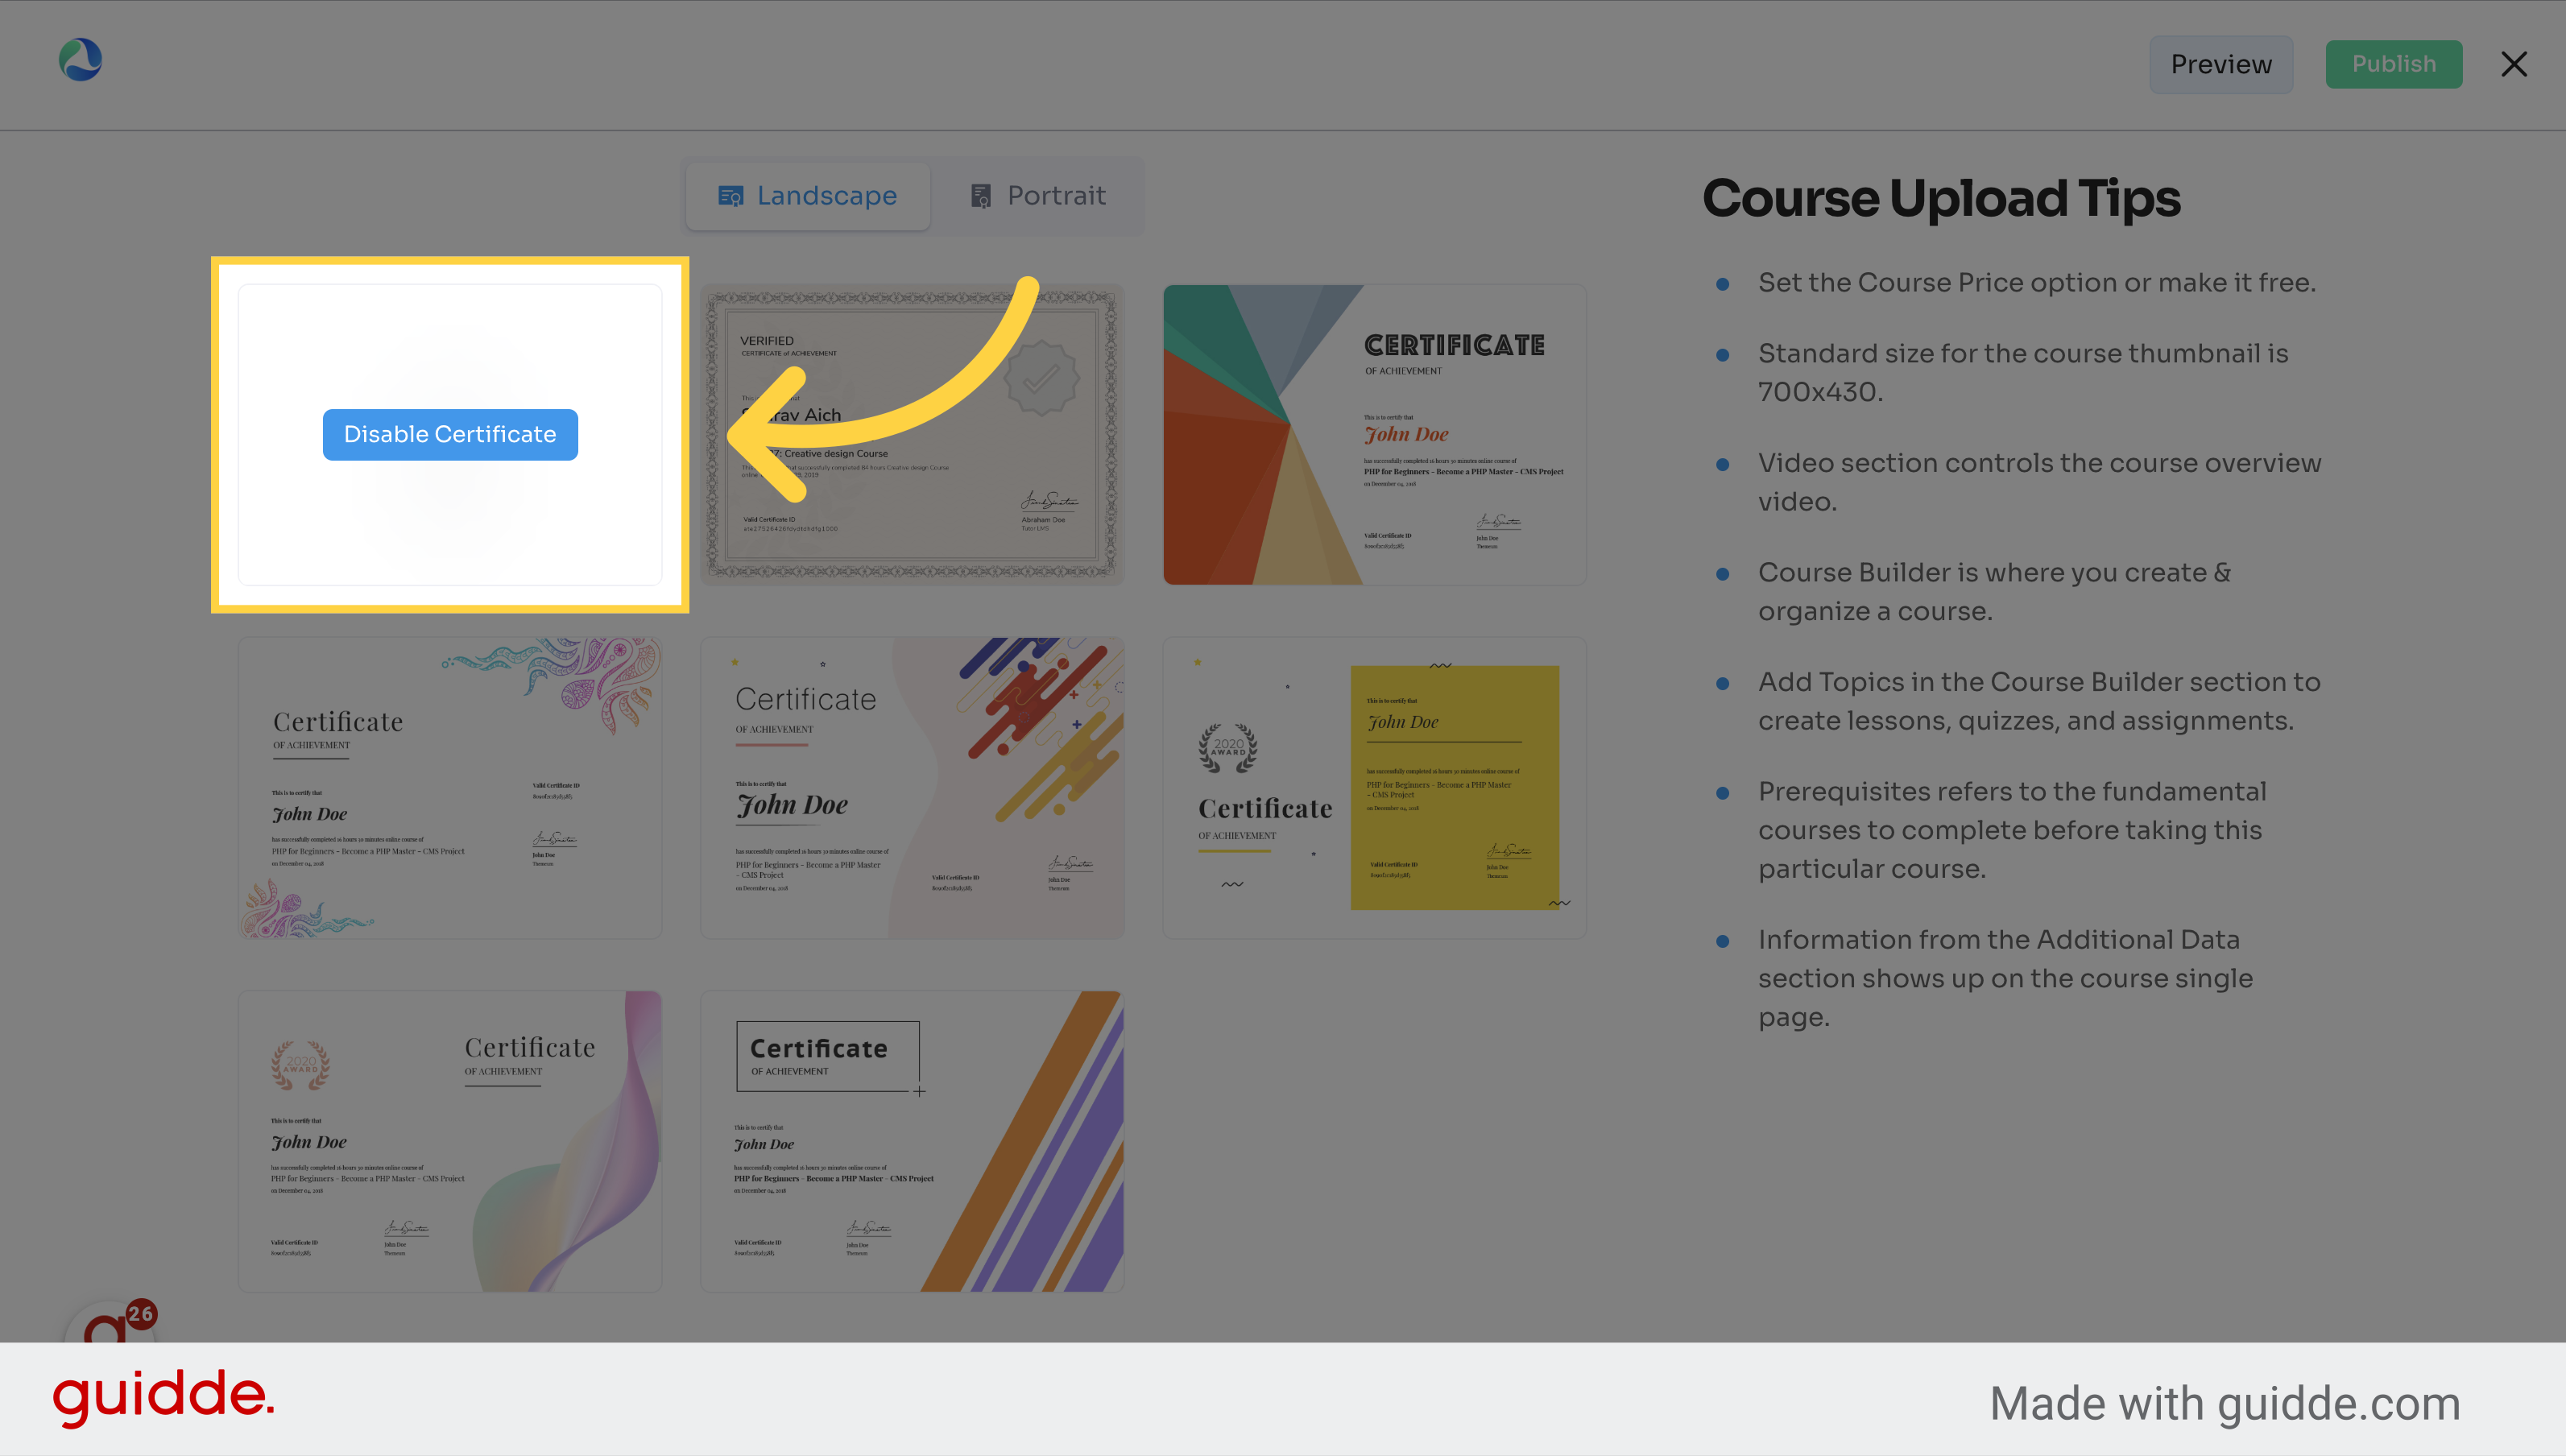
18. Choose a Certificate or Disable a Certificate
Turn off certificate option for the course.
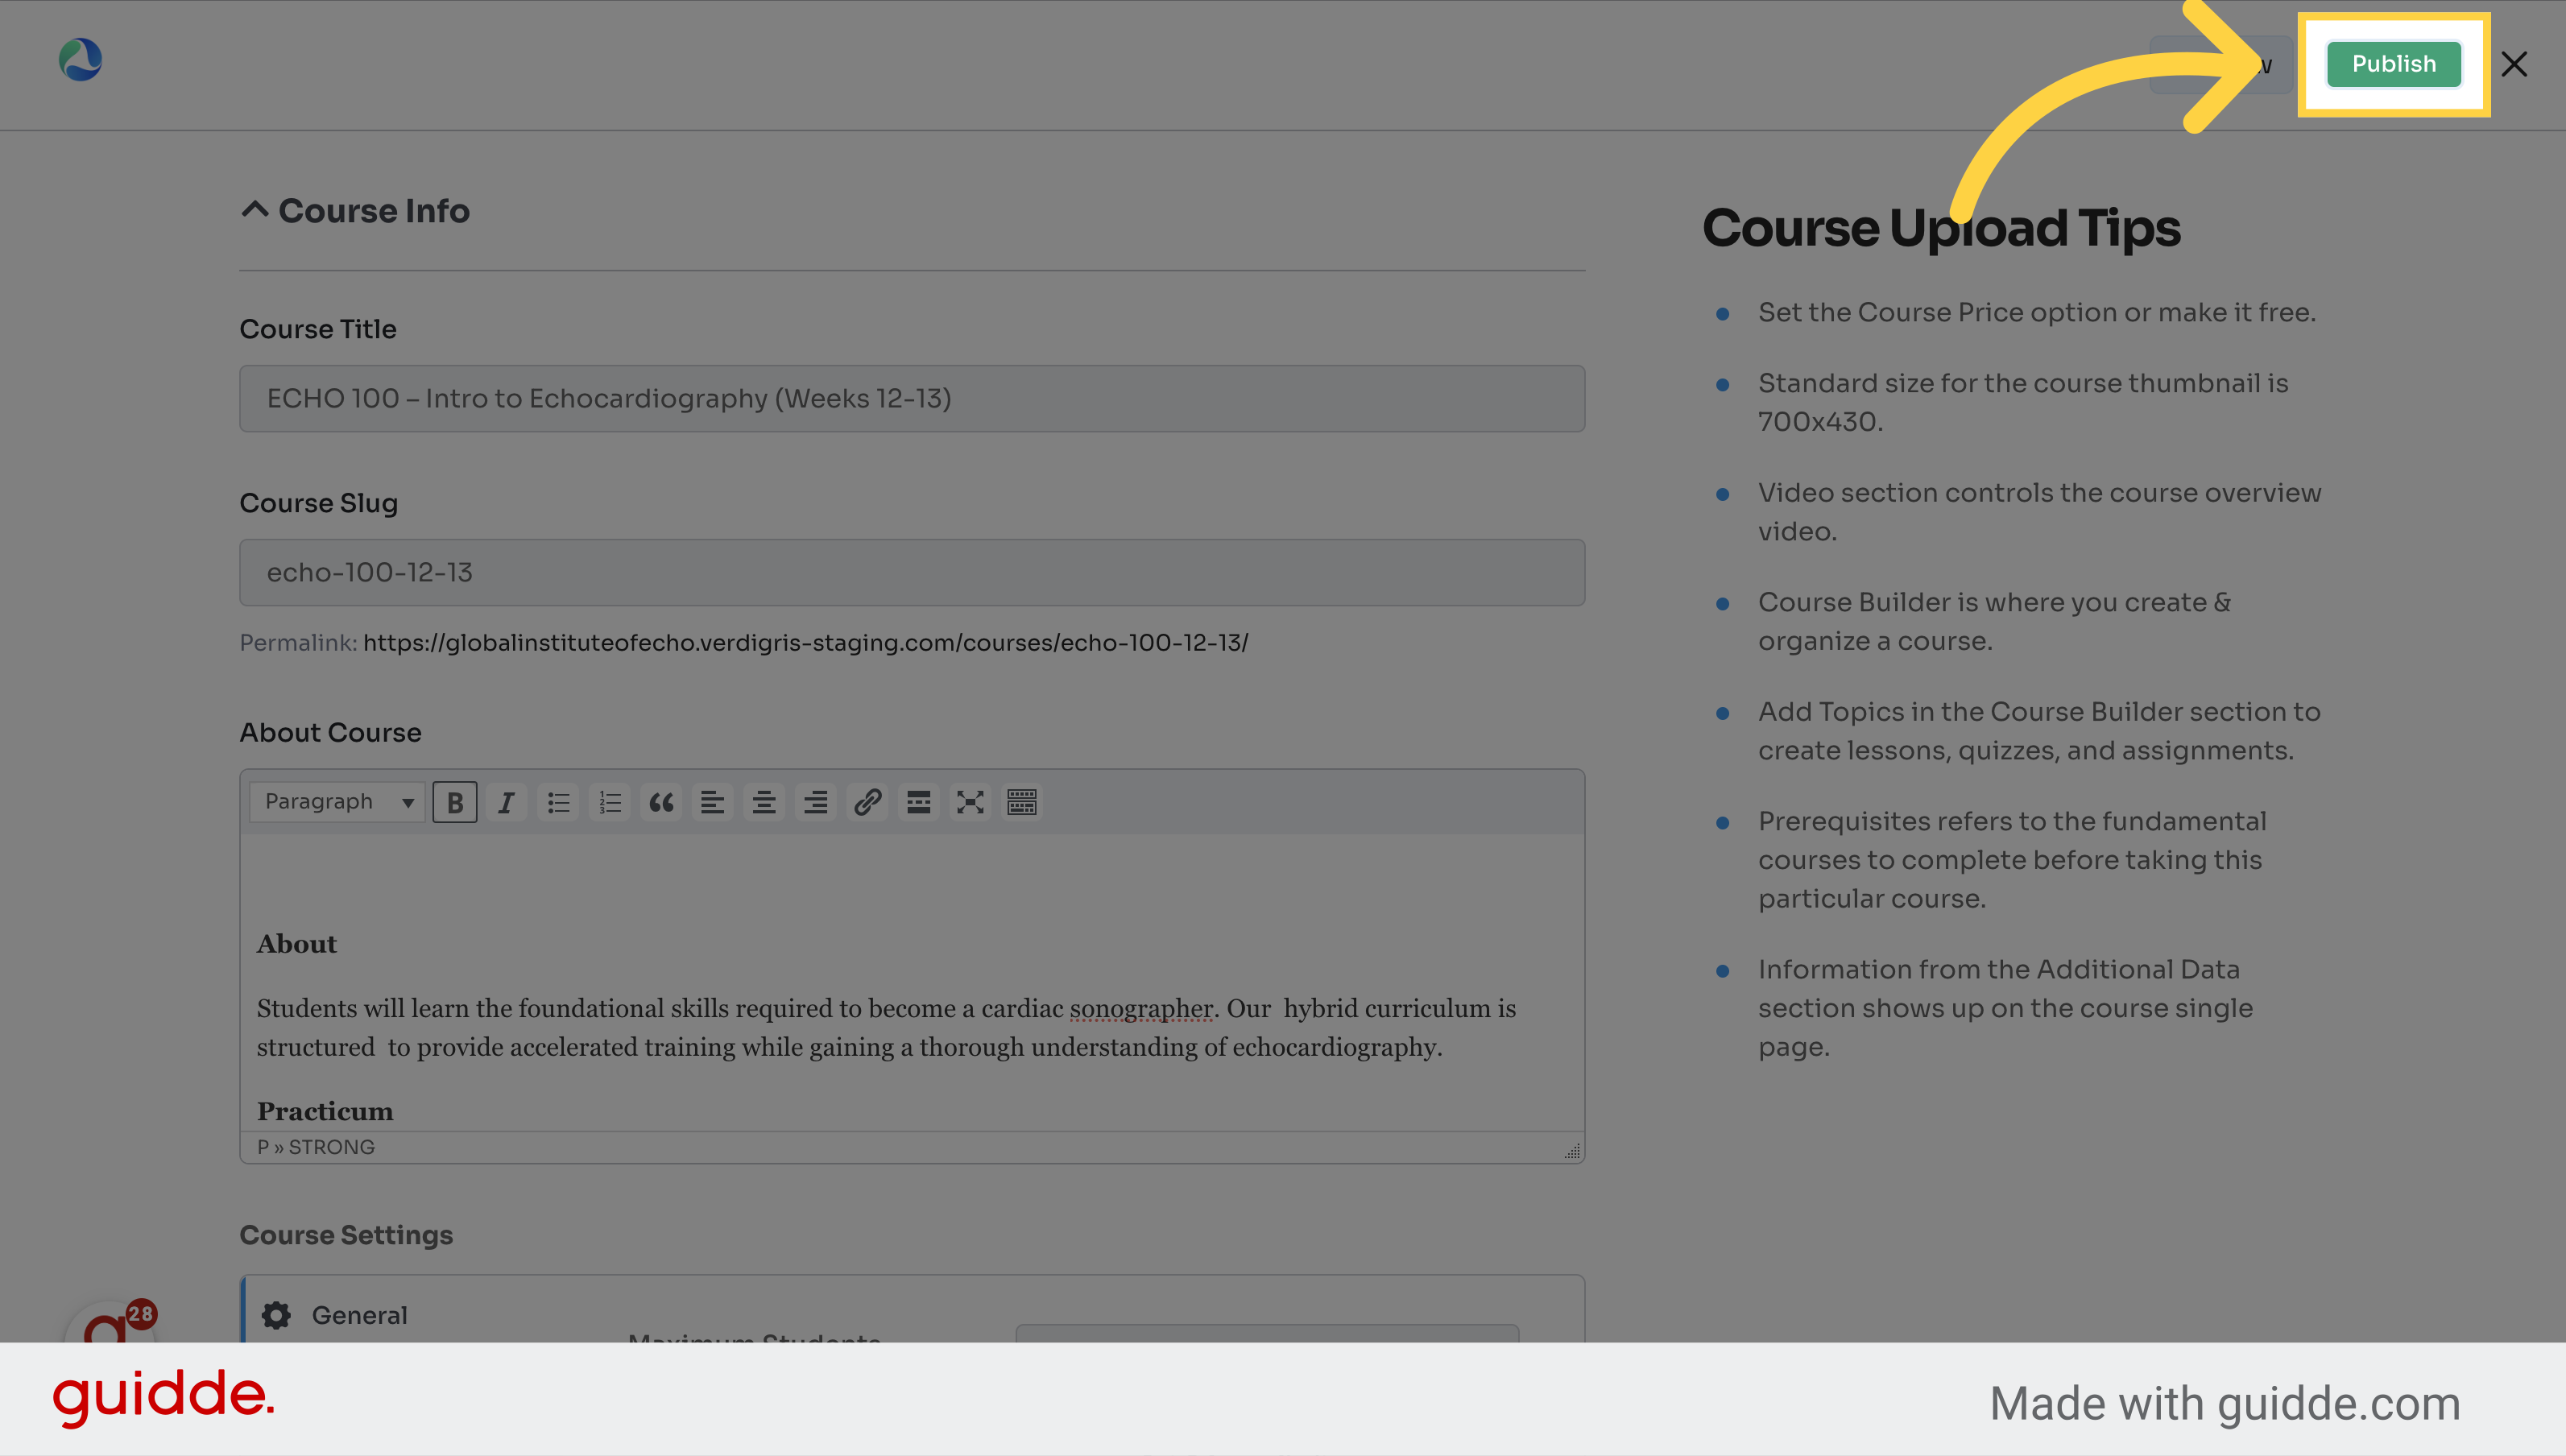
19. Click "publish_course"
Publish the course.
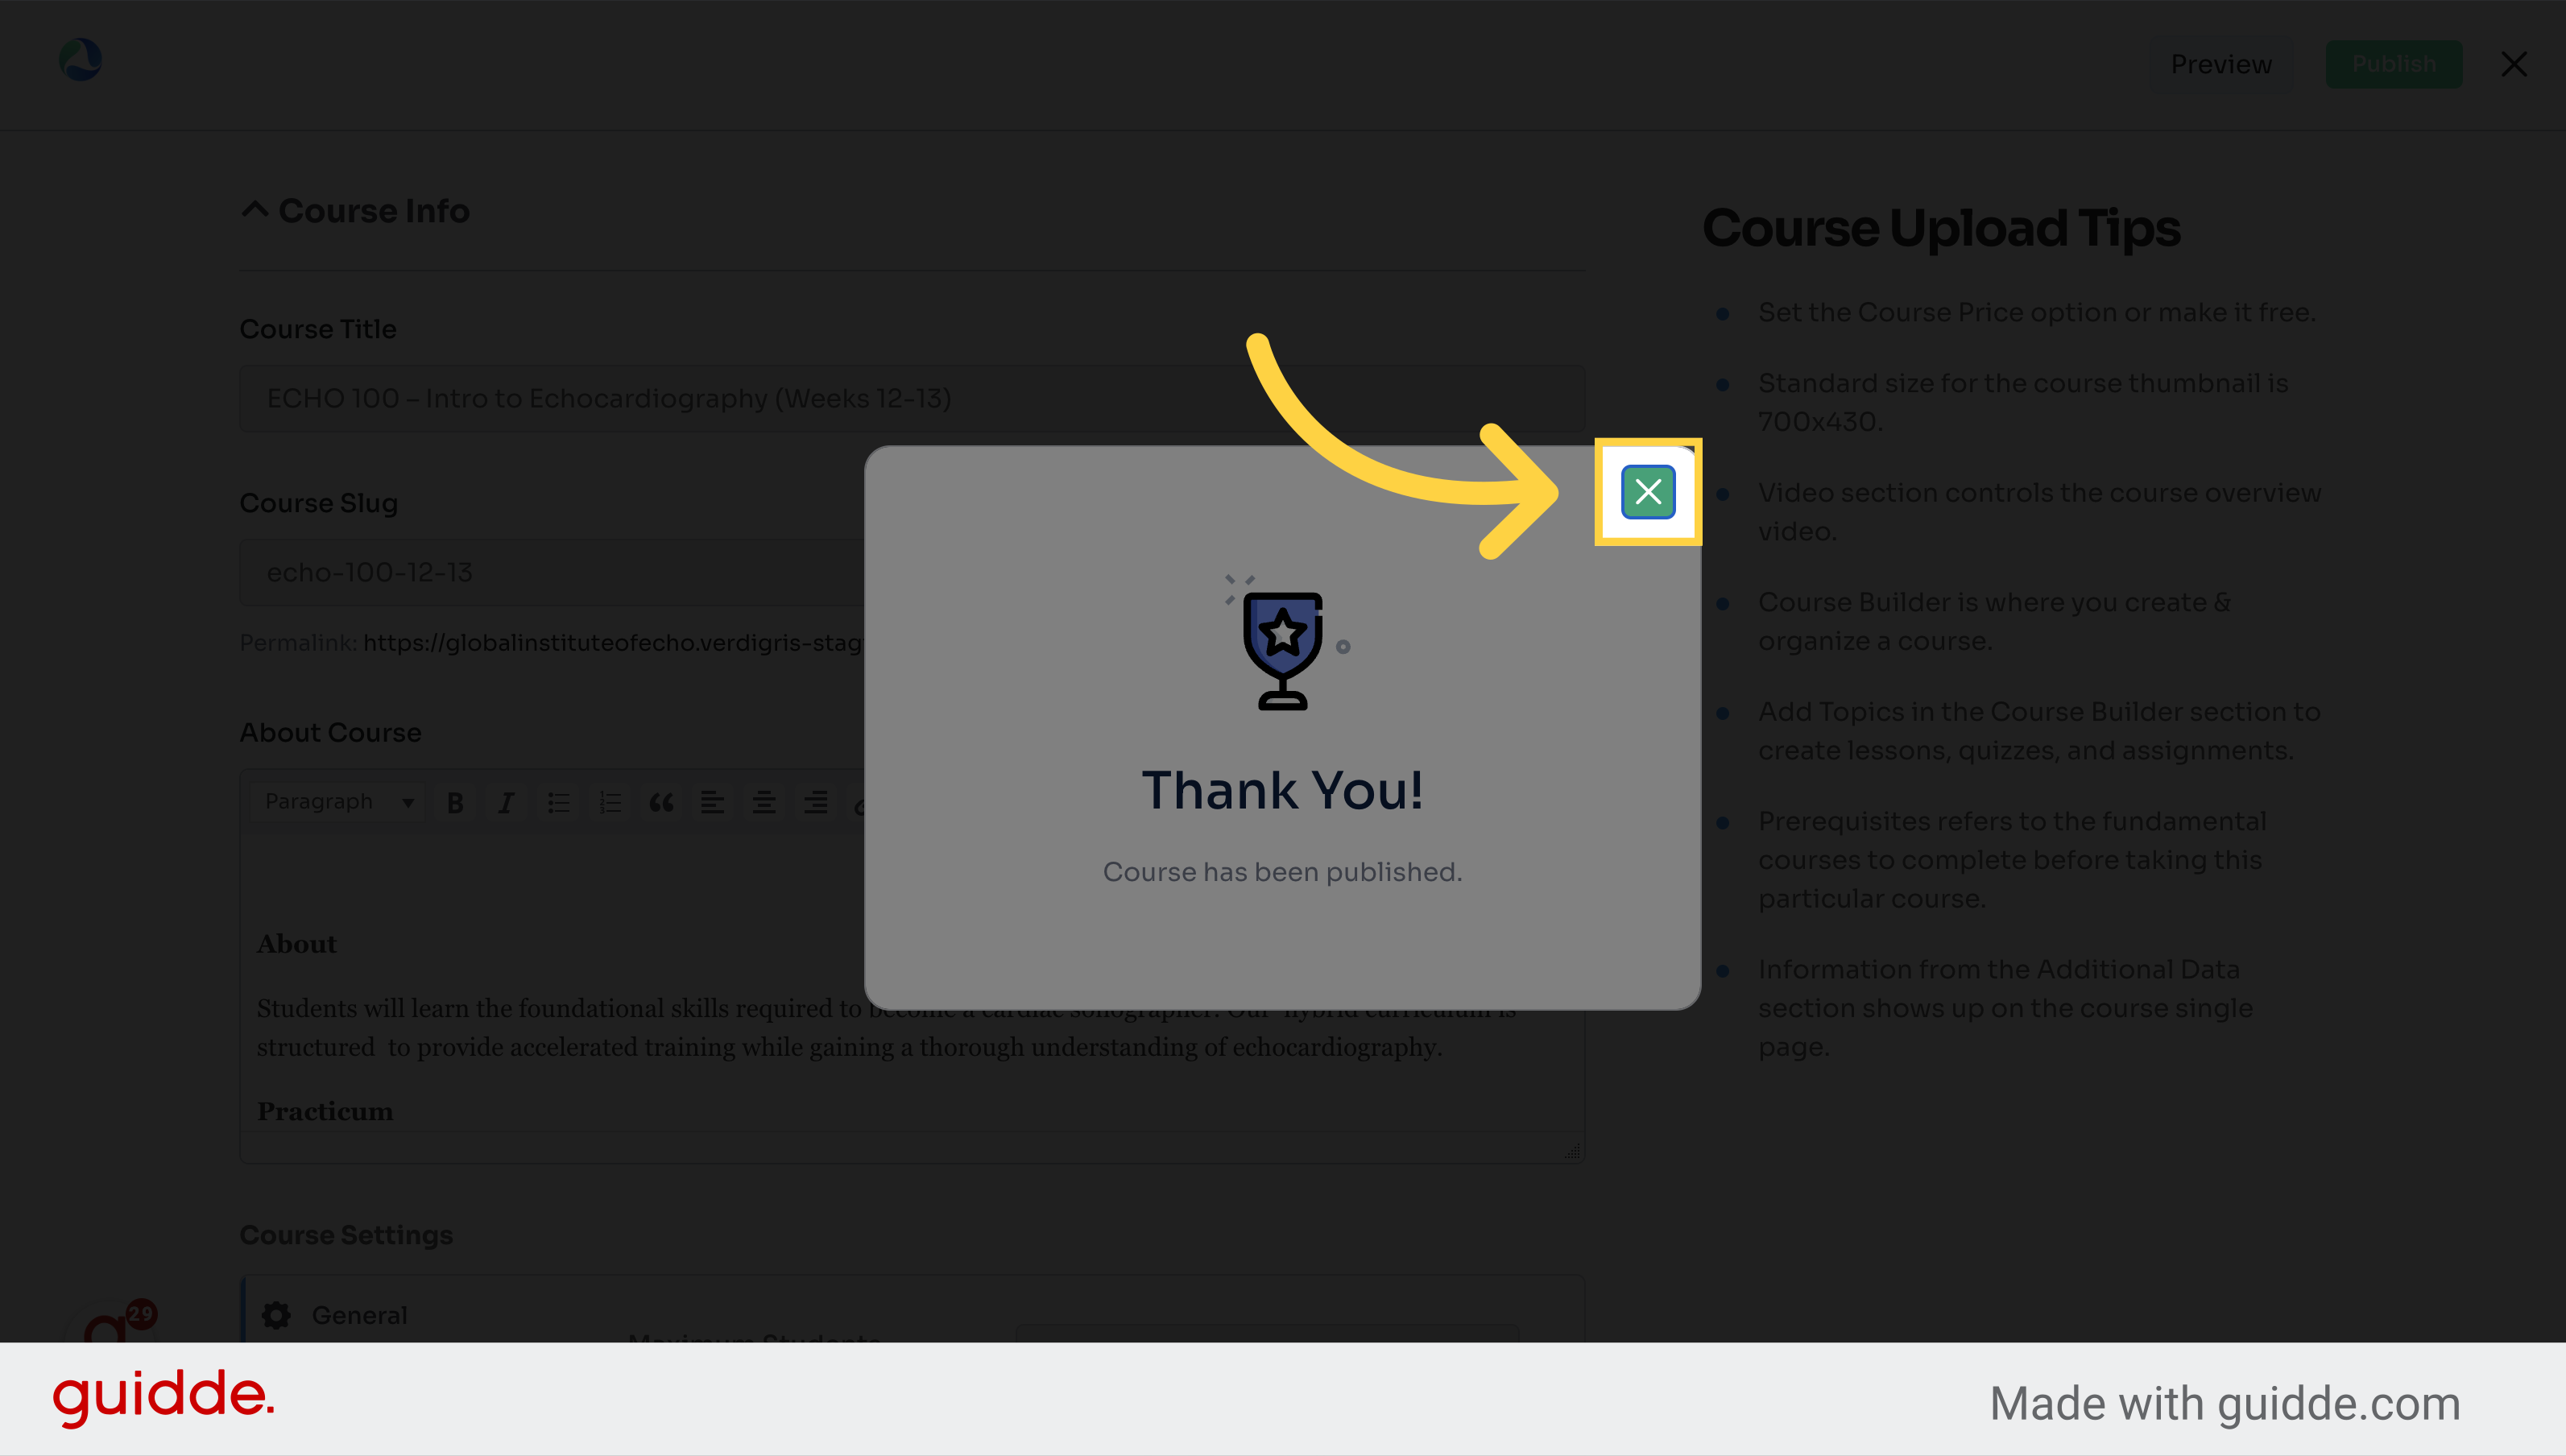
20. Click here
Select this field
21. Click here
Navigate to this section
The guide covered essential actions like adding images, scheduling sessions, managing attachments, and publishing a course in the LMS platform. Follow the steps to edit courses seamlessly.
How to Add a Lesson
Learn how to efficiently add a lesson to a course. From accessing and selecting the course to setting up video sources and content drip settings, this guide covers each step to streamline your employee training process.
1. Click "My Courses" from the Dashboard
Access "My Courses" section.
2. Click here to edit the course
Click here
3. Click here on the topic / week to edit
Click the selected button
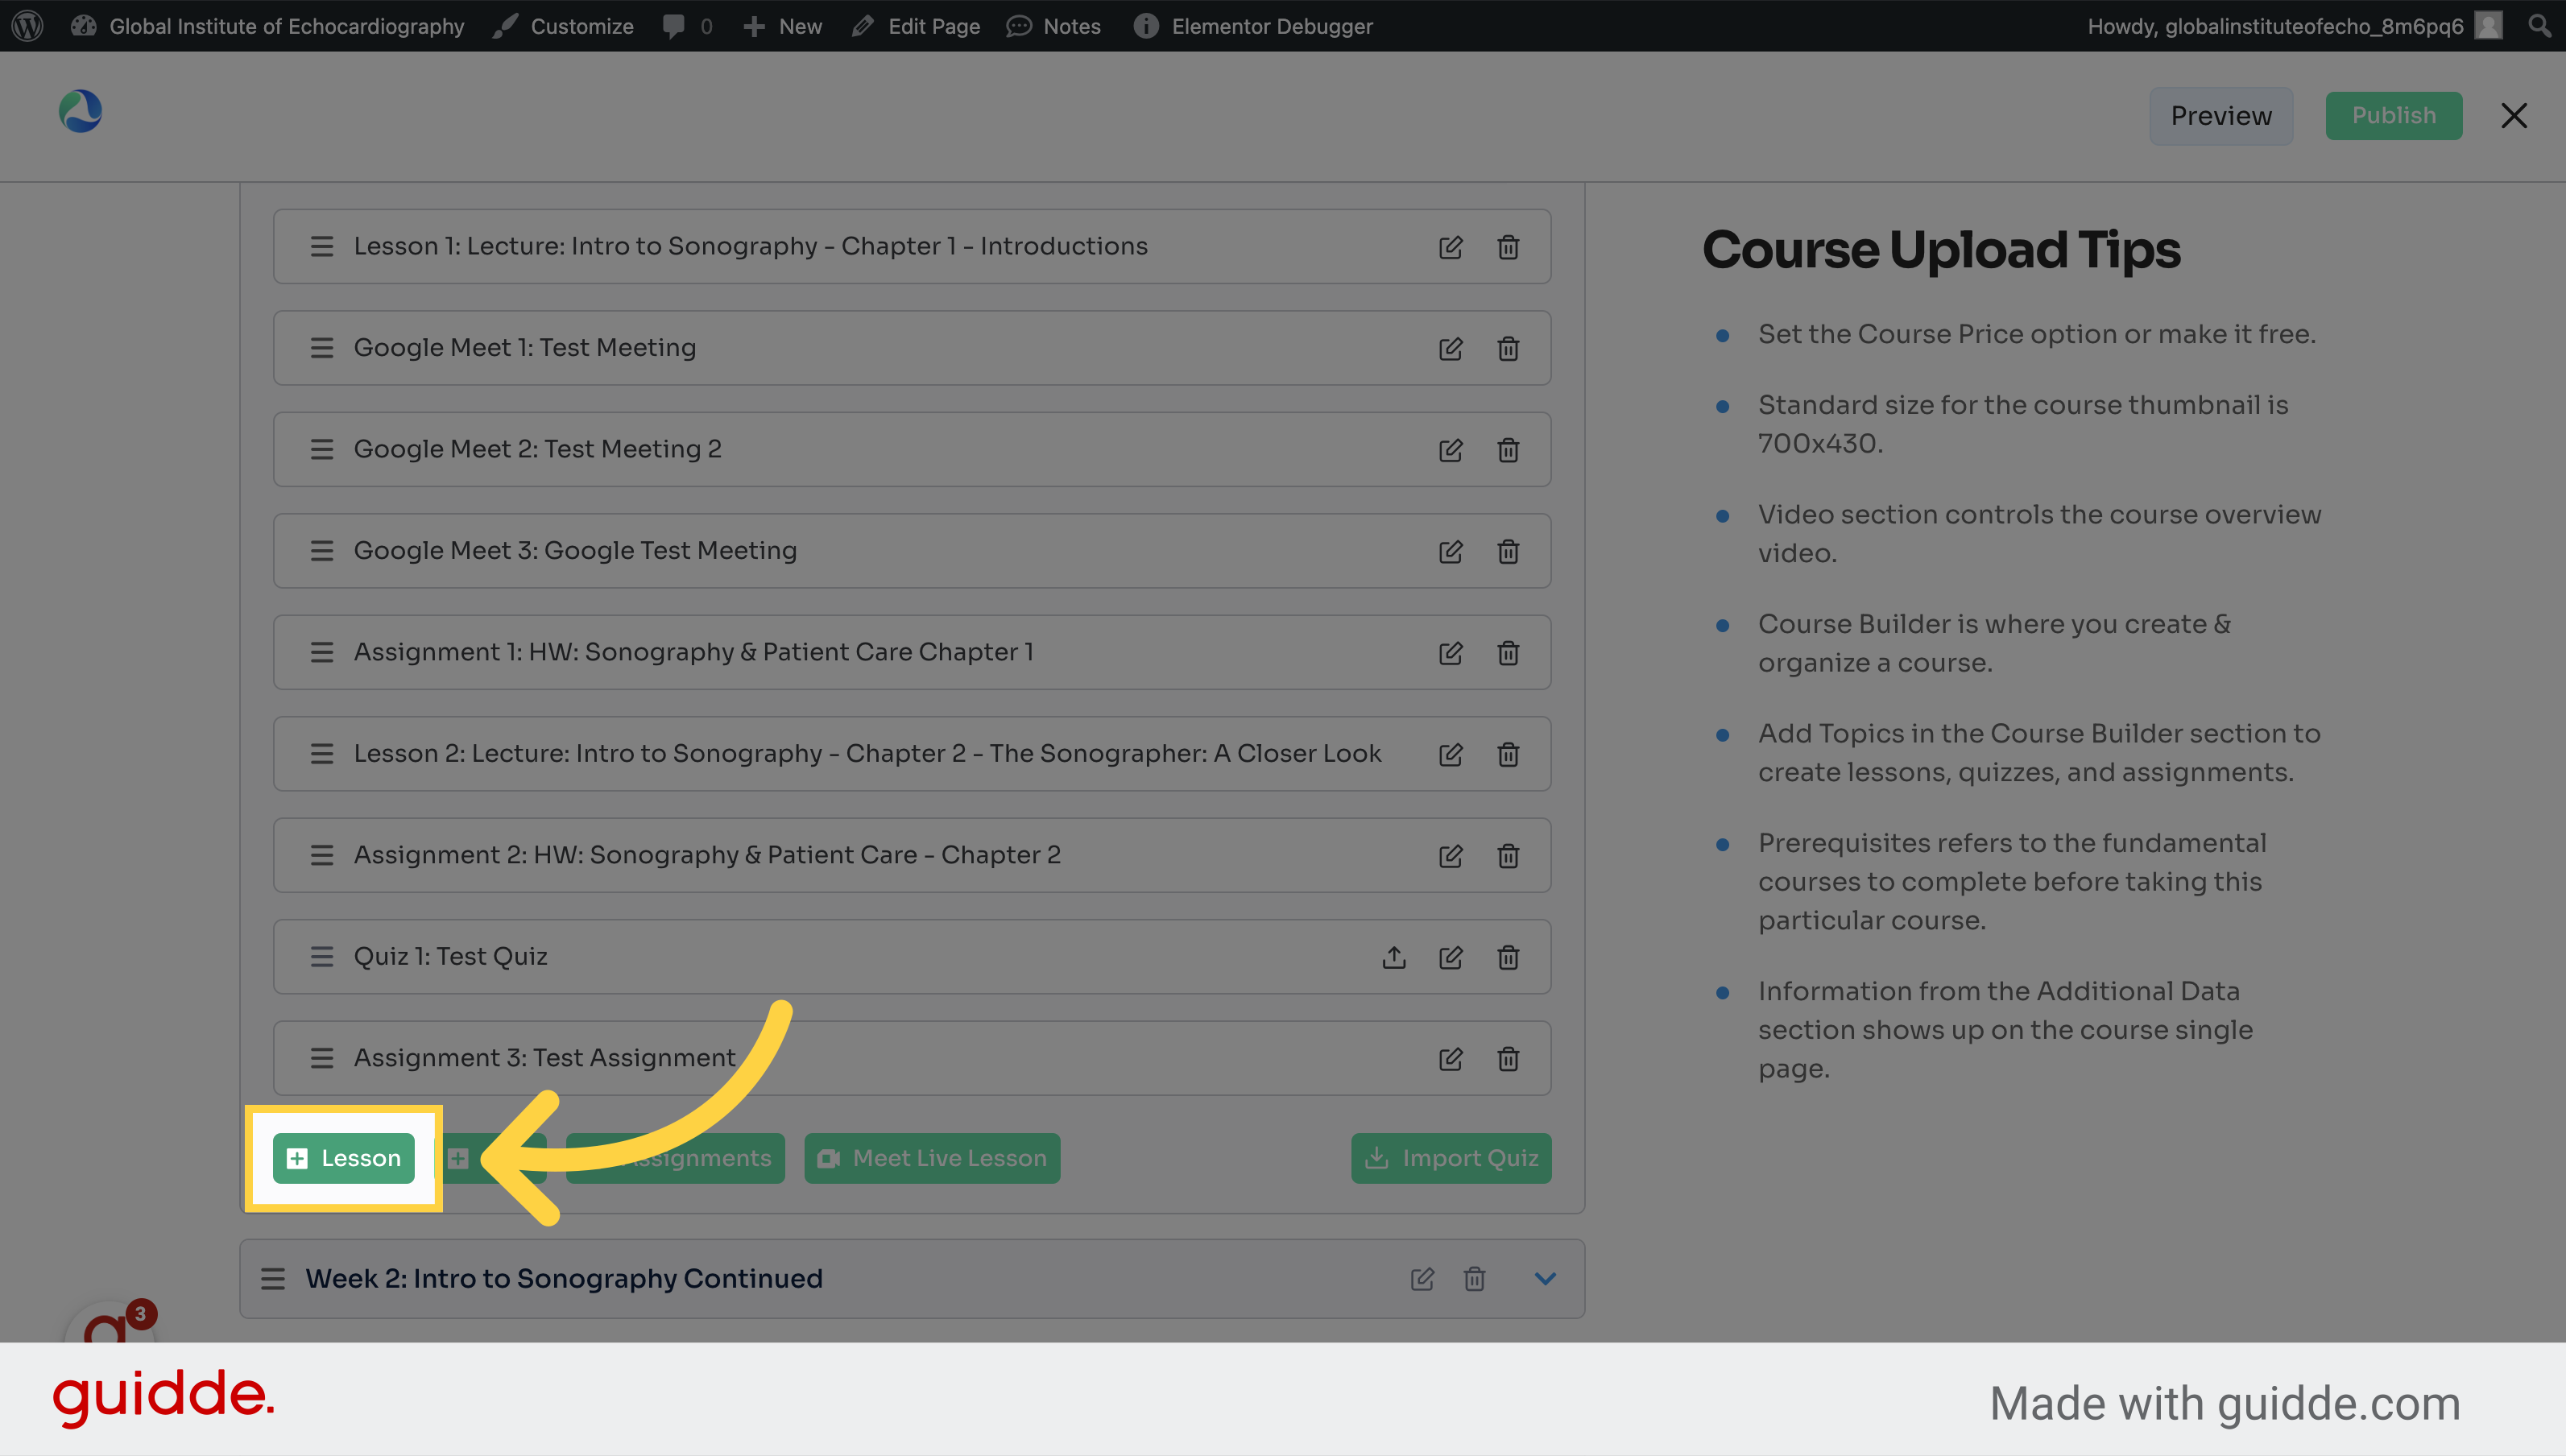
4. Click "+ Lesson"
Choose the option to add a new lesson.
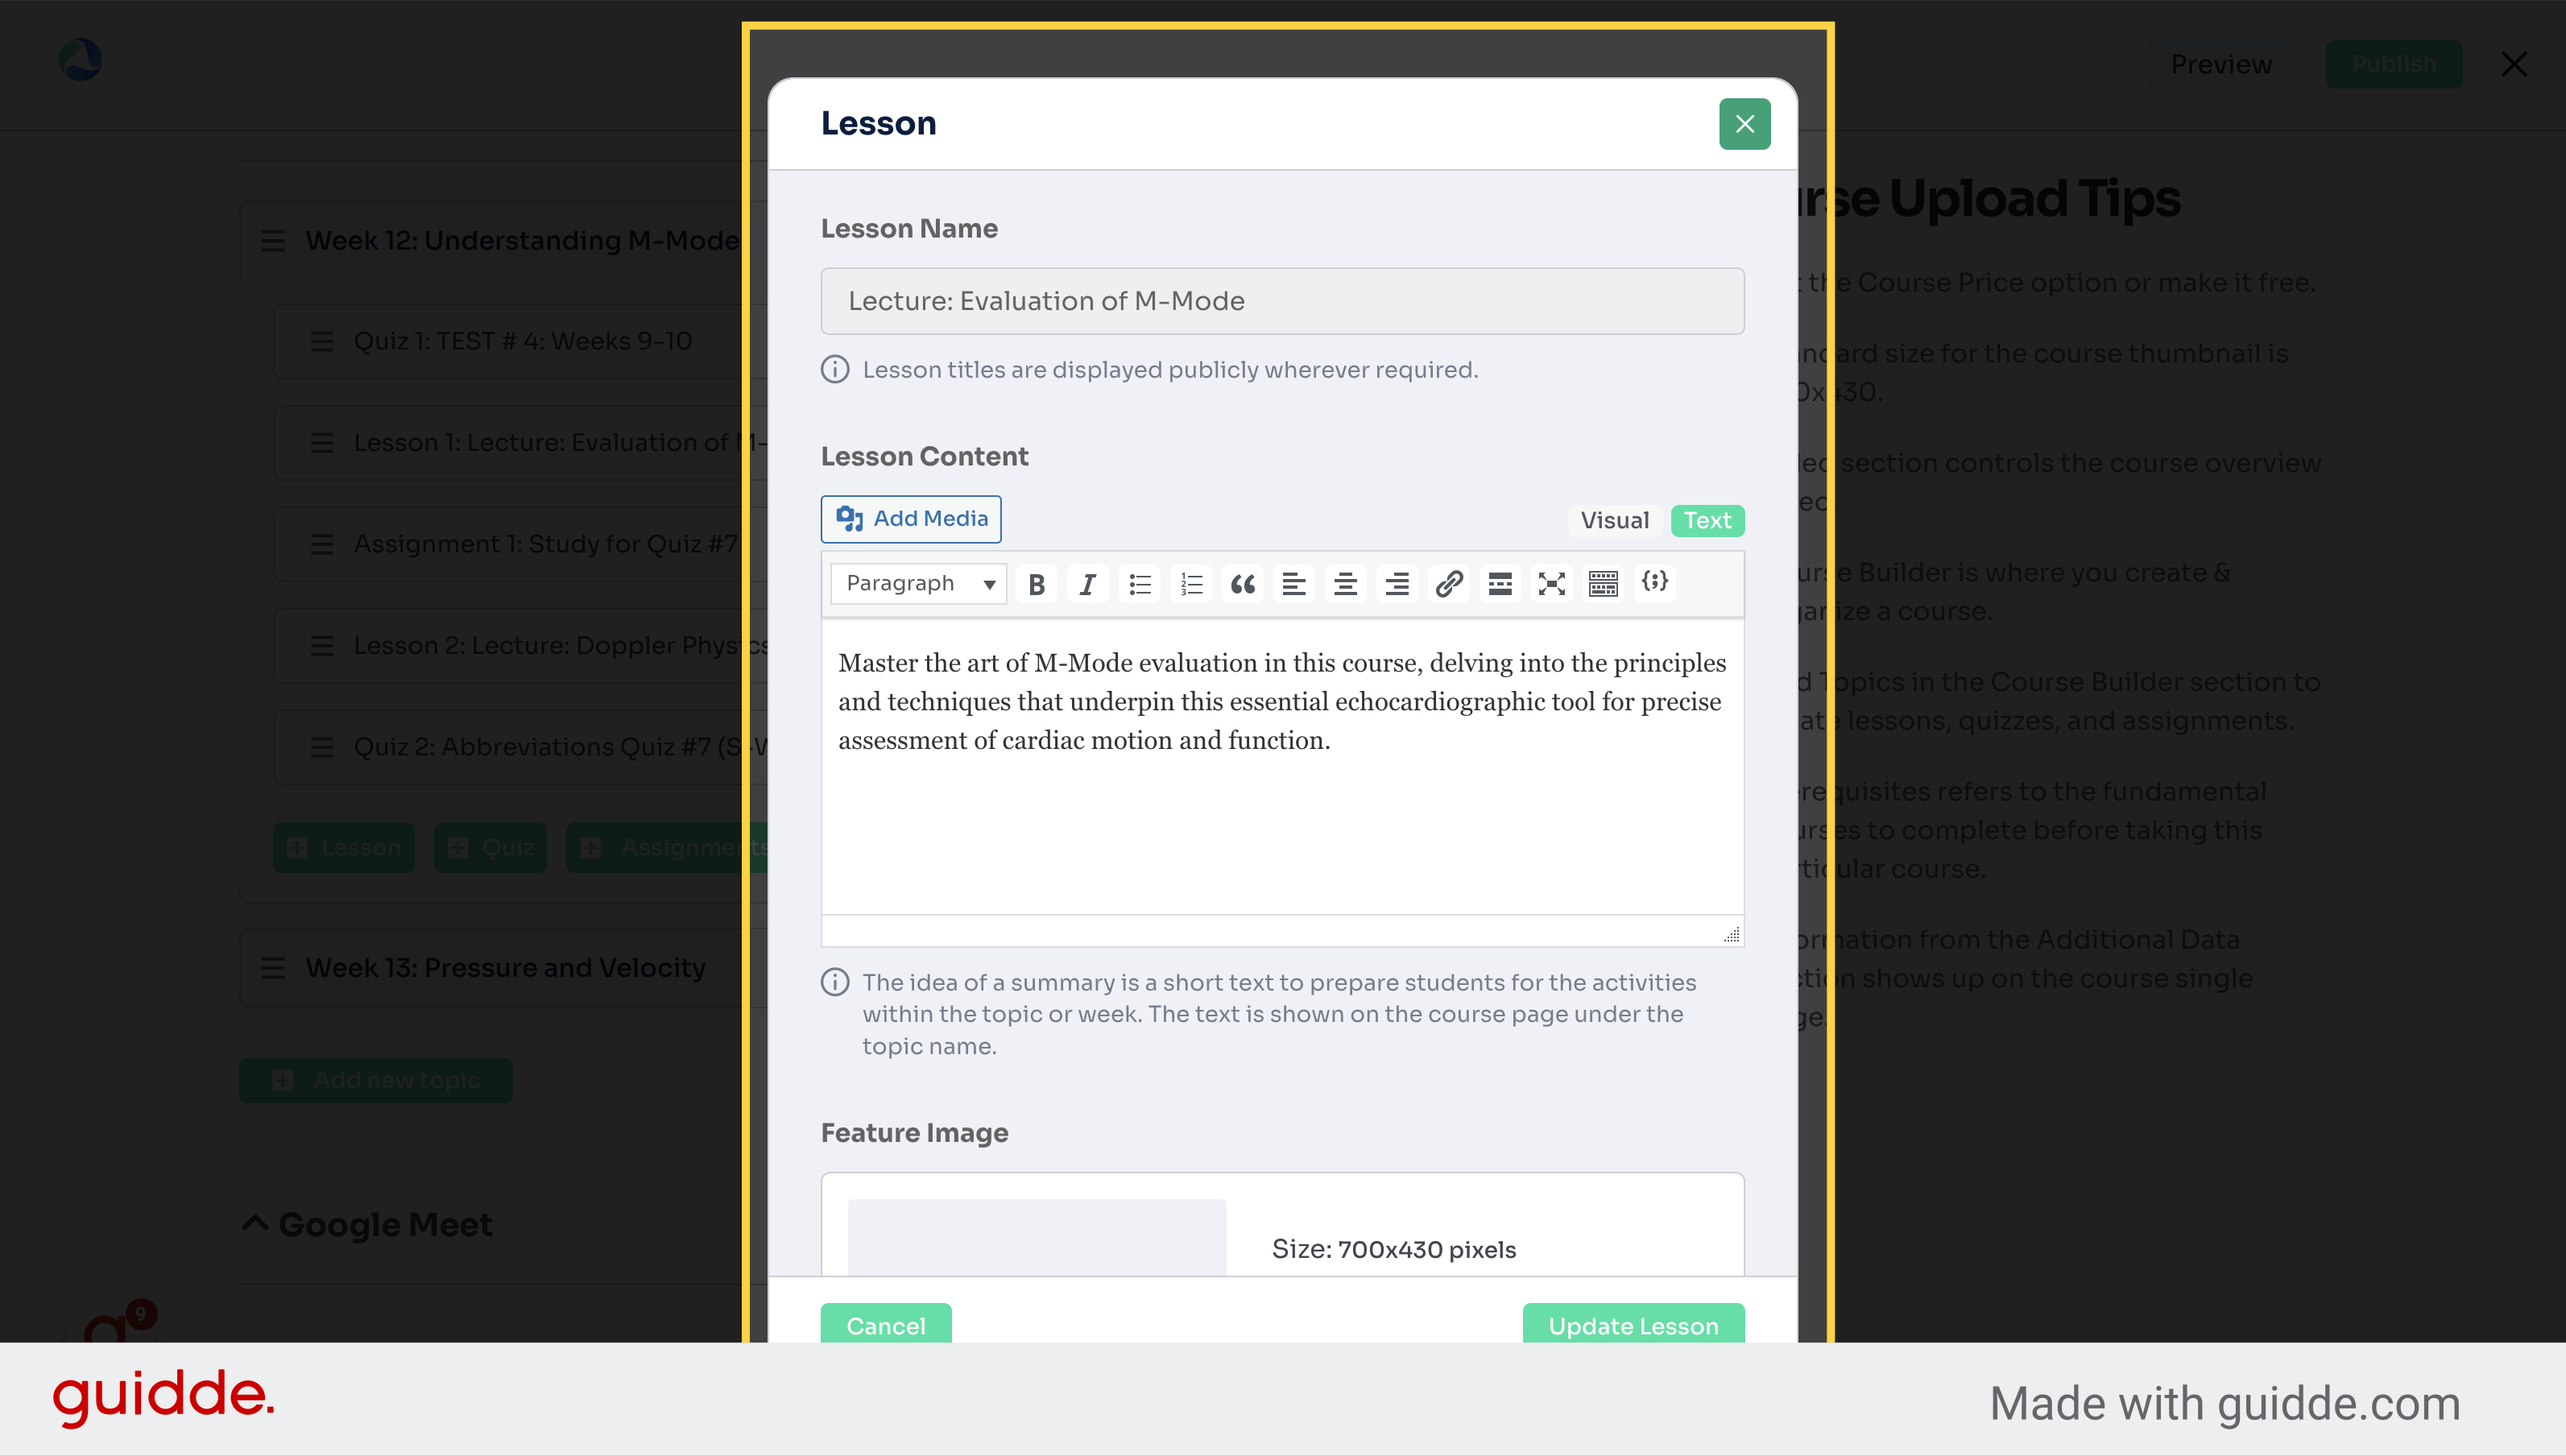
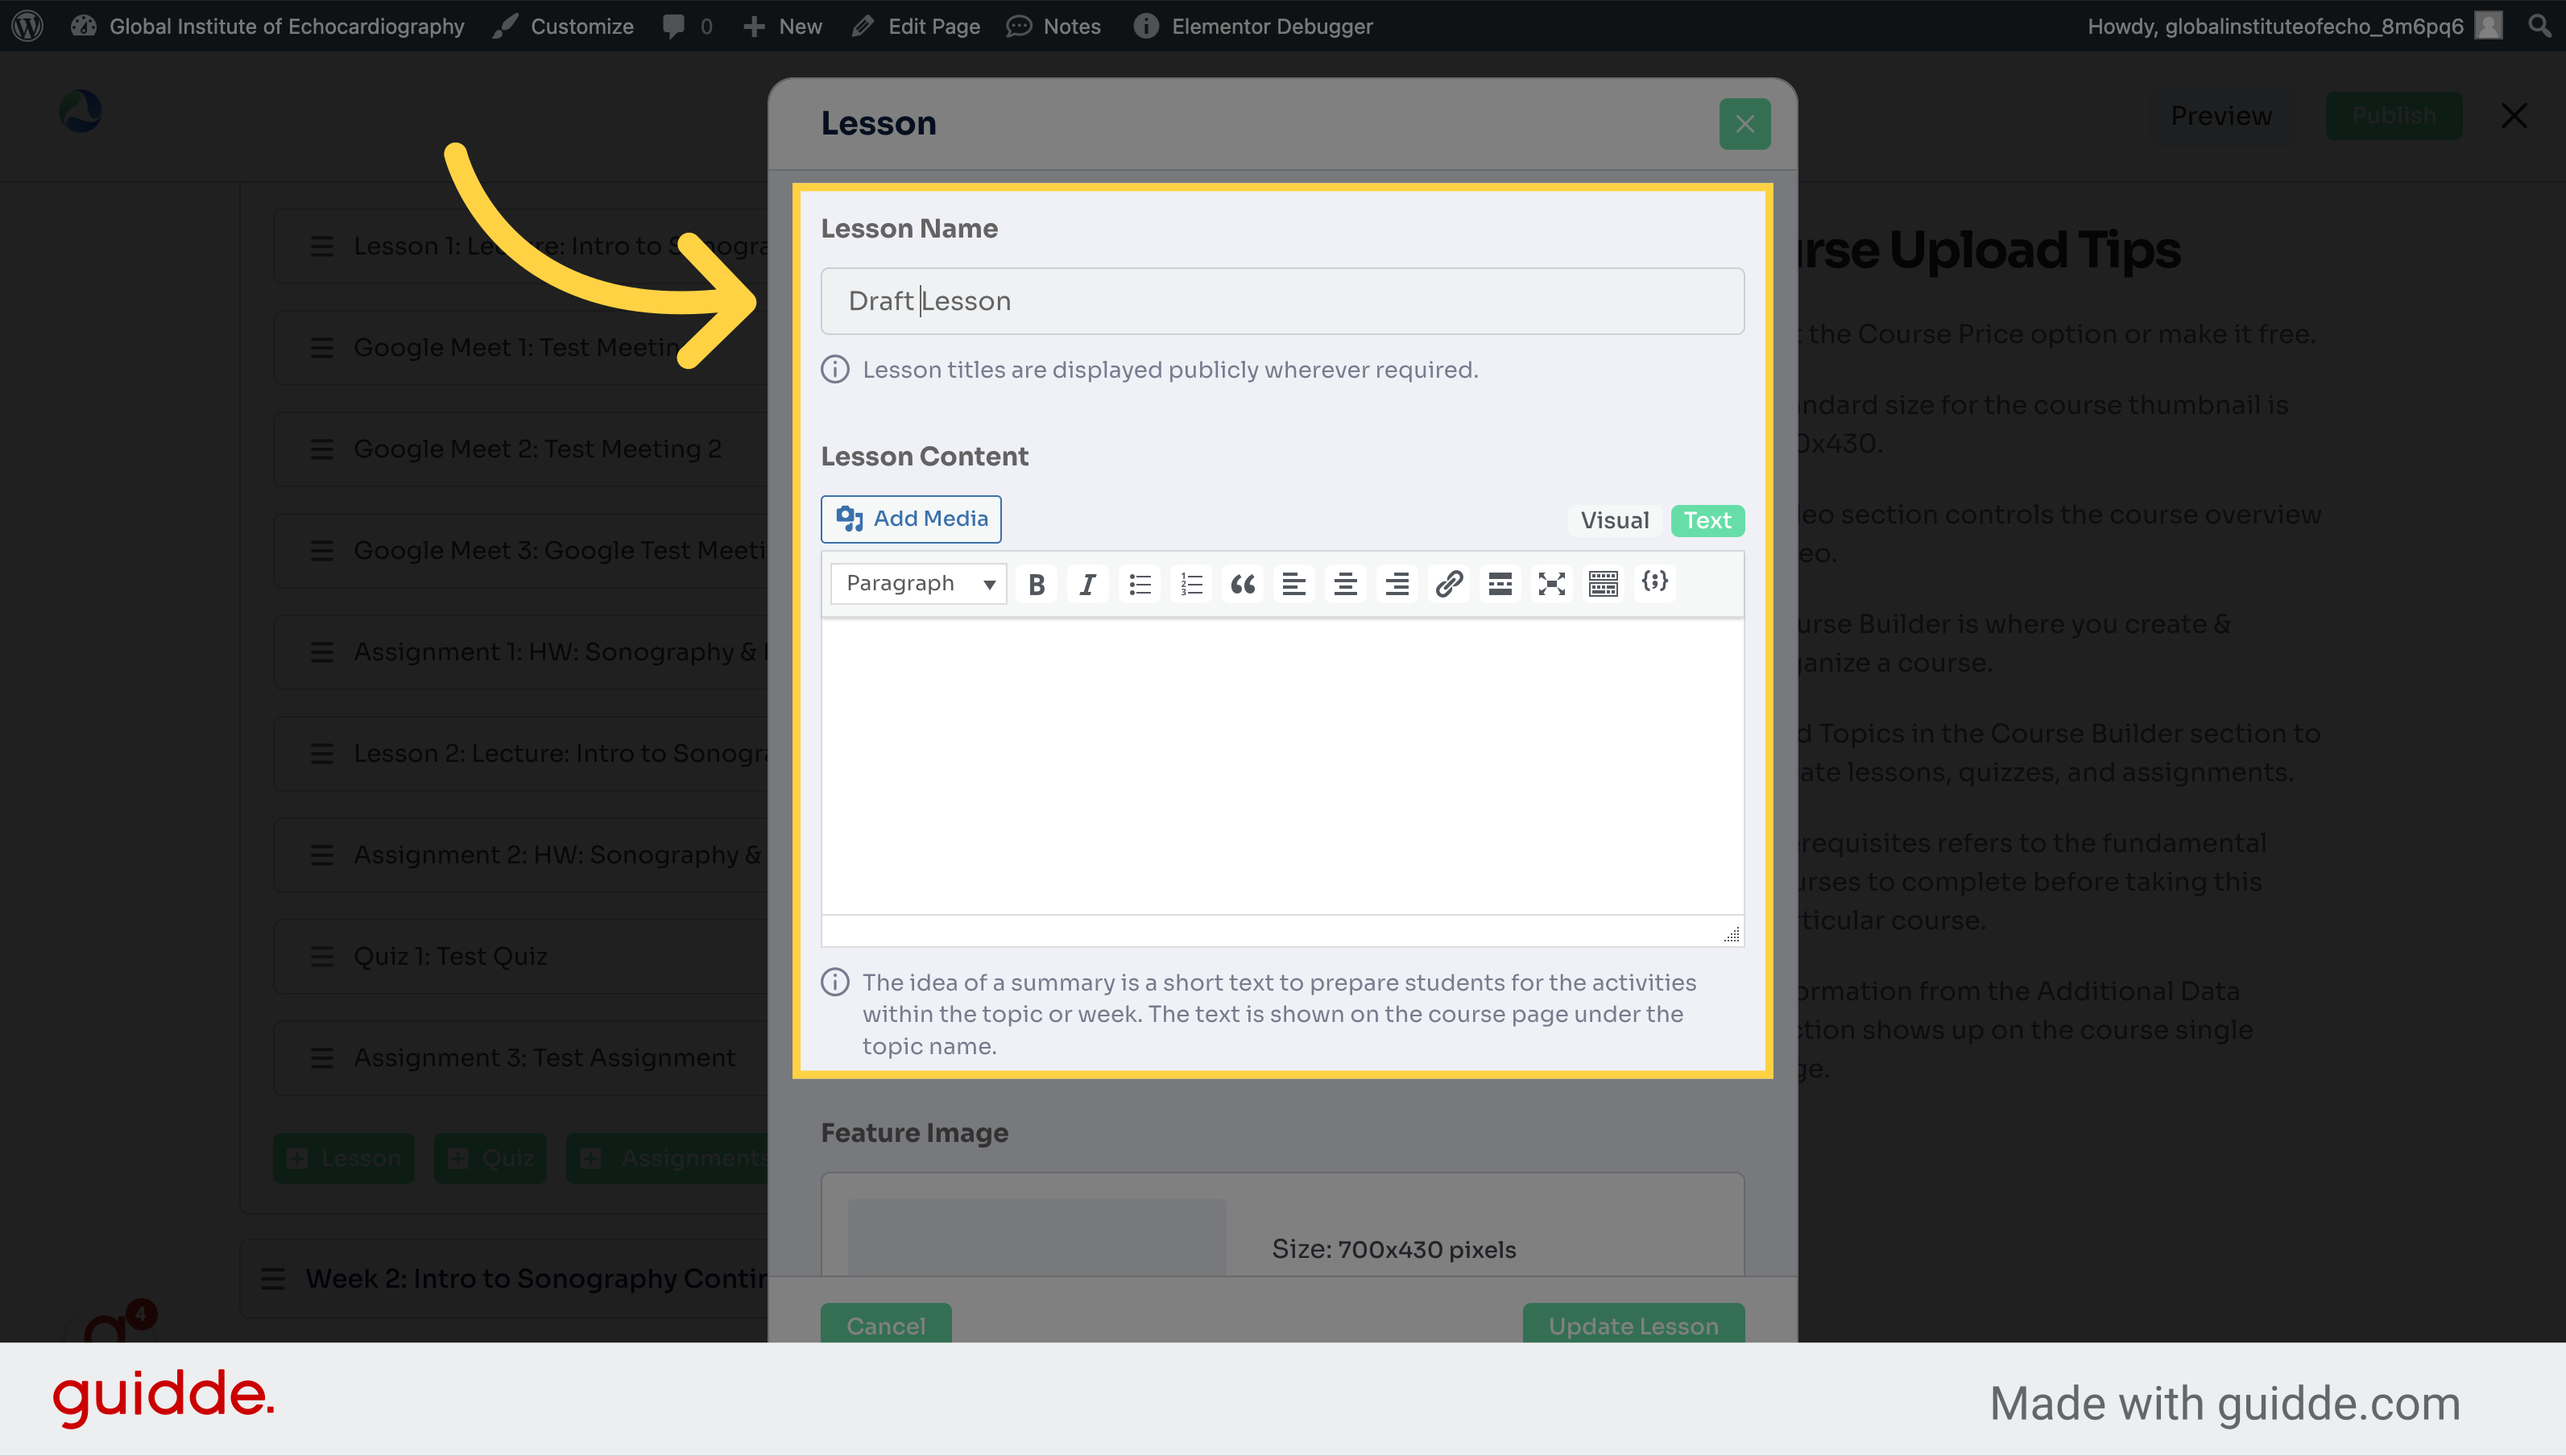
5. Enter the Lesson Name and and Content
Start creating a new lesson in draft mode.
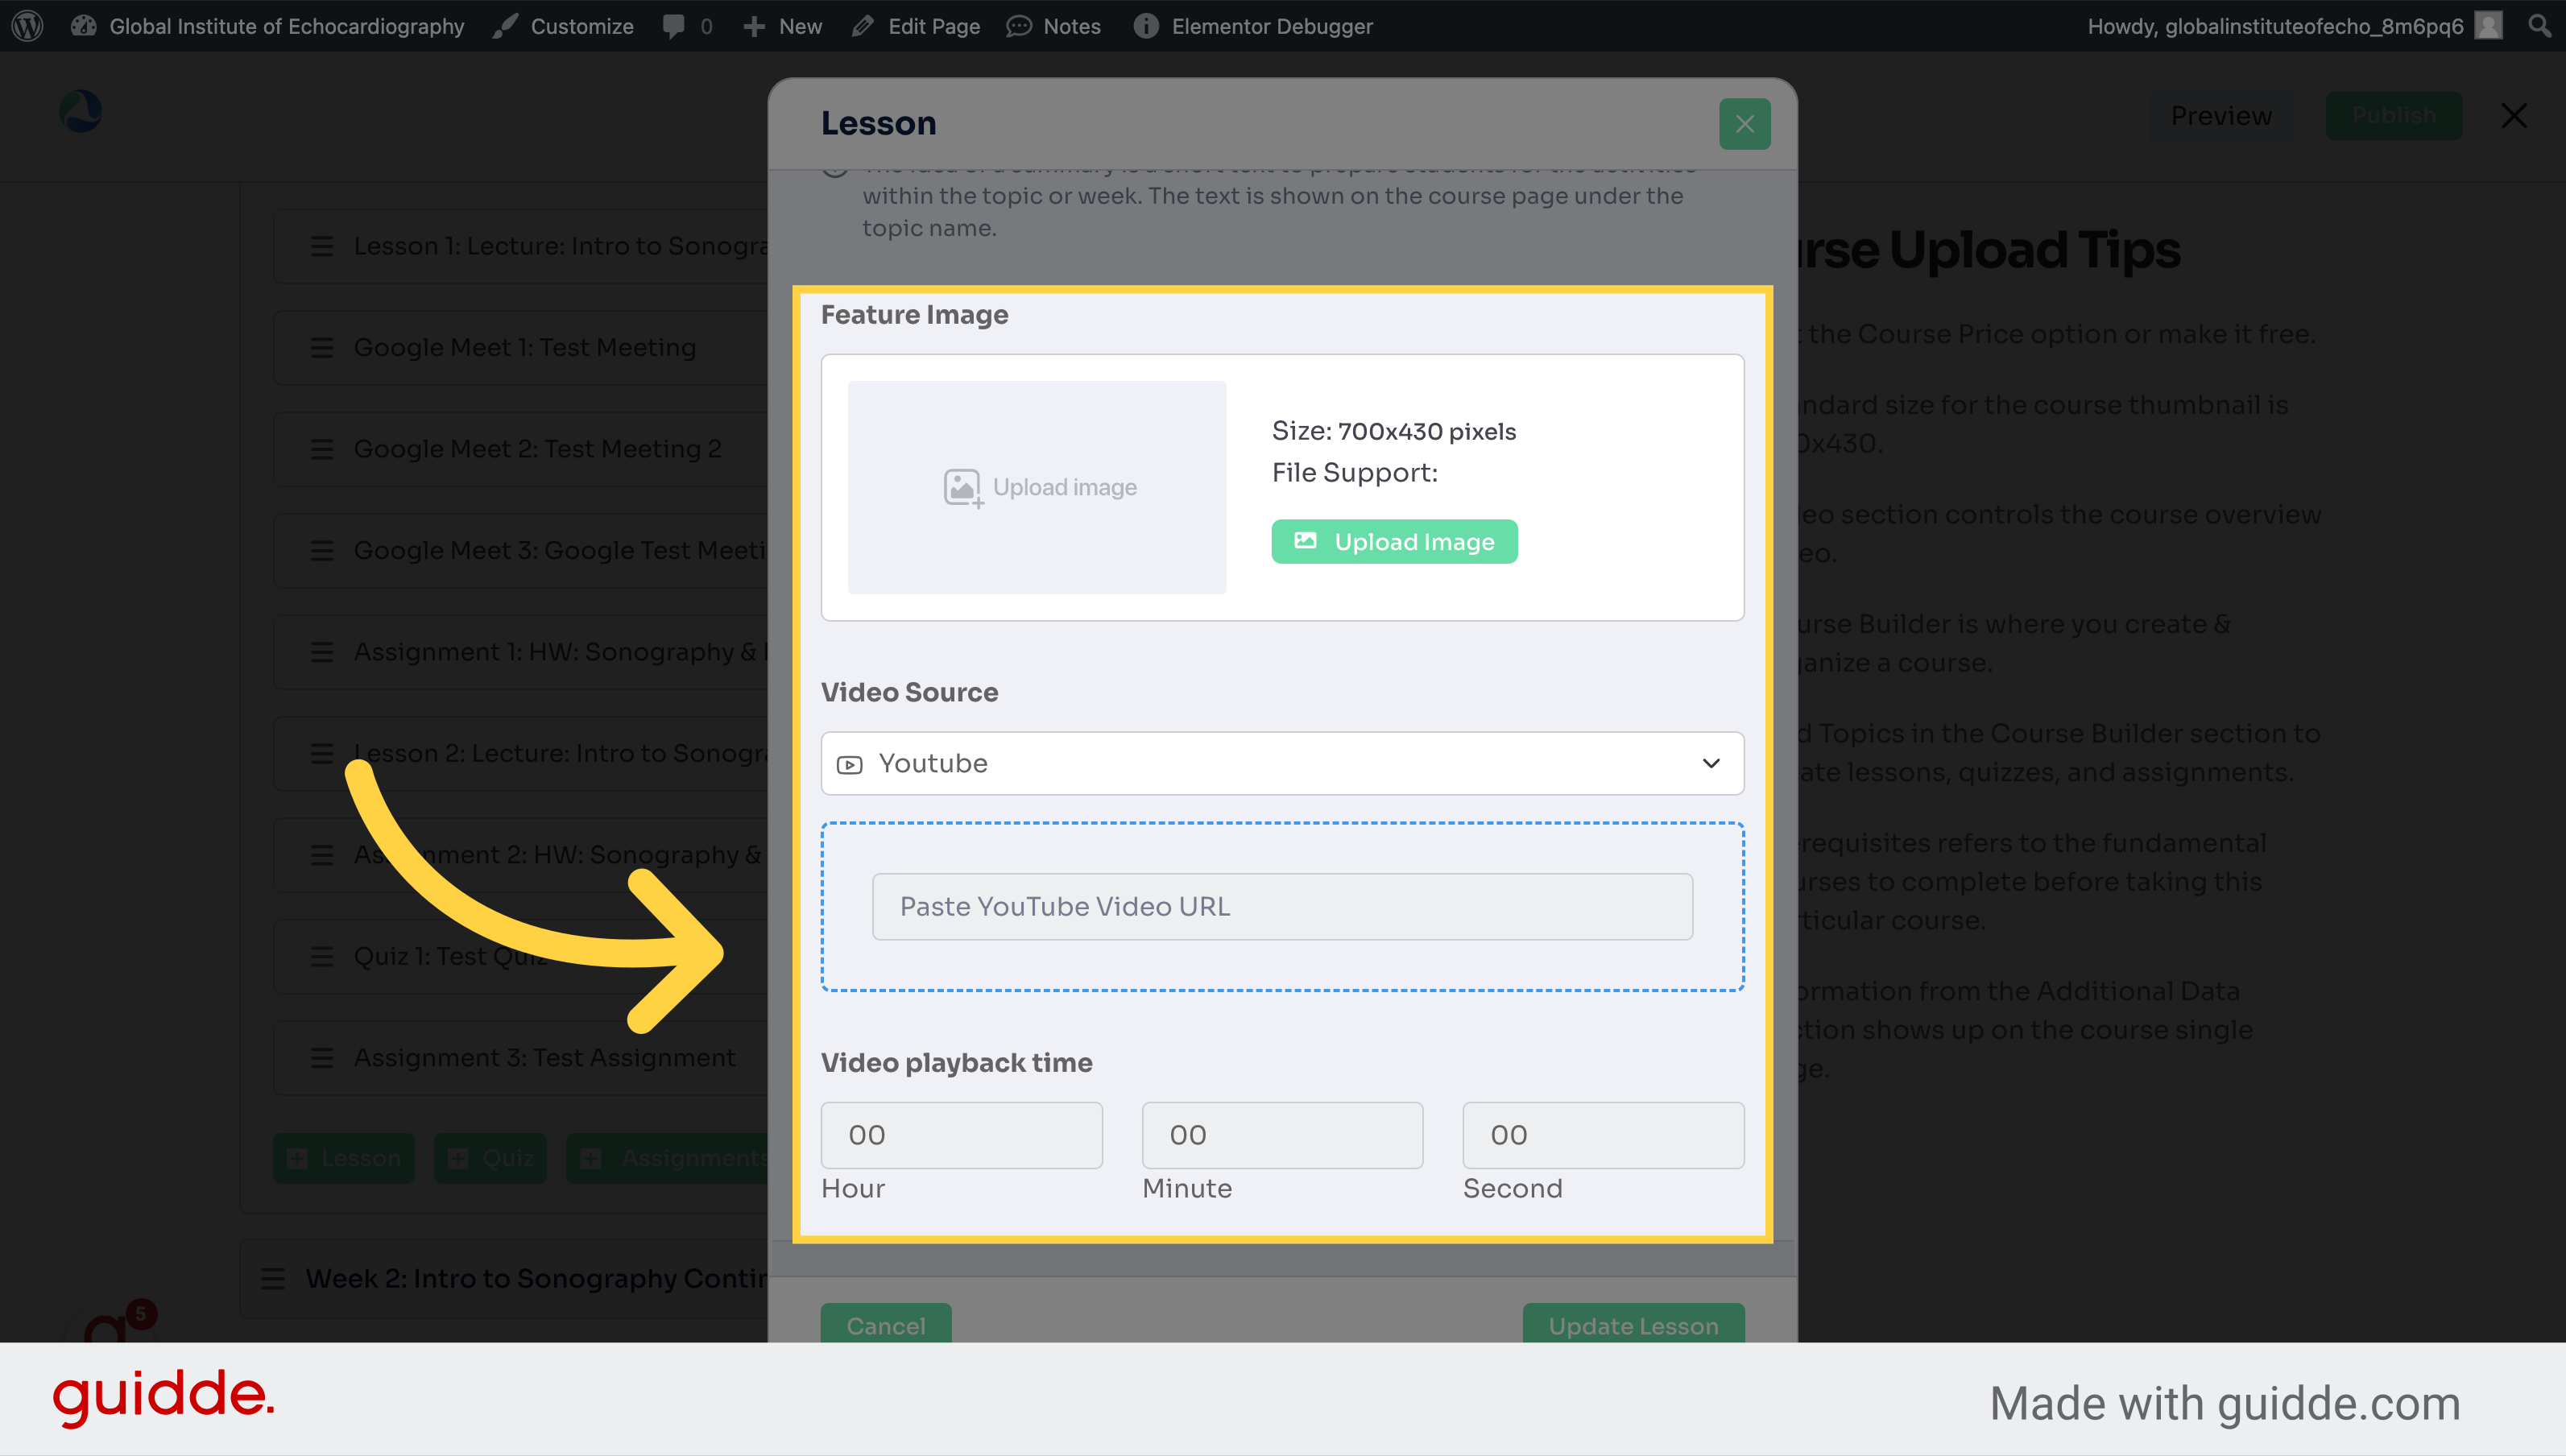
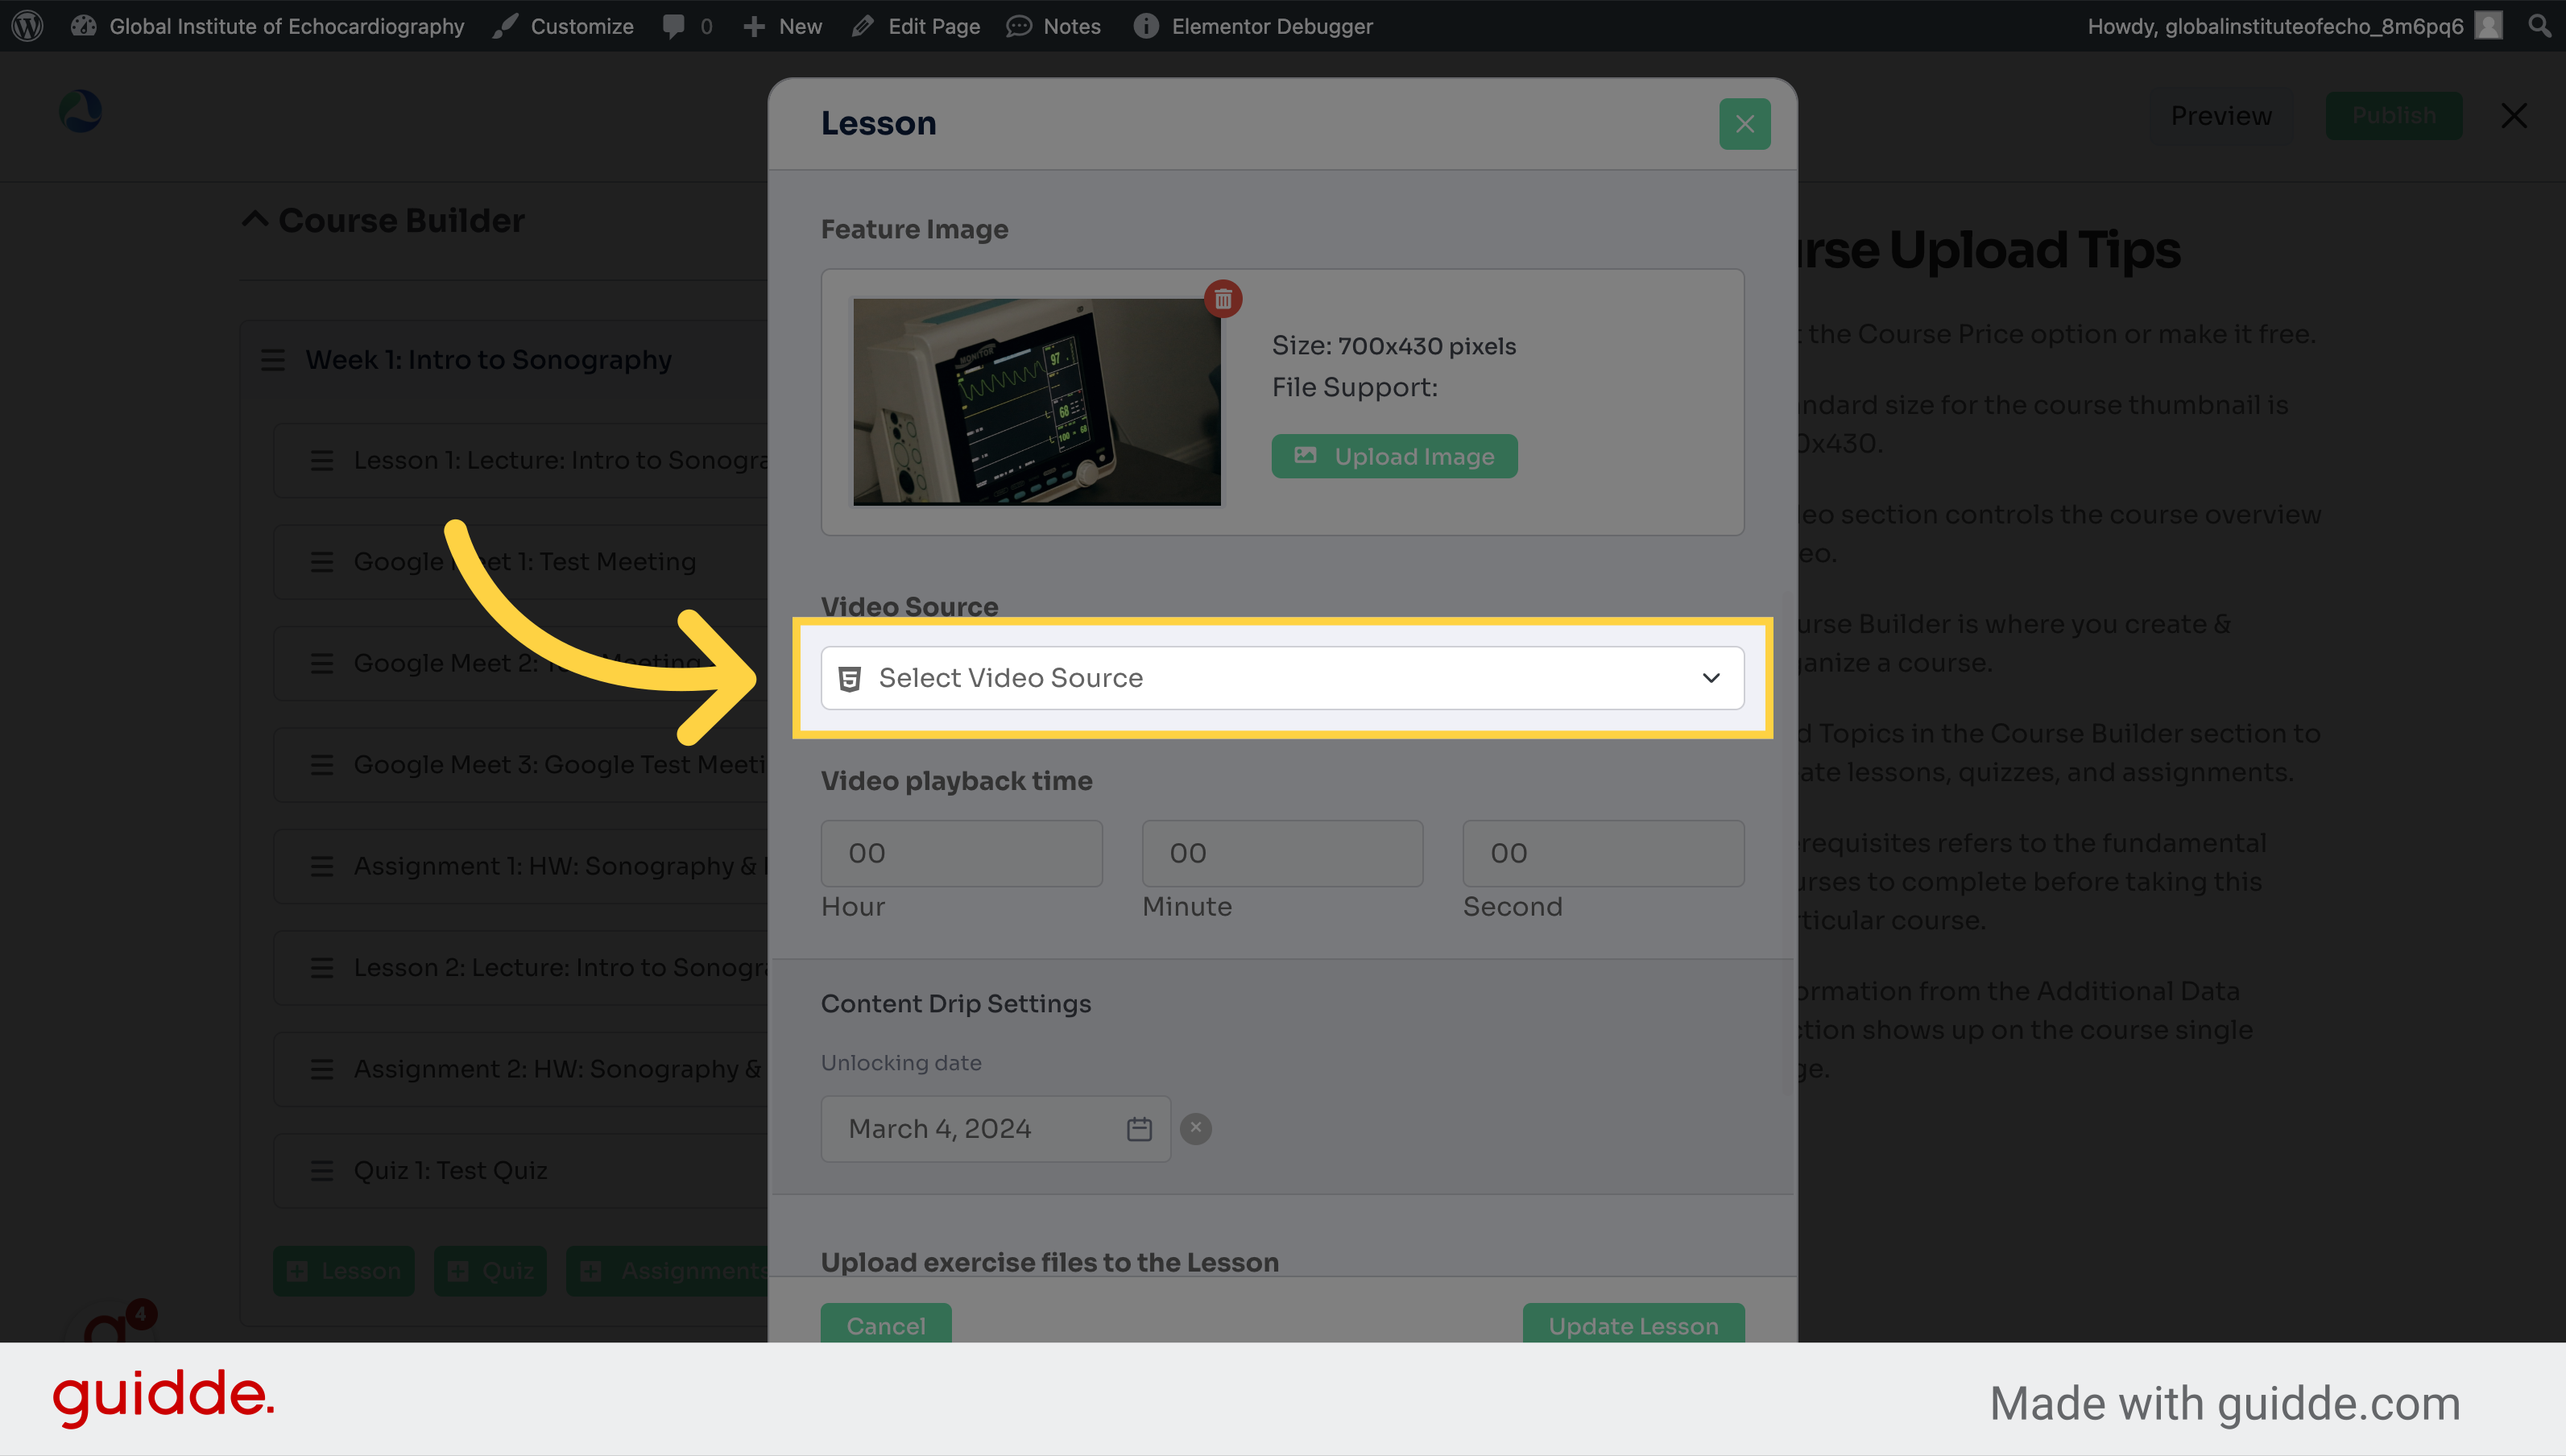
6. Scroll down to add a featured image (not necessary) and video source
Choose YouTube as the video source.
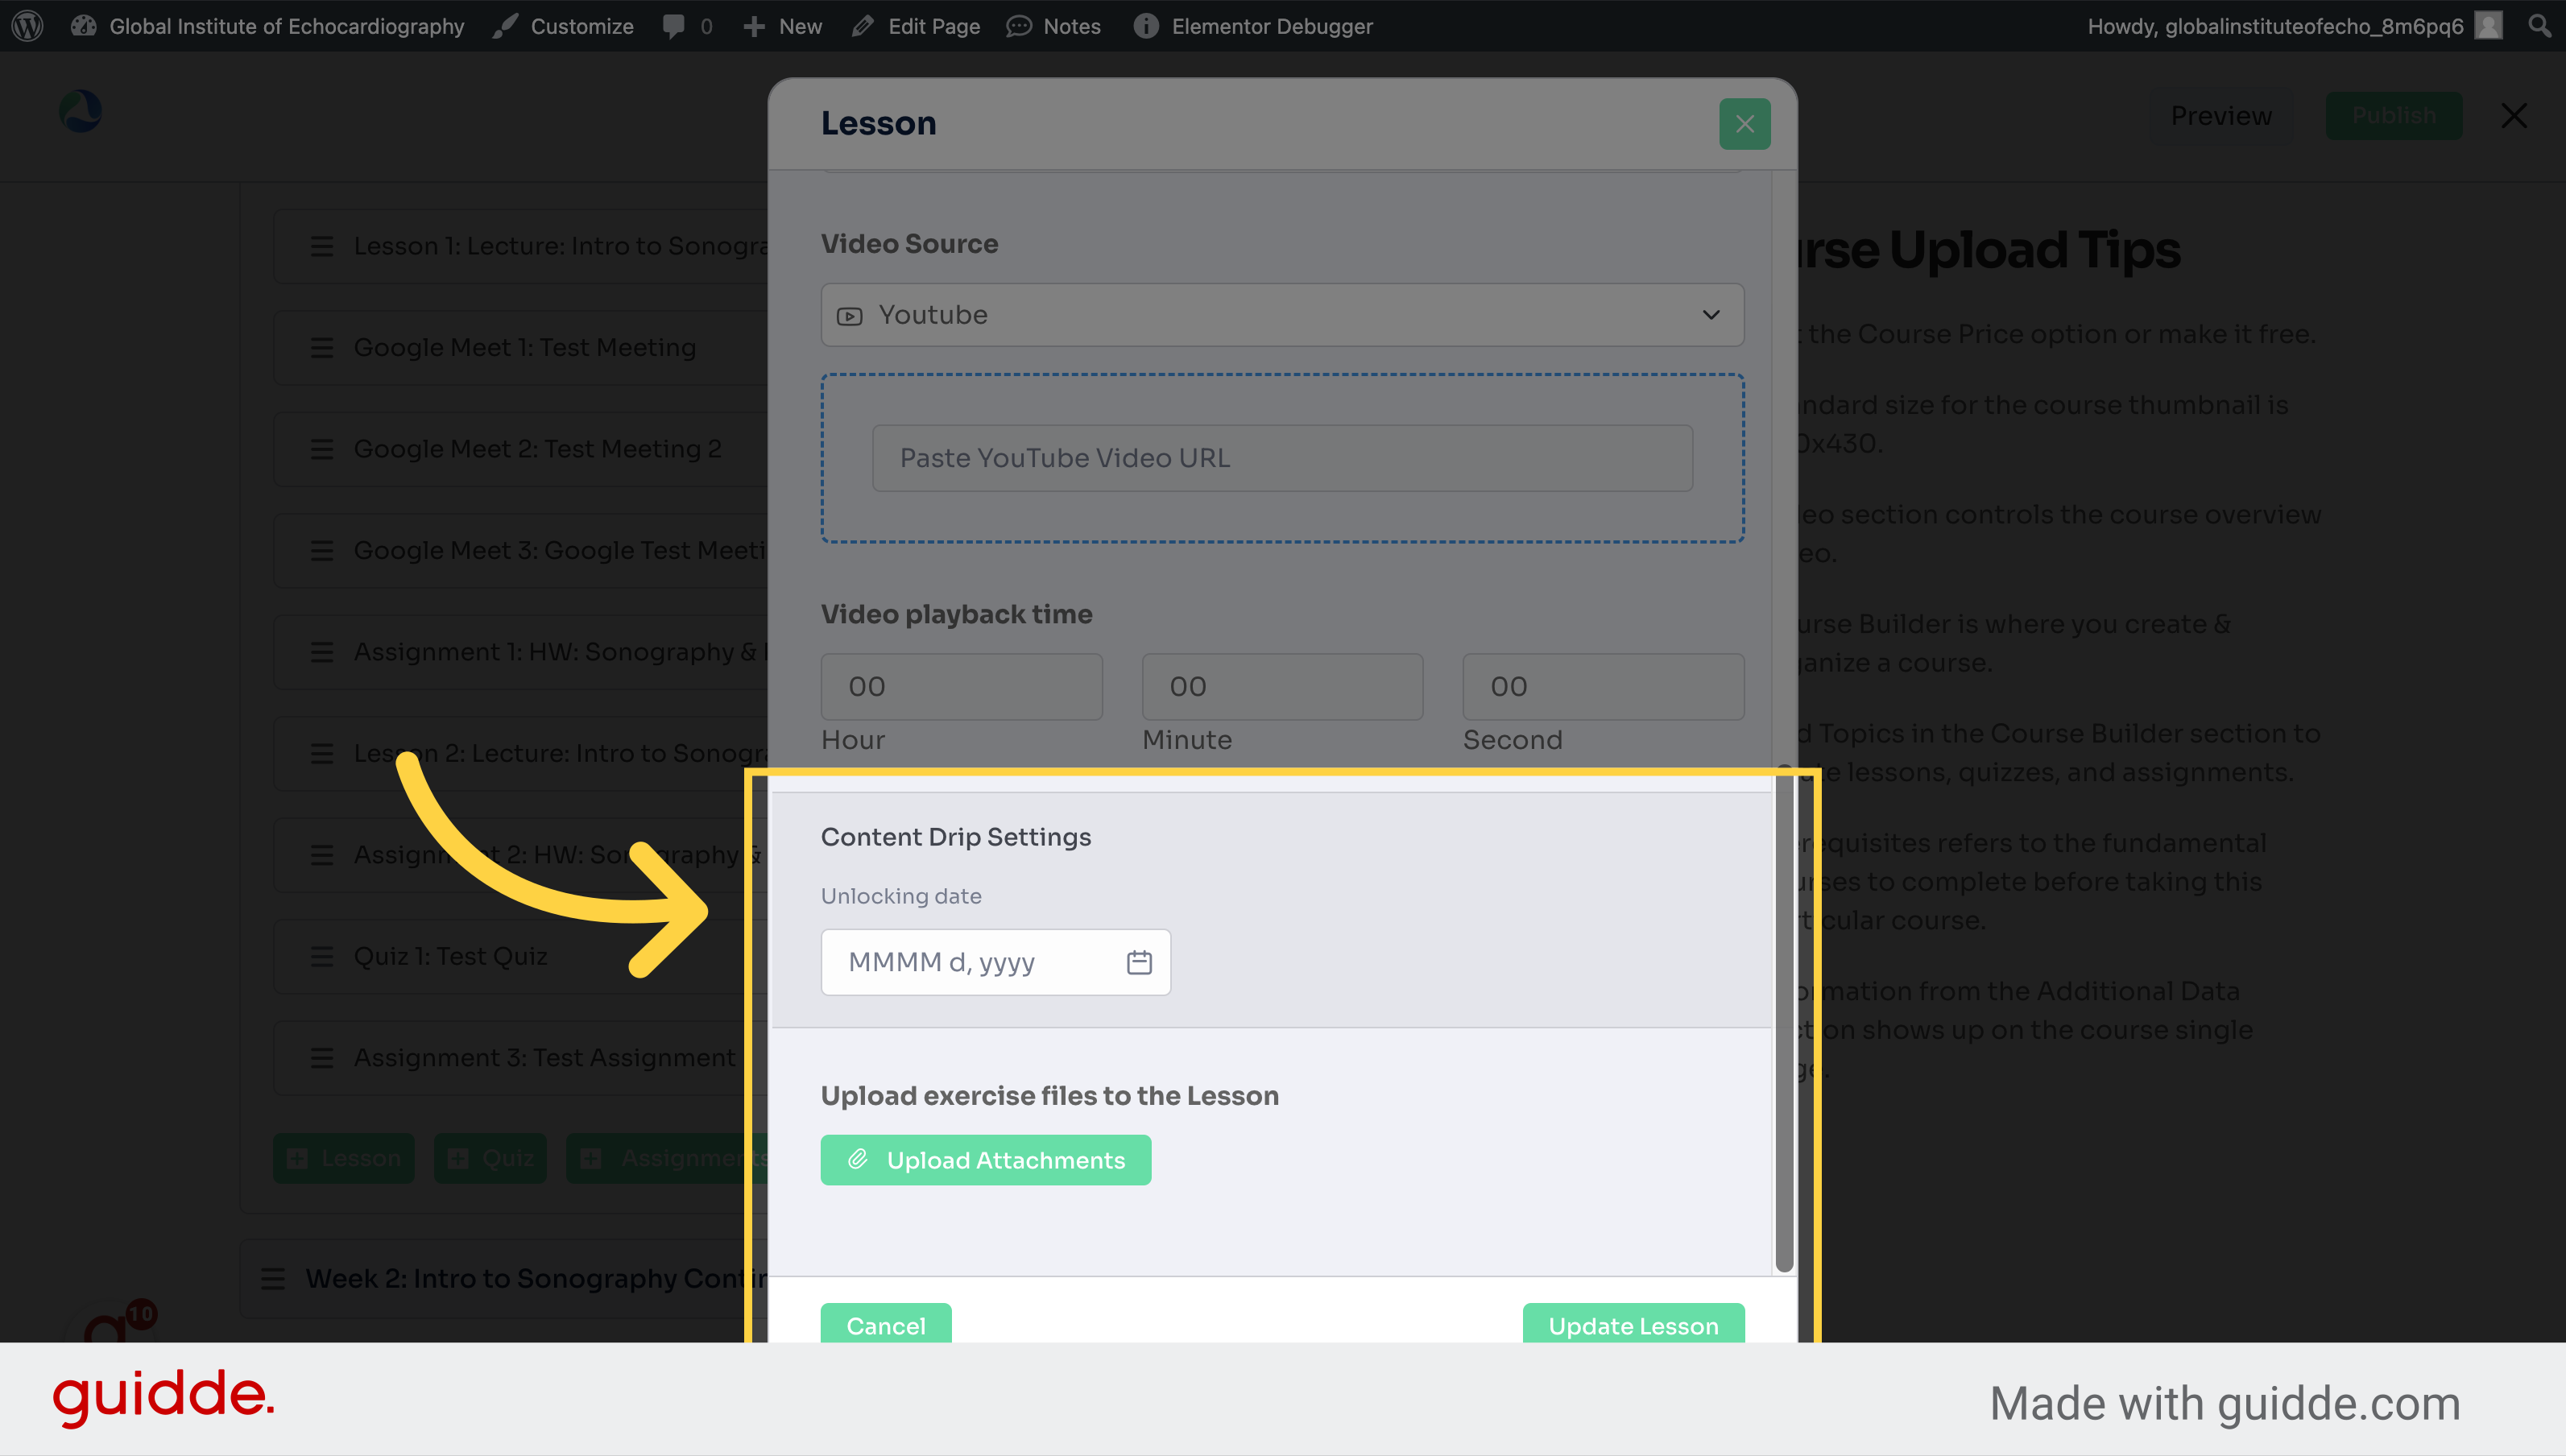
7. Scroll down to choose when the lesson should become available and upload relevant files to the lesson (pdfs, powerpoints, etc)
Adjust content drip settings like unlocking date.
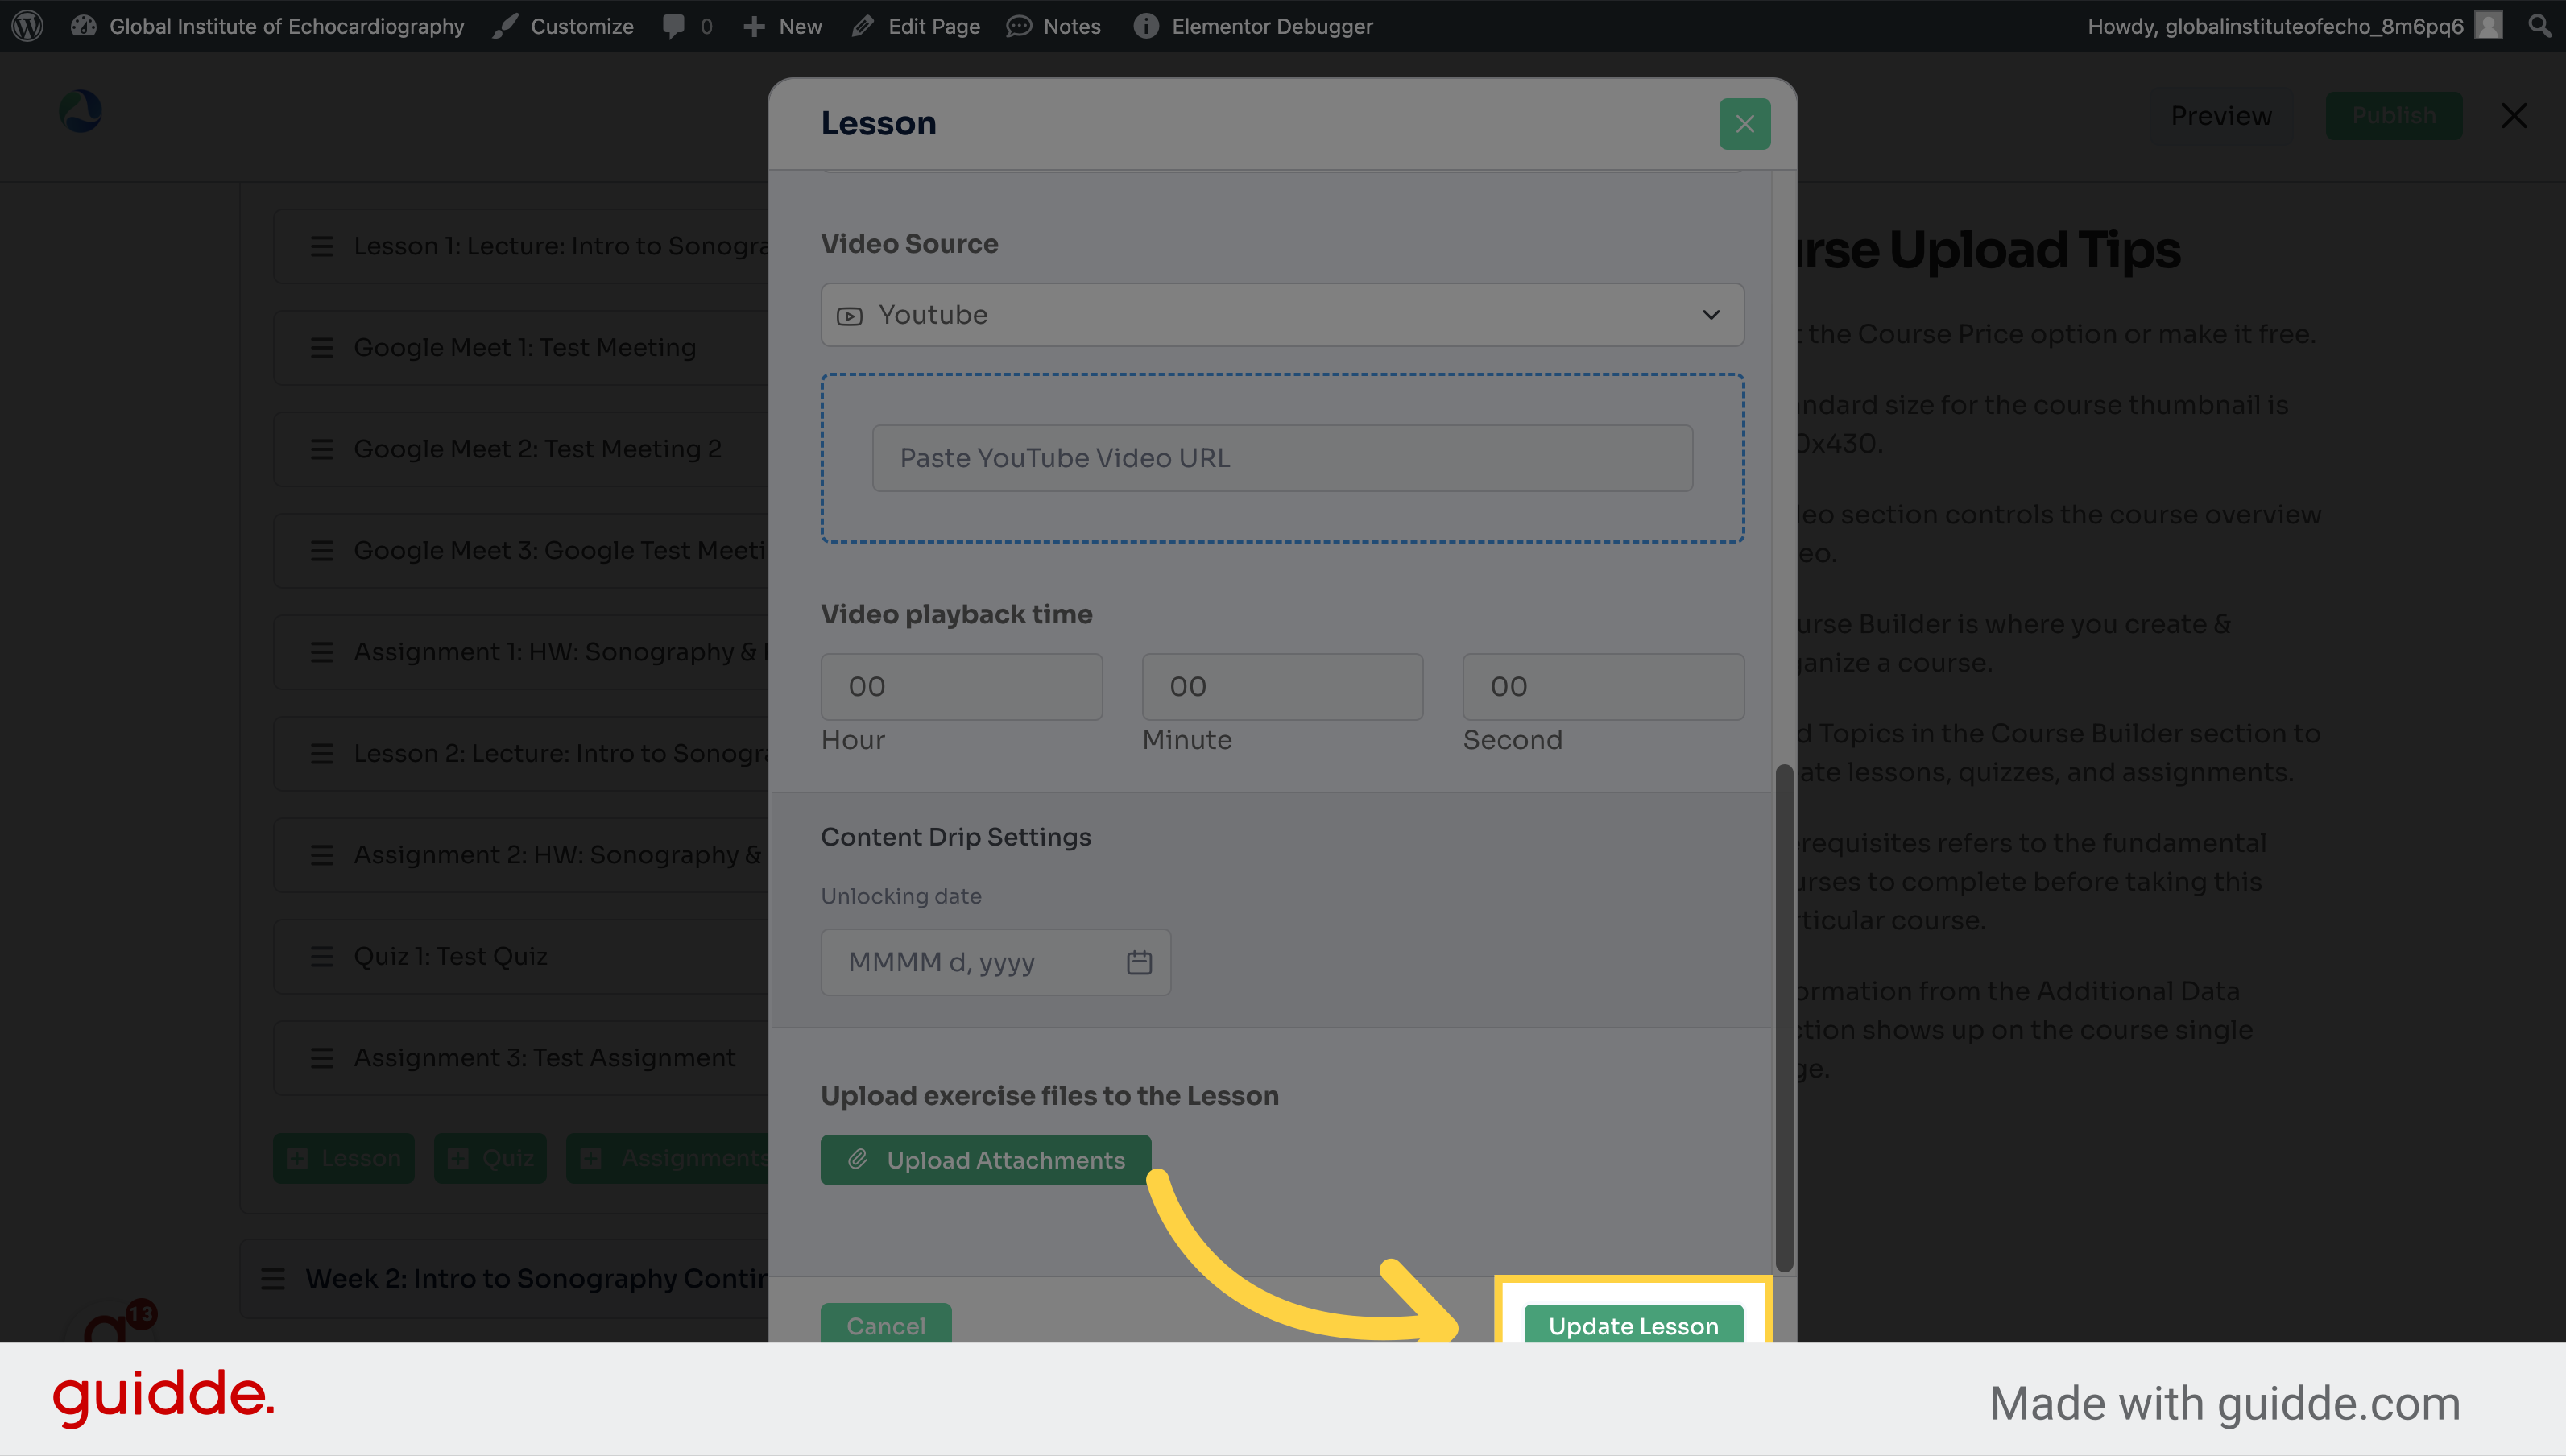
8. Click "Update Lesson"
Save the changes made to the lesson.
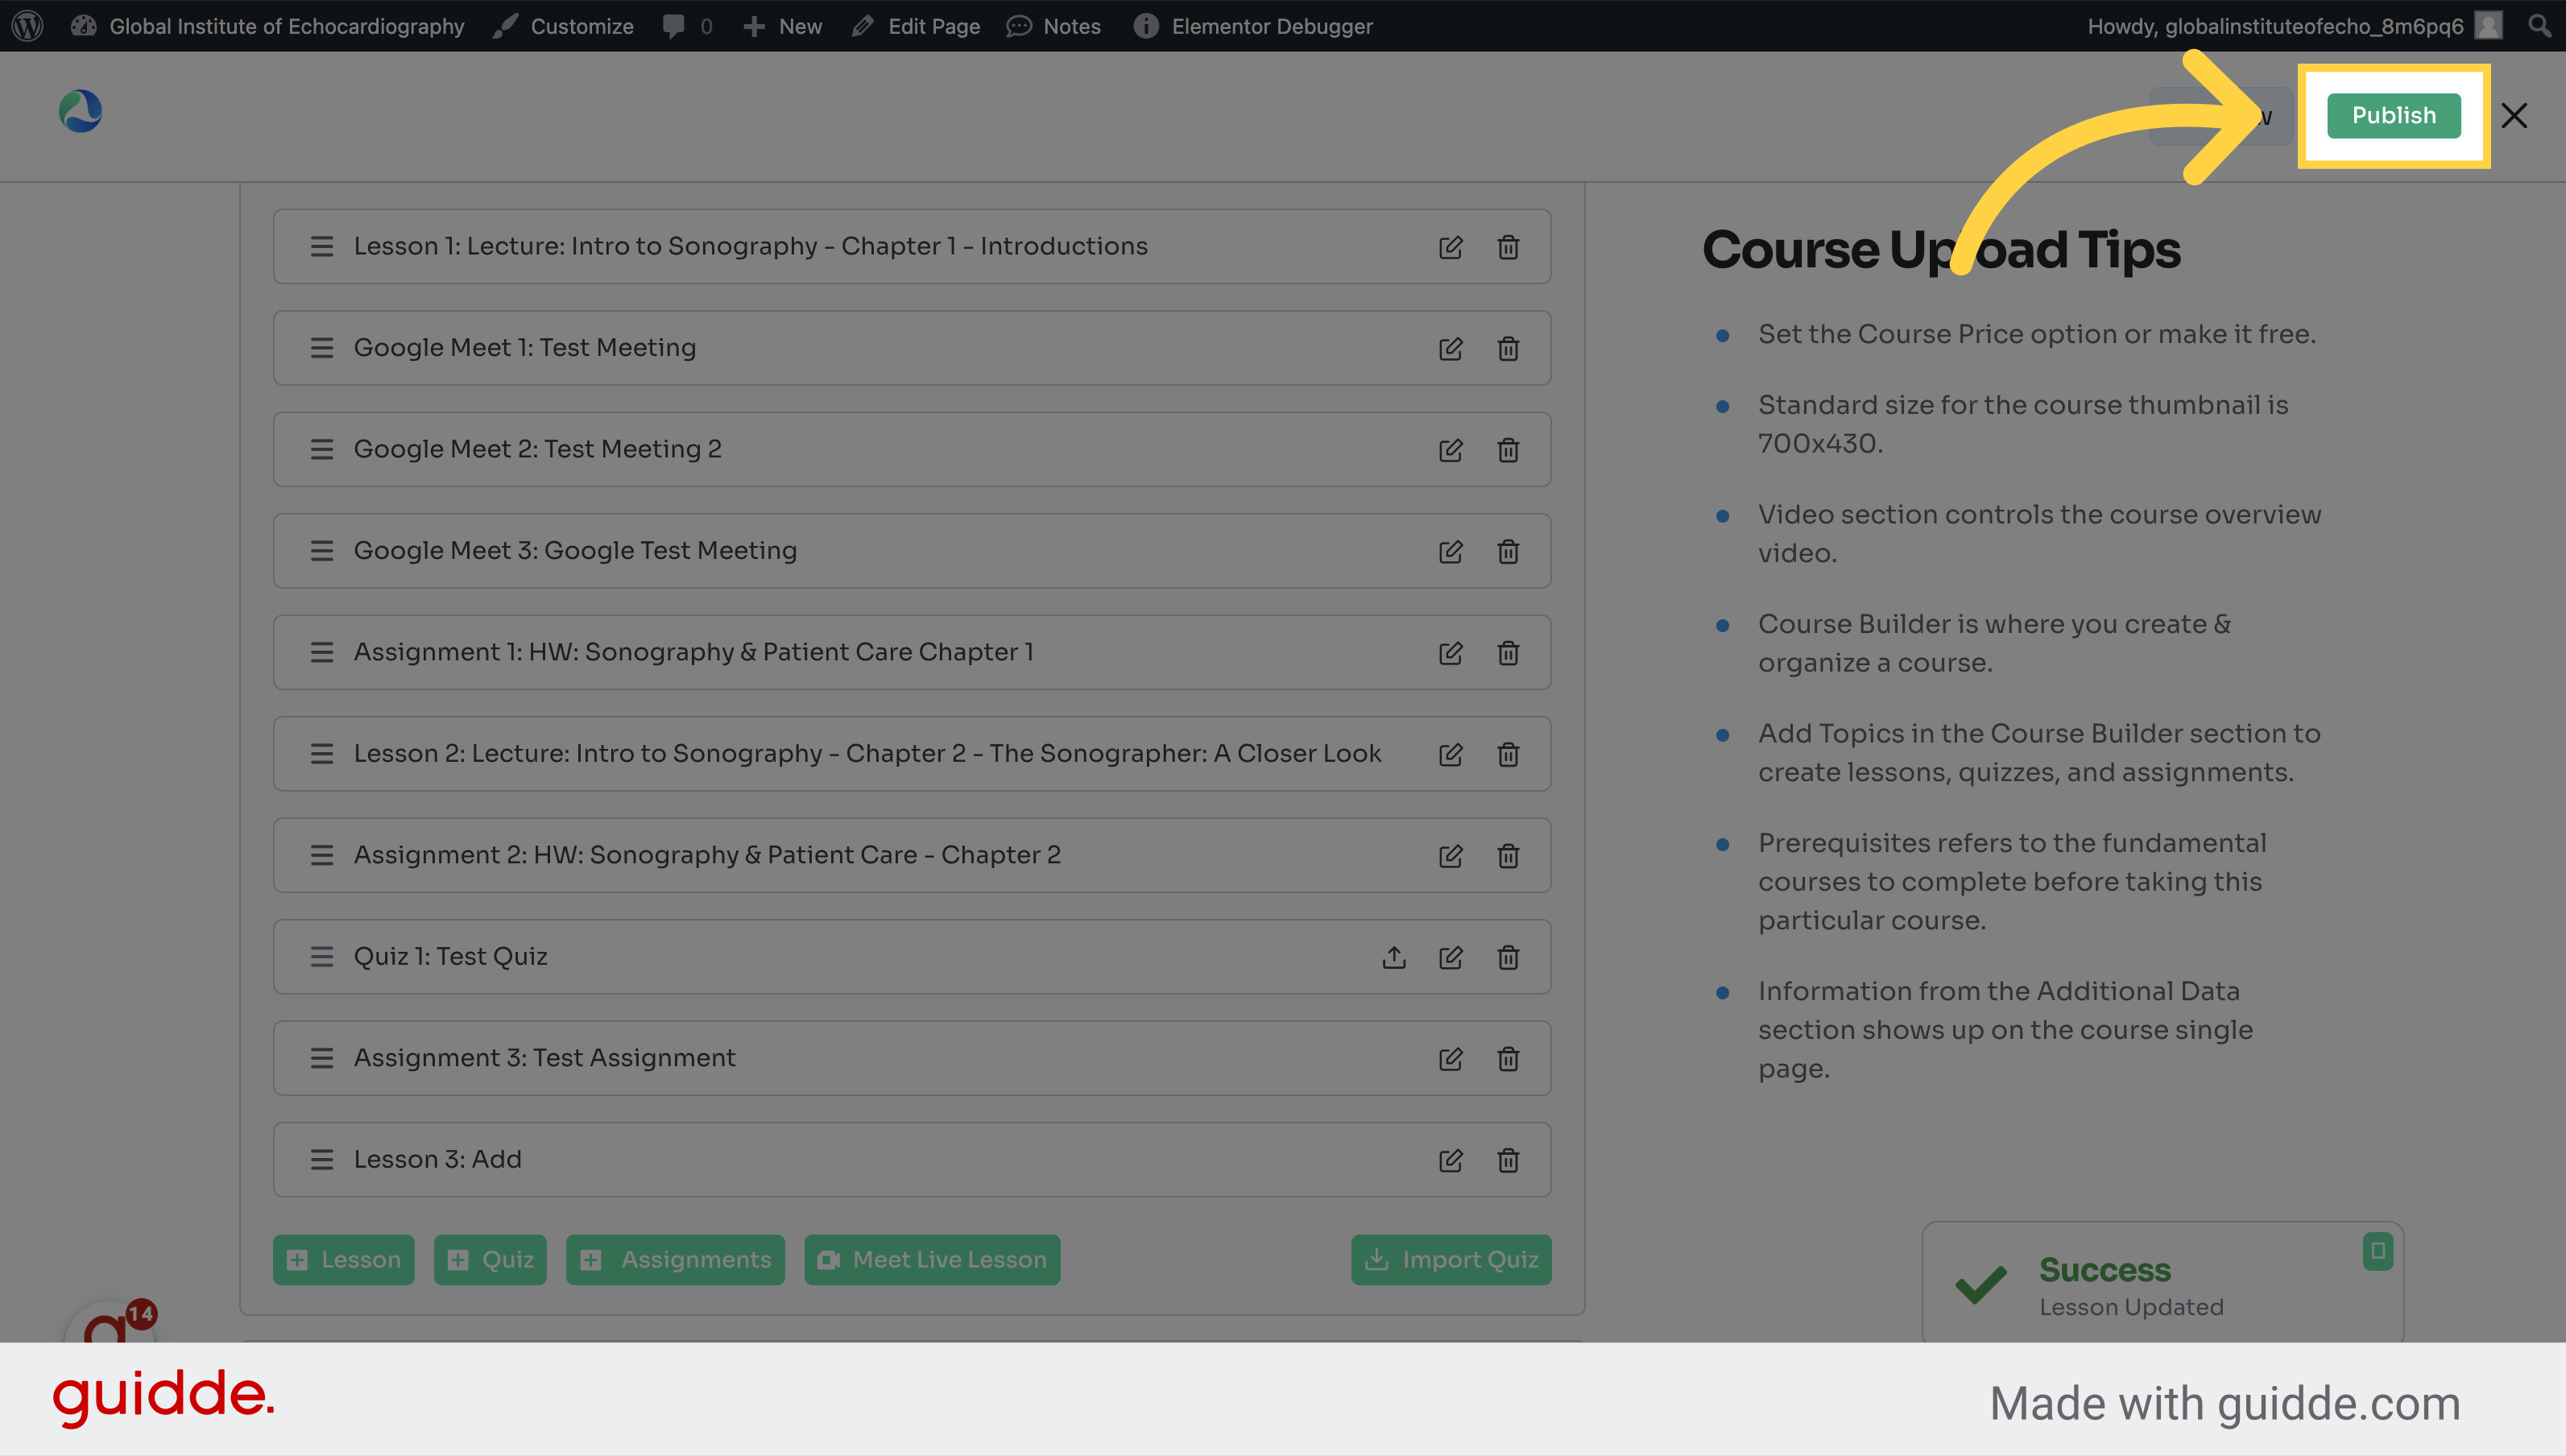
9. Click "publish_course"
Publish the course with the new lesson.
10. Click here
Click the selected option

This guide walks you through the process of adding a lesson to a course. From selecting the course to finalizing the lesson details and publishing, you are equipped to enhance your employee training experience effectively.
How to Add a Video to a Lesson
Enhance your employee training with this guide on adding a video to a lesson. Follow the precise instructions to seamlessly integrate YouTube videos into your course content using the LMS and YouTube platforms.
1. Click "My Courses"
Access "My Courses
2. Click here to edit course
Click here
3. Click the topic / week where the lesson is
Select the desired lesson
4. Click here
Click the selected button
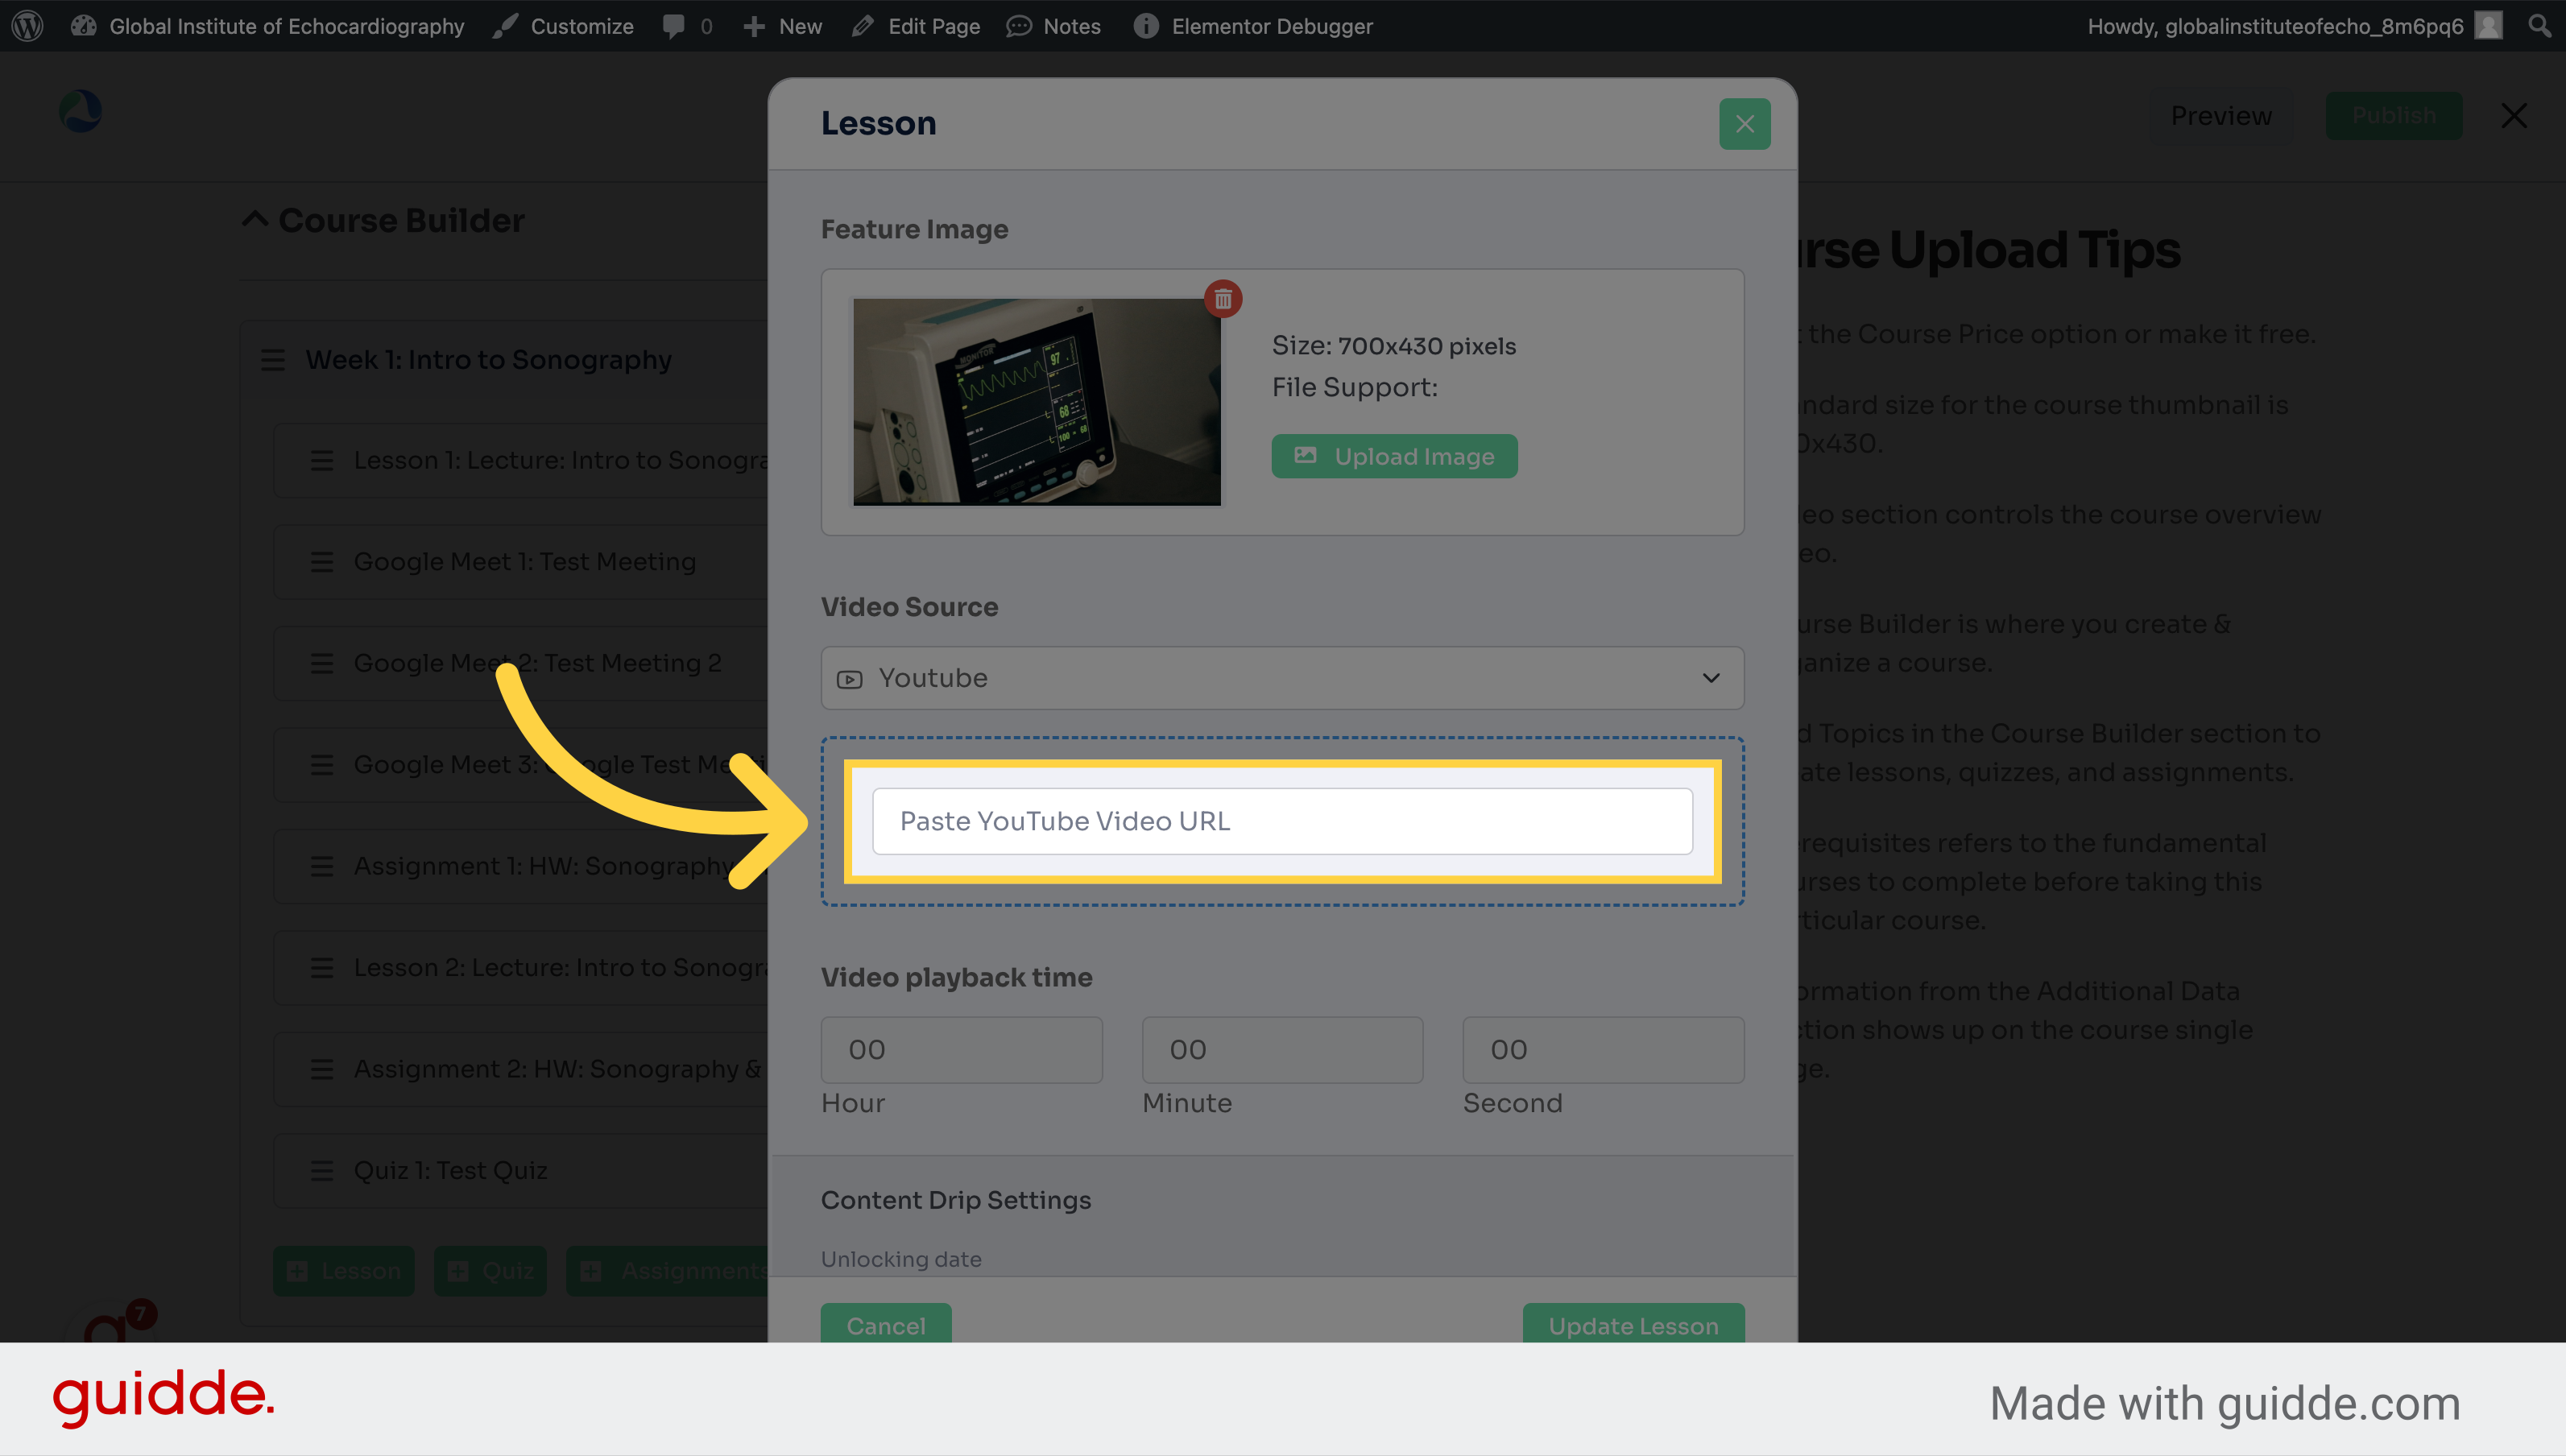
5. Click "Select Video Source - Youtube"
Choose YouTube as the video source
6. Fill "Paste YouTube Video URL"
Paste the YouTube video URL
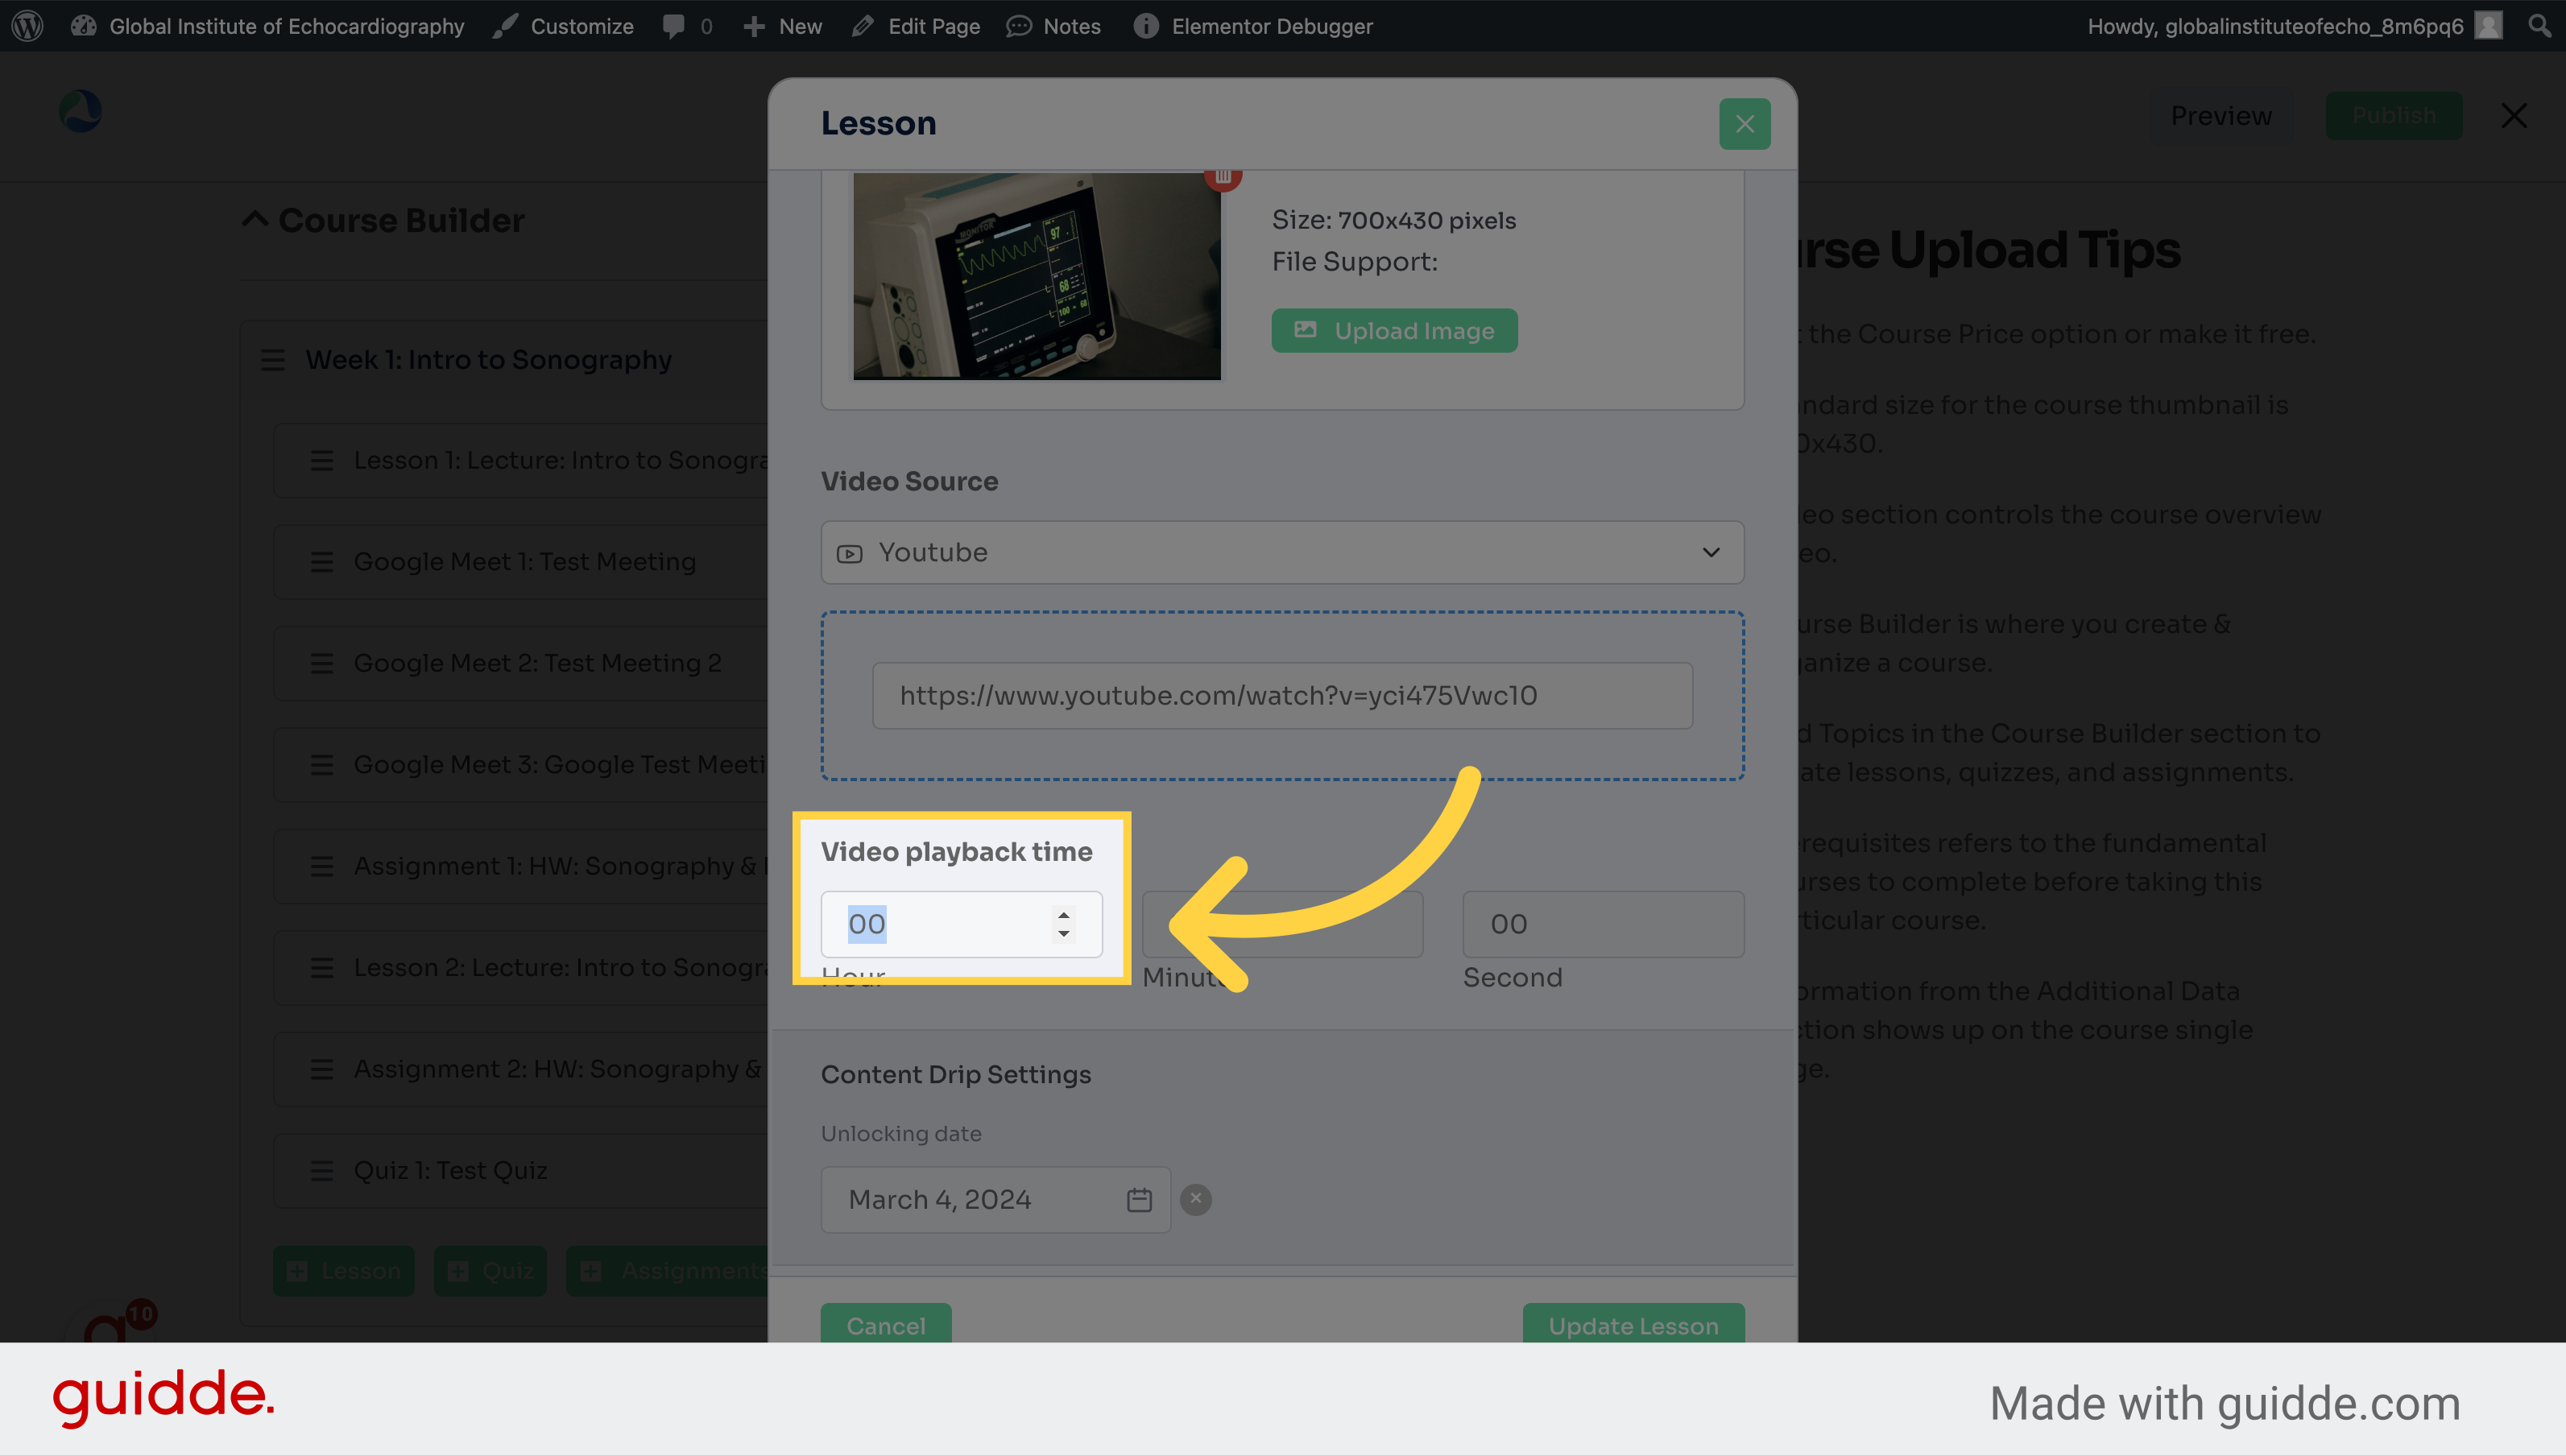
7. Enter the video duration
Move to the next step
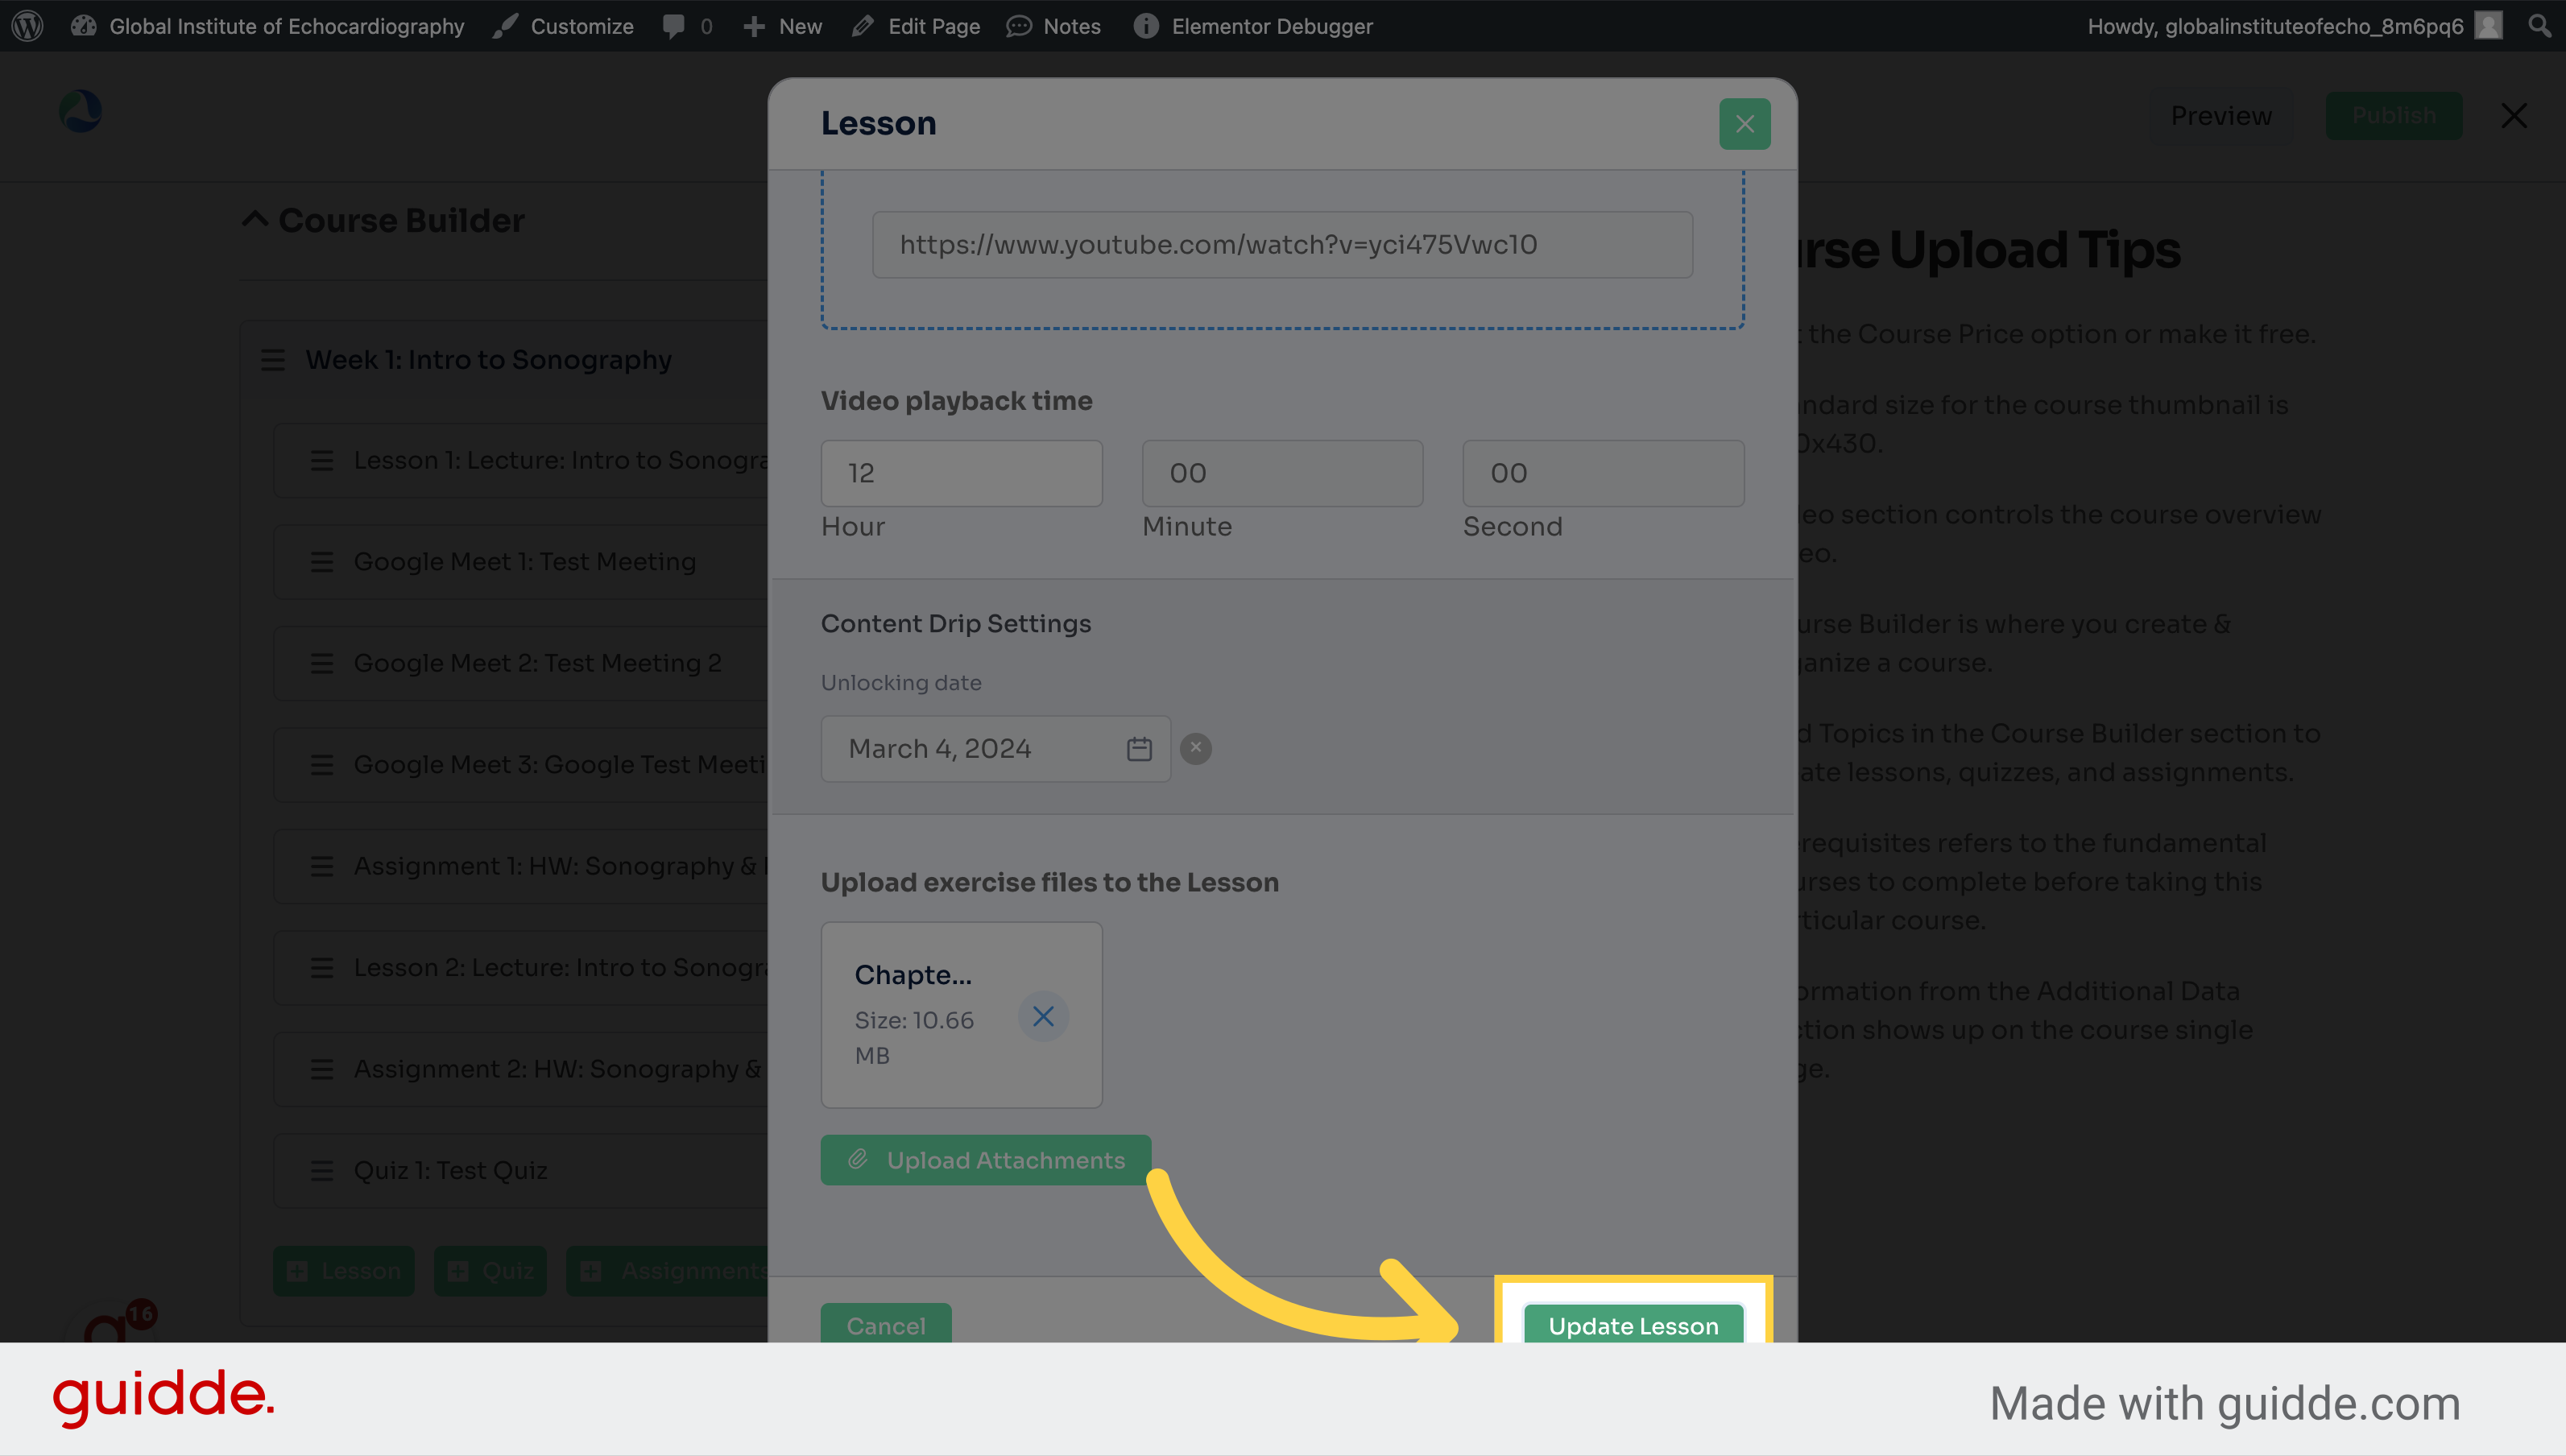
8. Click "Update Lesson"
Save the changes
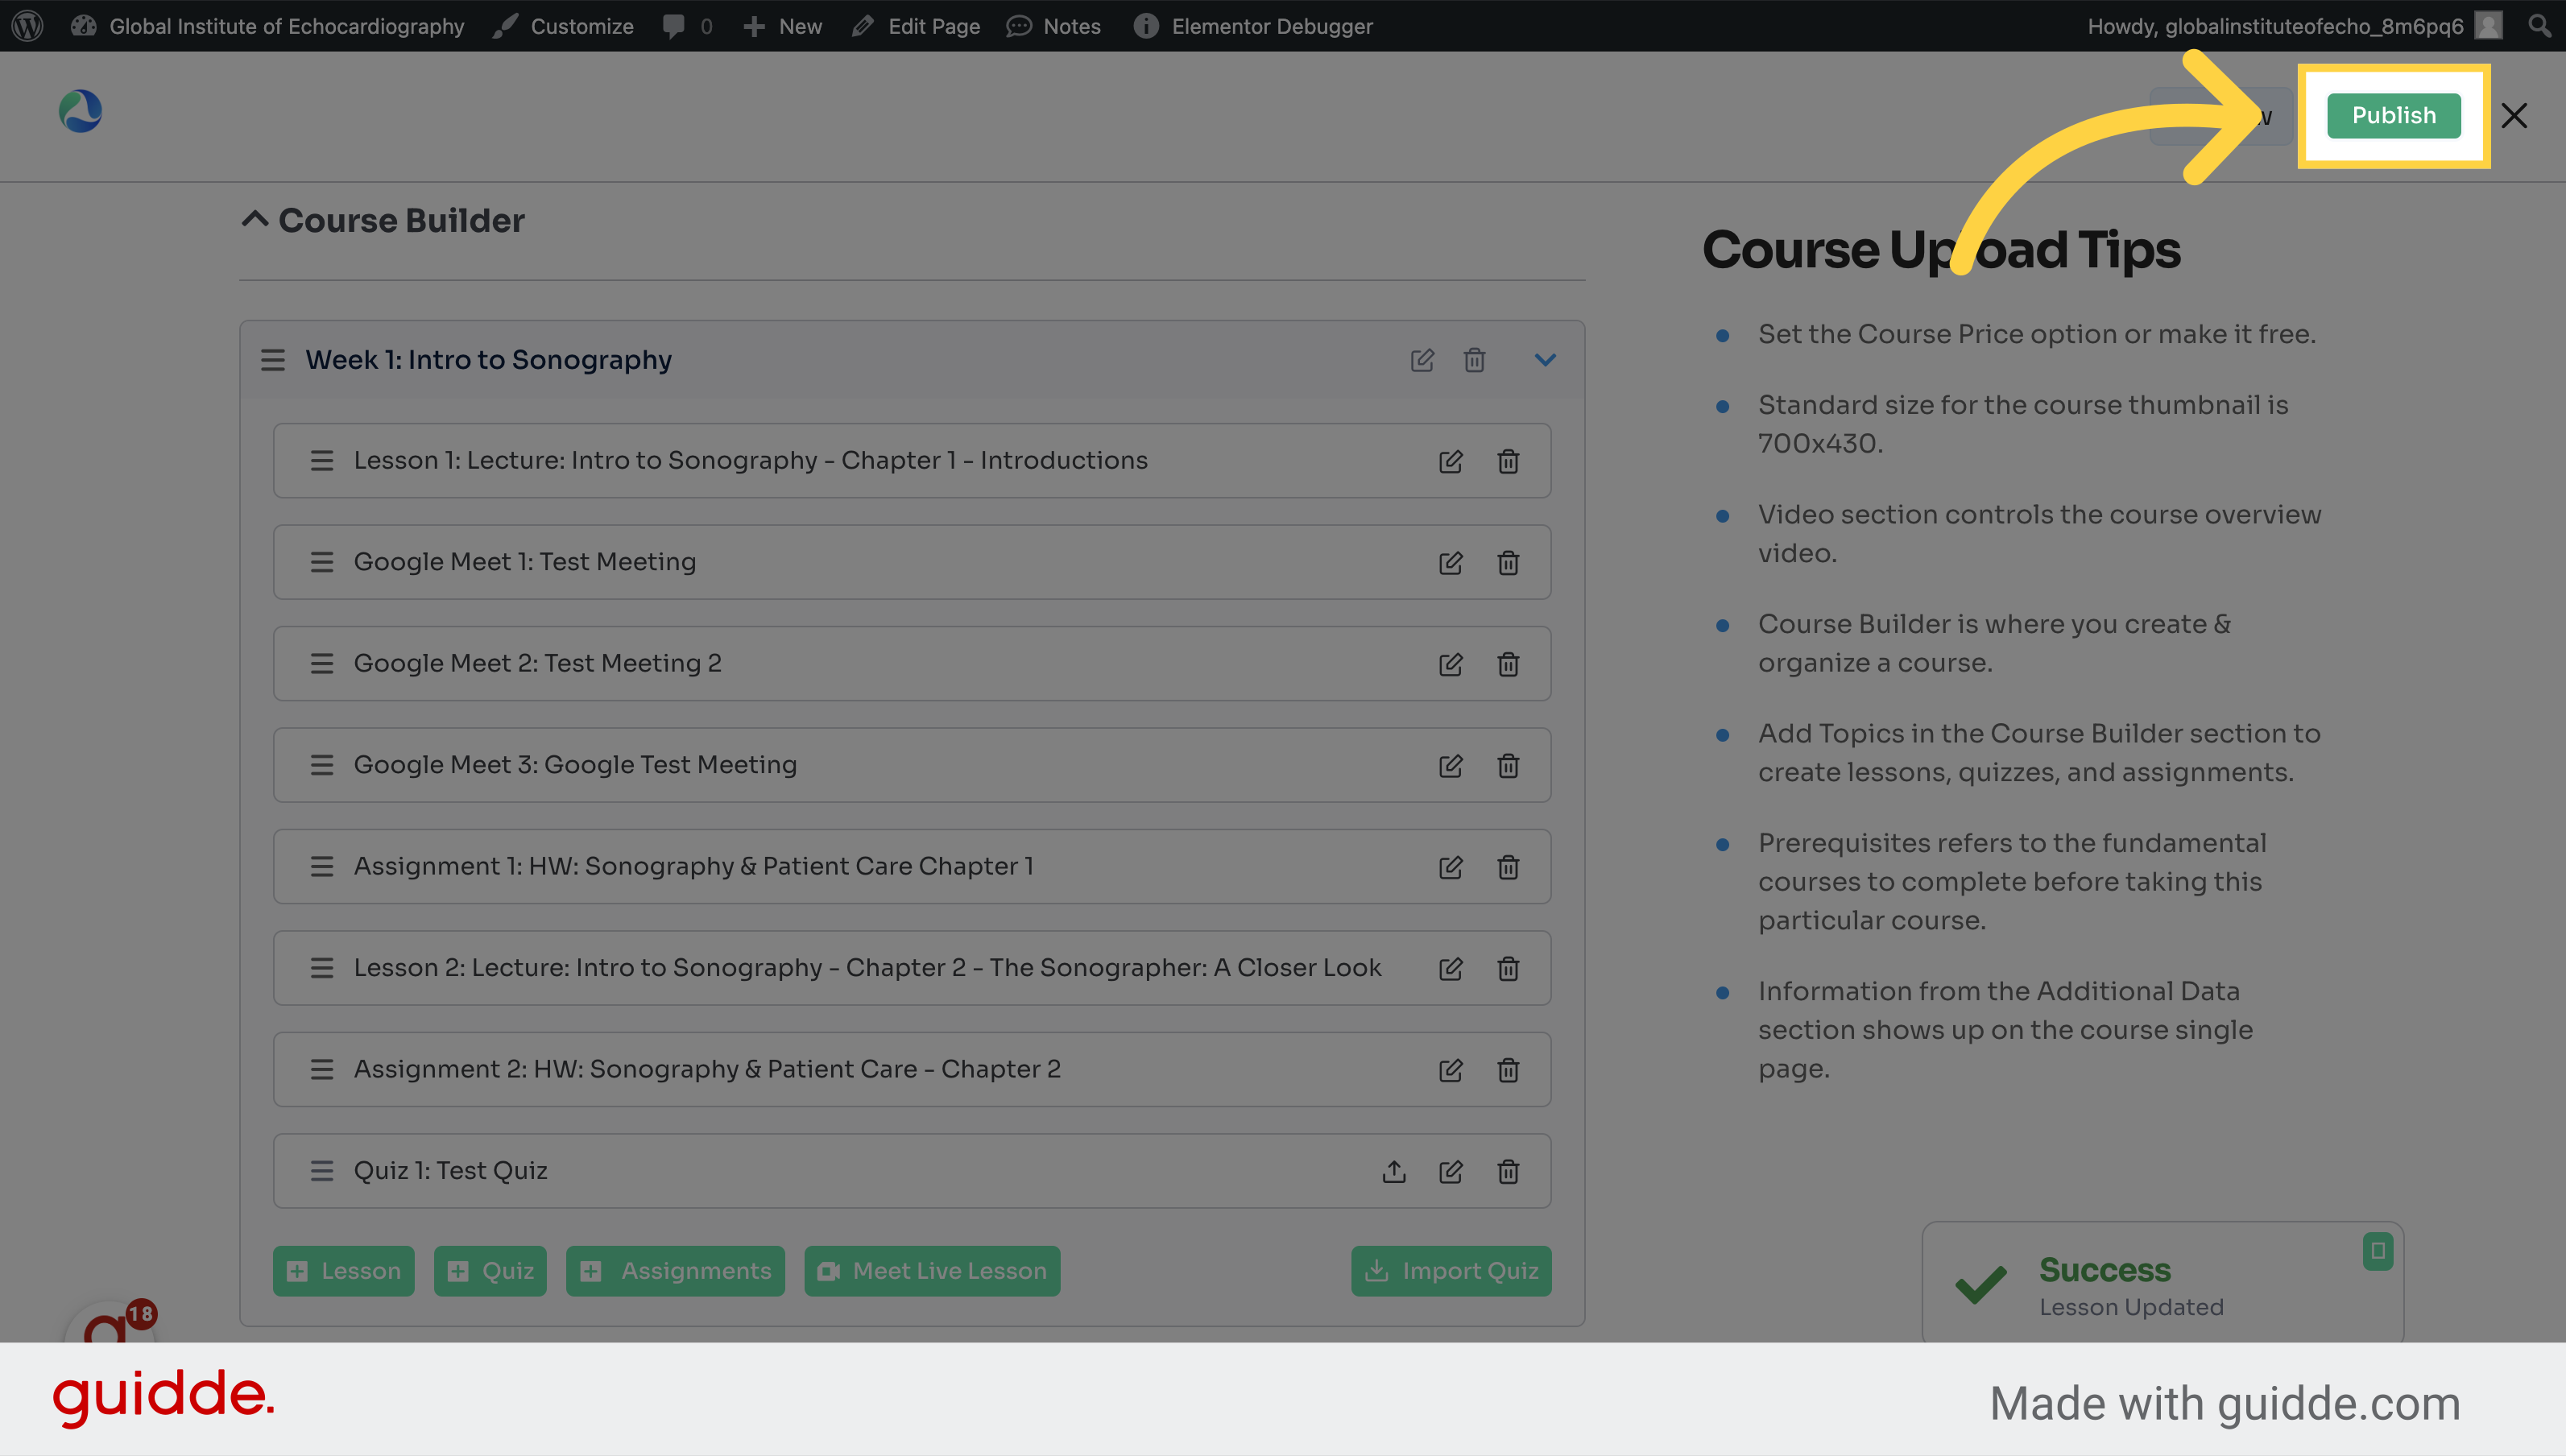
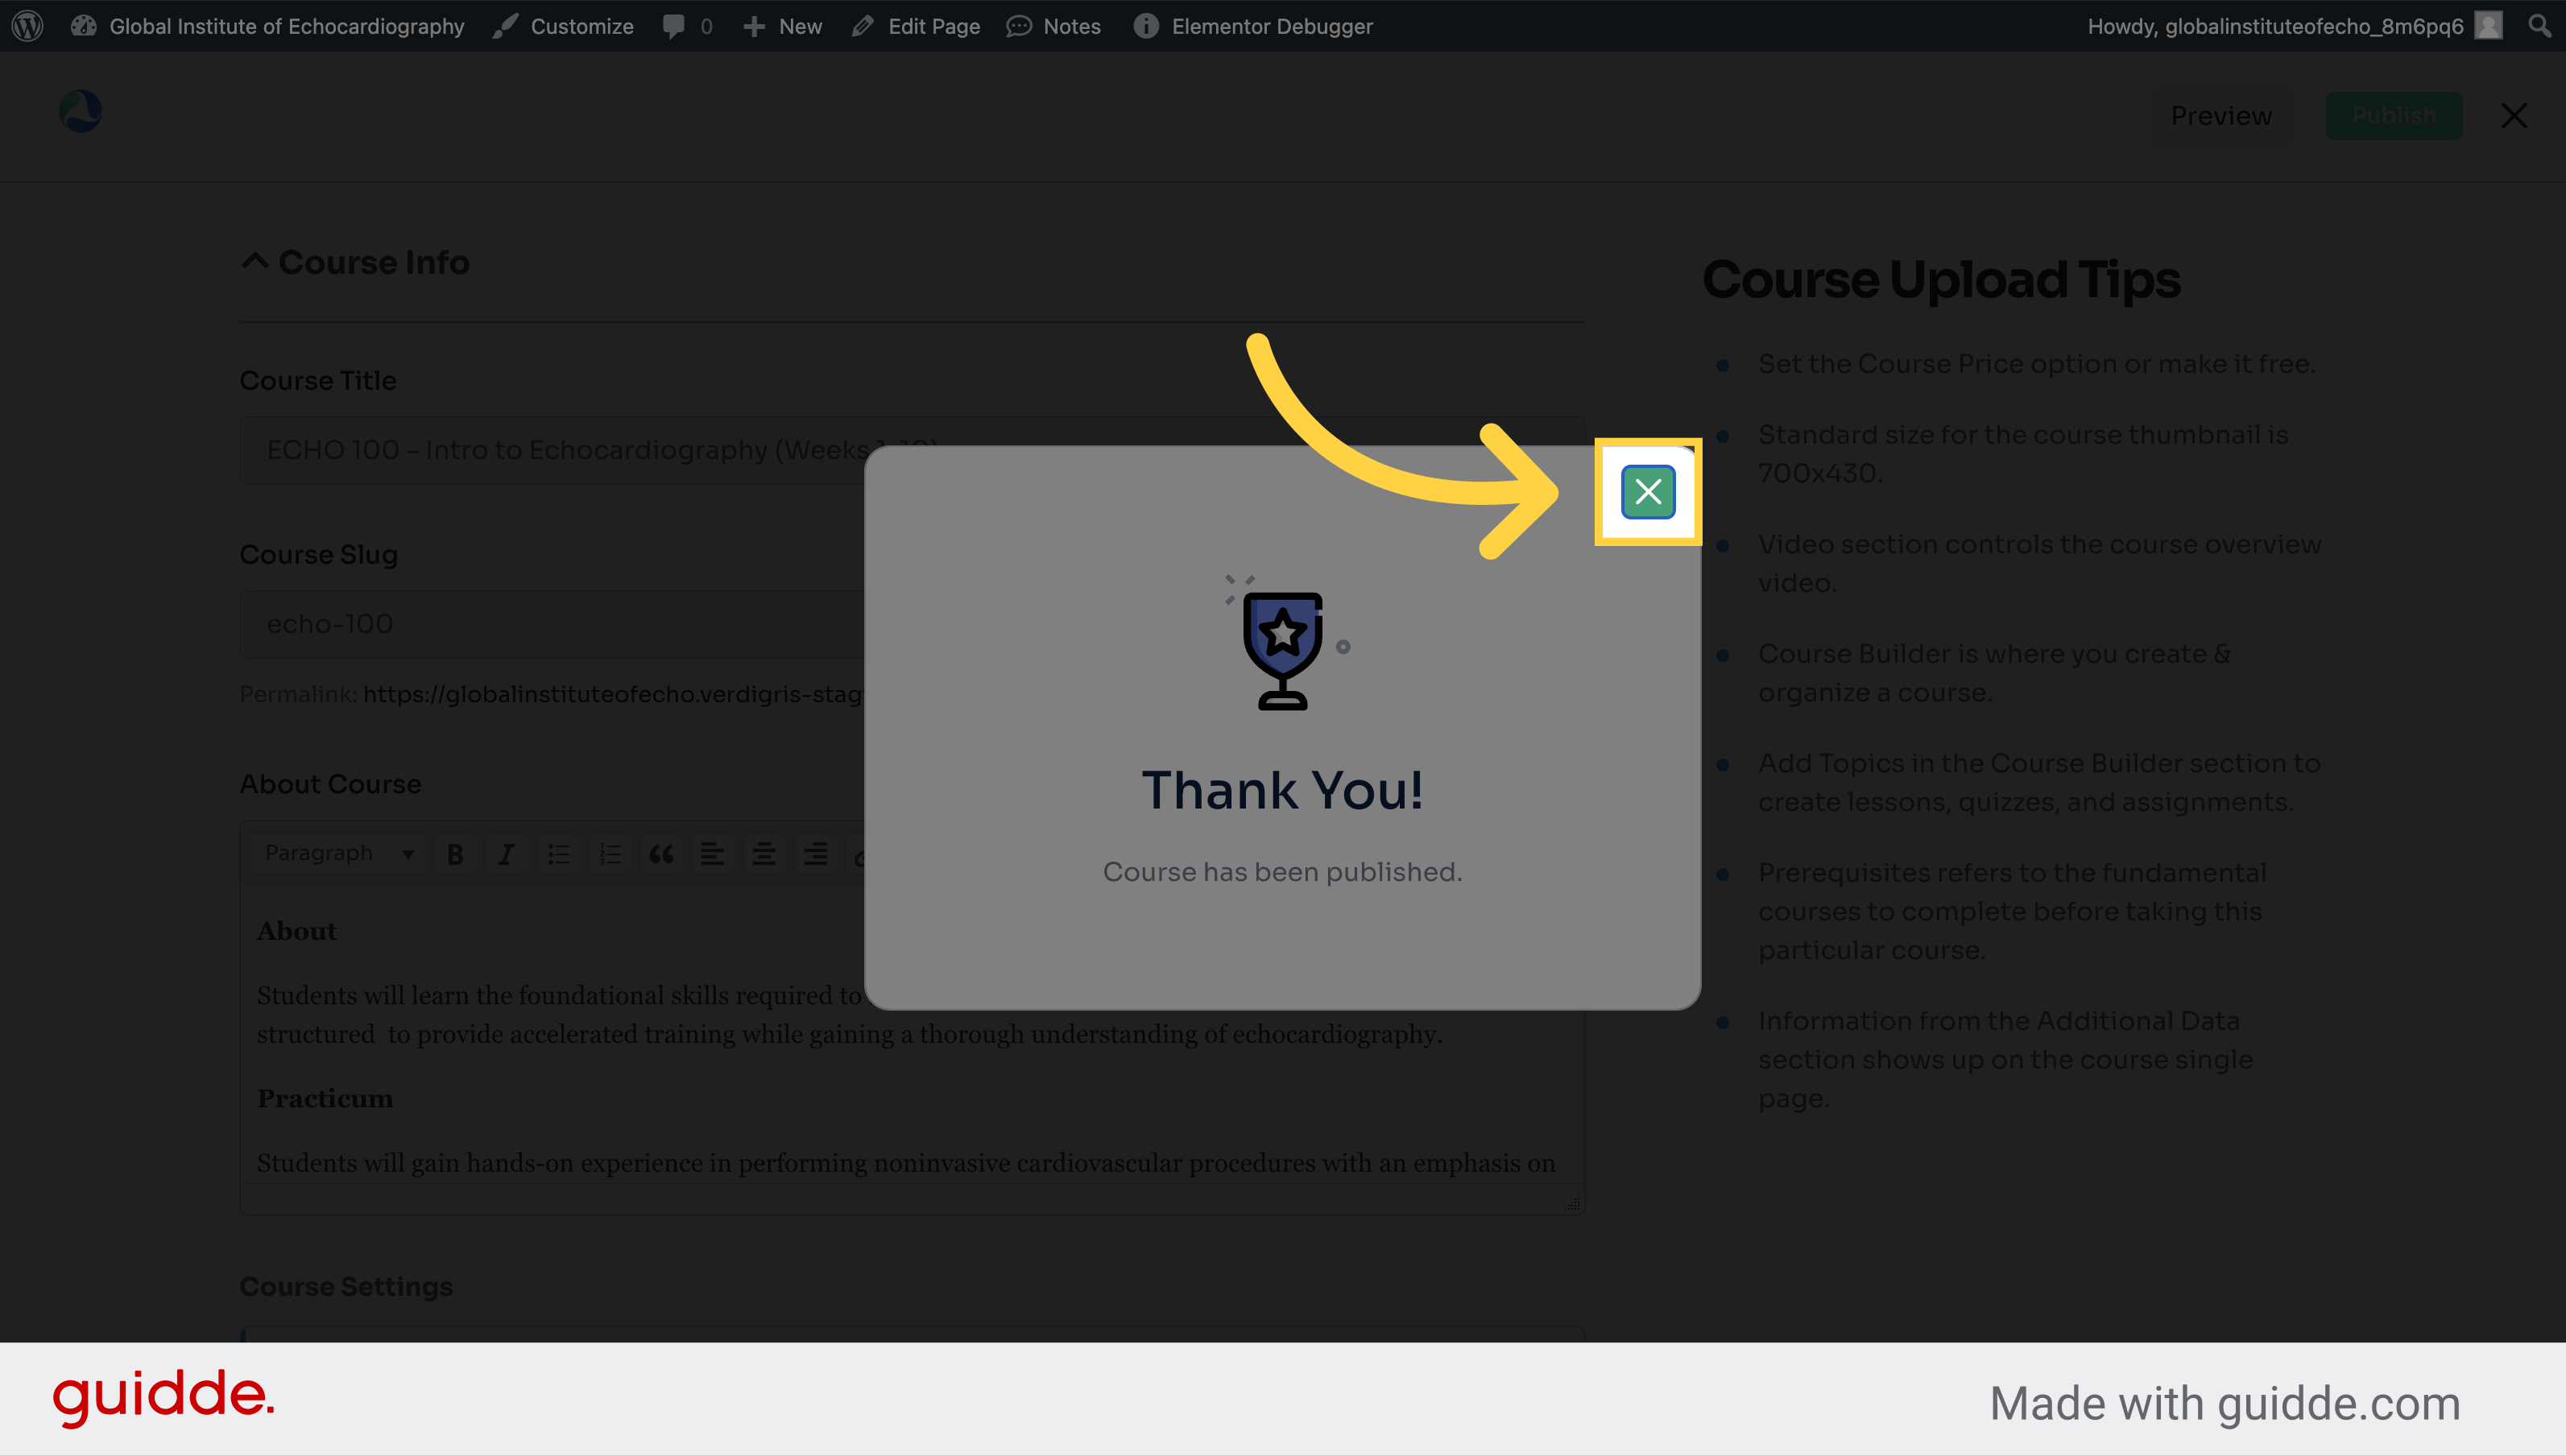
9. Click "publish_course"
Publish the course
10. Click here
Navigate here
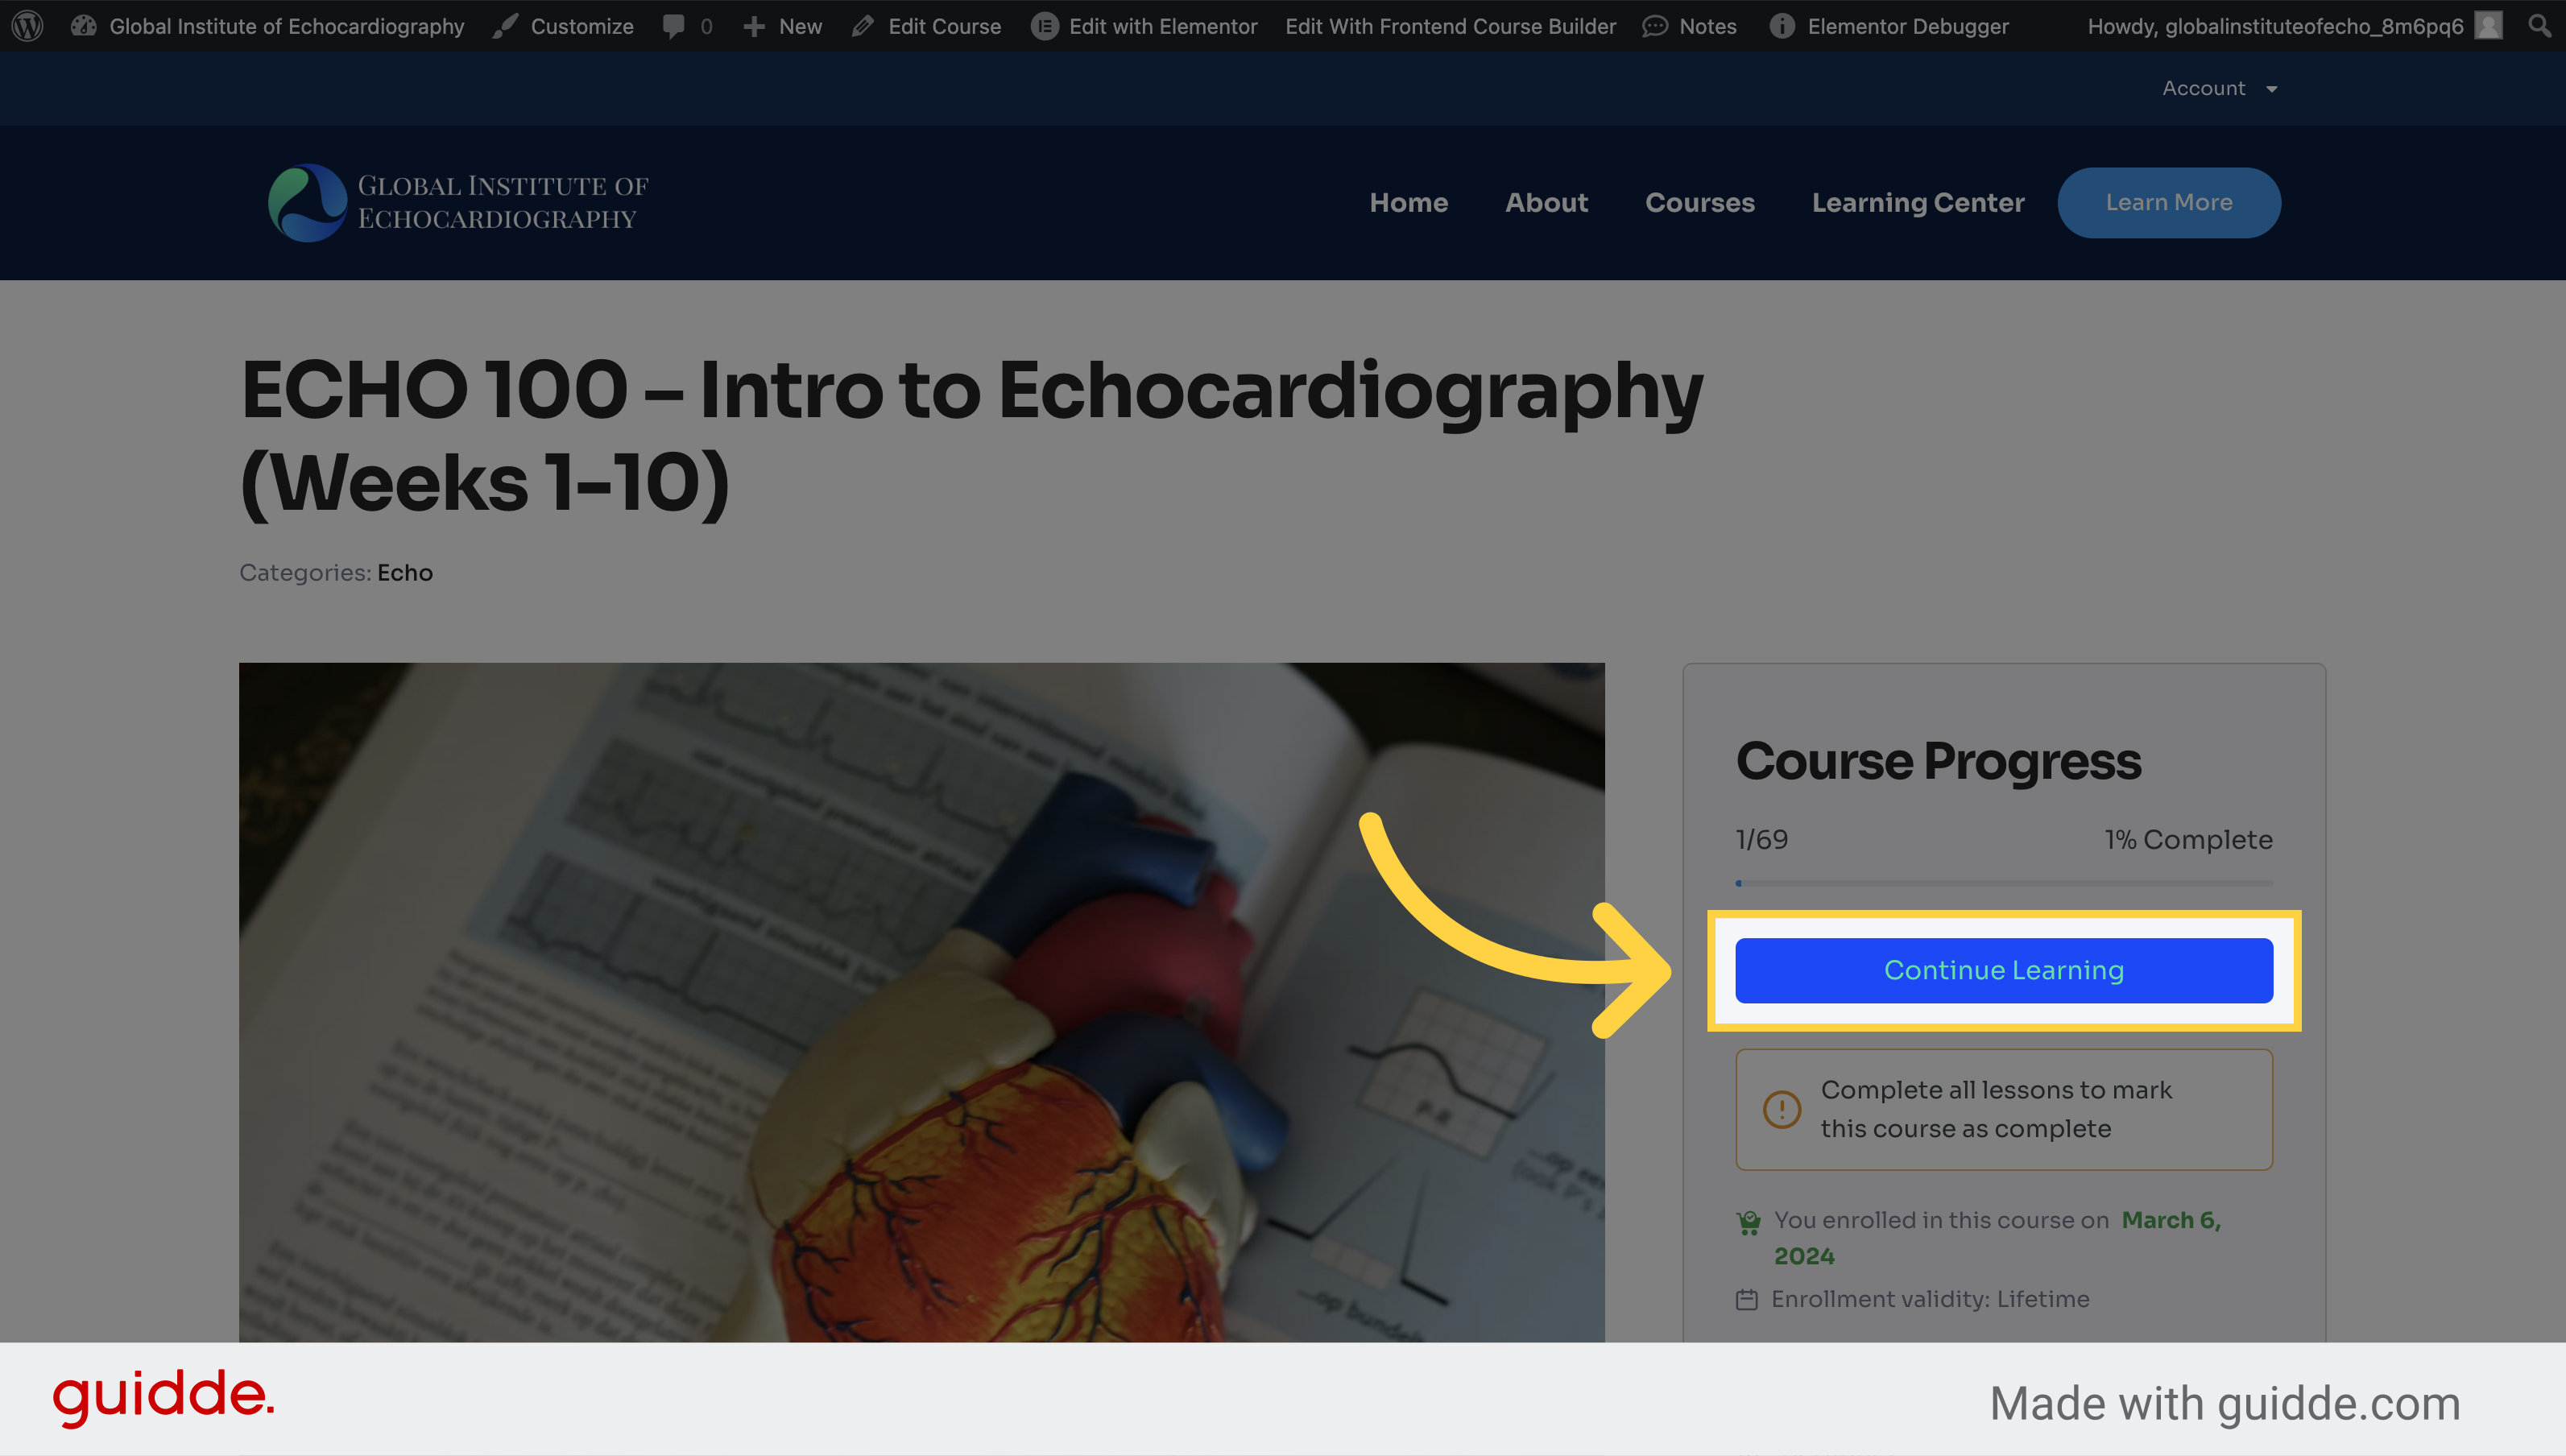
11. Click "Preview" to see the Lesson
Preview the lesson
12. Click "Continue Learning"
Proceed with the learning process
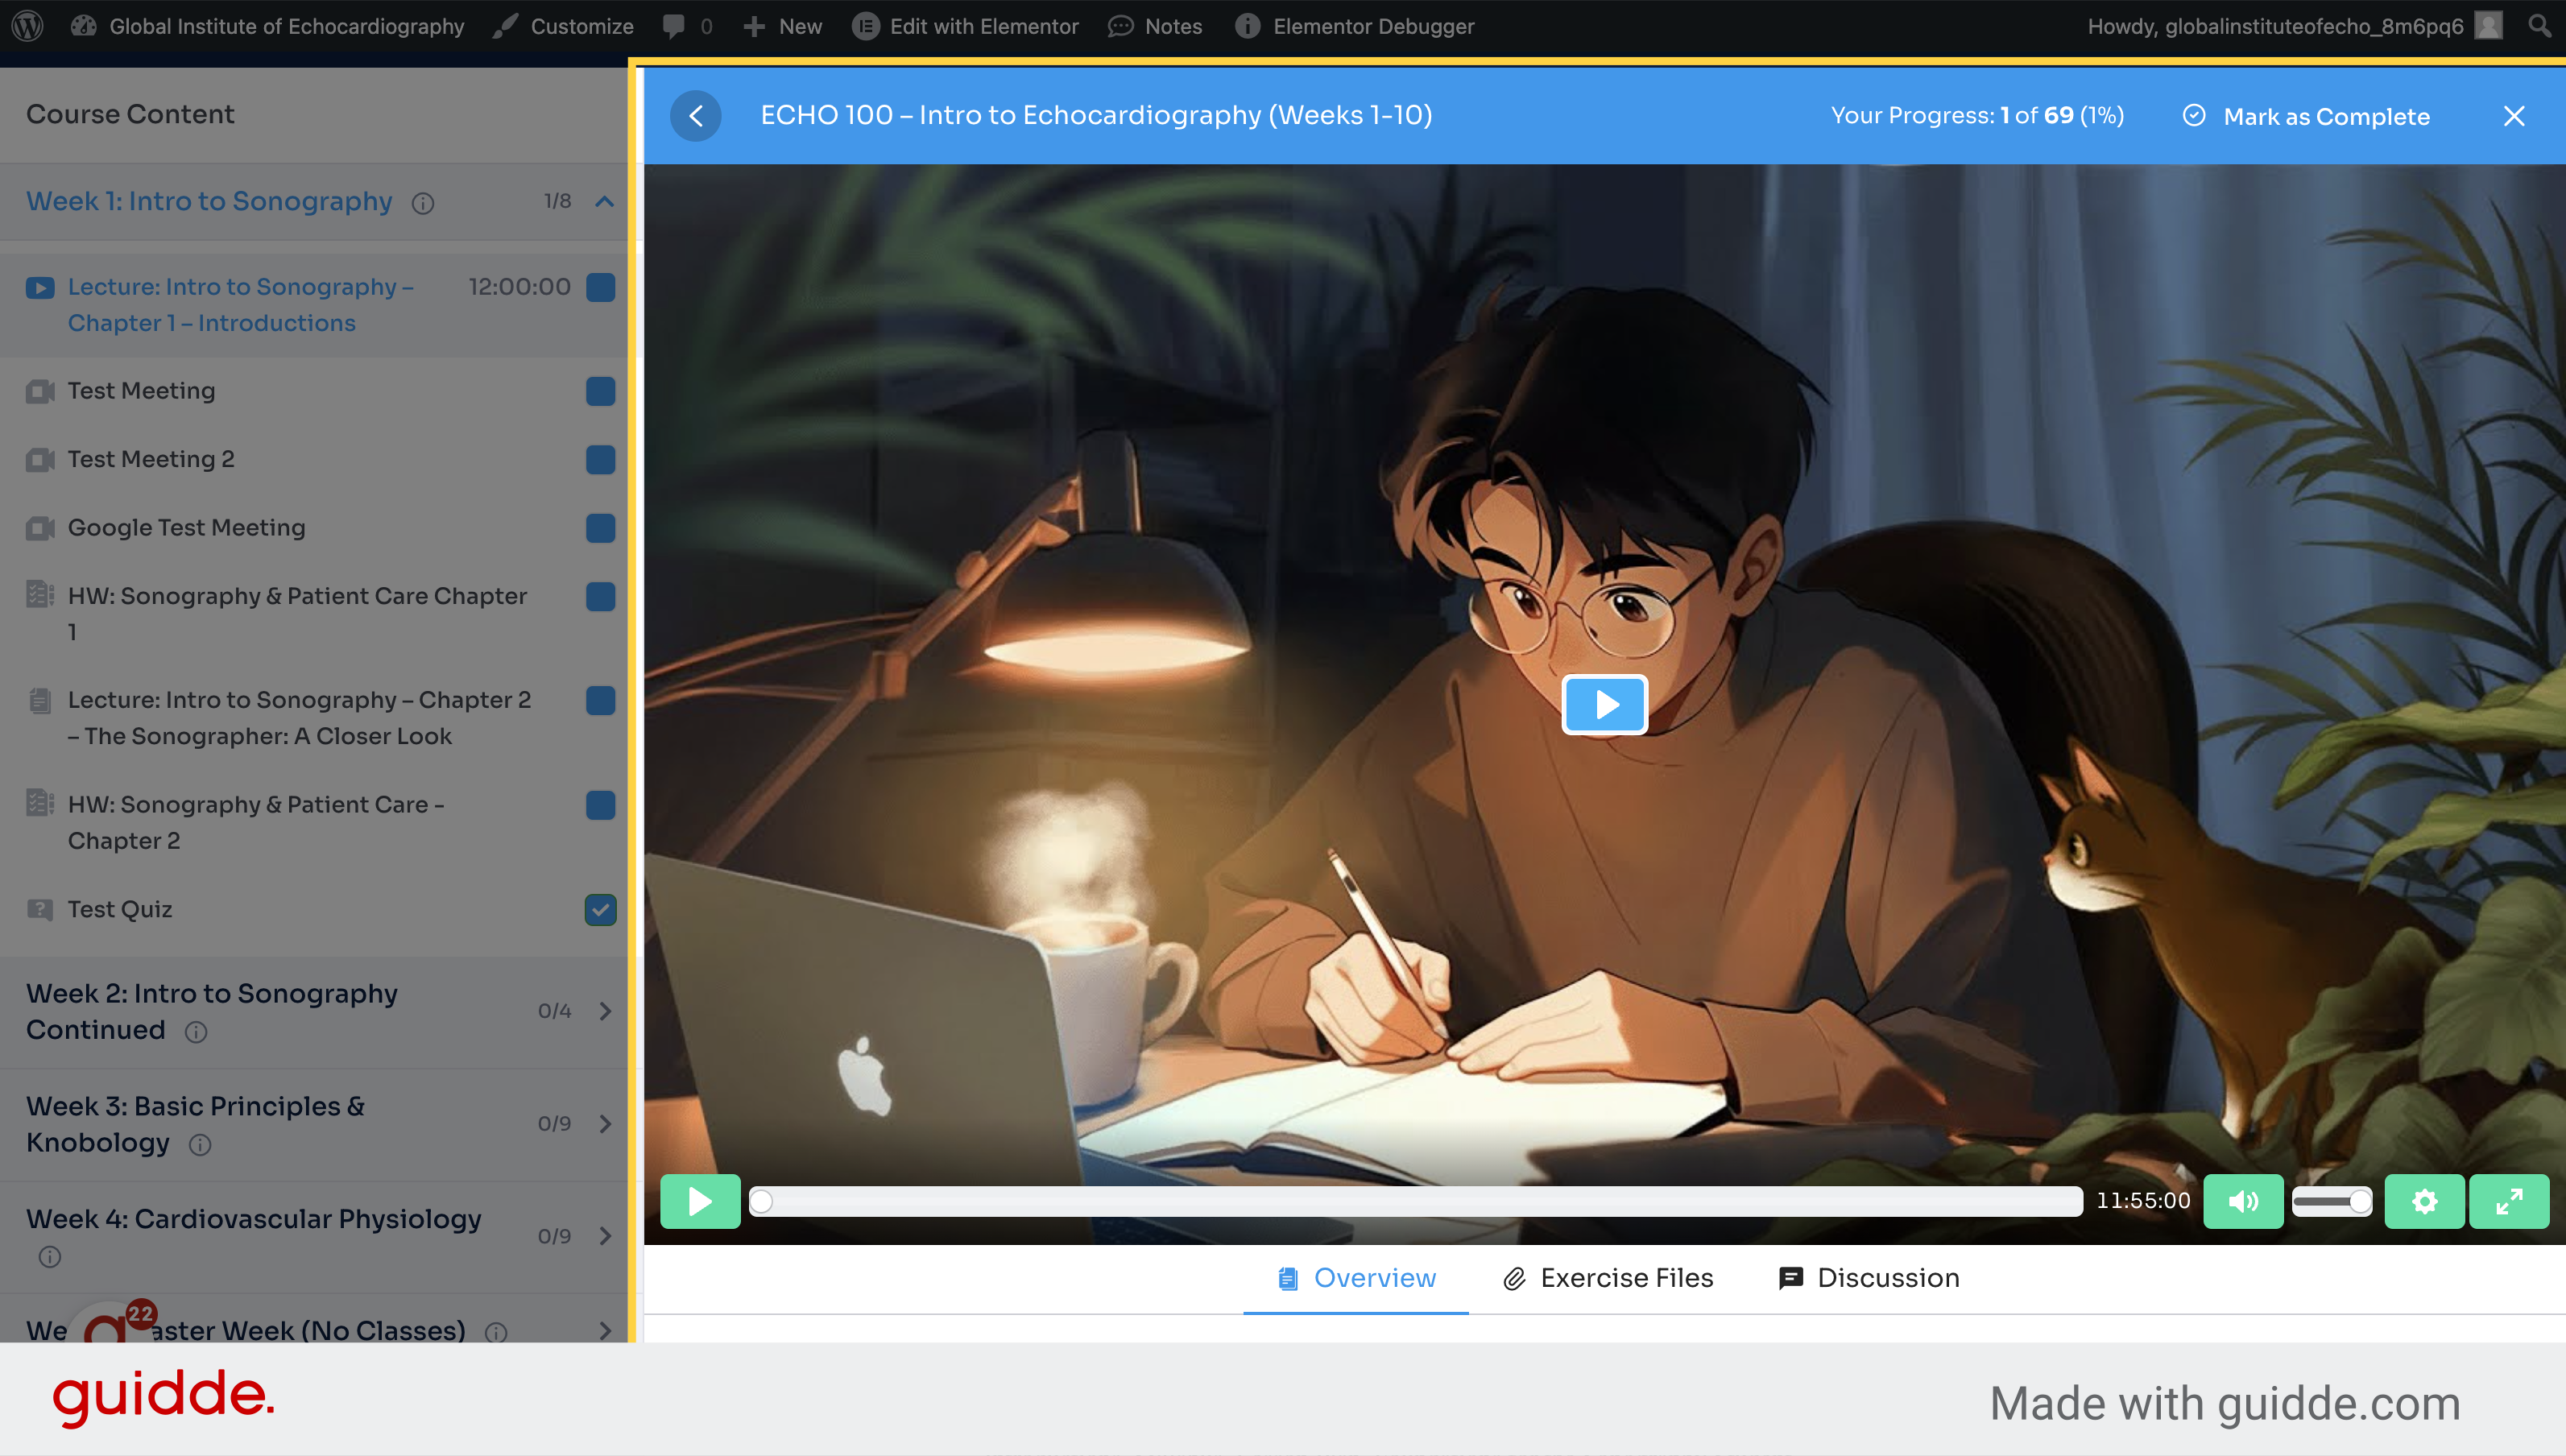
13. Your added video now appears when the Lesson is clicked
Start playing the video
This guide covered the steps to incorporate a YouTube video into a lesson for employee training using the LMS. From selecting the video source to publishing the course, follow these instructions to elevate your training materials.
How to Add an Assignment
This guide will help you seamlessly add an assignment in the Employee Training software. From accessing your courses to setting due dates and points, follow these clear steps to efficiently create assignments for your training modules.
1. Click "My Courses" from the dashboard
Access your courses.
2. Click here to edit
Click here
3. Click here in the appropriate topic / week
Click the selected button
4. Click "+ Assignments"
Access the assignments tab.
5. Enter the title and summary - note that the title should be uniqe for the assignment to help students differentiate from others
Access the assignments tab.
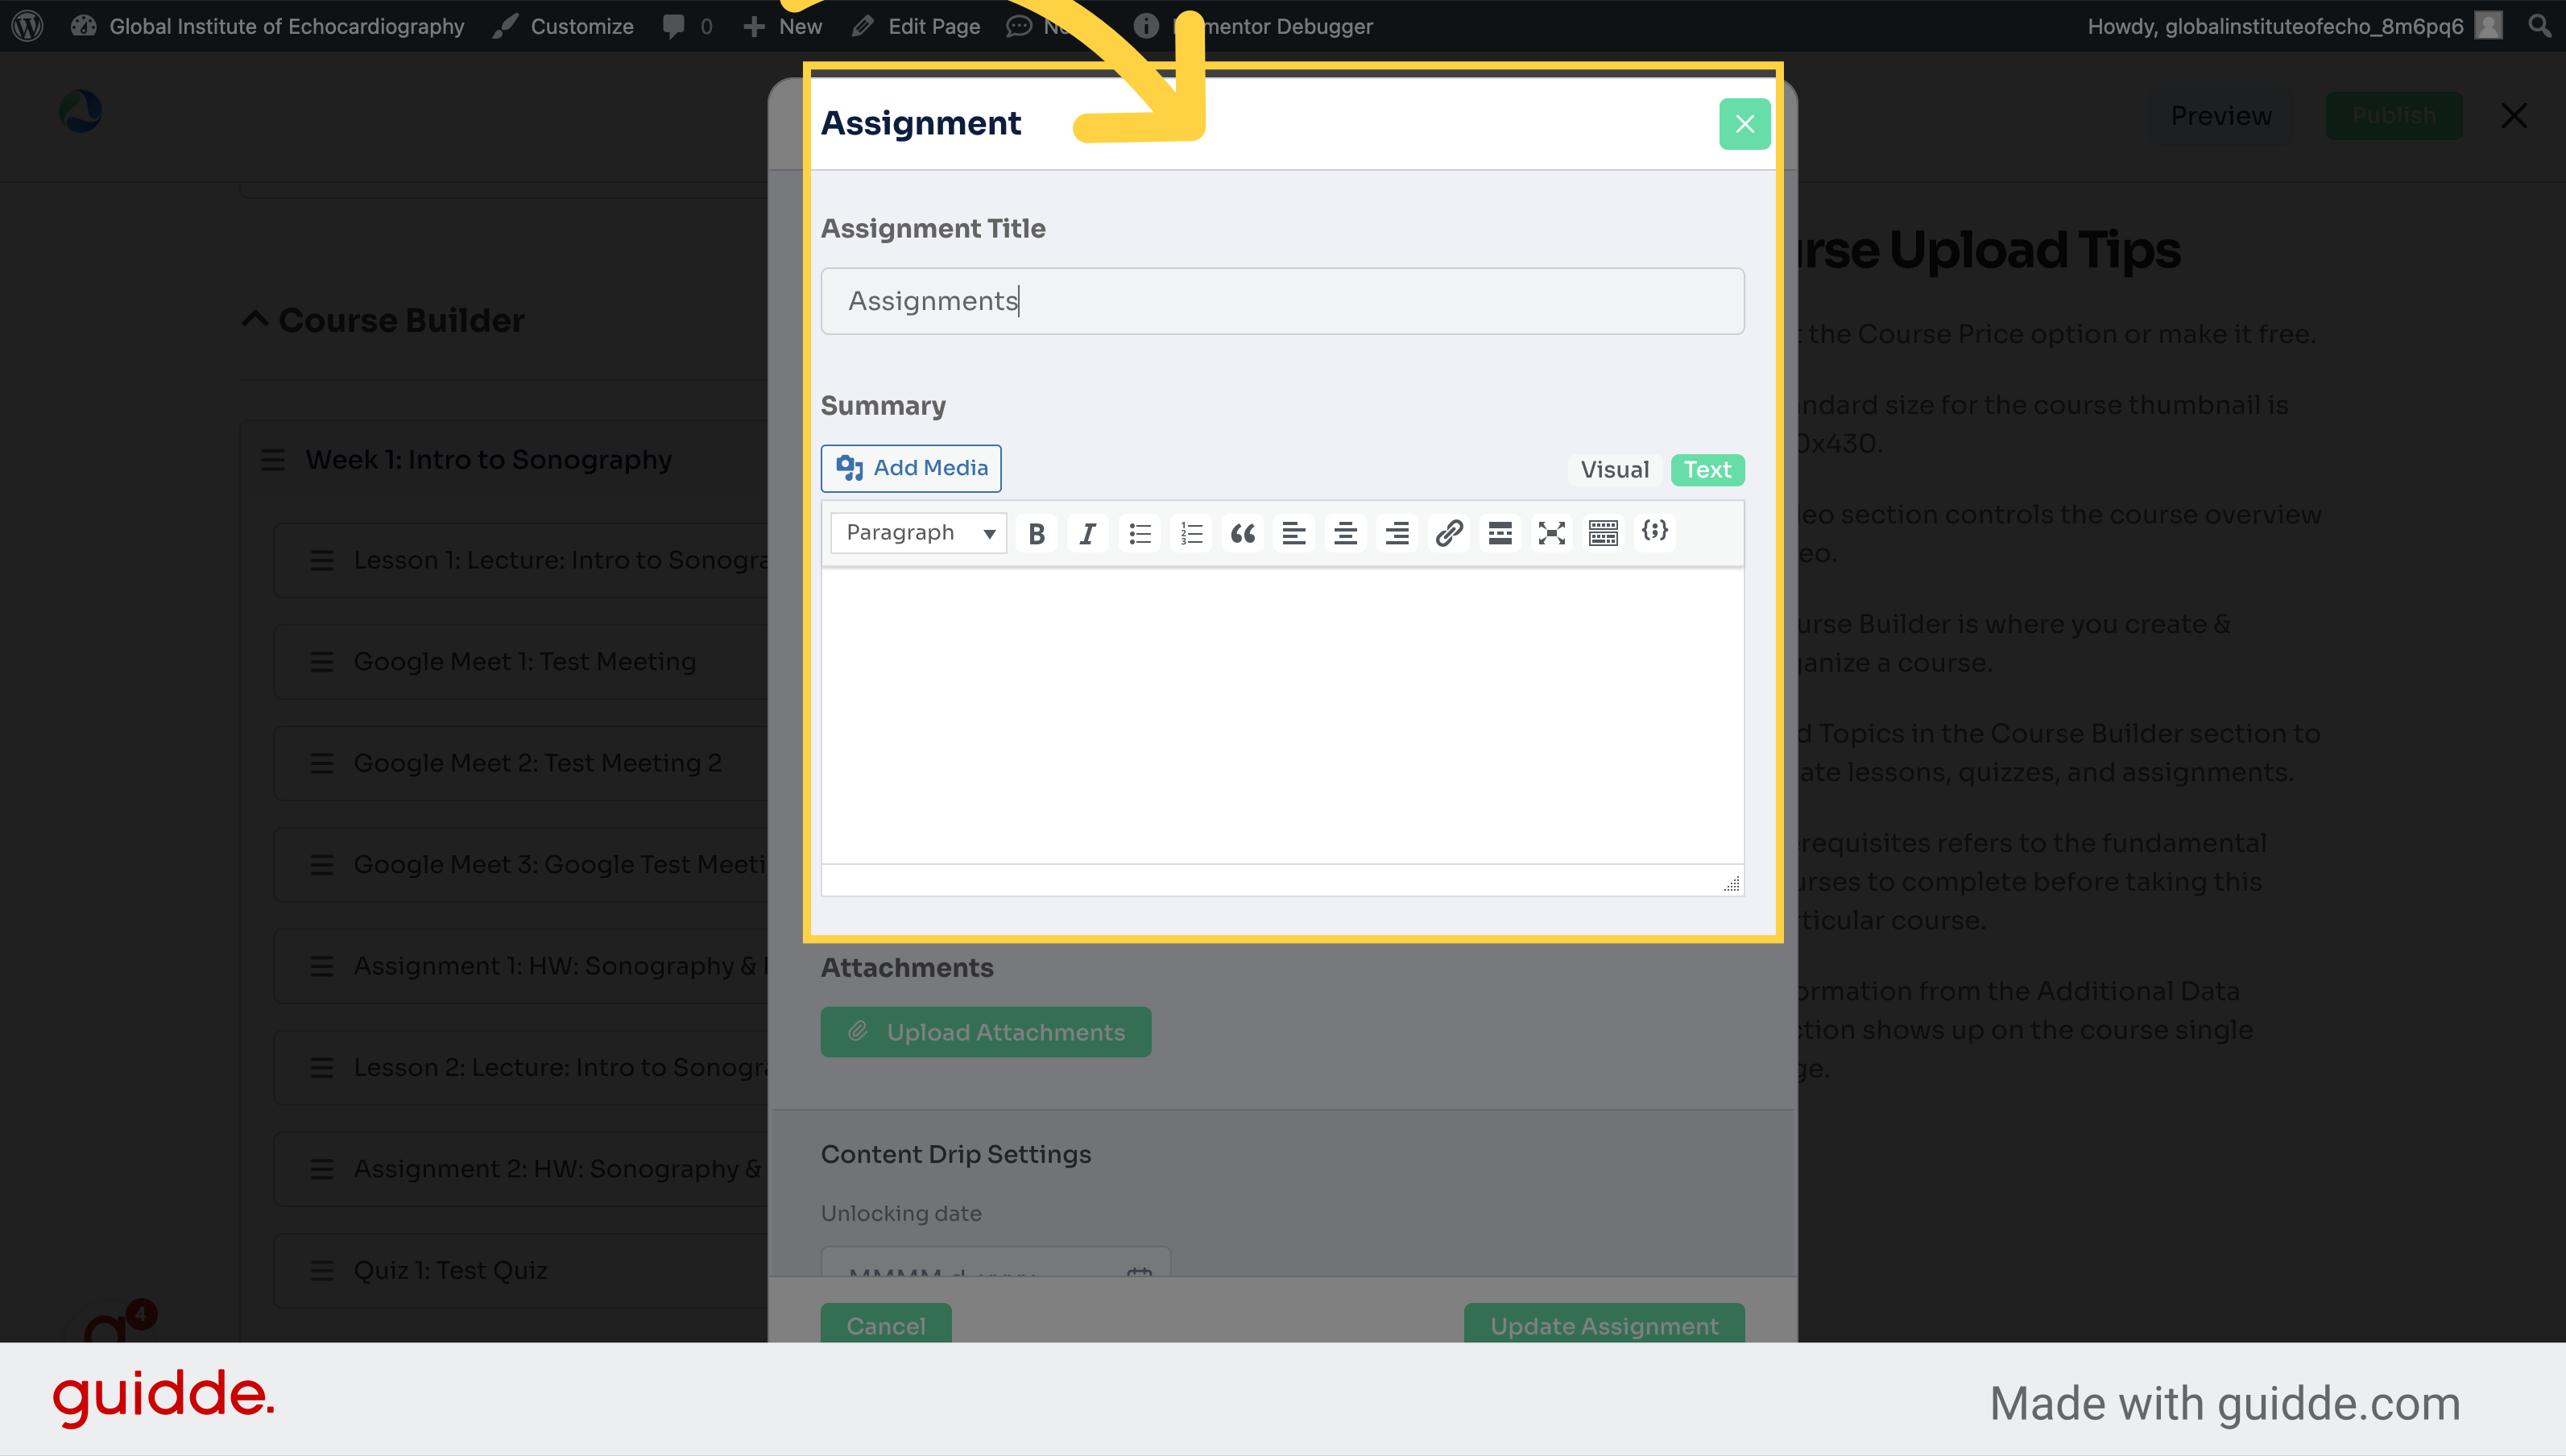
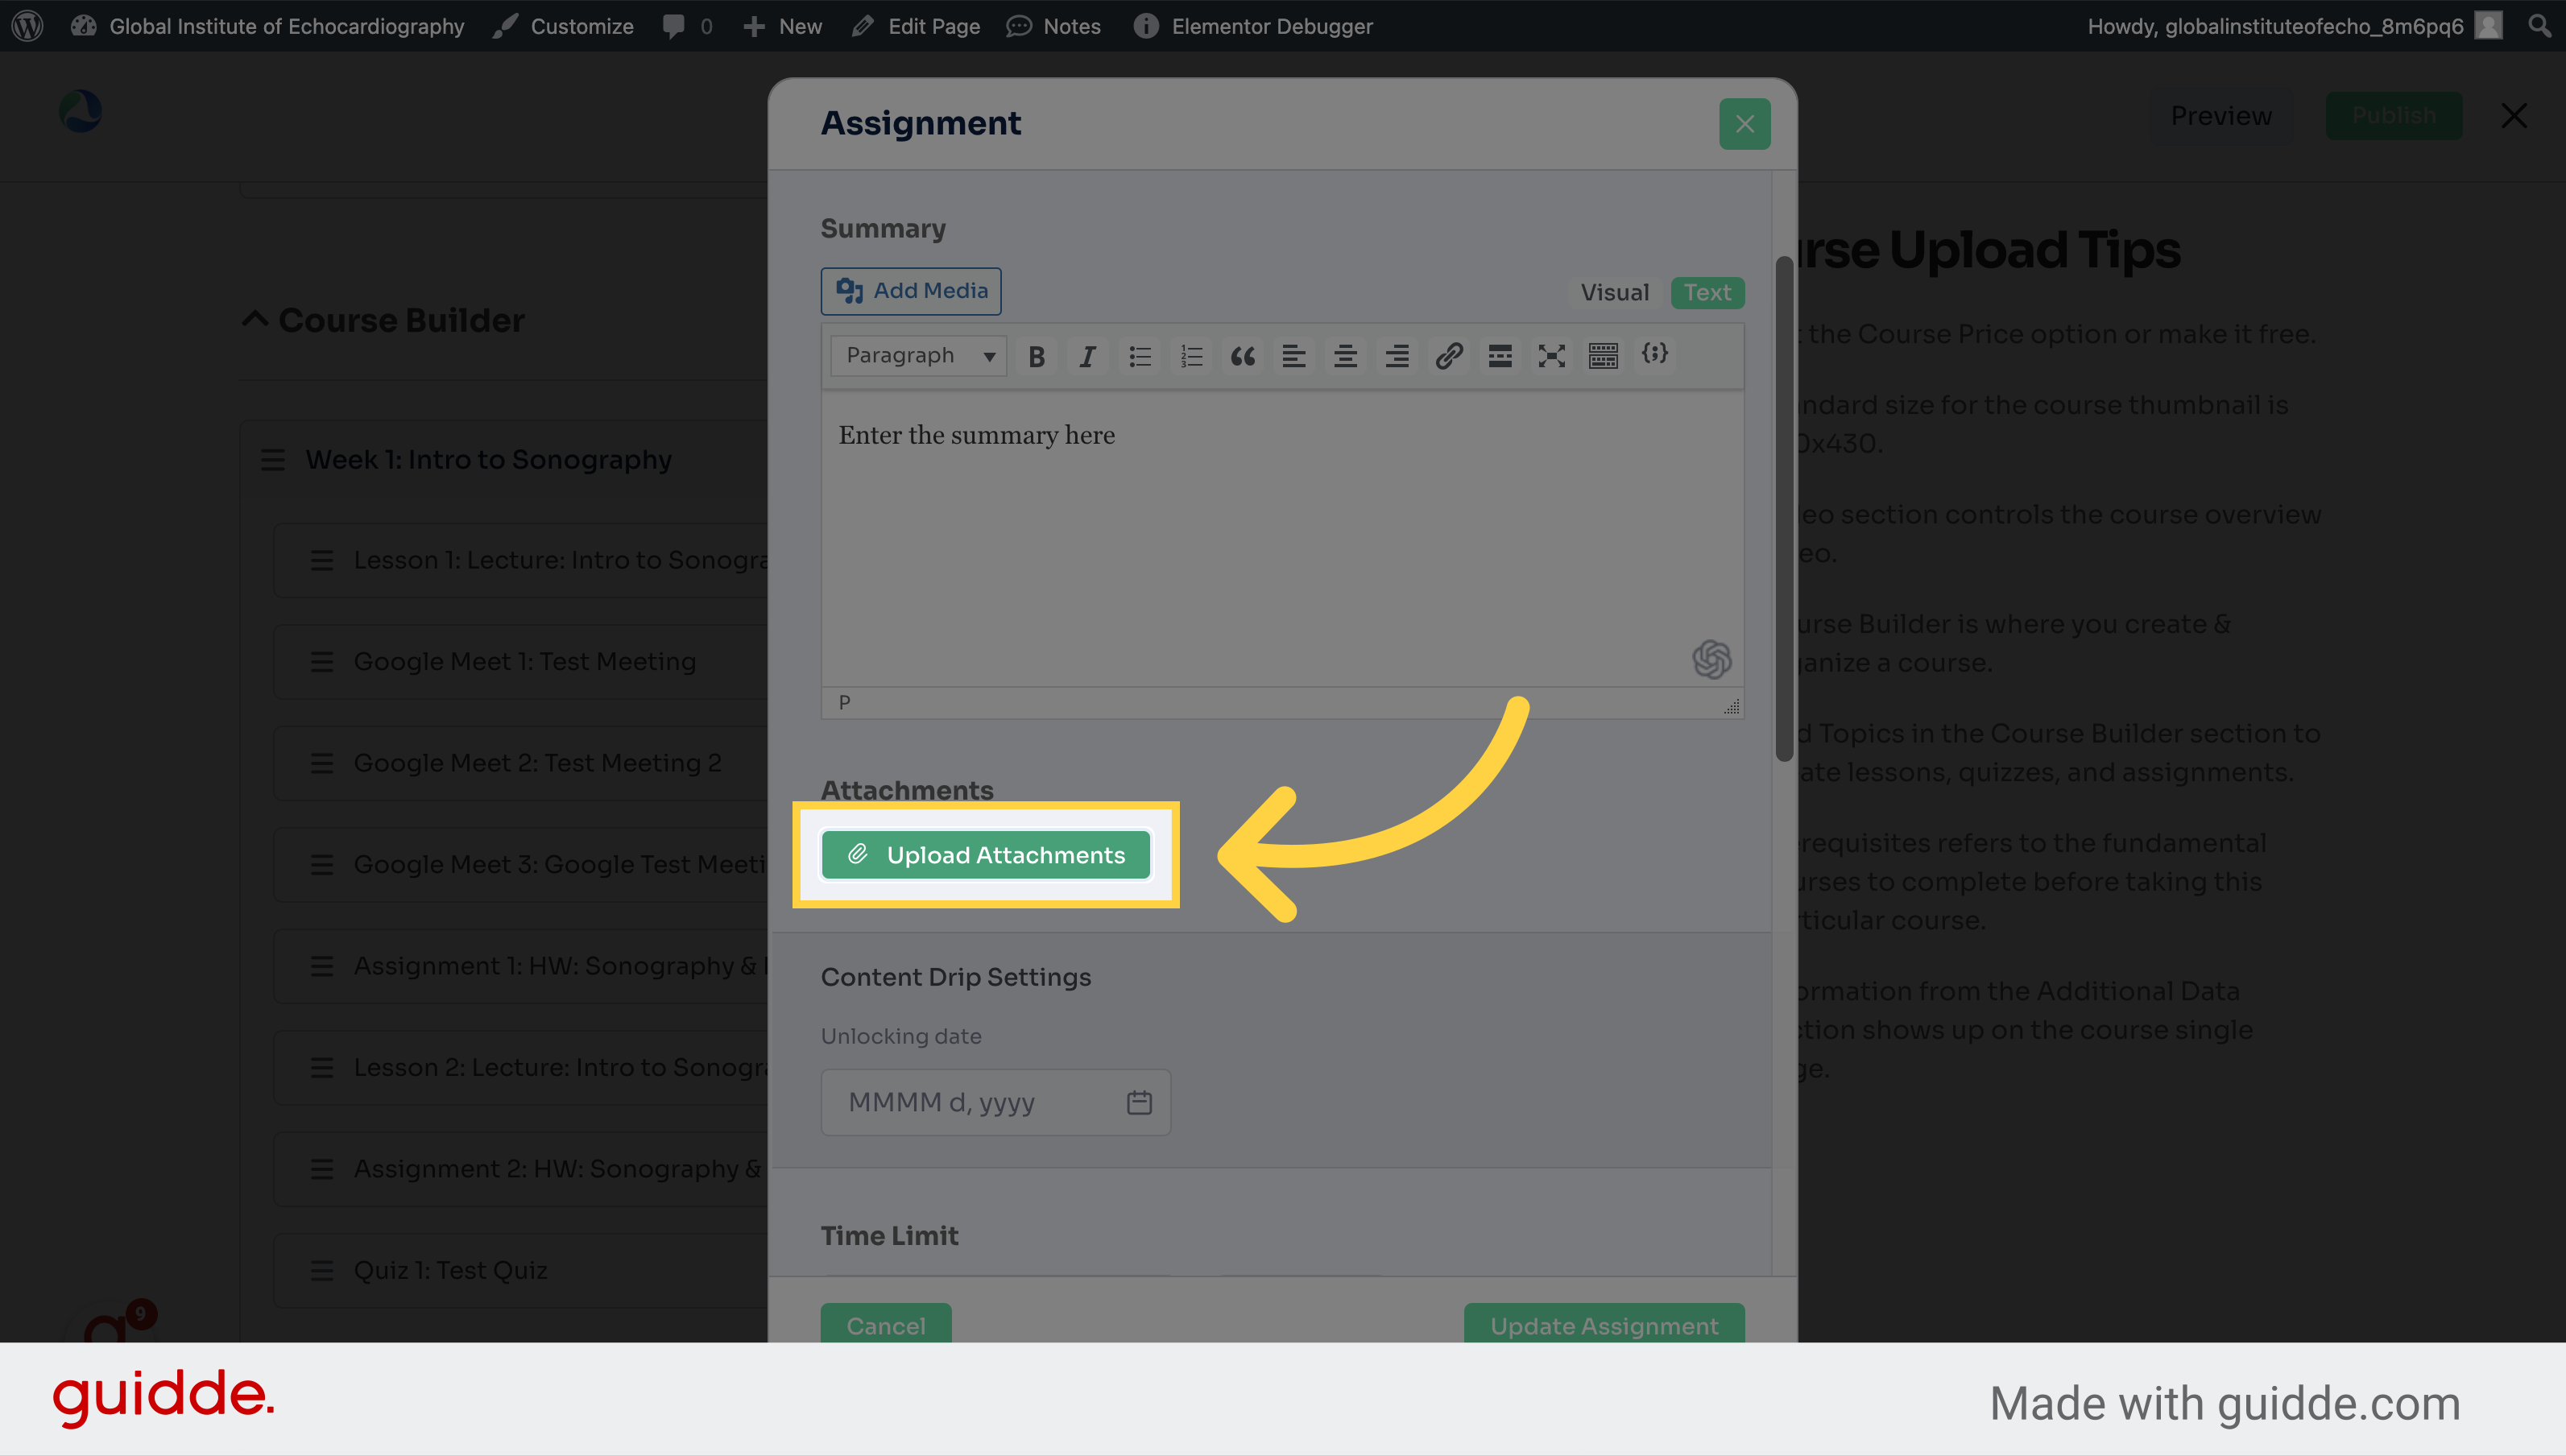
6. Click "Upload Attachments" to add appropriate attachments such as pdfs, questions, or assignment resources
Attach files, if needed.
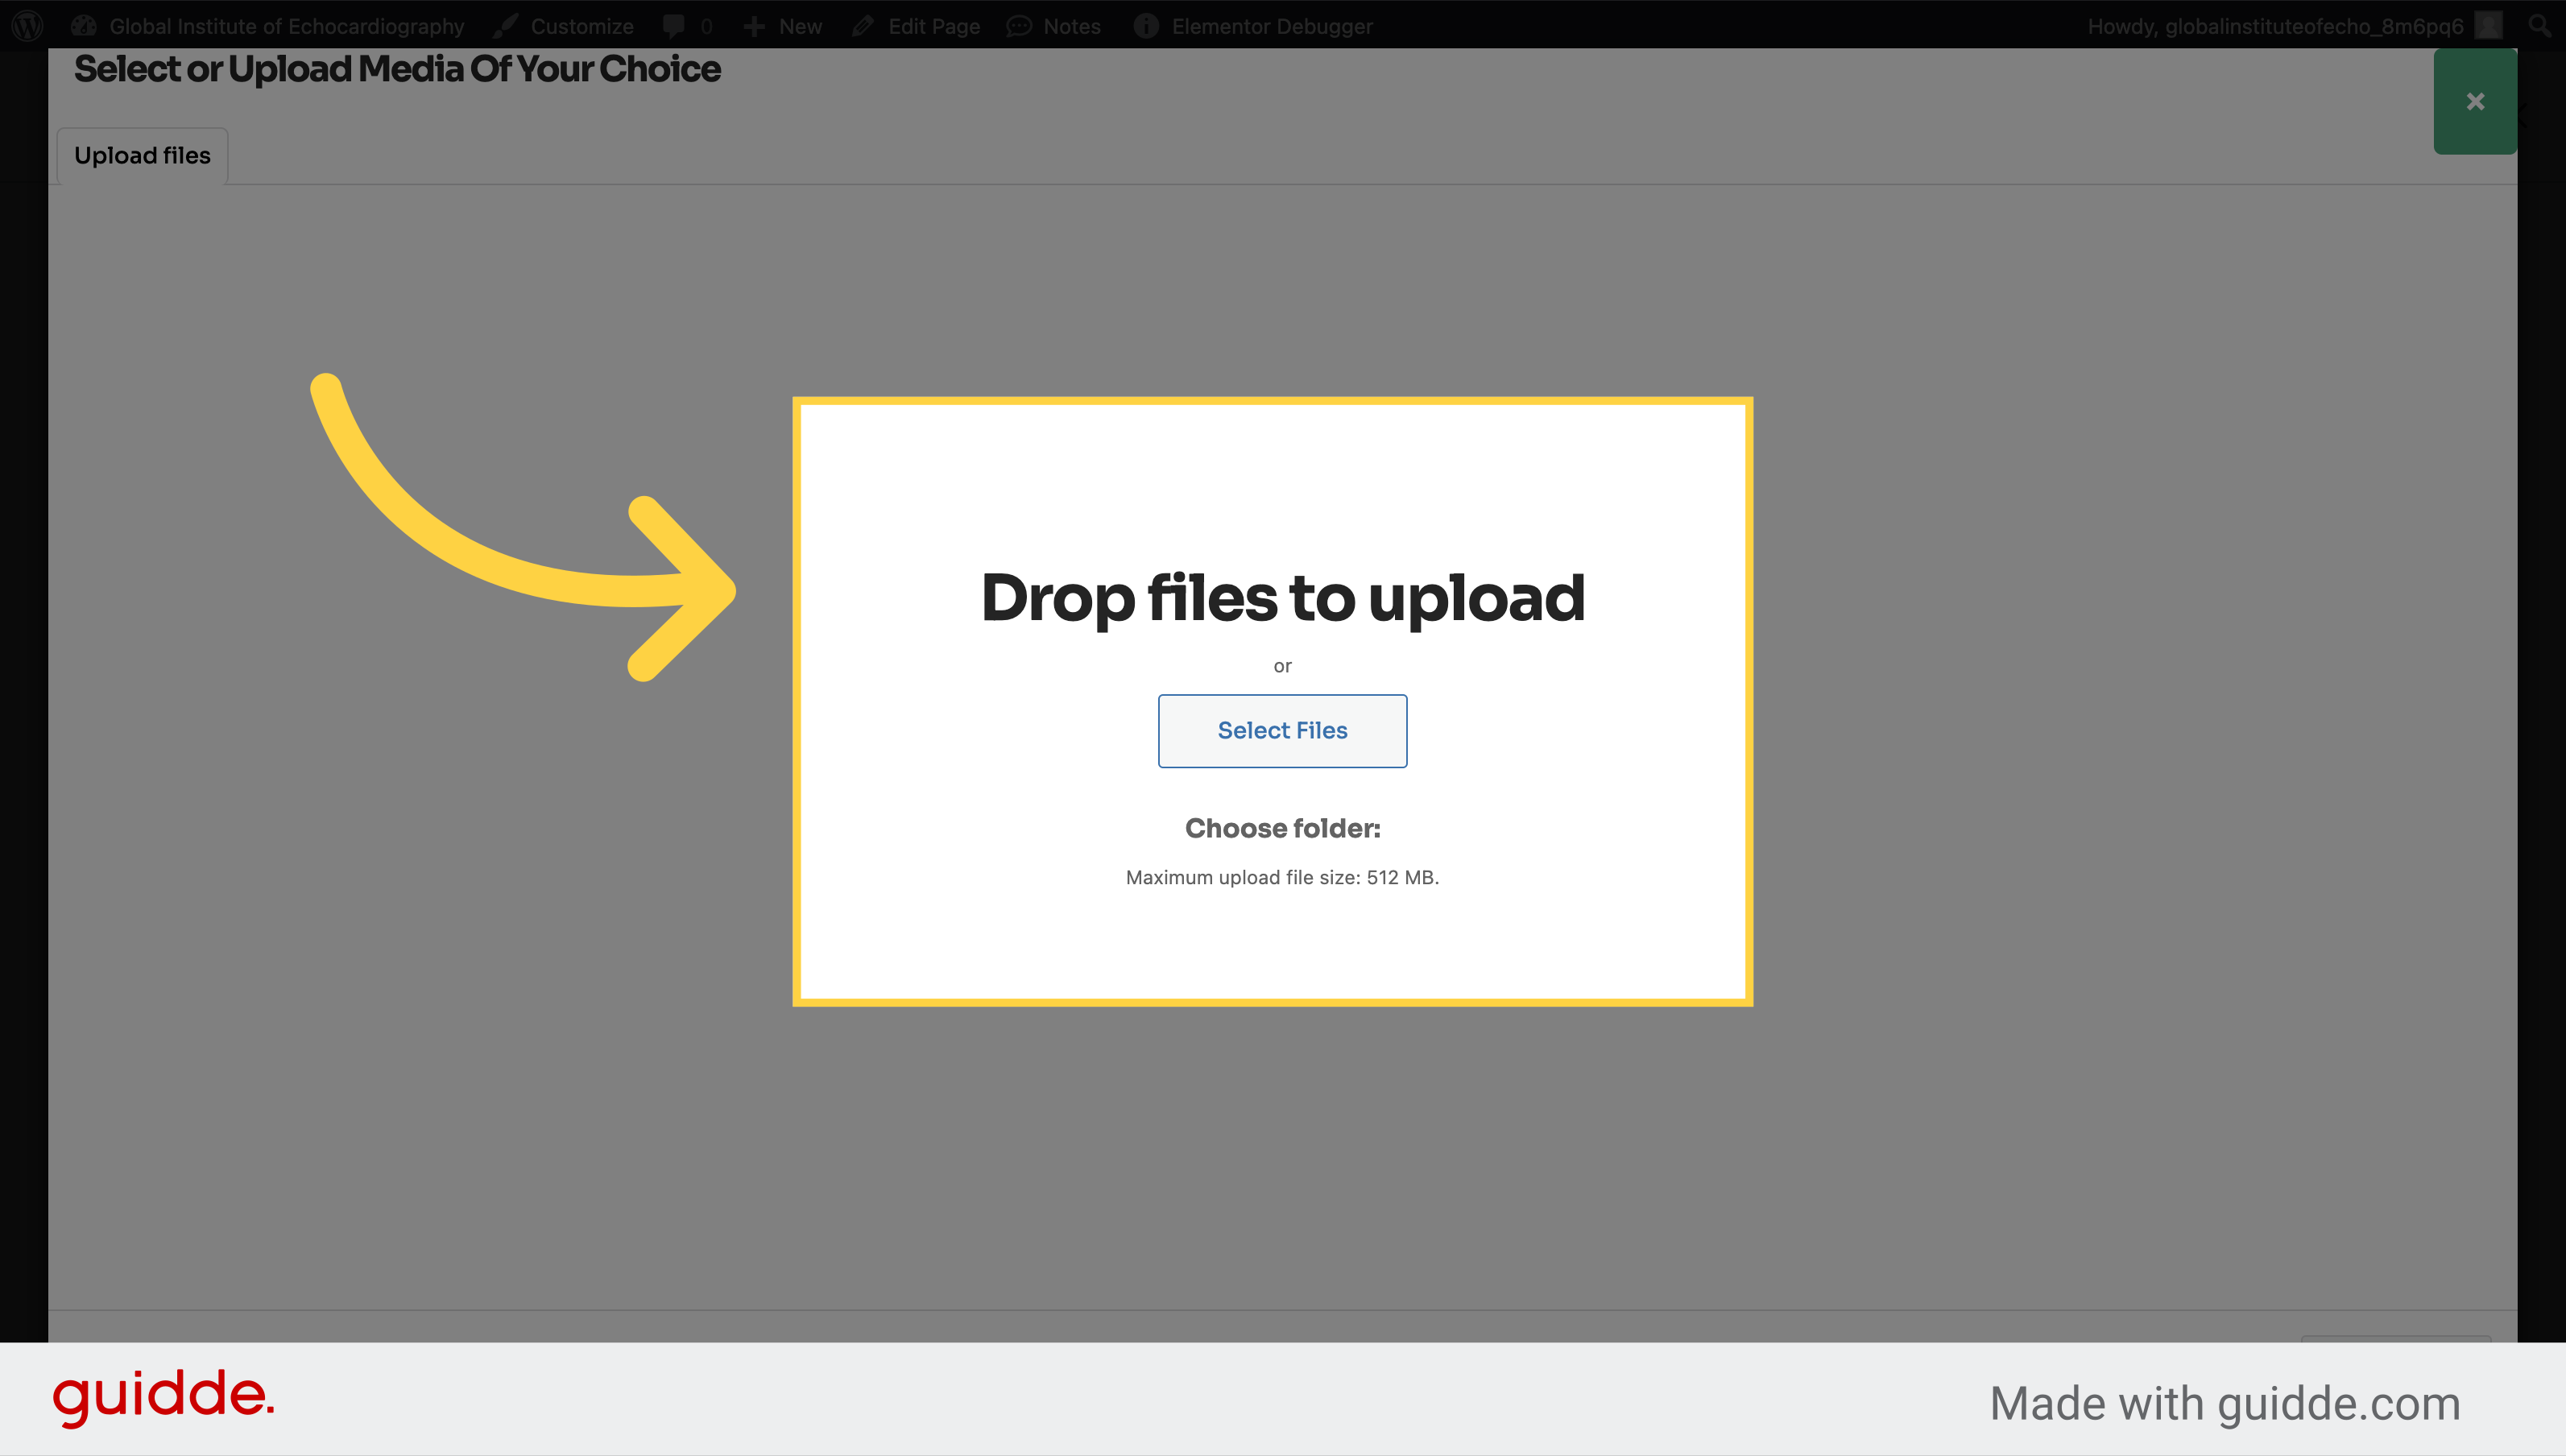
7. Upload files
Close the dialog box.
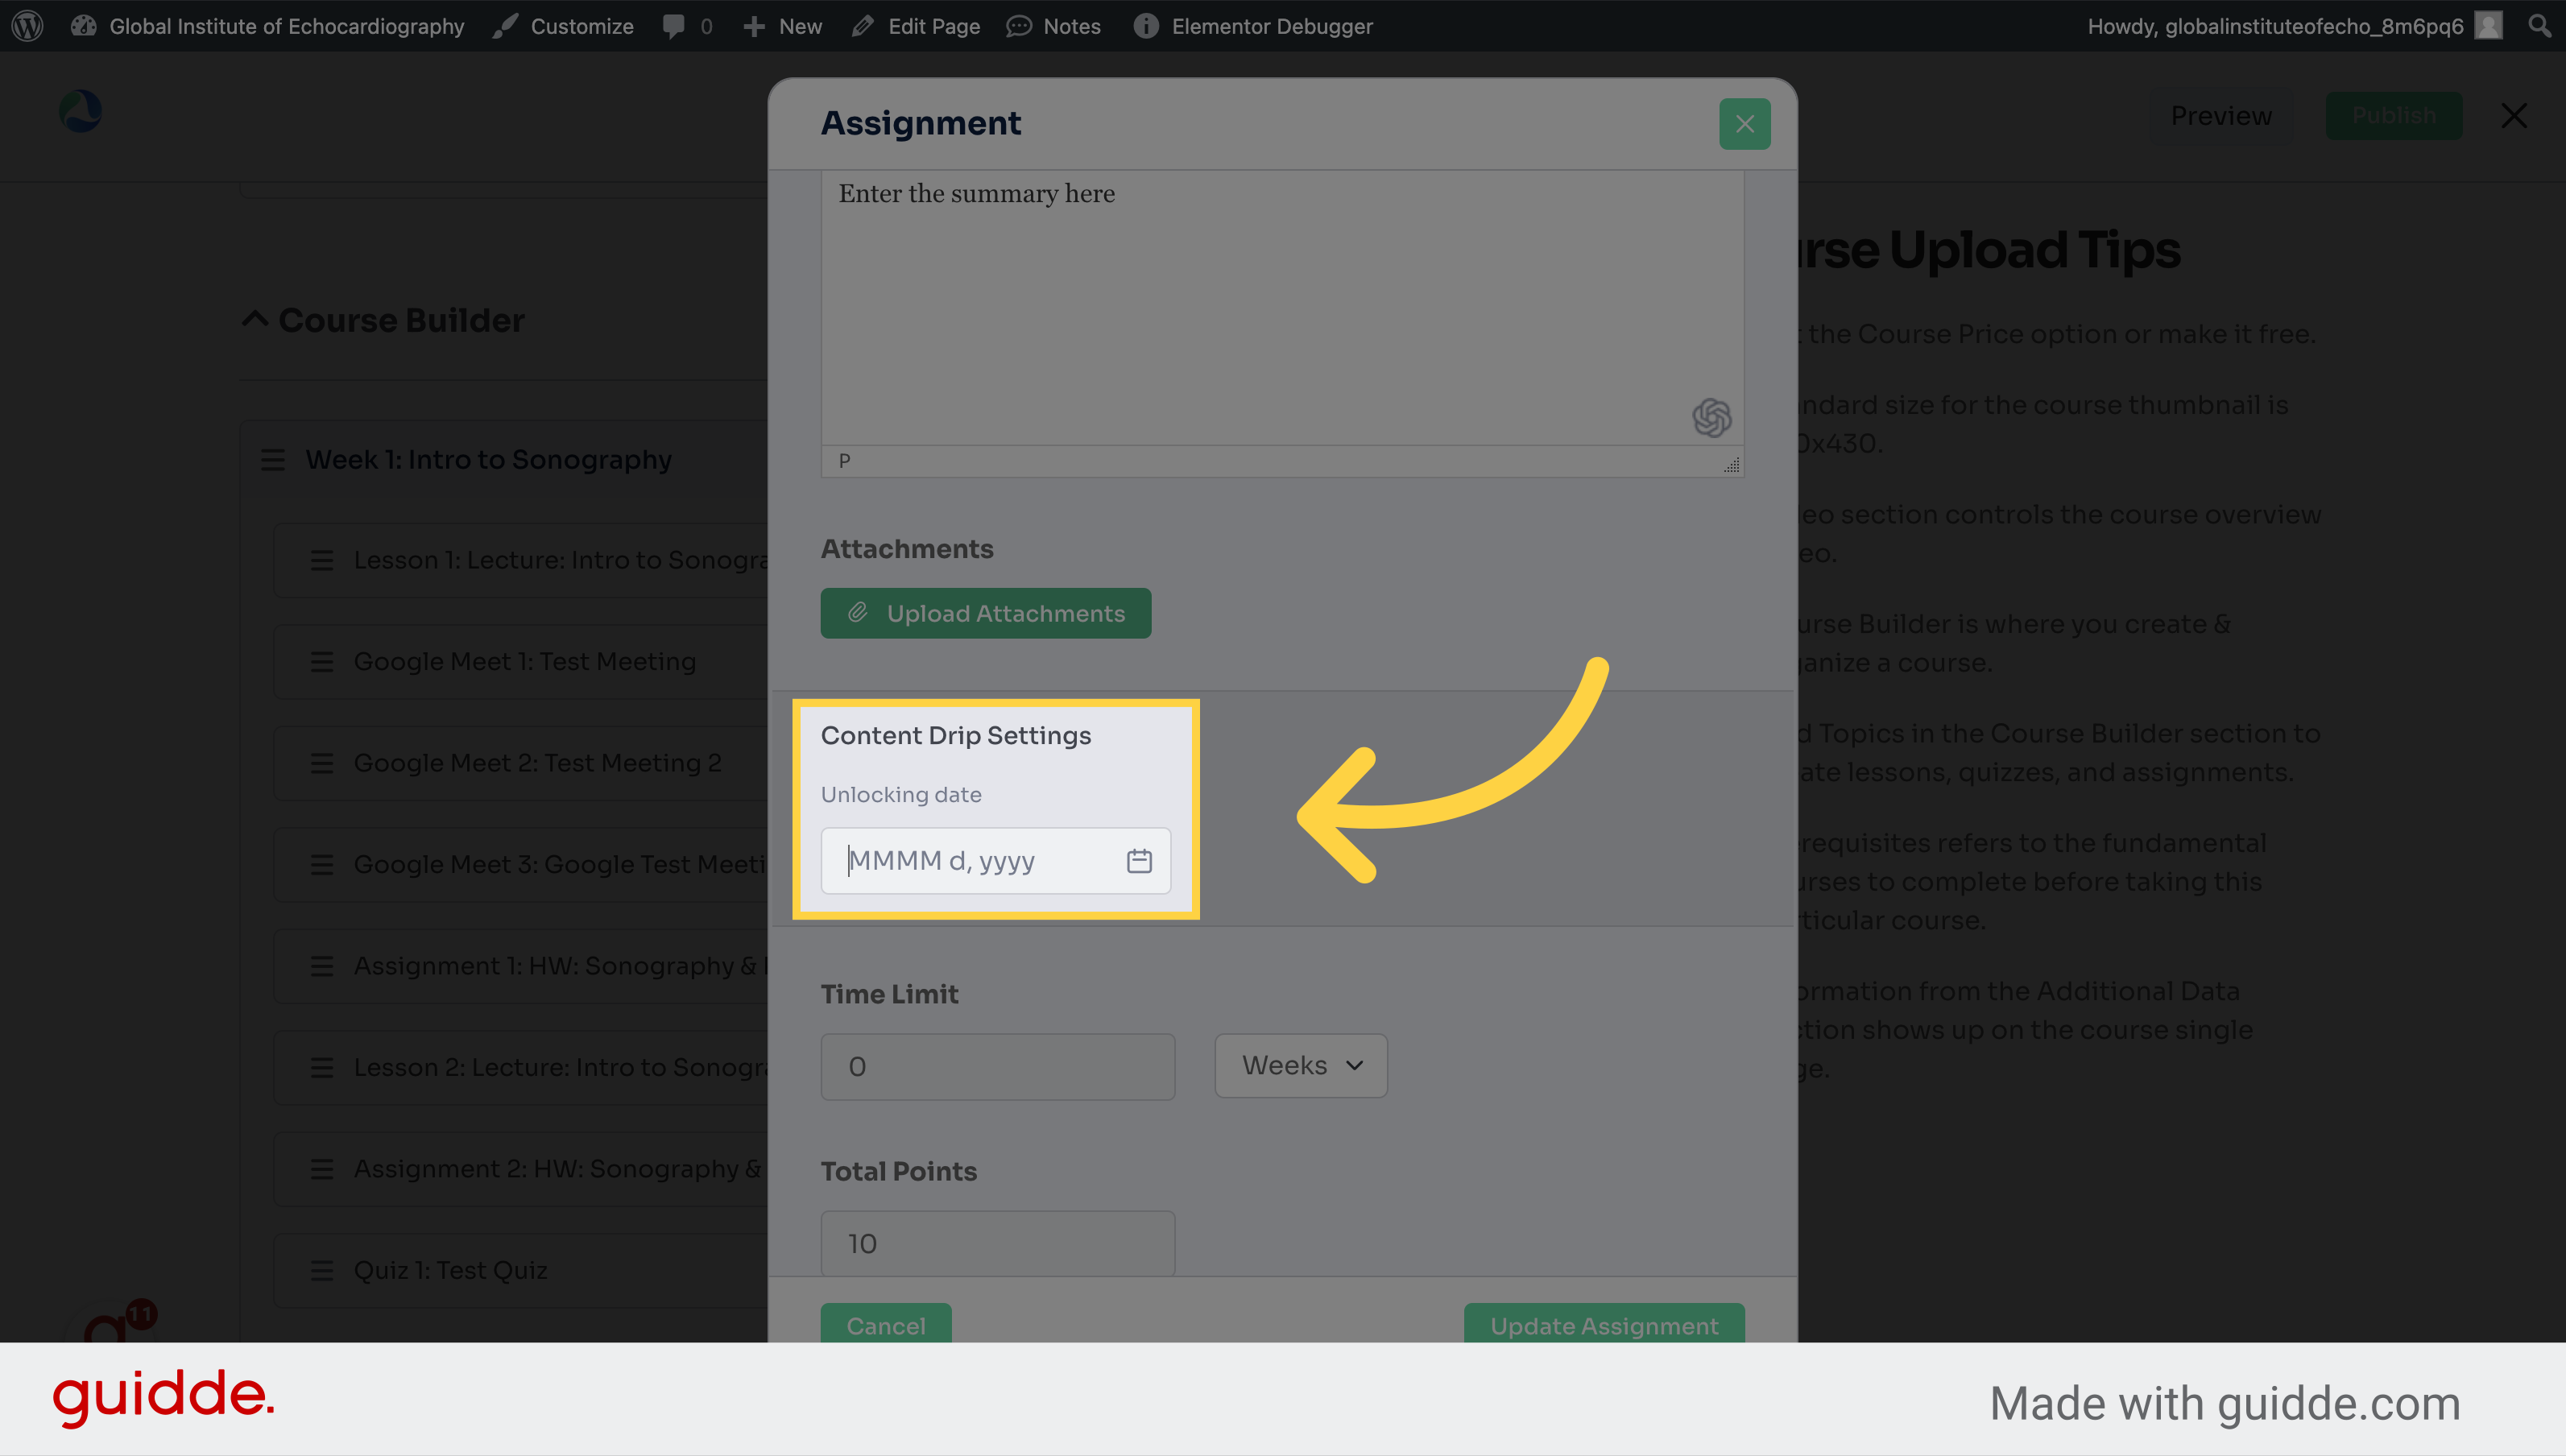
8. Choose the date that this assignment should become availalbe (this is not the due date)
Set the due date.
9. Click here to set the 'time limit'. This will be the DUE DATE. After the time limit, the assignment will be inaccessible.
Set initial points.
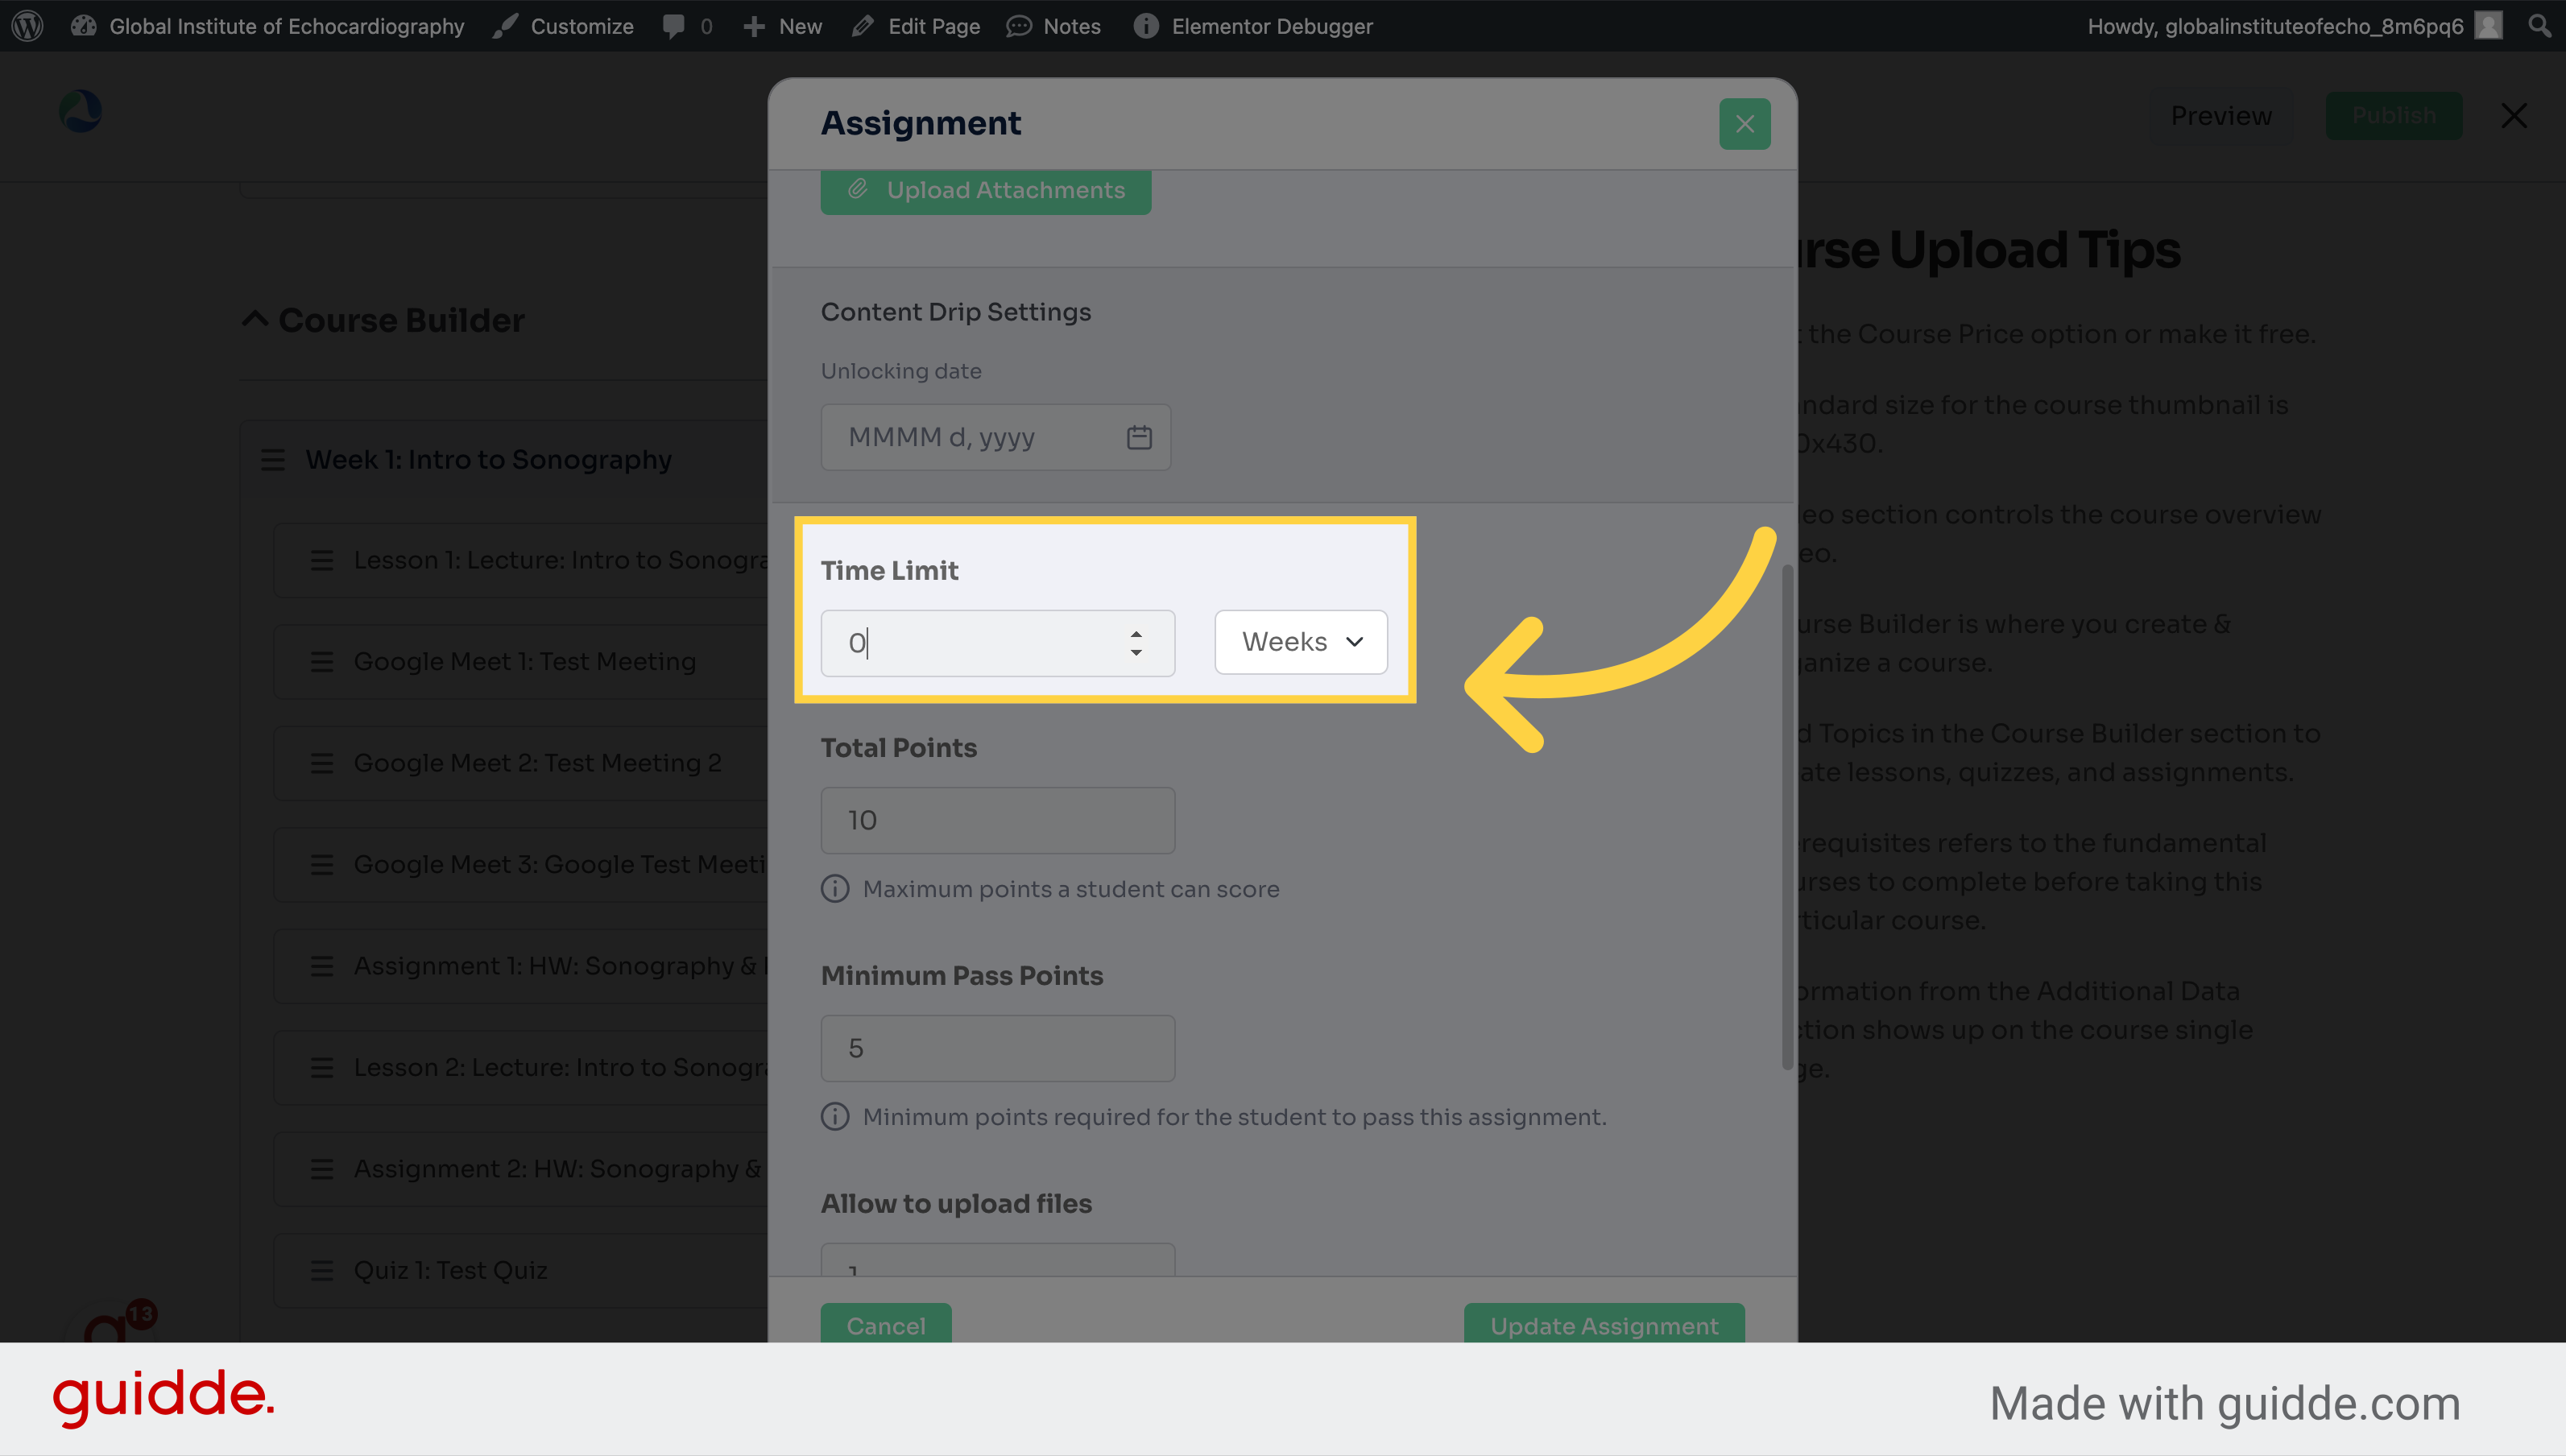
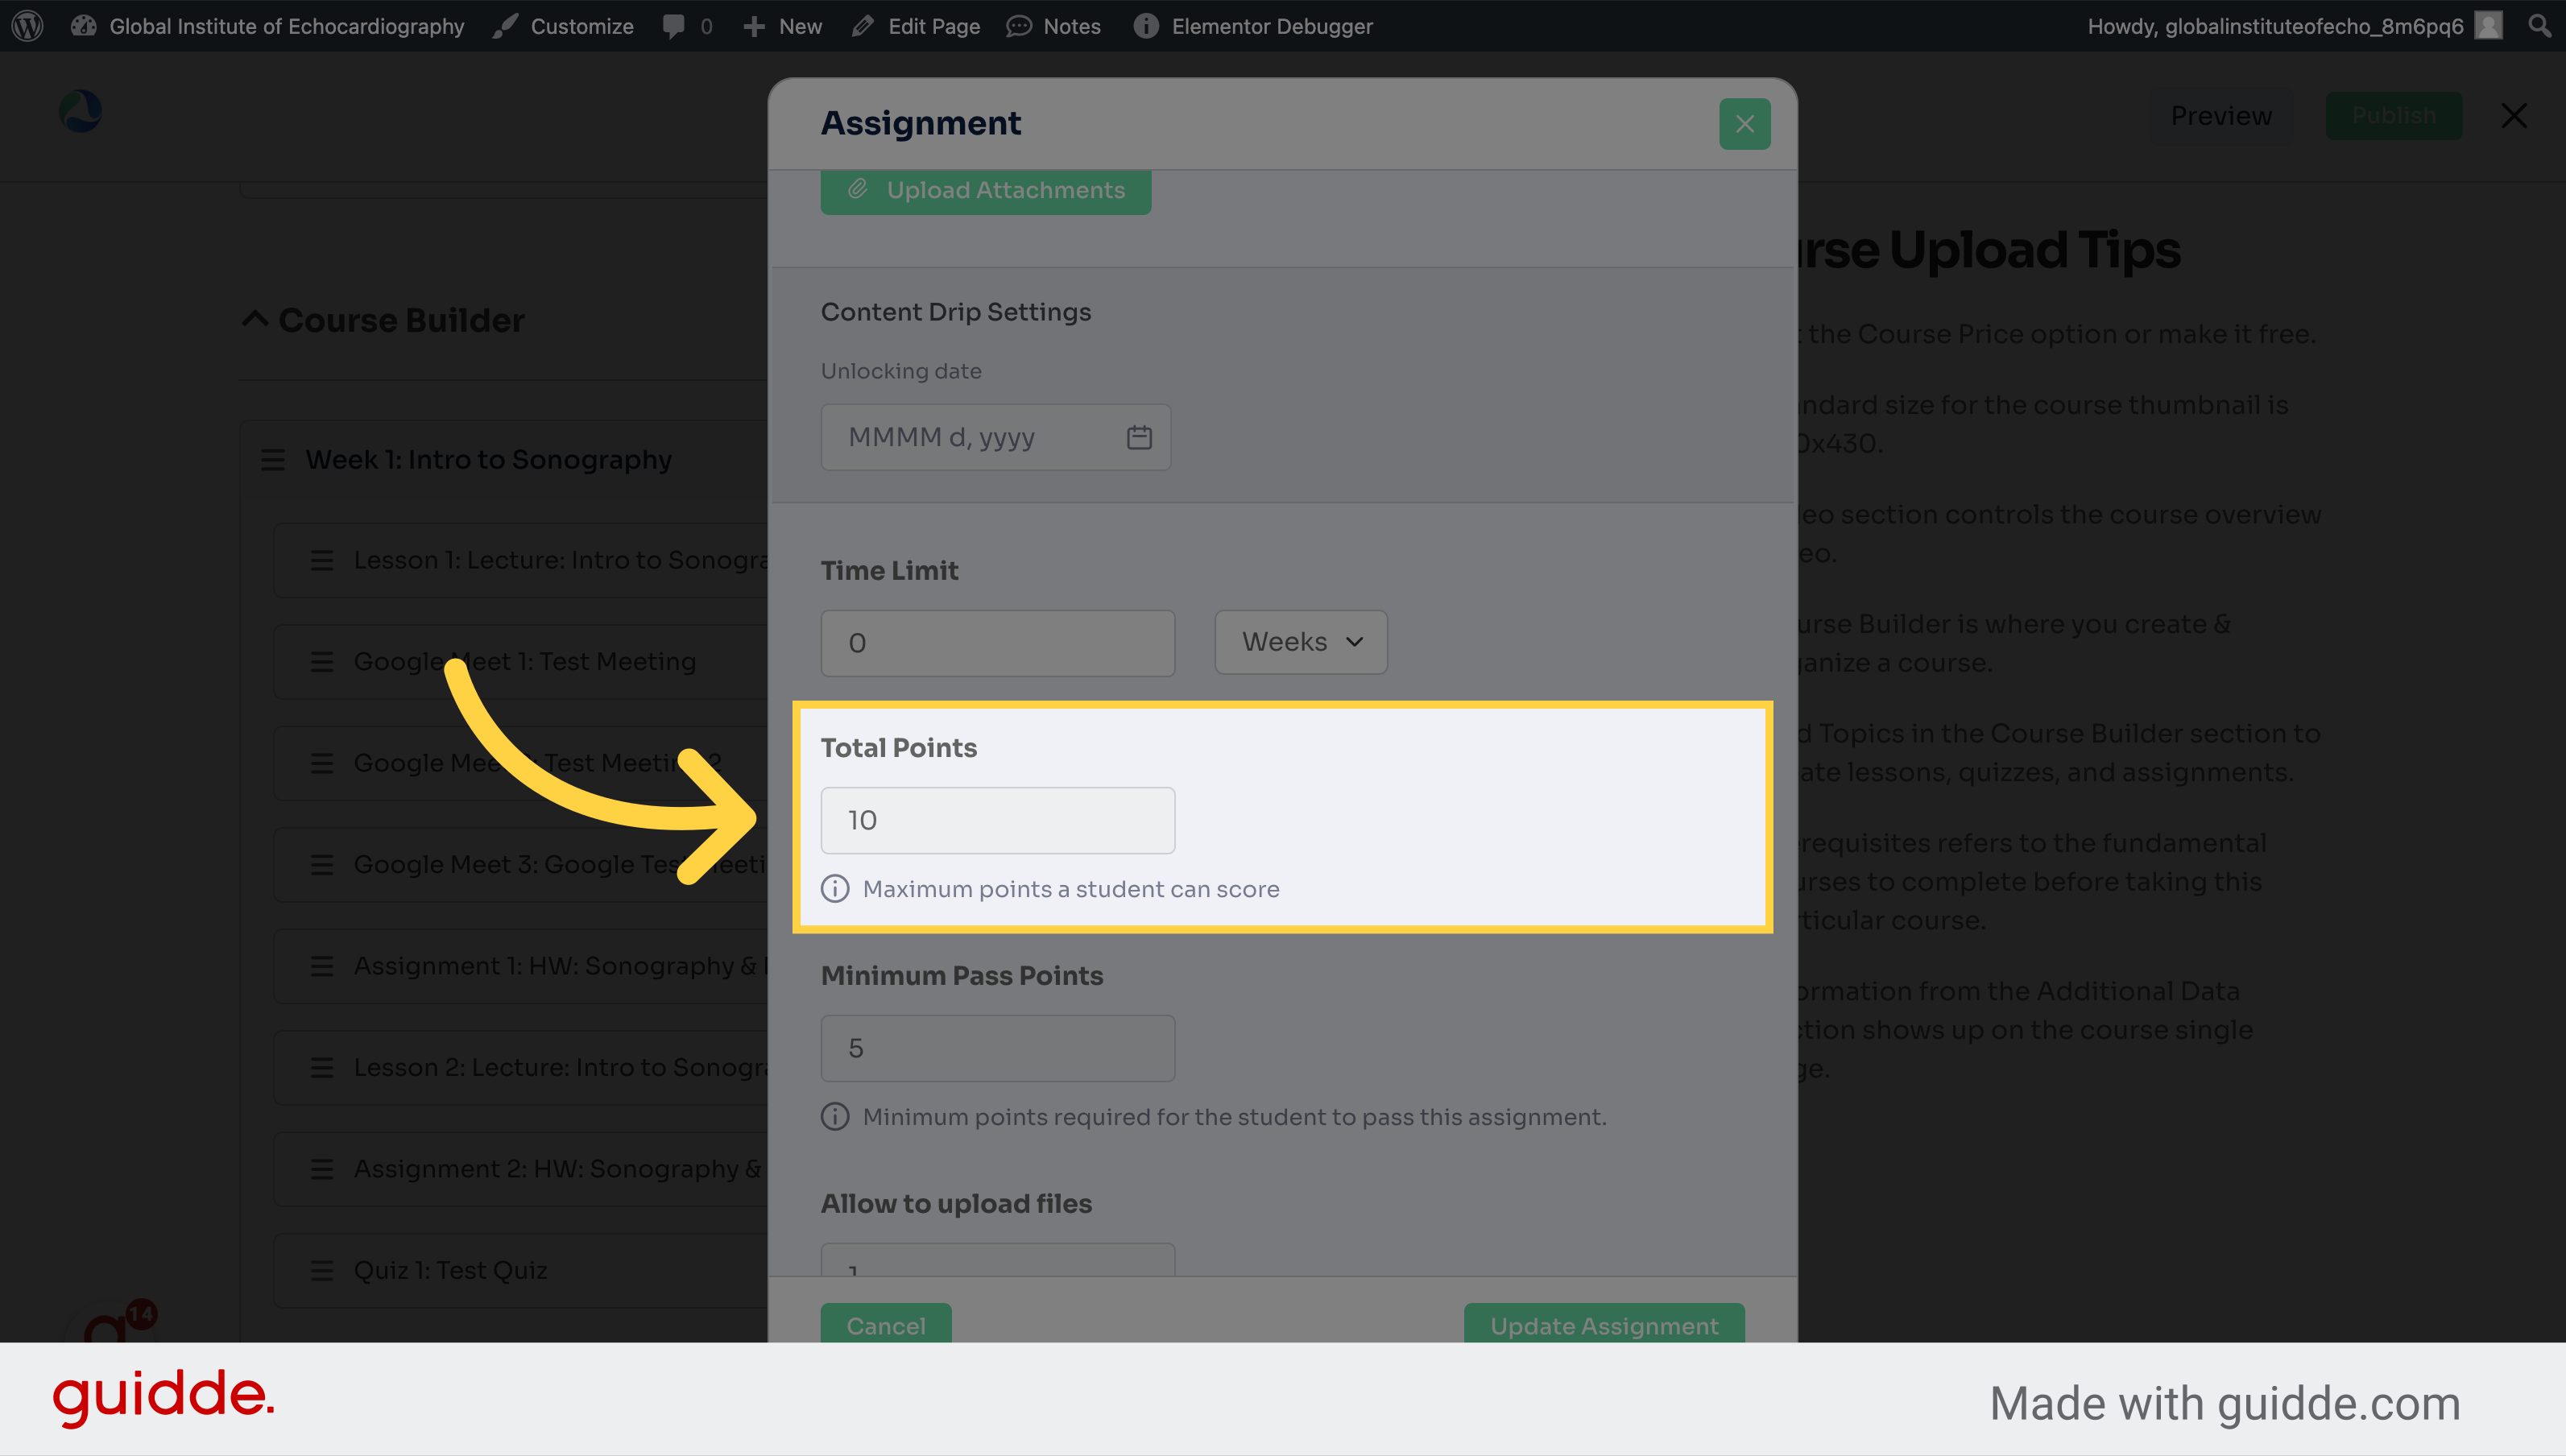
10. Set the amount of points that the assignment should be worth here
Define total points.
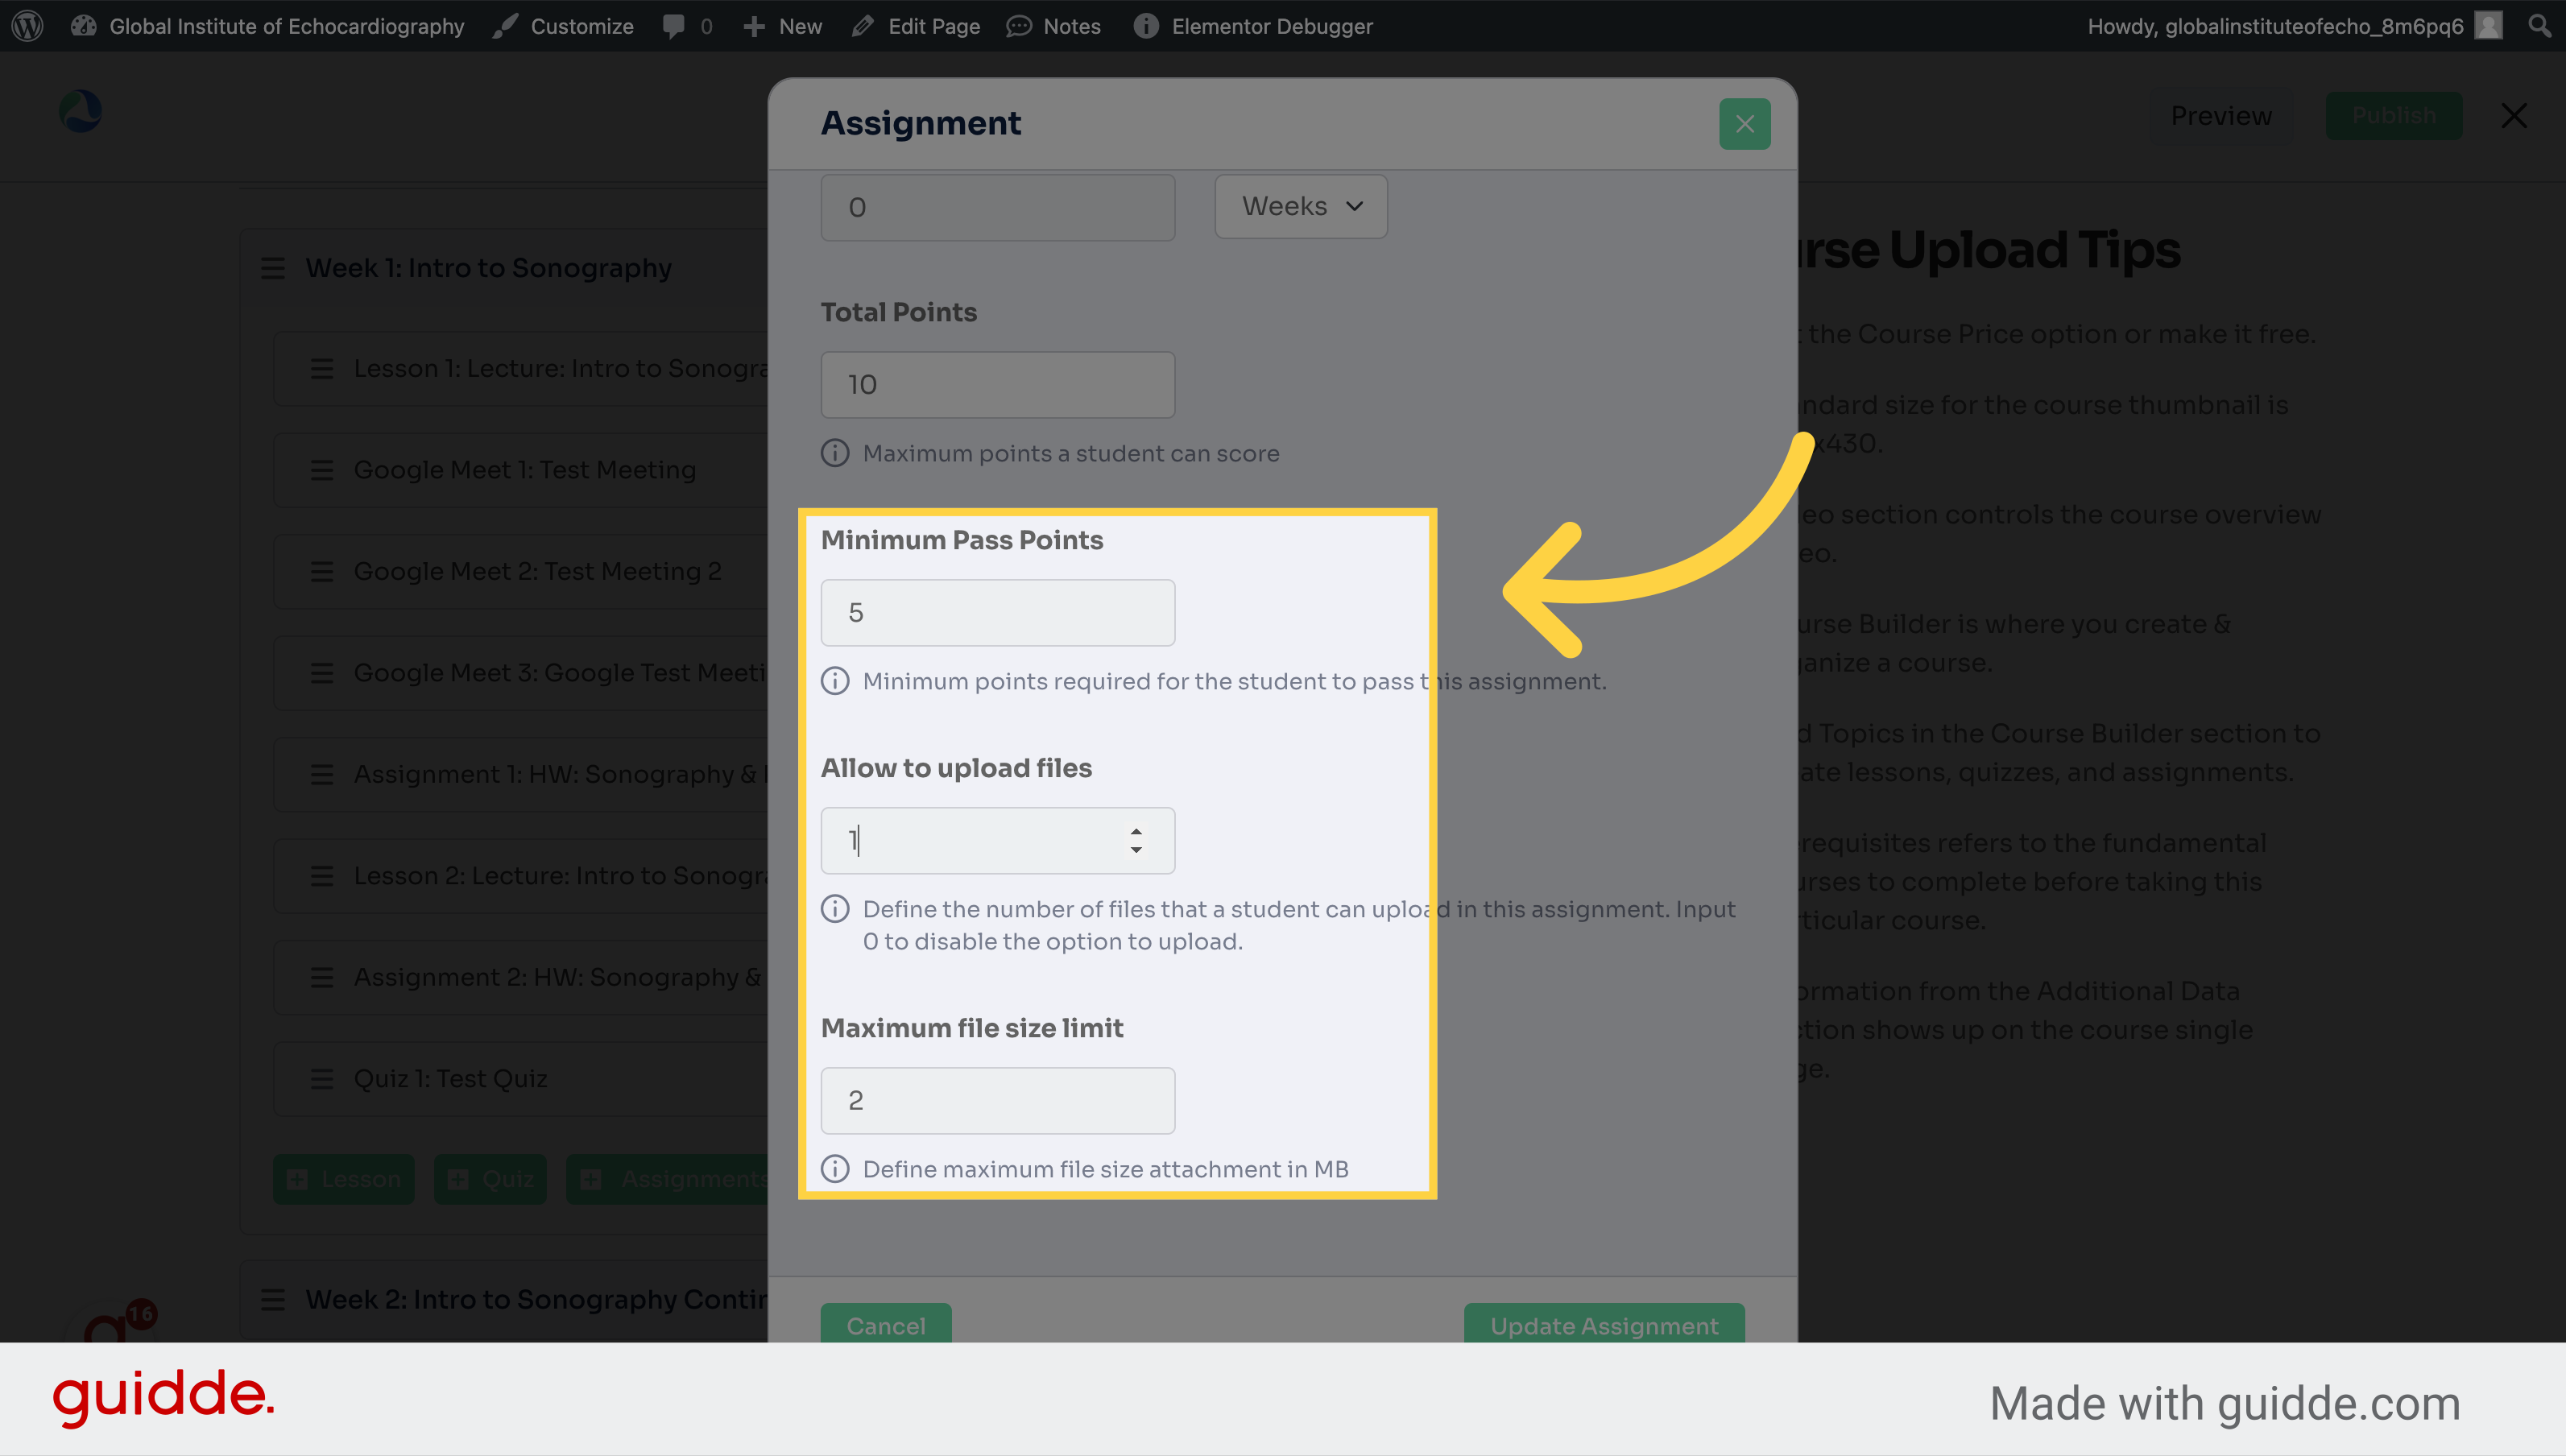
11. Choose the rest of the settings
Set the minimum points.
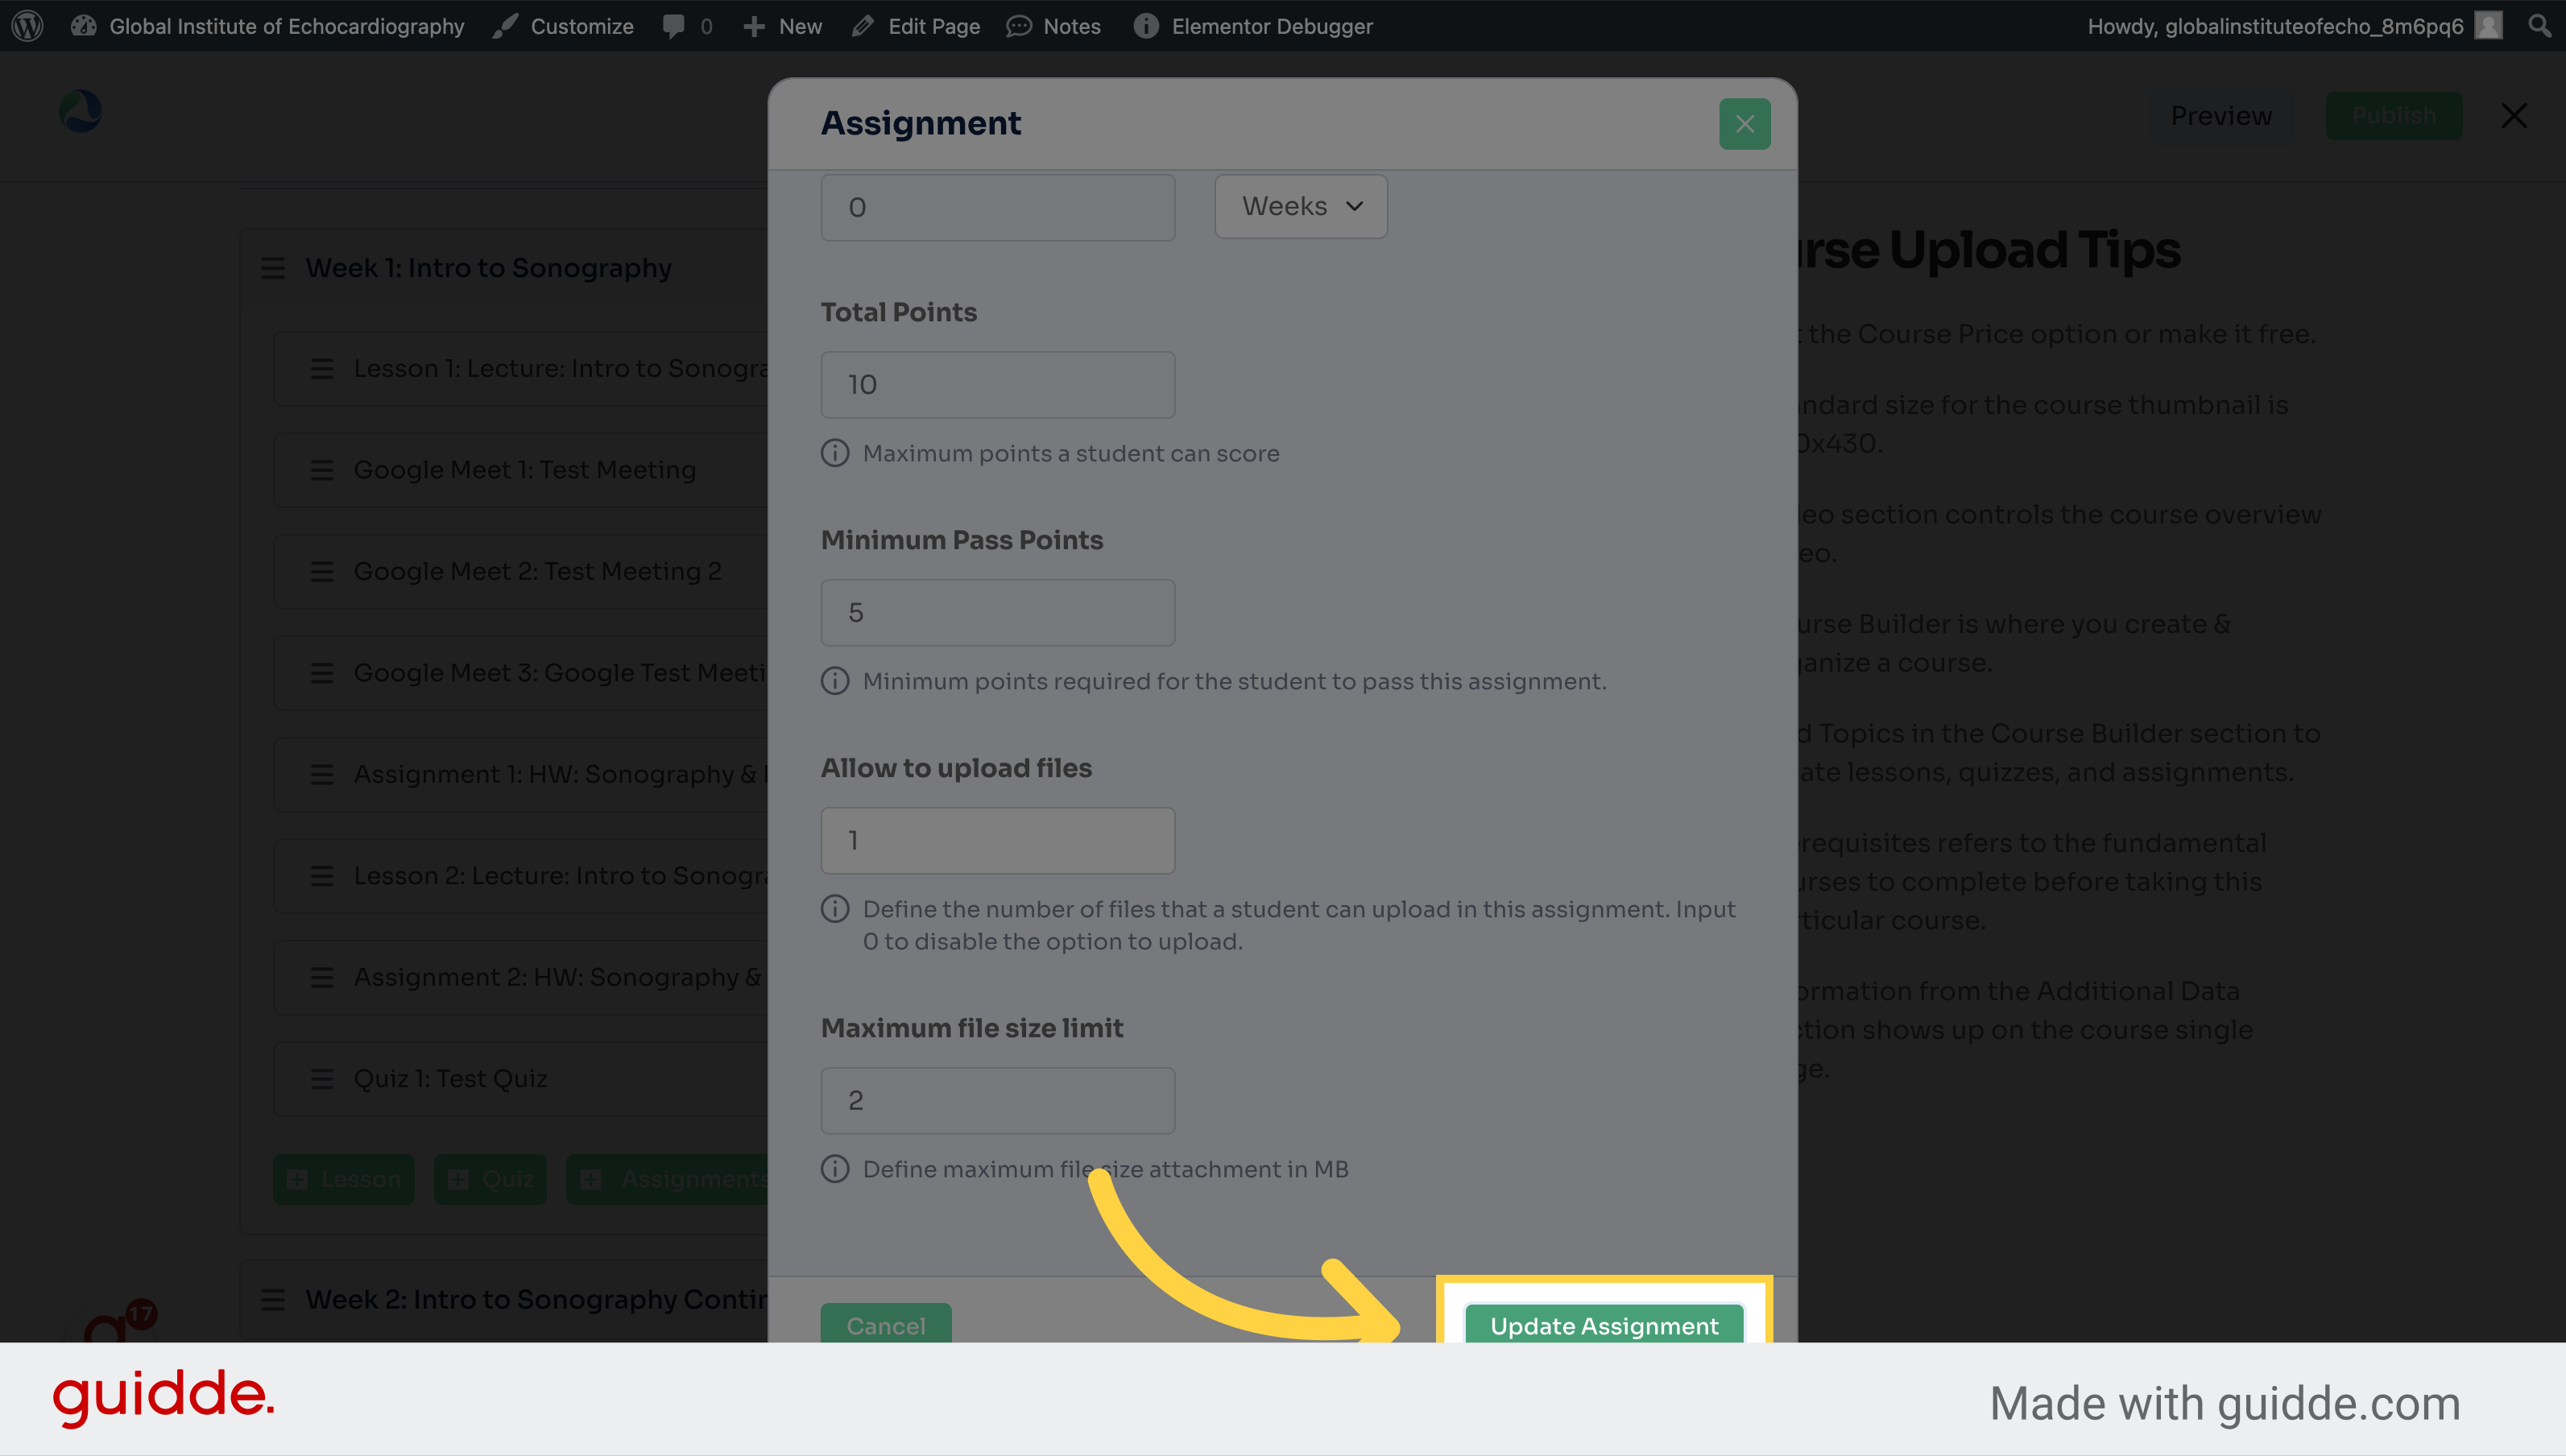
12. Click "Update Assignment"
Finalize and update the assignment.
This guide covered accessing courses, naming the assignment, setting due dates, attaching files, defining points, and finalizing the assignment in the Employee Training platform. Master these steps to streamline your assignment creation process.
How to View & Evaluate Assignments
This guide will walk you through efficiently viewing assignments and submissions in the LMS platform. Follow the engaging instructions to navigate through courses, submissions, details, and feedback effortlessly.
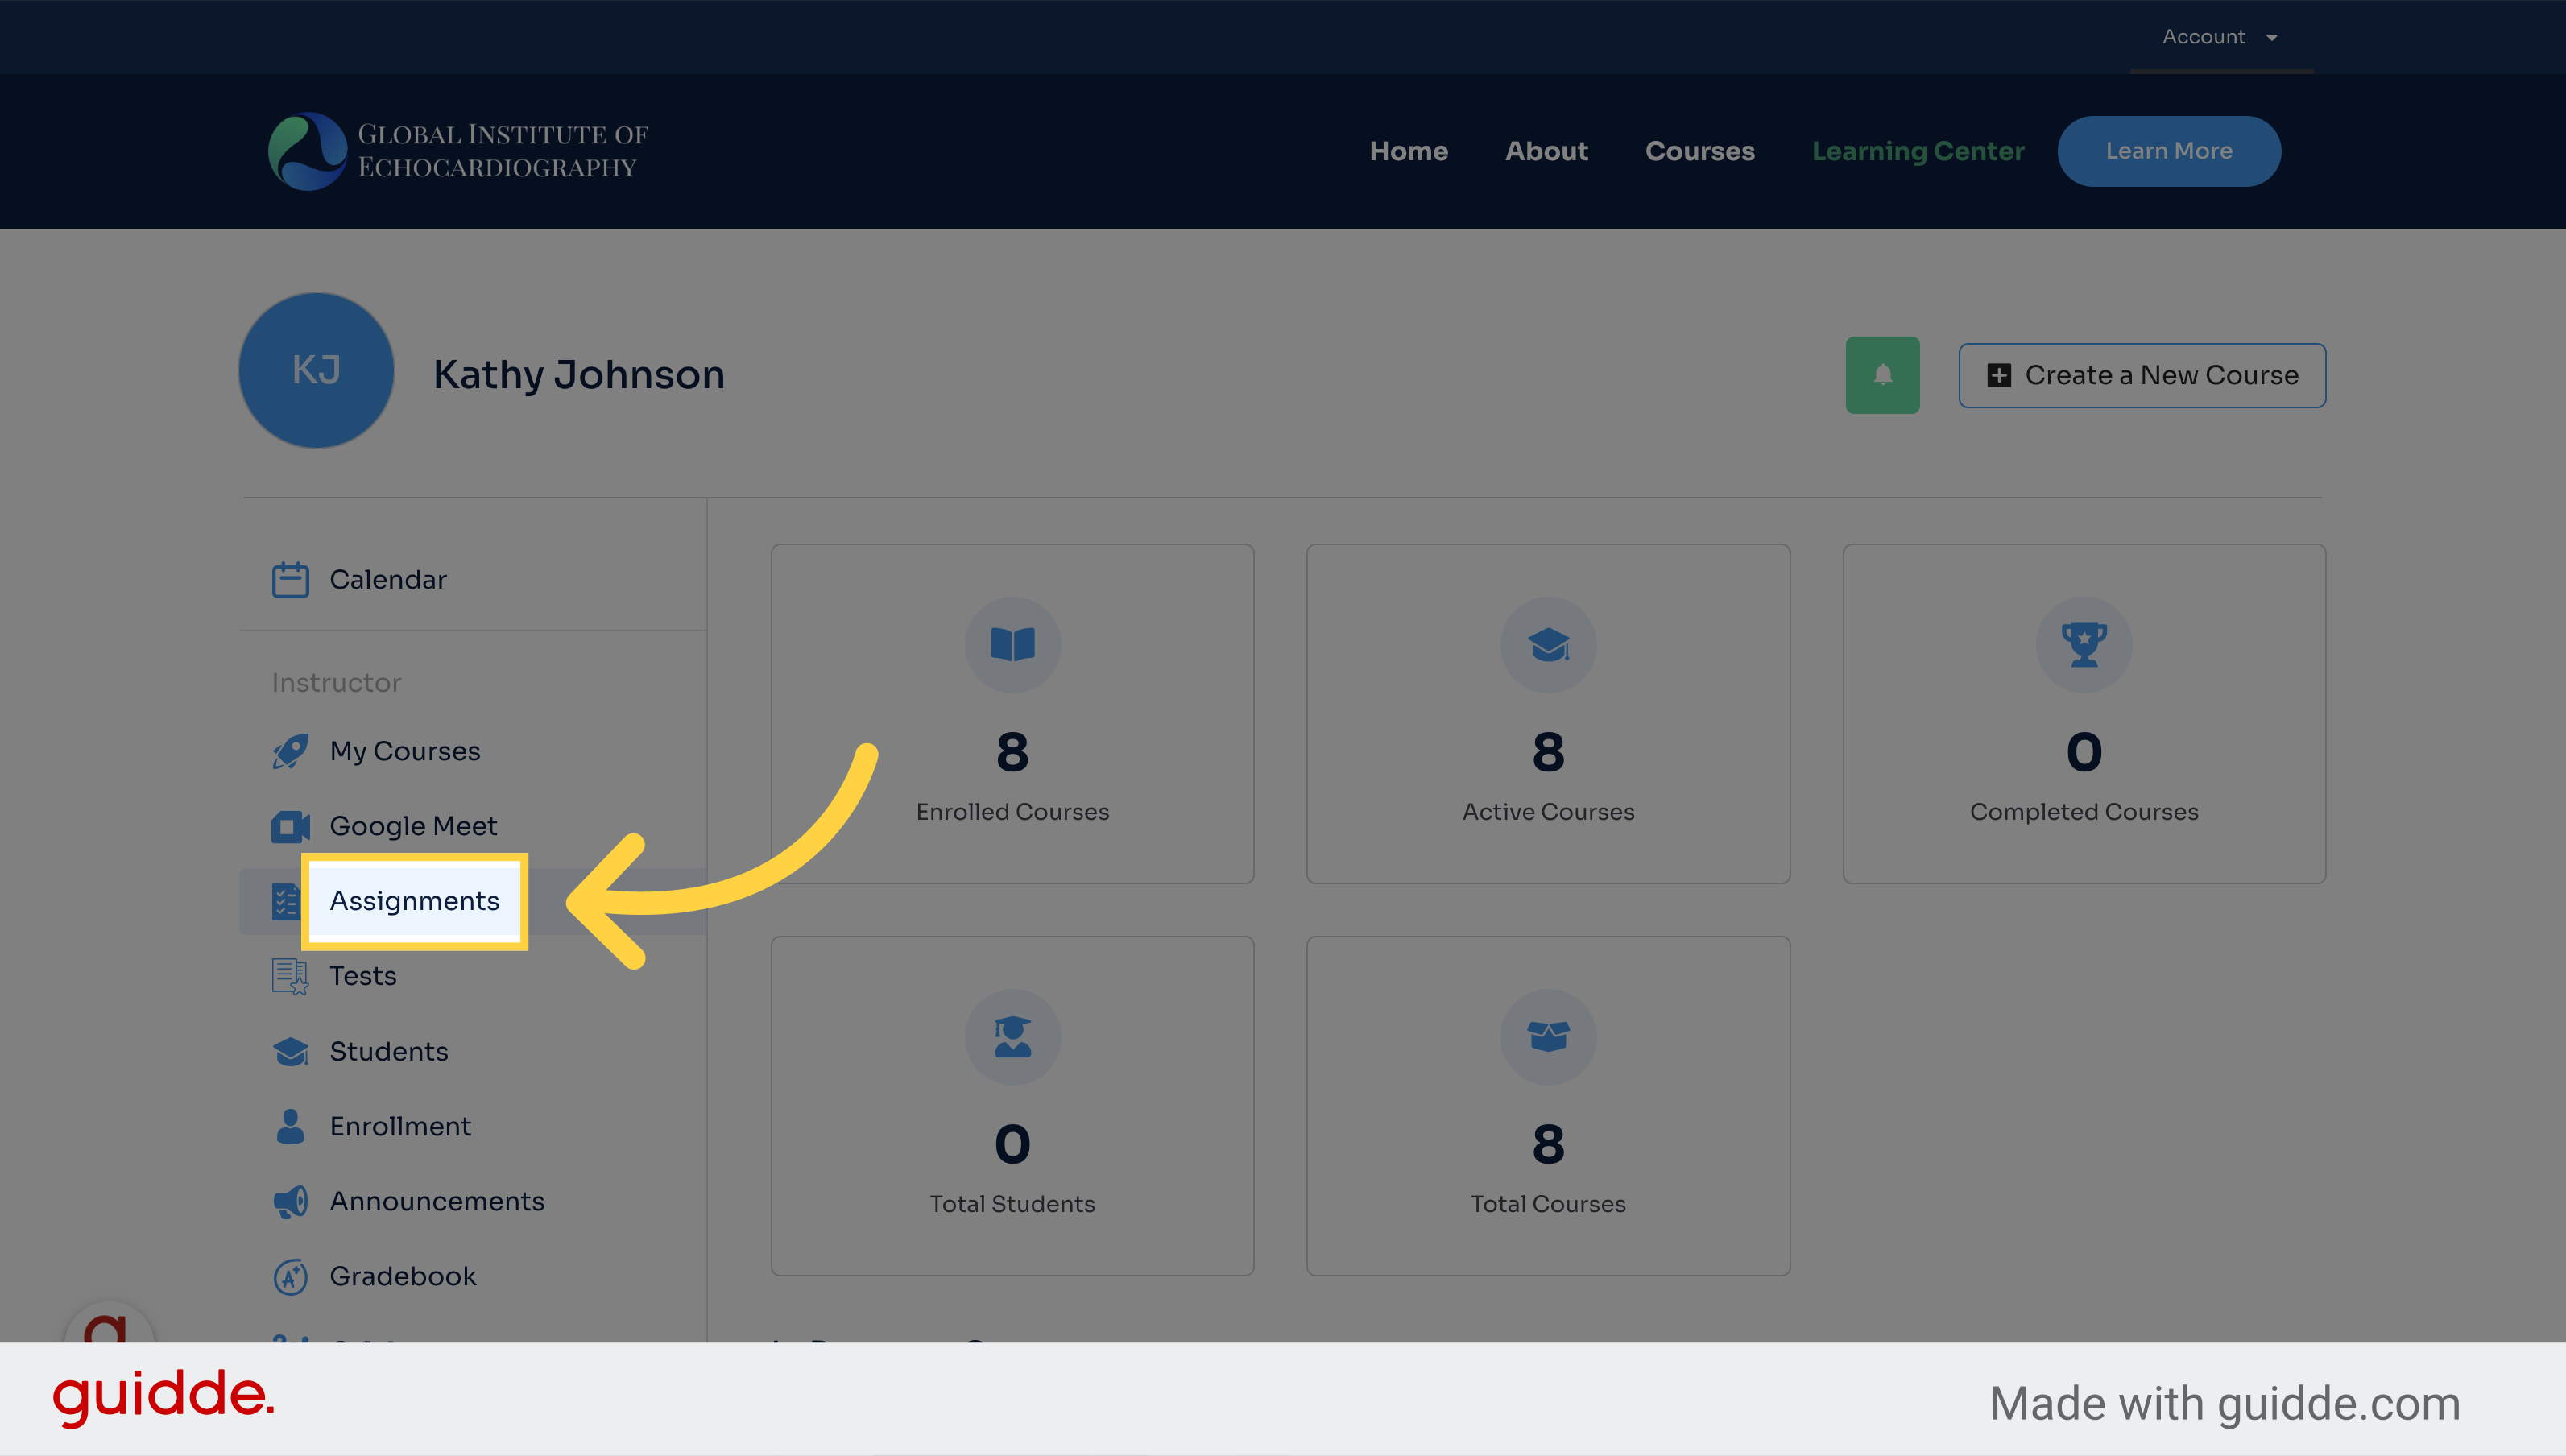
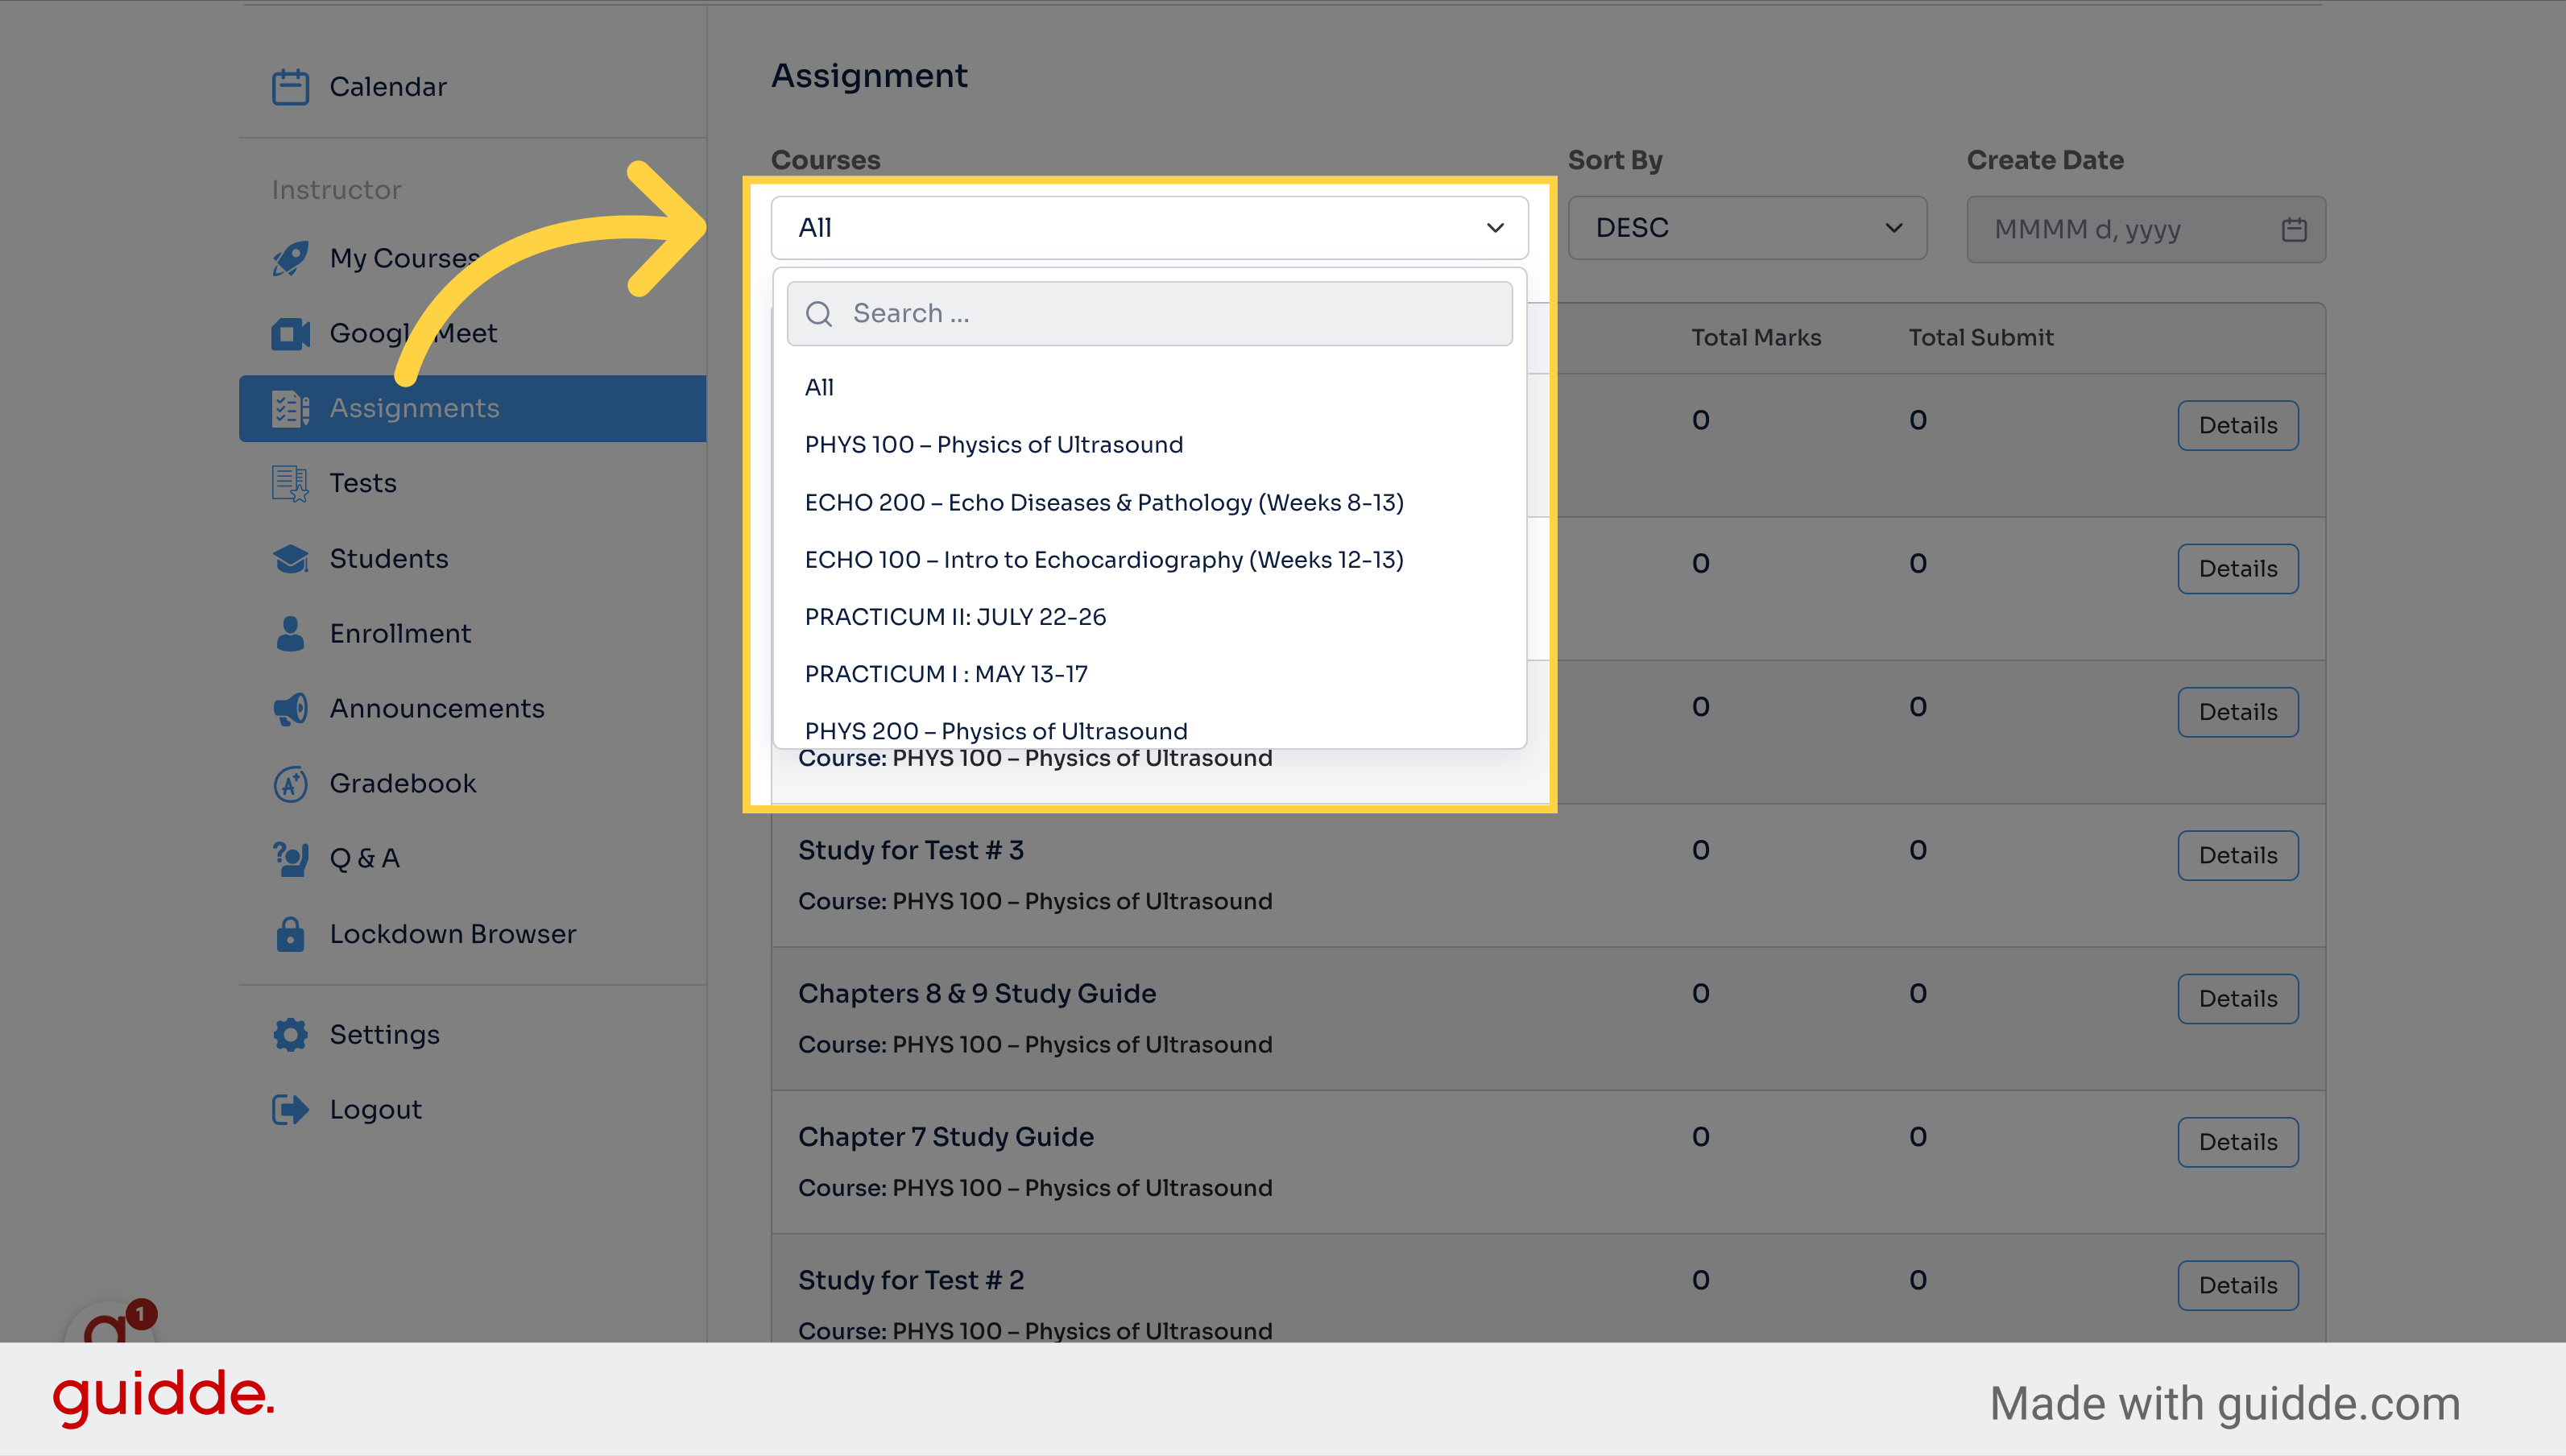
1. Click "Assignments" from the dashboard
Access the assignments section.
2. Click the dropdown to sort the assignments by Course
Navigate to the specific course "PHYS 100 – Physics of Ultrasound.
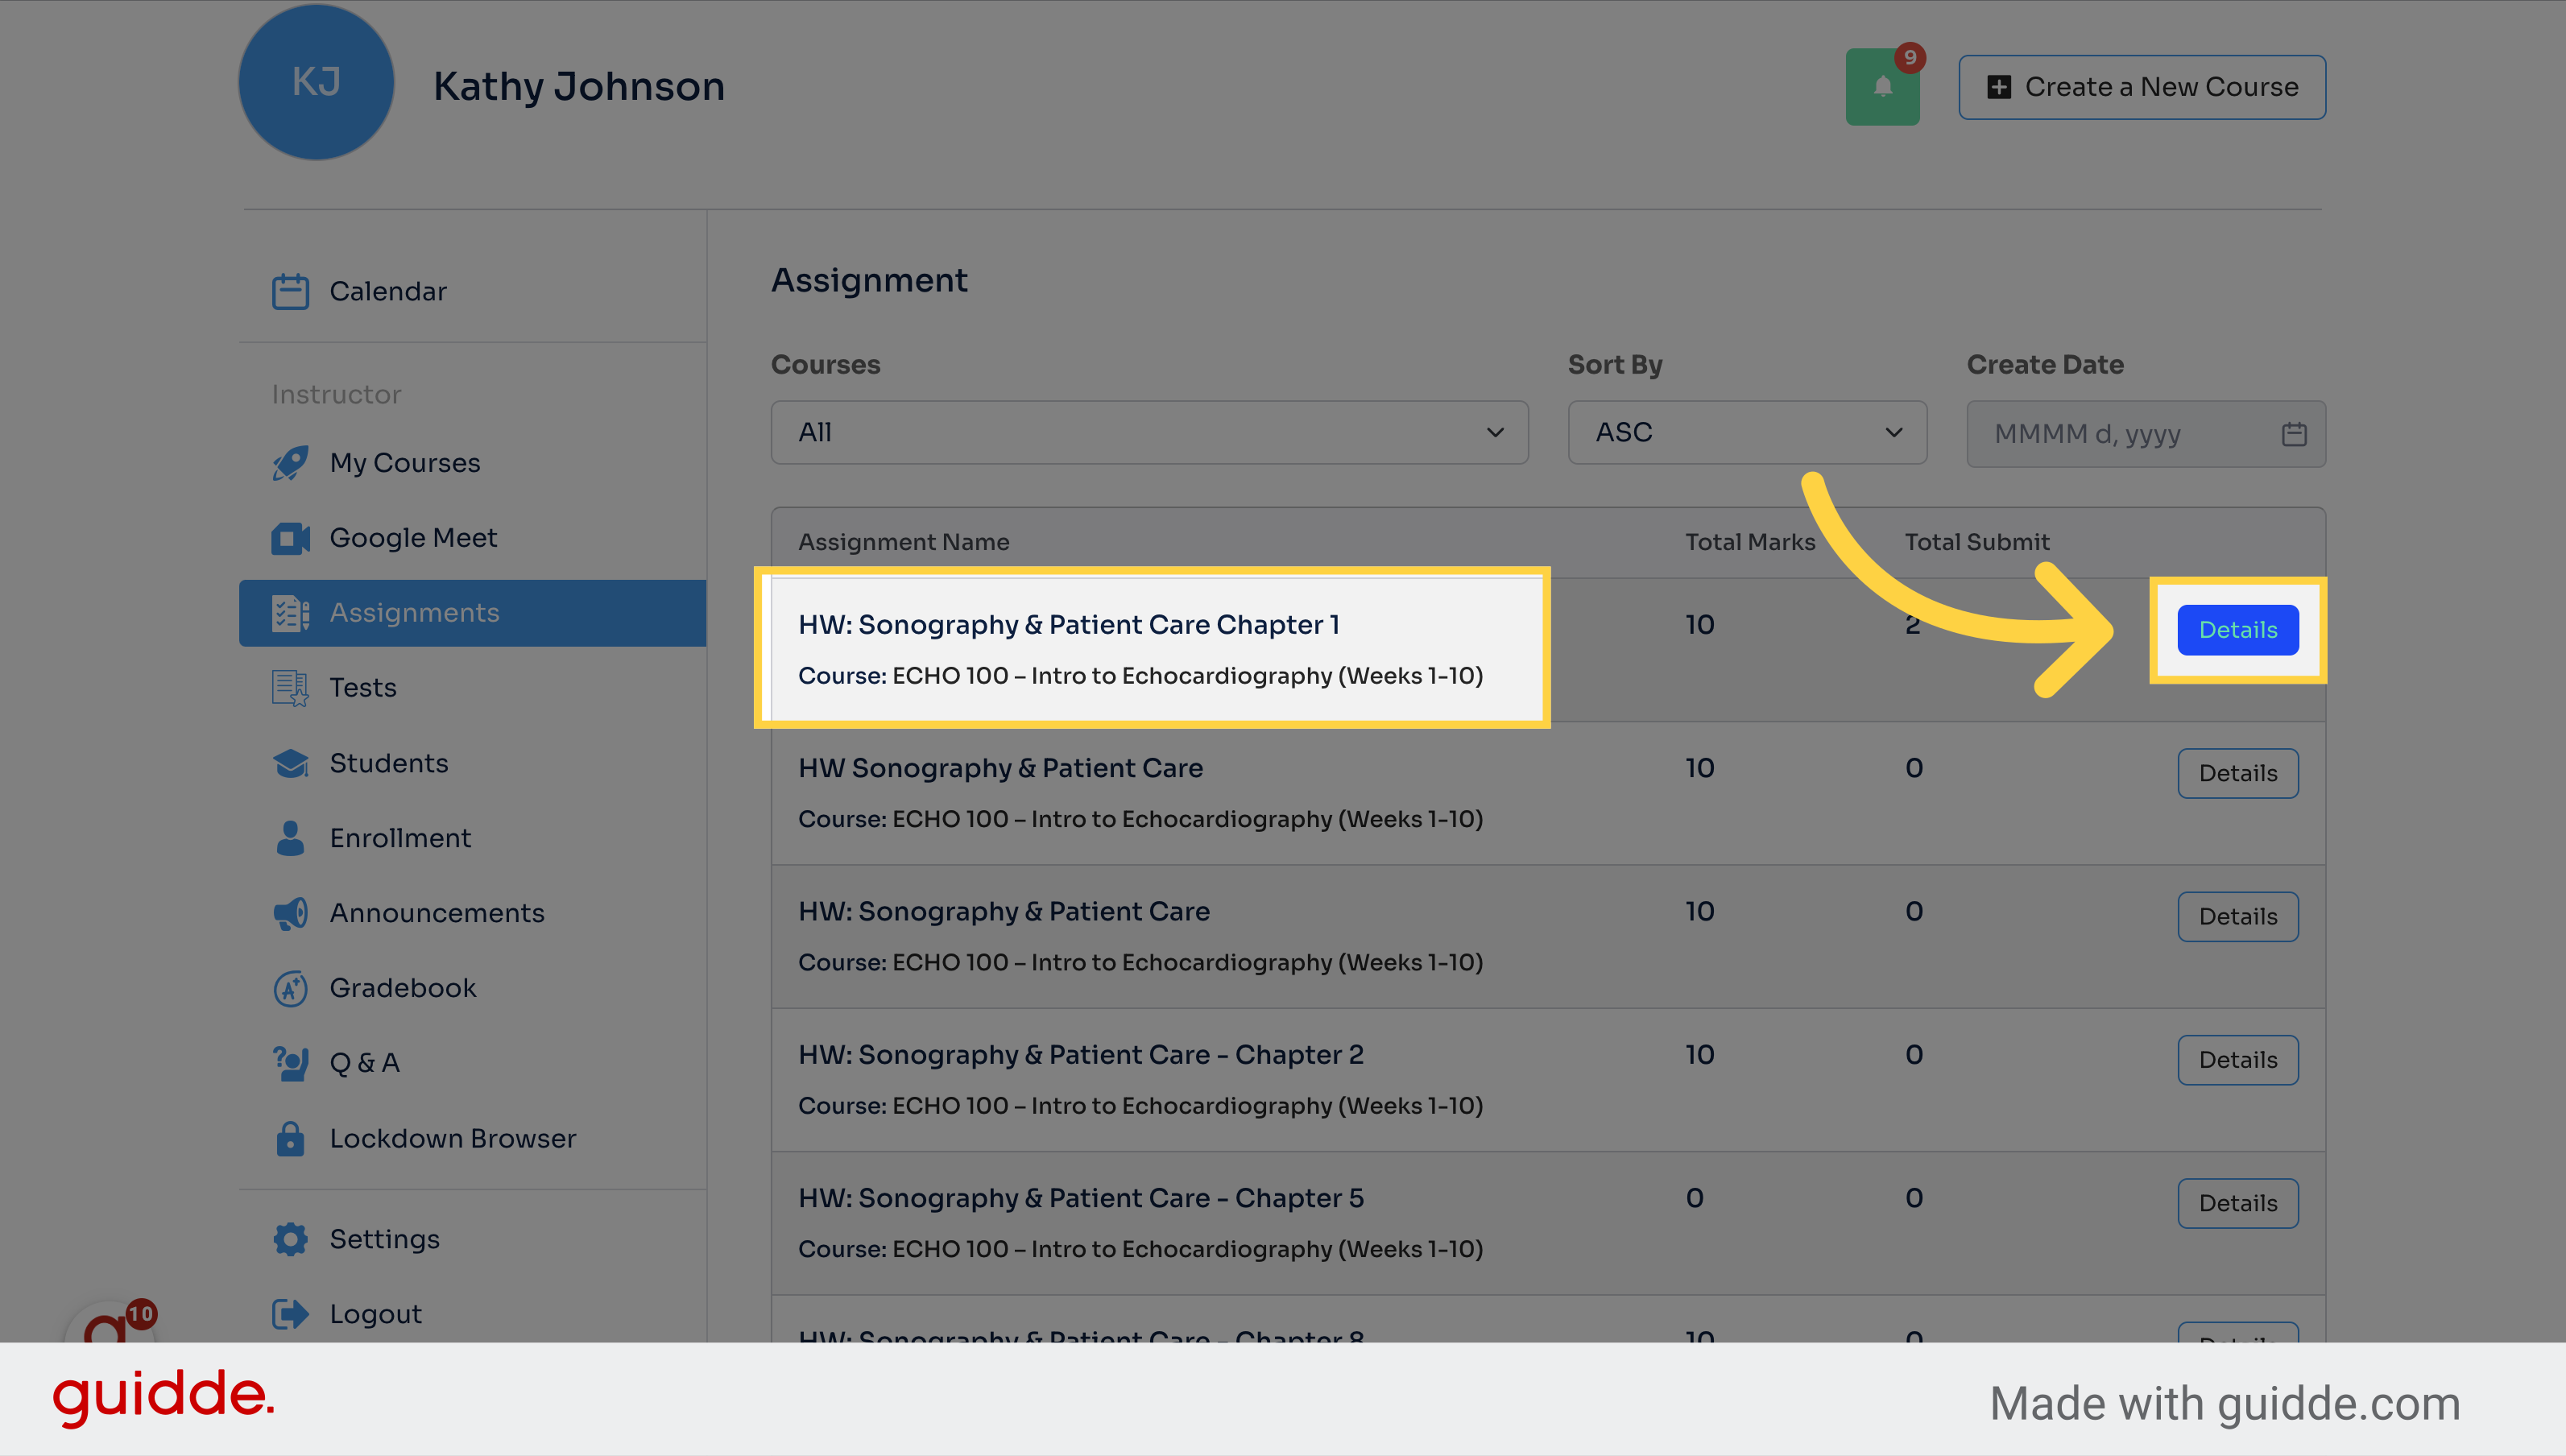
3. Click "ASC / DSC " to sort the assignments by date
Sort in ascending order.

4. Click "Details" next to the assignment to view and evaluate submissions
View additional details.
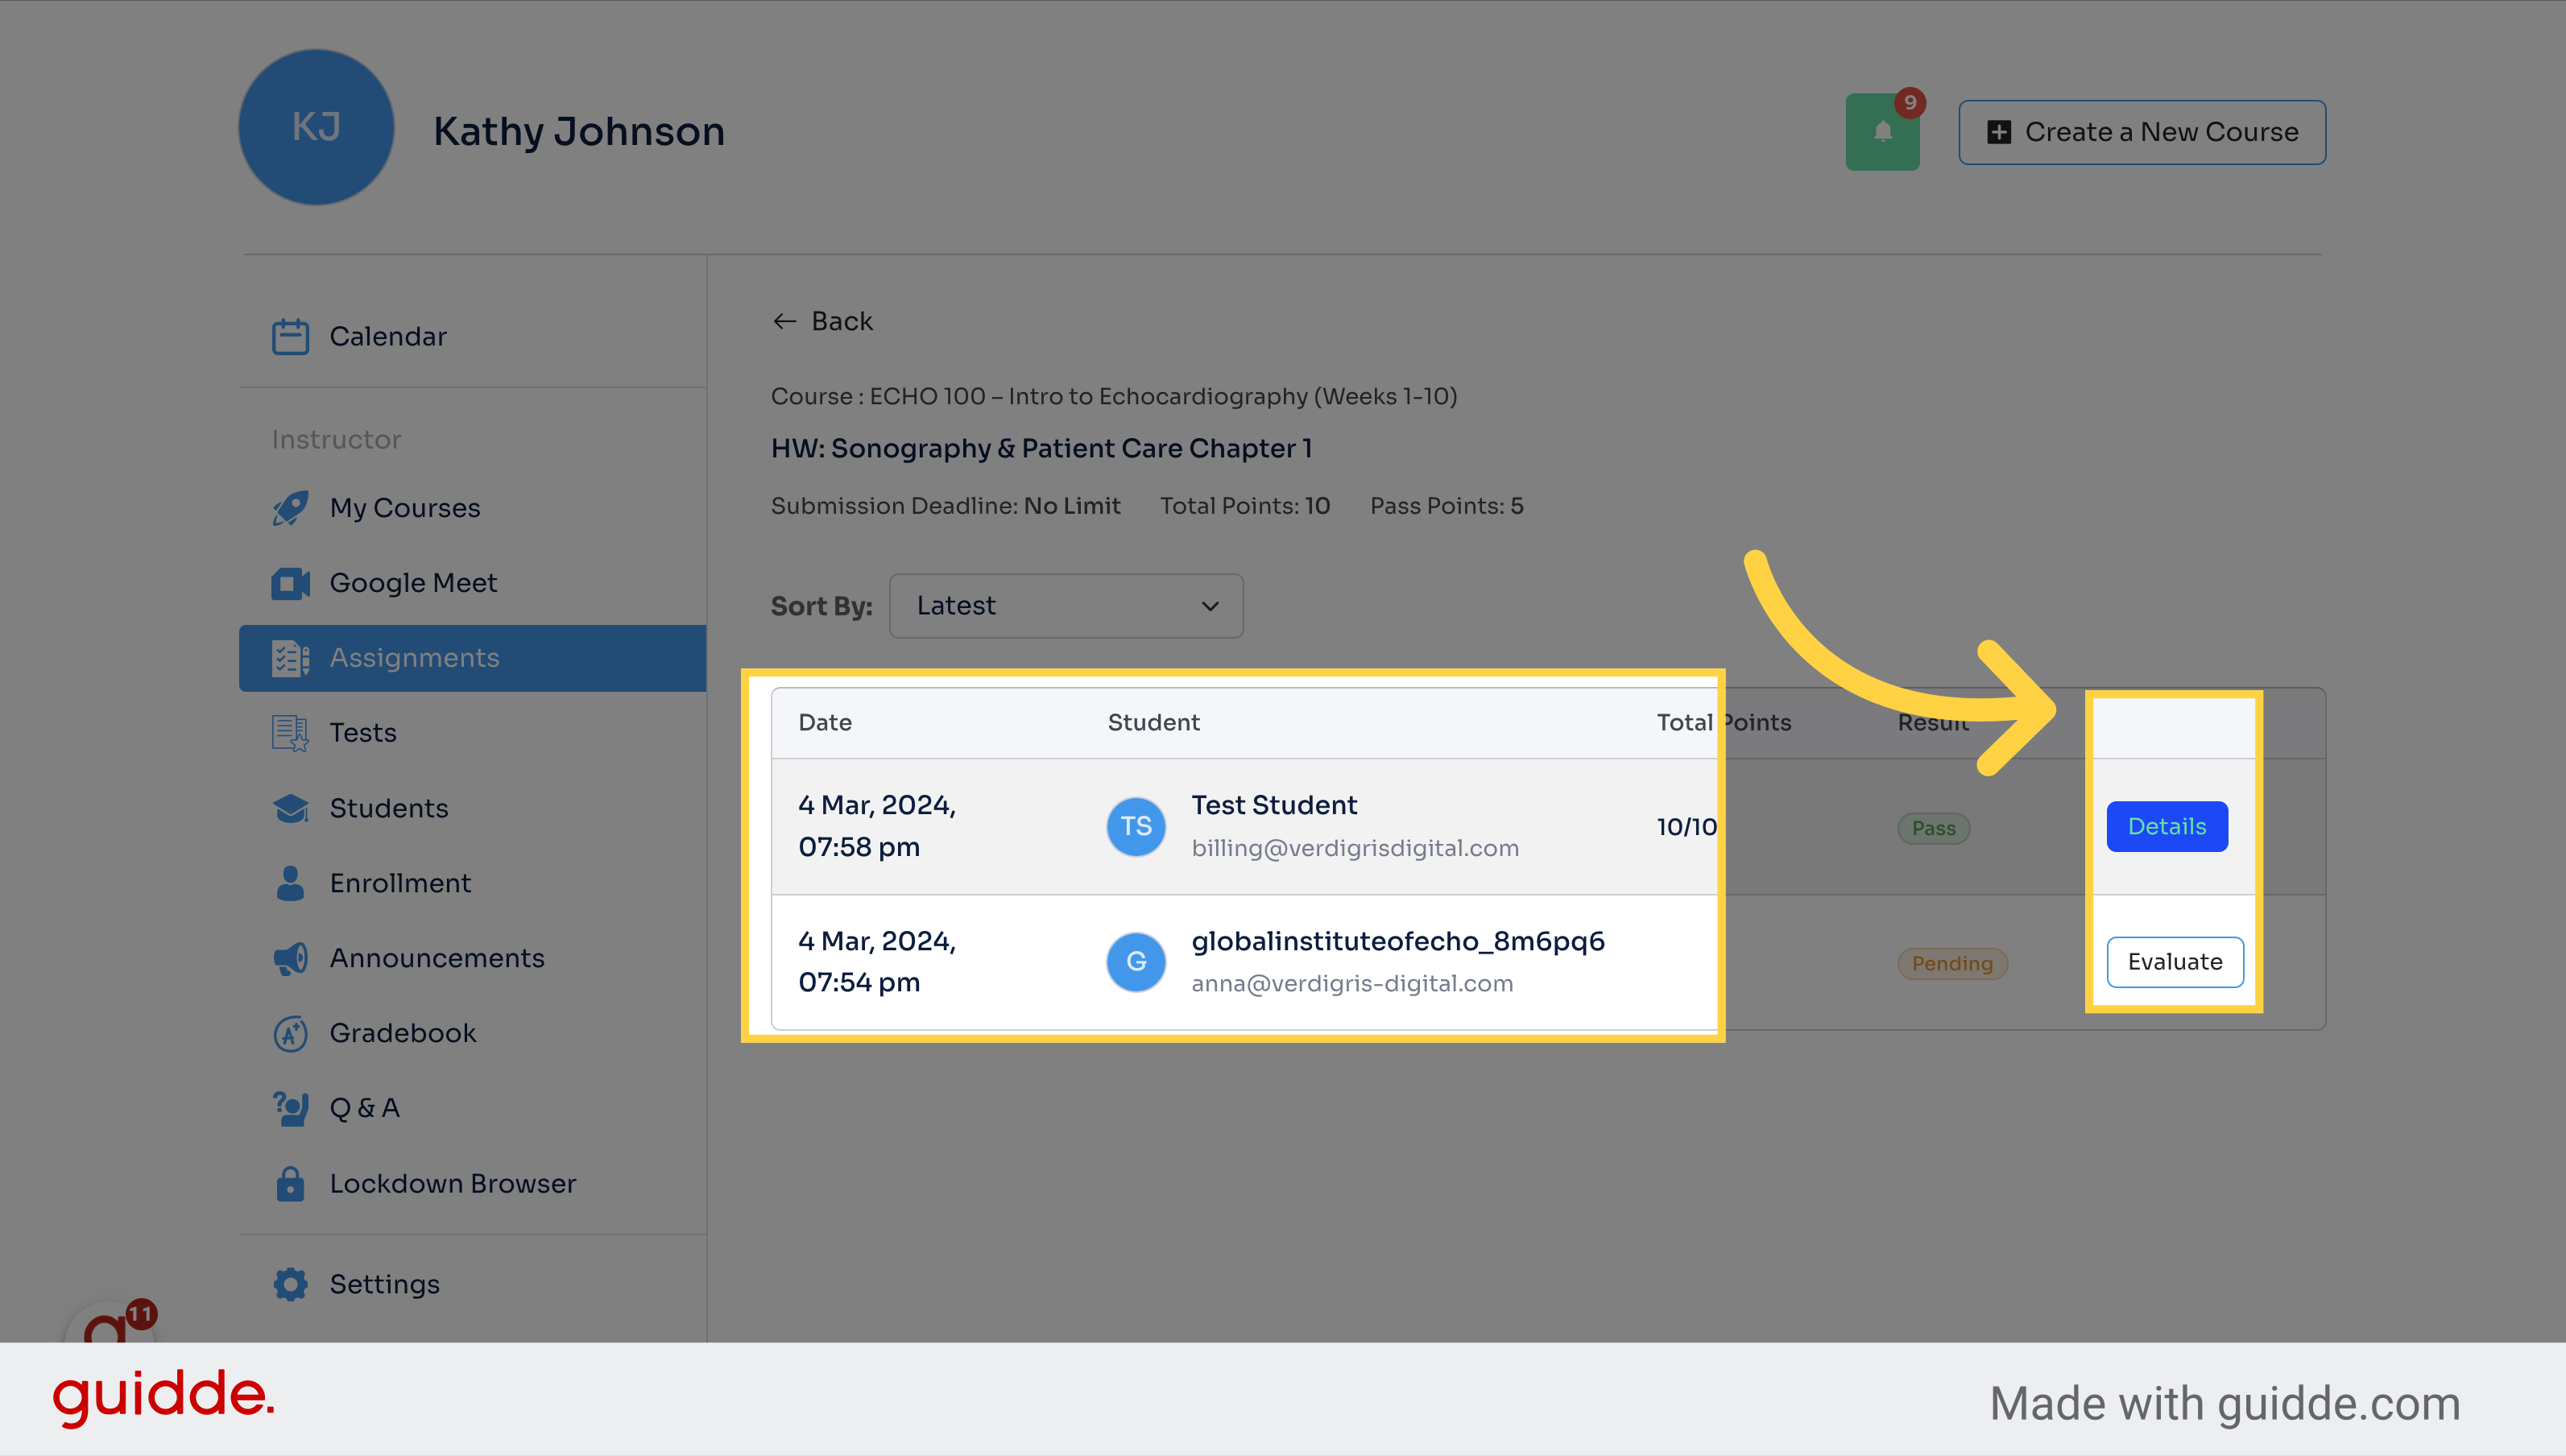
5. Click "Details" or "Evaluate" next to the assignment
Access more information about the submission.
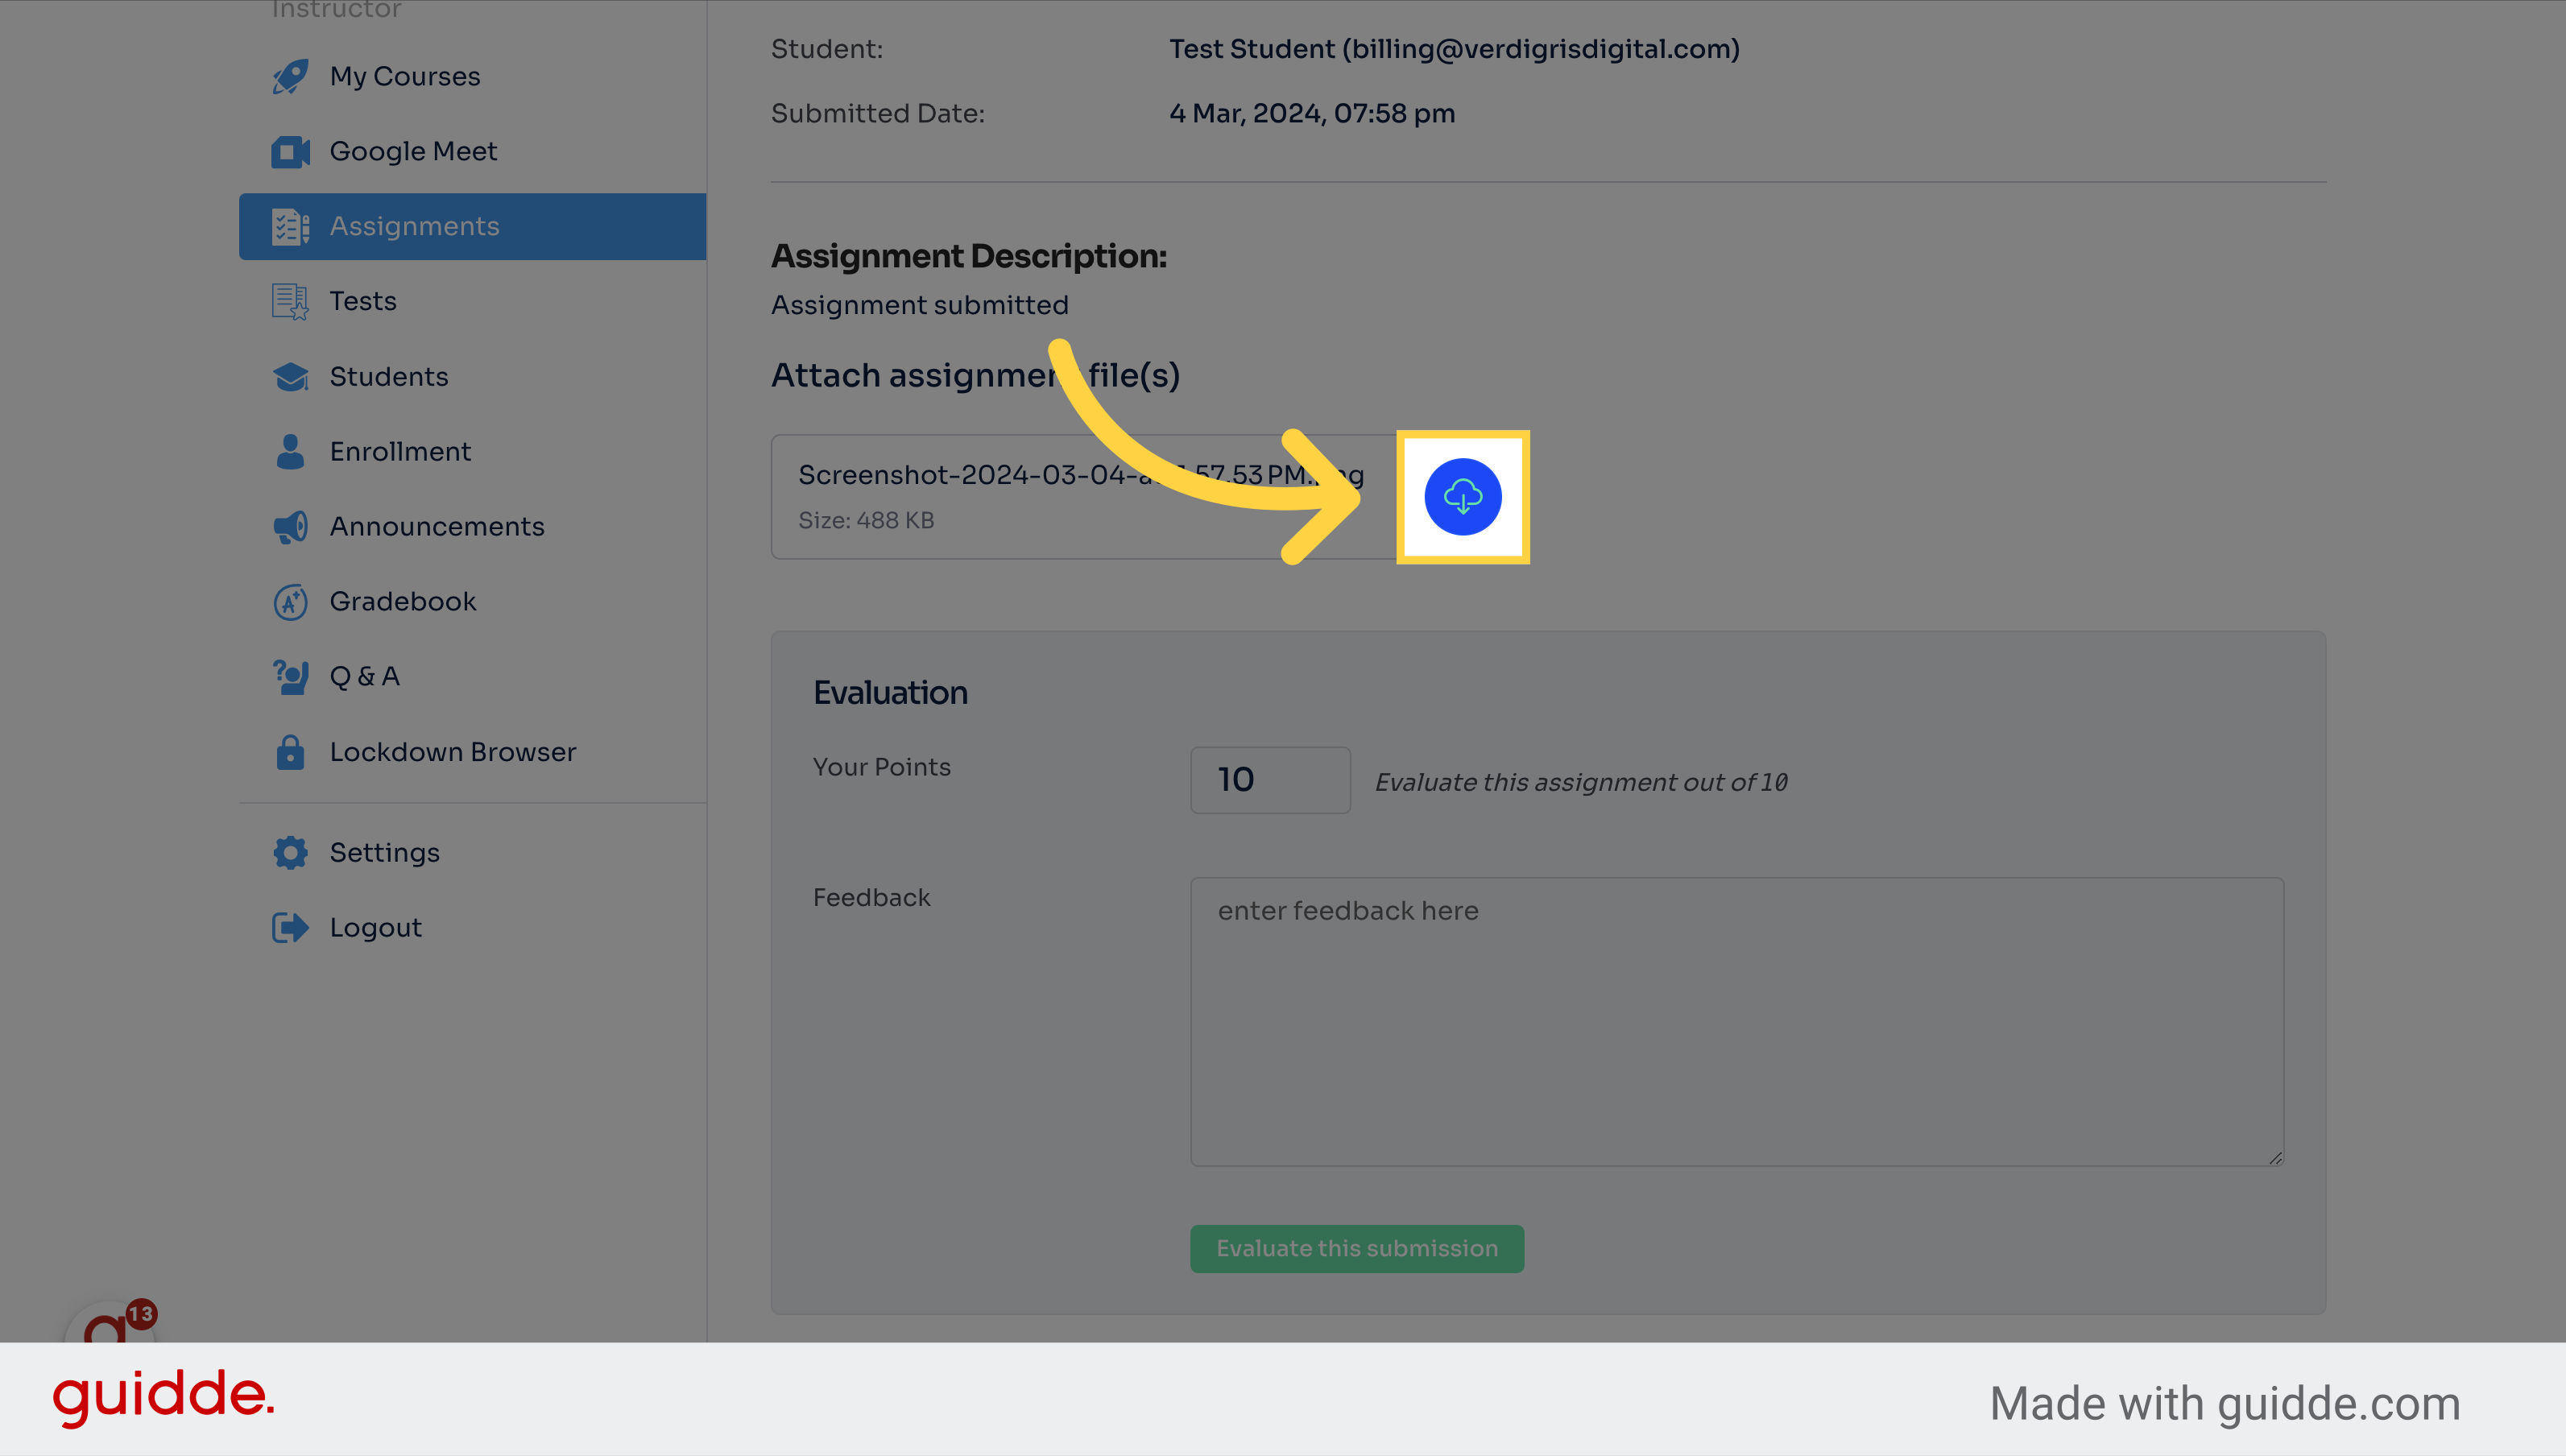
6. Click the attachment to view the attached assignments
Open the specified screenshot.
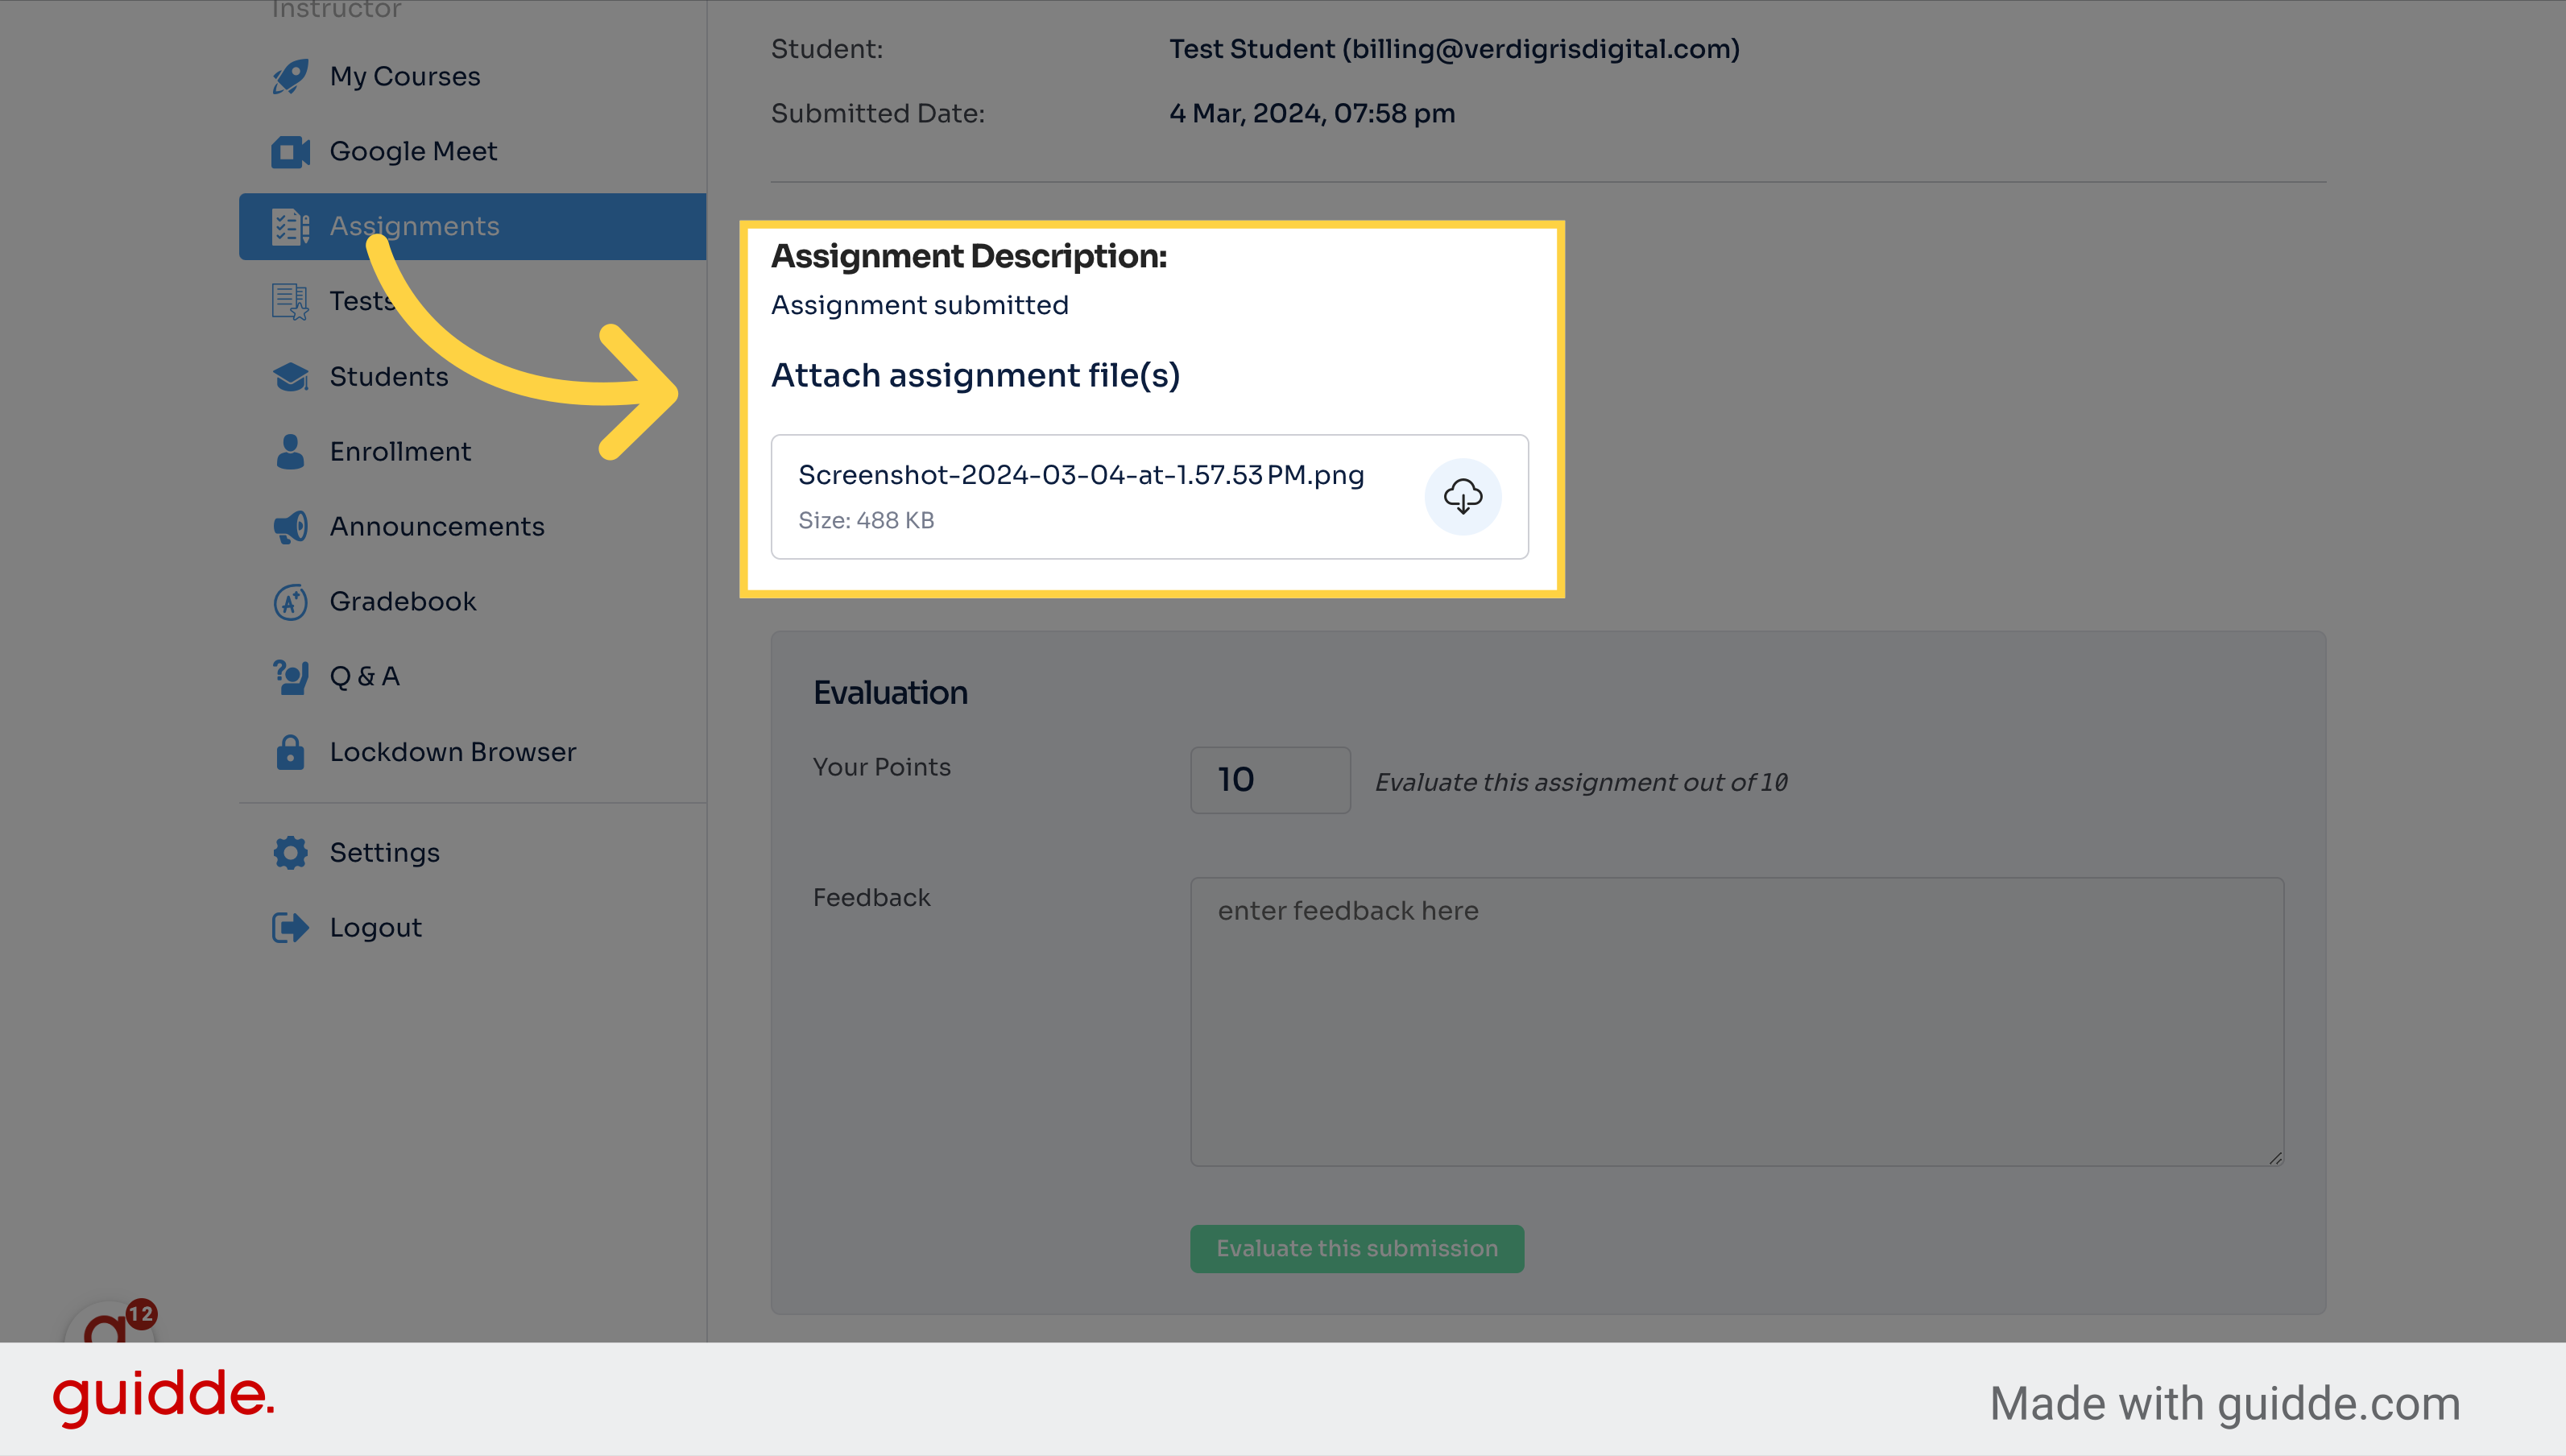
7. Click here to view the attached assignment
Click the selected button
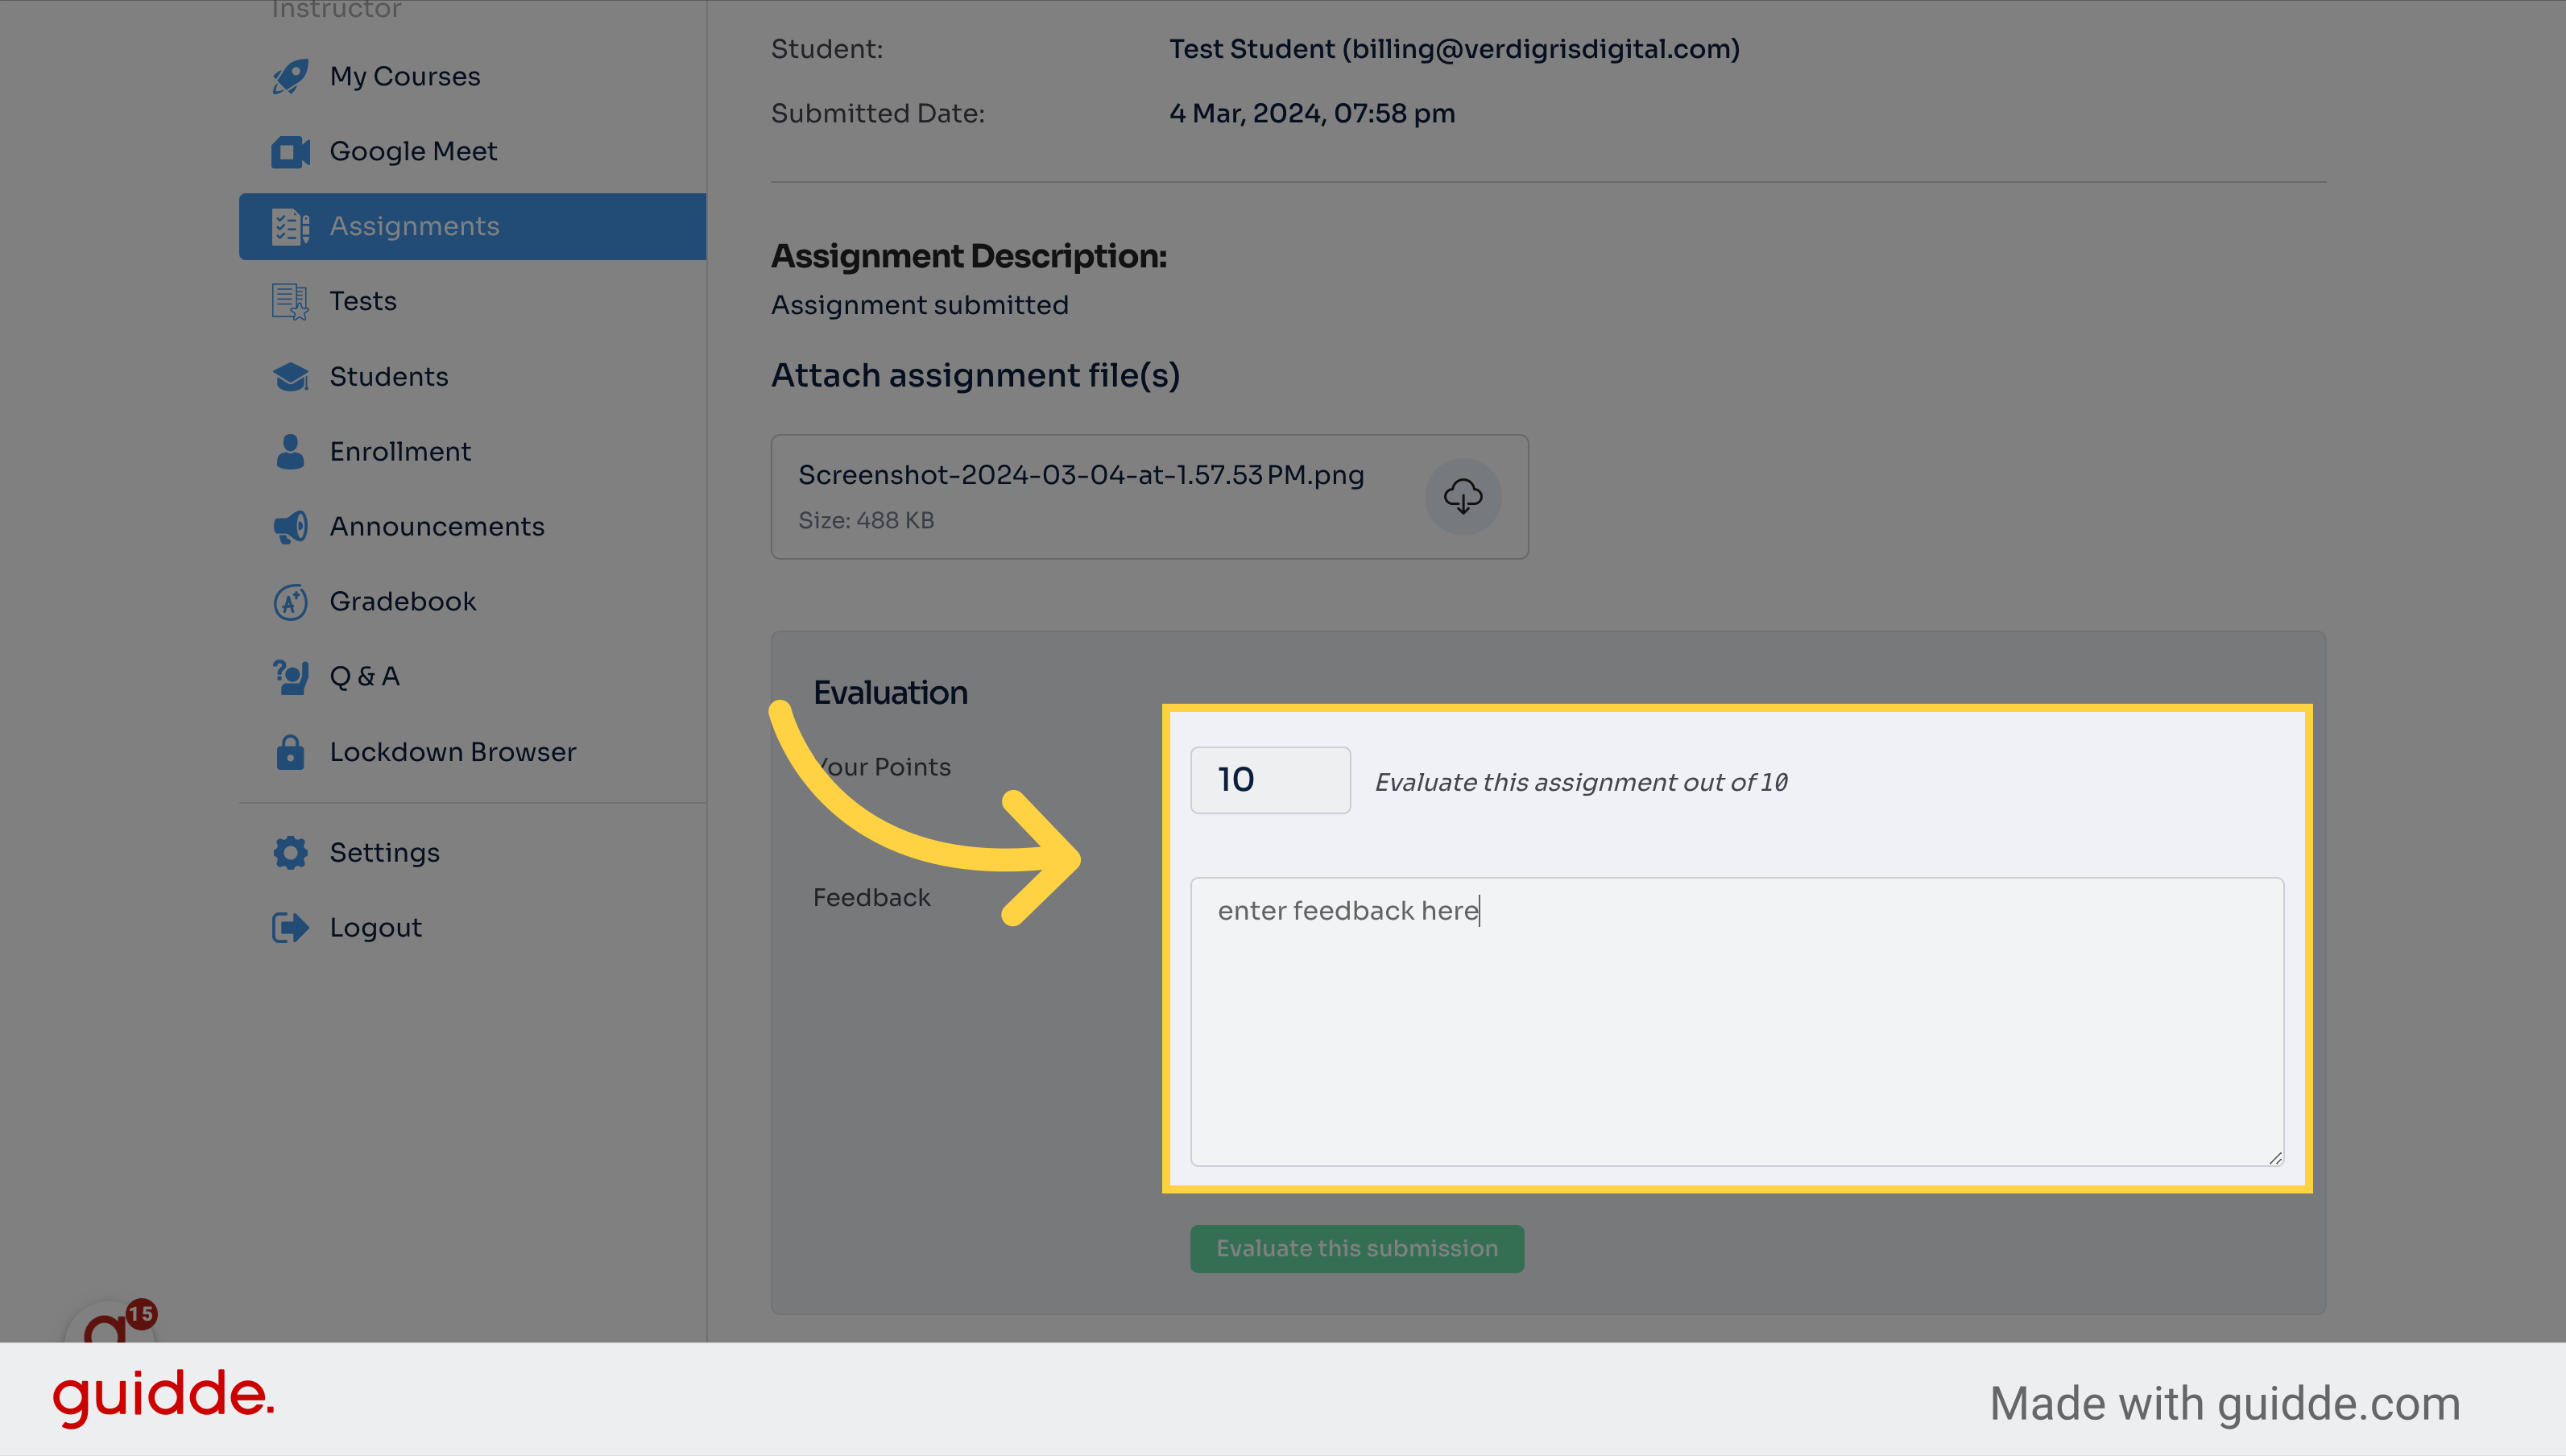
8. Click the points to grade, and enter feedback below
Provide feedback or comments.
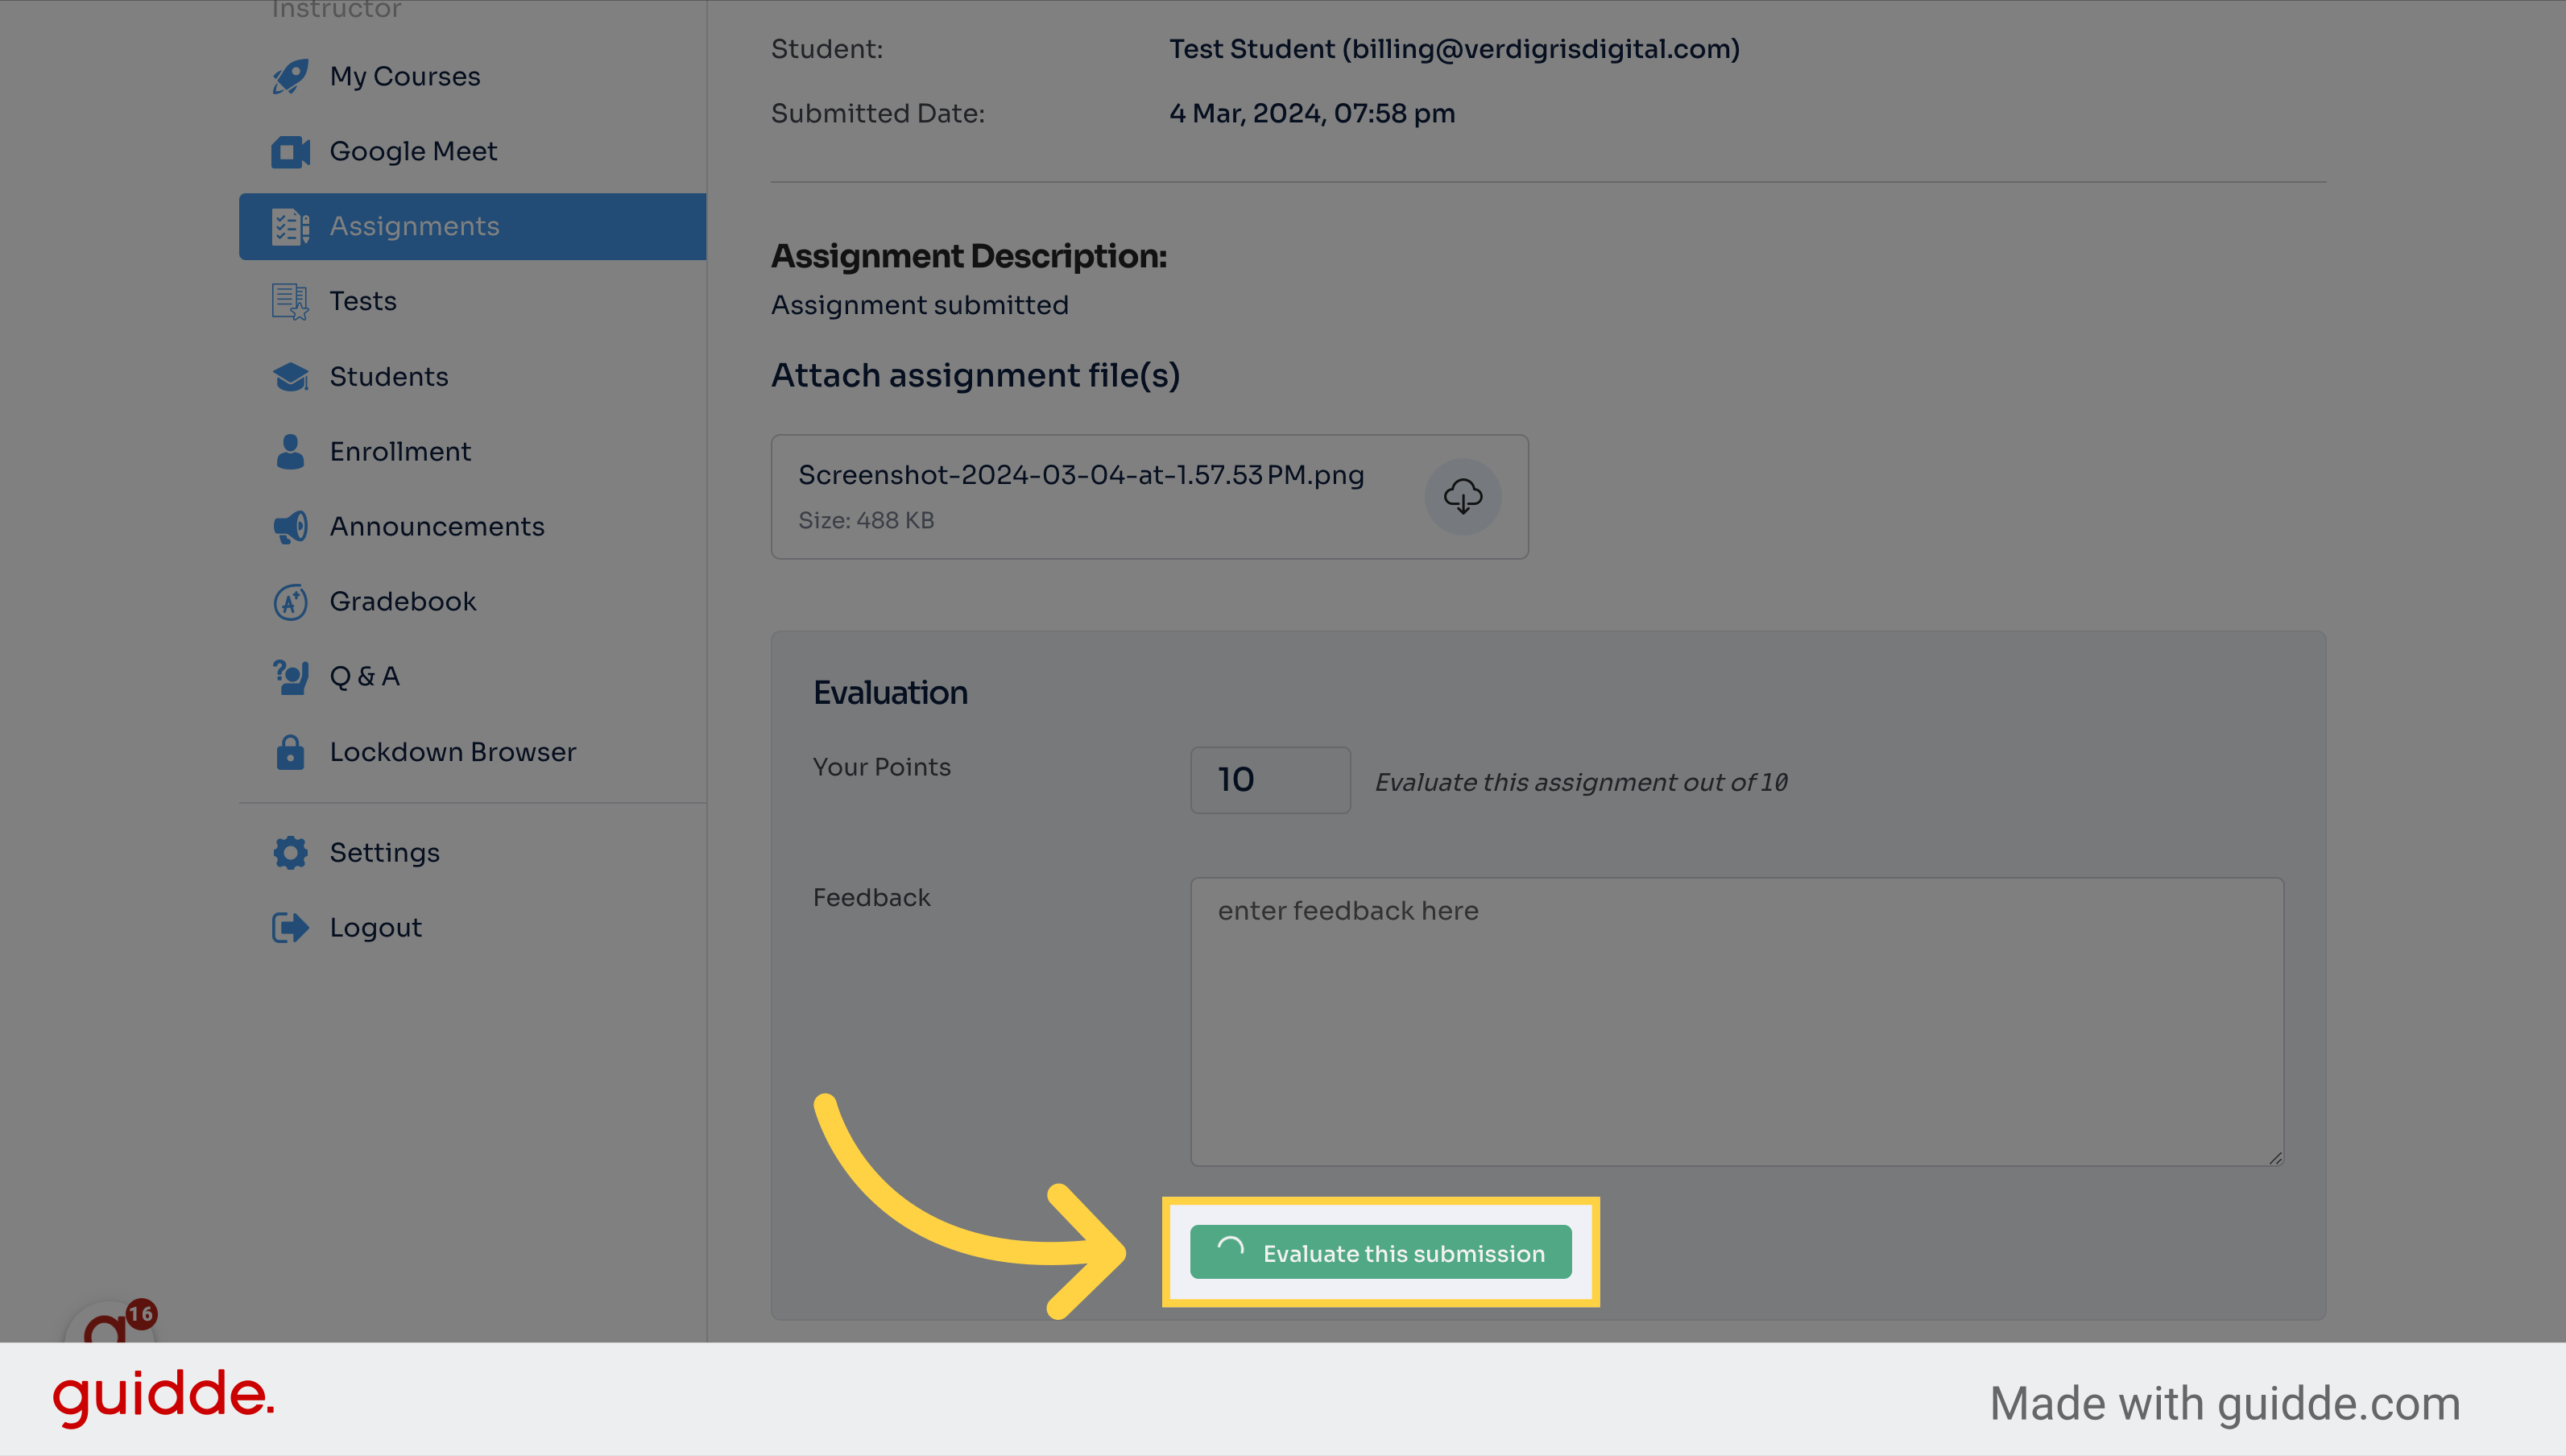
9. Click "Evaluate this submission"
Assess the submission.
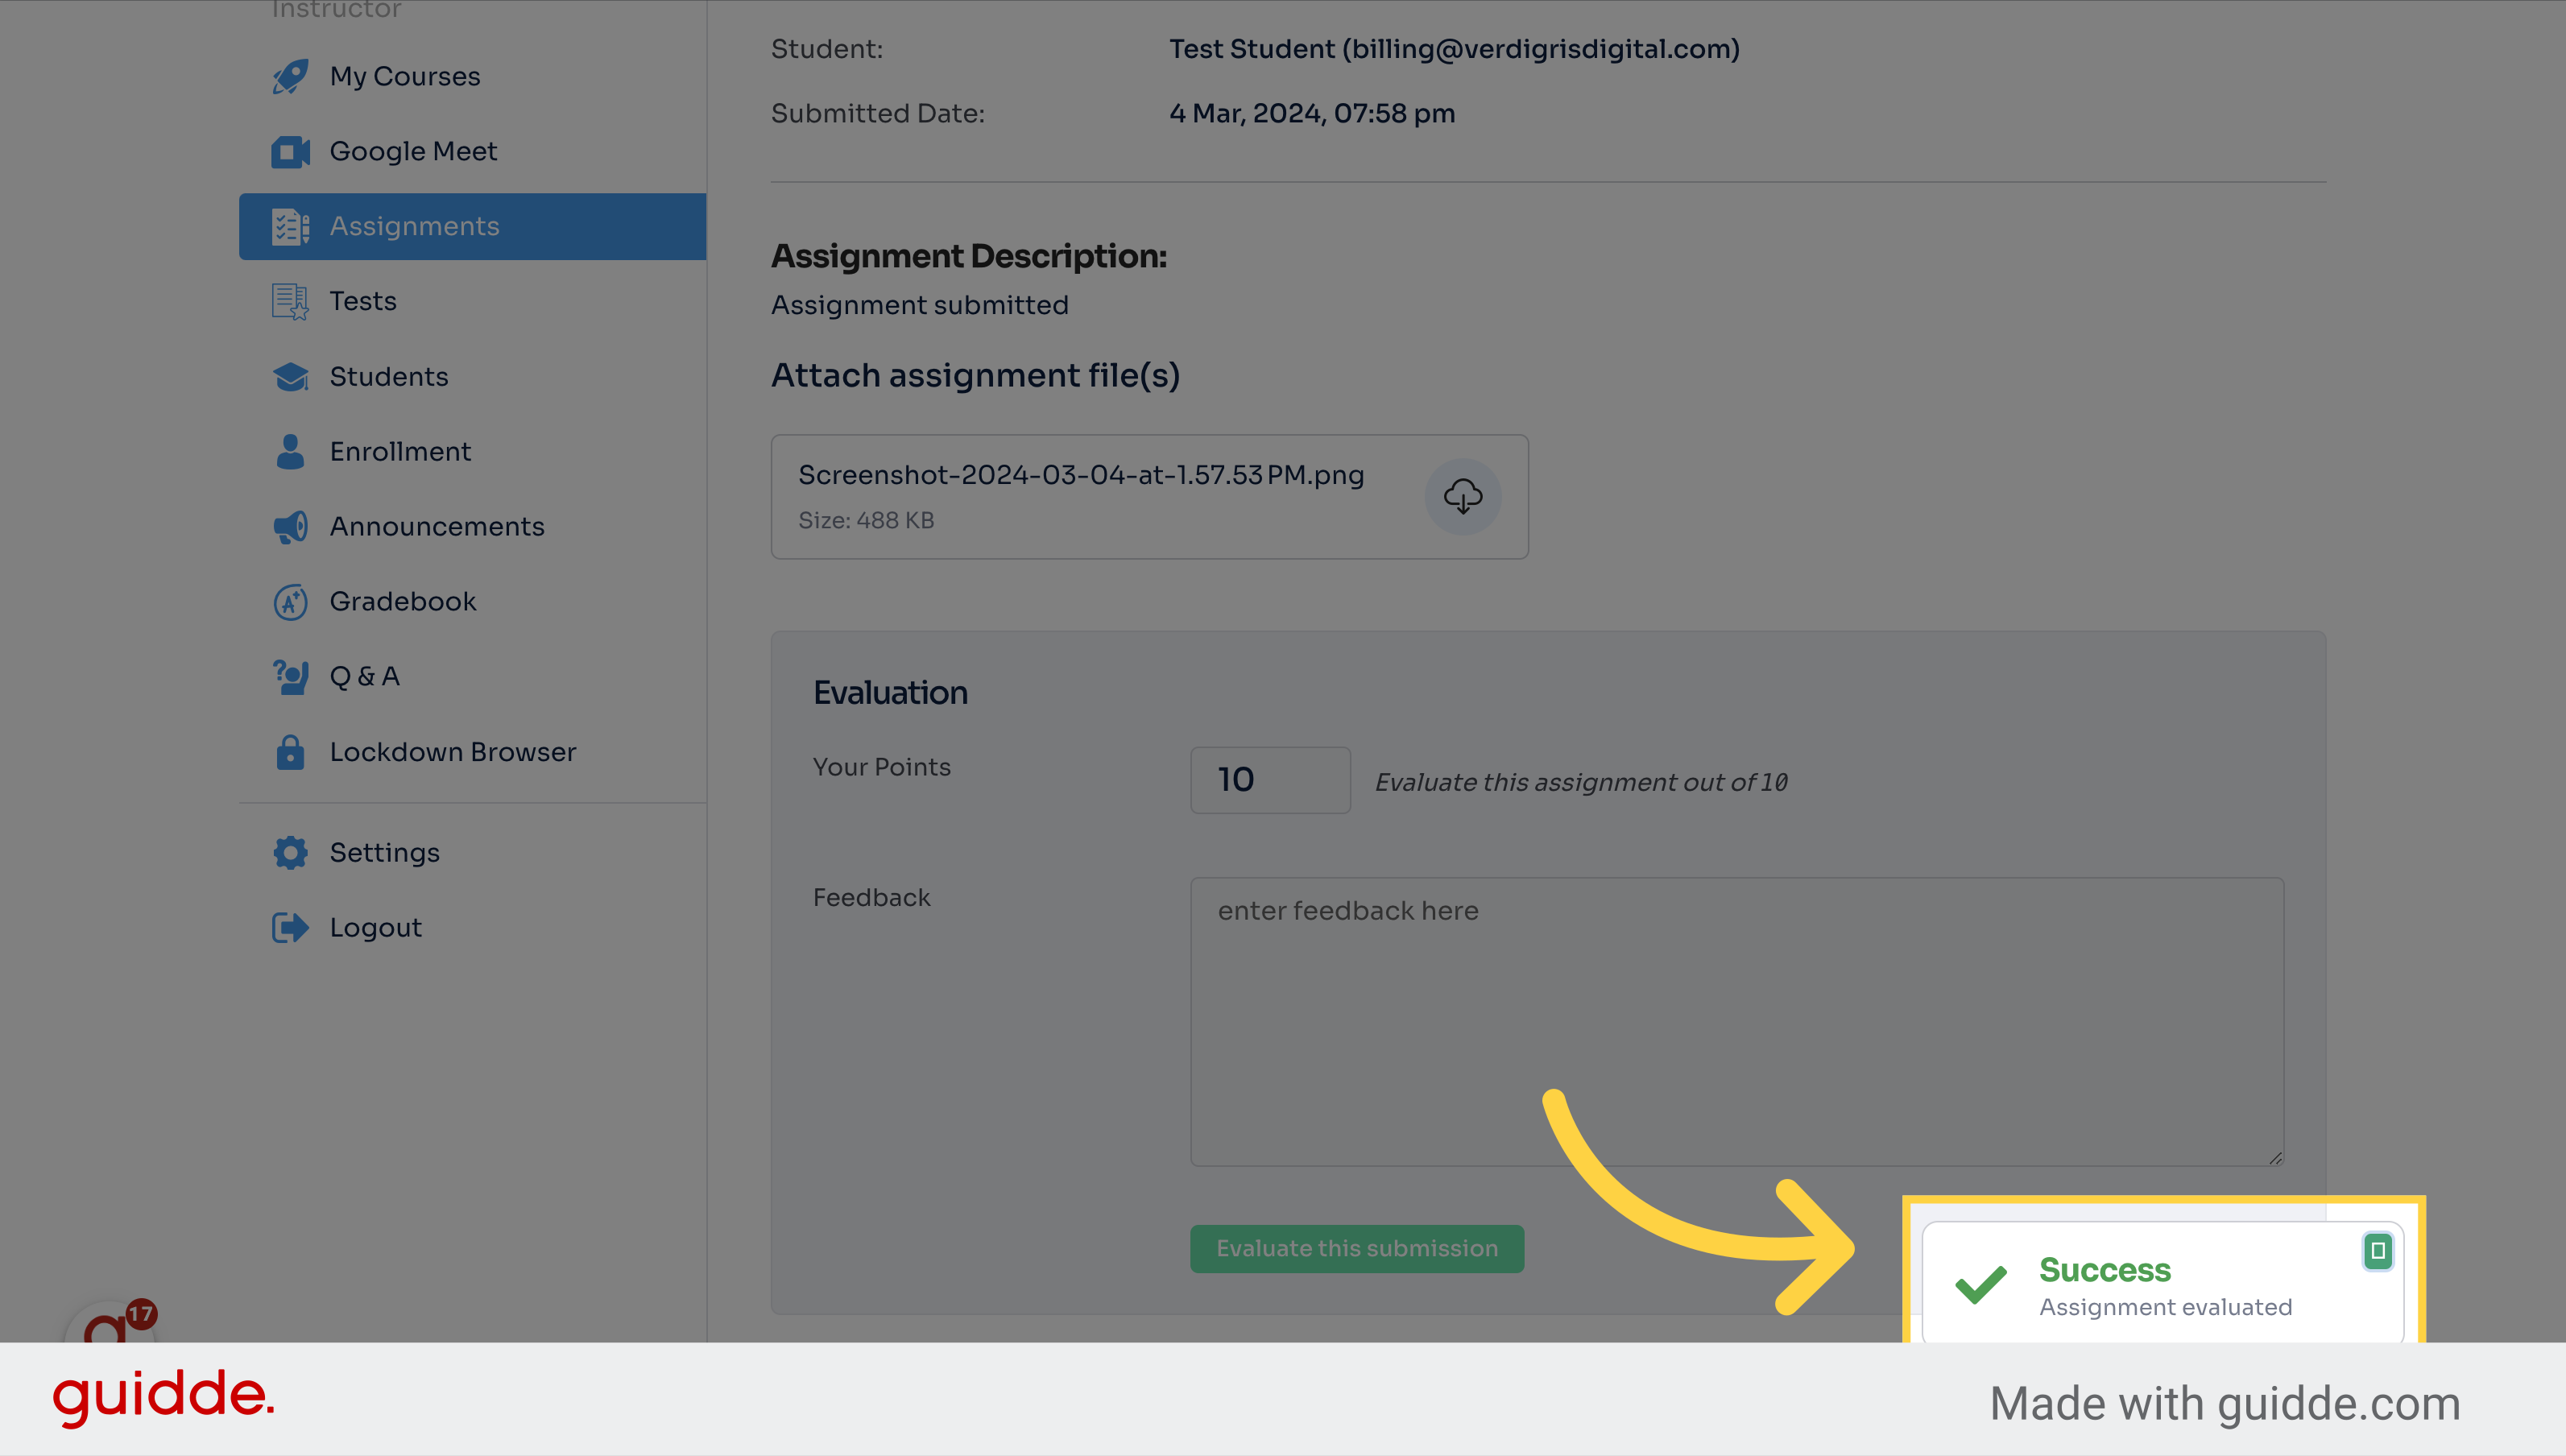
10. A success message will show up here
Select this field
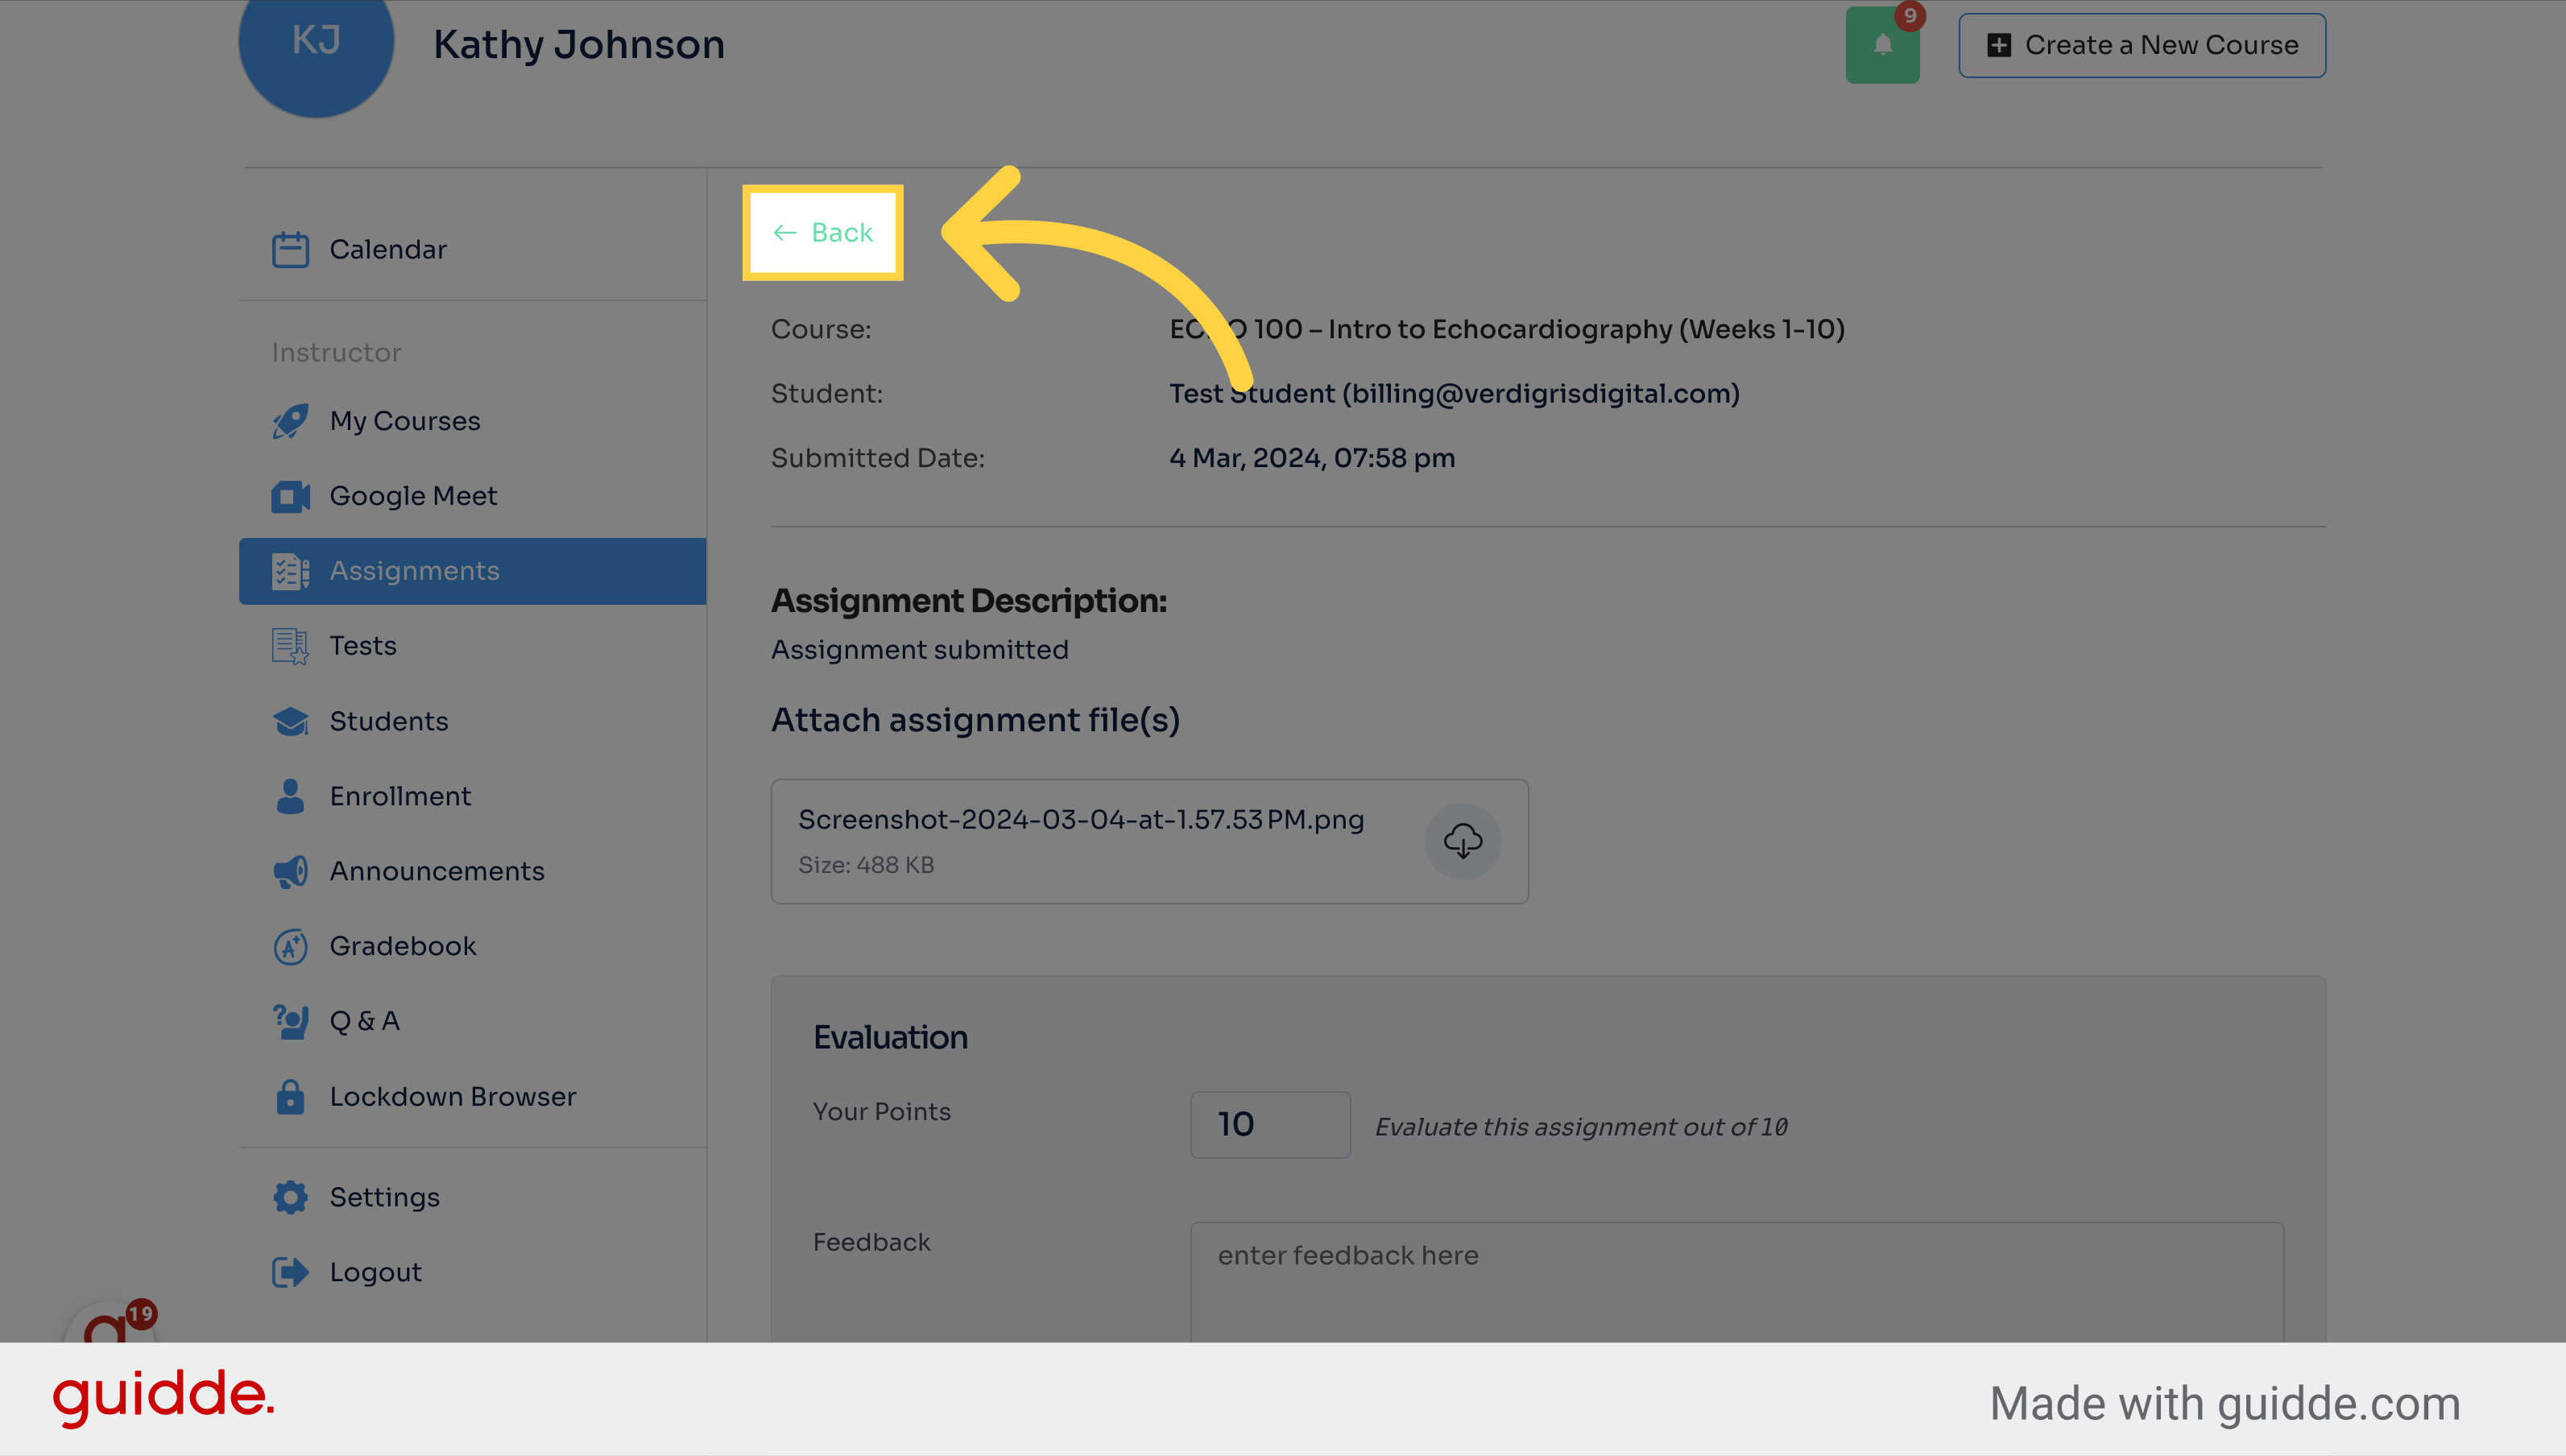
11. Click "Back"
Navigate back to the previous screen.
The guide covered accessing assignments, navigating courses, viewing details, providing feedback, evaluating submissions, and sorting orders in the LMS platform. Master the process of managing training tasks effectively.
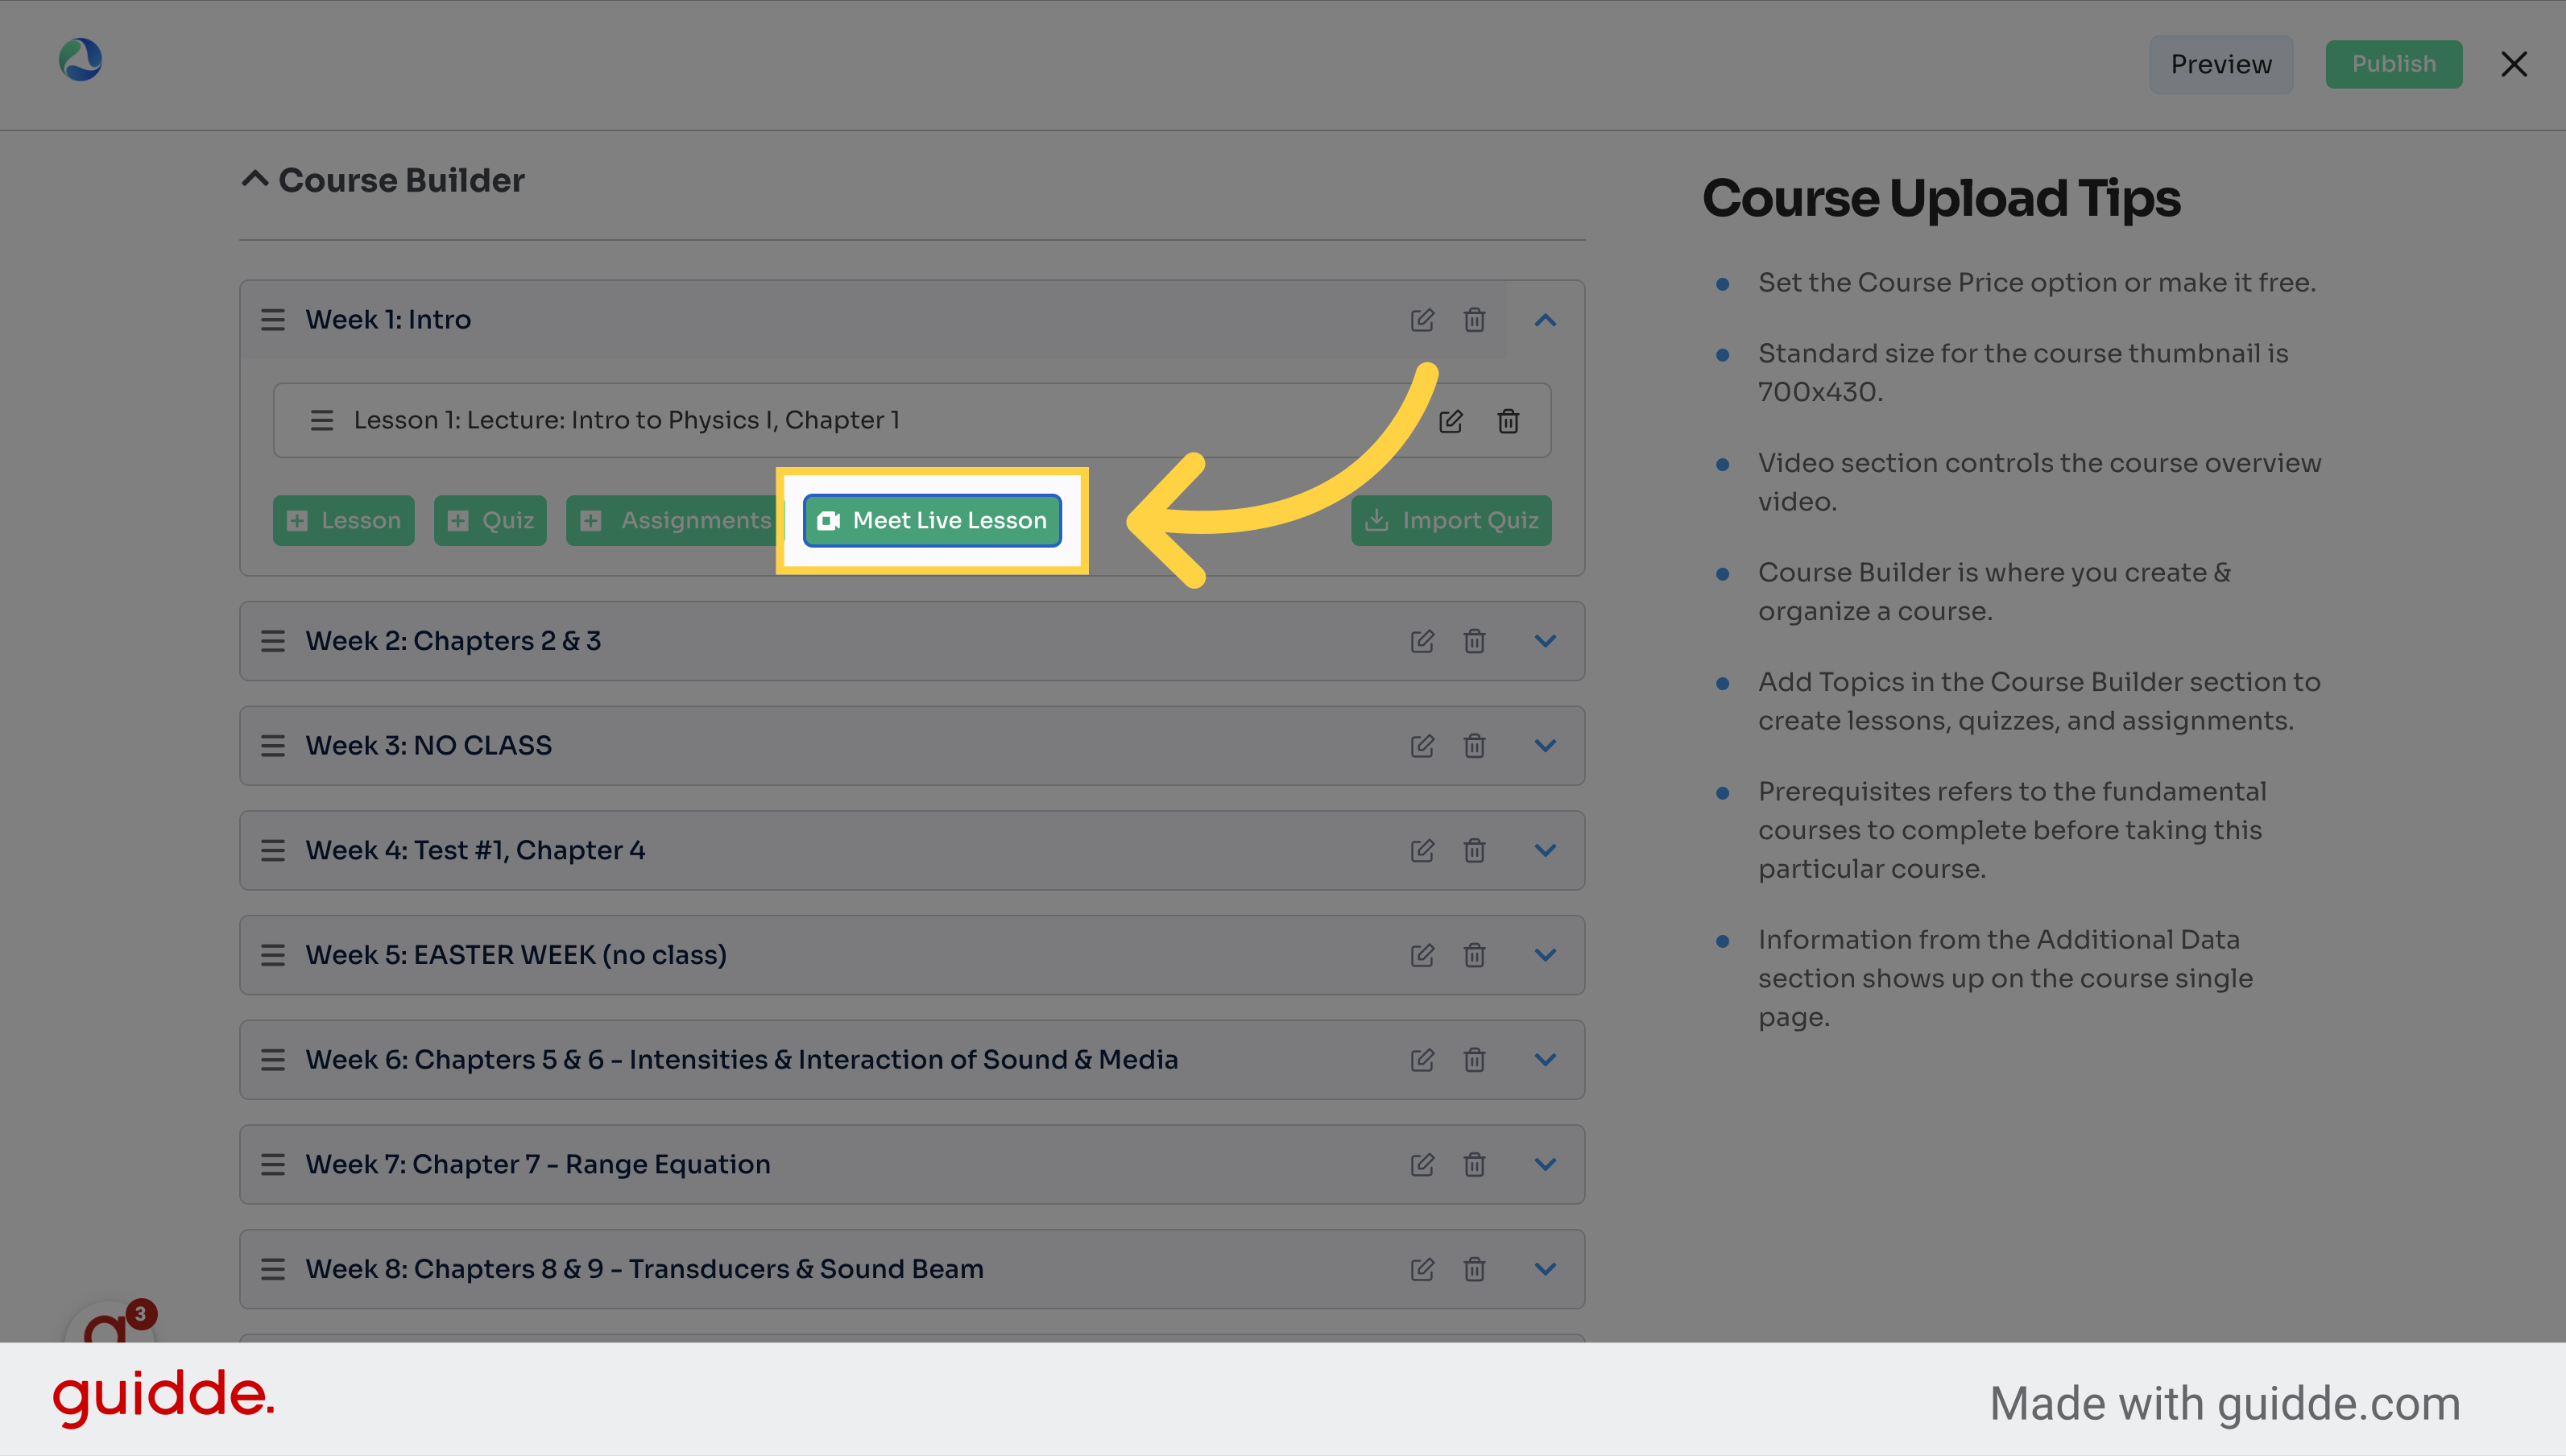
How to Add a Google Meeting
Learn how to efficiently add a Google Meeting within the LMS. Follow the engaging instructions to navigate through the process seamlessly.
1. Click "My Courses"
Access your courses.
2. Click here
Click here
3. Click into the week / topic you want to add the meeting to
Select the specific week.
4. Click "+ Meet Live Lesson"
Access the live lesson feature.
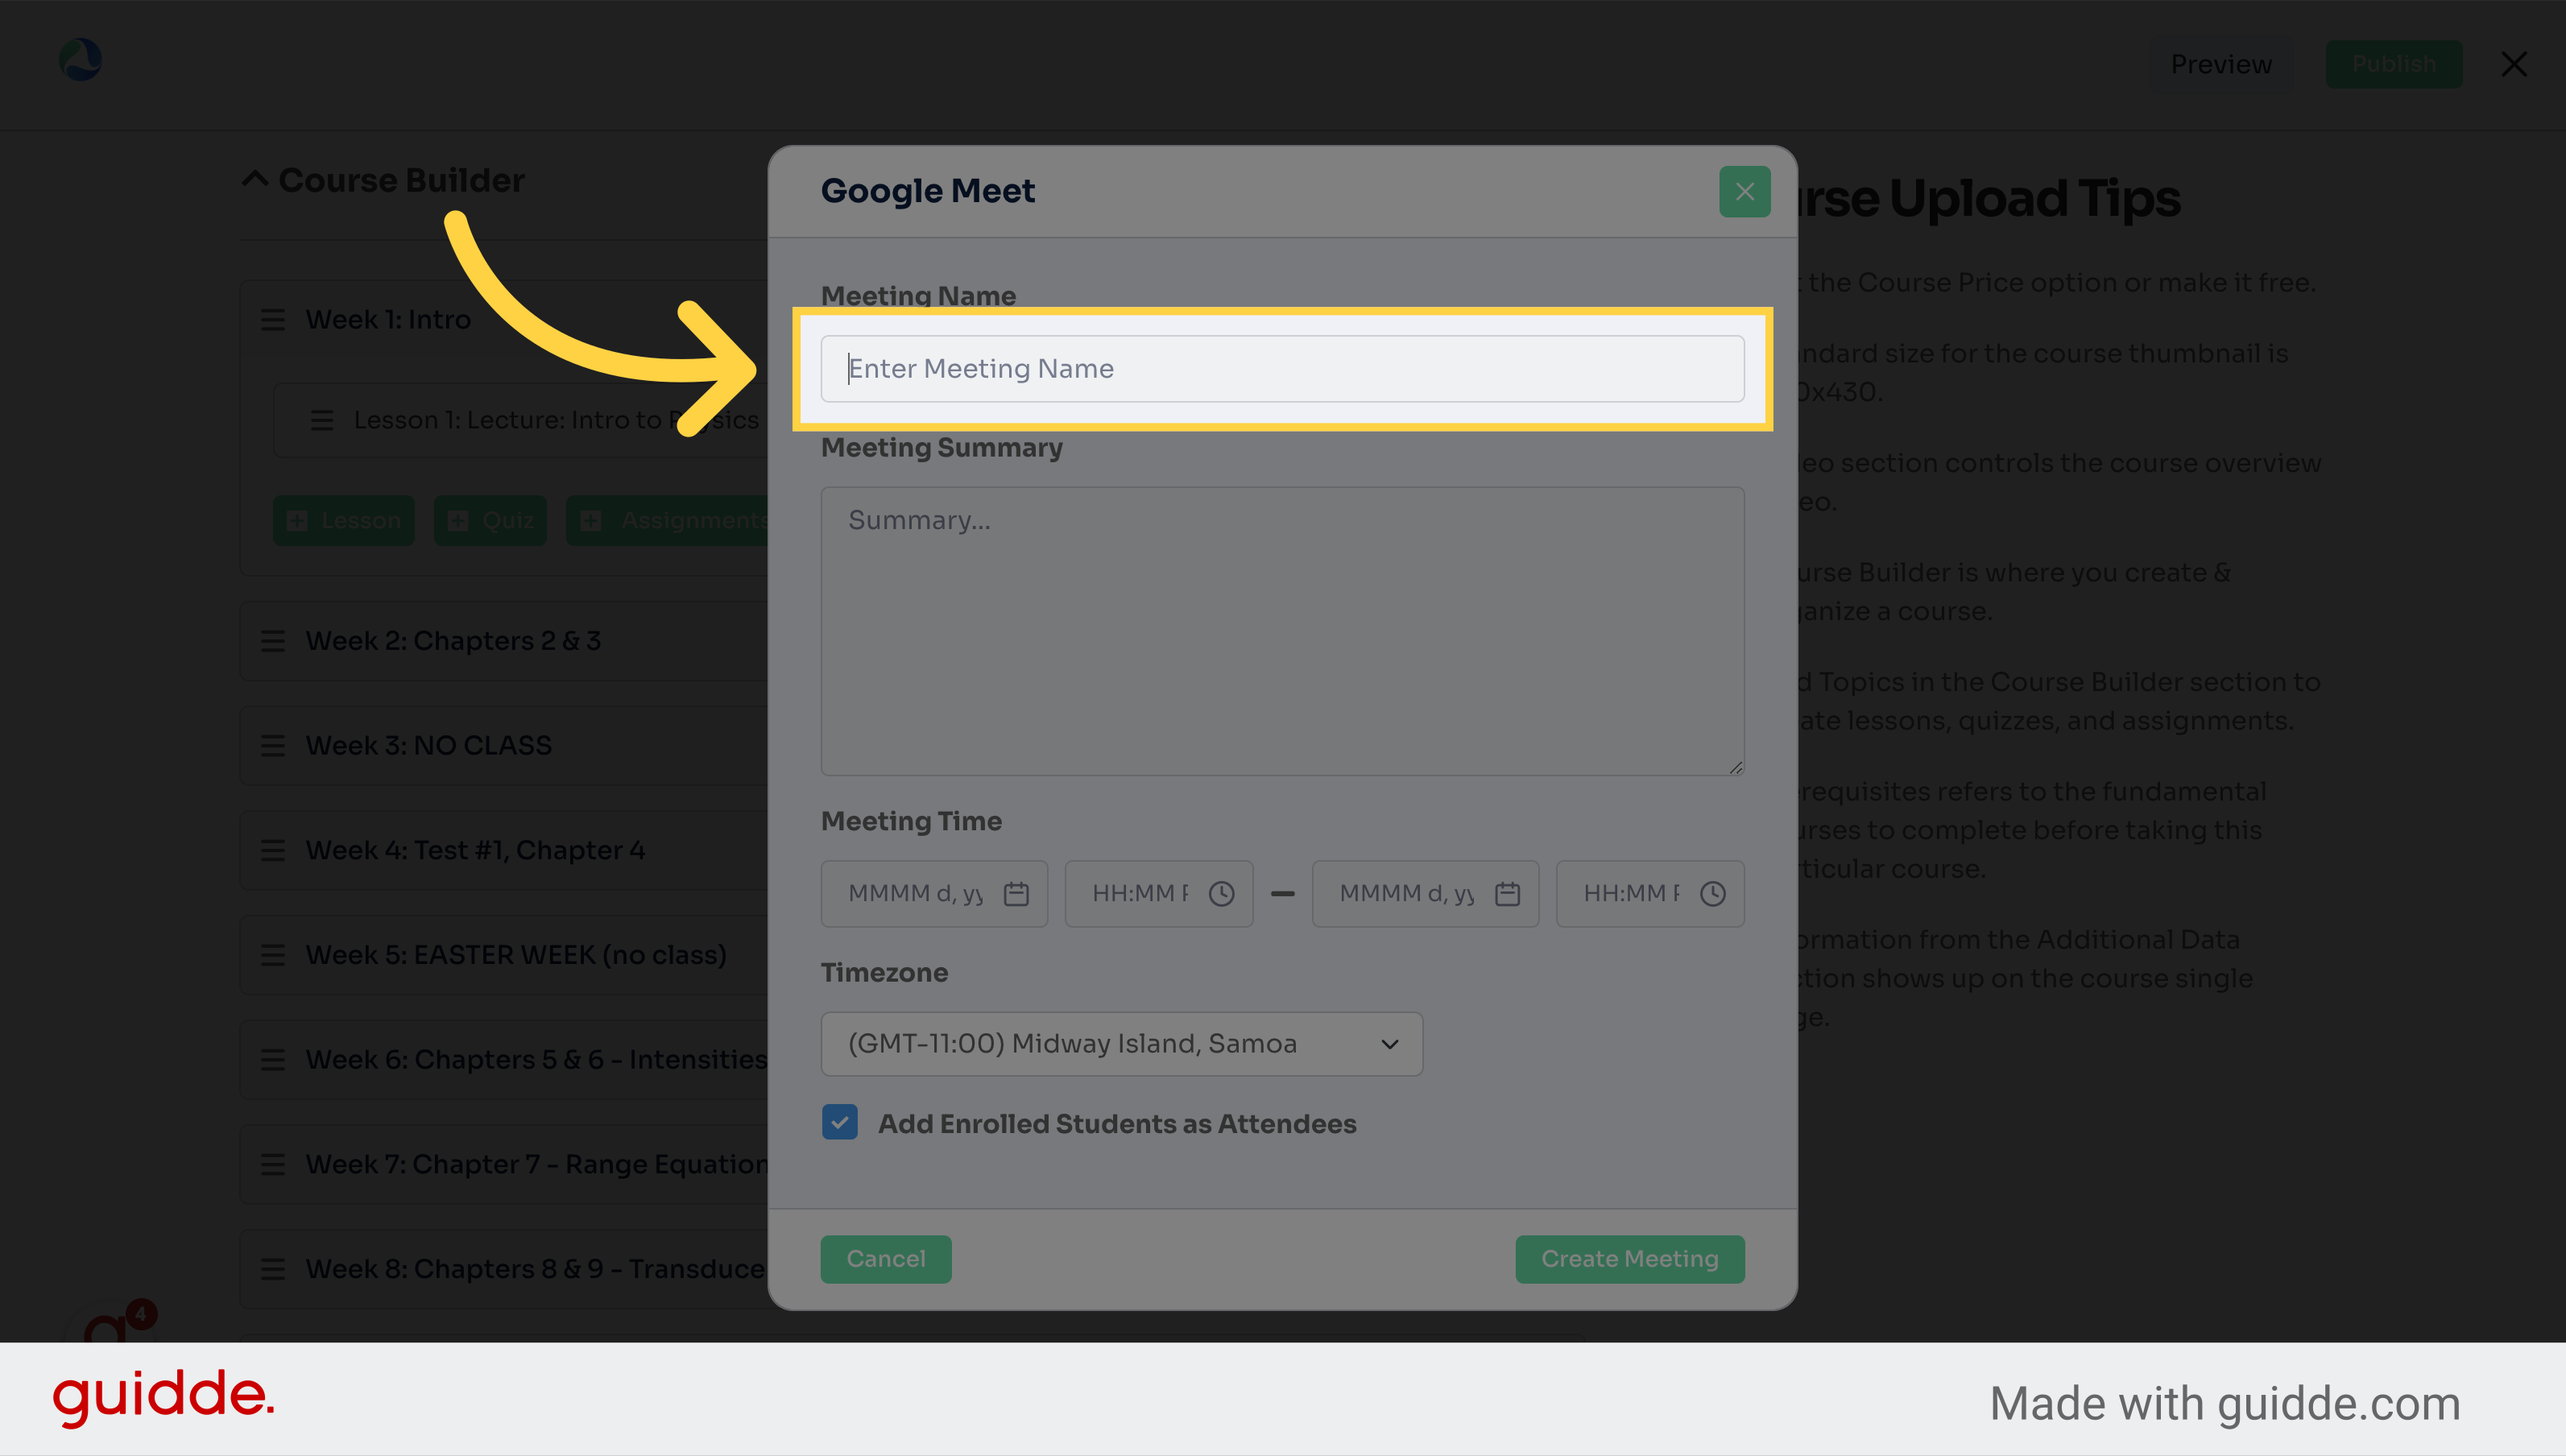
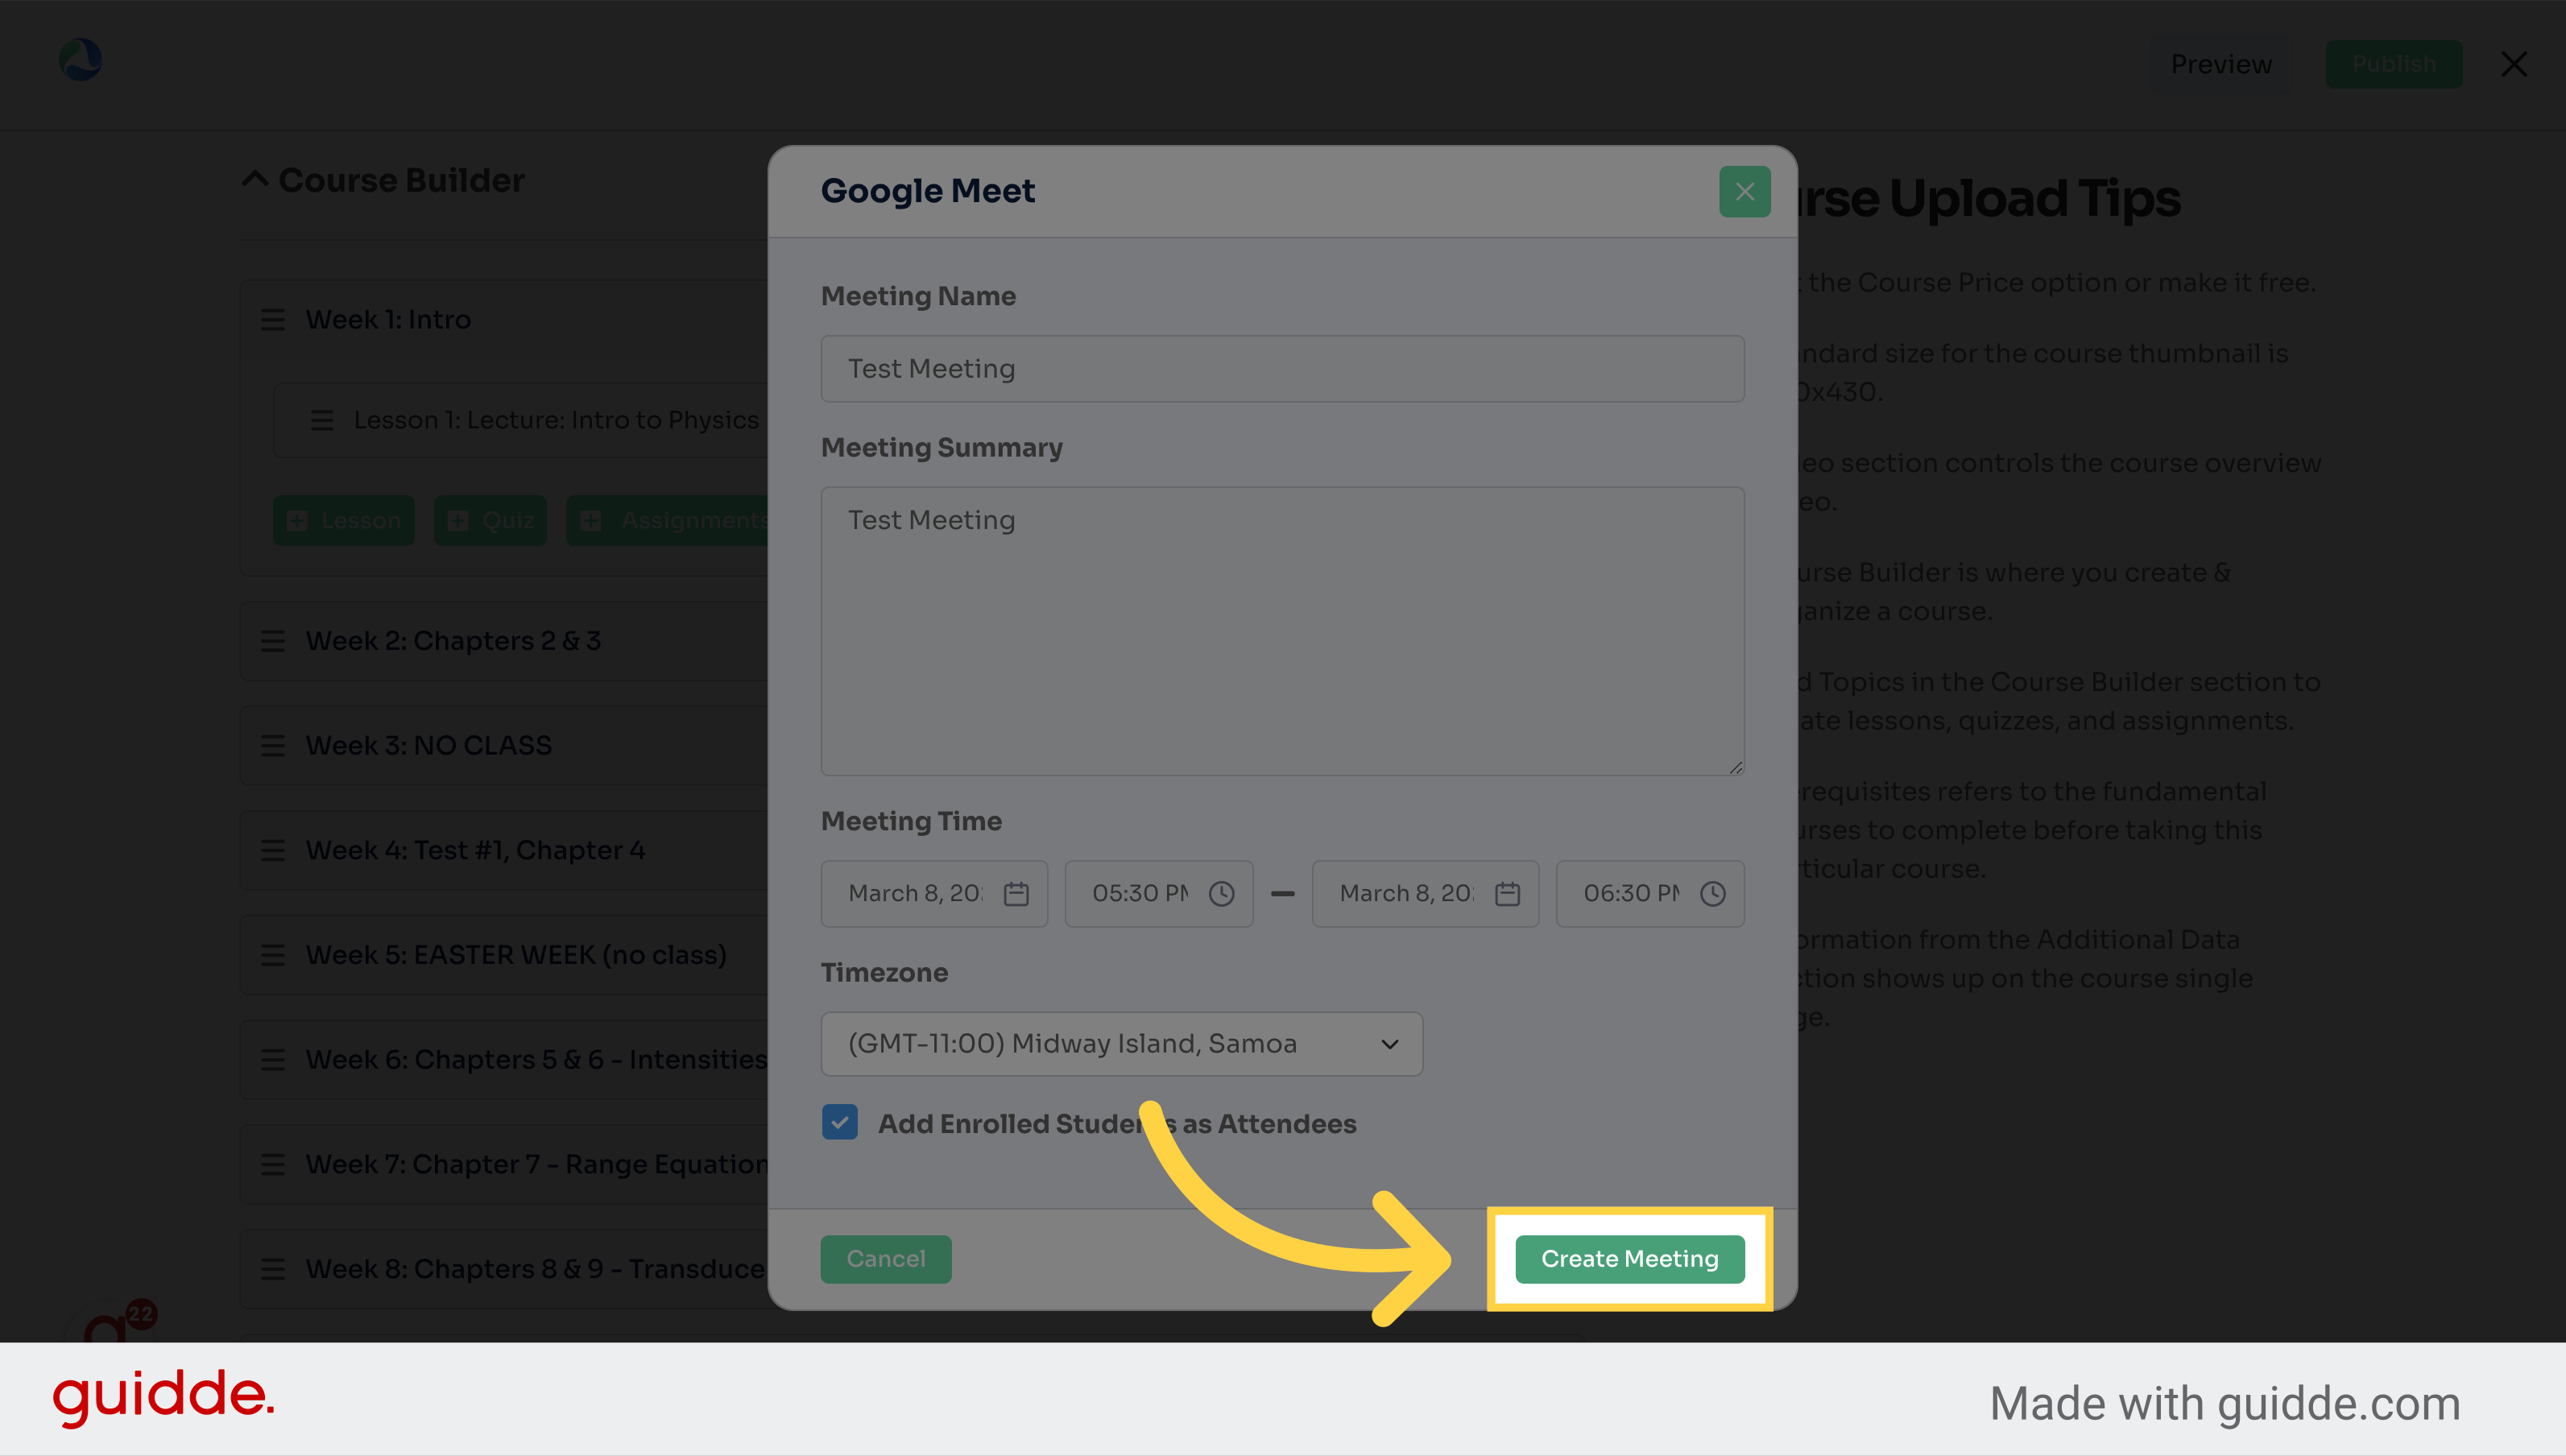
5. Enter the meeting name and information
Input the meeting title.
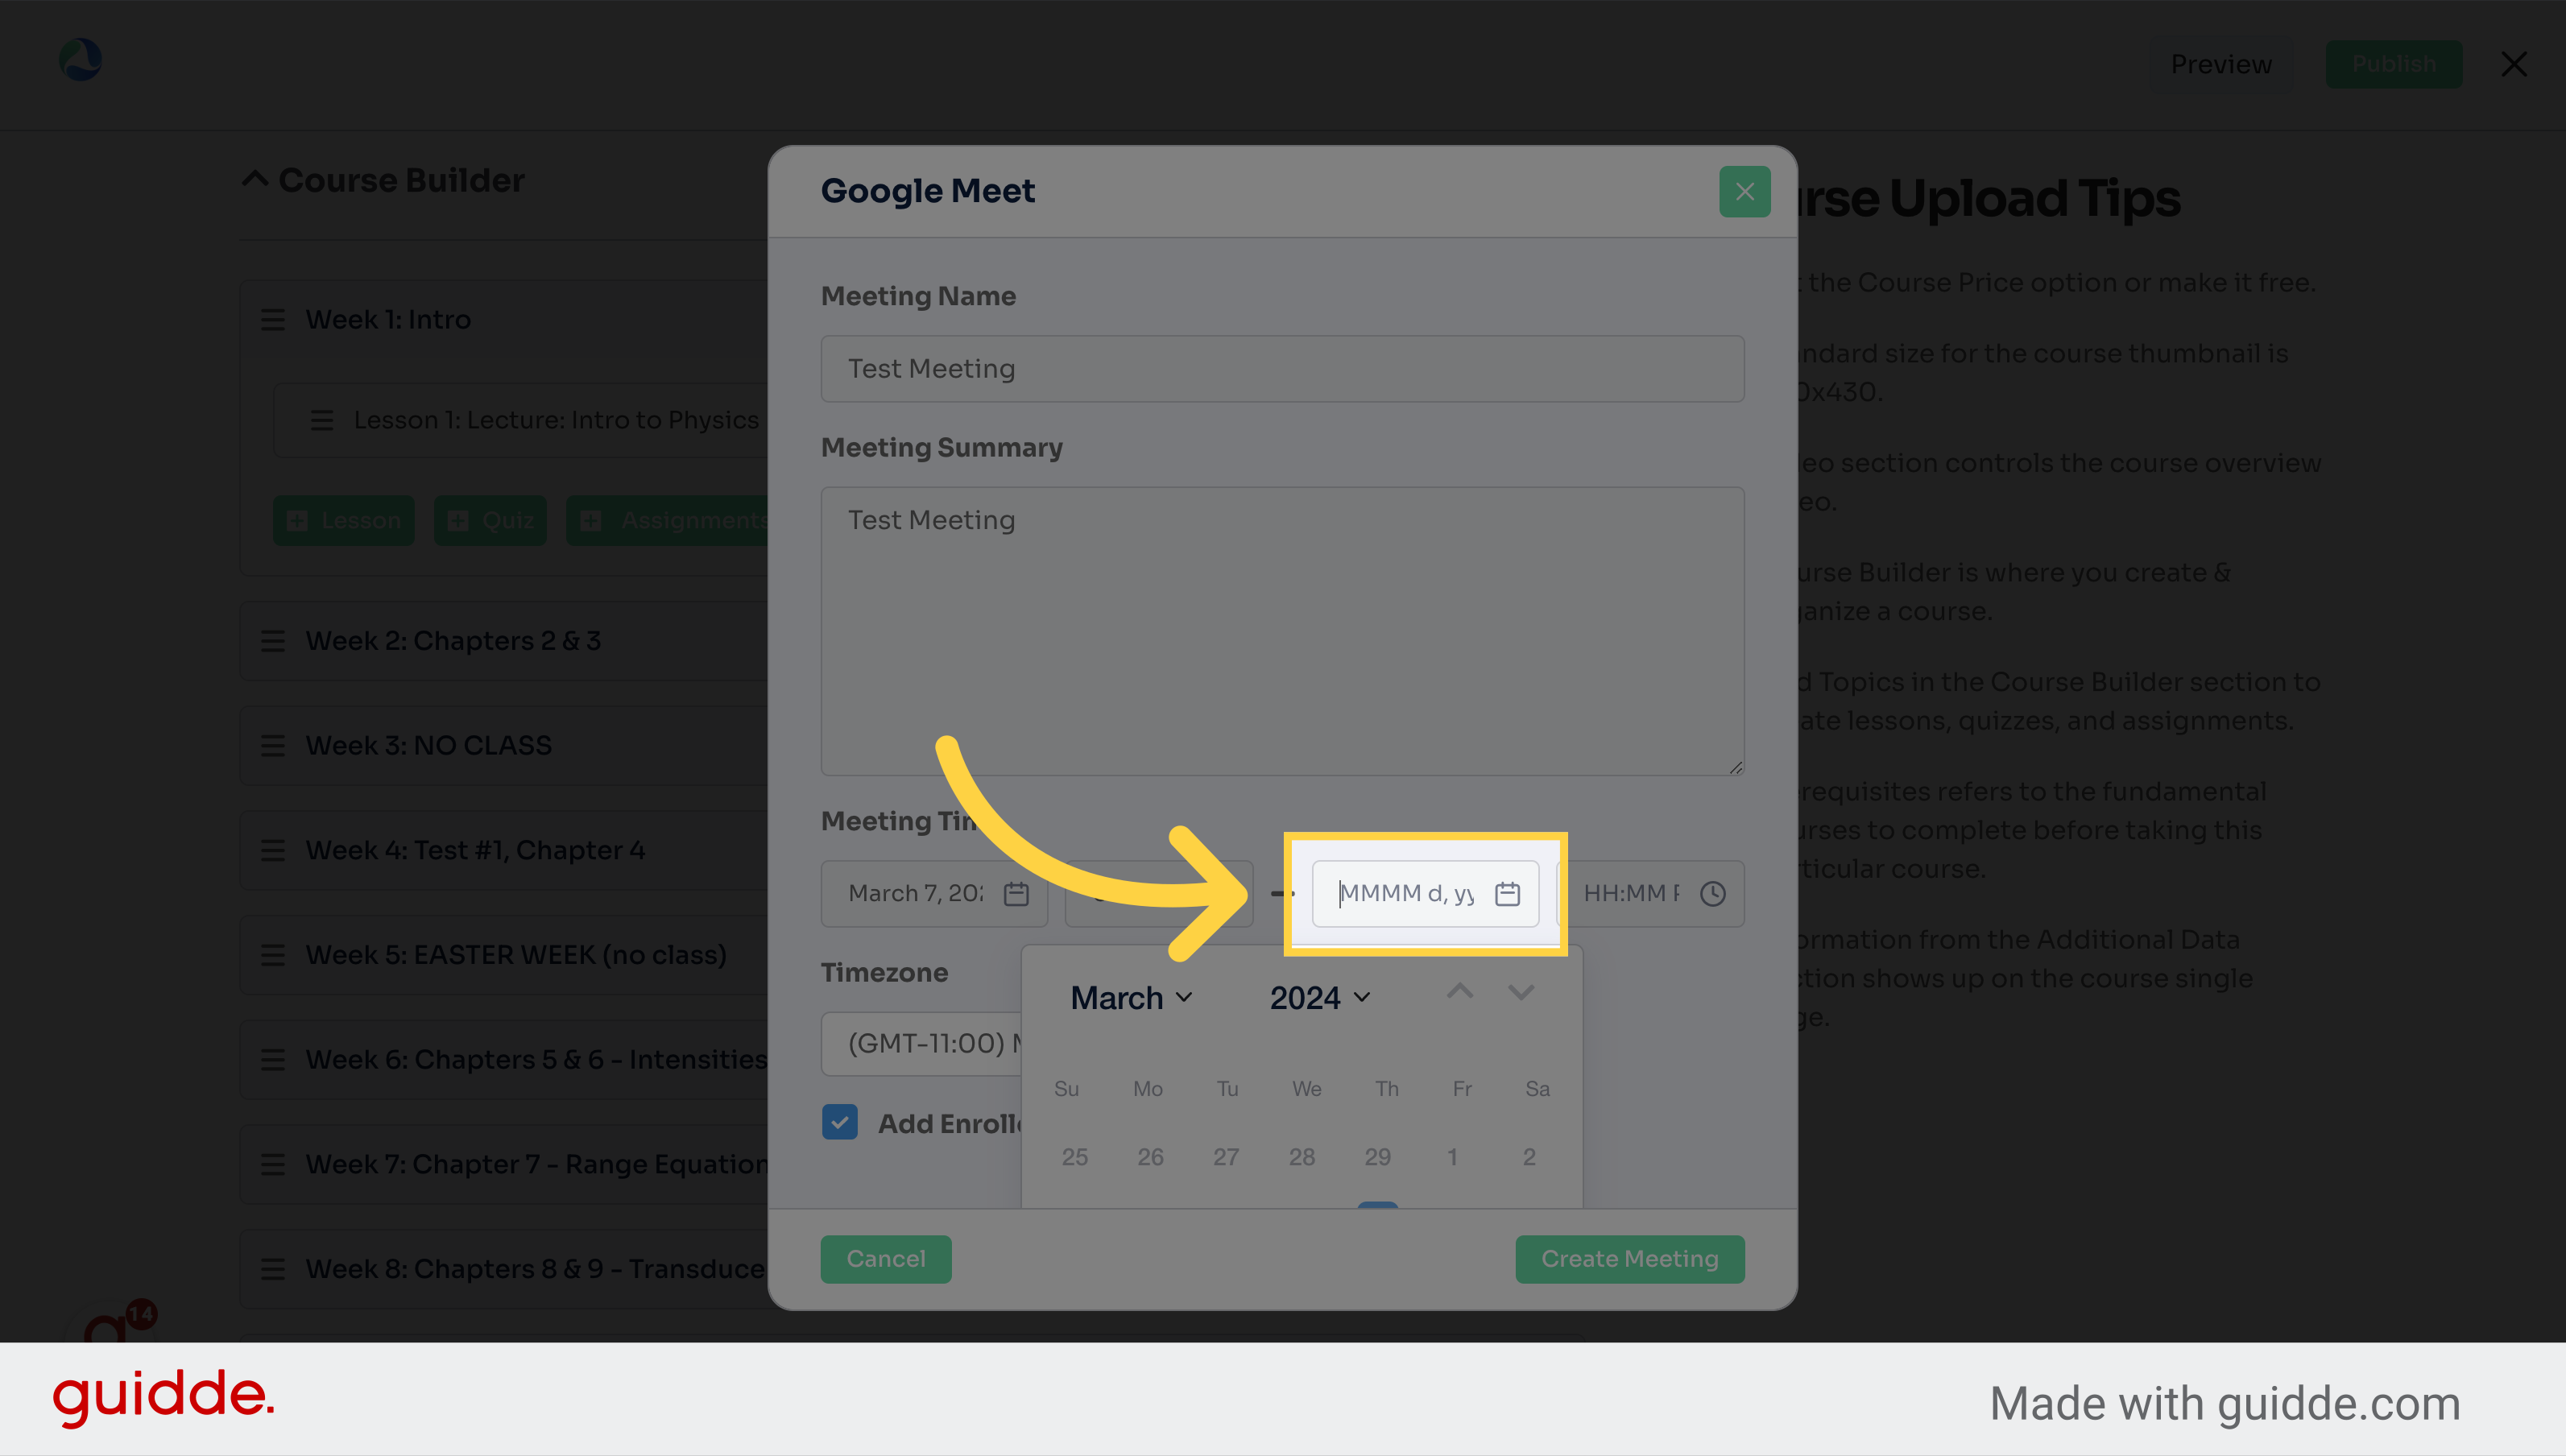
6. Click "MMMM d, yyyy" to schedule the date
Select the date format.
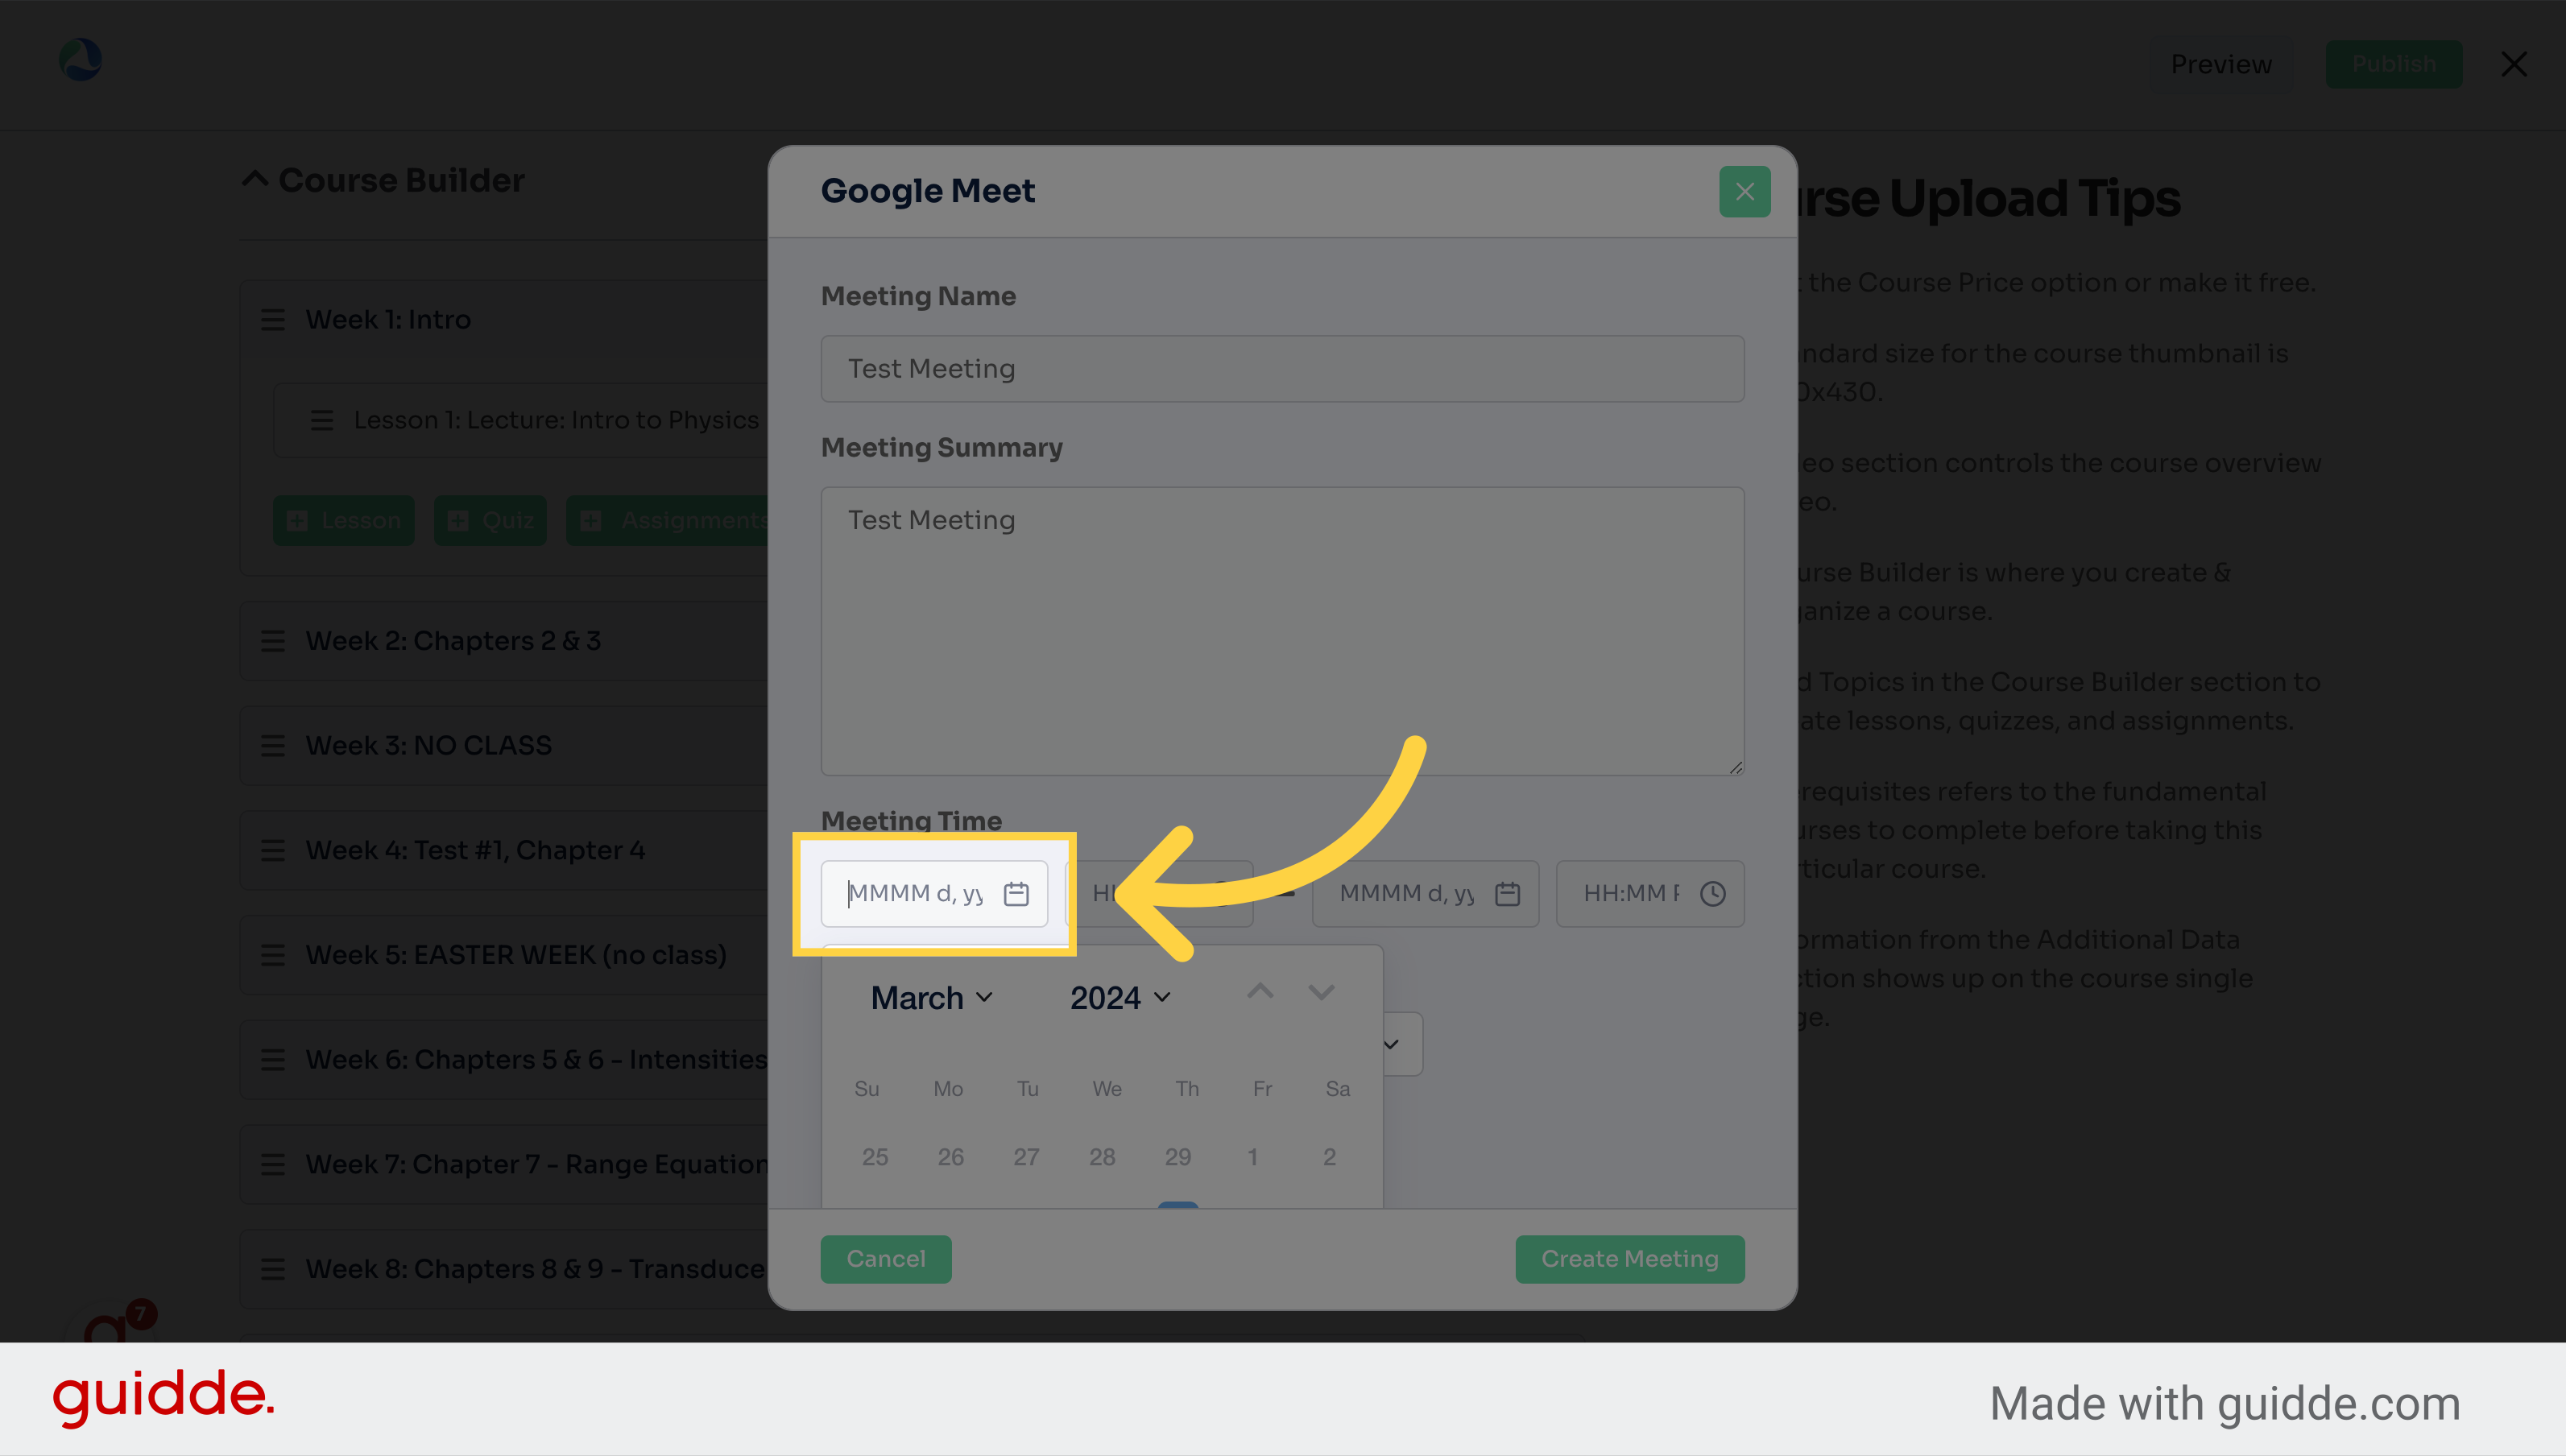
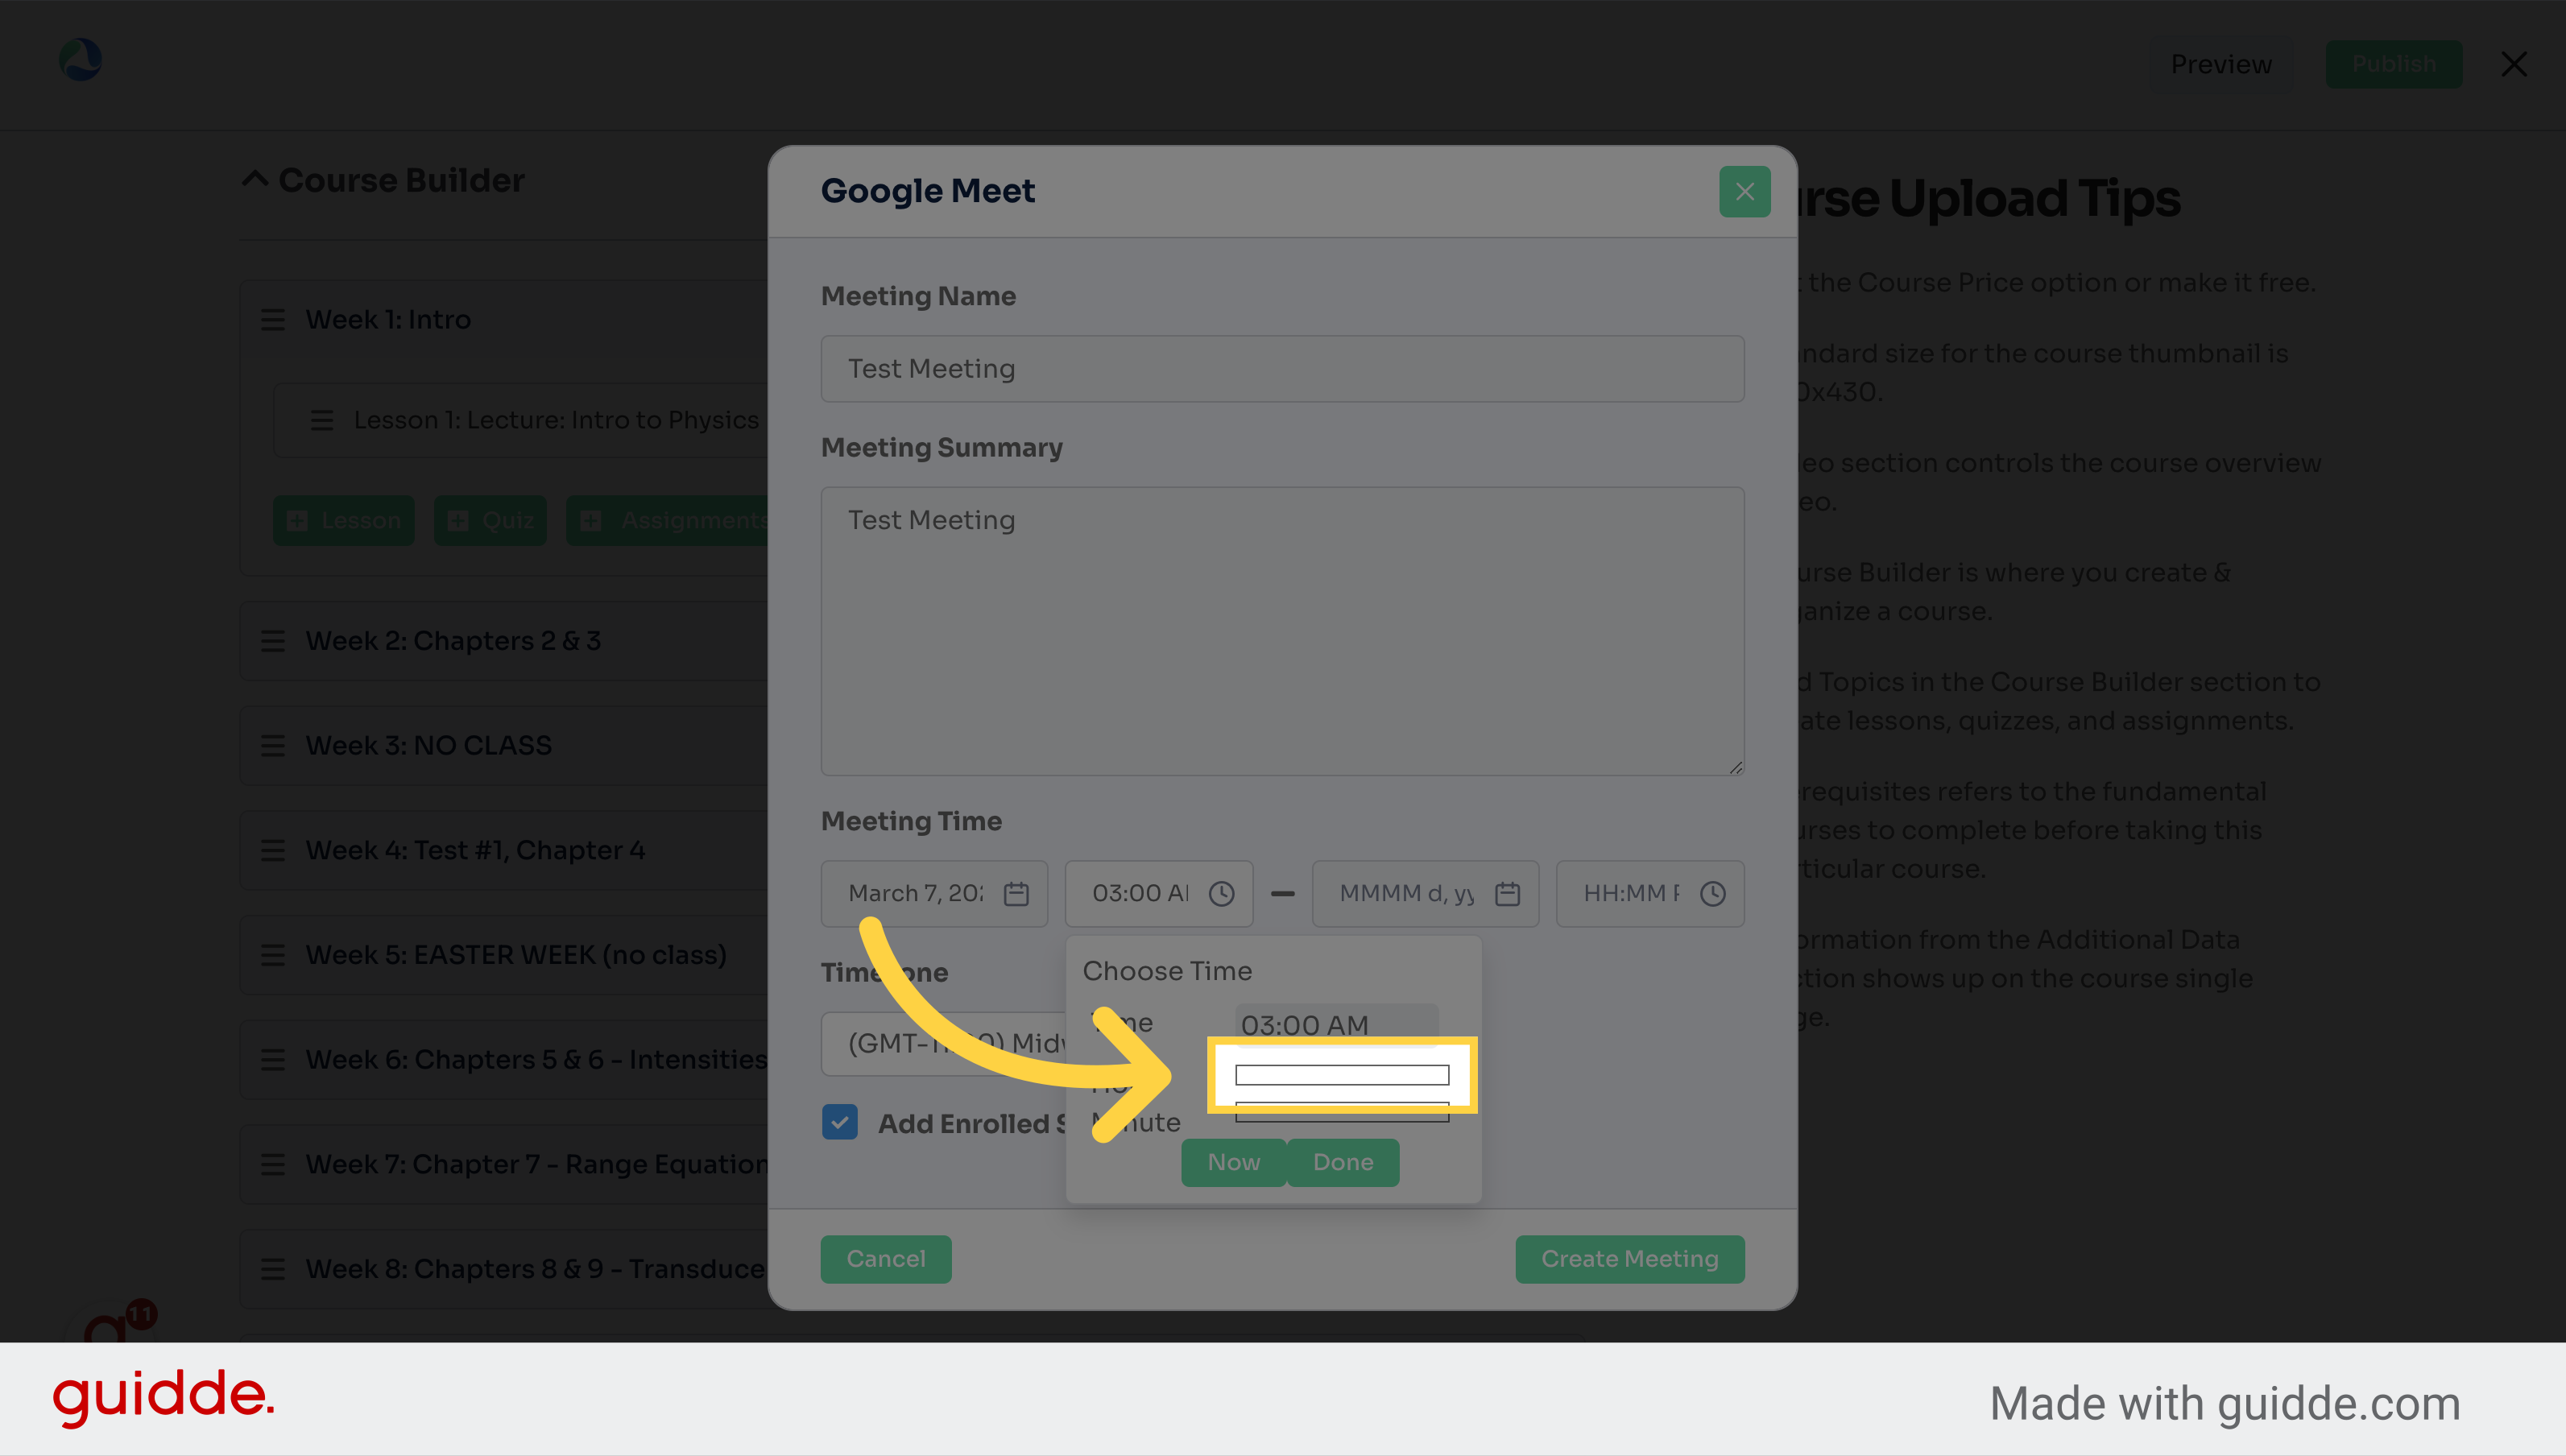
7. Enter the time here
Choose the date.
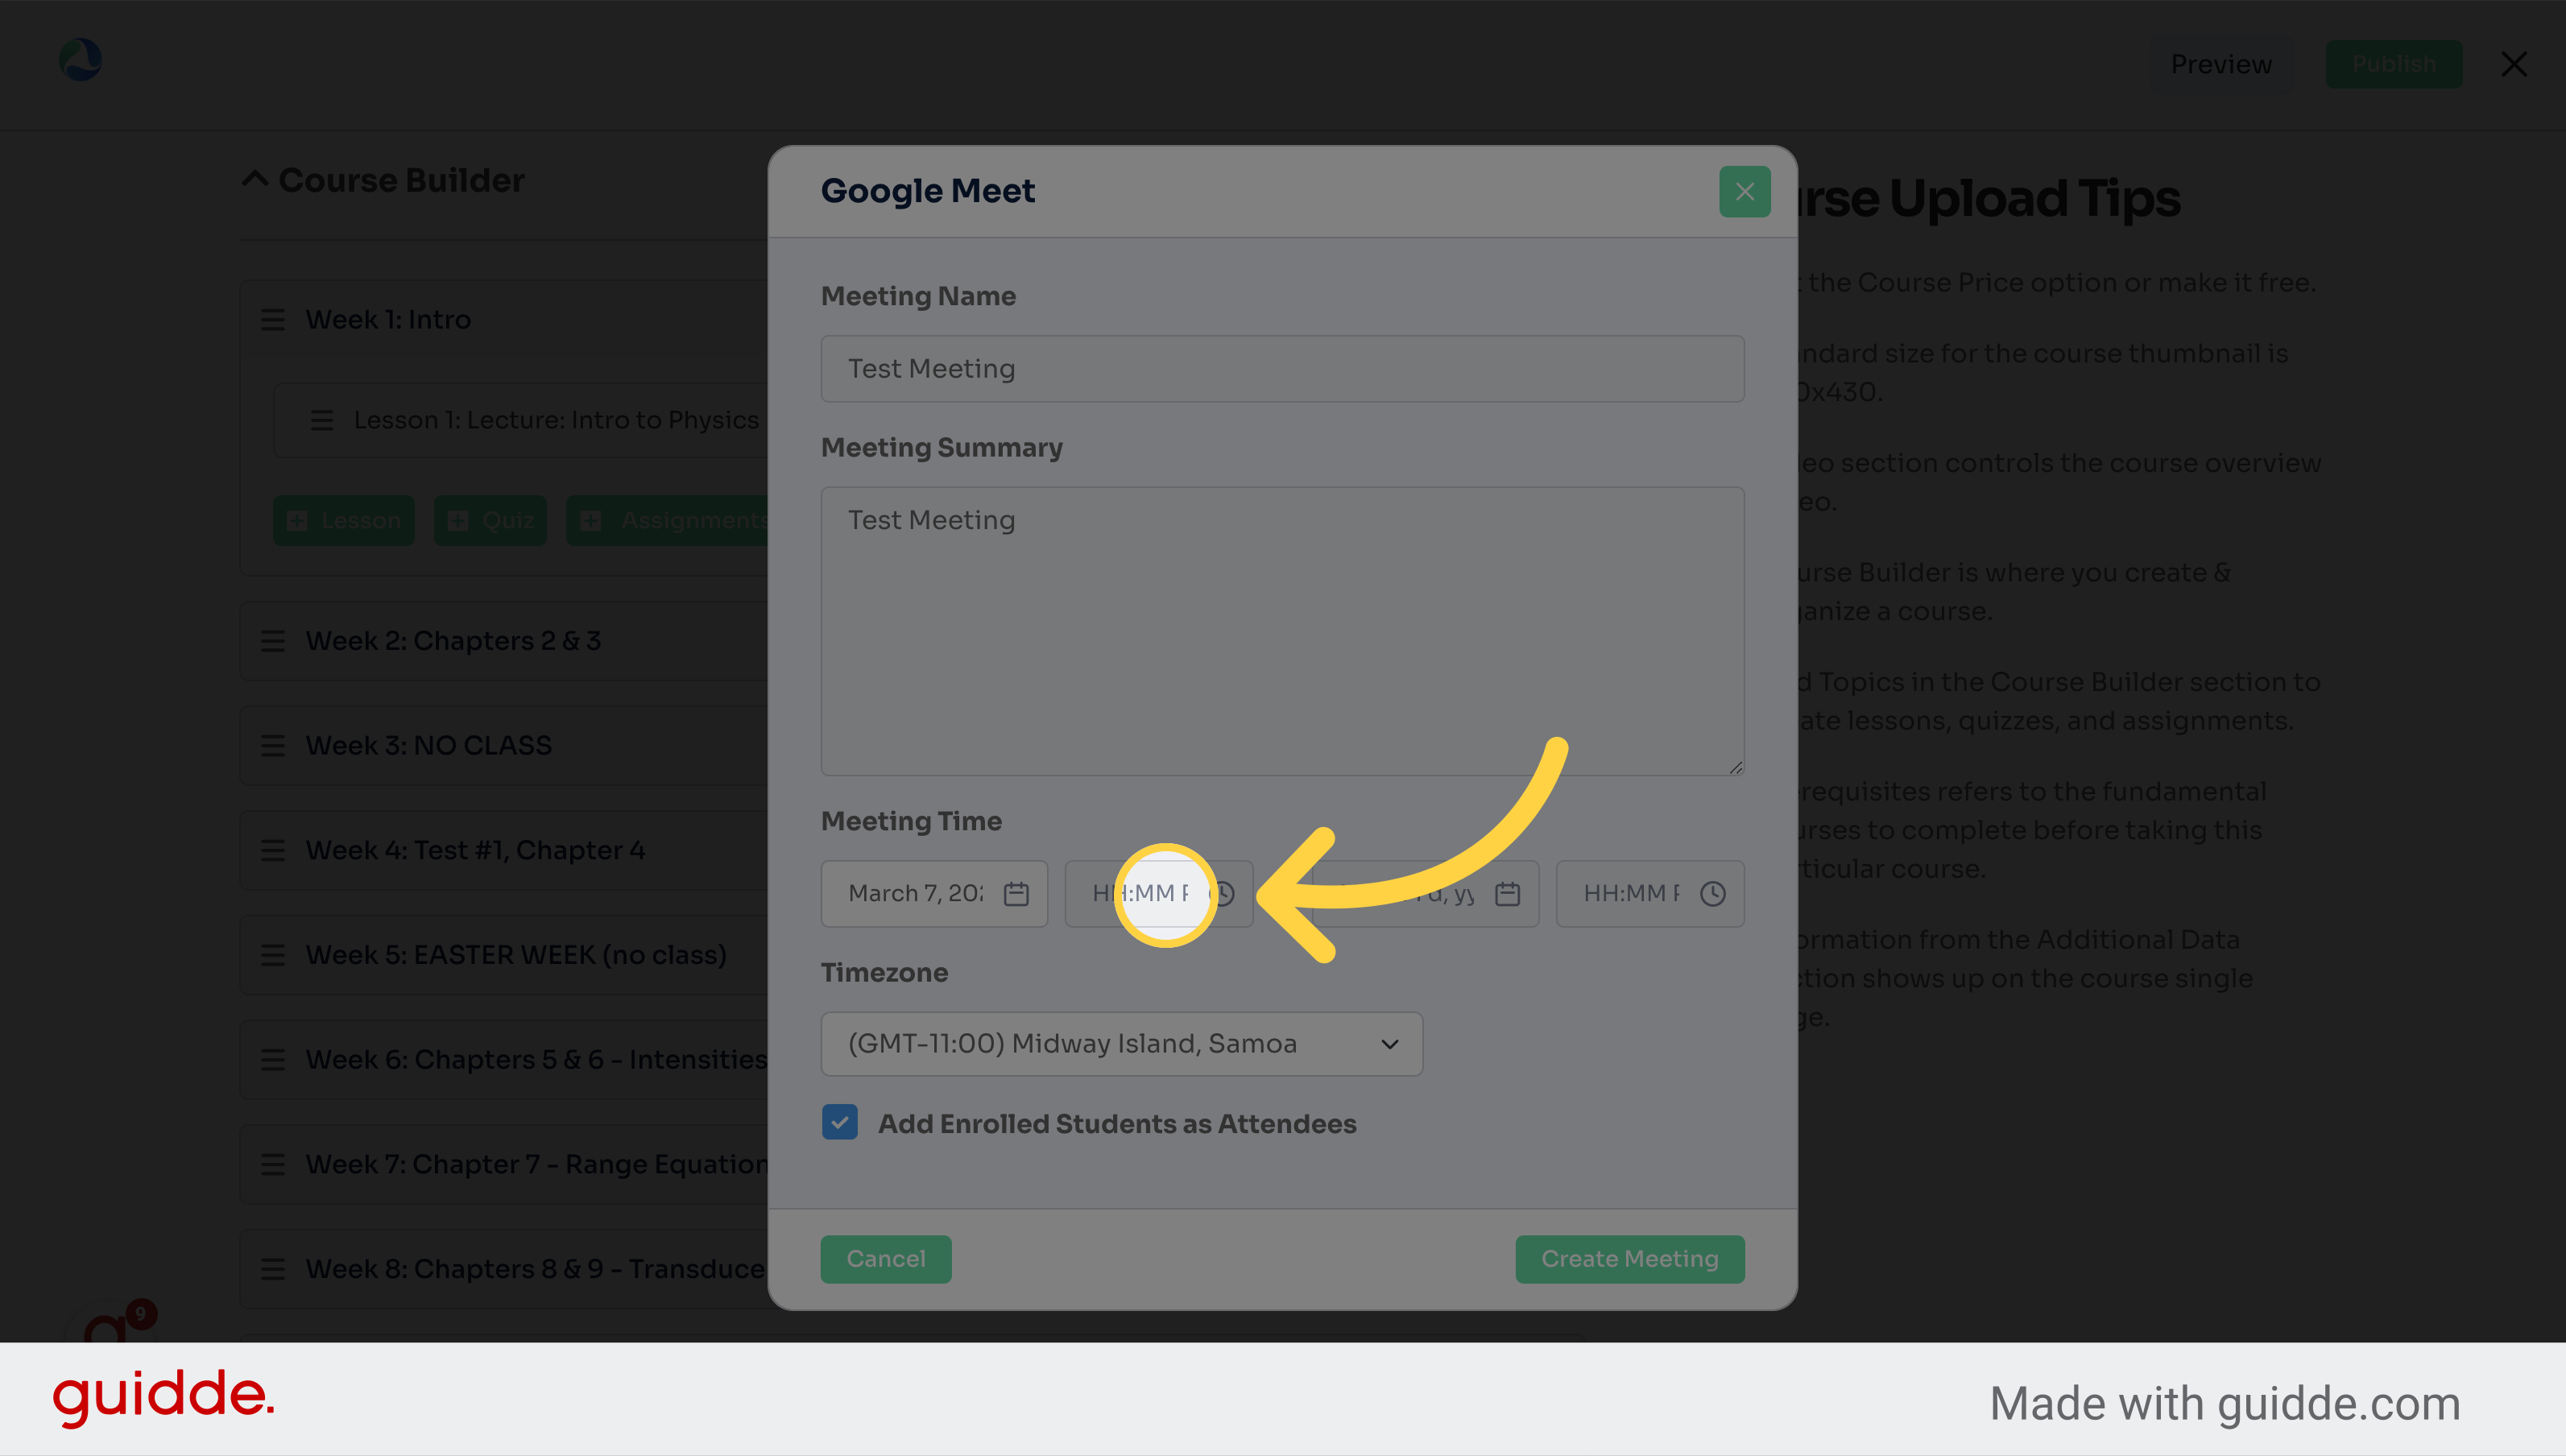
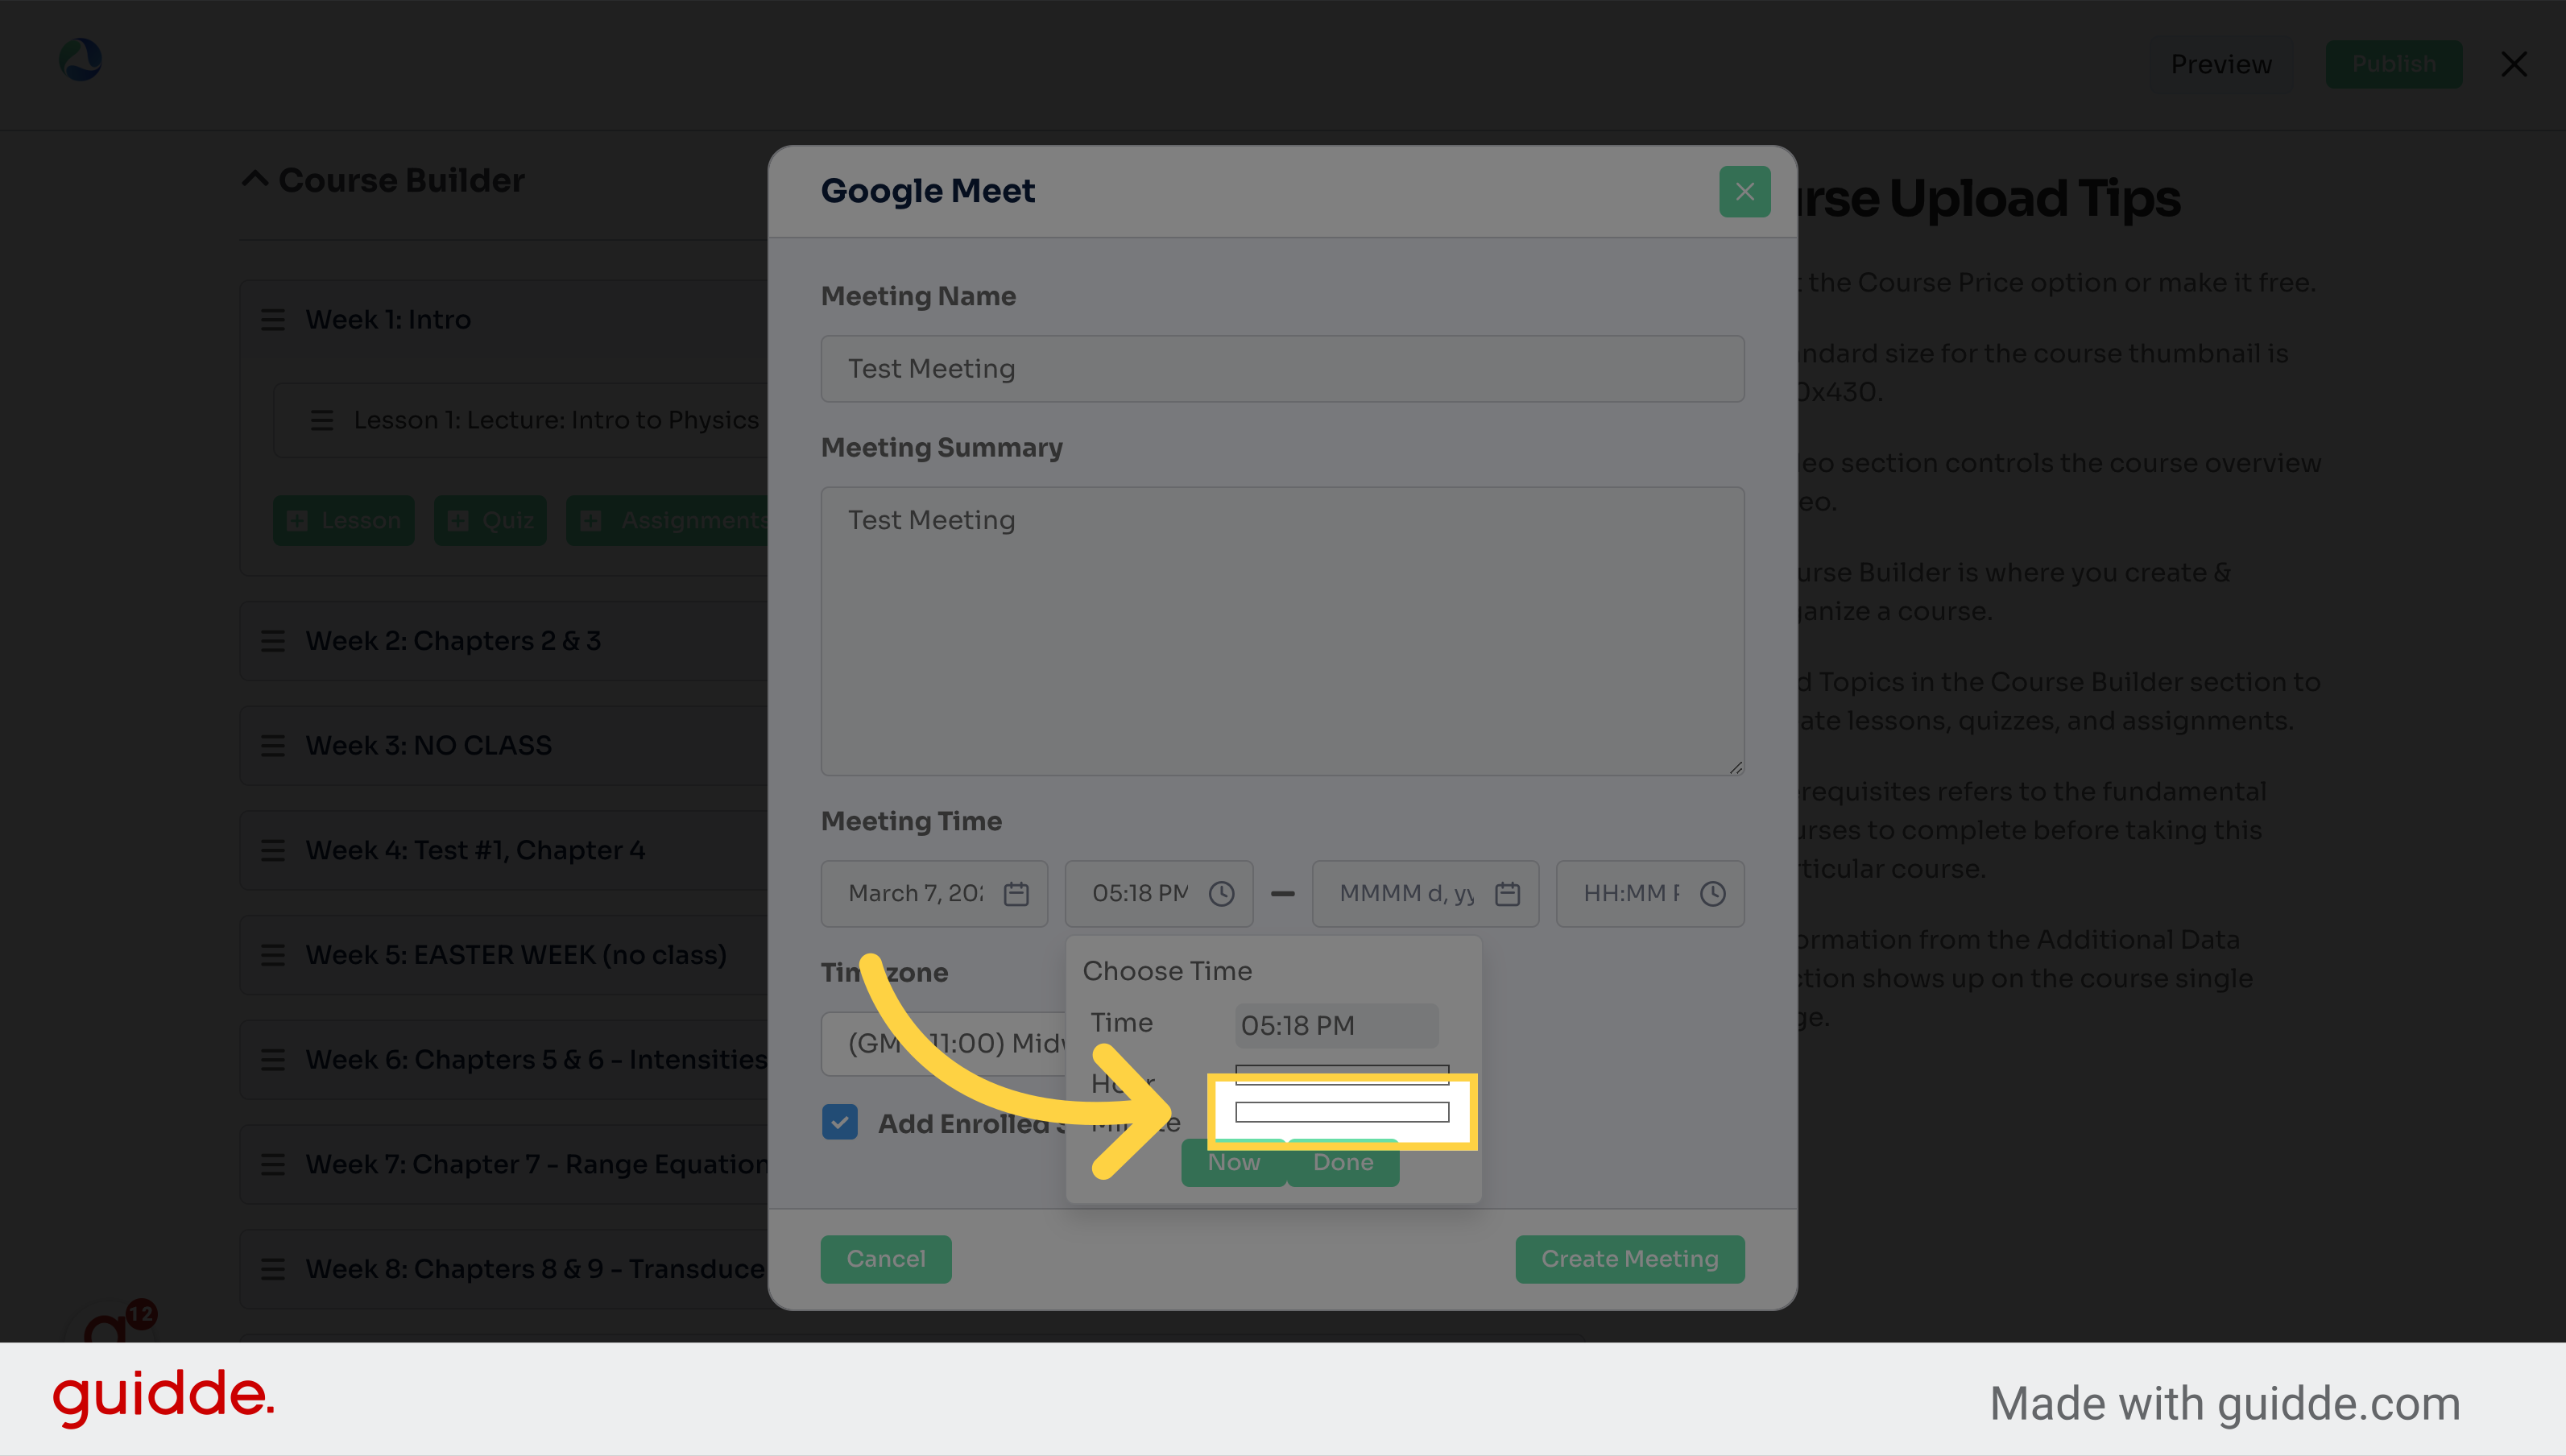
8. Click and slide your mouse along the bar to select the time
Click the selected button
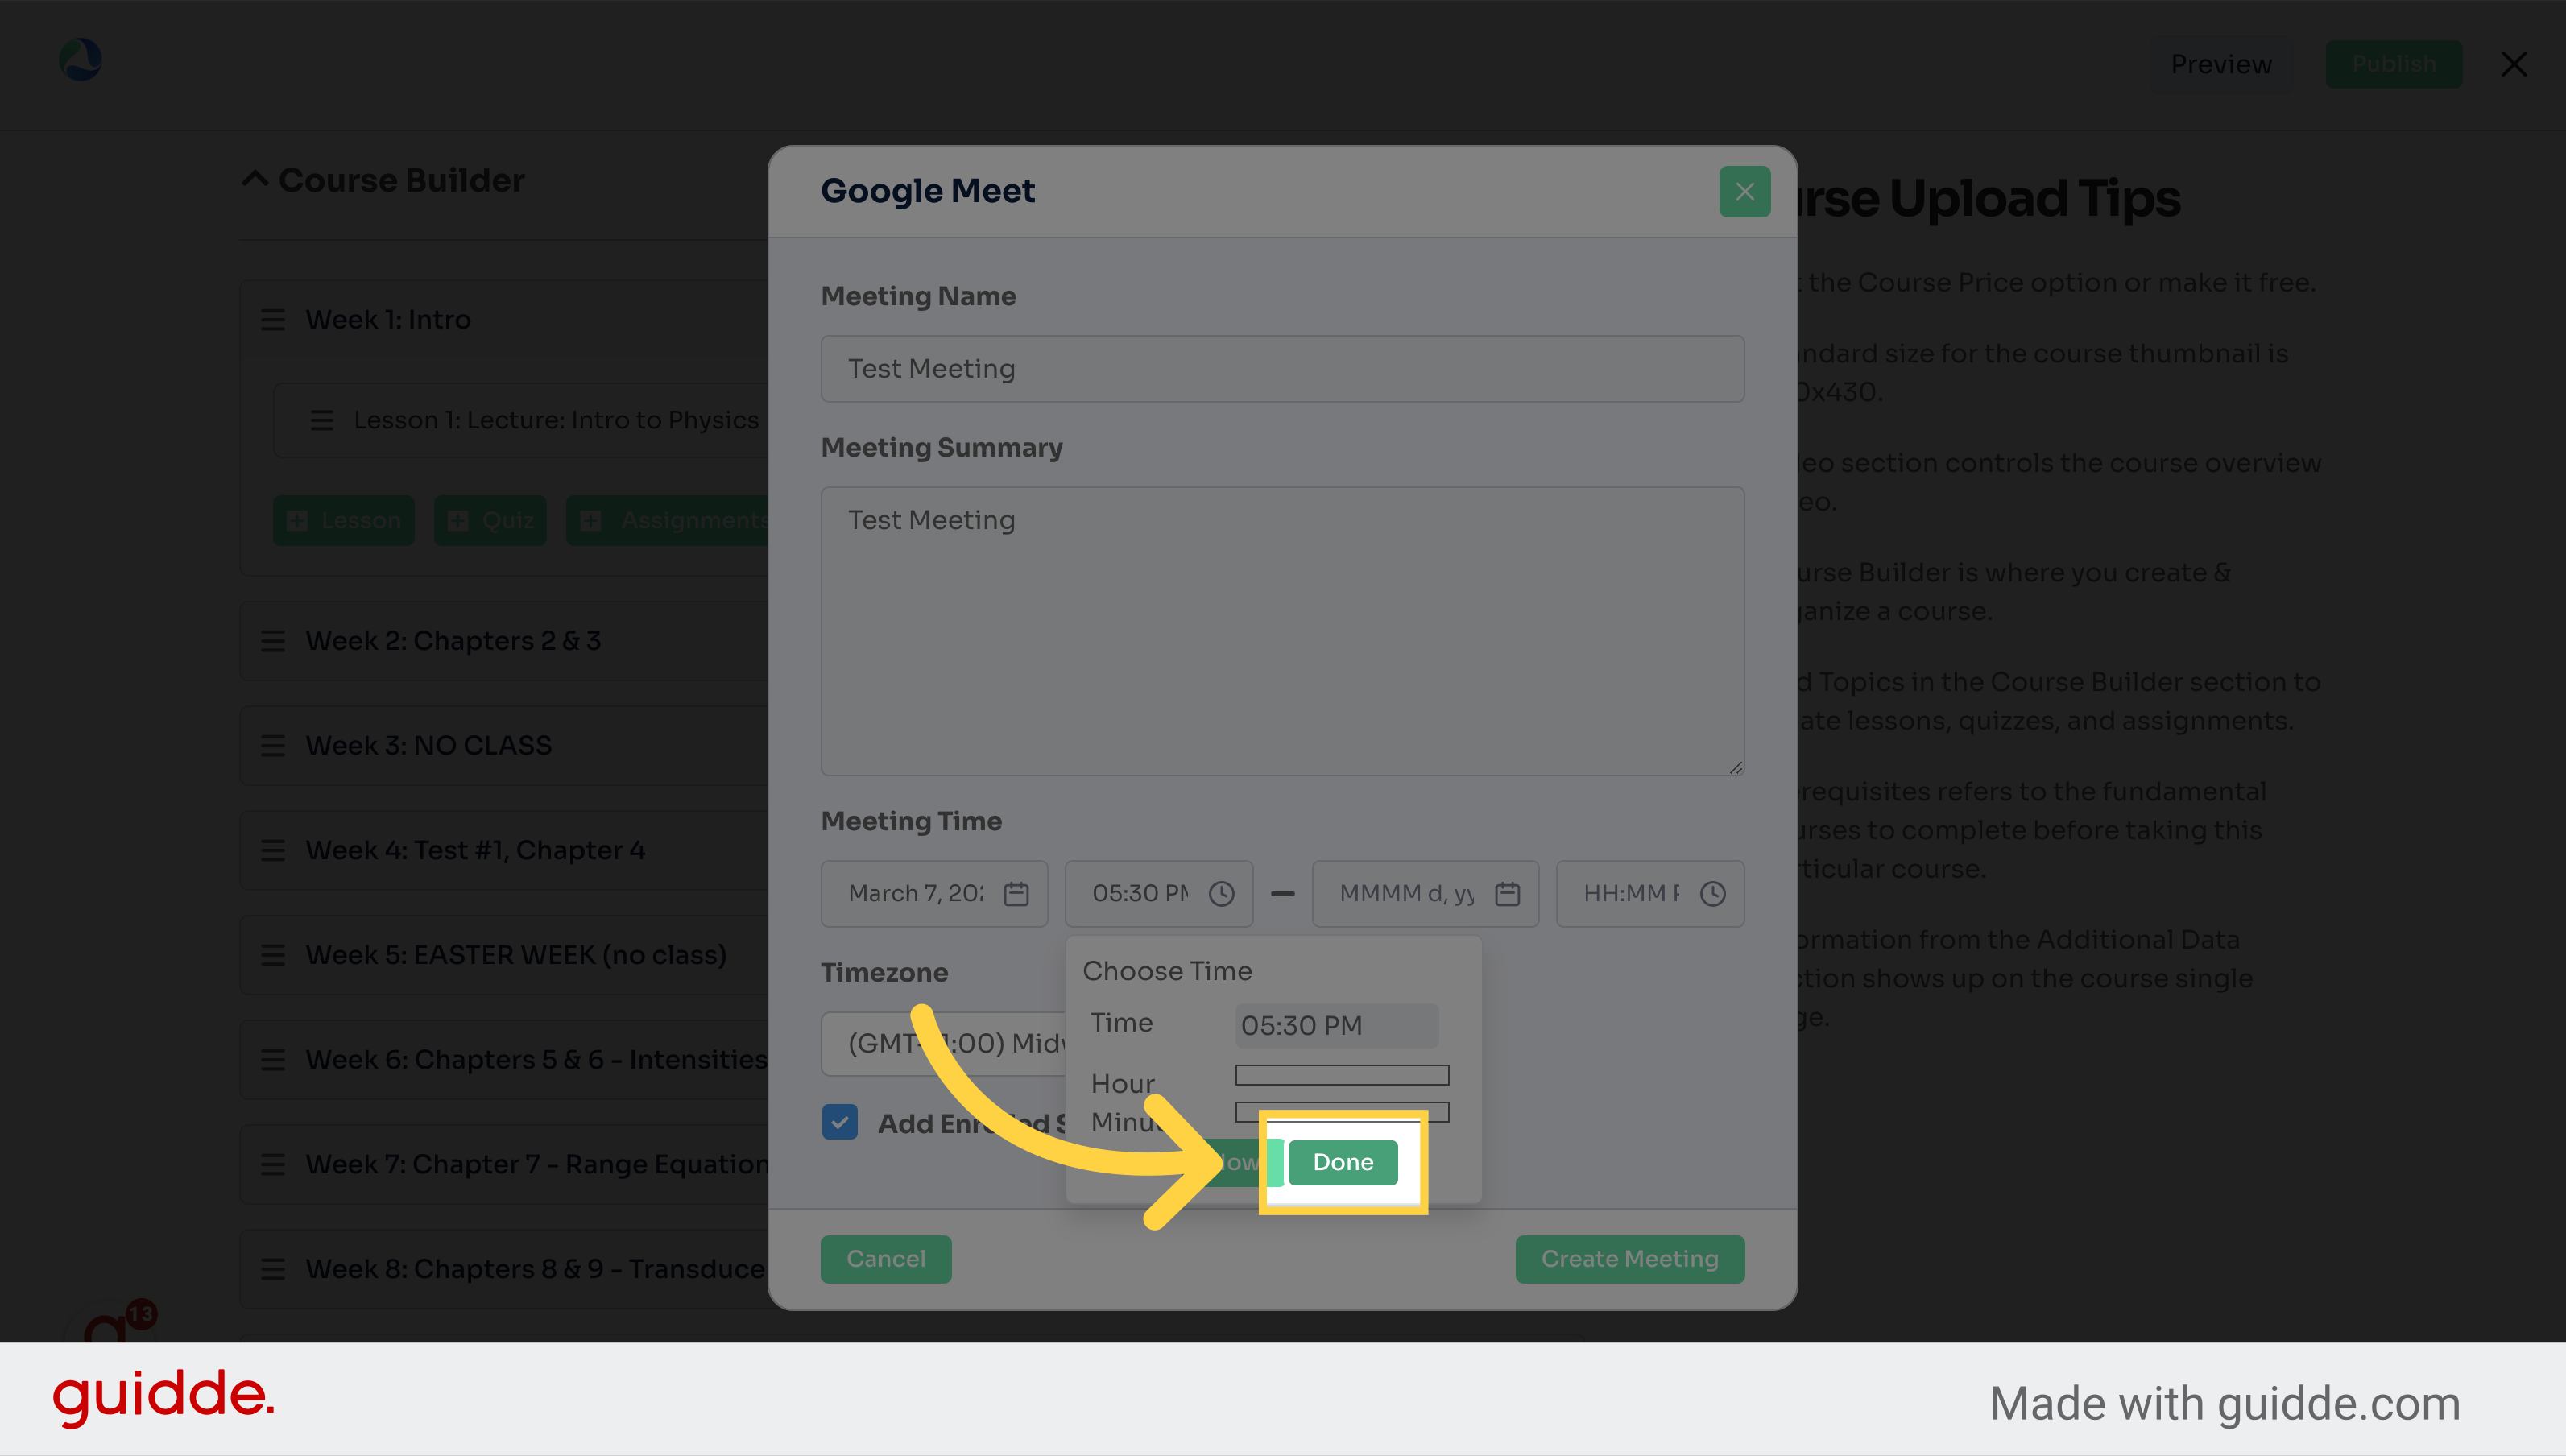
9. Repeat for the minutes
Click the selected option
10. Click "Done"
Complete the action.
11. Repeat for the end day and time
Select the date format.
12. Click "Create Meeting"
Initiate the meeting creation.
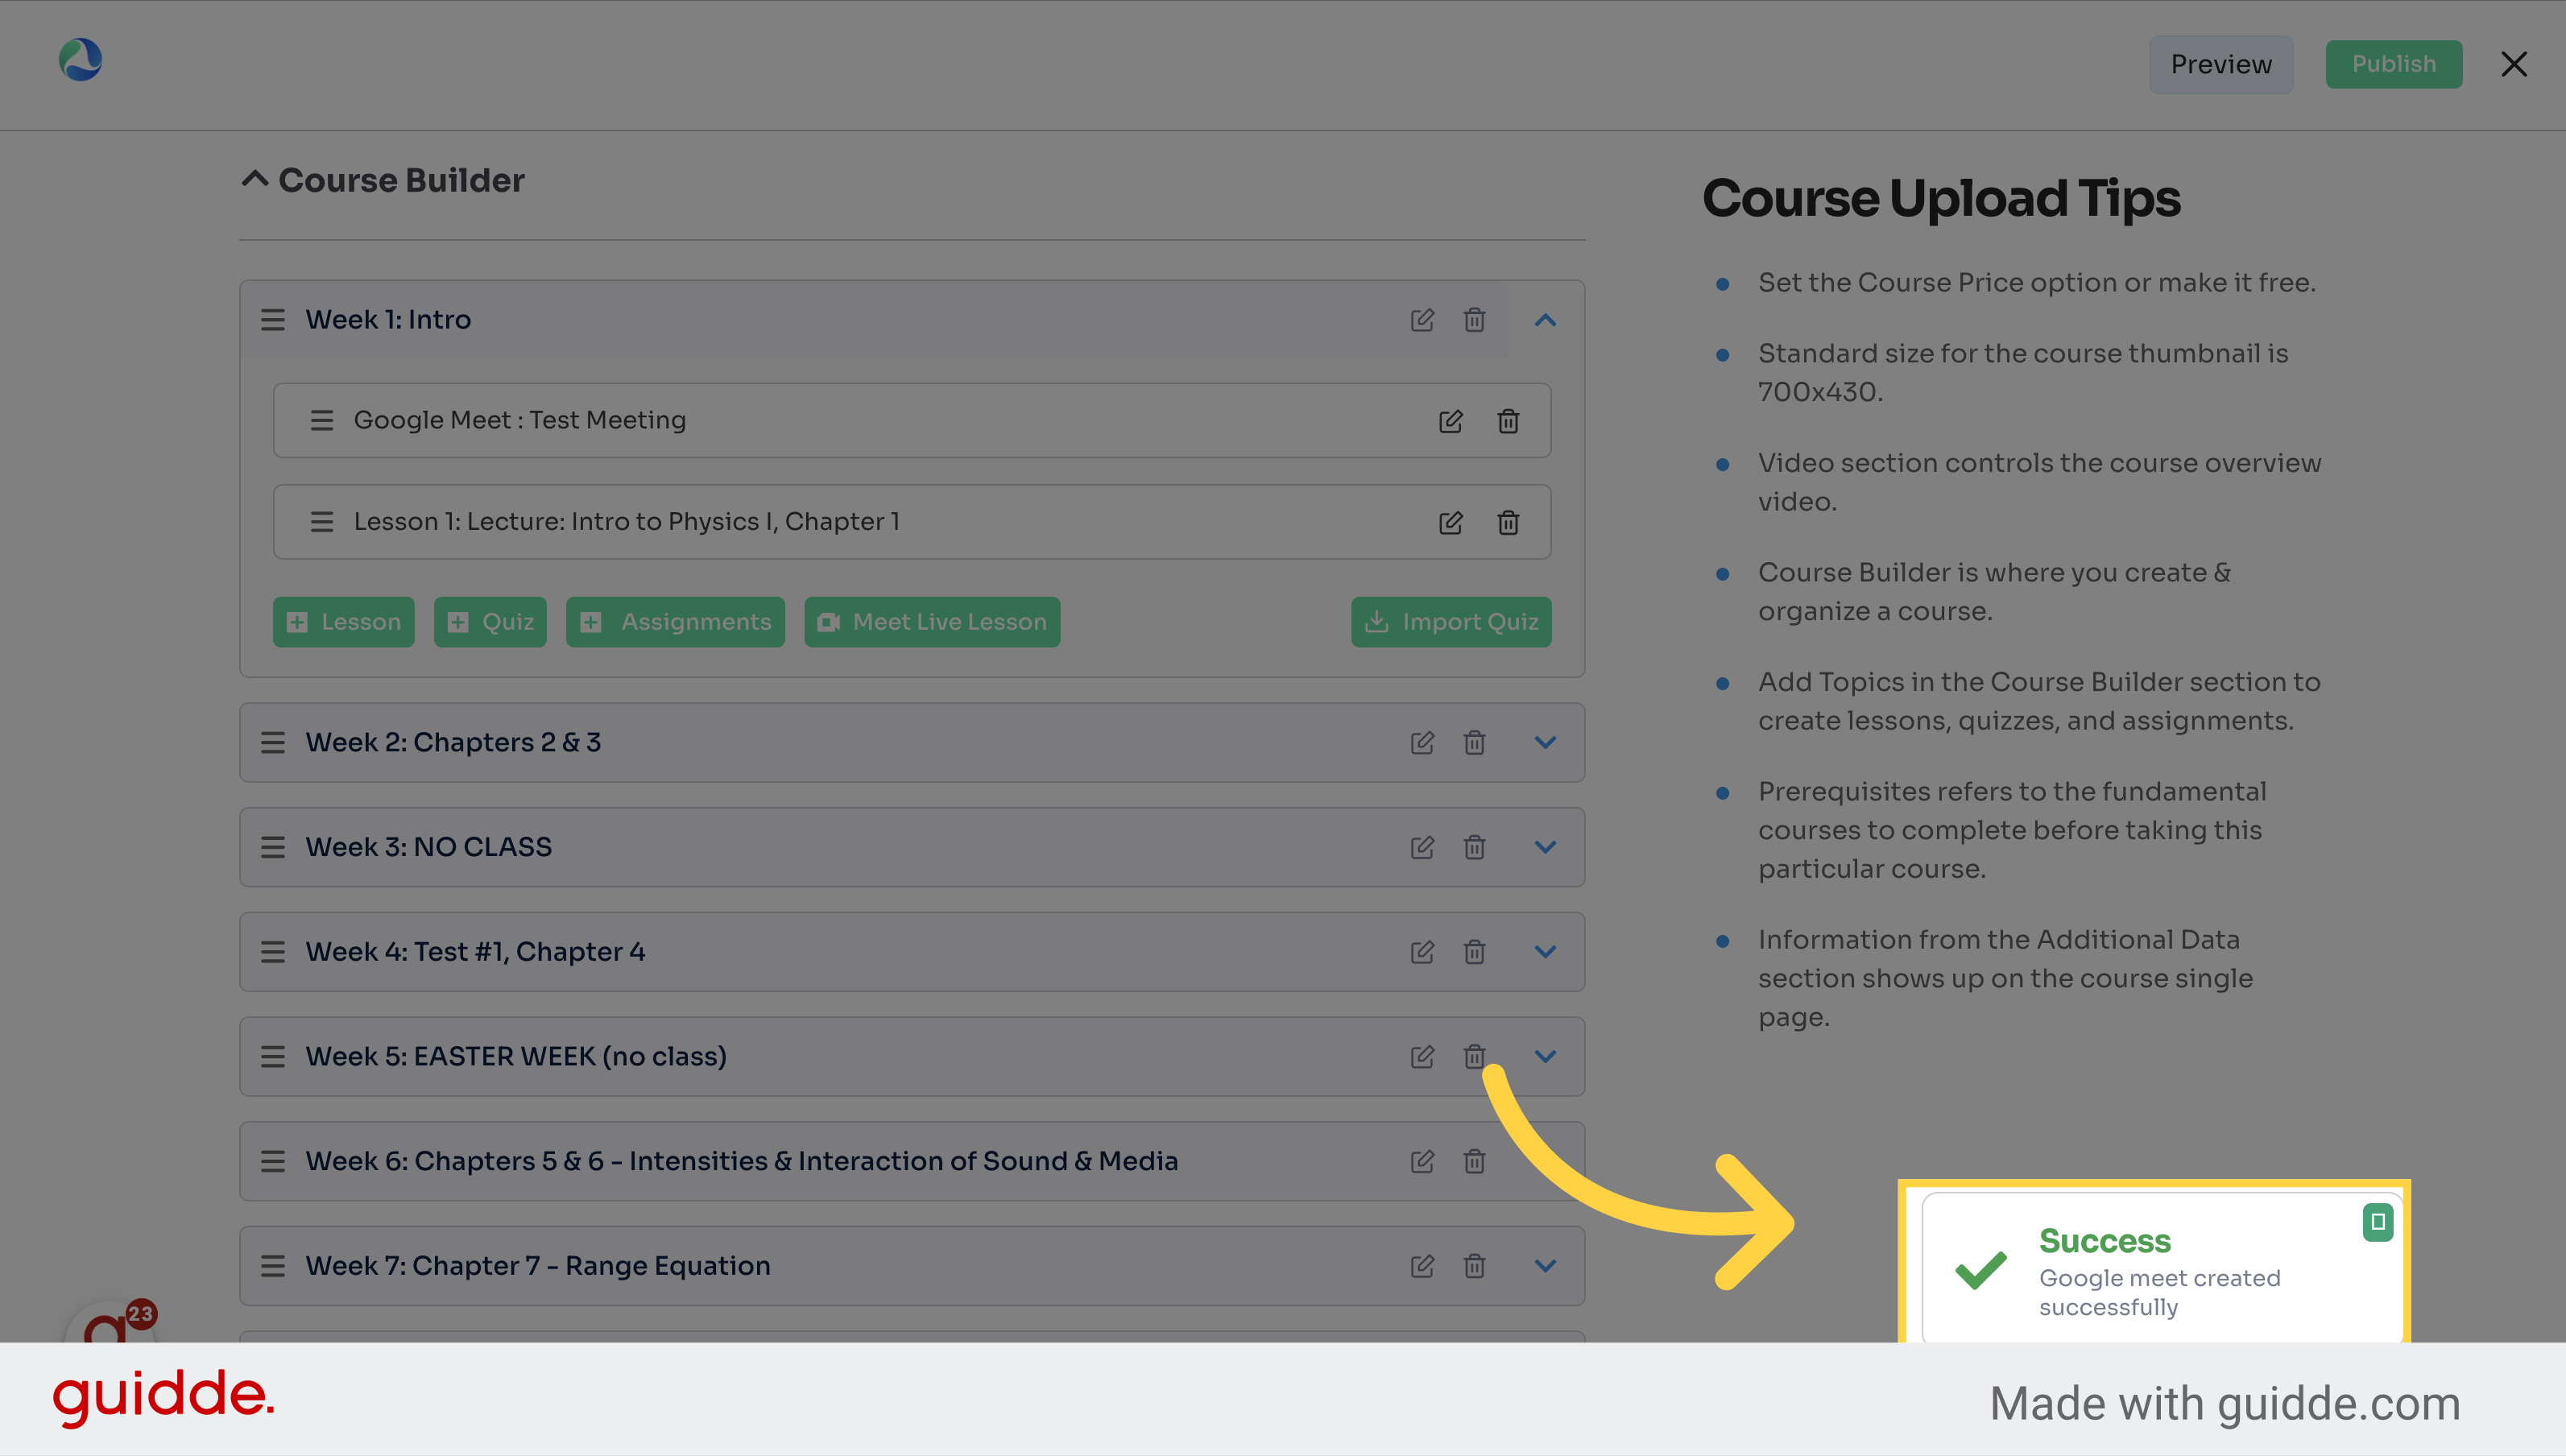
13. You will get a success message here
Select this option
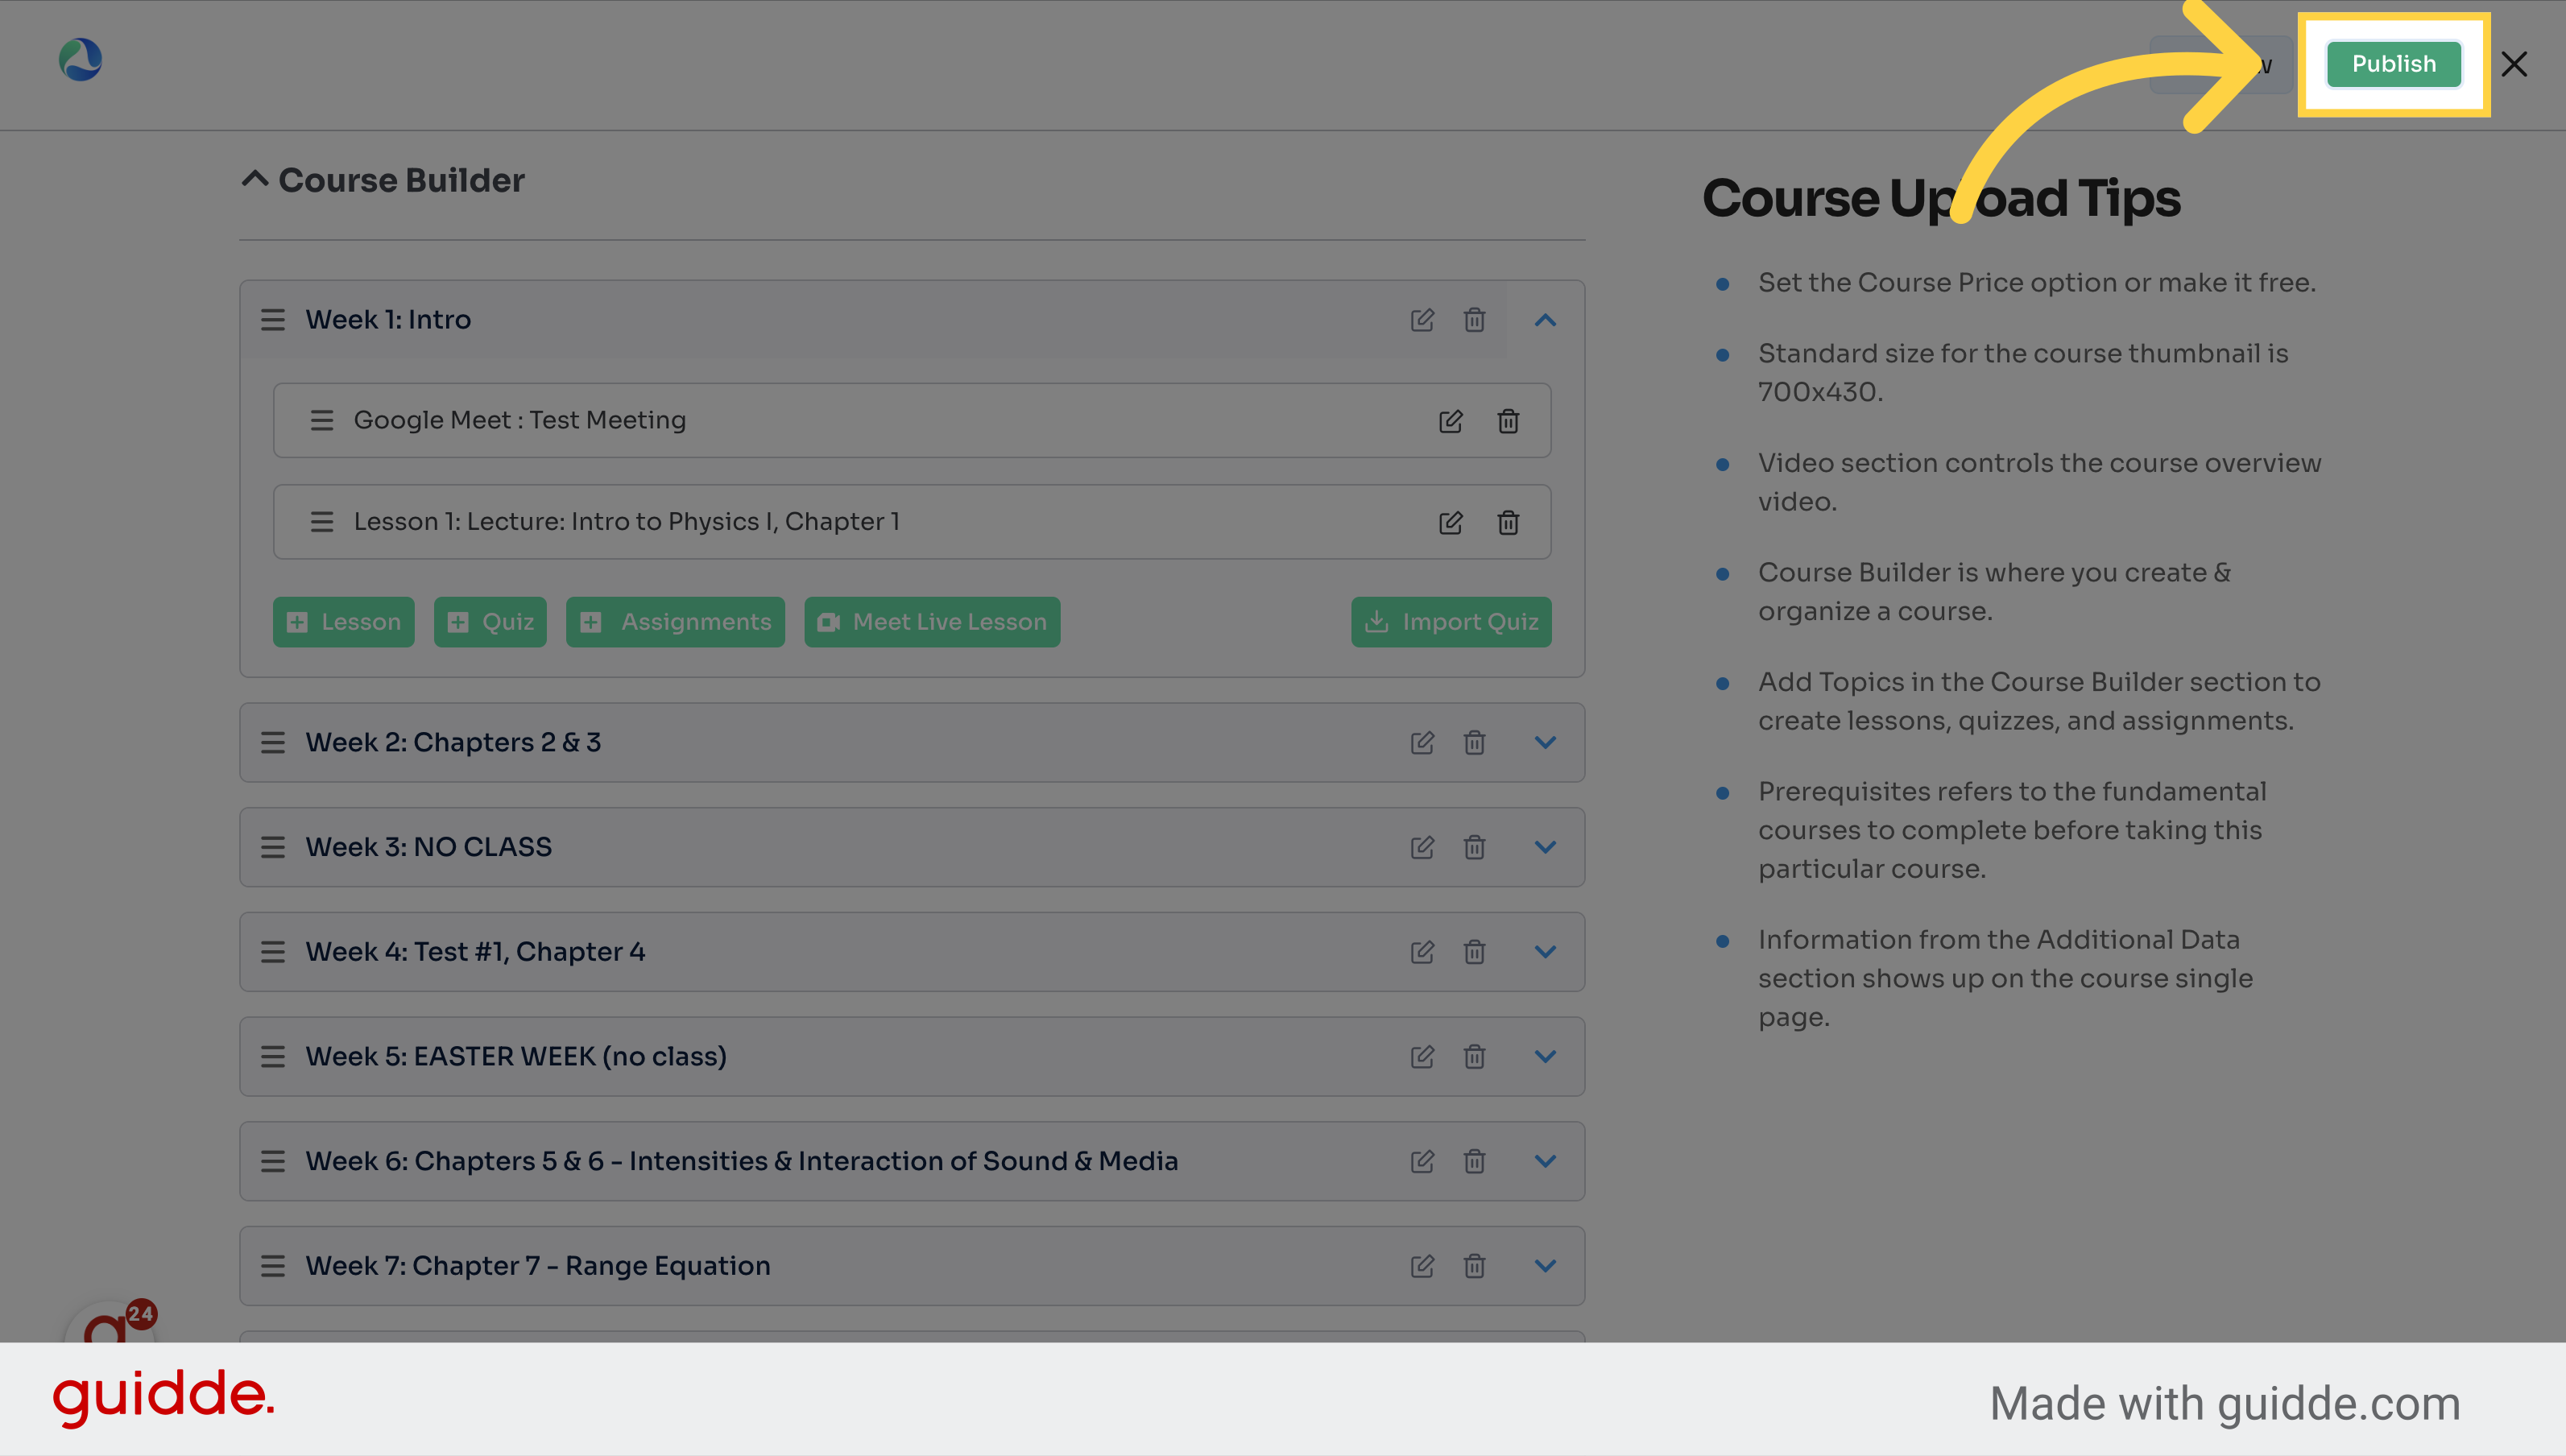
14. Click Publish
Publish the course content.
15. That's it!
Navigate here
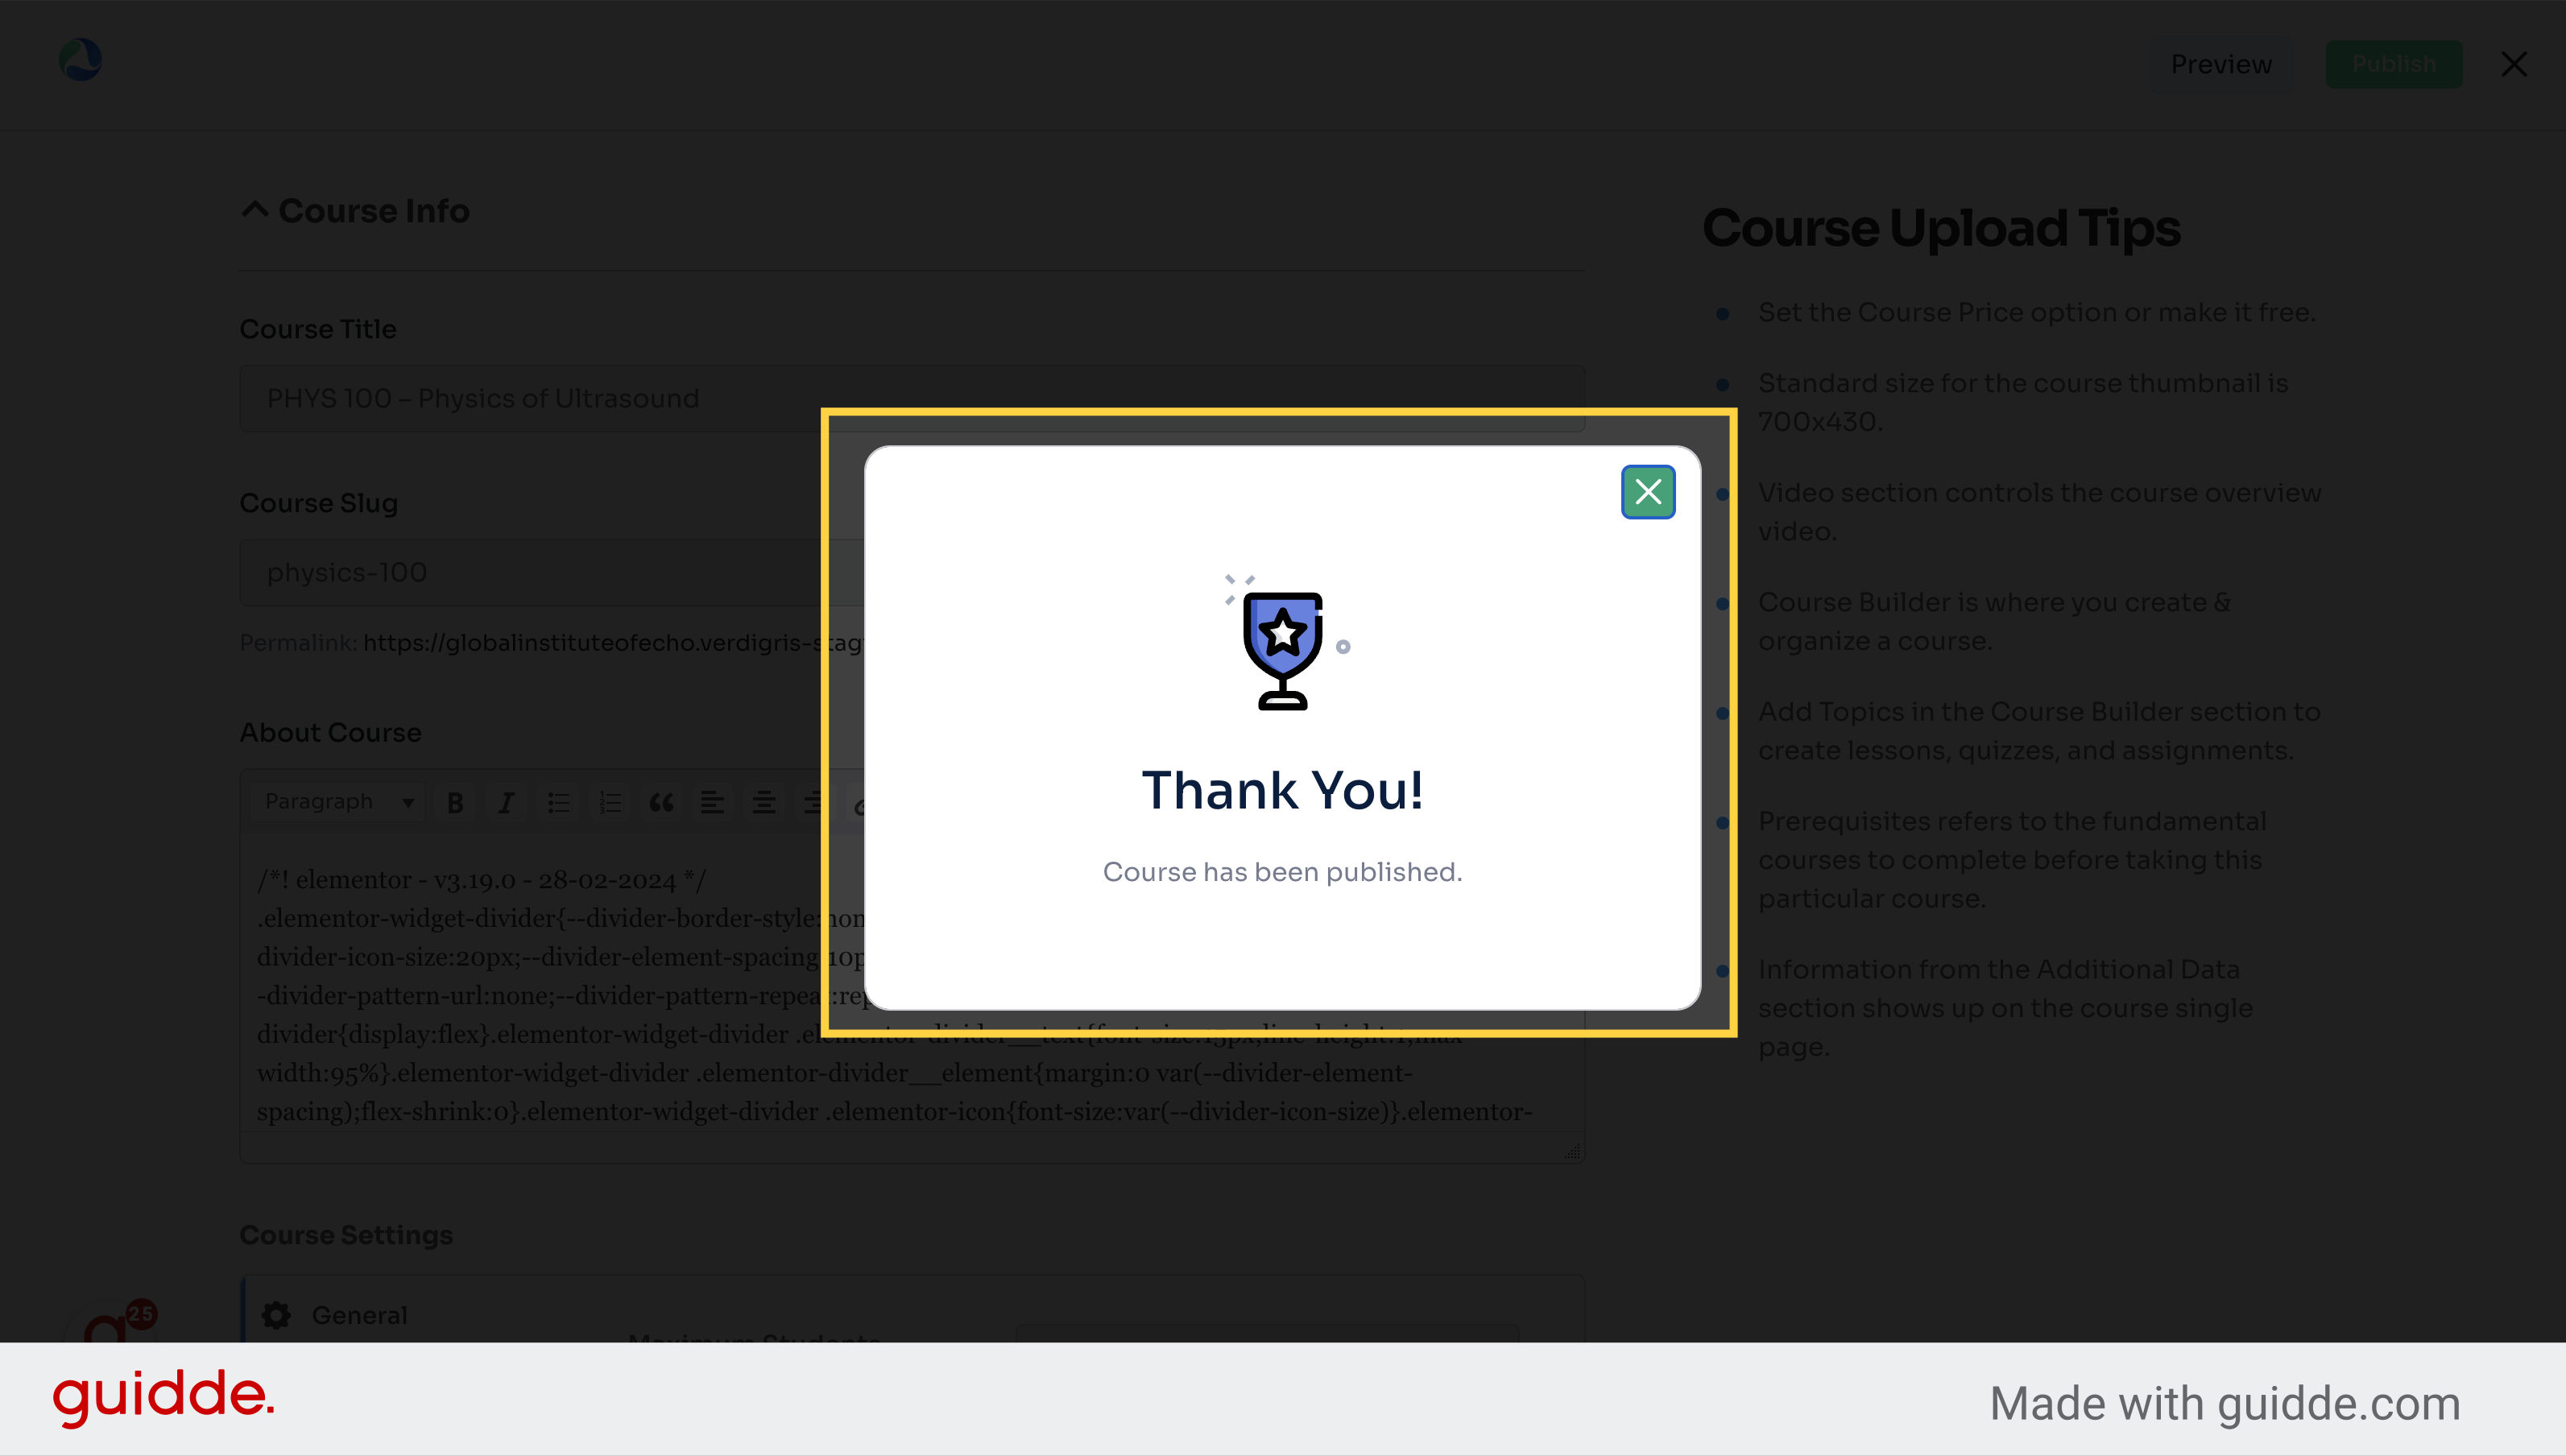
This guide covered the process of adding a Google Meeting.
How to Add a Quiz
Empower your employees by creating interactive quizzes with ease. This guide will walk you through adding quizzes to enhance your training materials efficiently.
1. Click "My Courses" from the dashboard
Access your courses.
2. Click here to edit the course
Click here
3. Click the topic / week to where you need to add the quiz
Select the desired week.
4. Click "+ Quiz"
Access the quiz section.
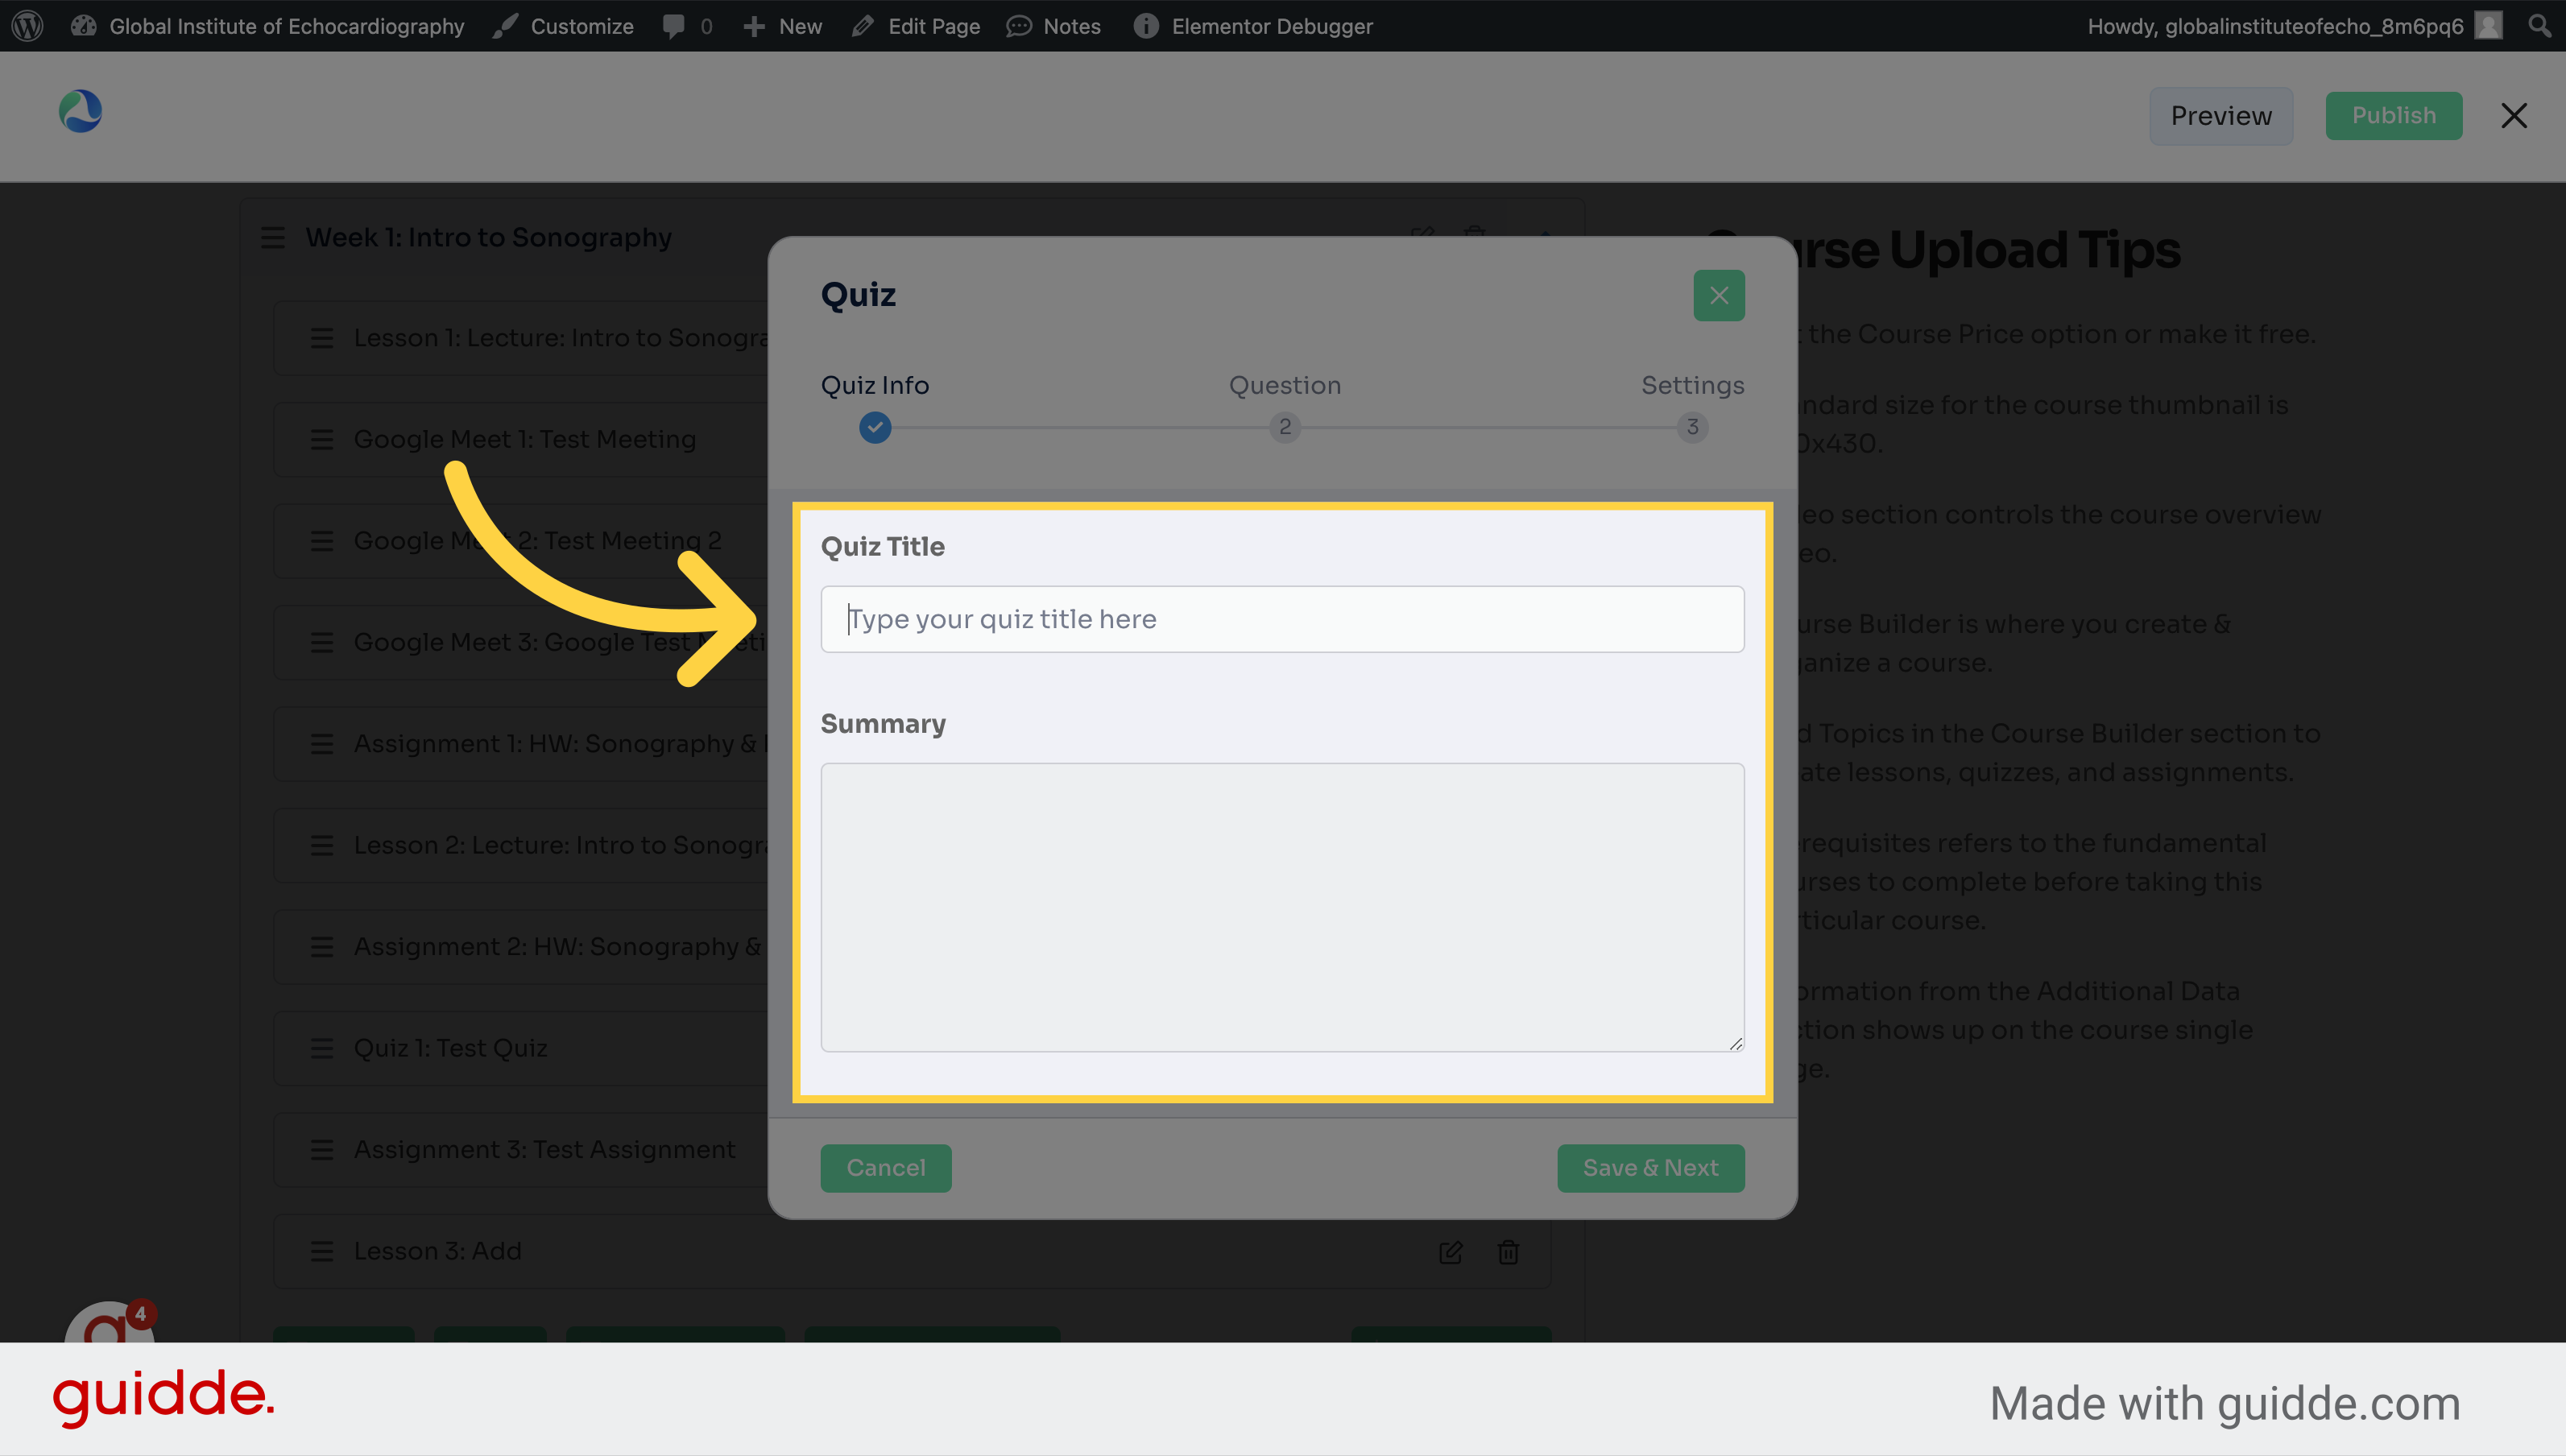
5. Enter the Quiz Title and Summary
Enter the quiz title.
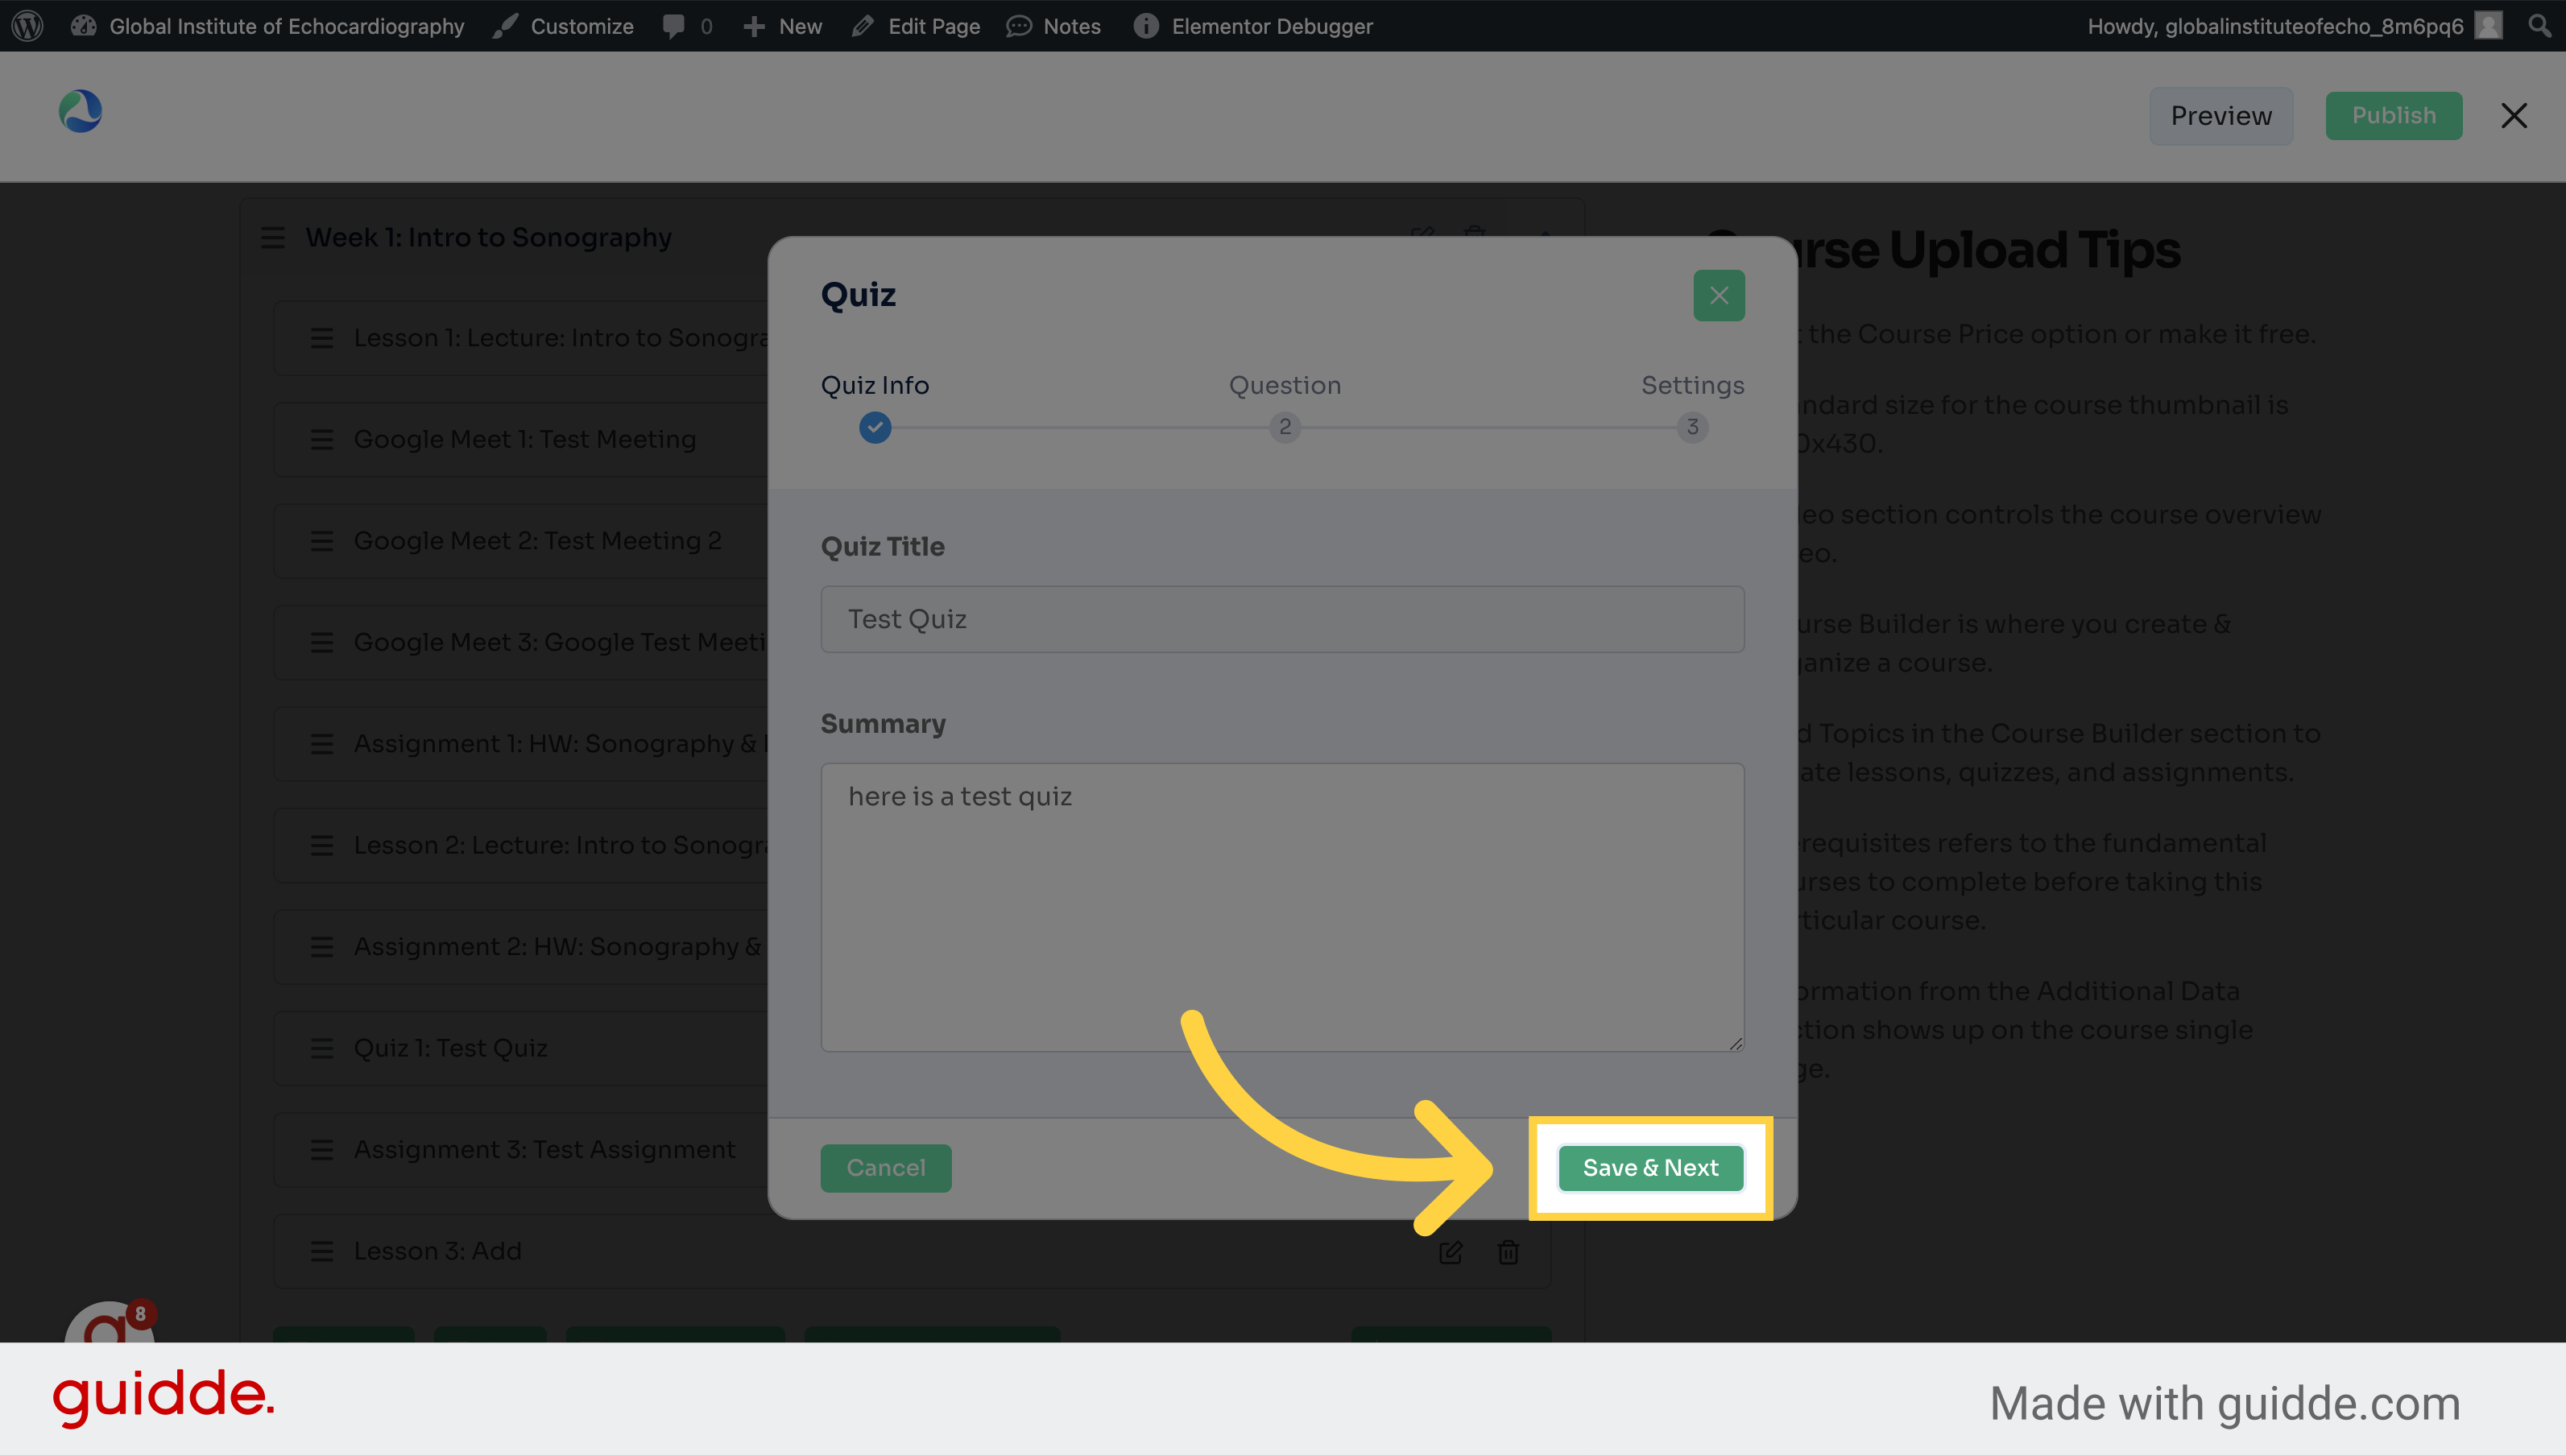
6. Click "Save & Next"
Proceed to the next step.
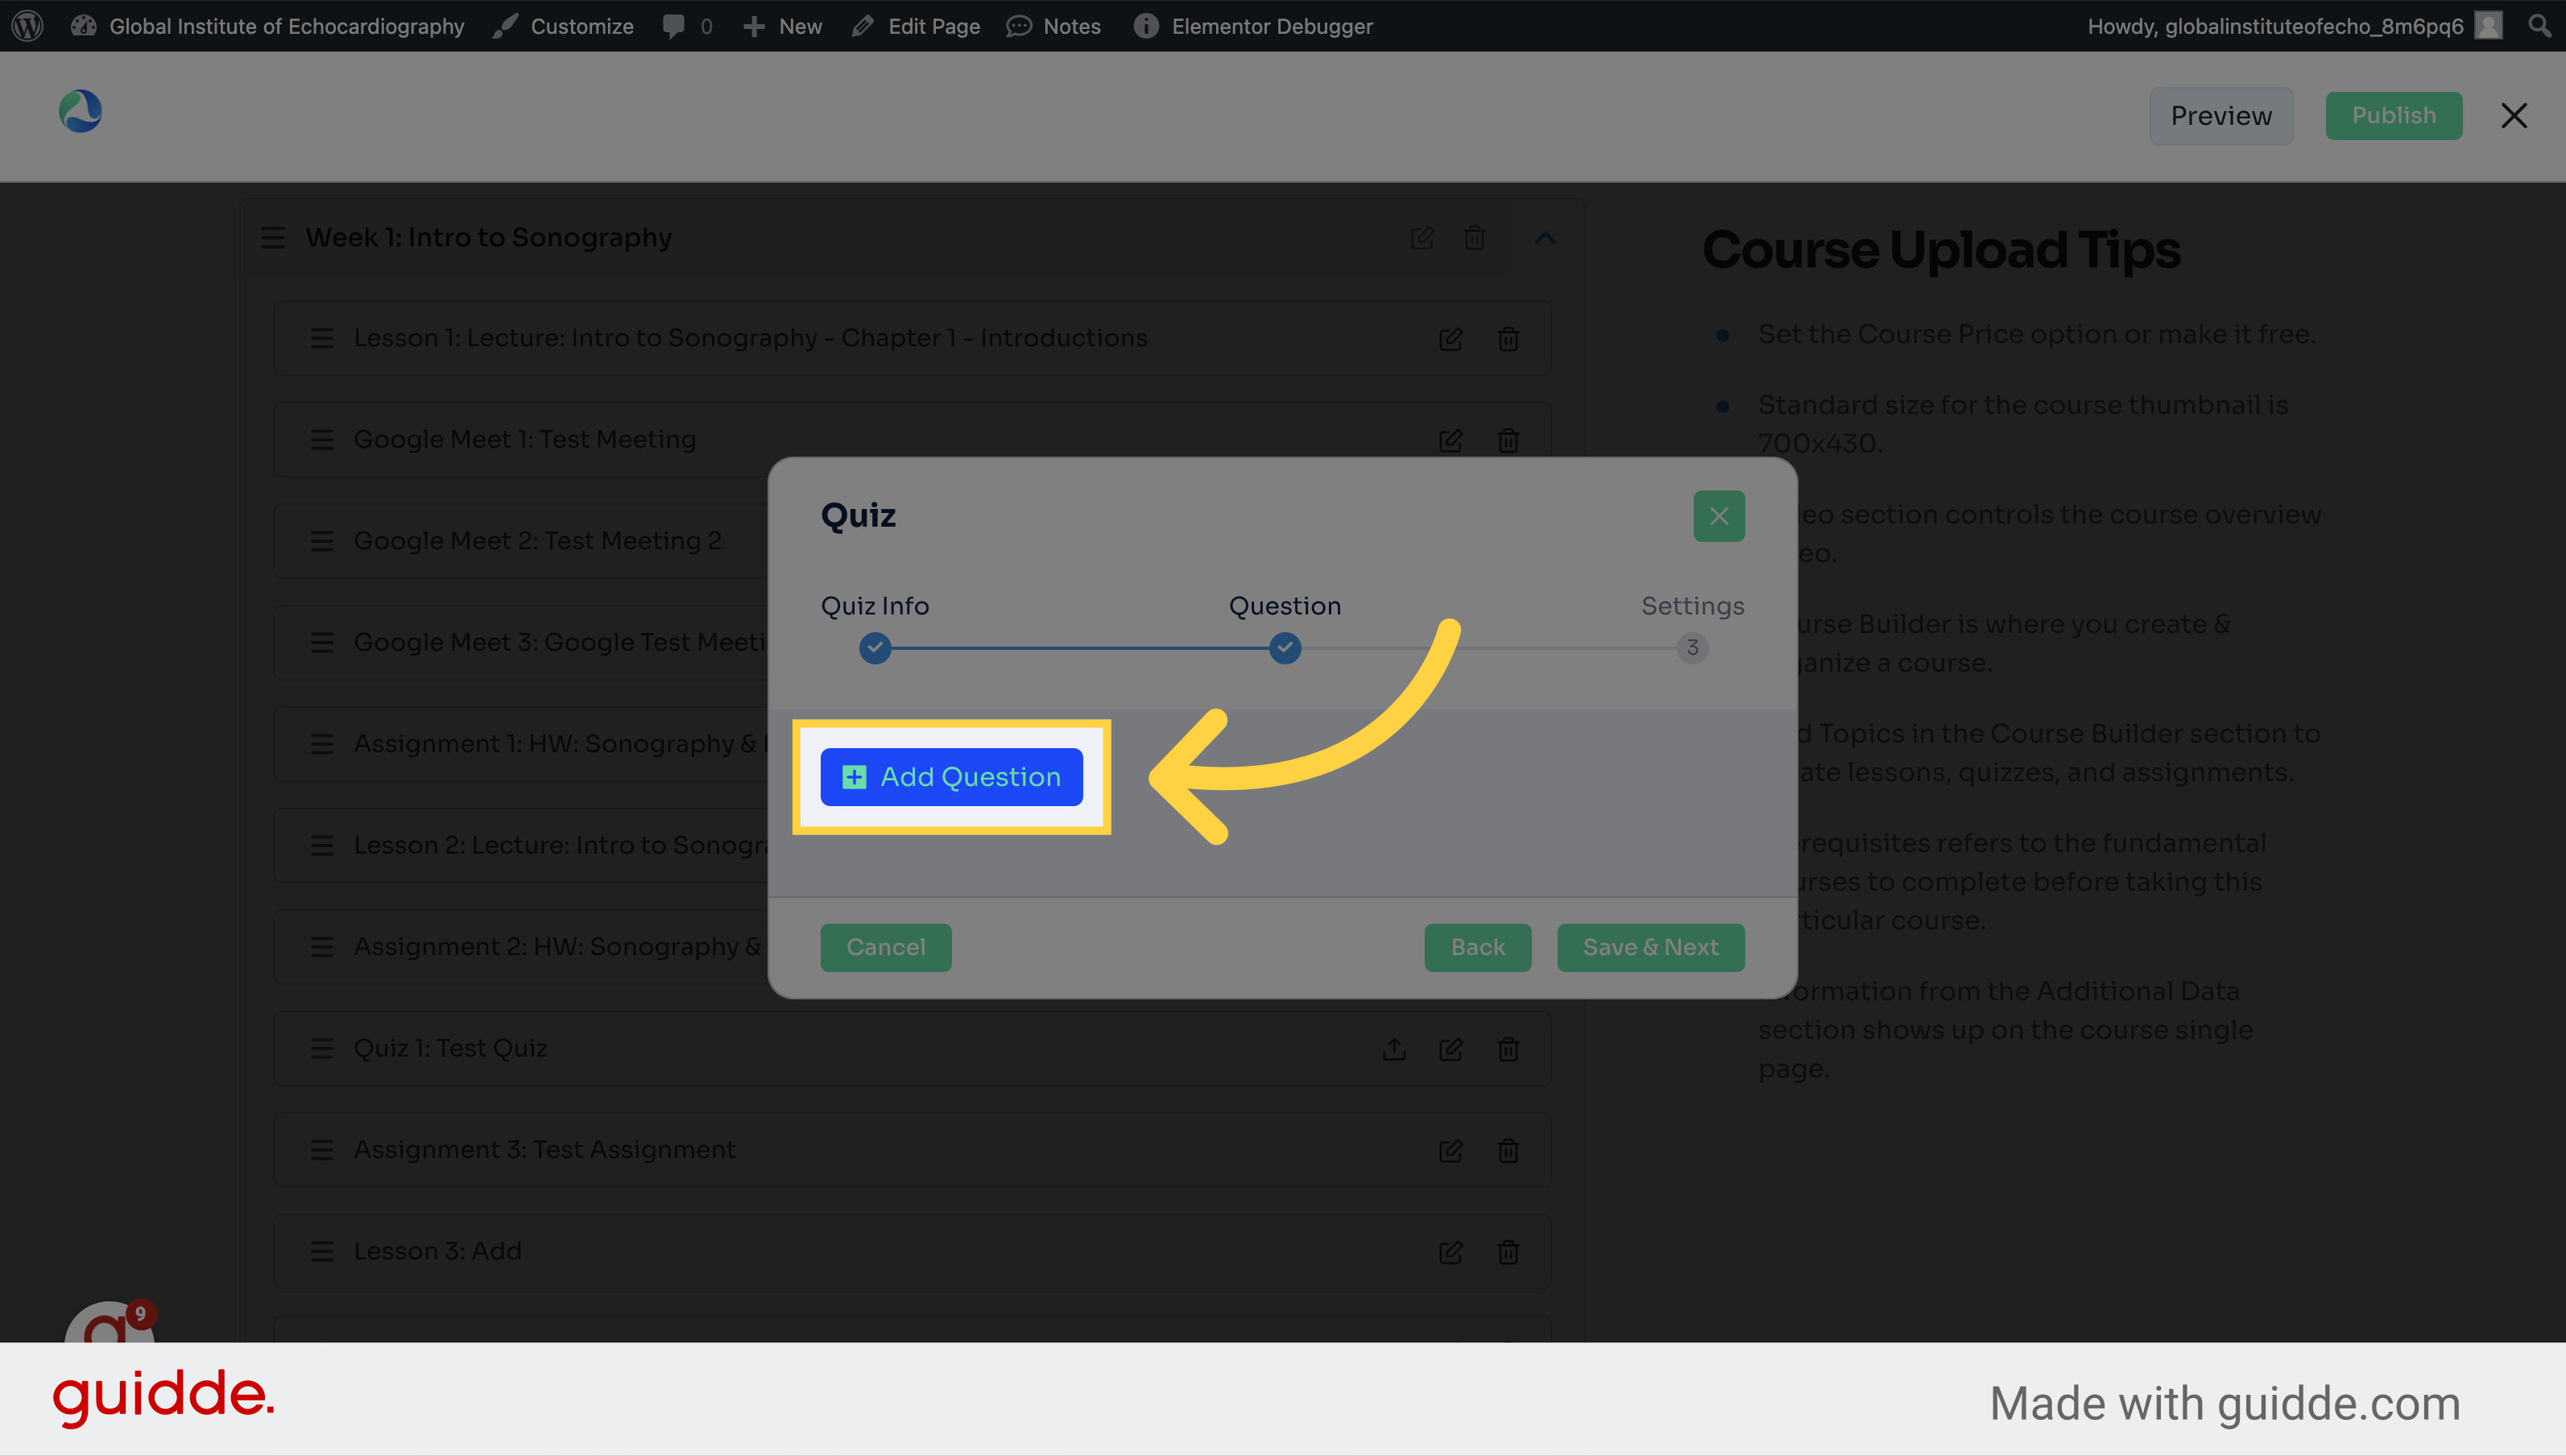
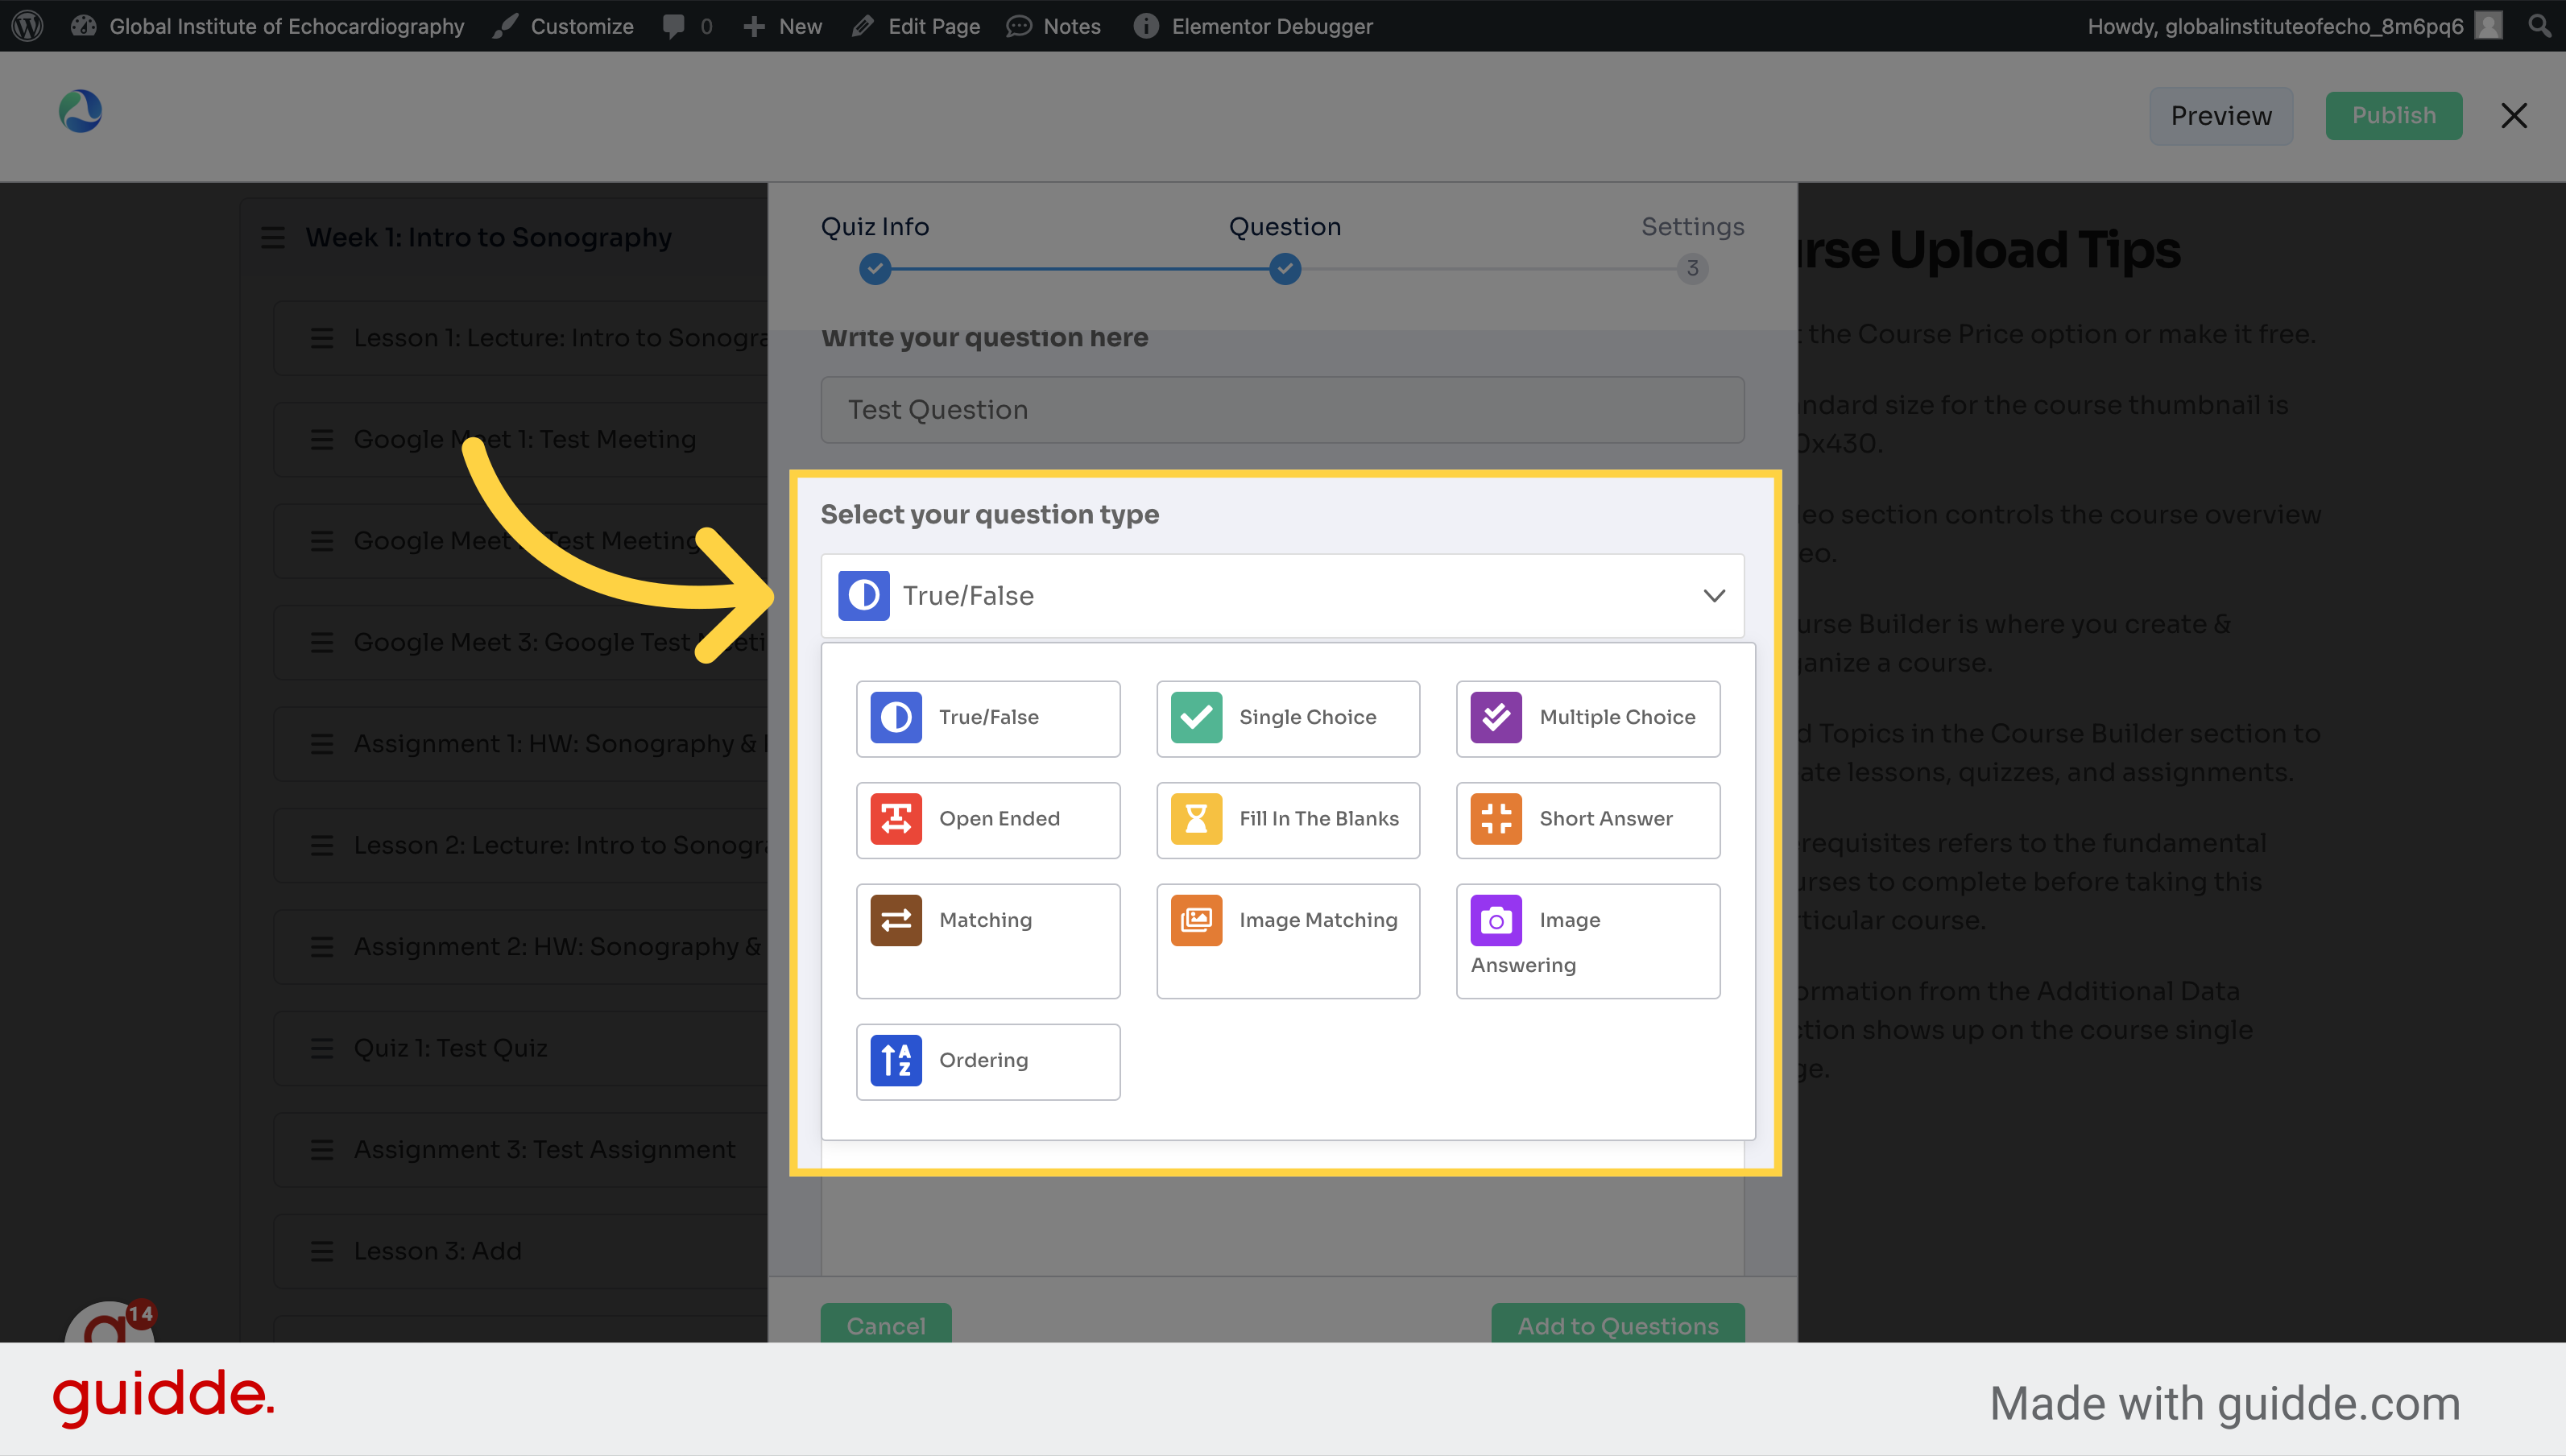
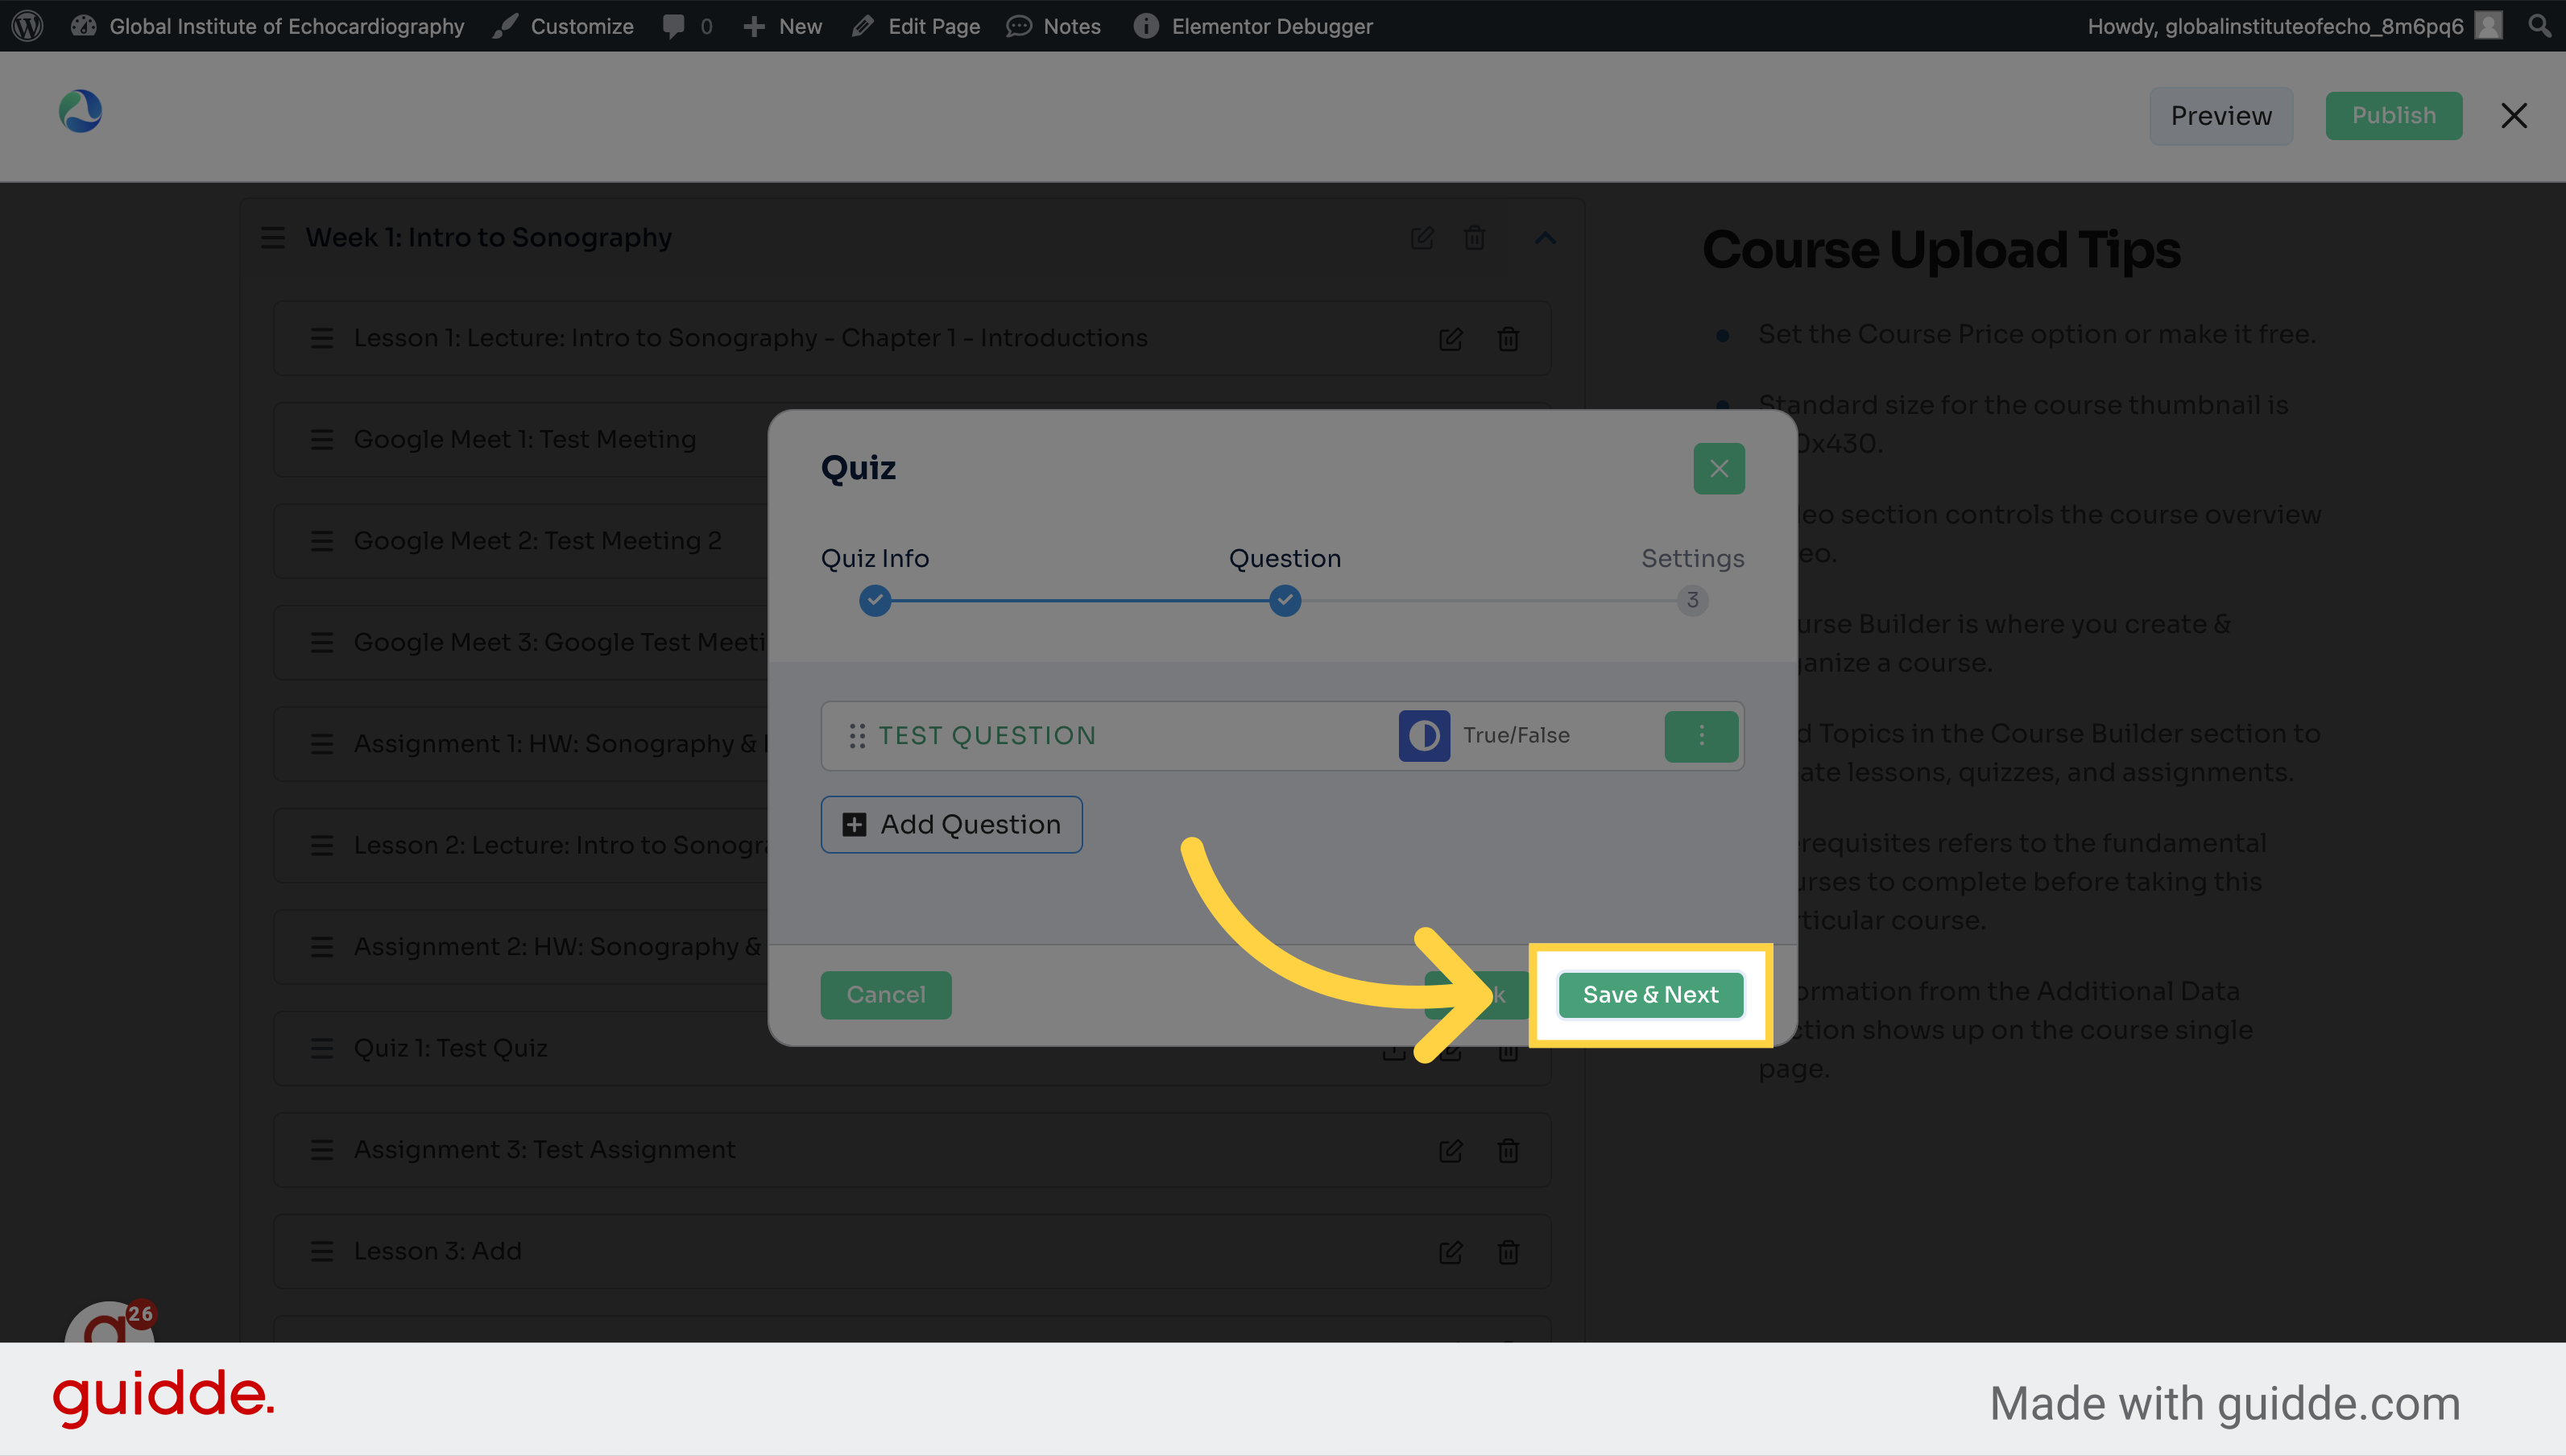
7. Click "Add Question"
Start adding questions.
8. Write the question
Select a question.
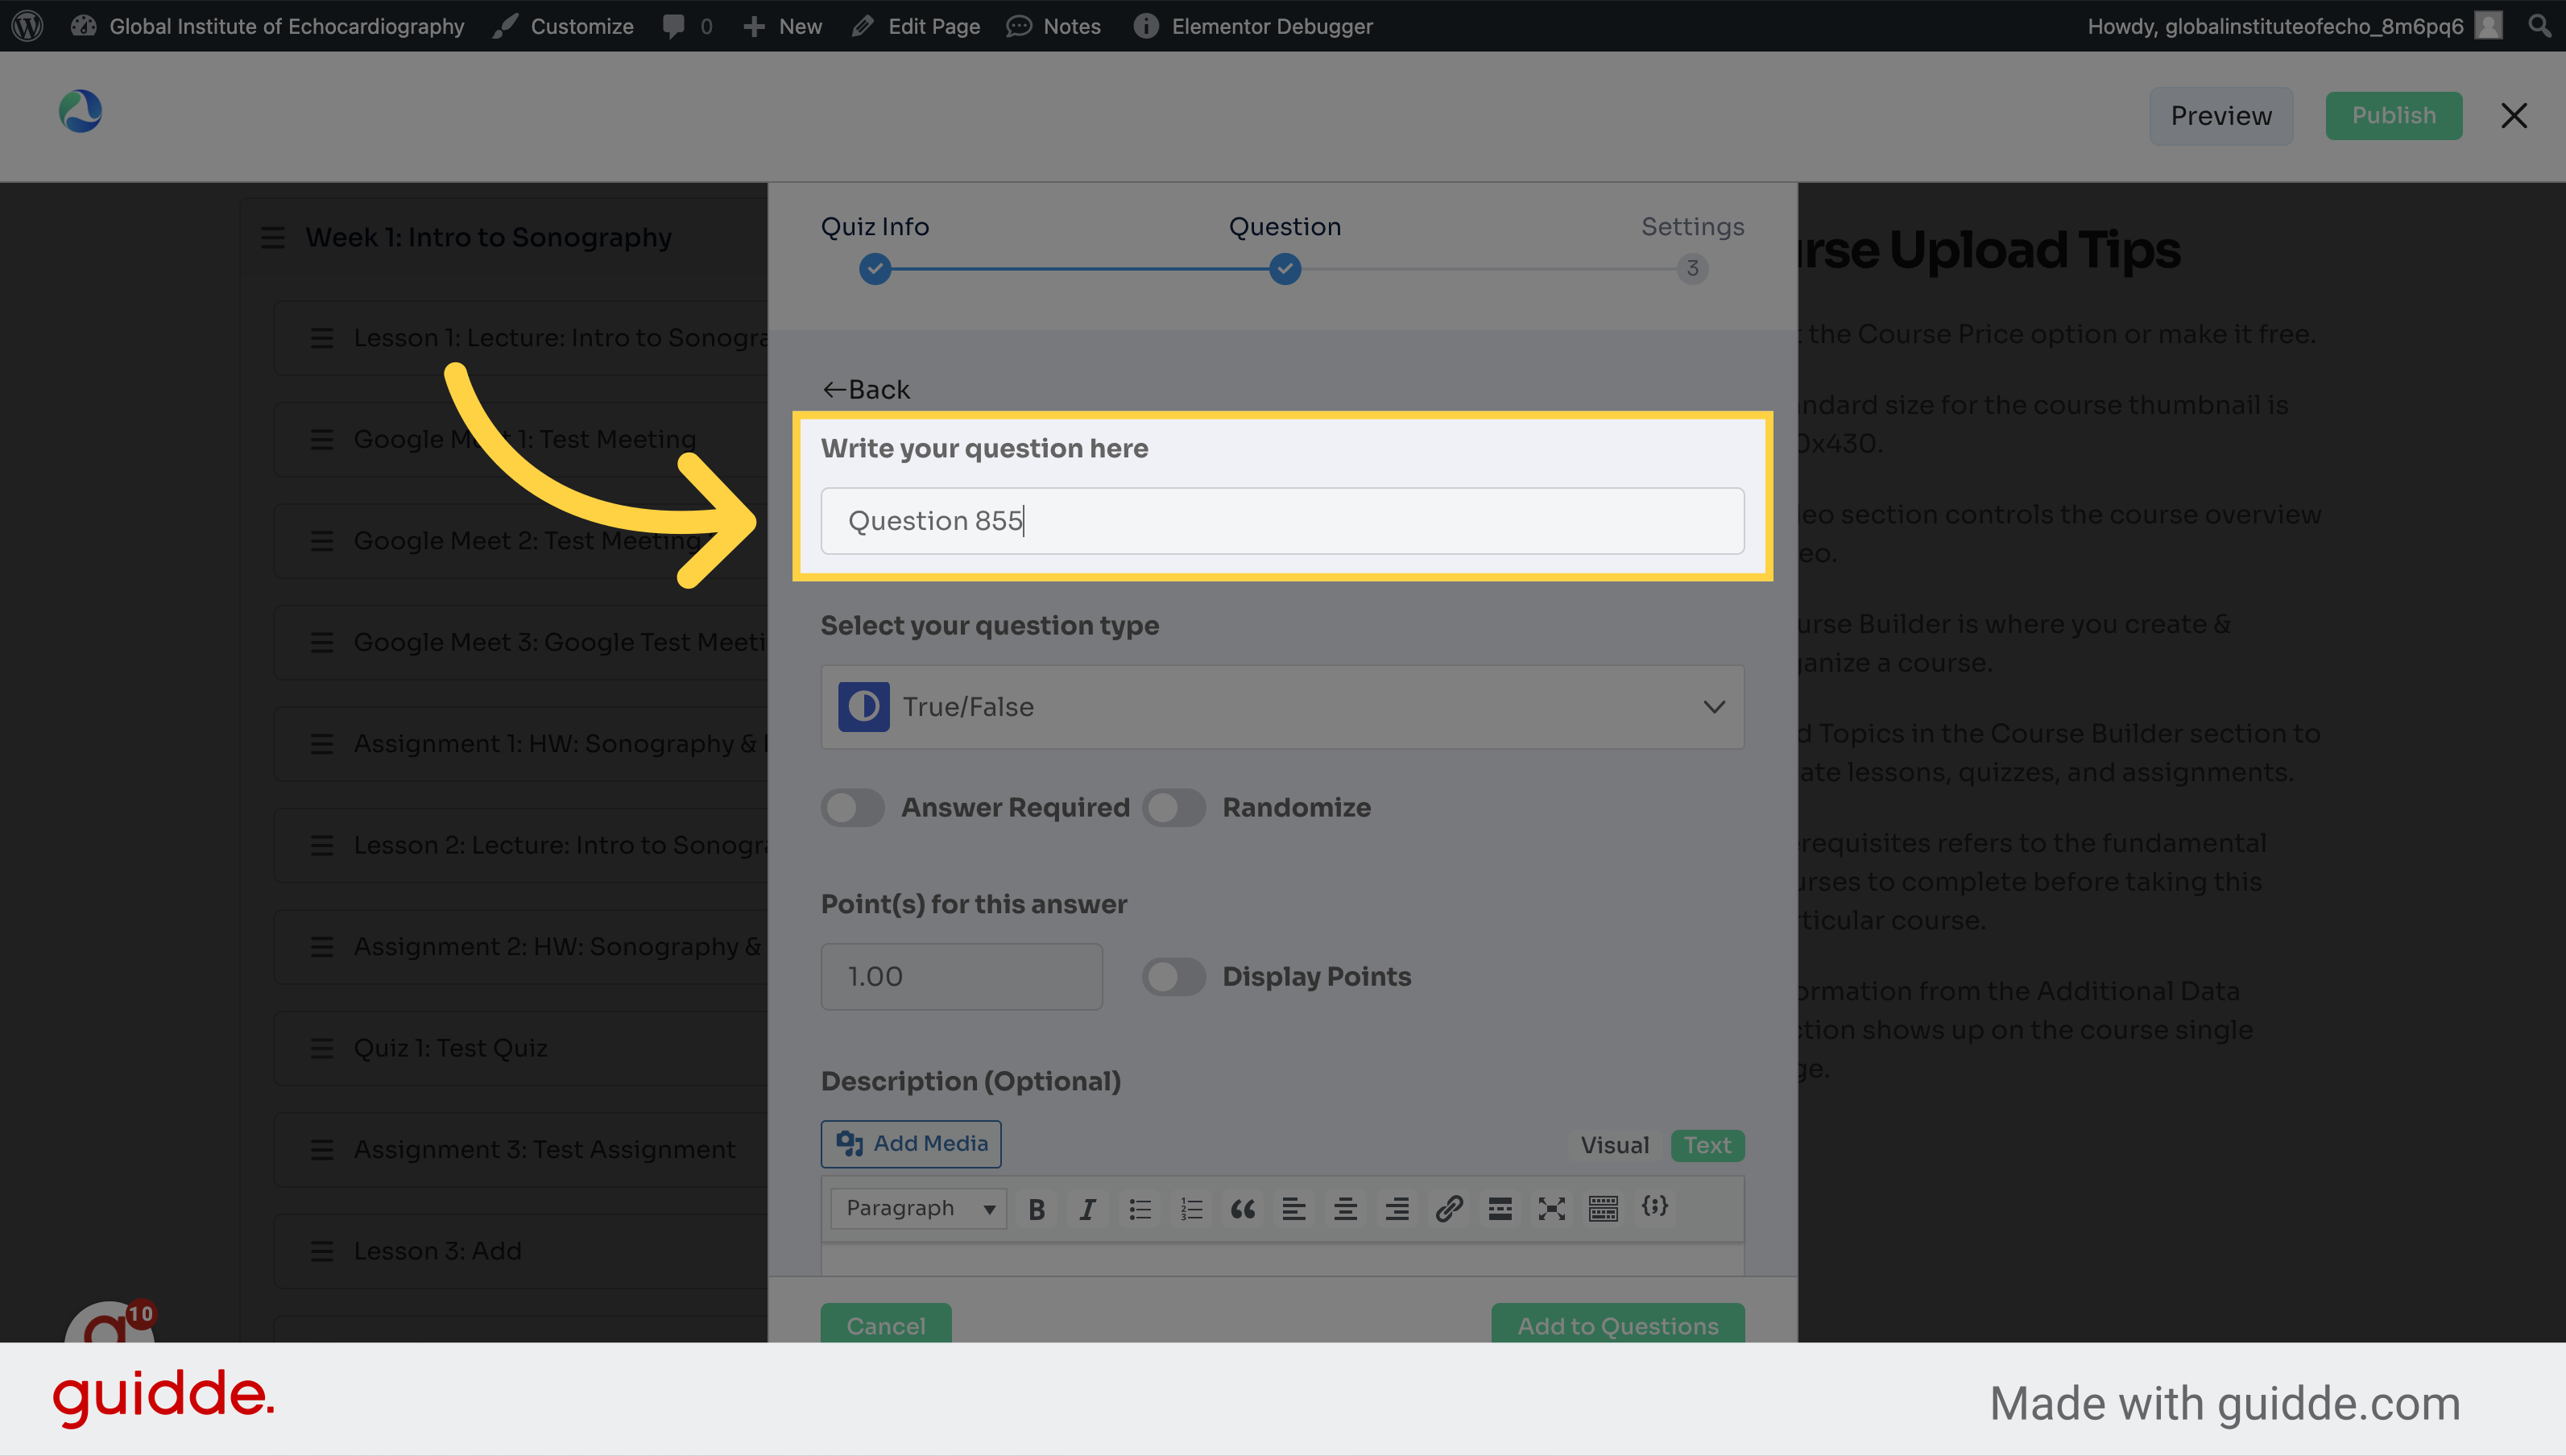
9. Choose the type of question here
Confirm the question type.
10. Choose if the answer should be required
Click the selected button
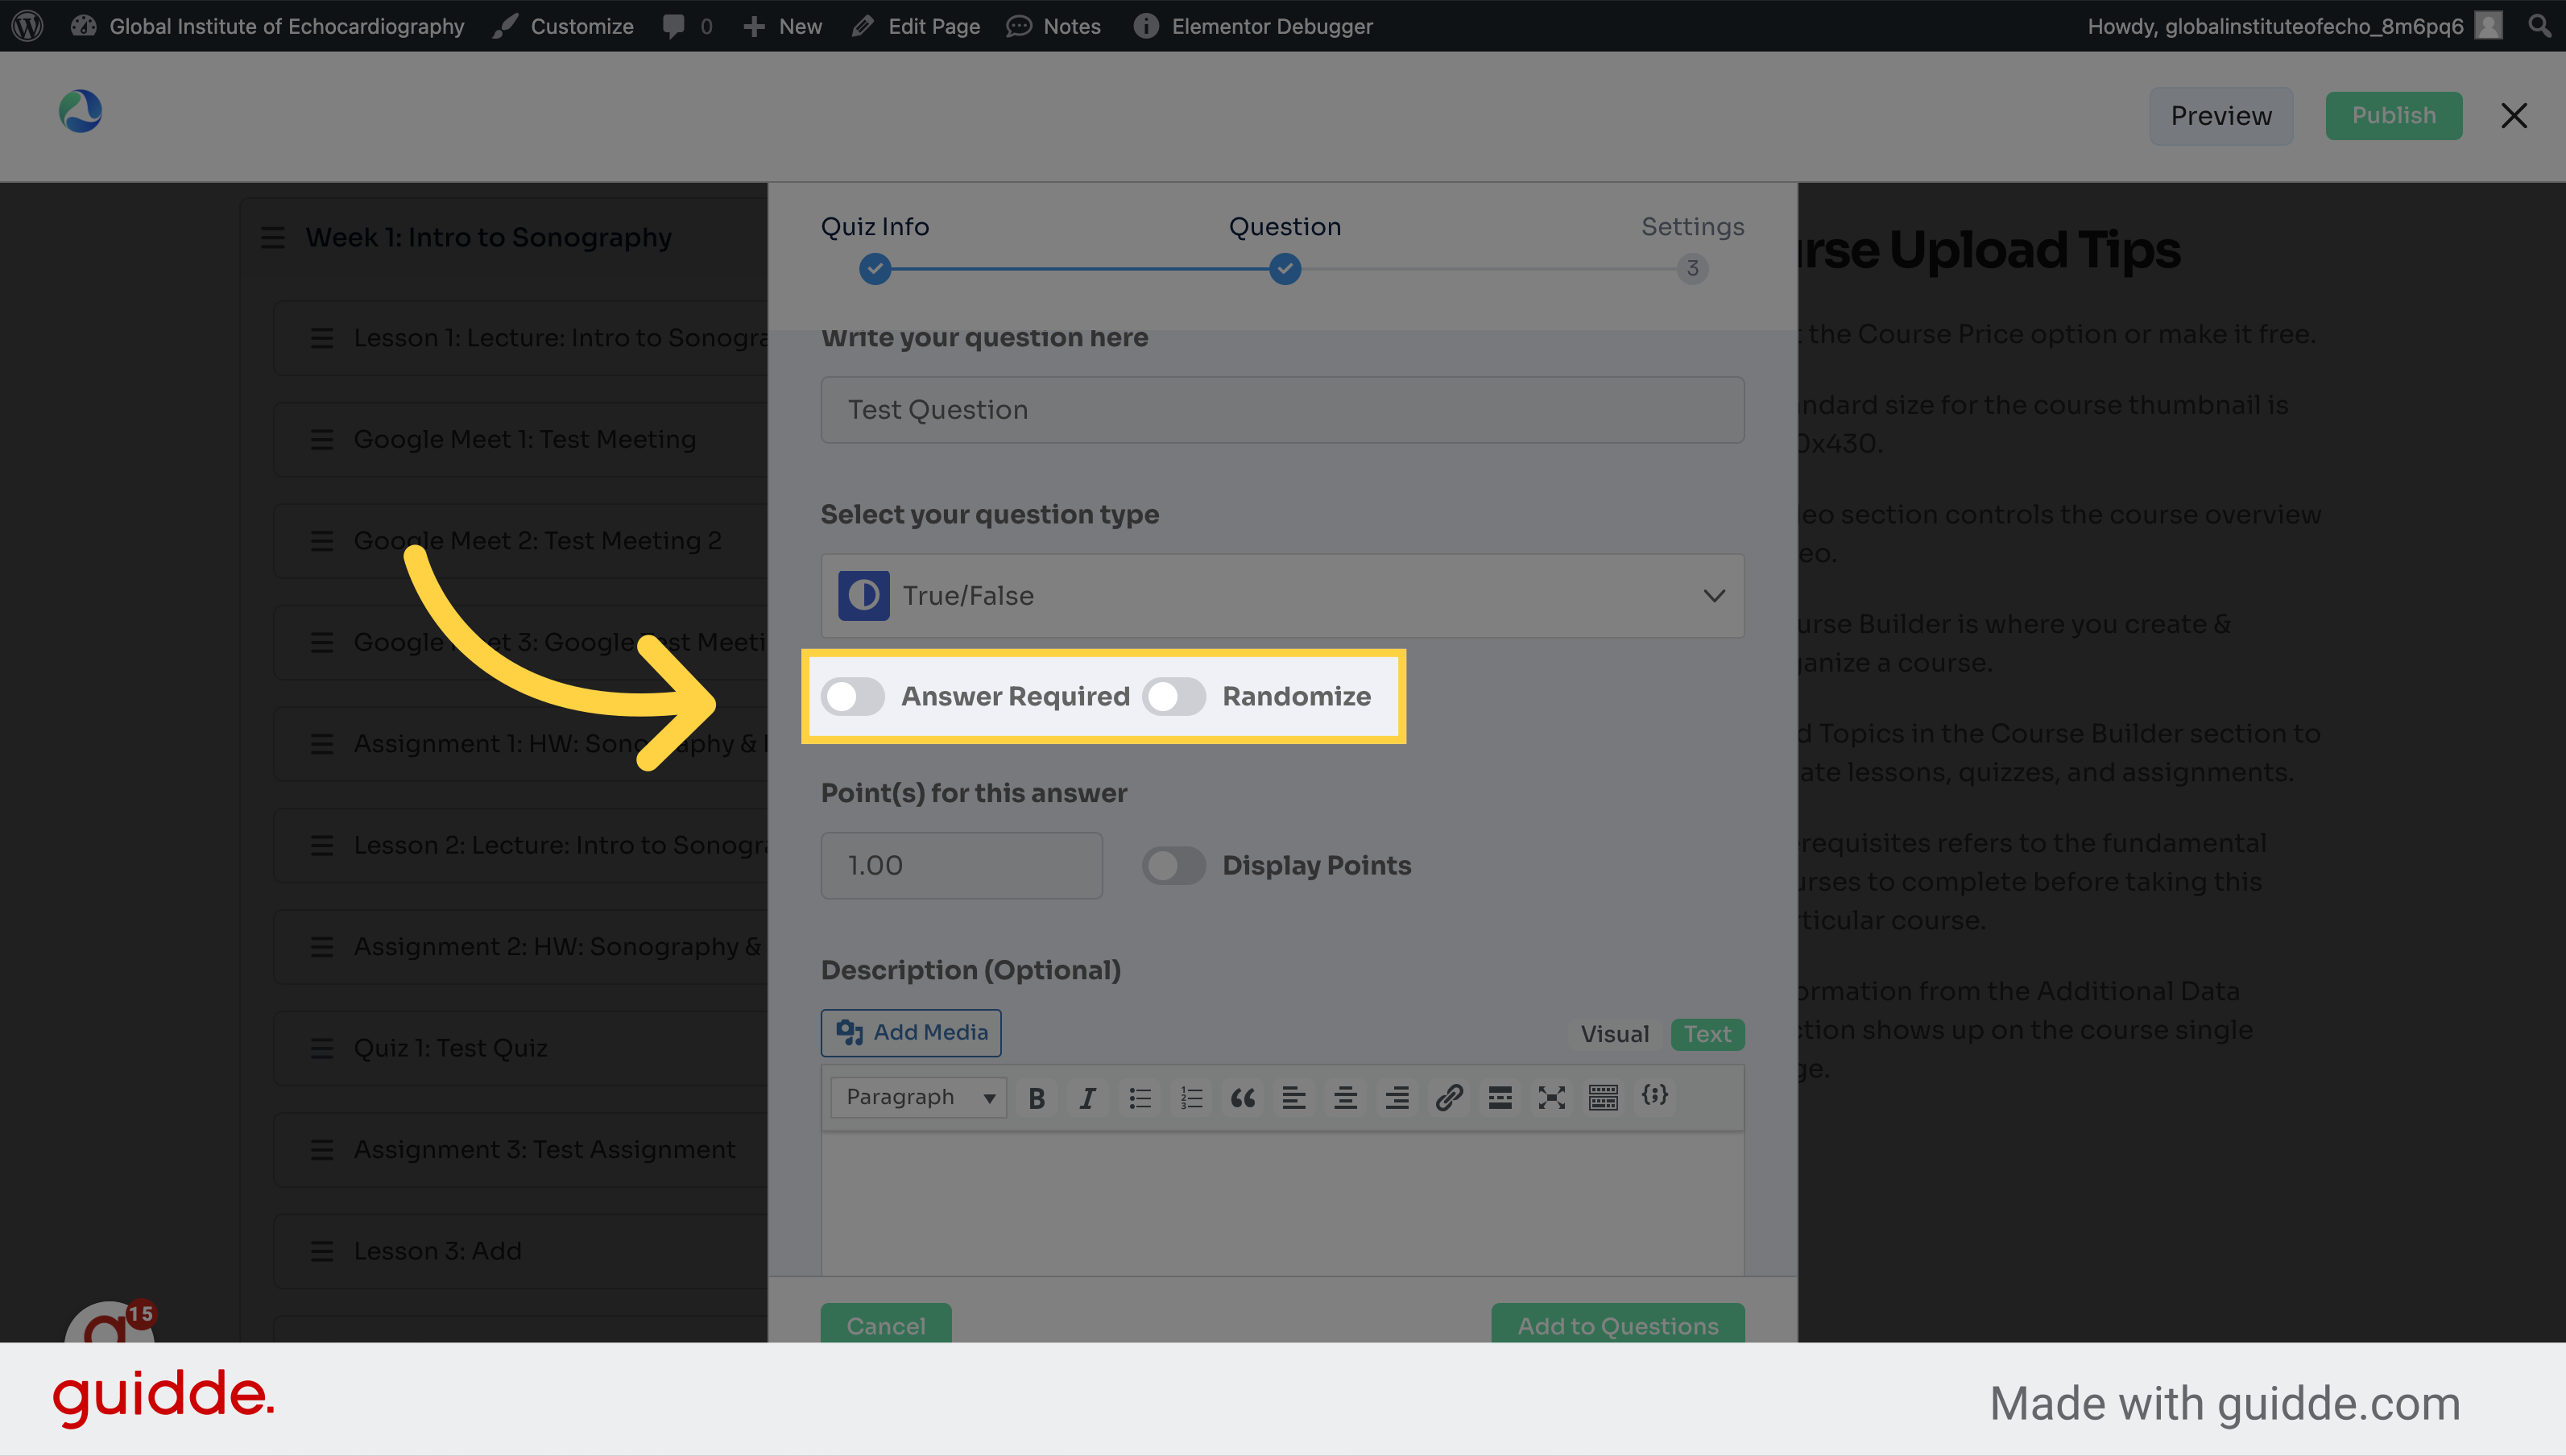
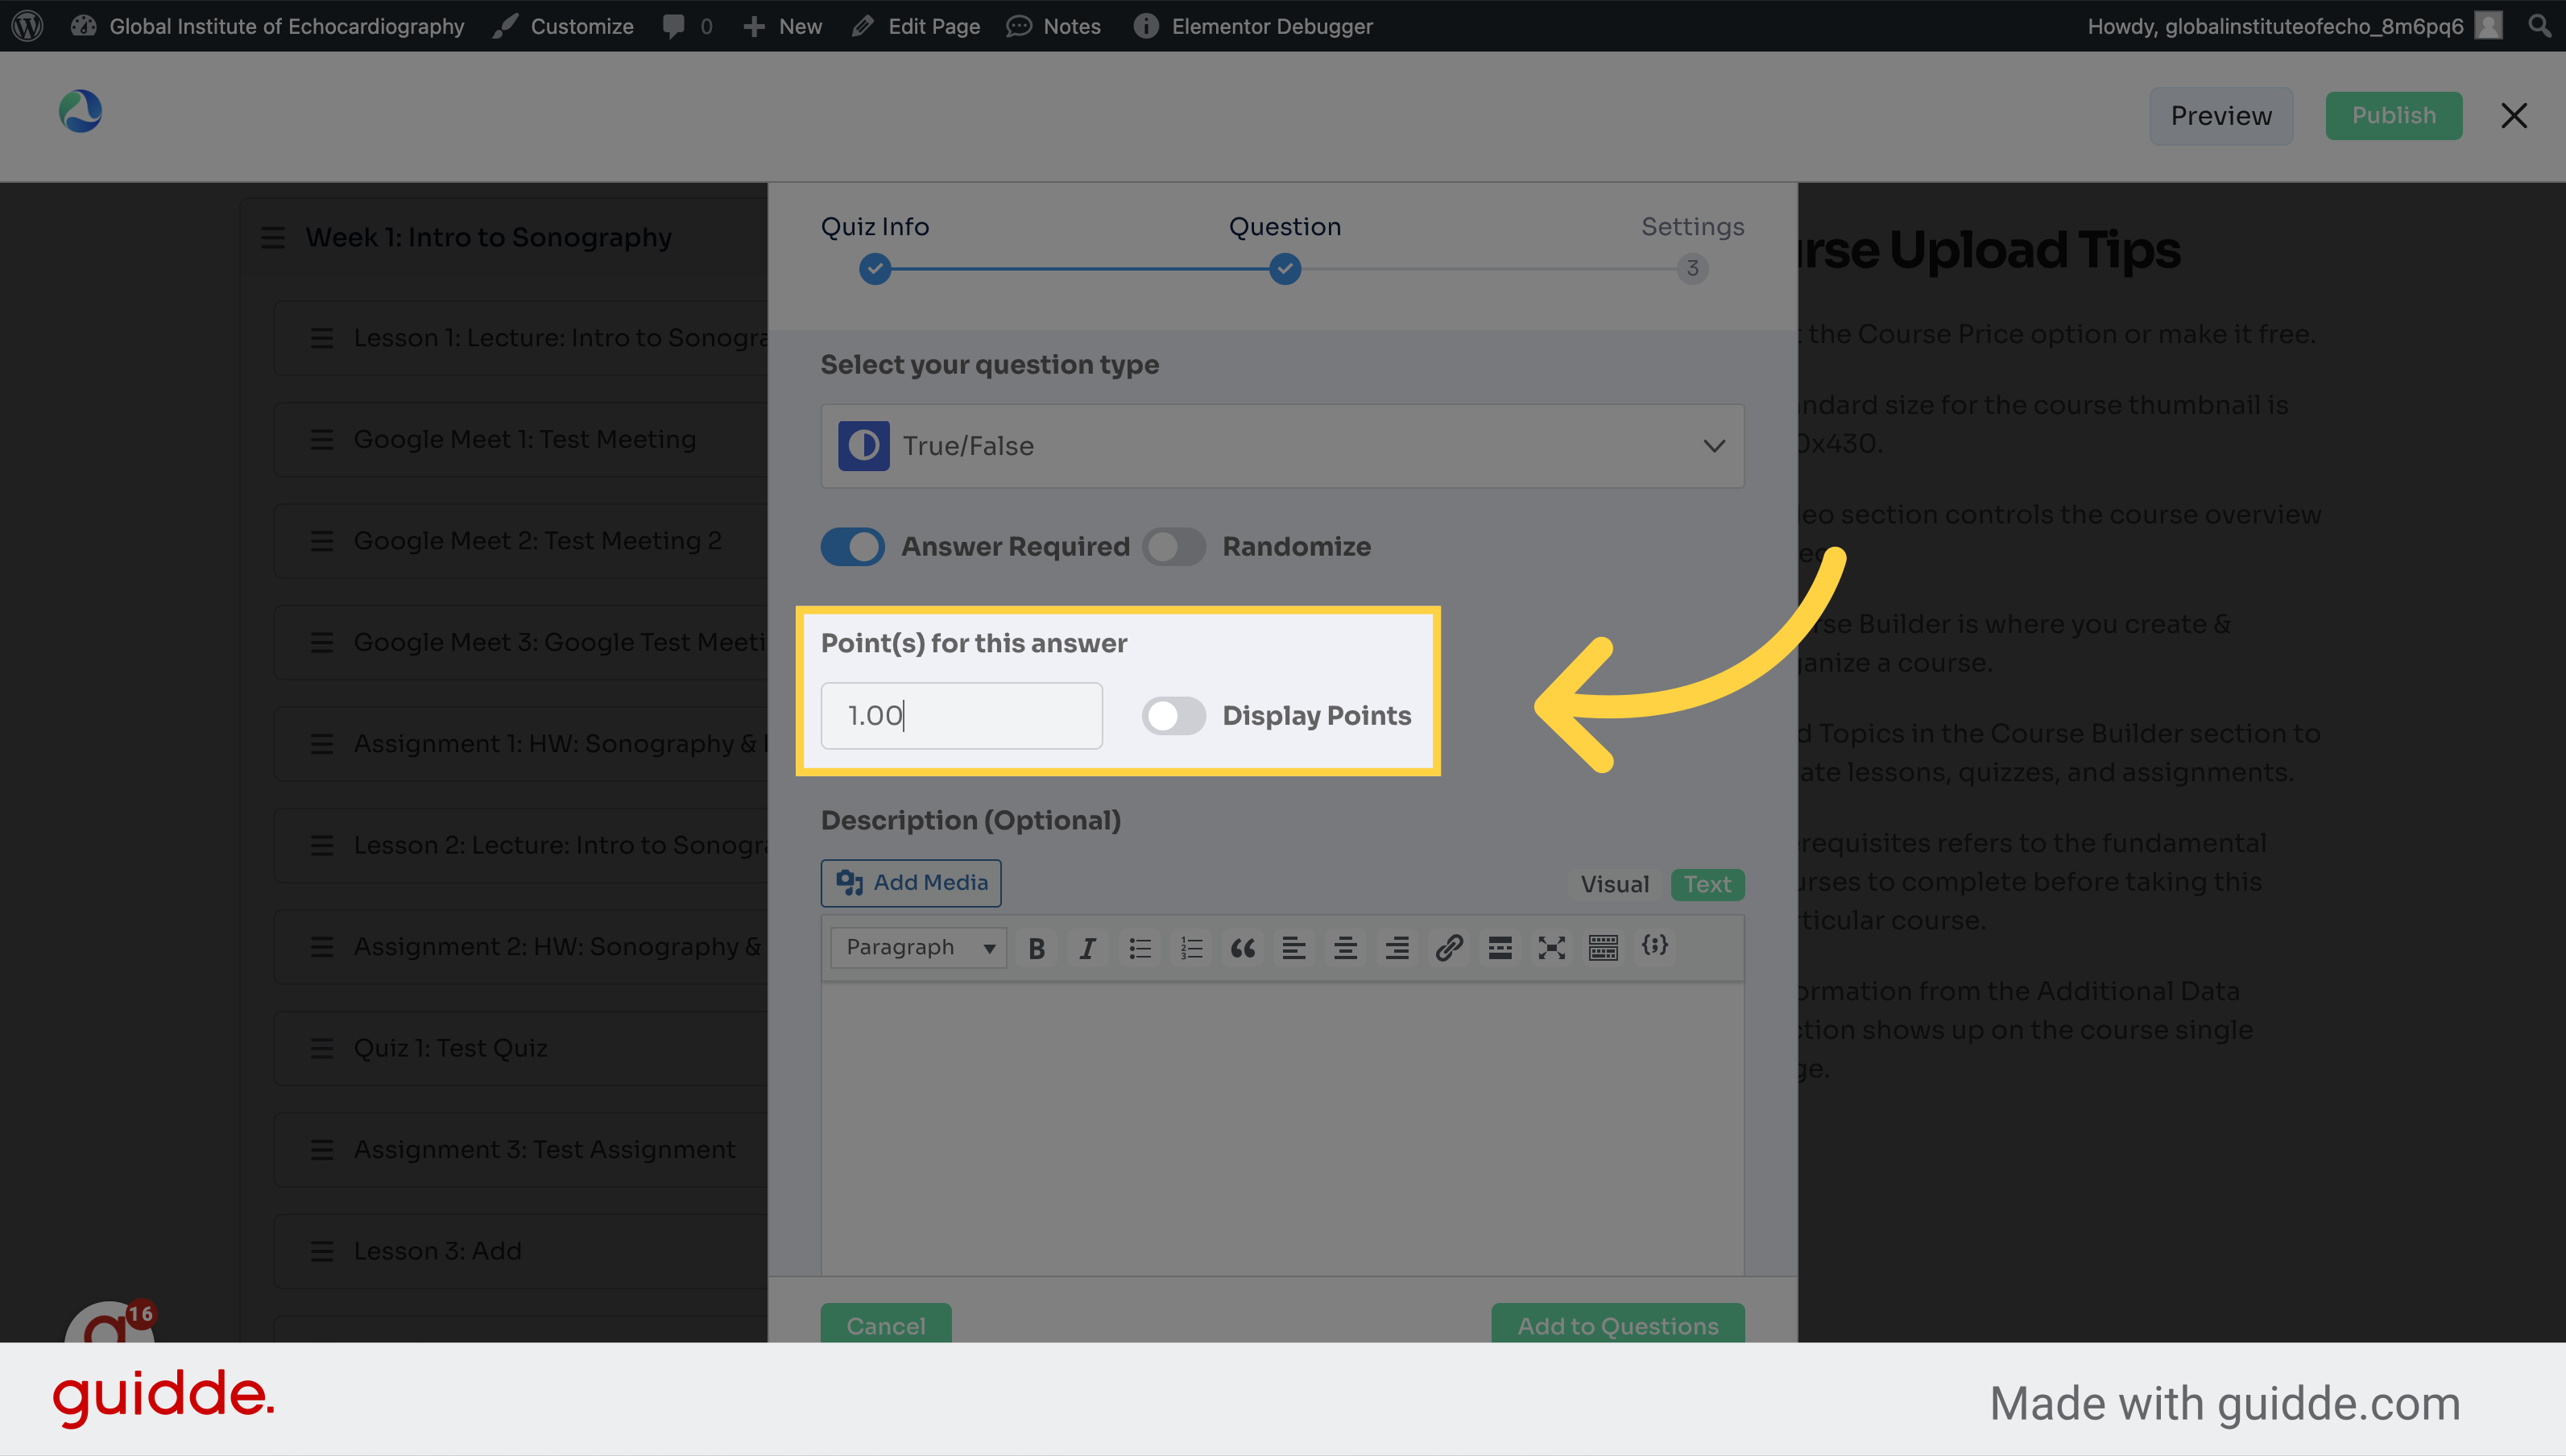
11. Choose the amount of points this question is worth
Set the question weight.
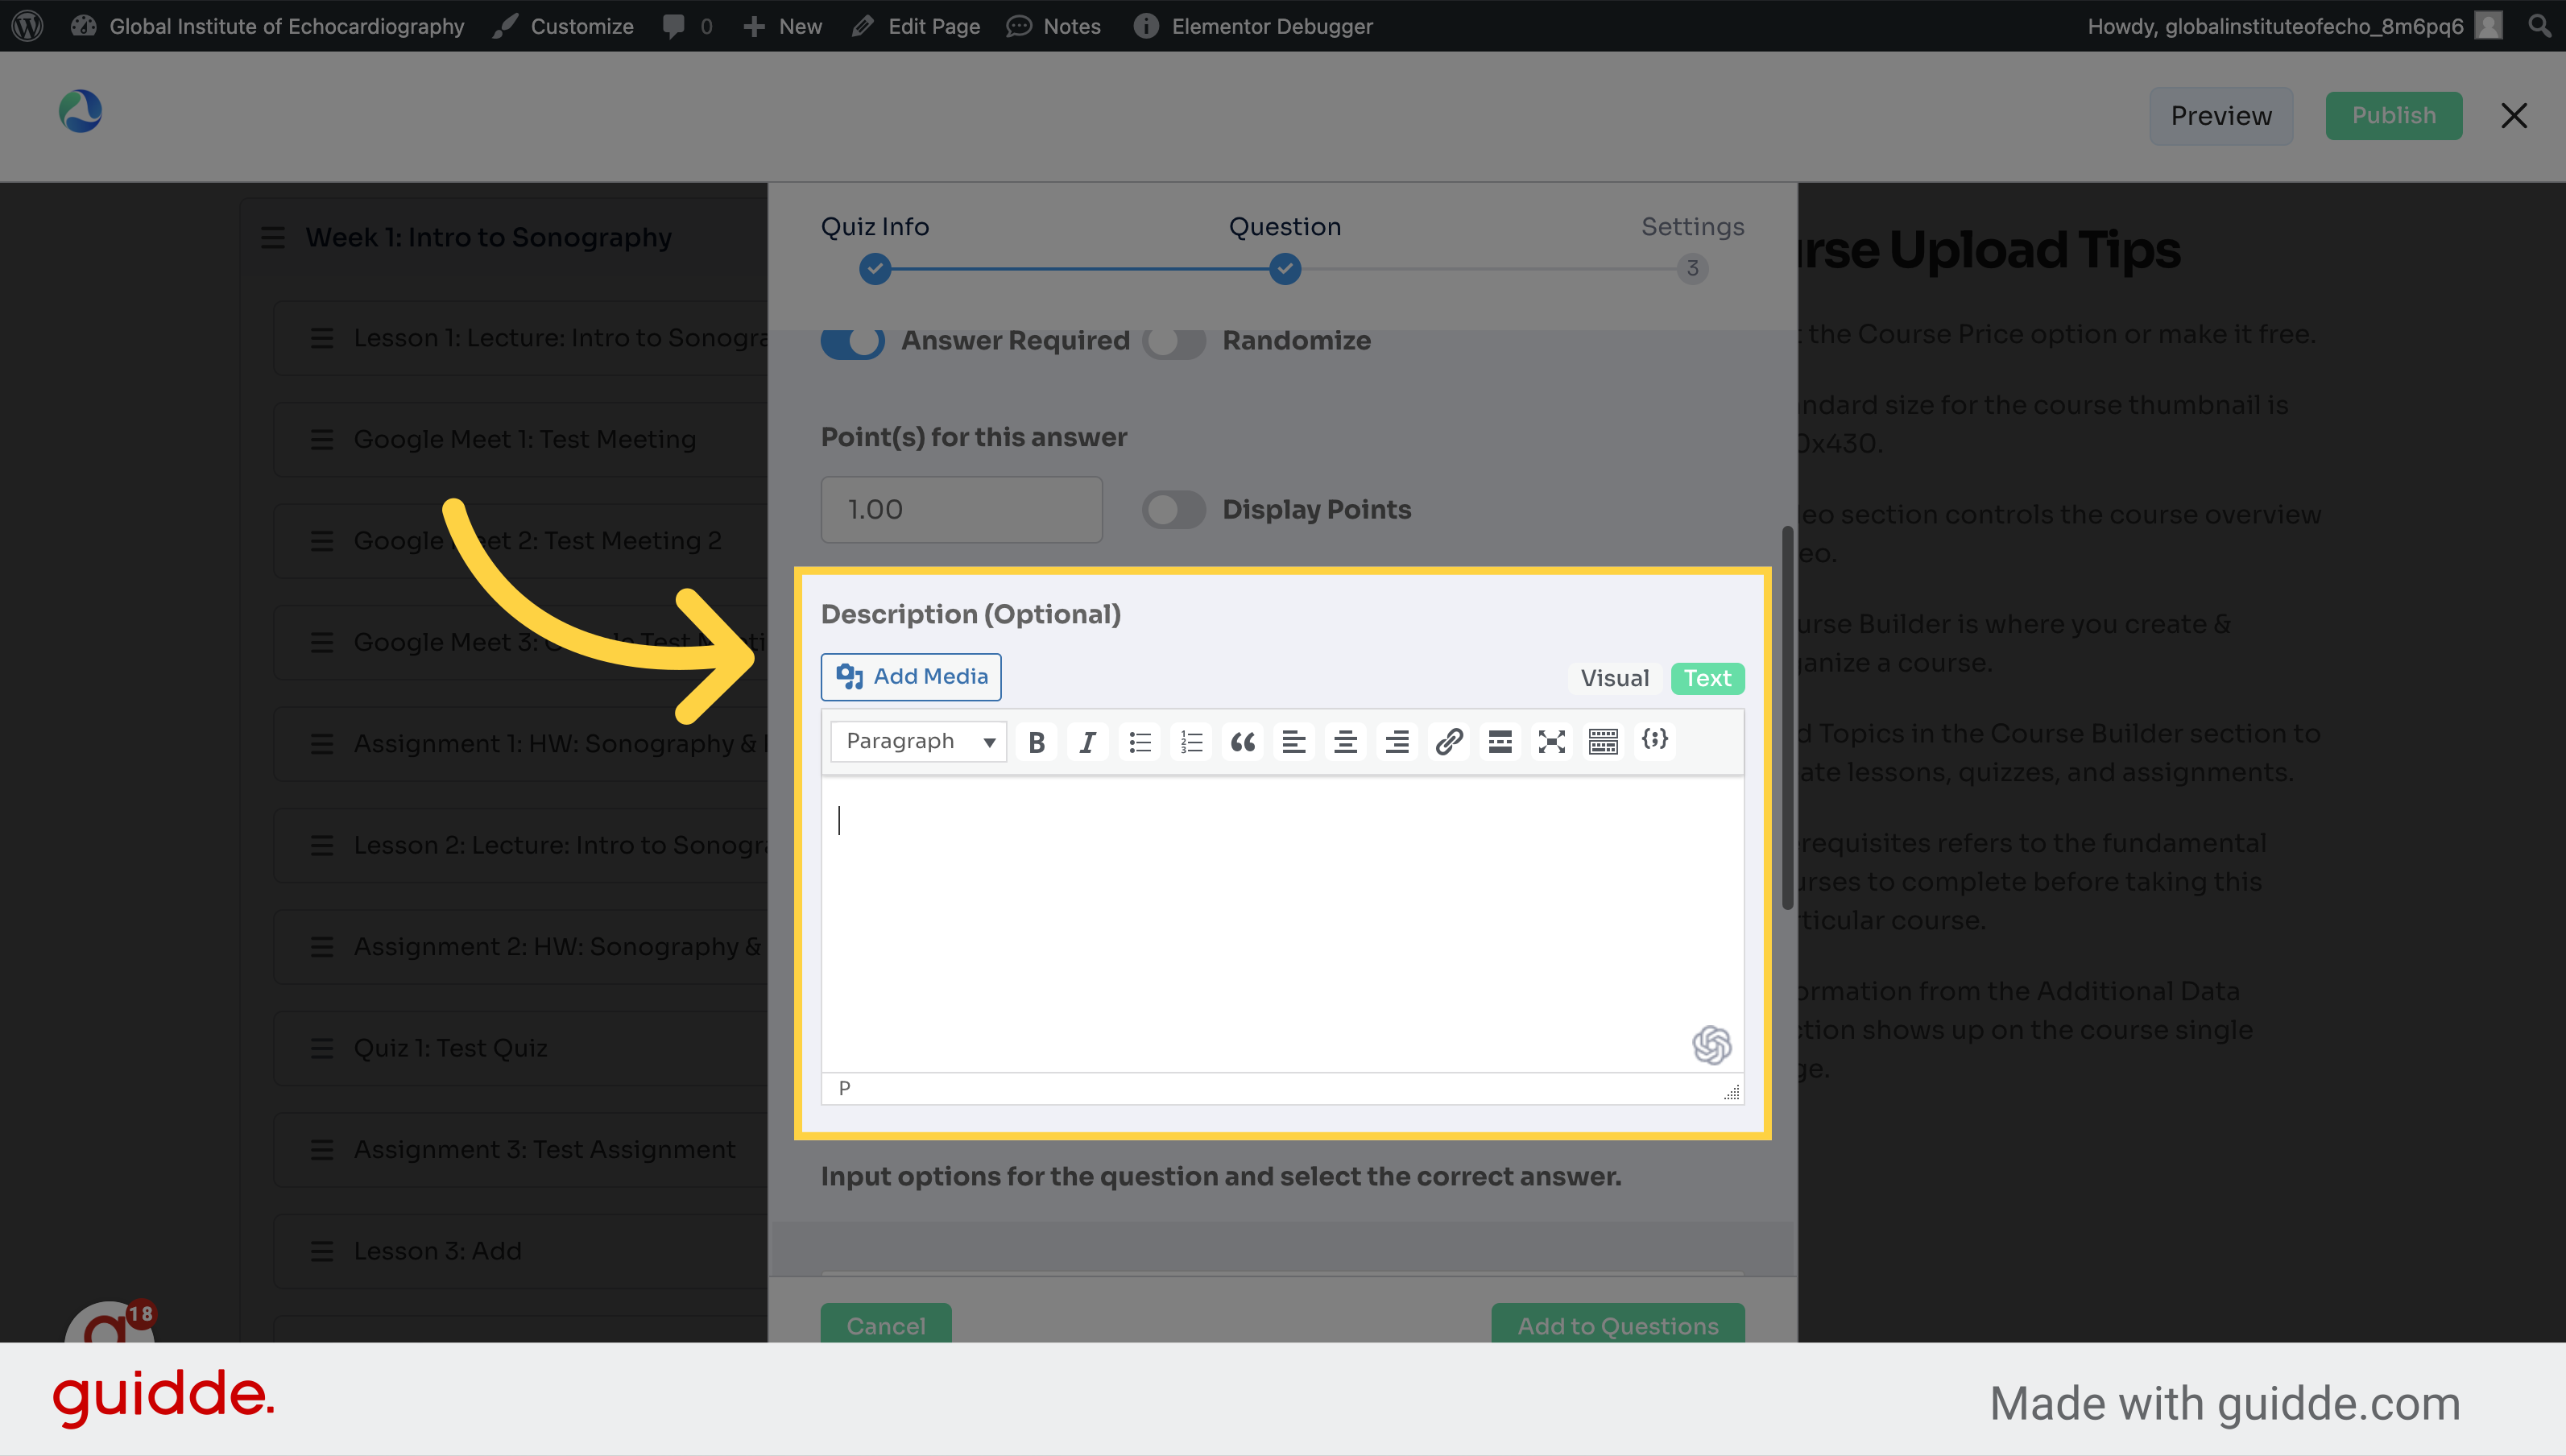
12. Write a description of the question if needed. If there is a reference image needed, click 'Add Media'
Access the question description.
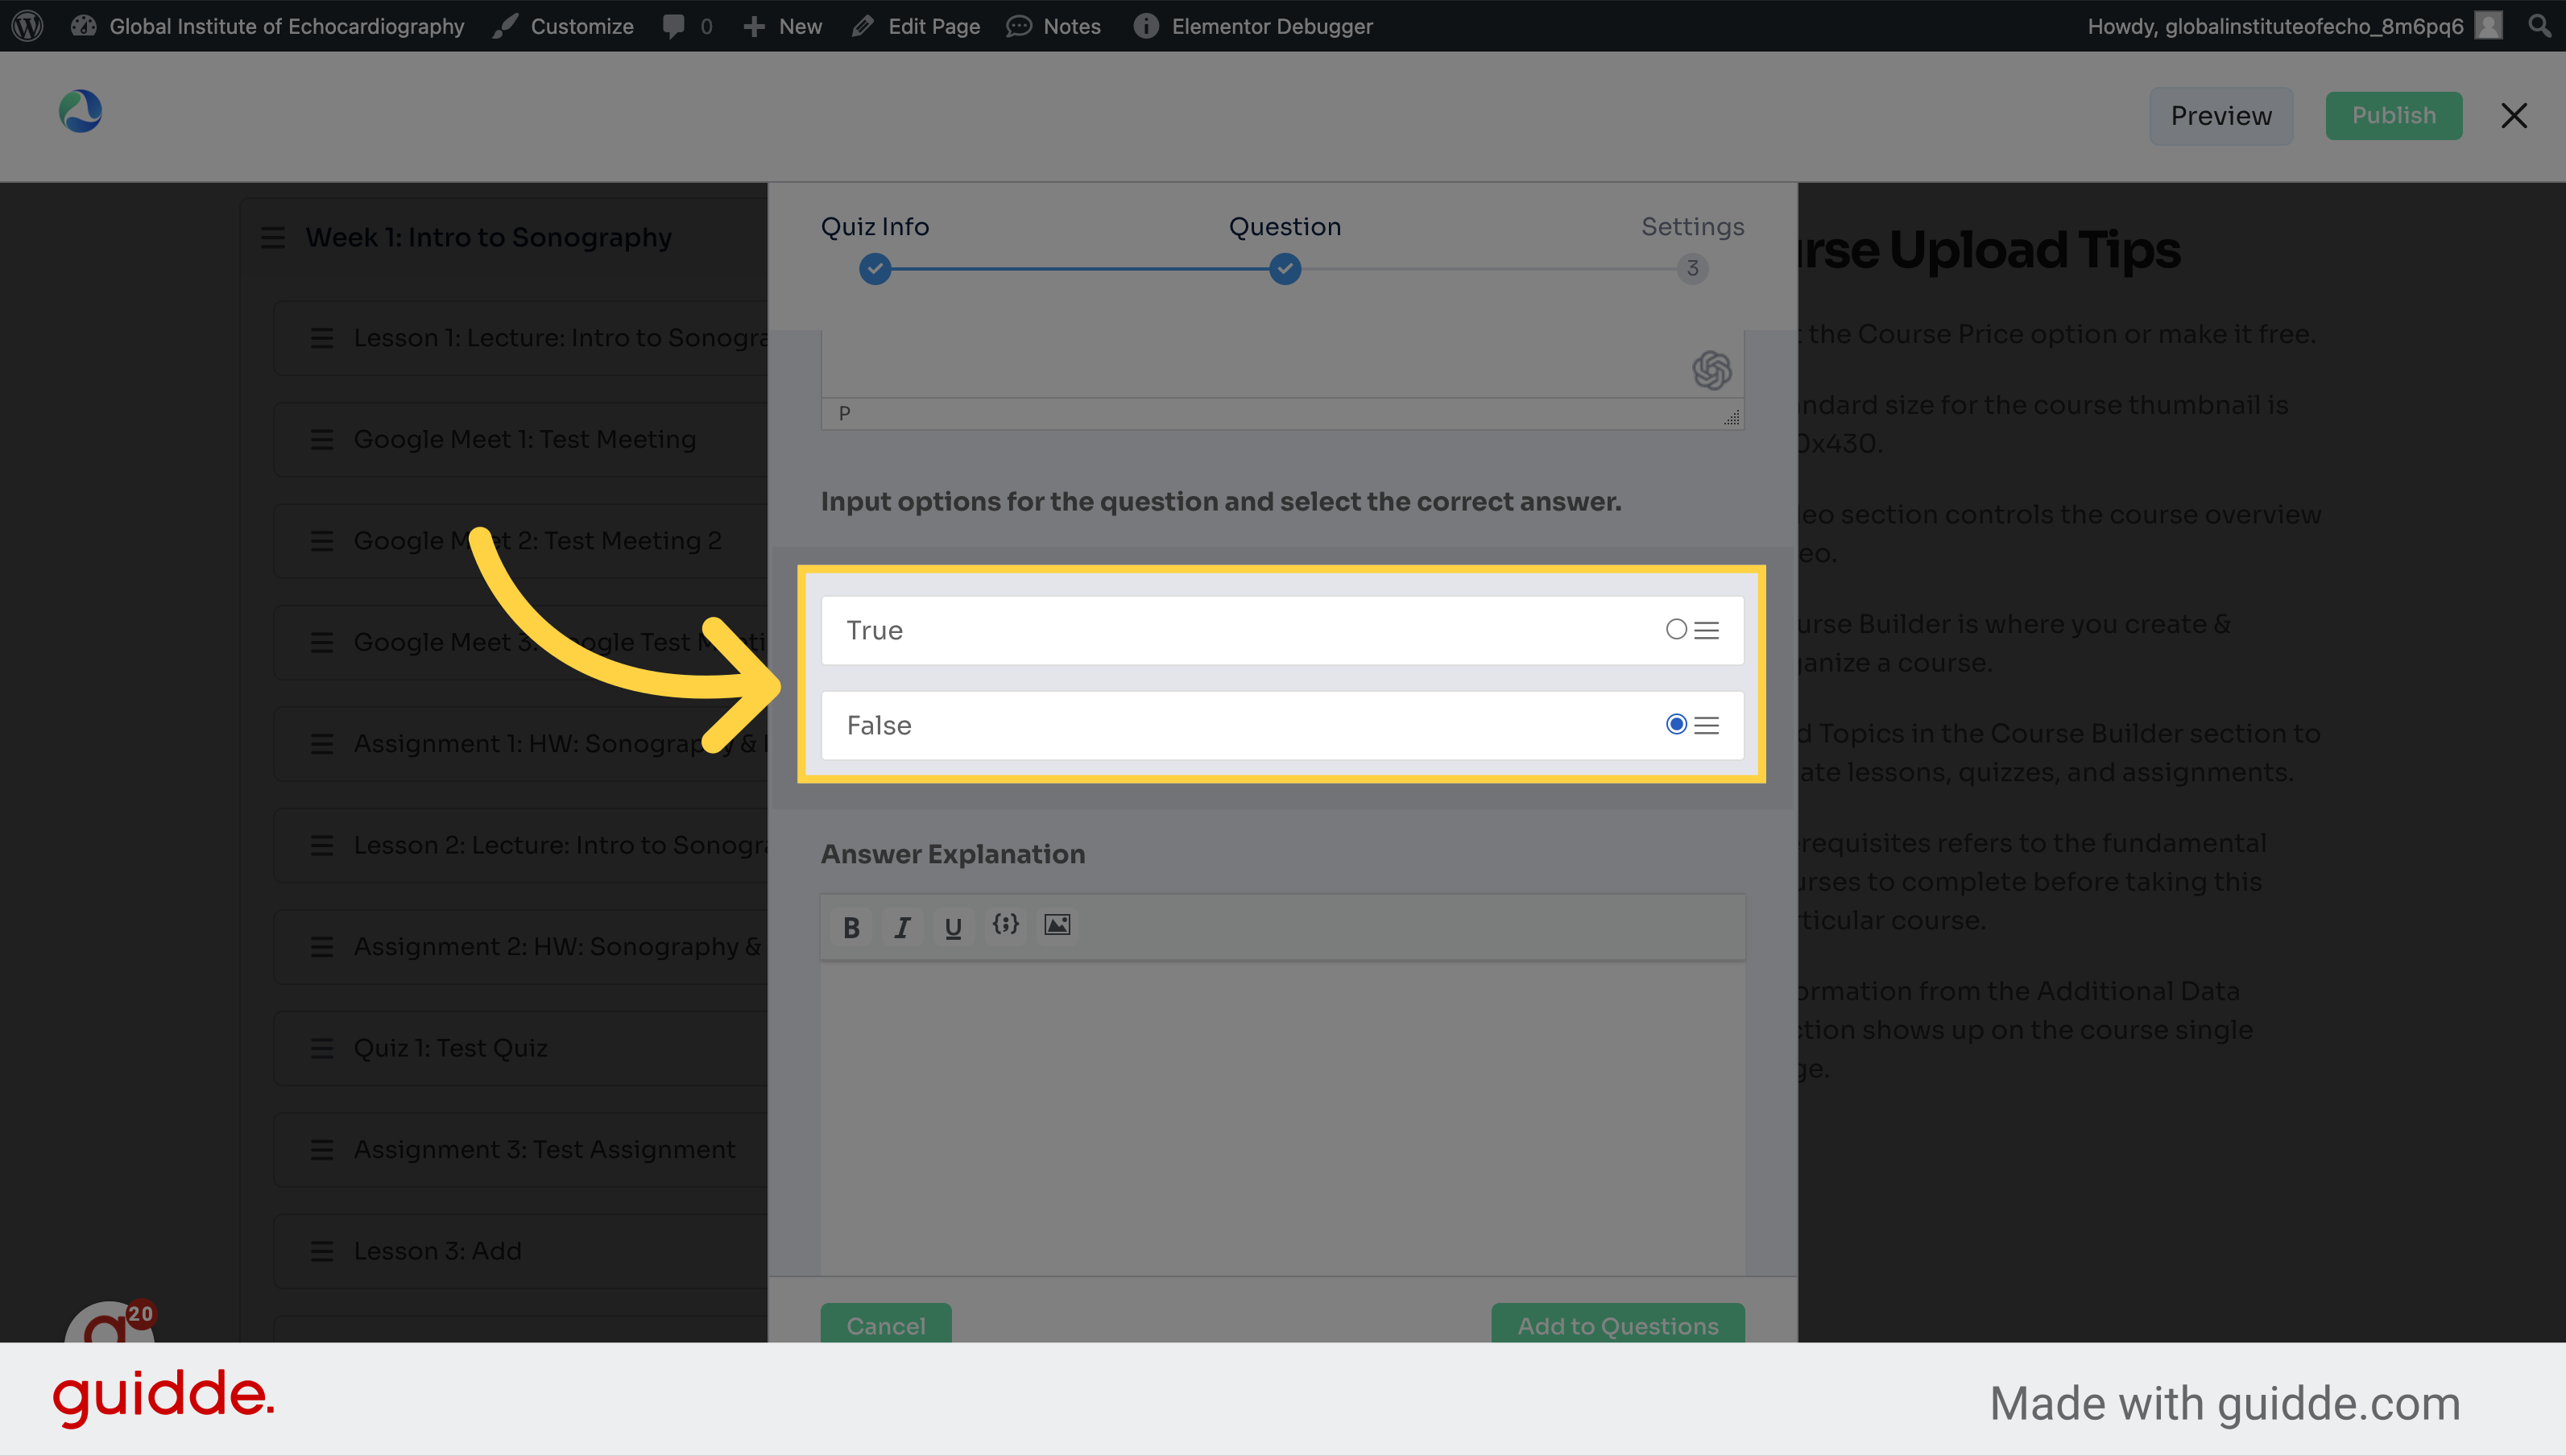
13. Choose the answer for your question
Set the question points.
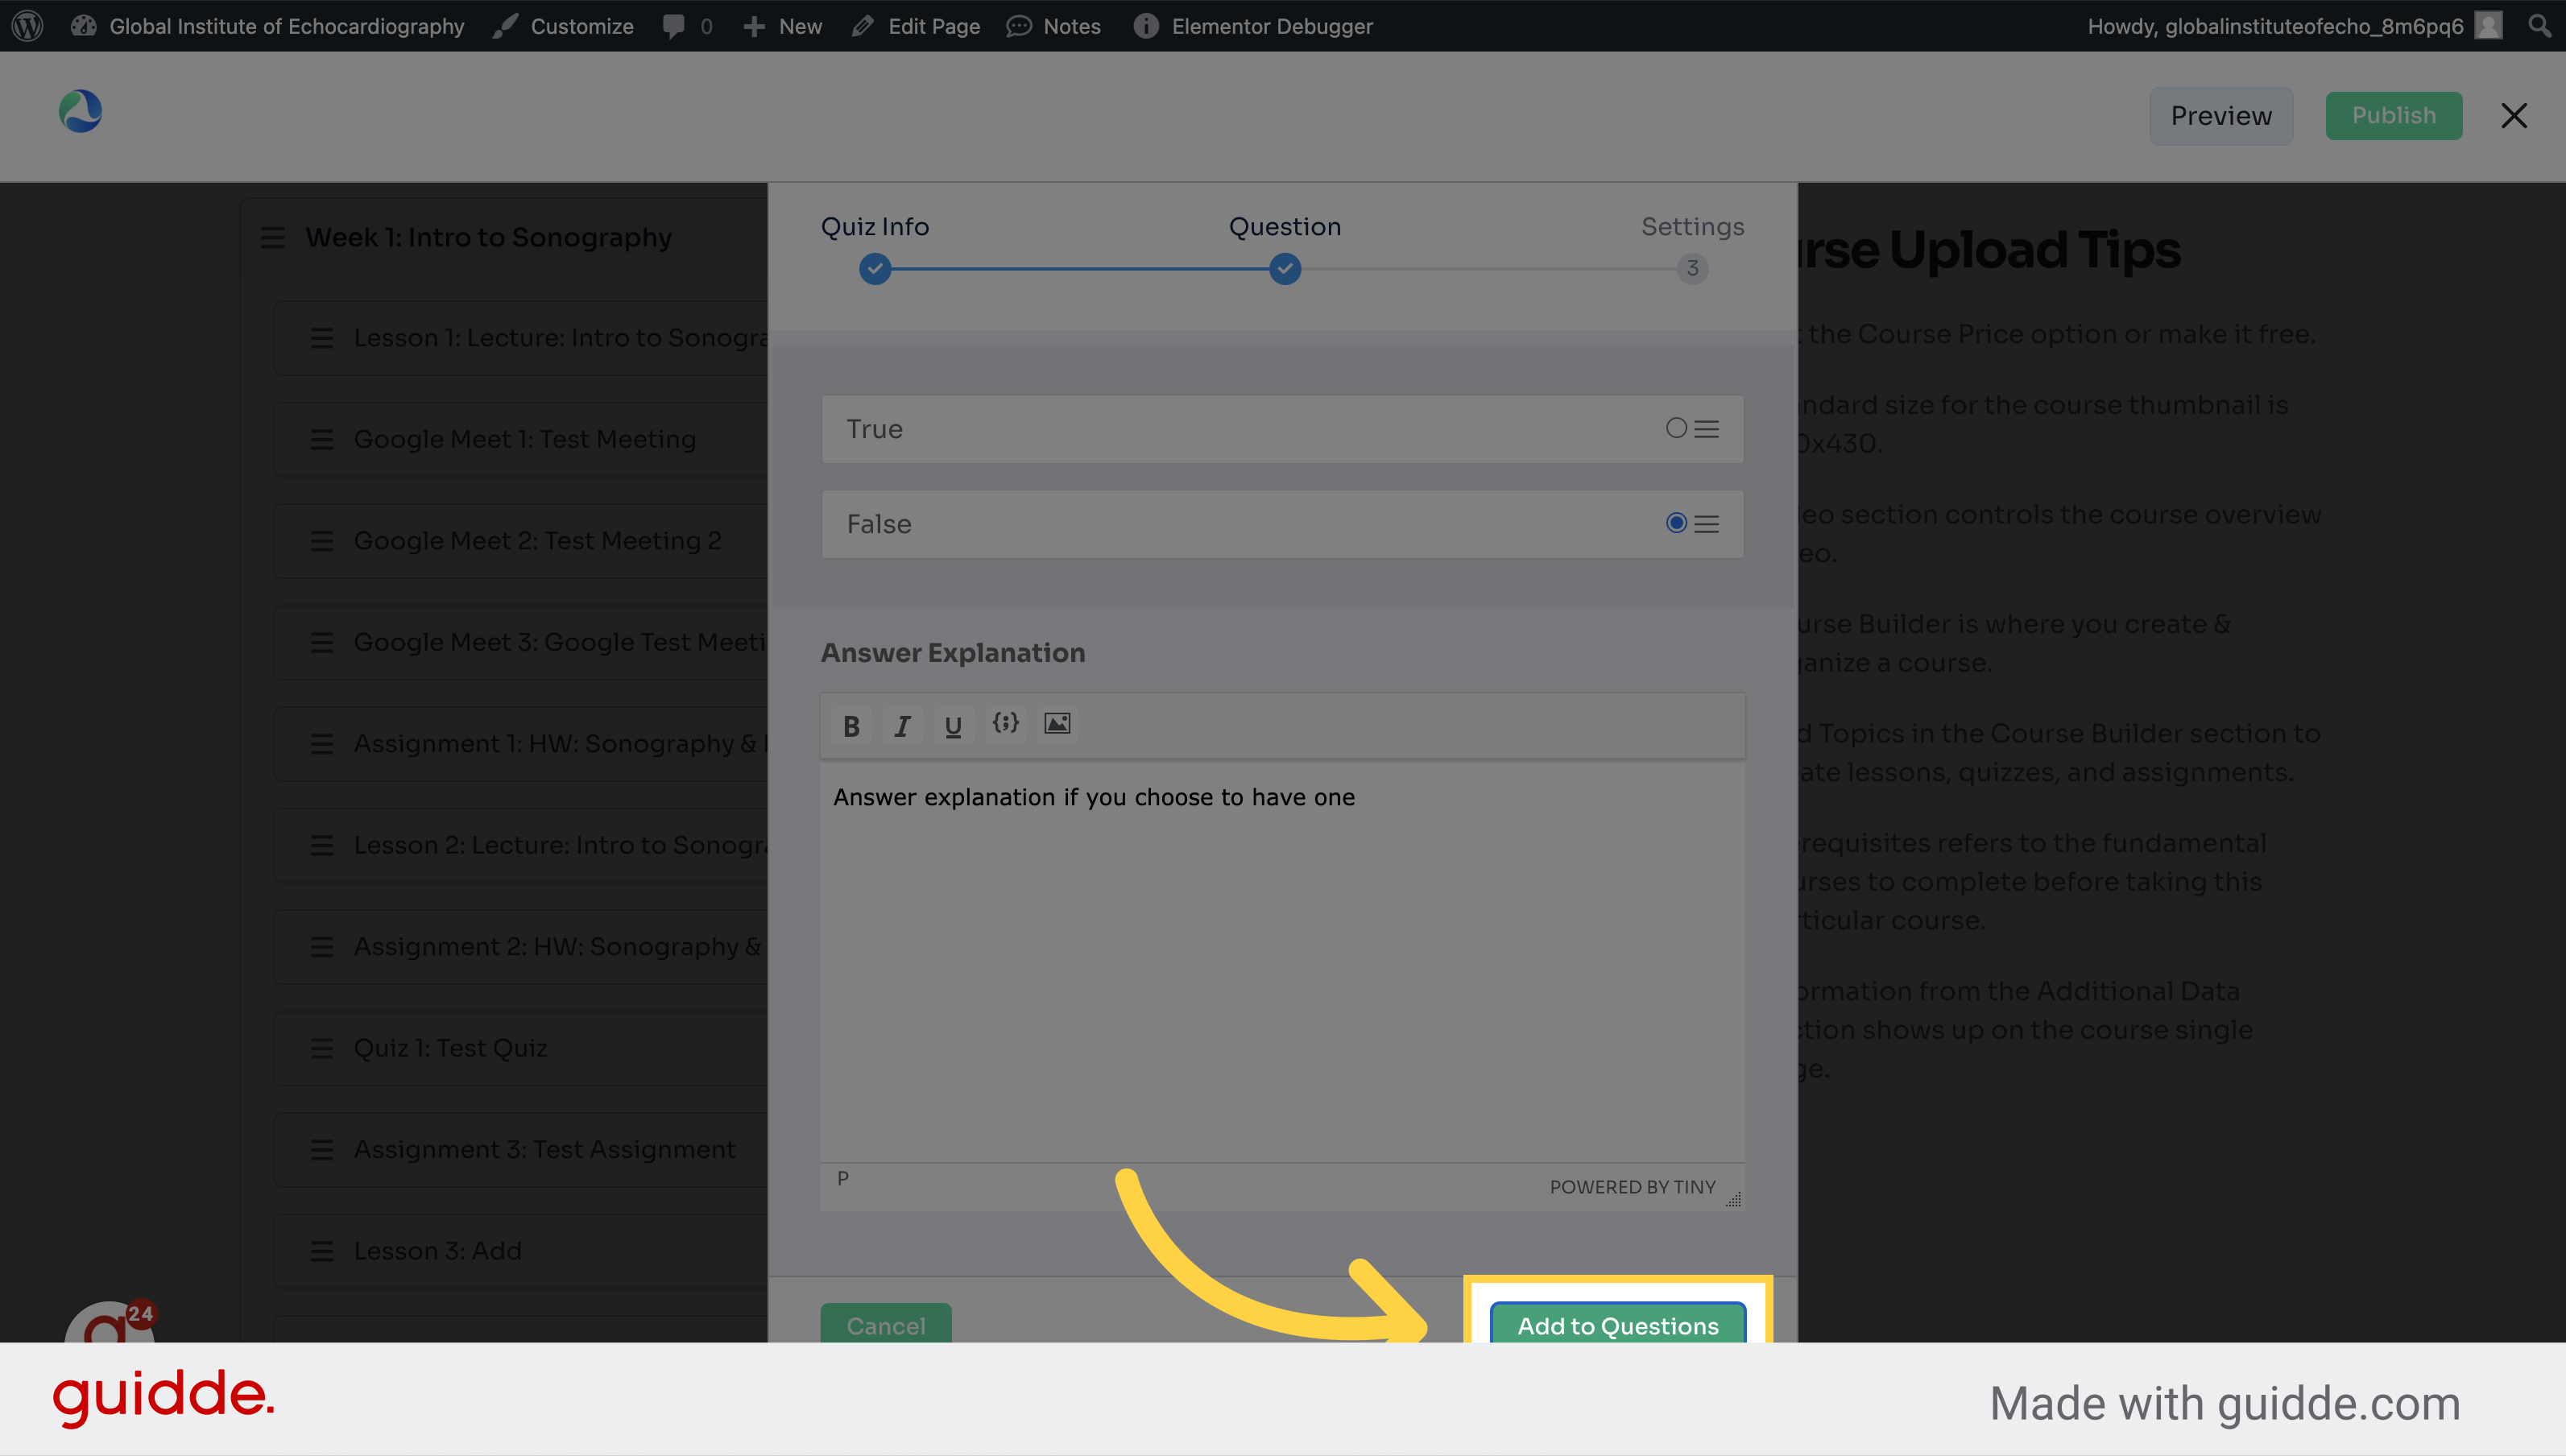
14. Enter the explanation for the answer, if desired
Access the answer explanation section.

15. Click "Add to Questions"
Add the question to the quiz.
16. Click "Save & Next" after you have added all questions
Proceed to the next step.
17. Enter a time limit for the test / quiz if desired
Set the question order.
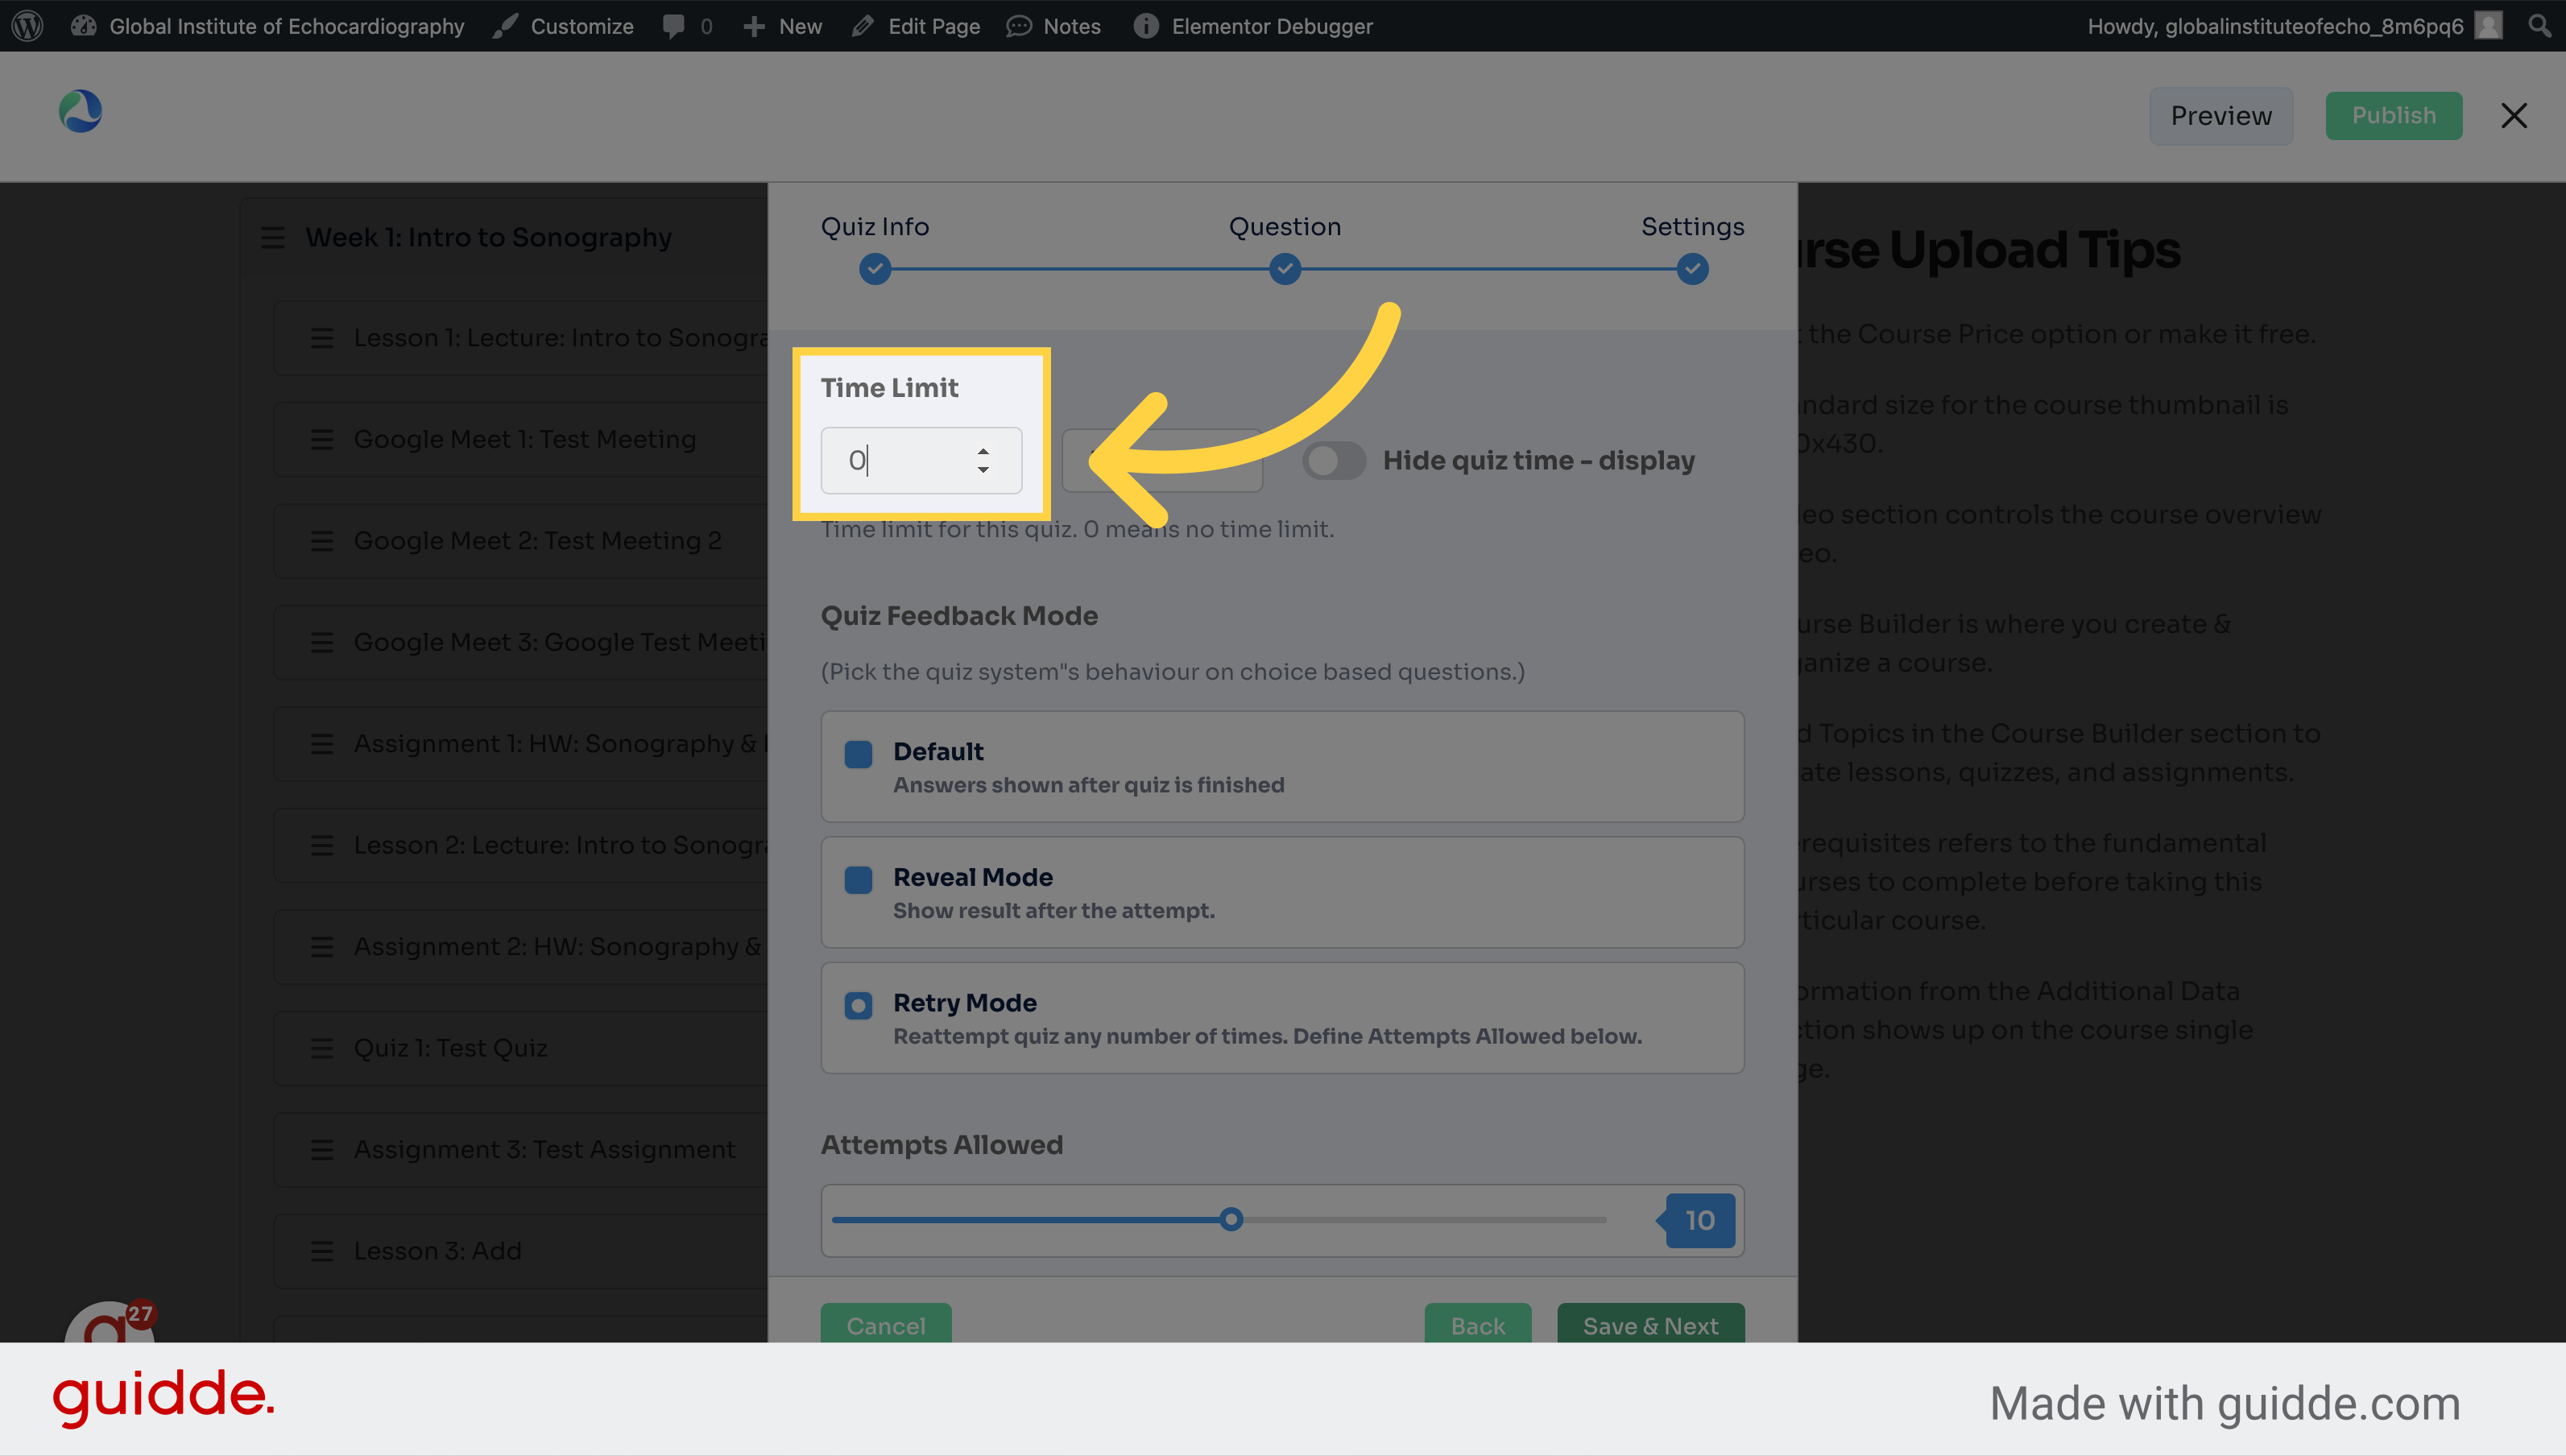
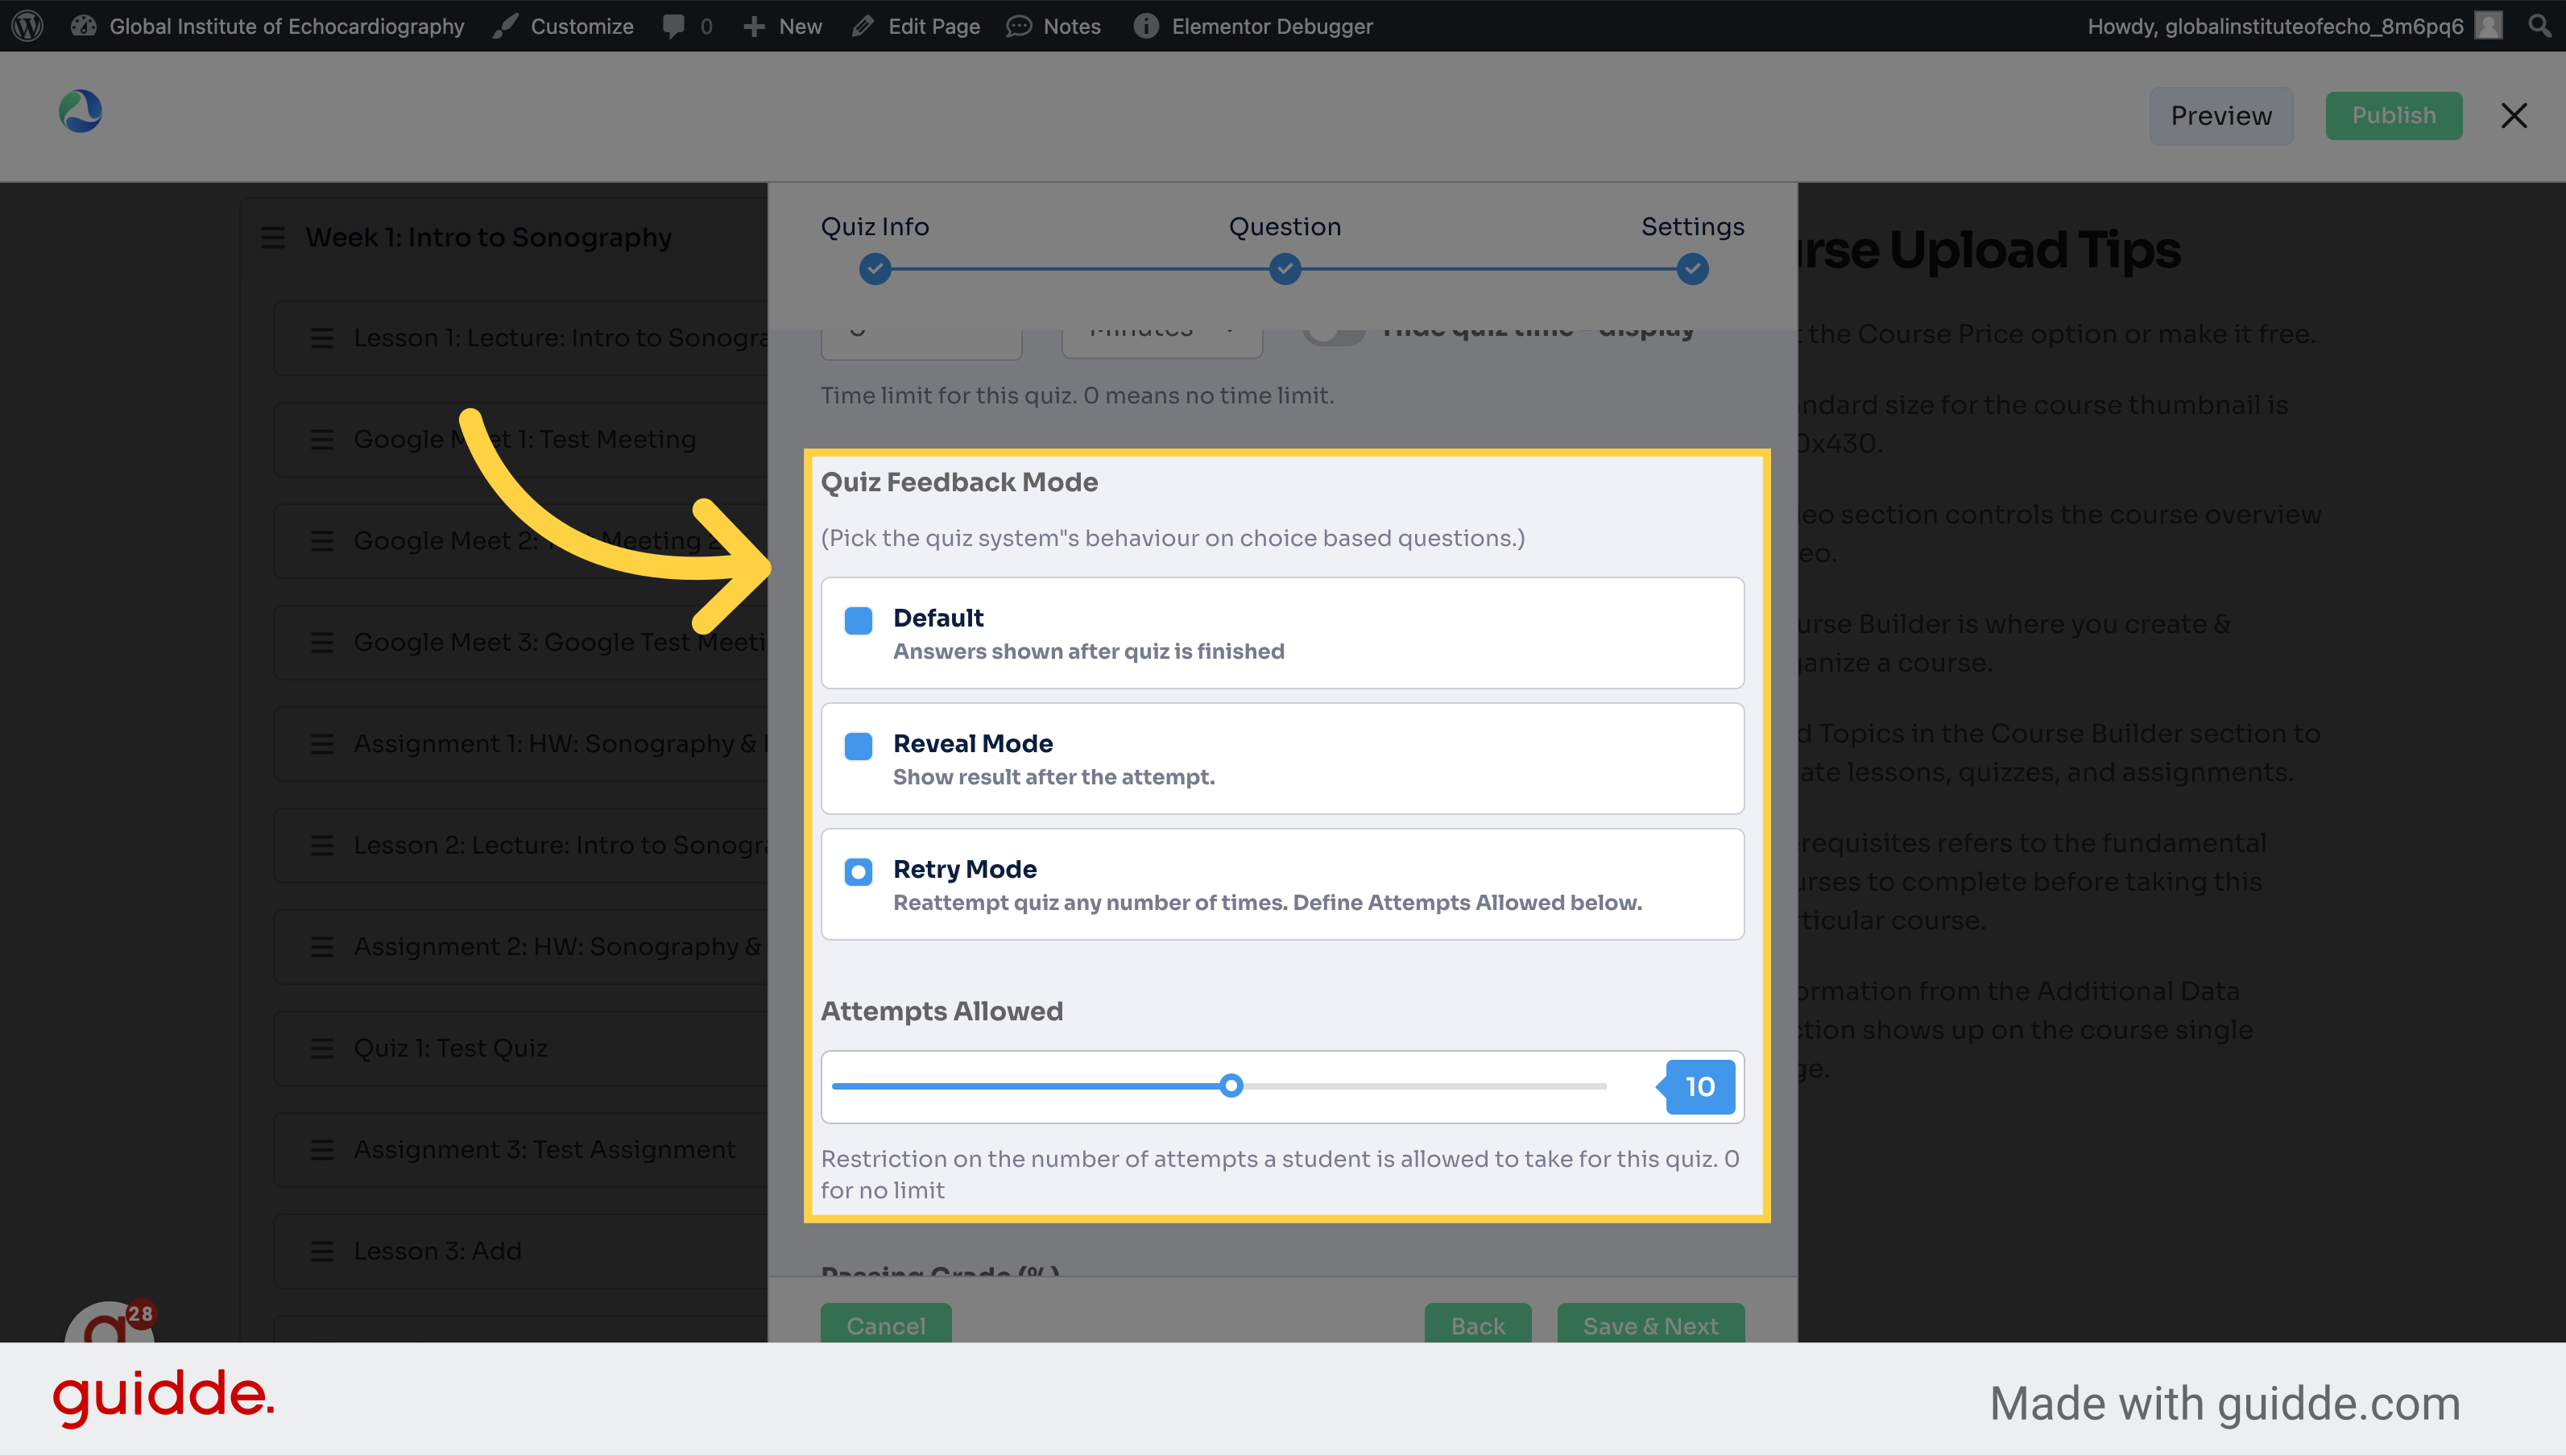
18. Choose your quiz settings
Choose answer display settings.
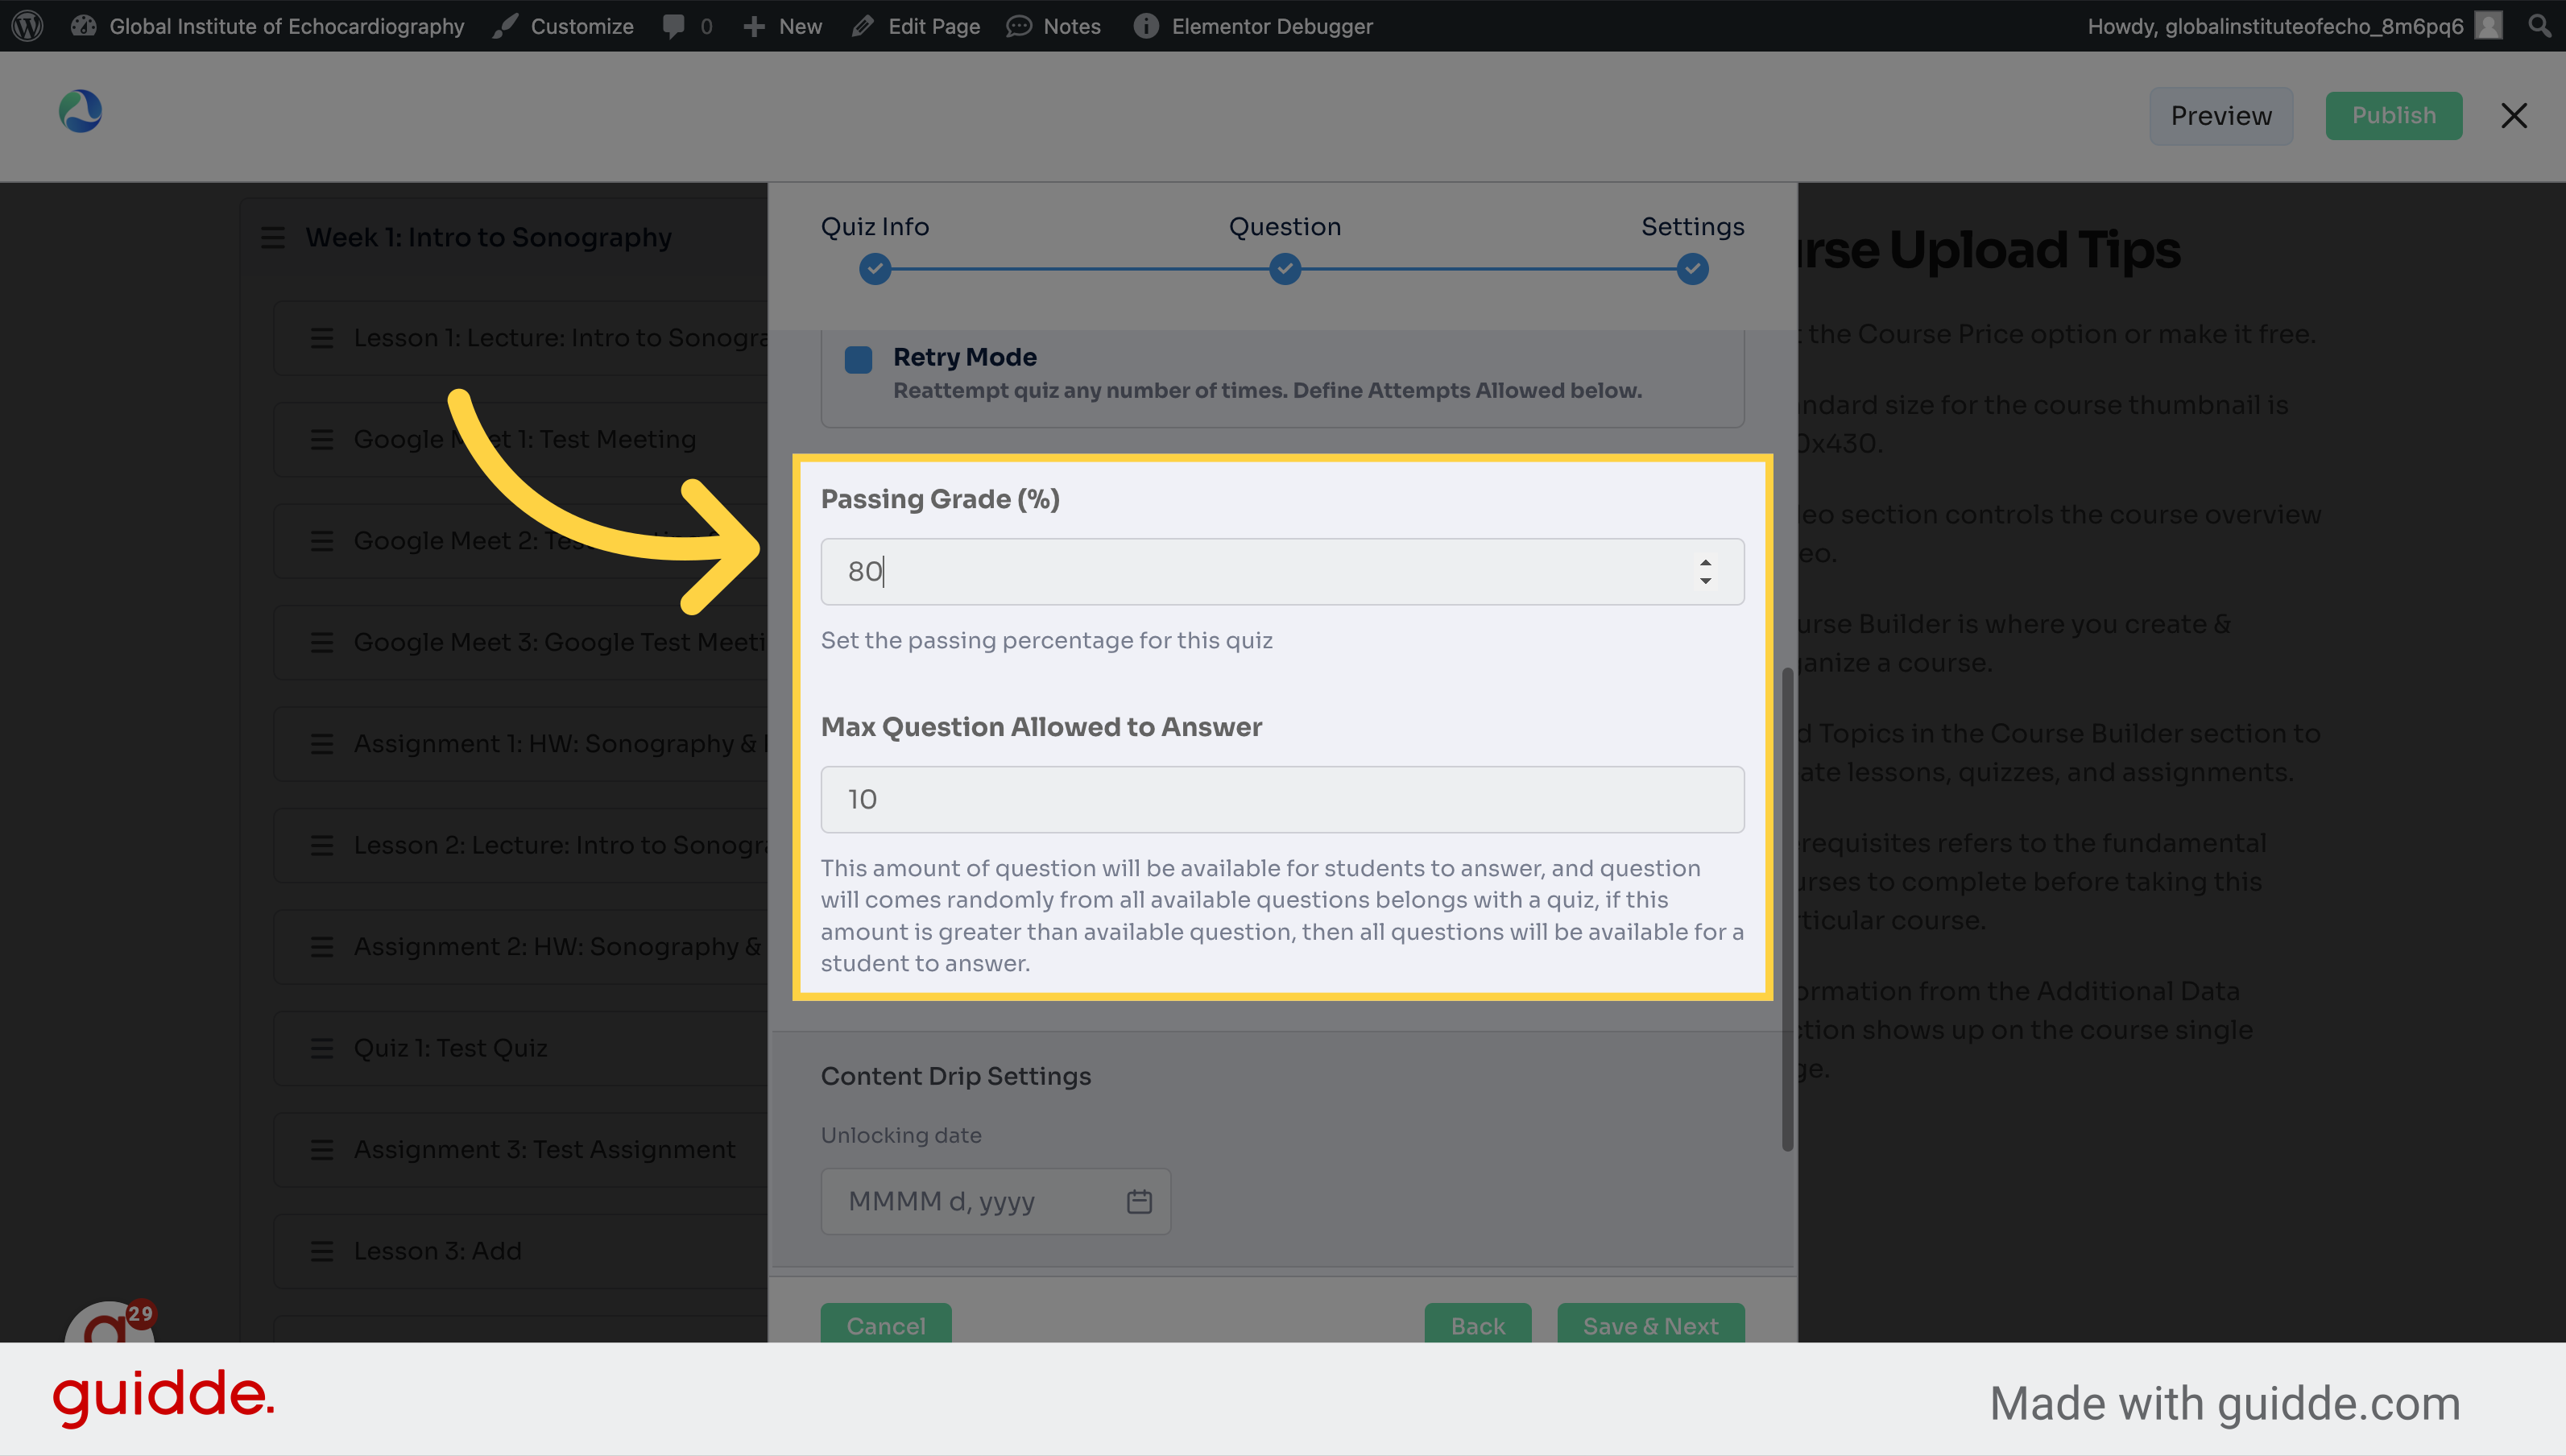
19. Enter the passing grade for the test, then the amount of questions to be answered
Set the passing score.
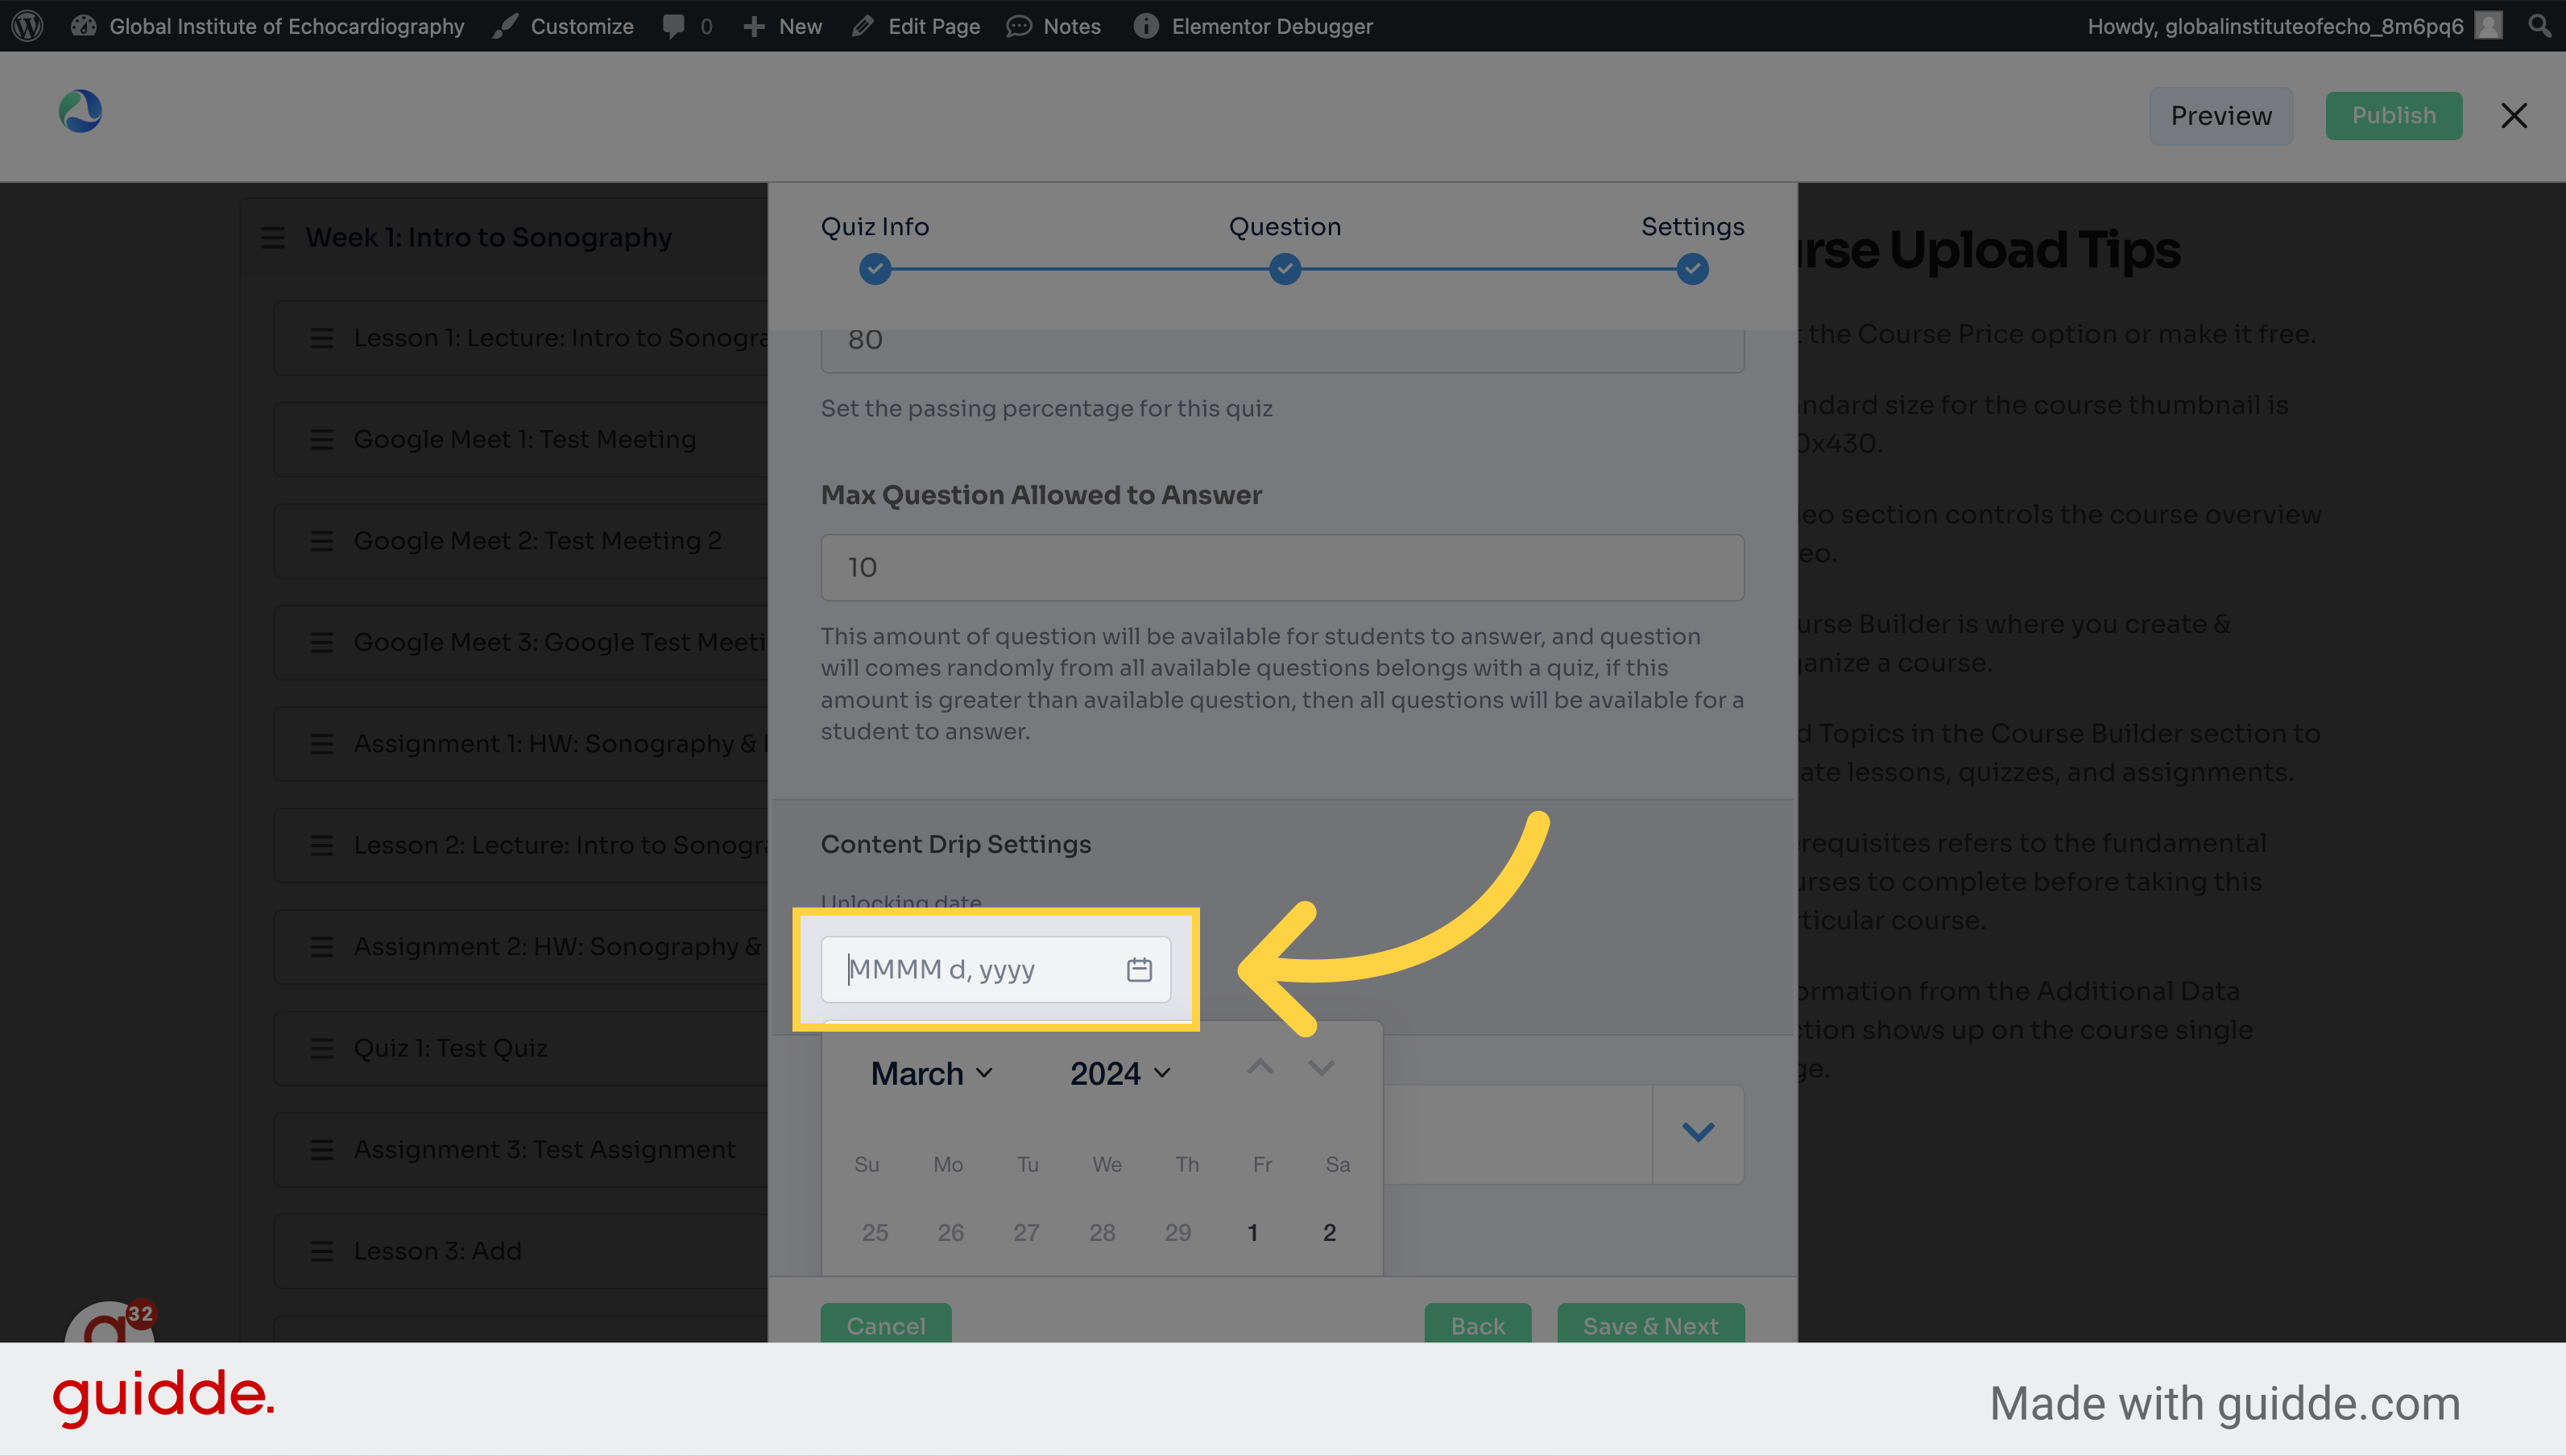
20. Choose when the test should be available
Choose the date format.
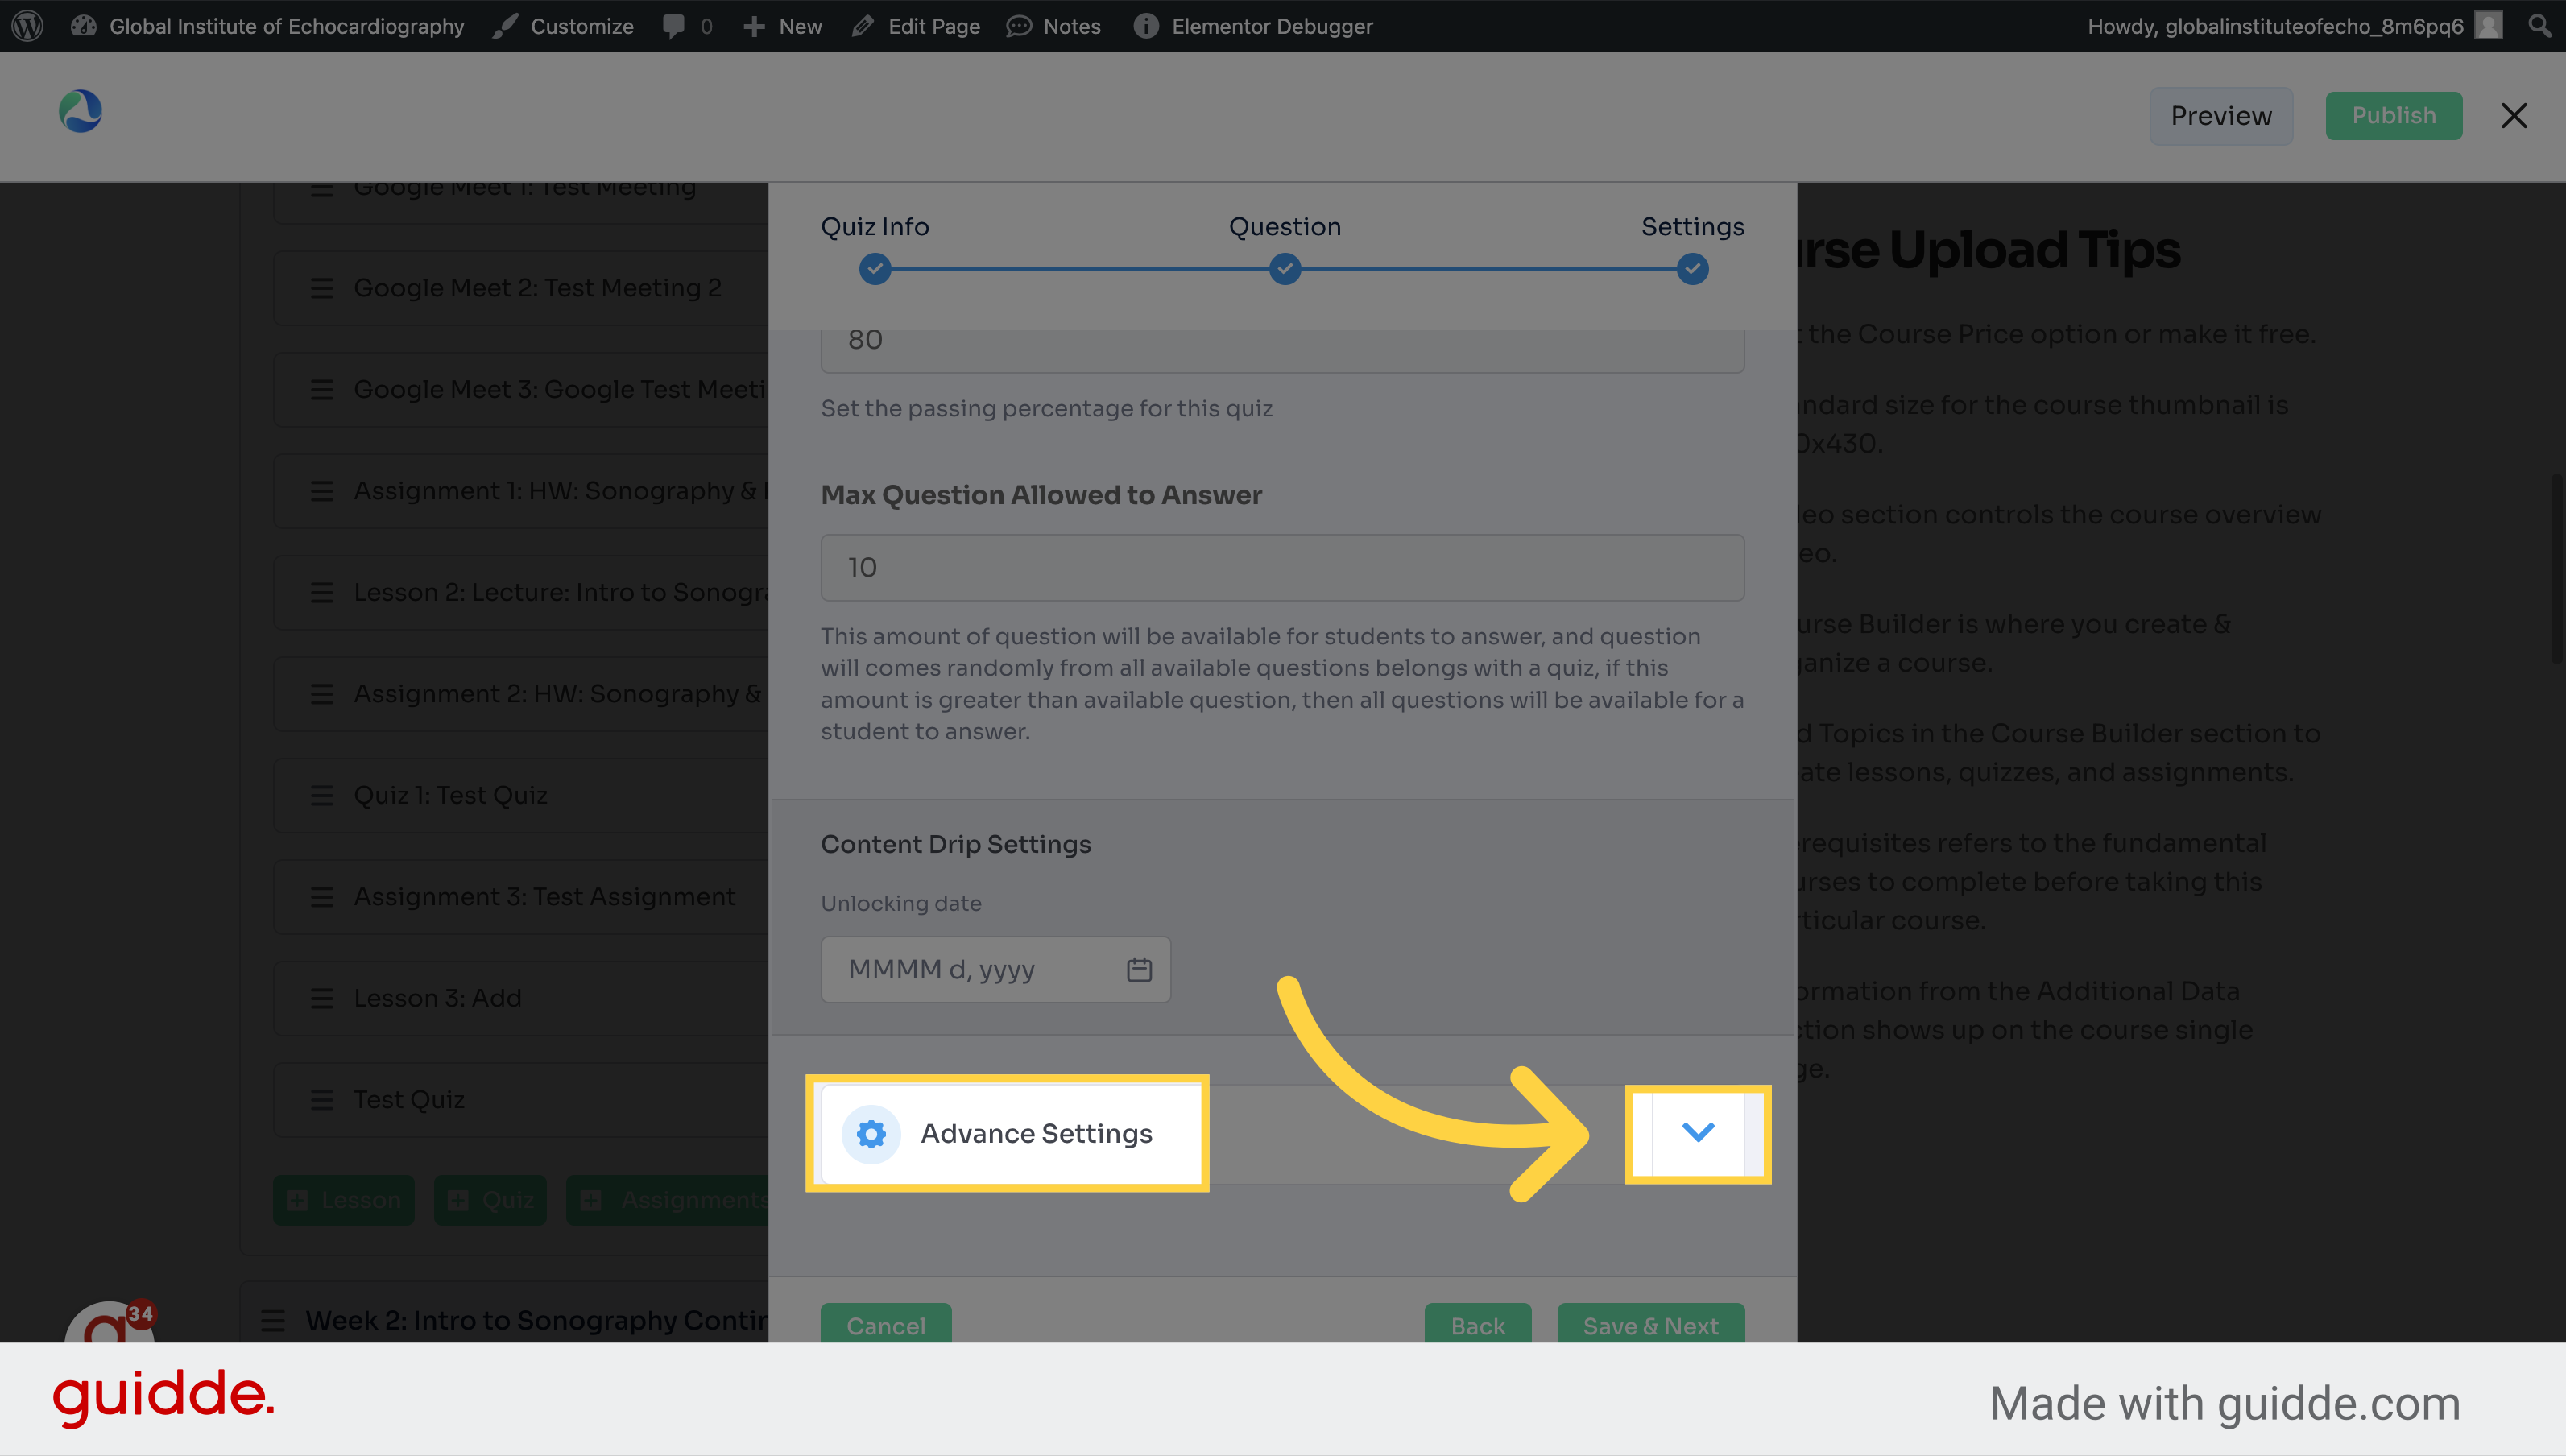
21. Click here to open 'Advanced Settings' for the test / quiz
Click the selected option
22. Choose your advanced settings
Select this field
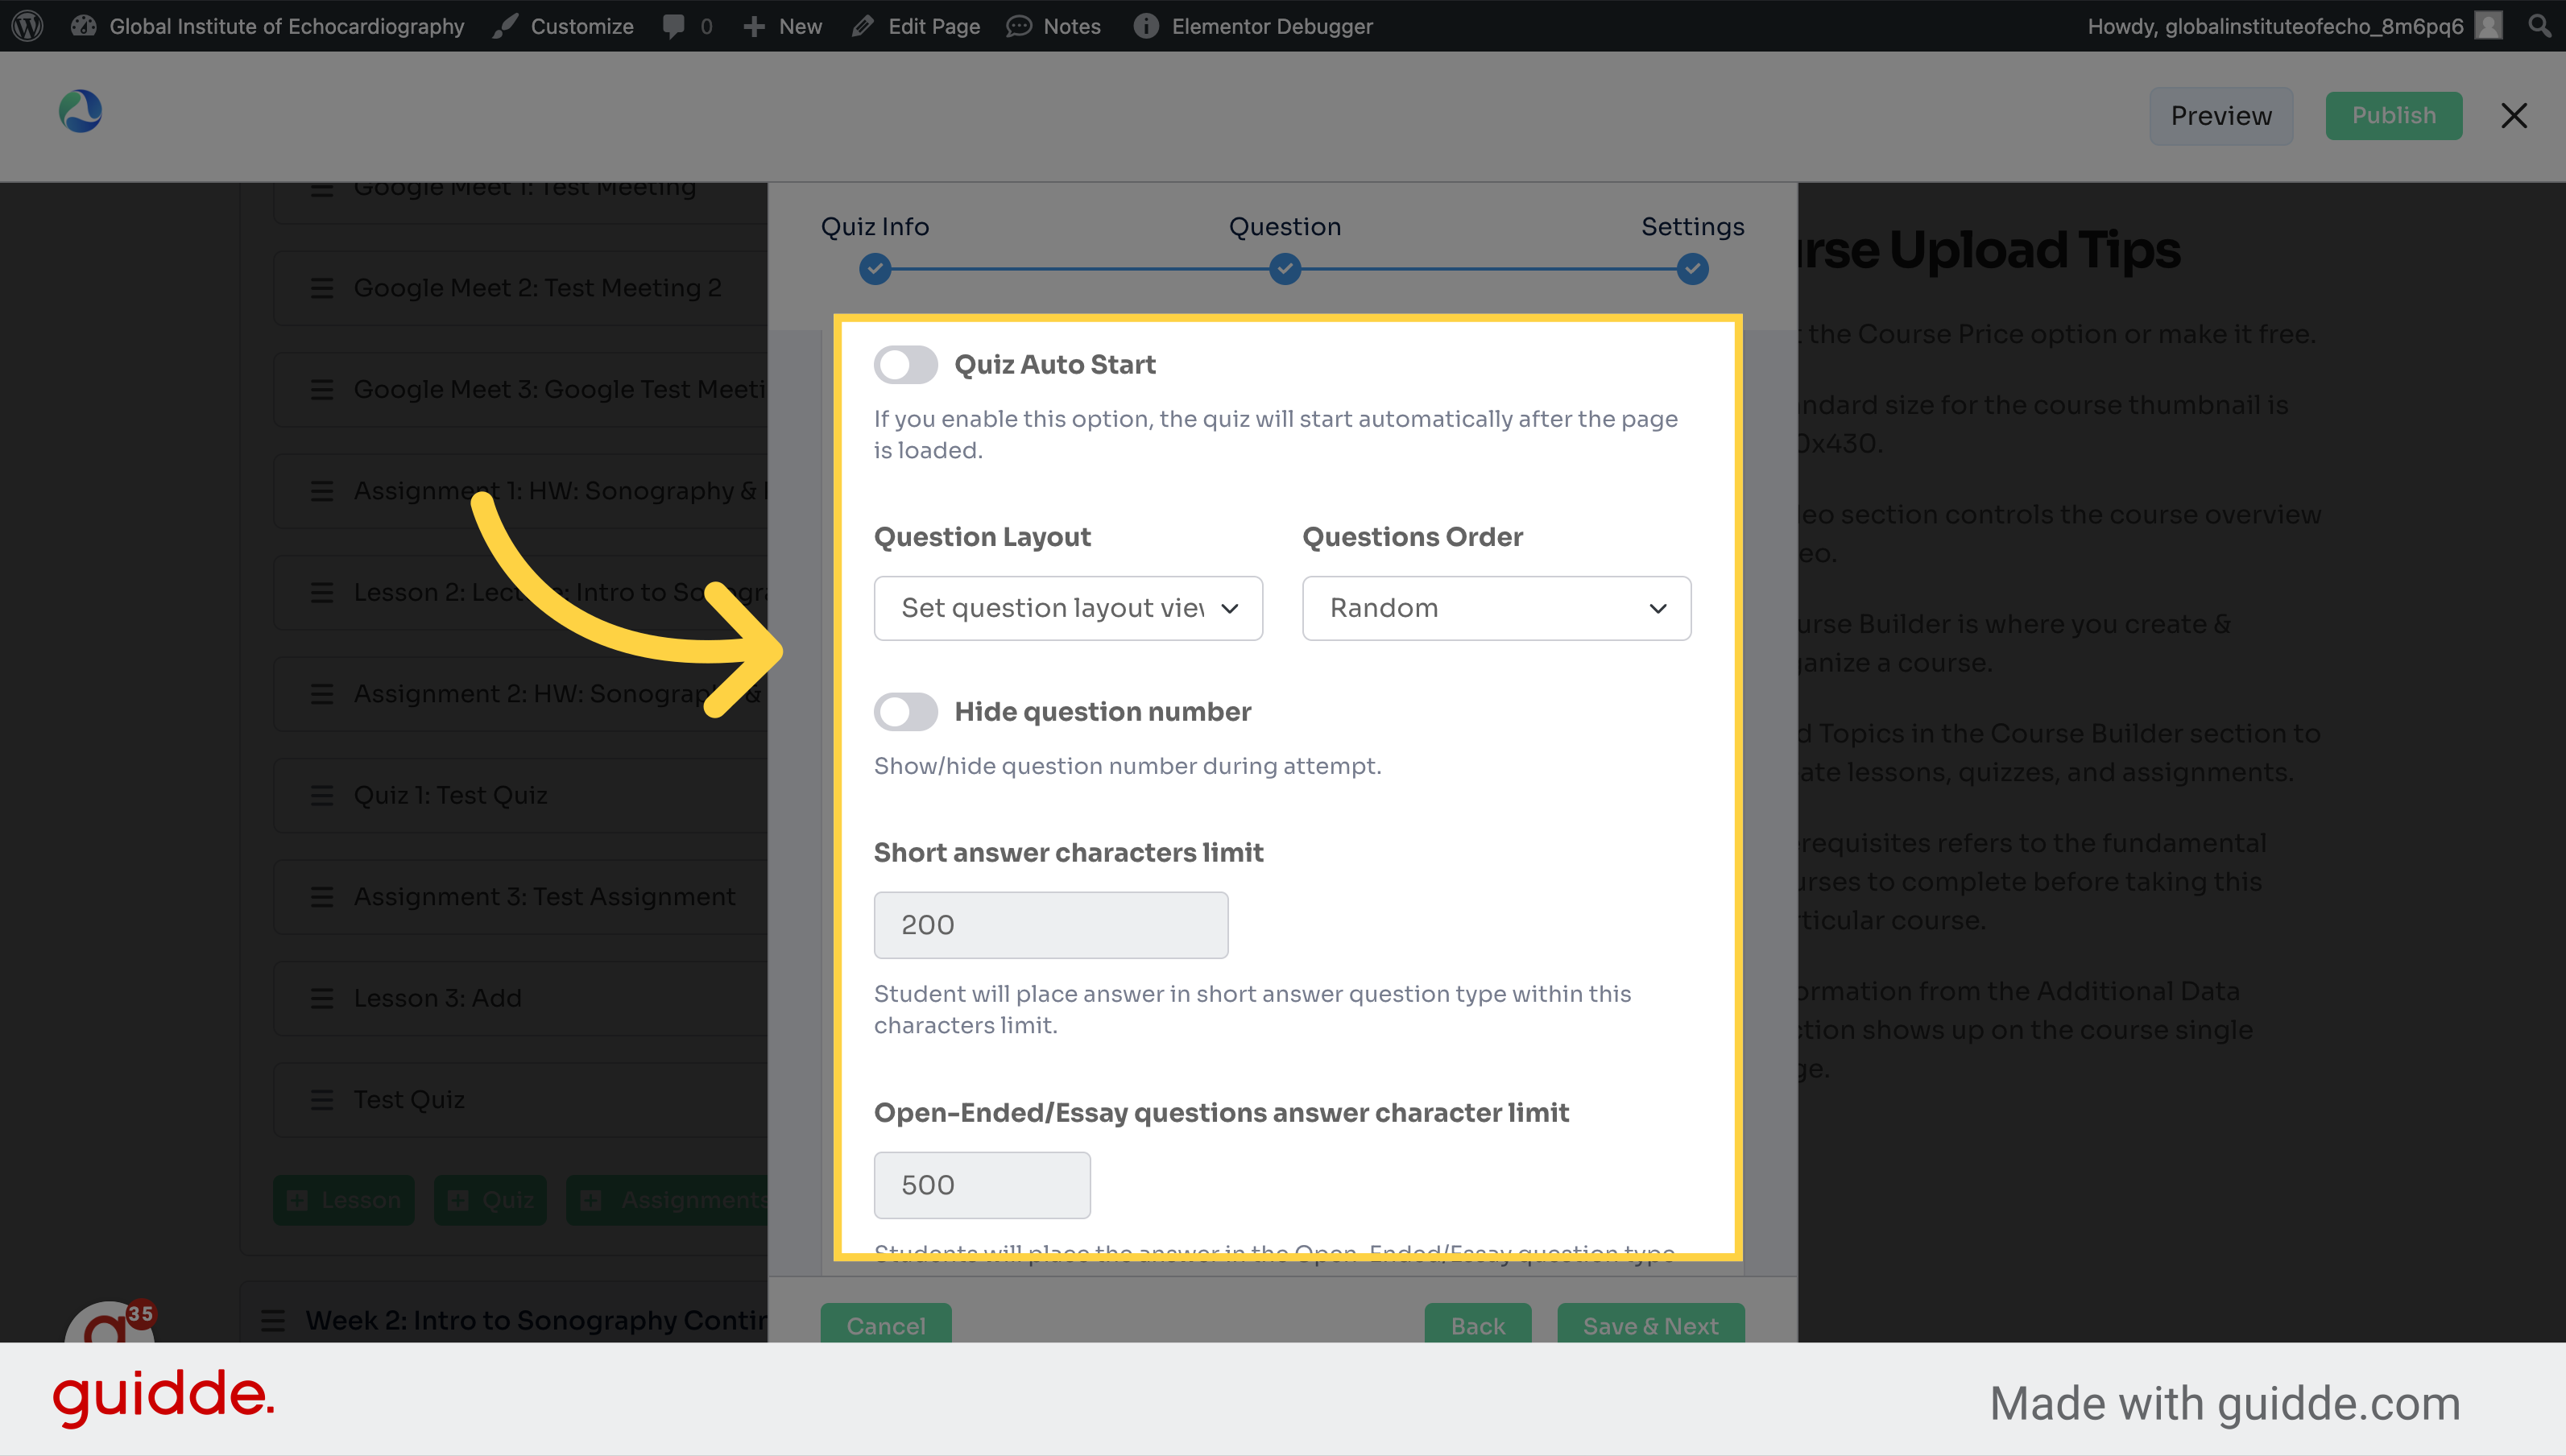
23. Click "Save & Next"
Proceed to the next step.
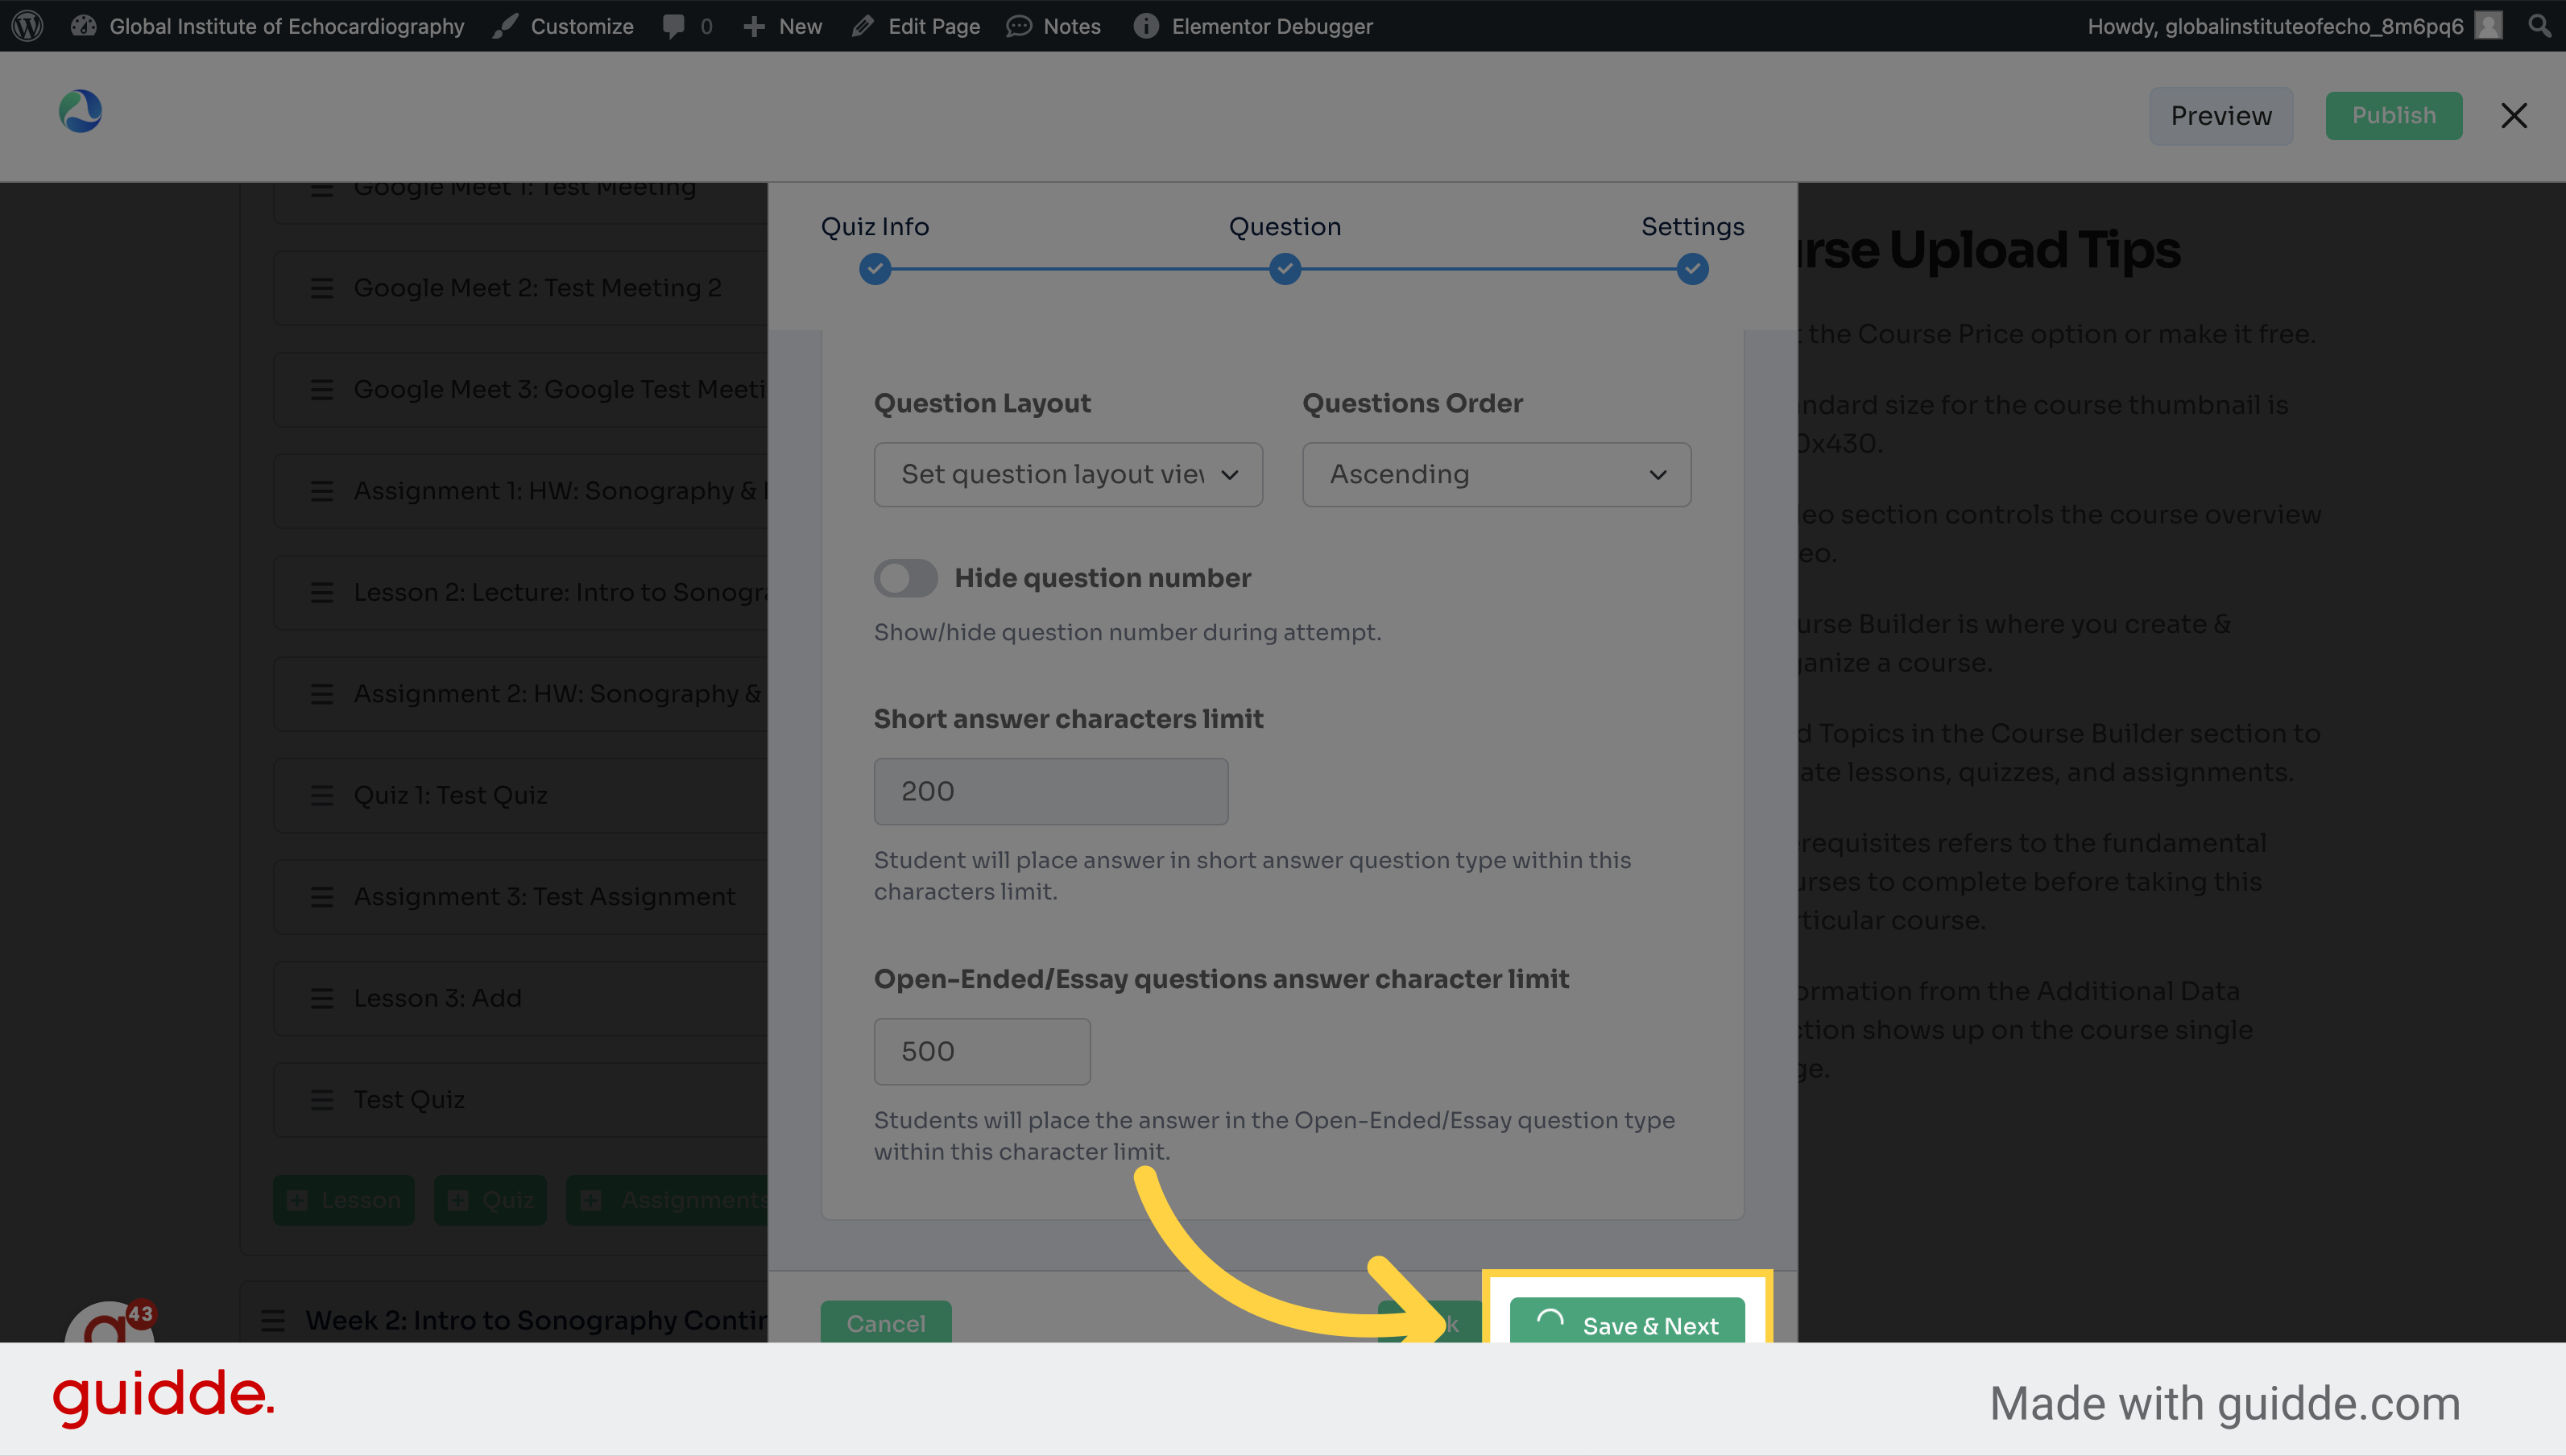
24. Click "publish_course"
Publish the quiz.
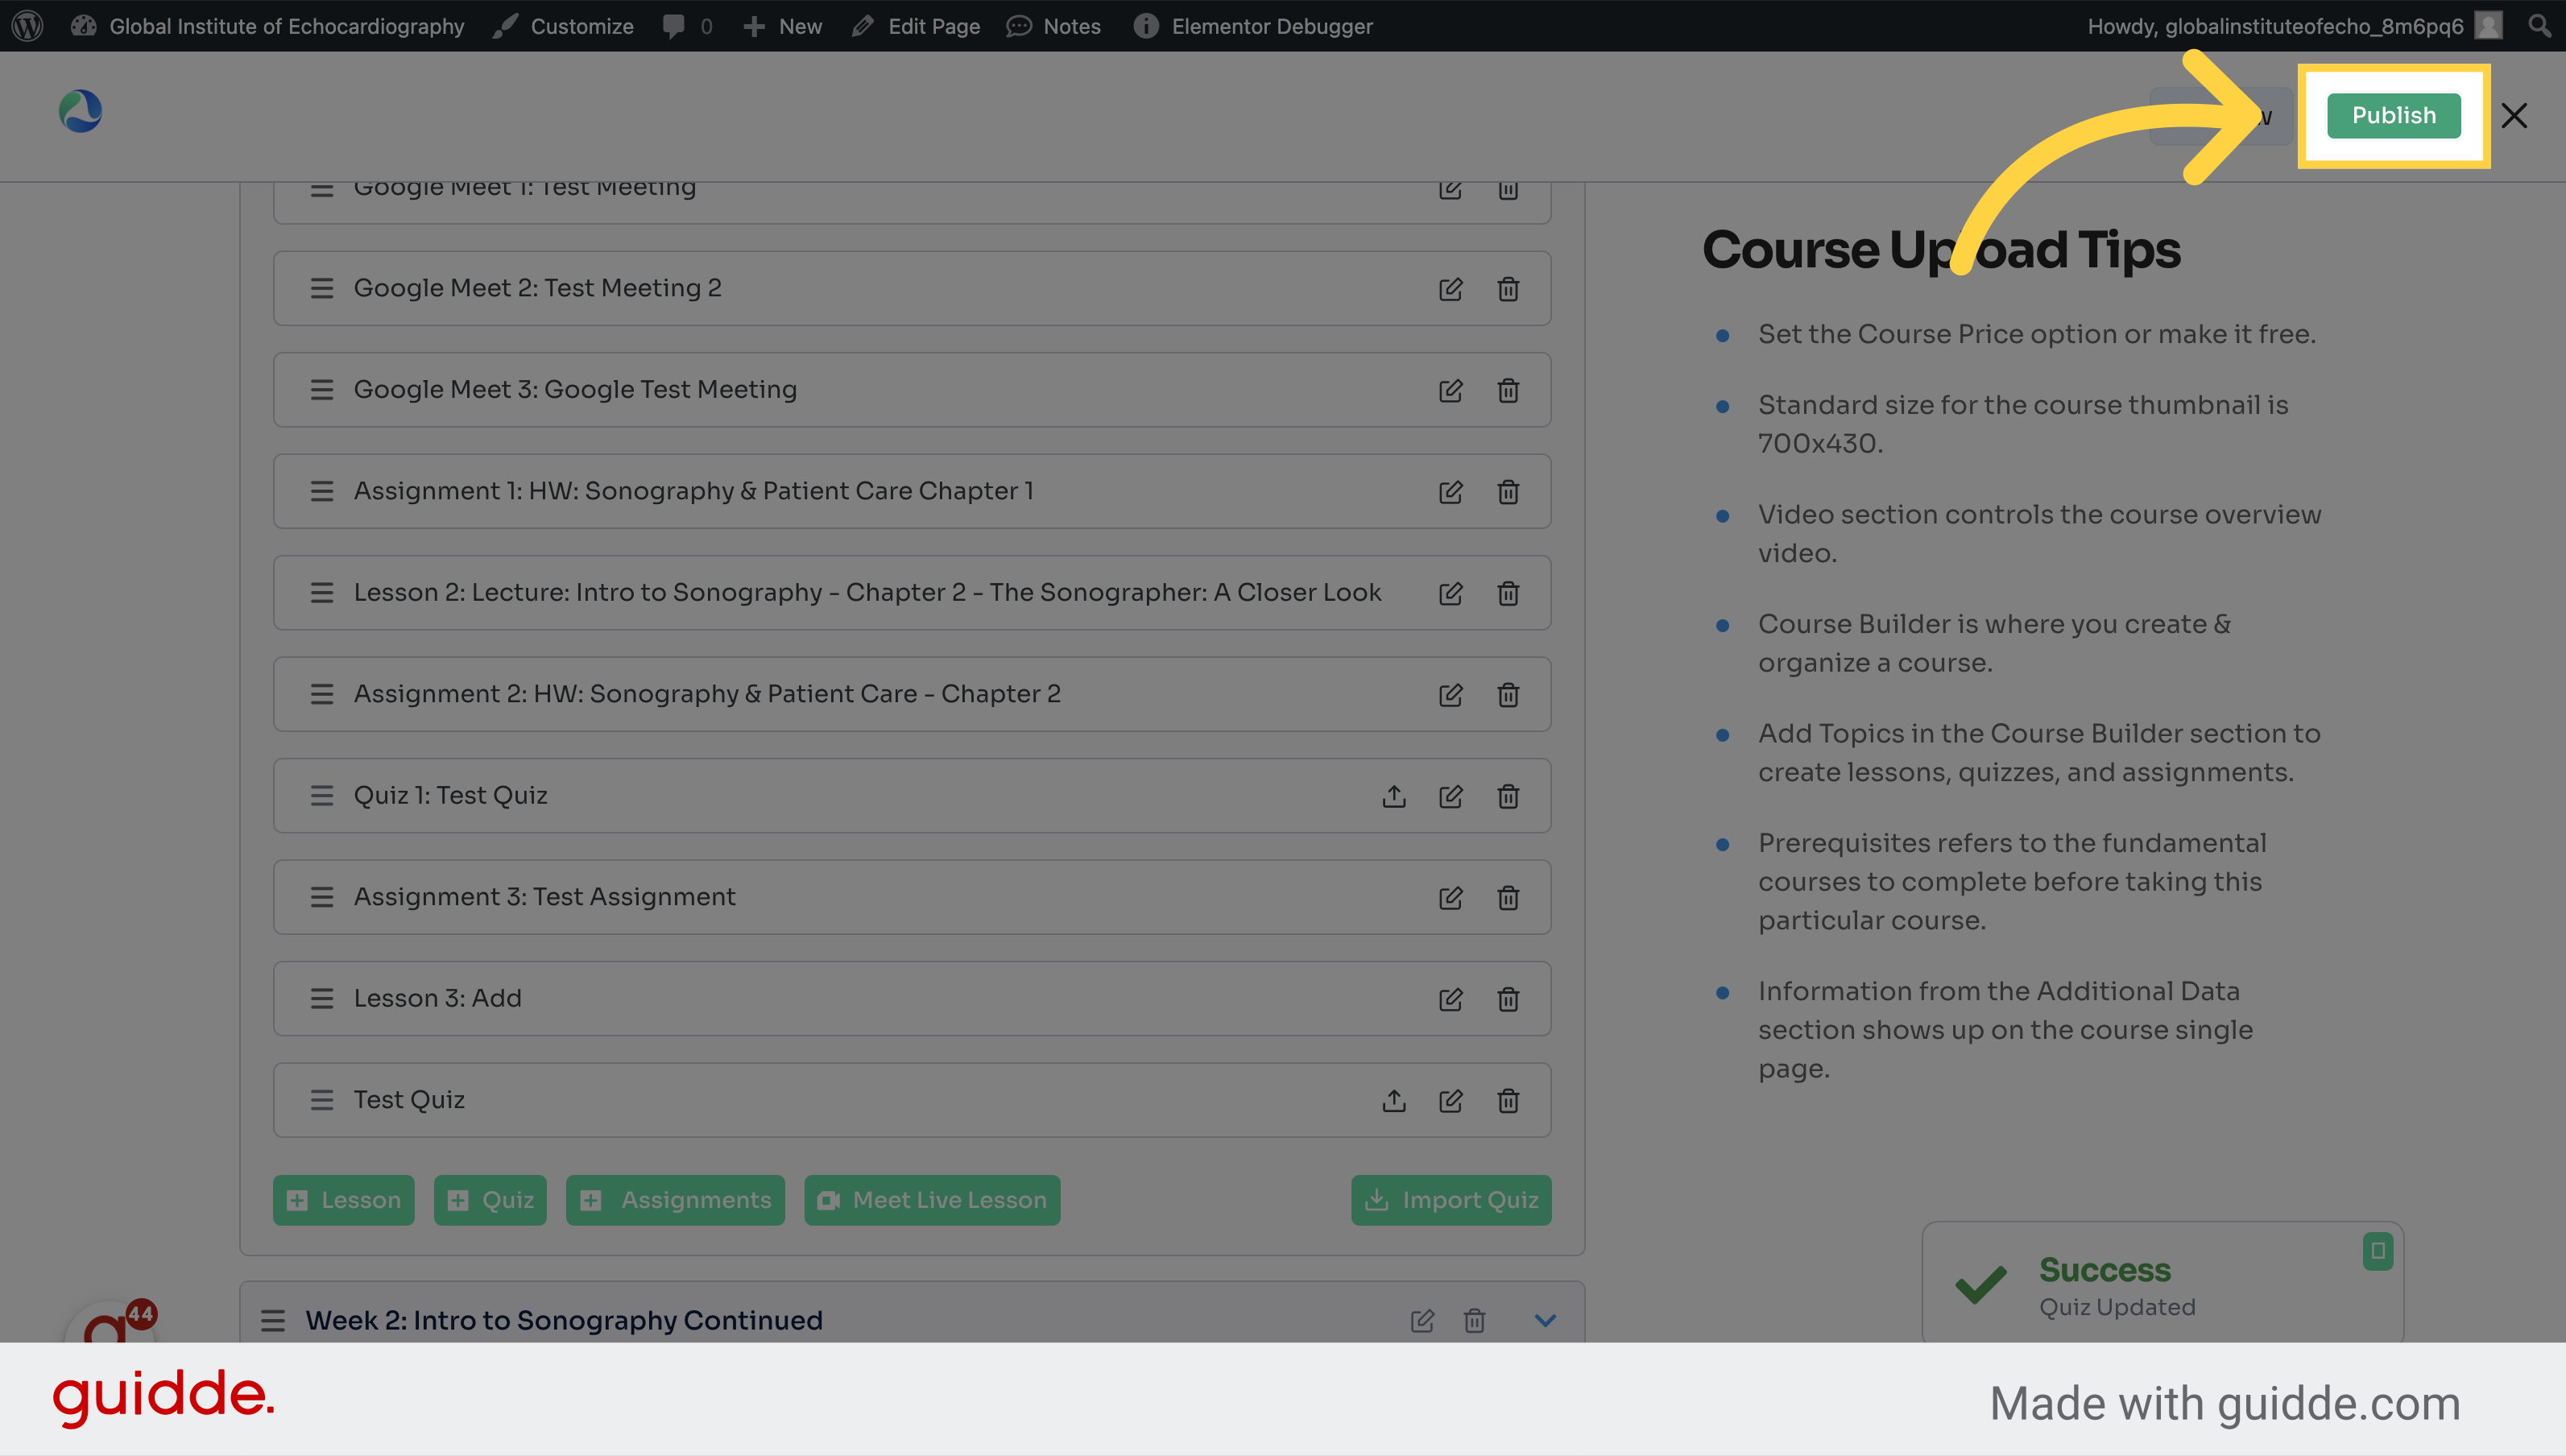
25. Click here
Navigate to this section

This guide covered the process of adding a quiz to your courses, from naming the quiz to setting question details and publishing it for your employees' training needs.
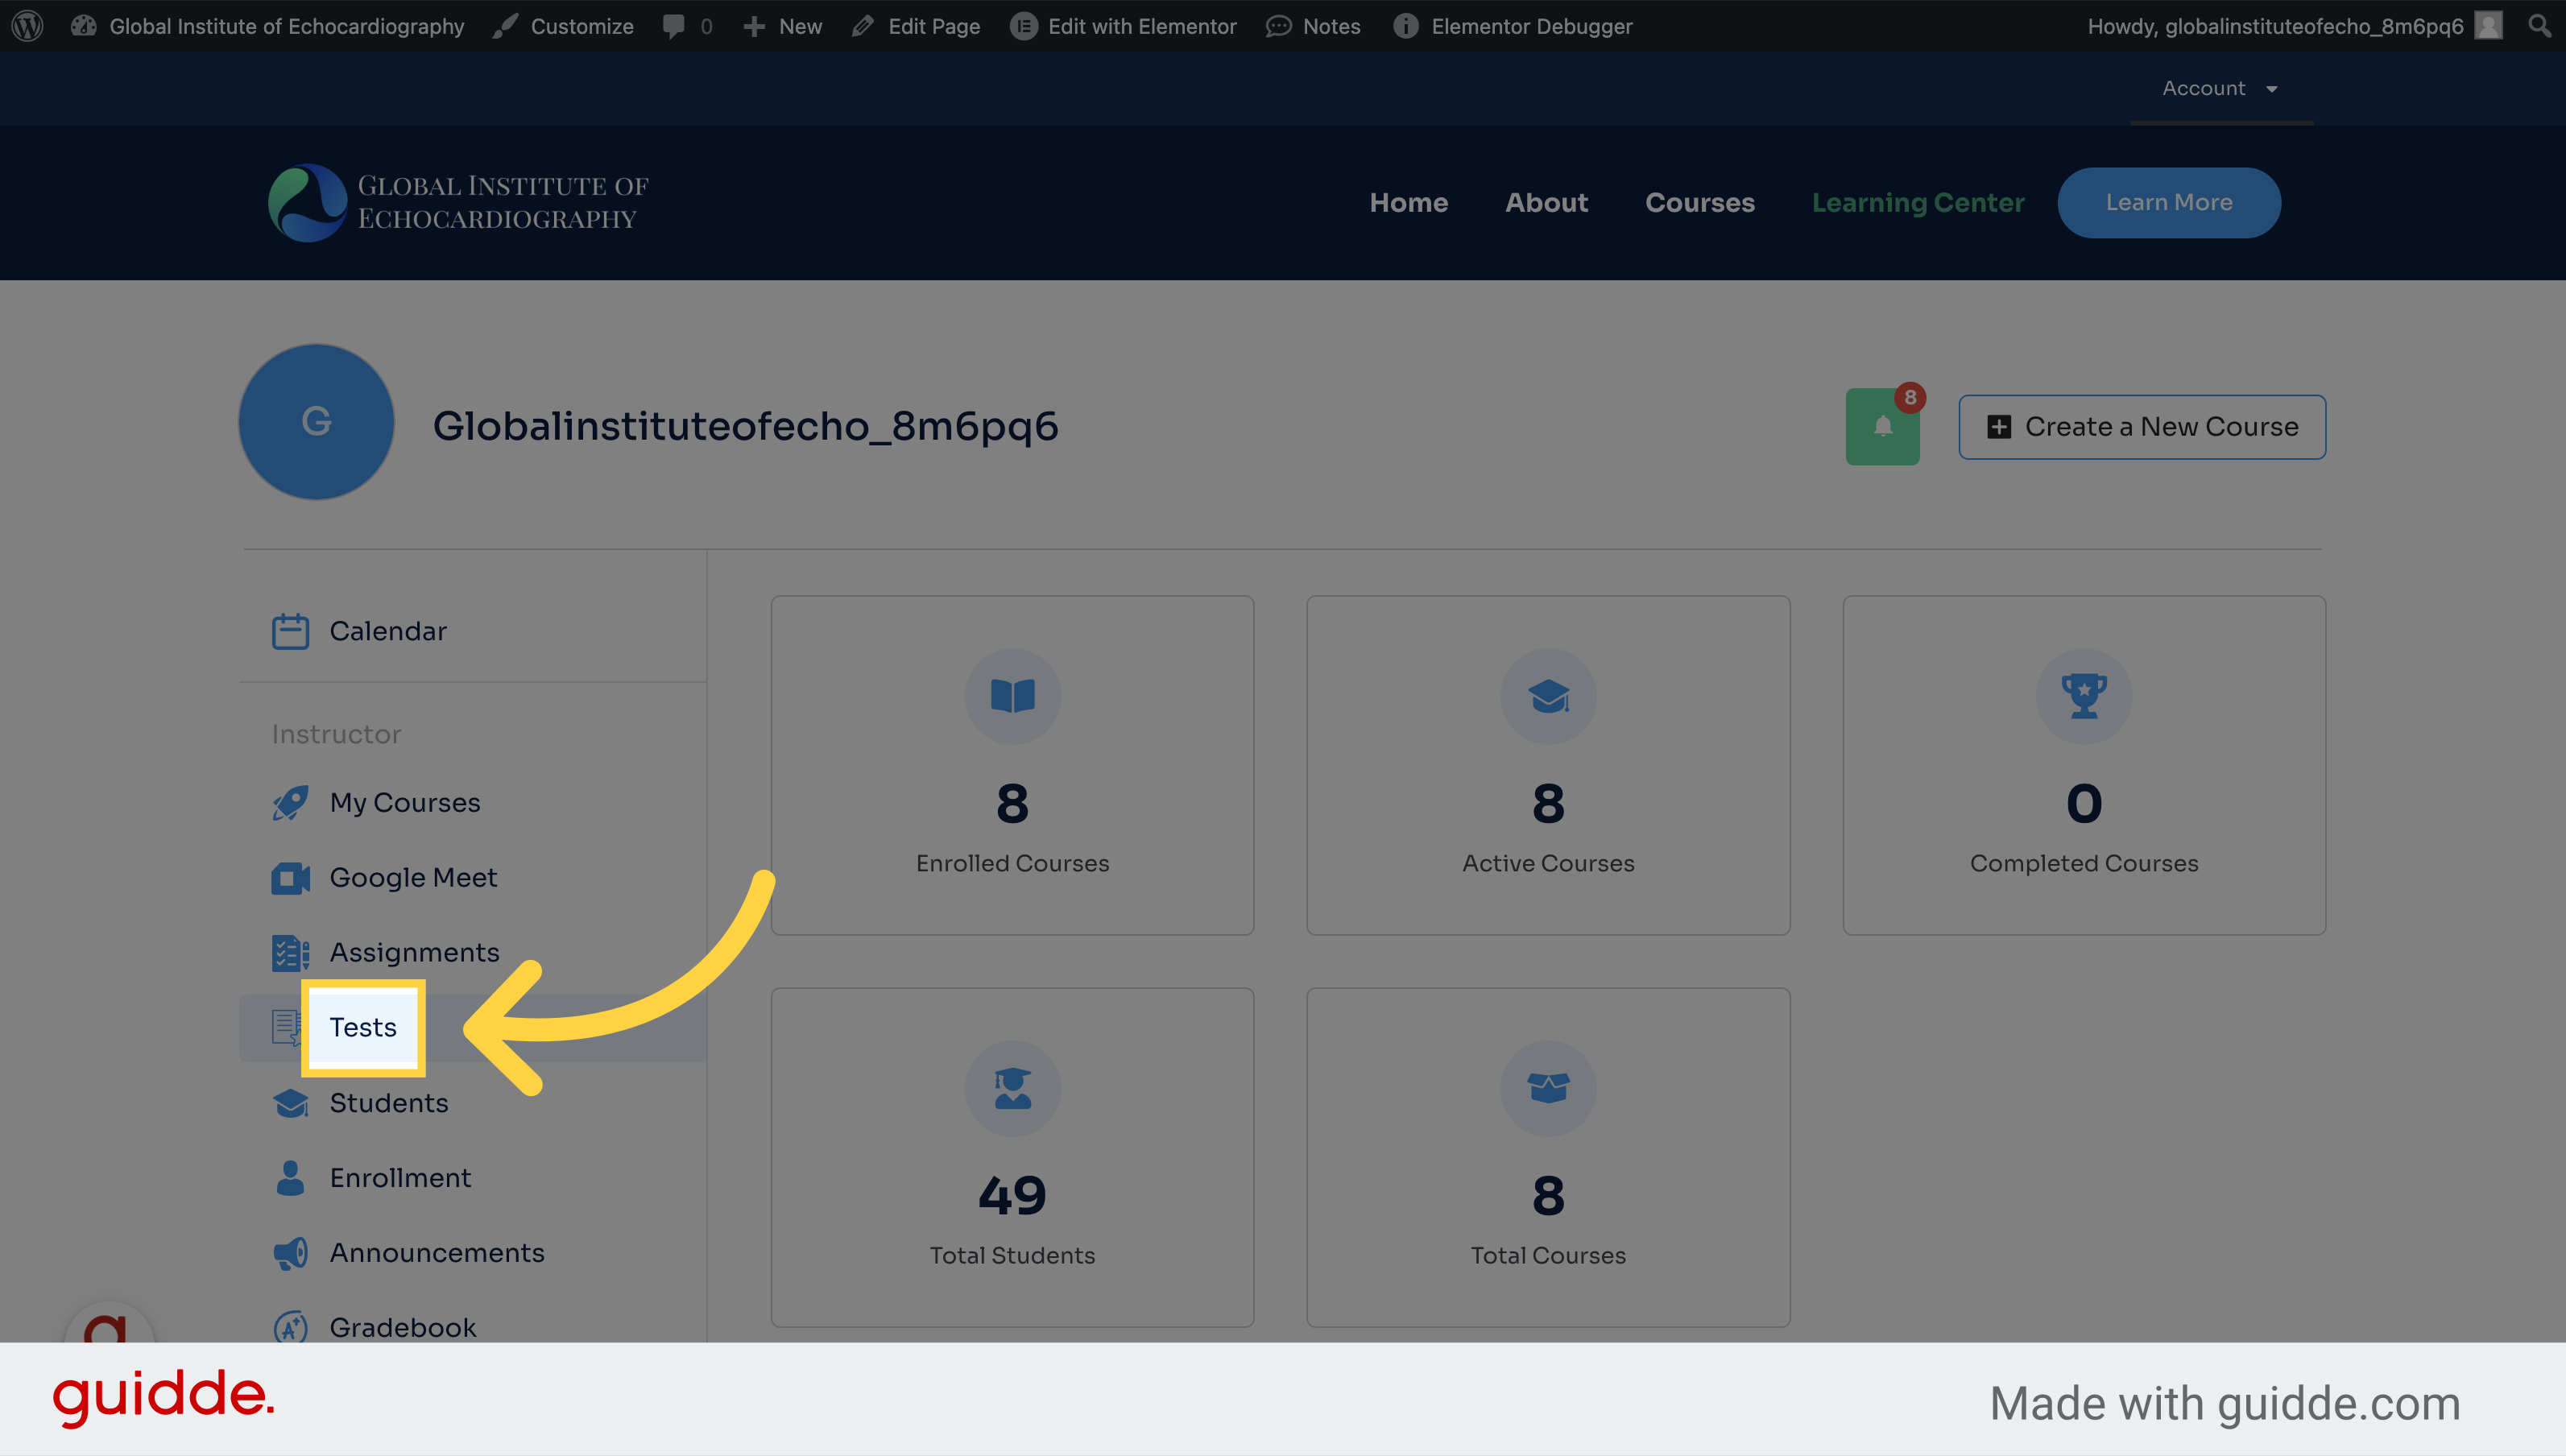
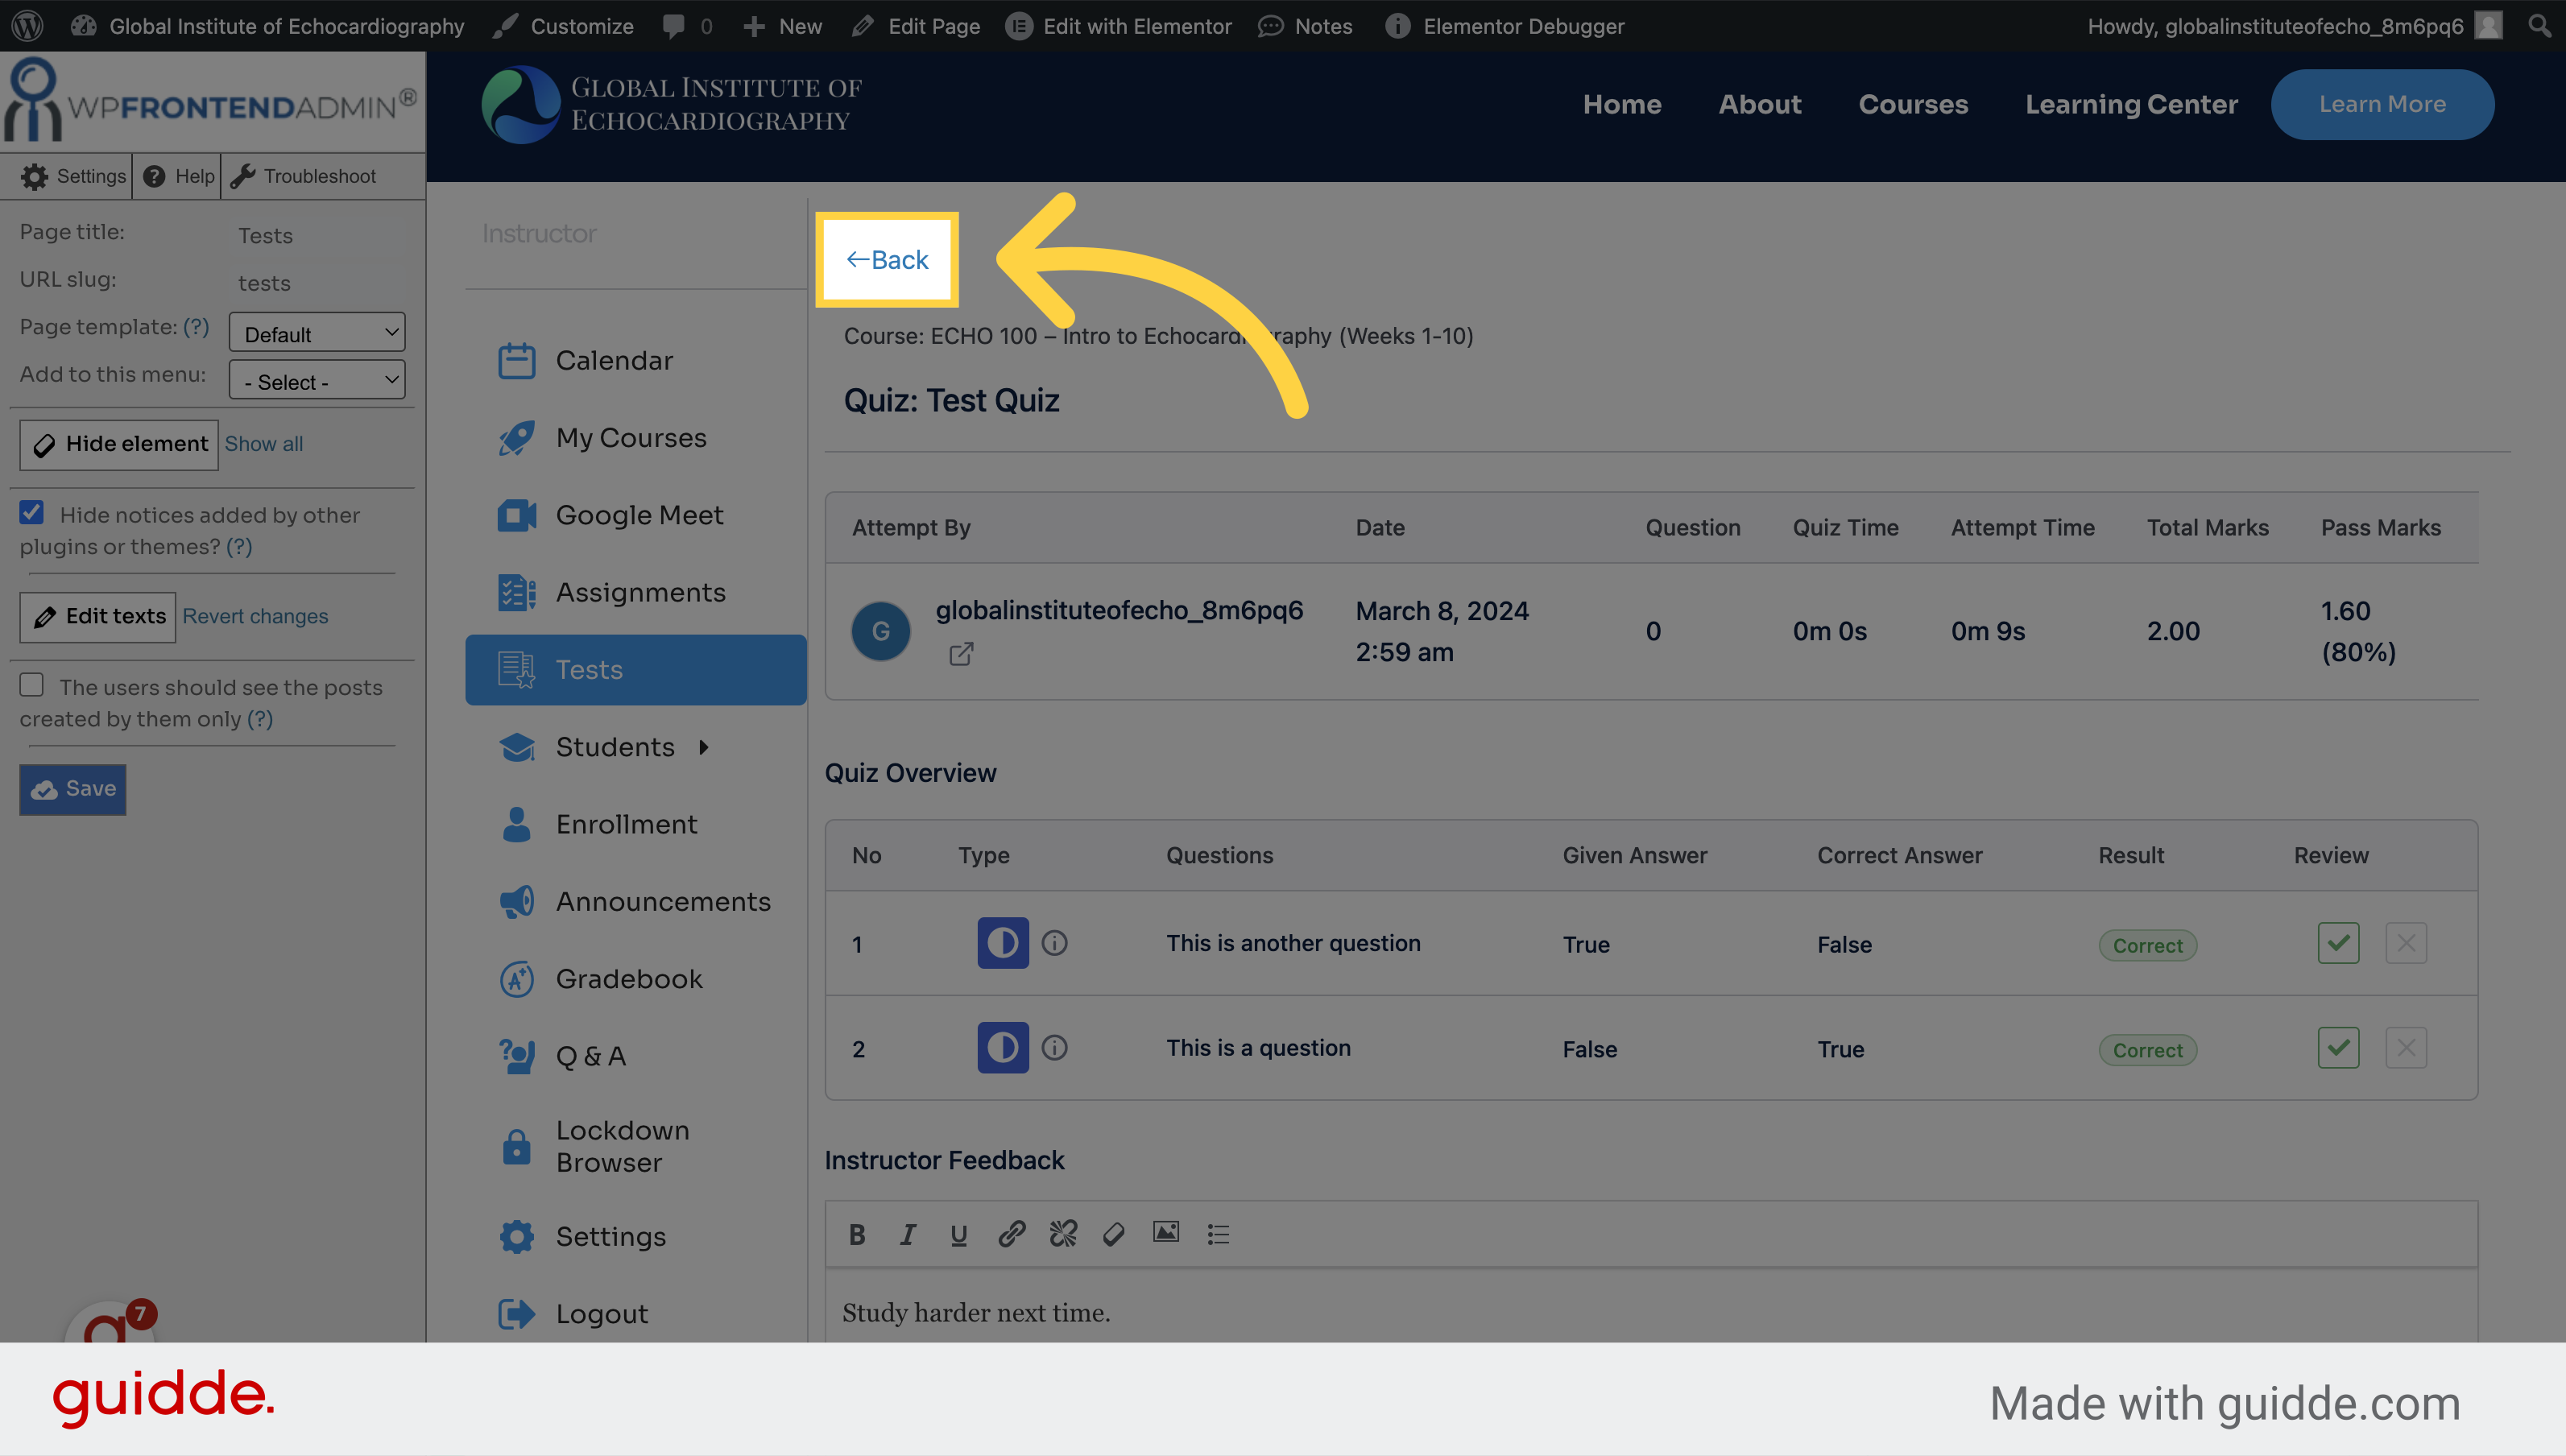
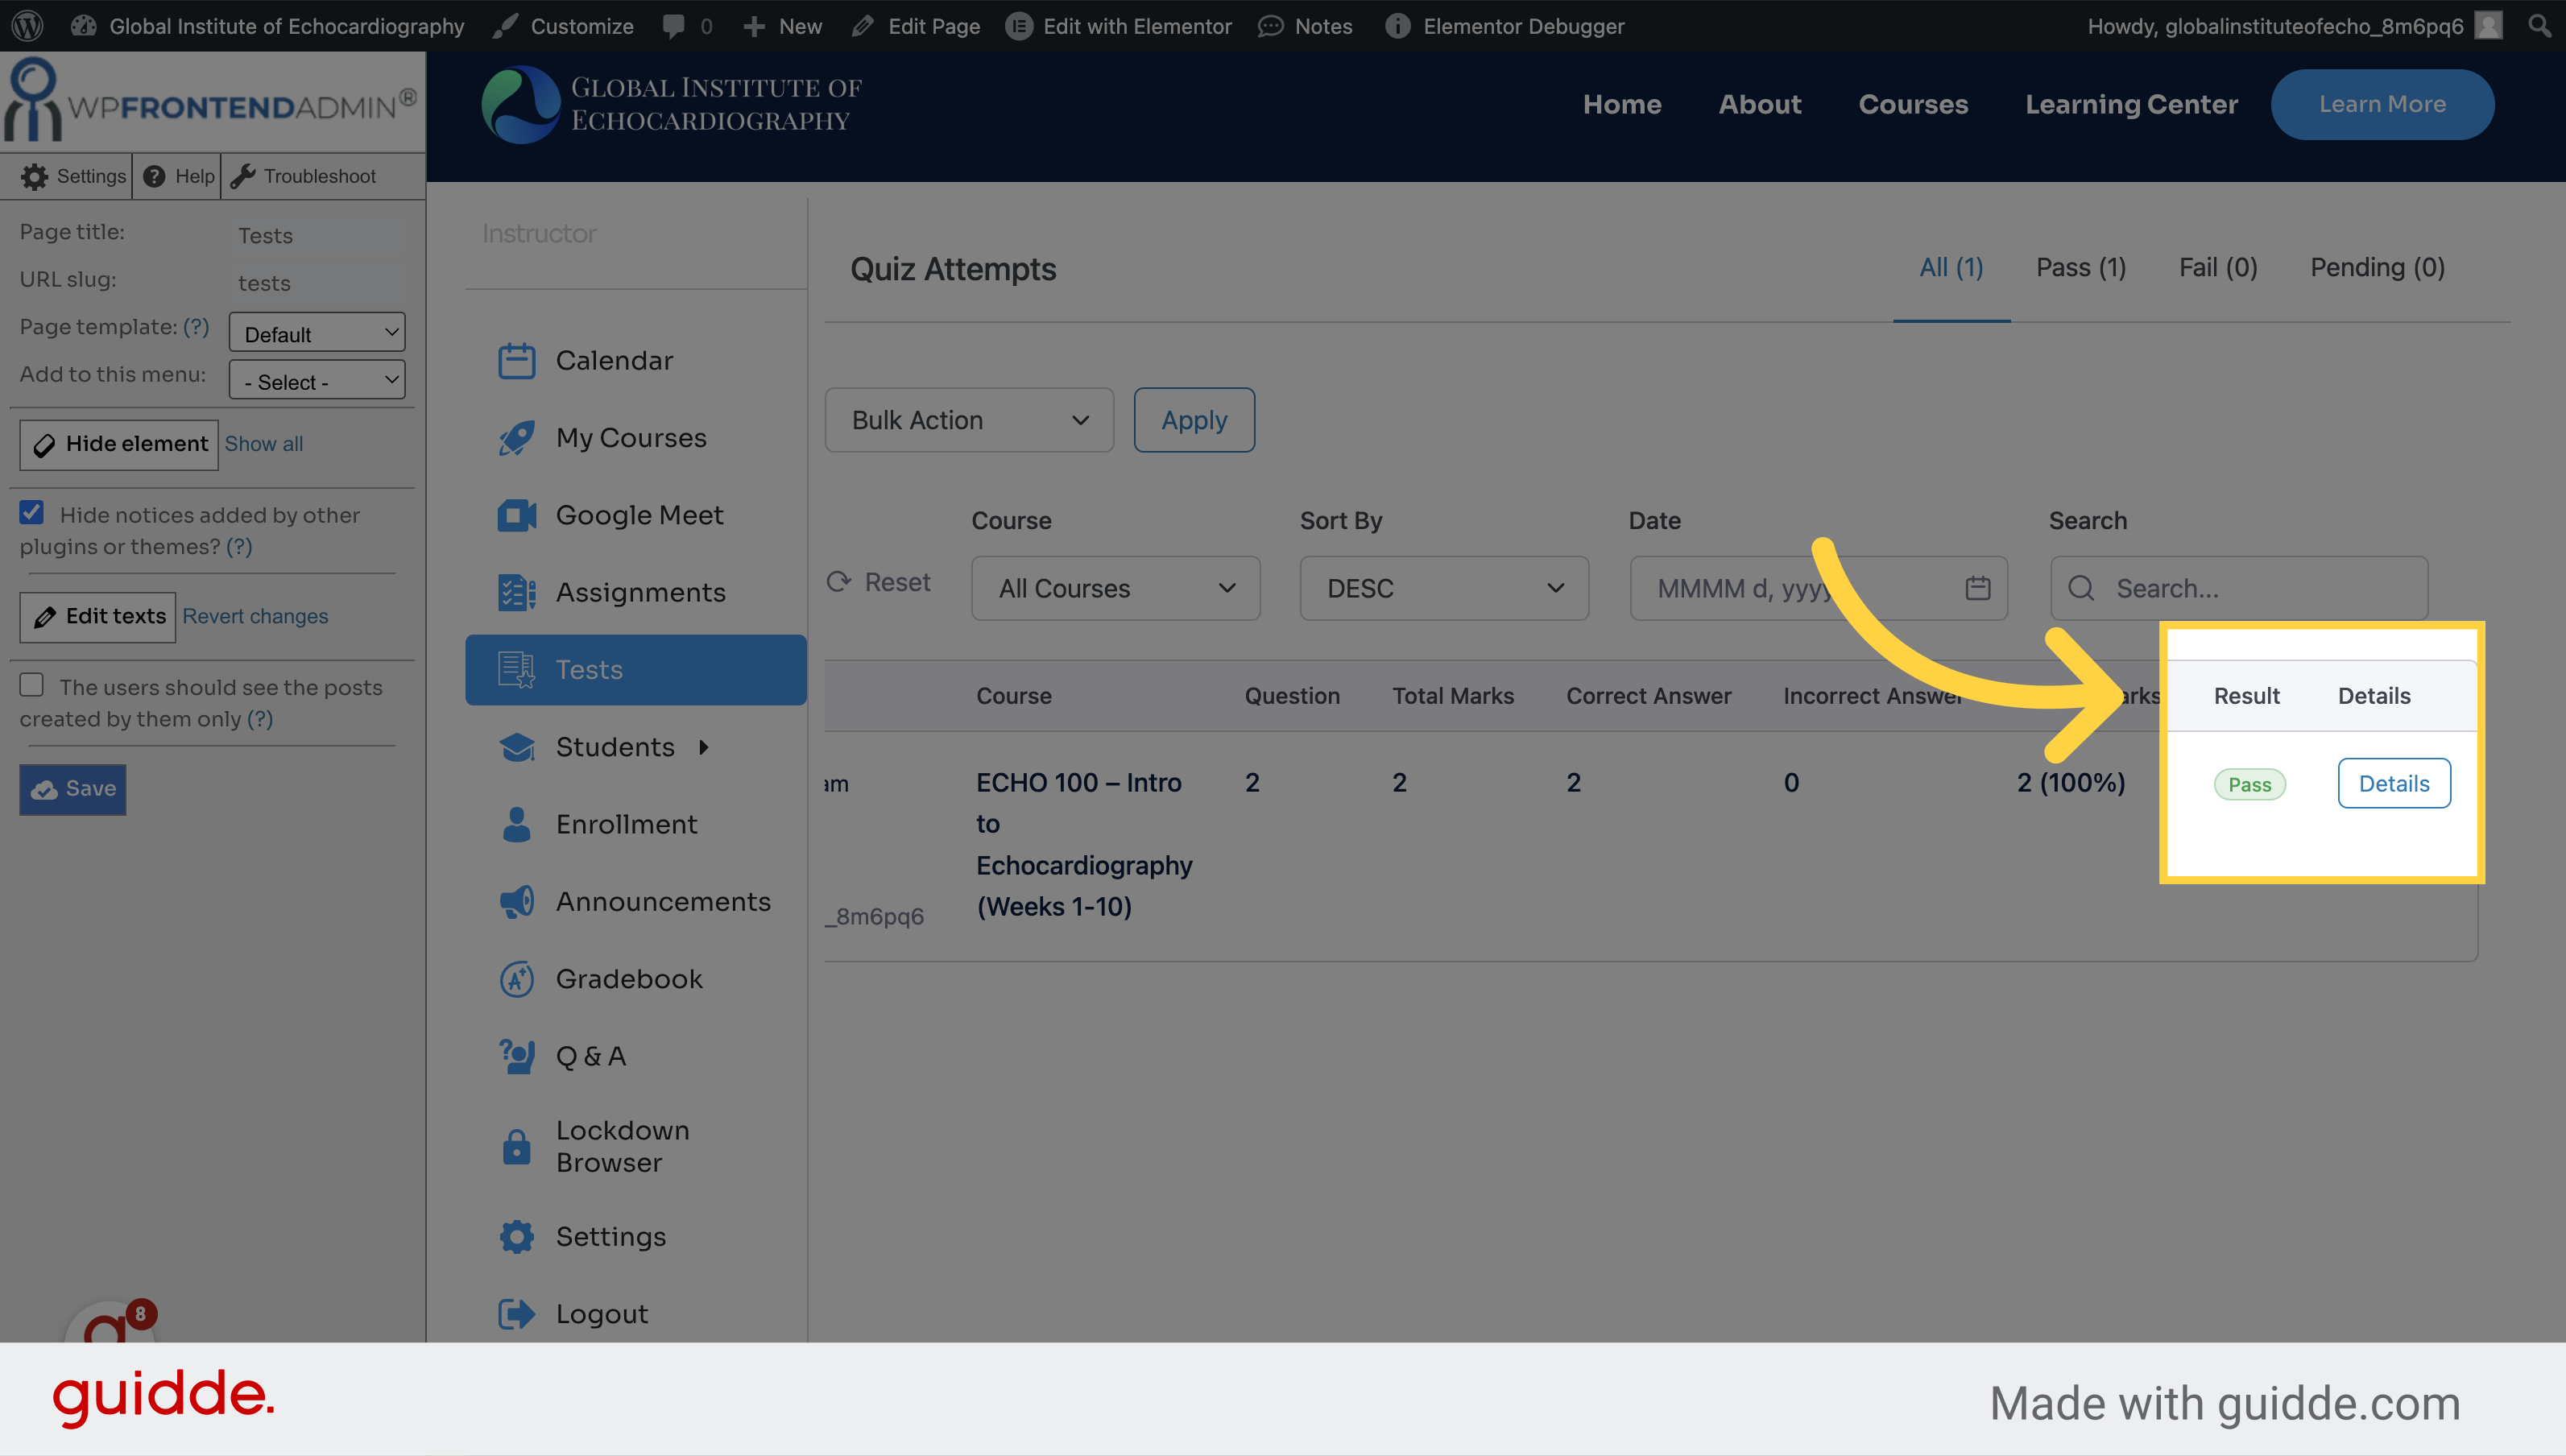
How to View and Grade Tests
Explore the process of viewing and grading tests effortlessly within the LMS platform. From accessing test details to providing feedback and updating results, this guide will navigate you through seamless employee training procedures.
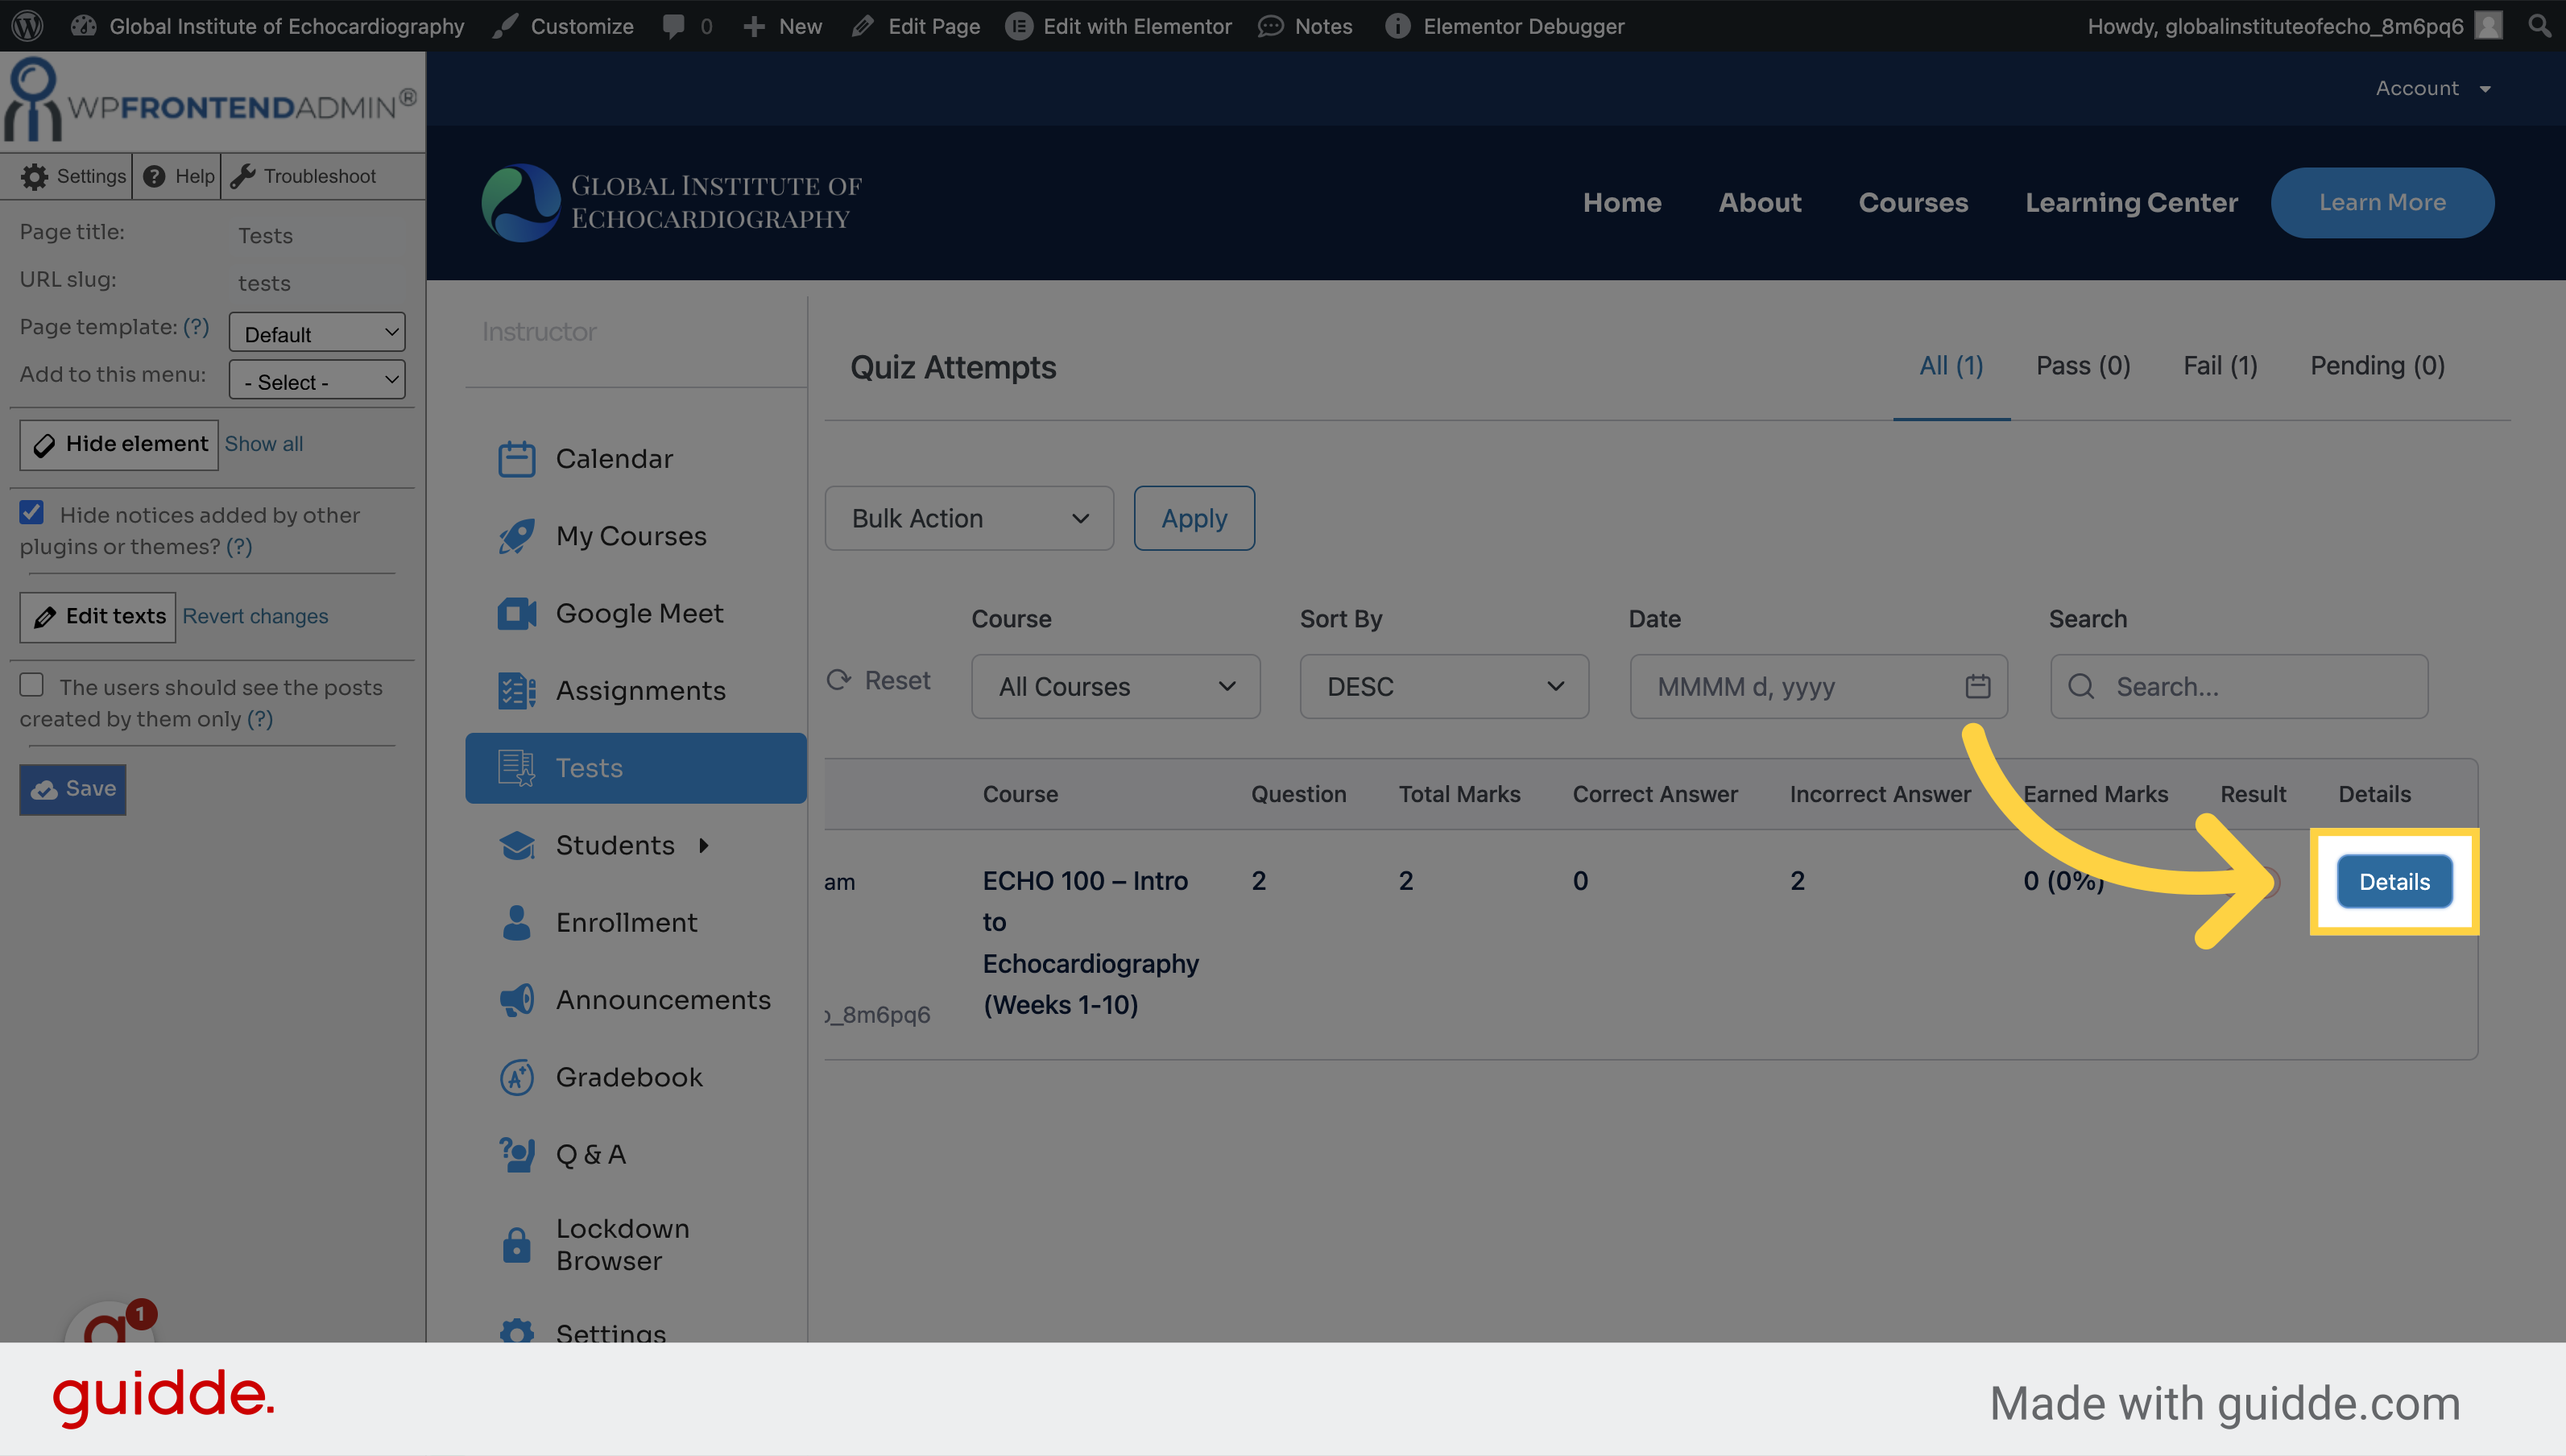
1. Click "Tests" from your dashboard
Access the tests section.
2. Click "Details"
View detailed test information.
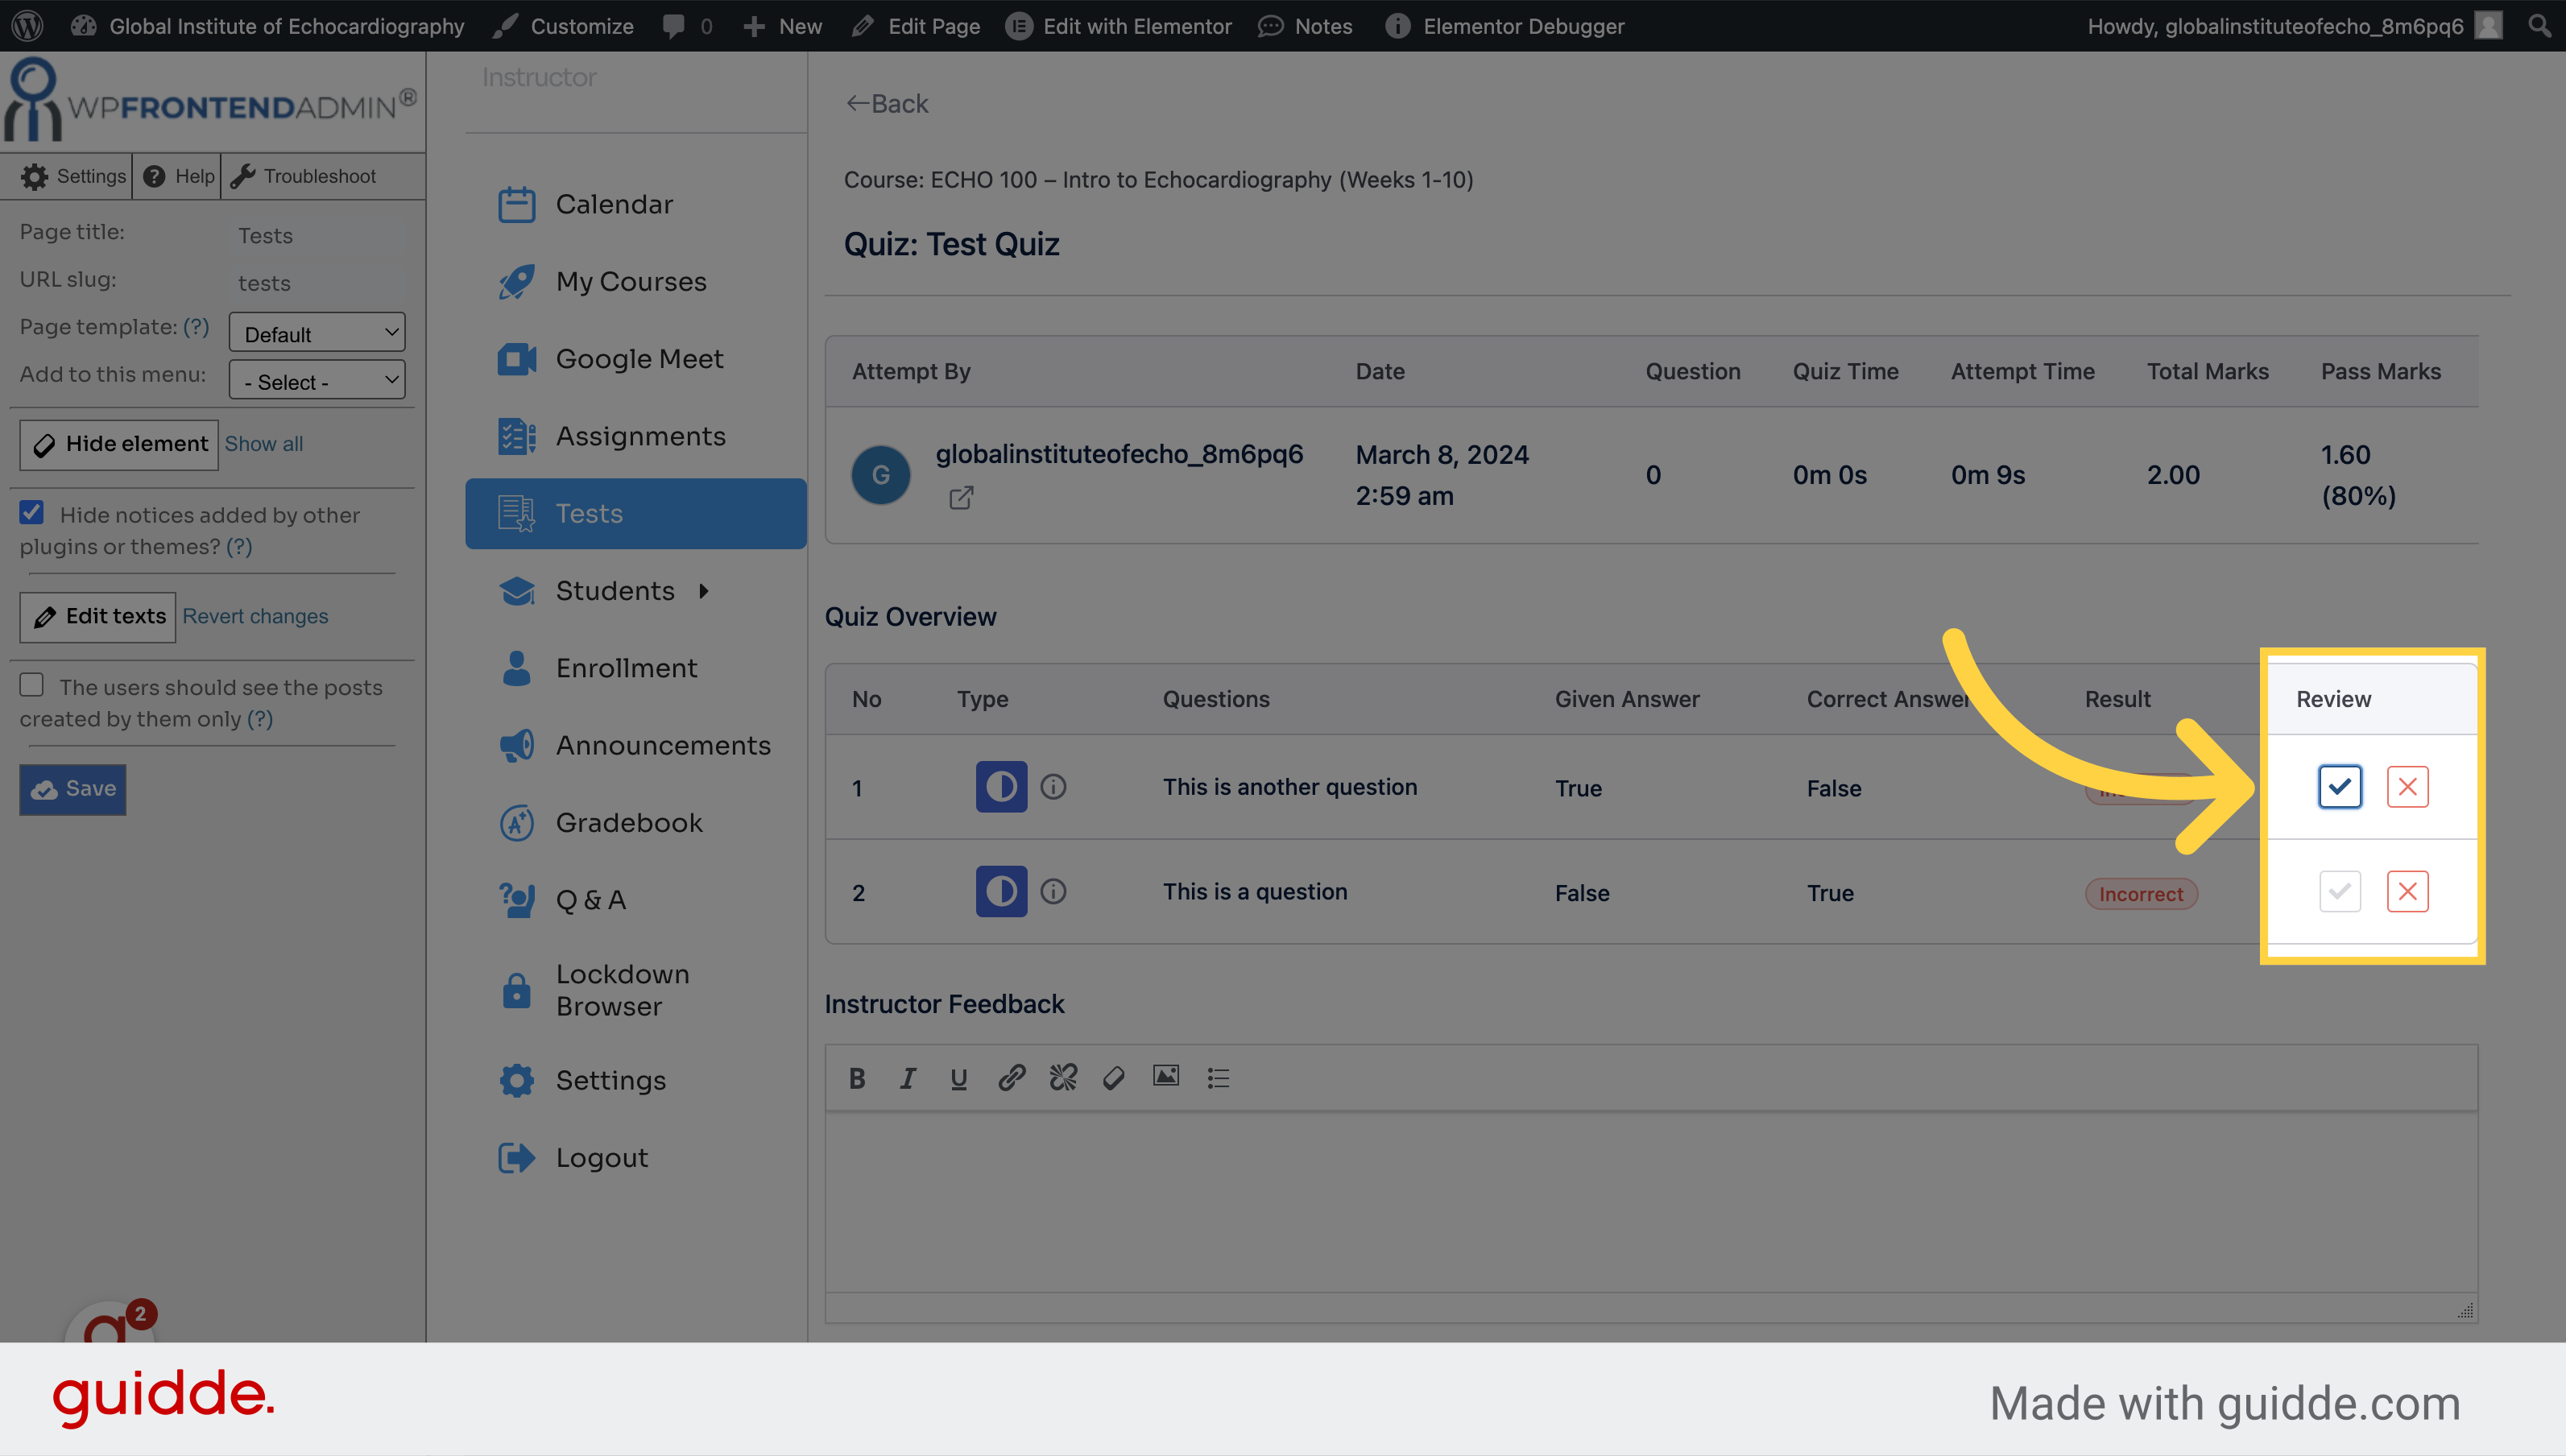
3. Click here to change the result of an answer
Click here
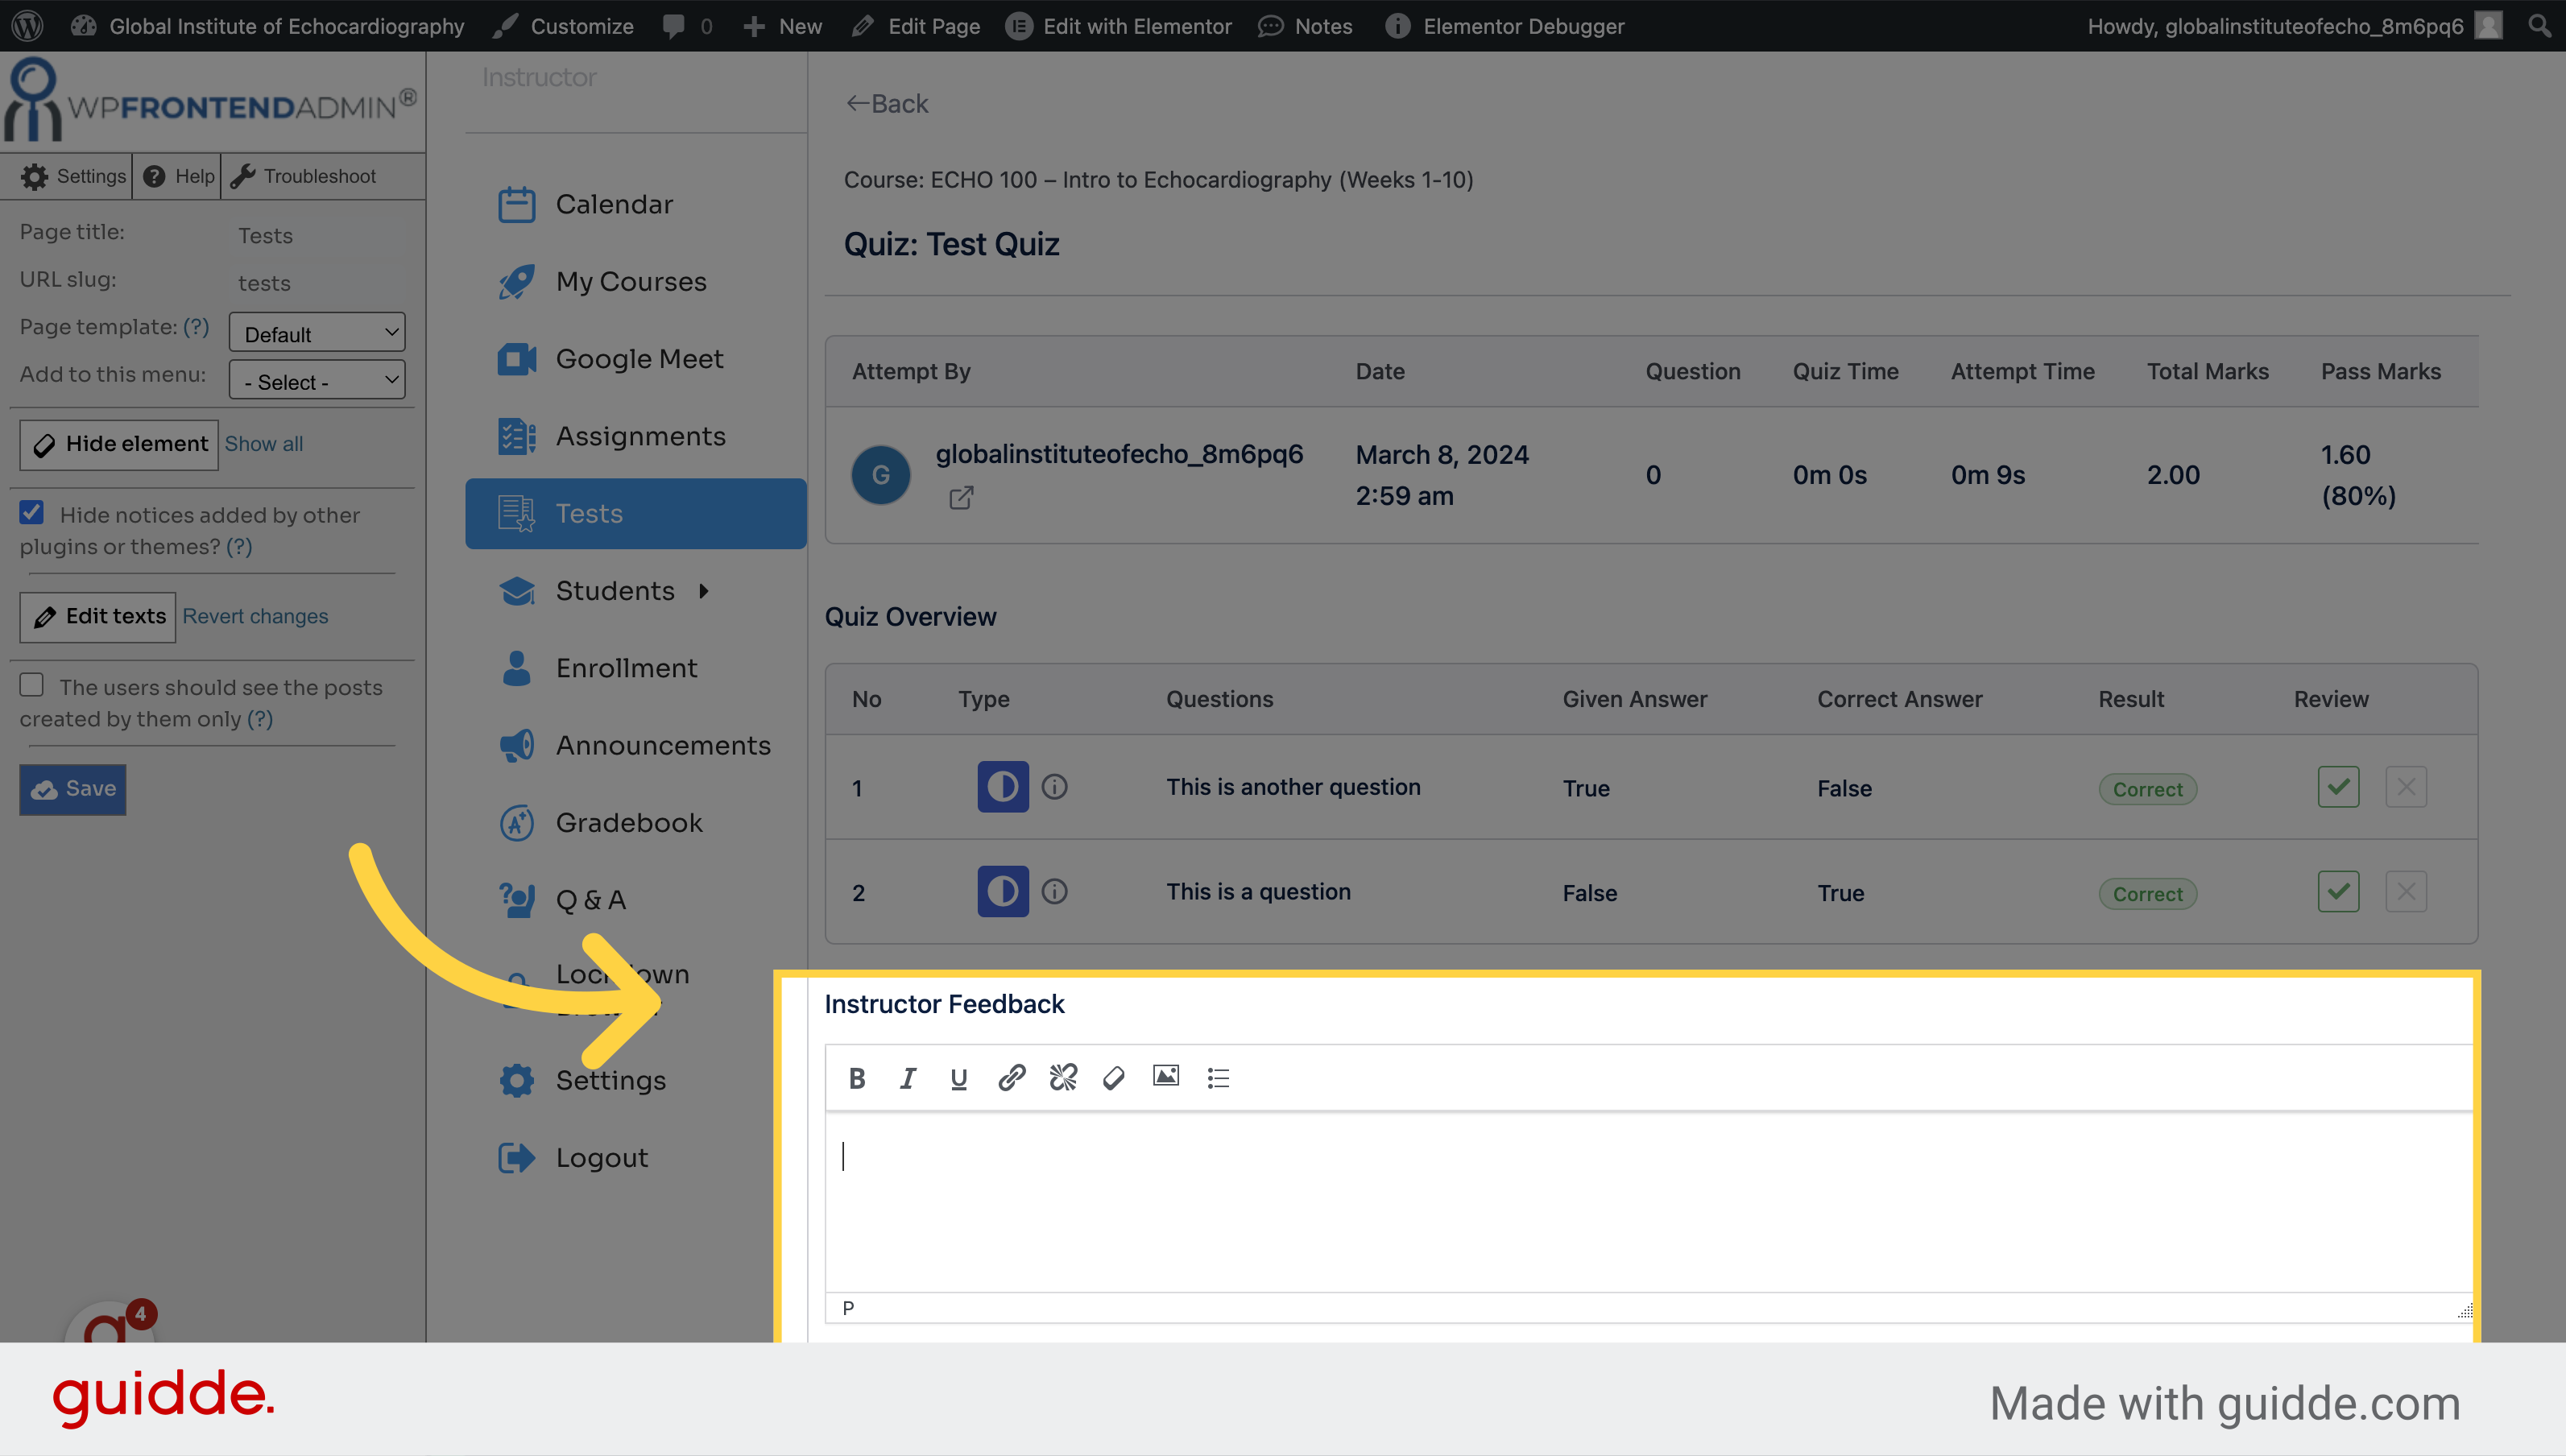
4. Insert feedback here
Perform a specific action by clicking on this element.
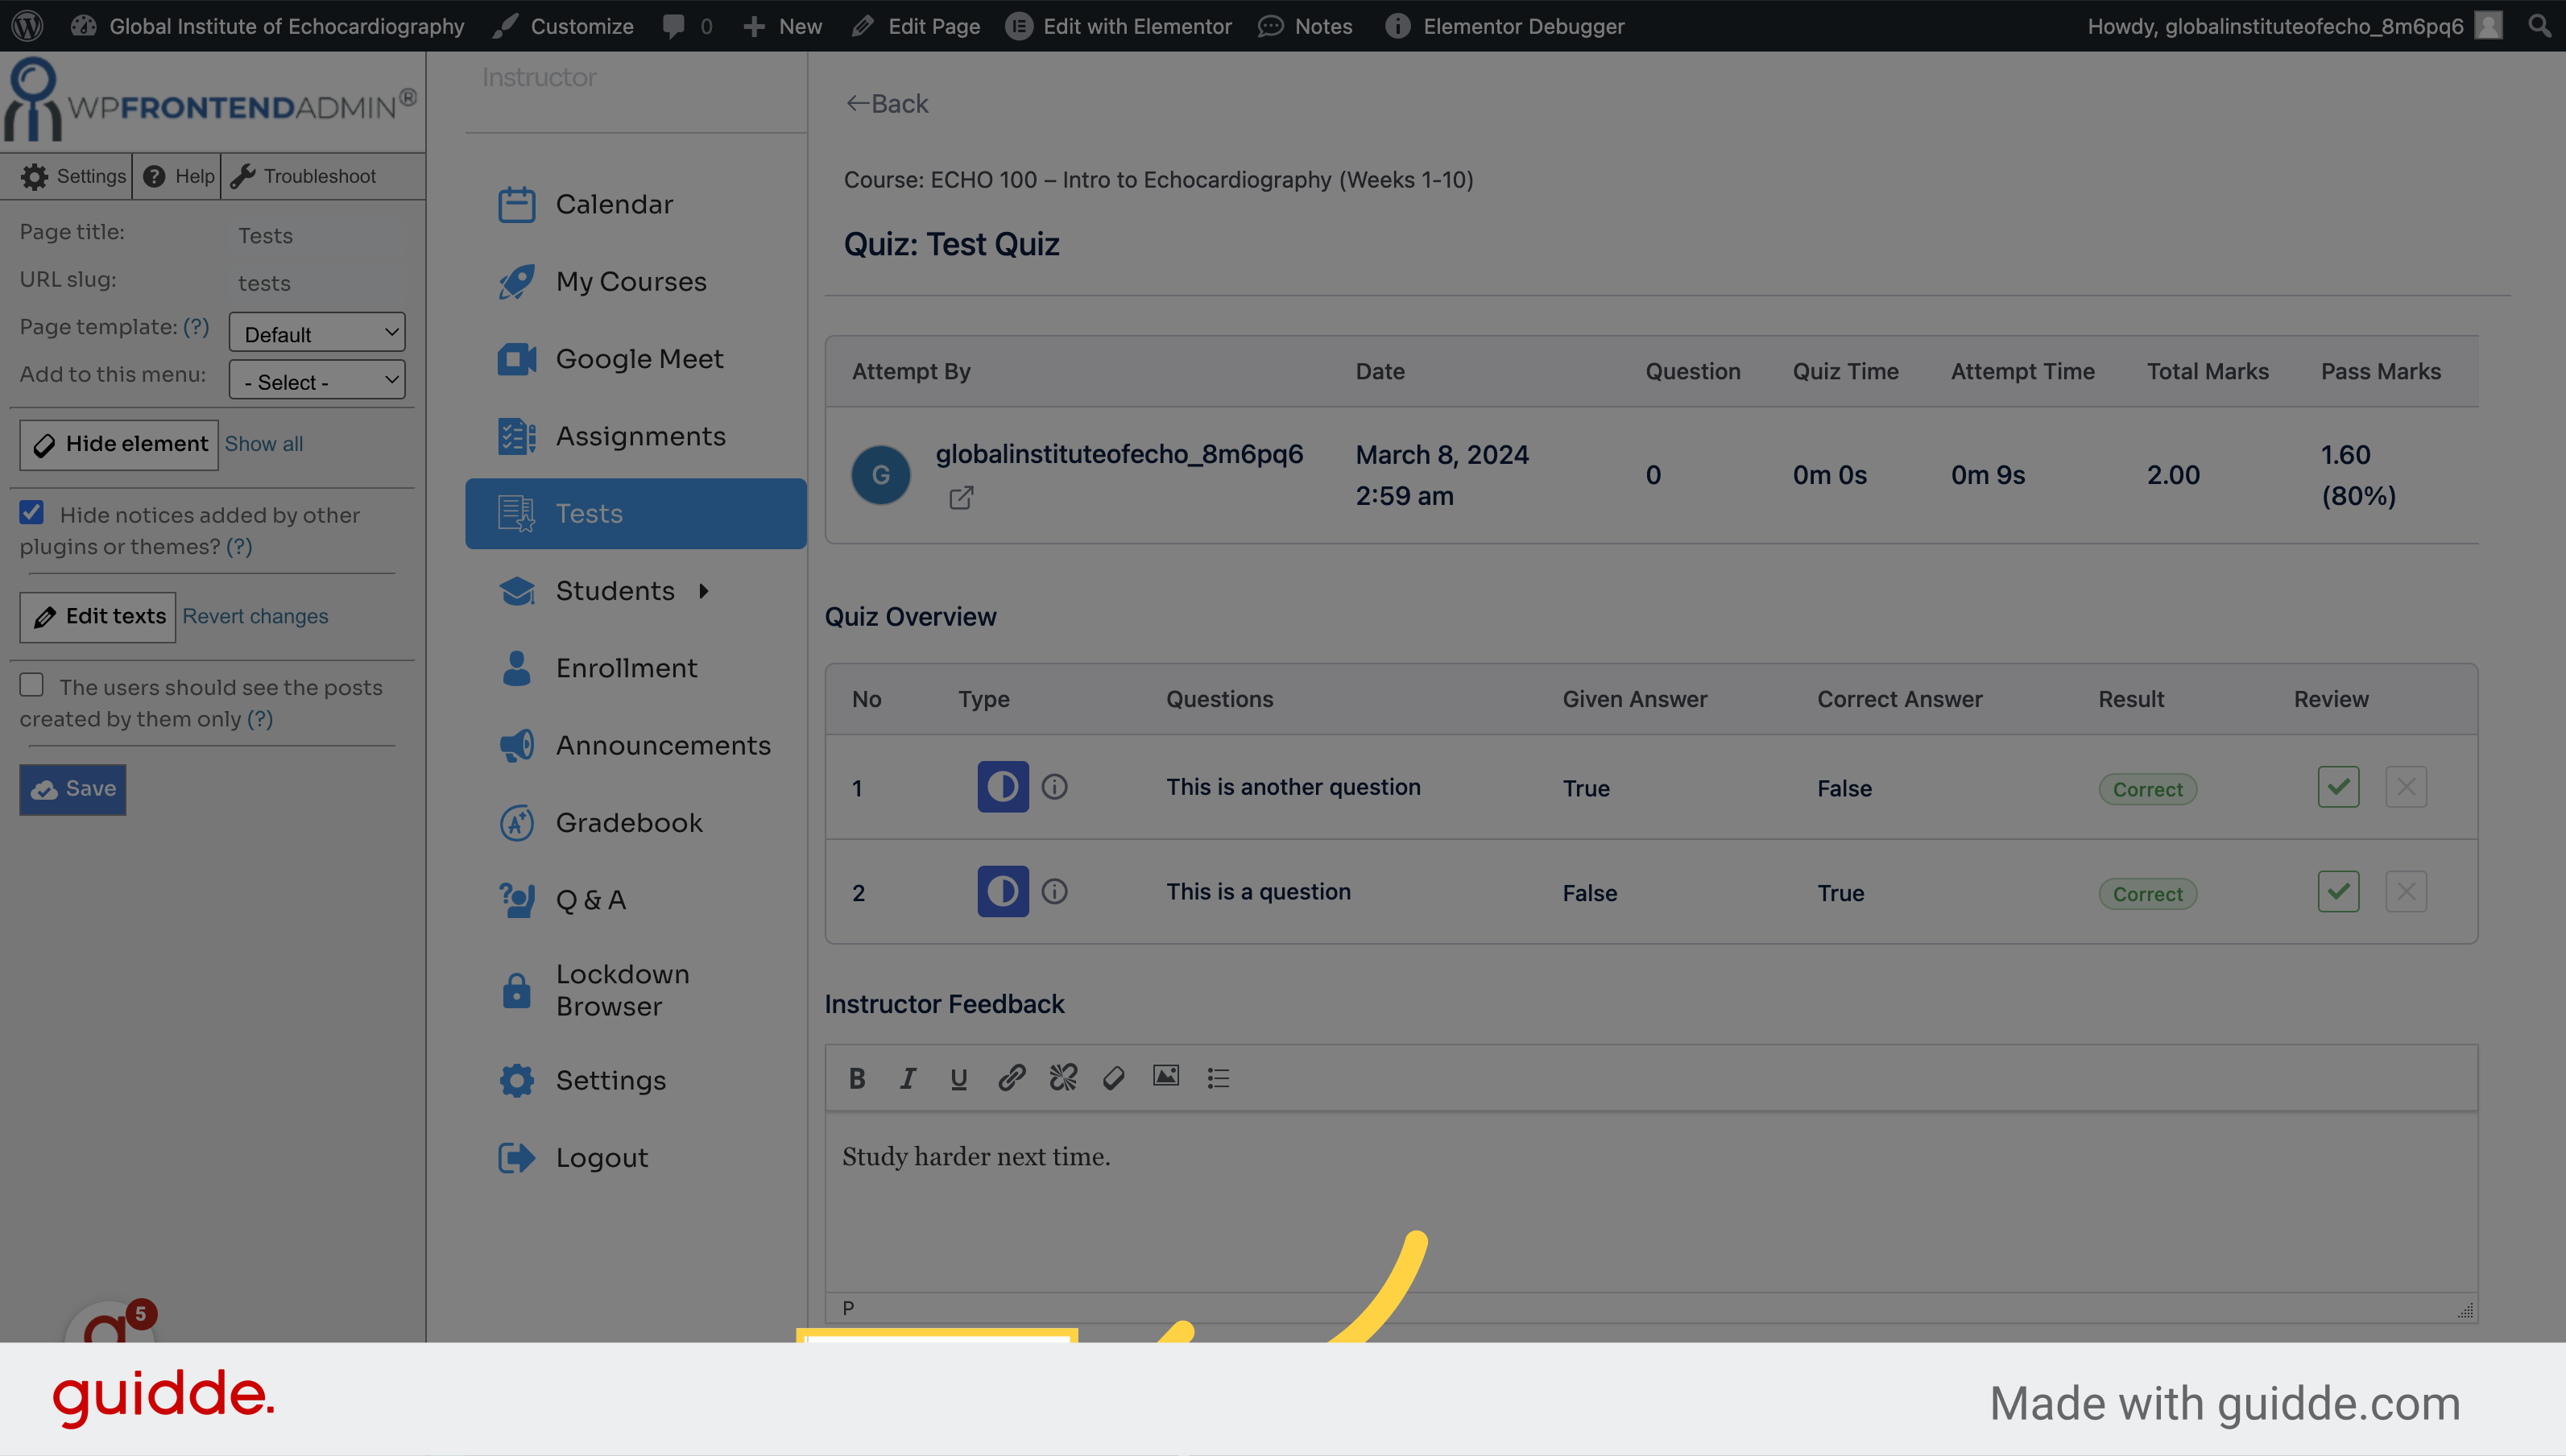
5. Click "Update"
Wait for the system to update.
6. Click "Back"
Navigate back to the previous page.
7. View the updated result
Access the test result.
This guide navigated through accessing test details, providing feedback, and updating results in Verdigris-staging for efficient employee training. Master the process of viewing and grading tests effortlessly.
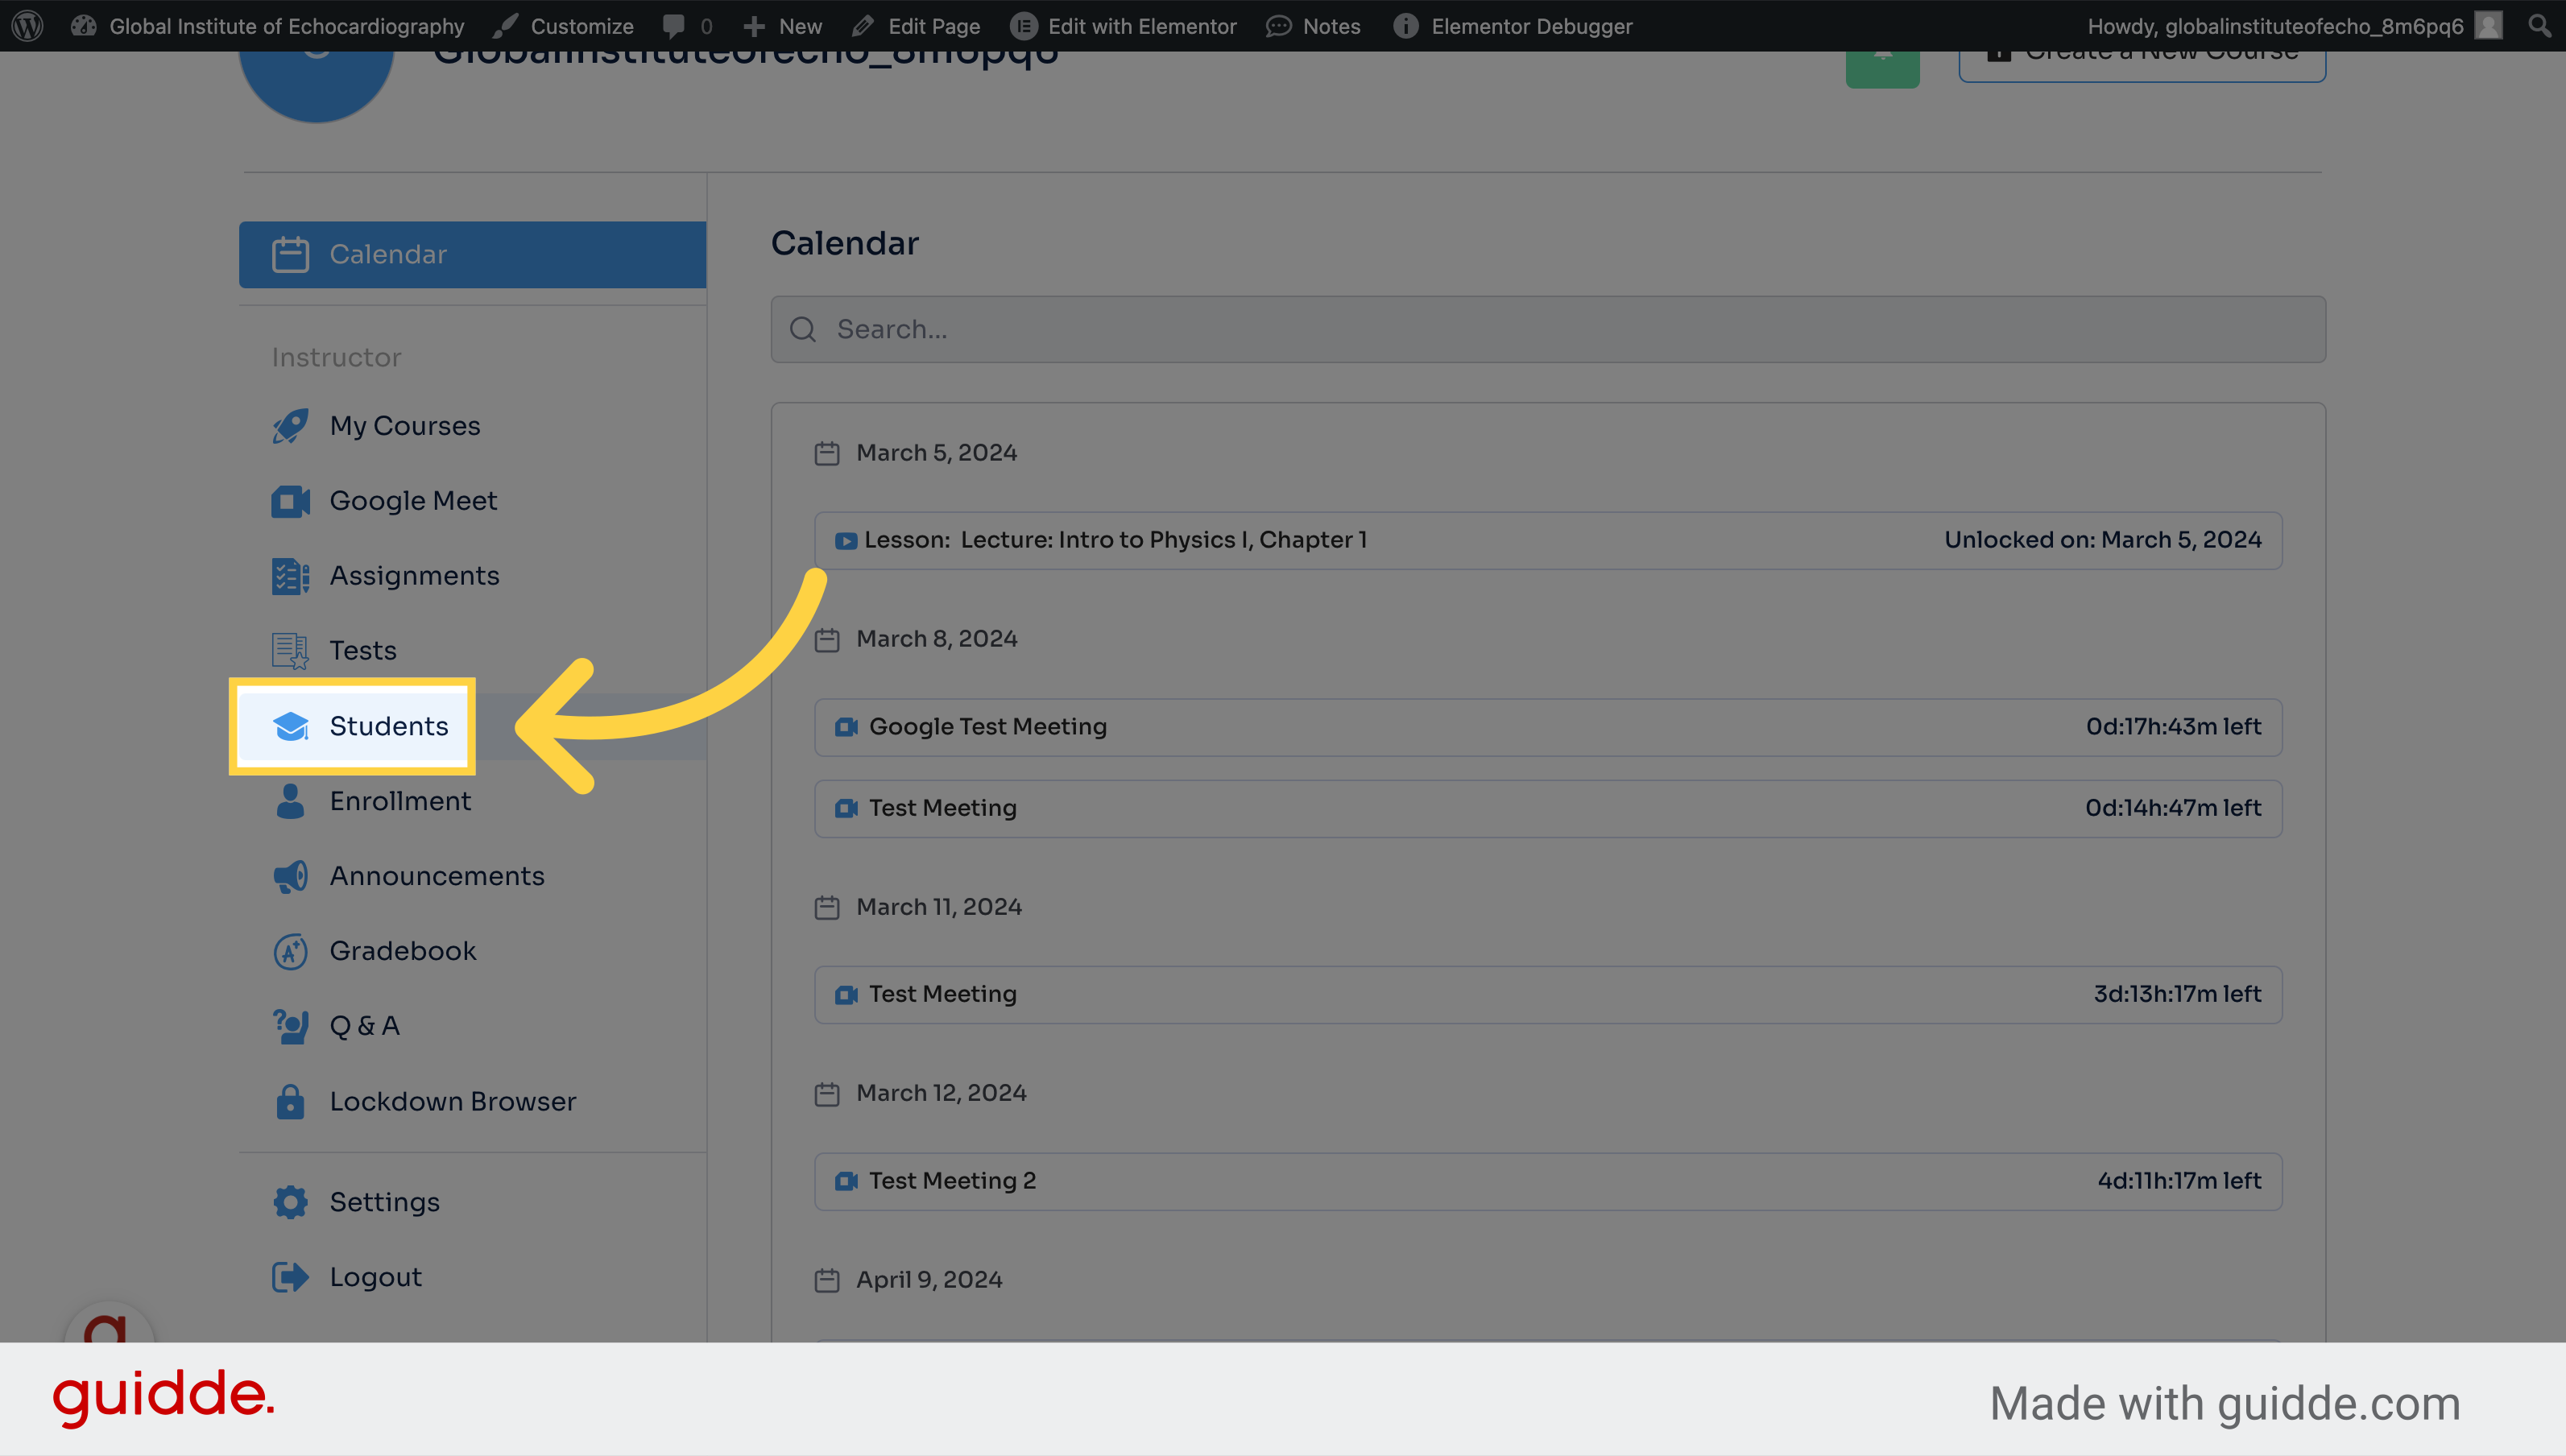
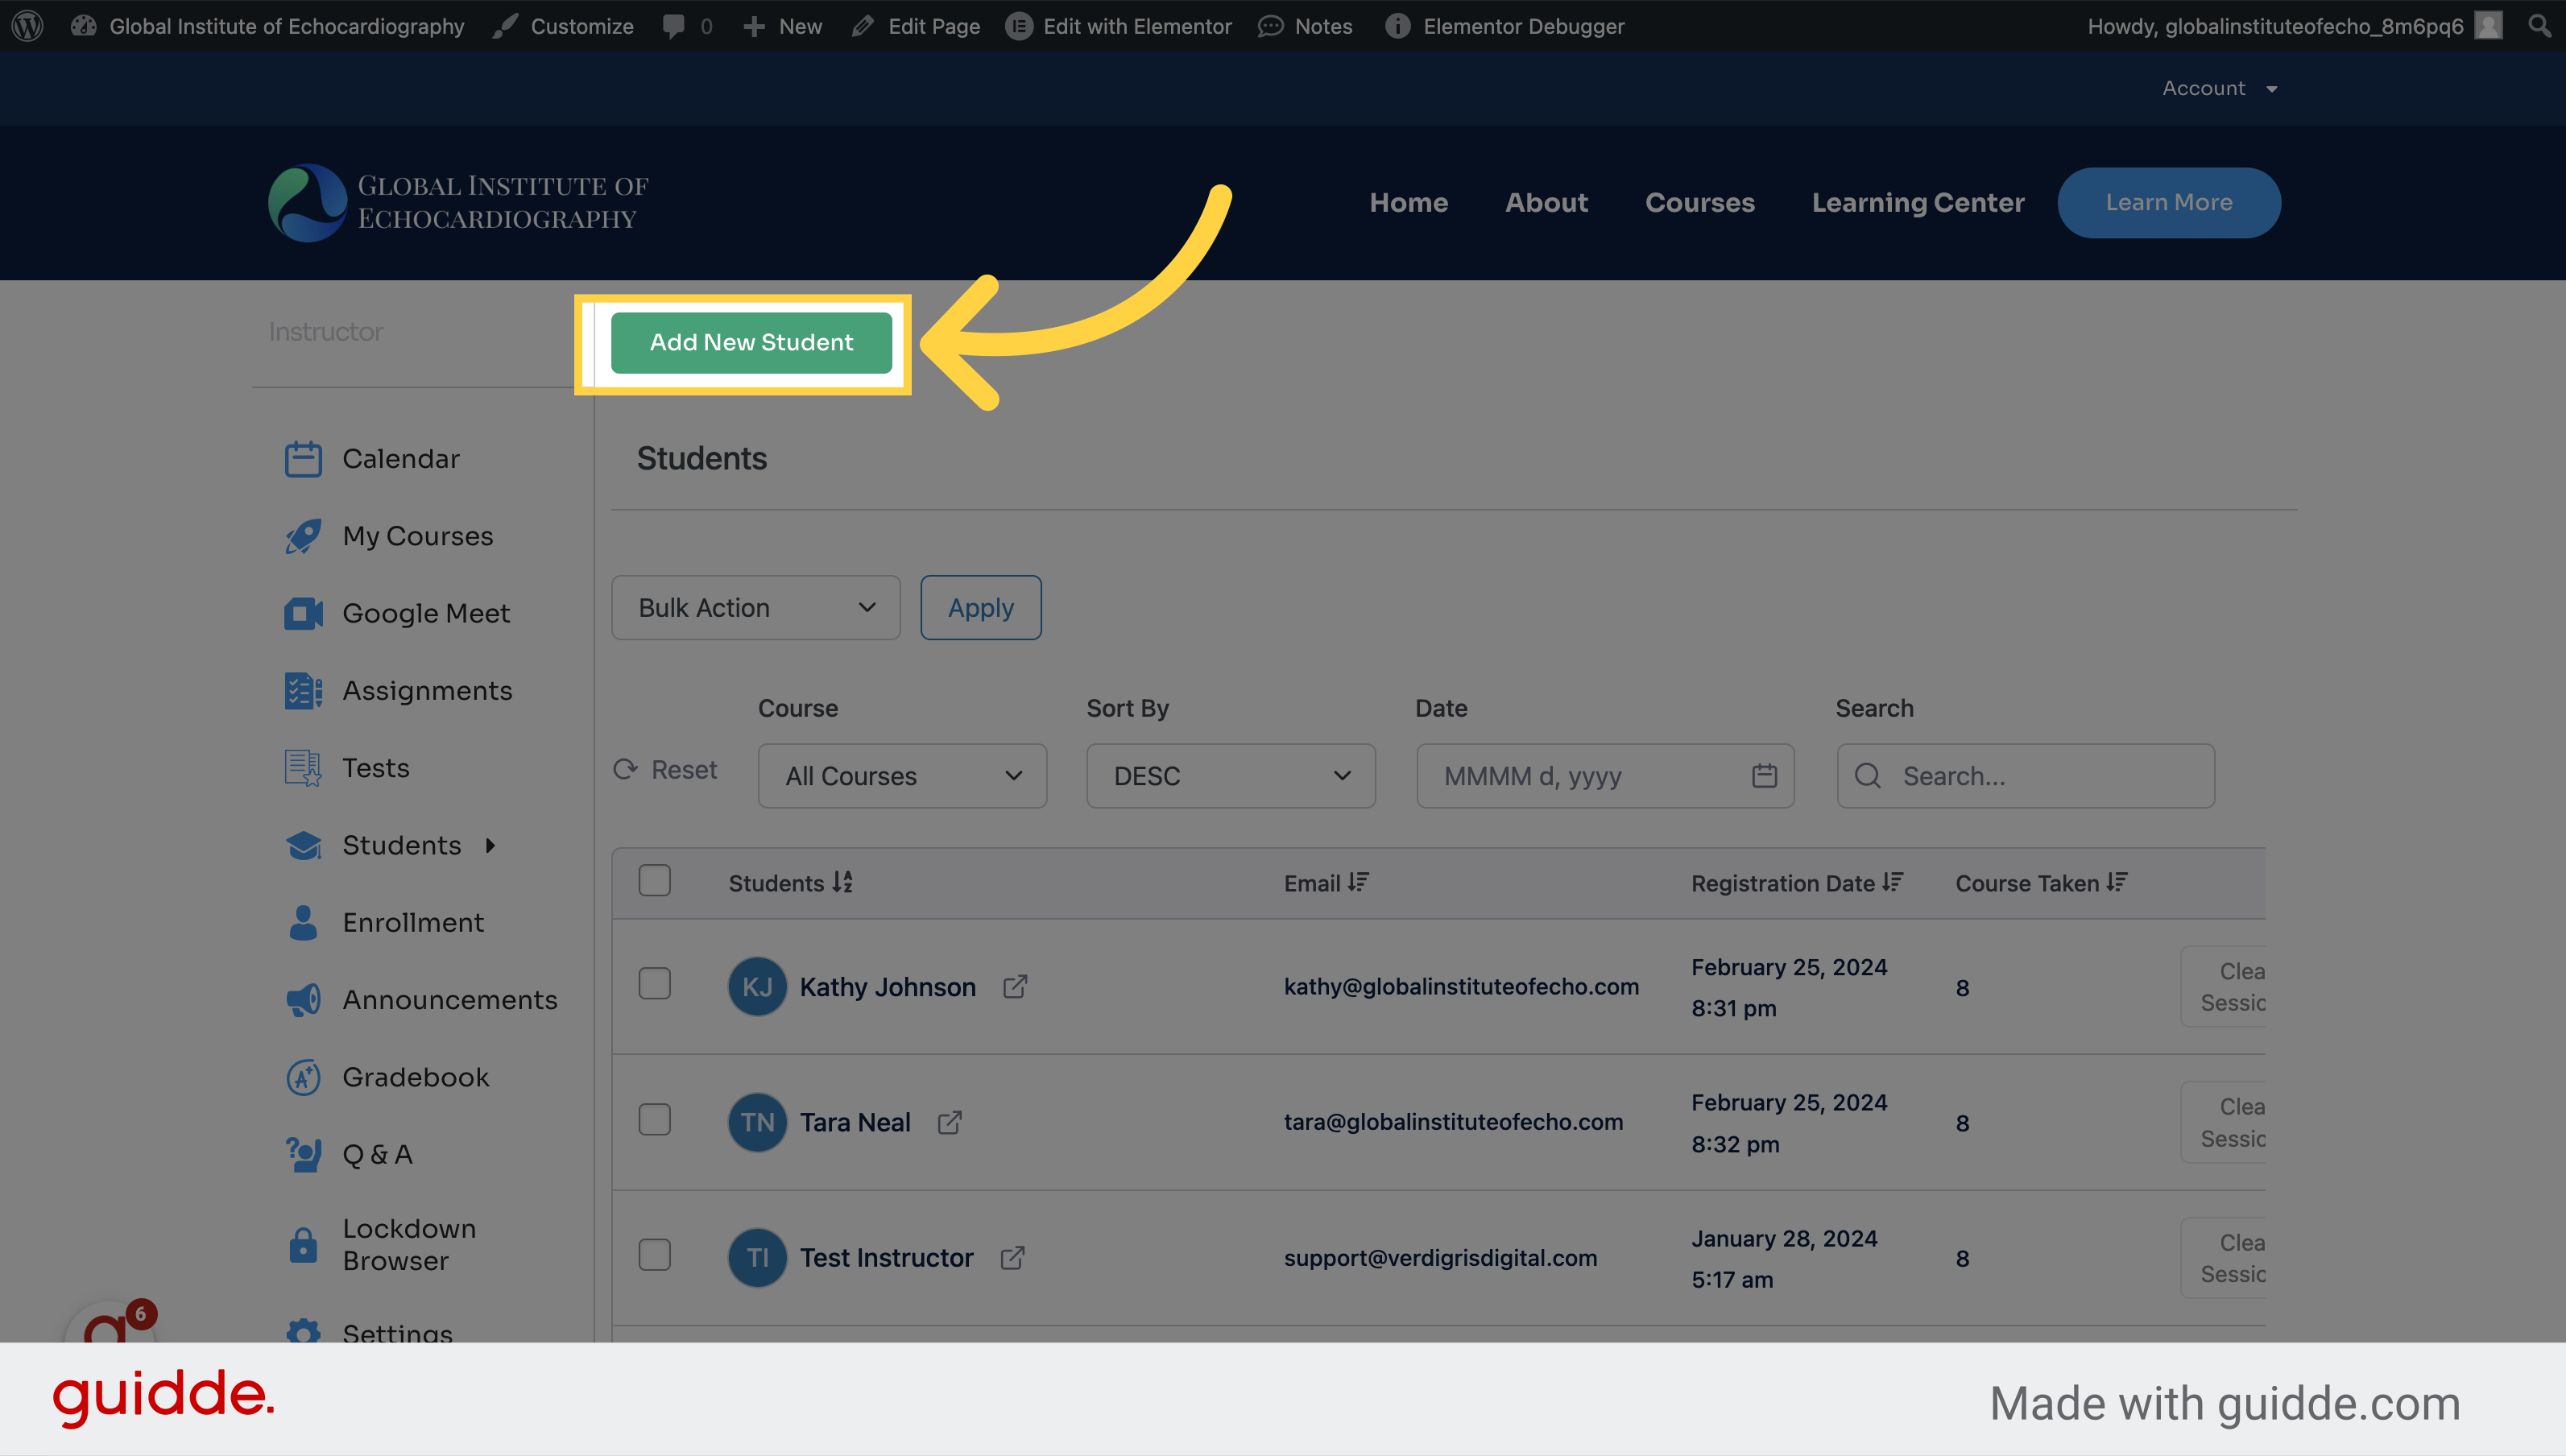
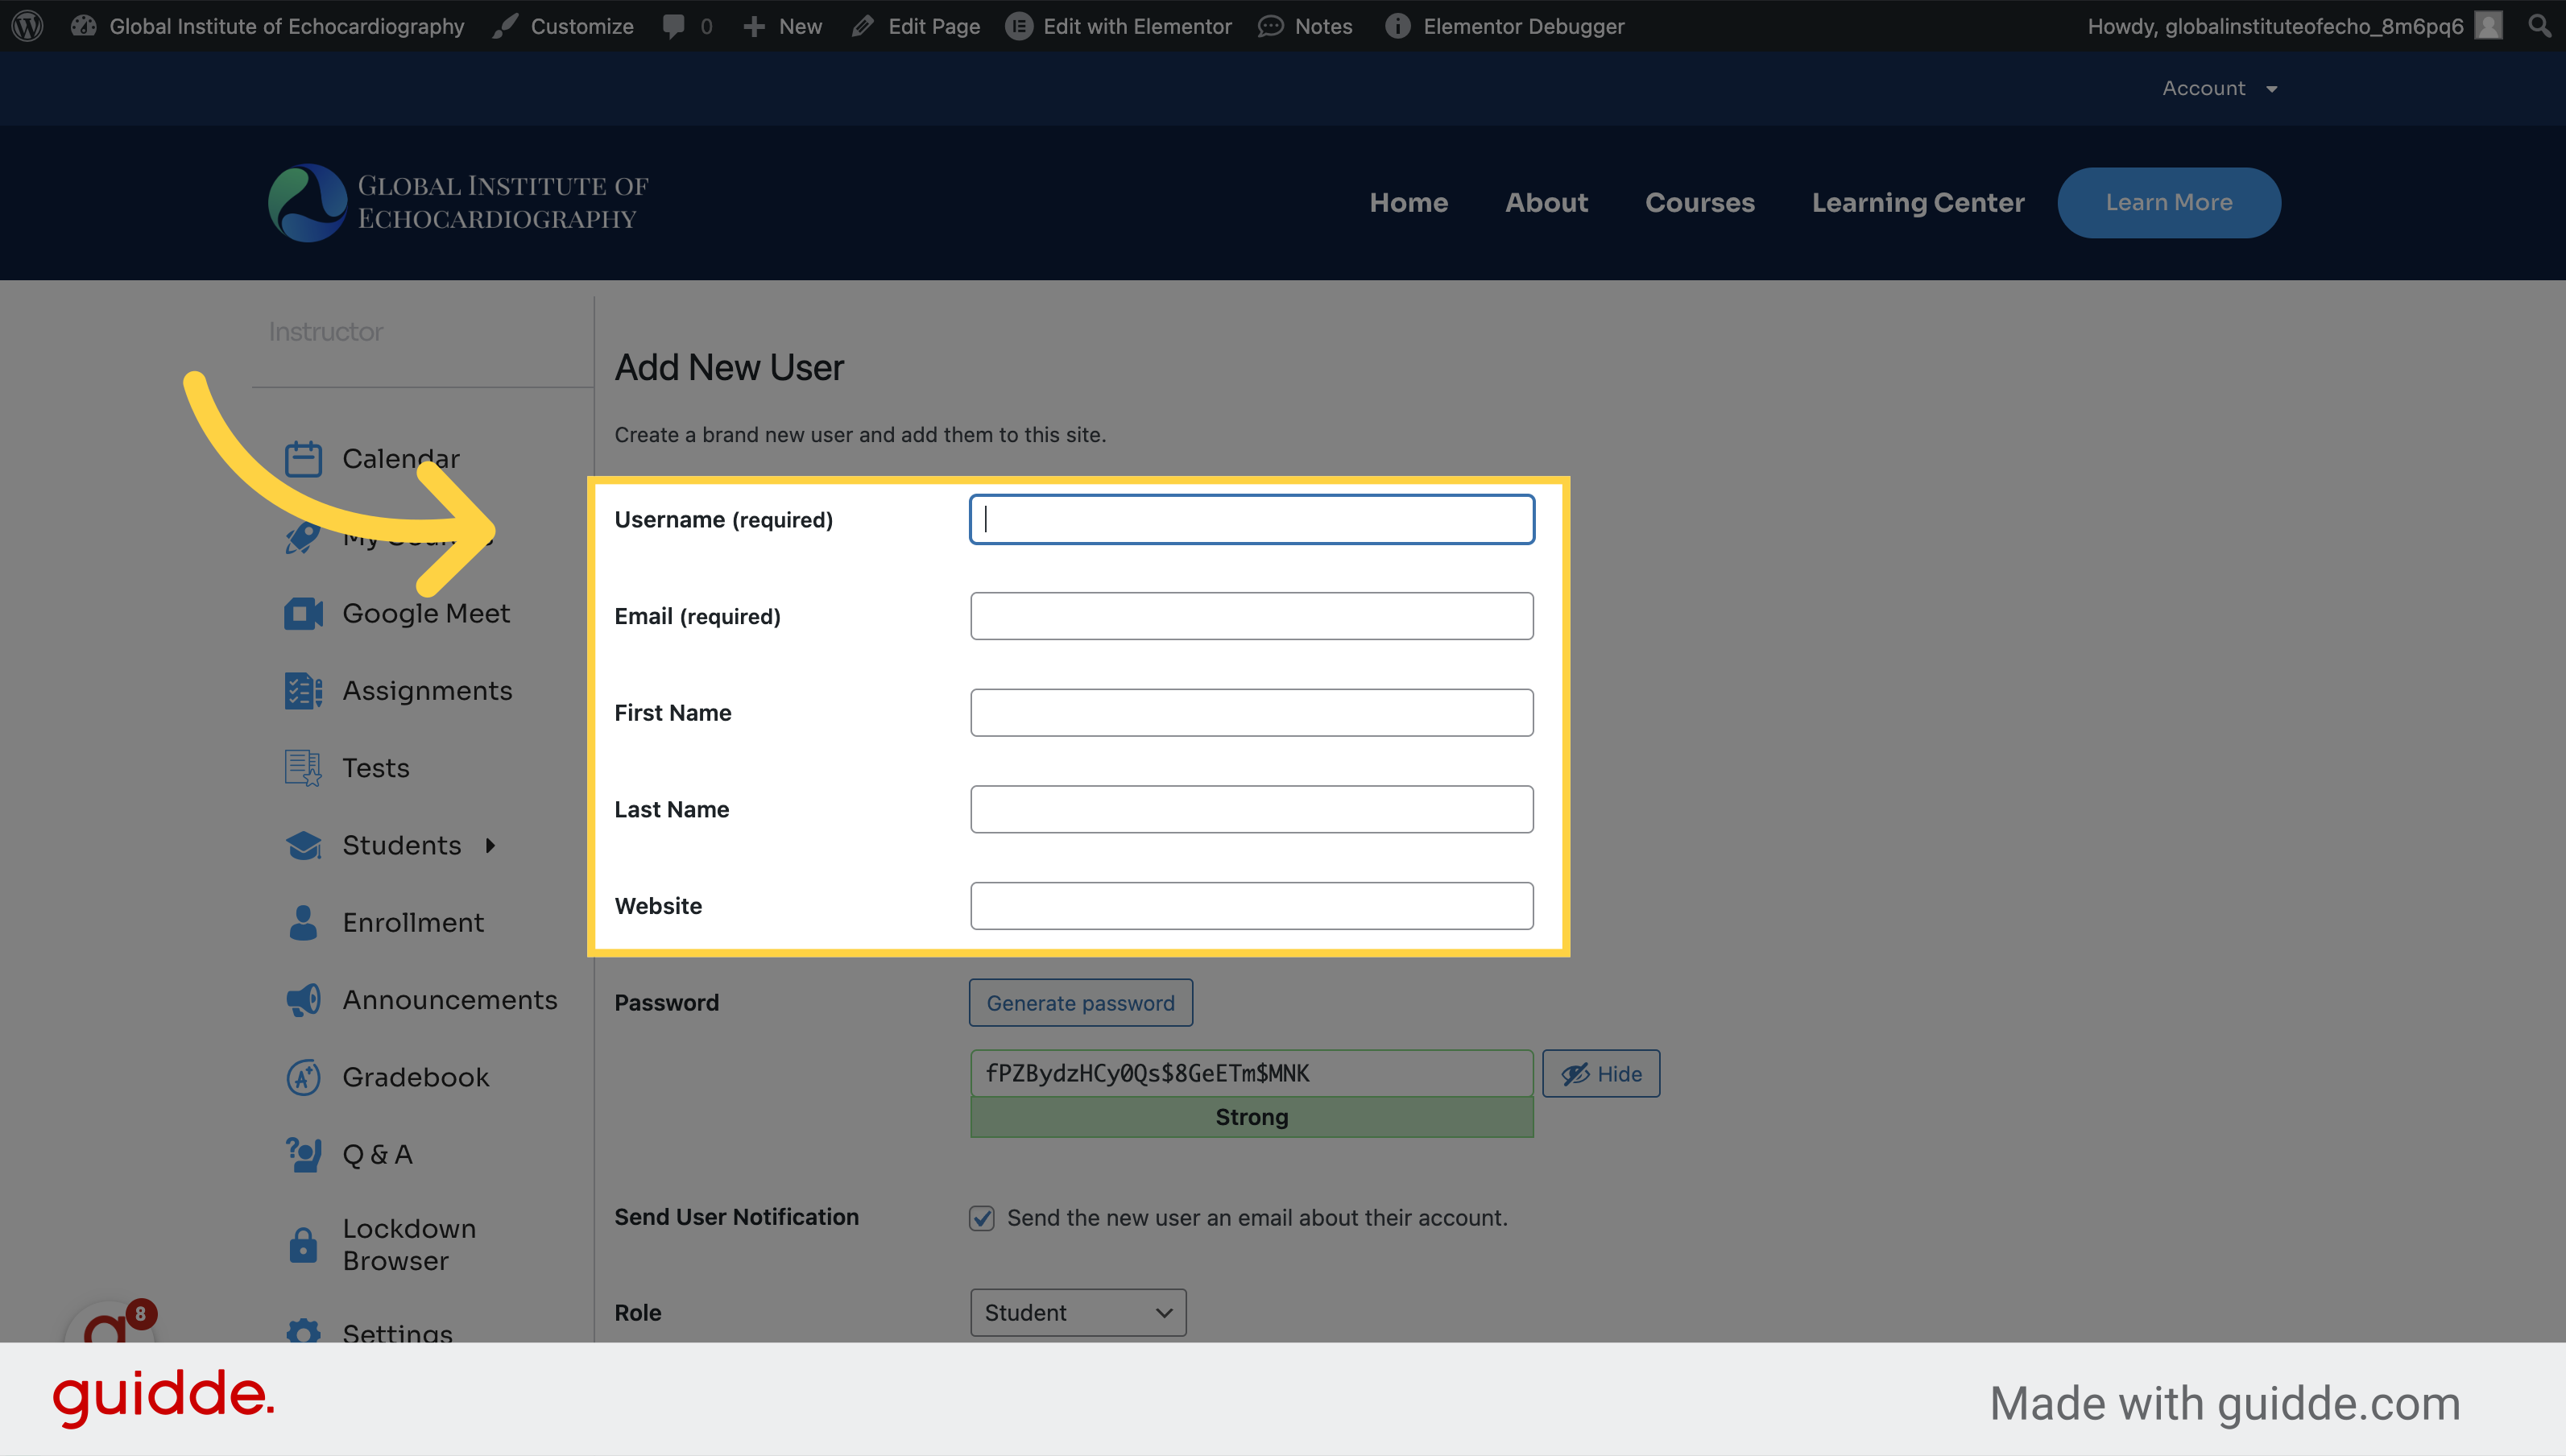
How to Add a Student
Learn how to efficiently add a student to your system with ease. This guide will walk you through the necessary steps in the LMS application.
1. Click "Students" from the dashboard
Access the Students section.
2. Click "Add New Student"
Initiate adding a new student.
3. Enter the student's information
Select the Username field that is mandatory.
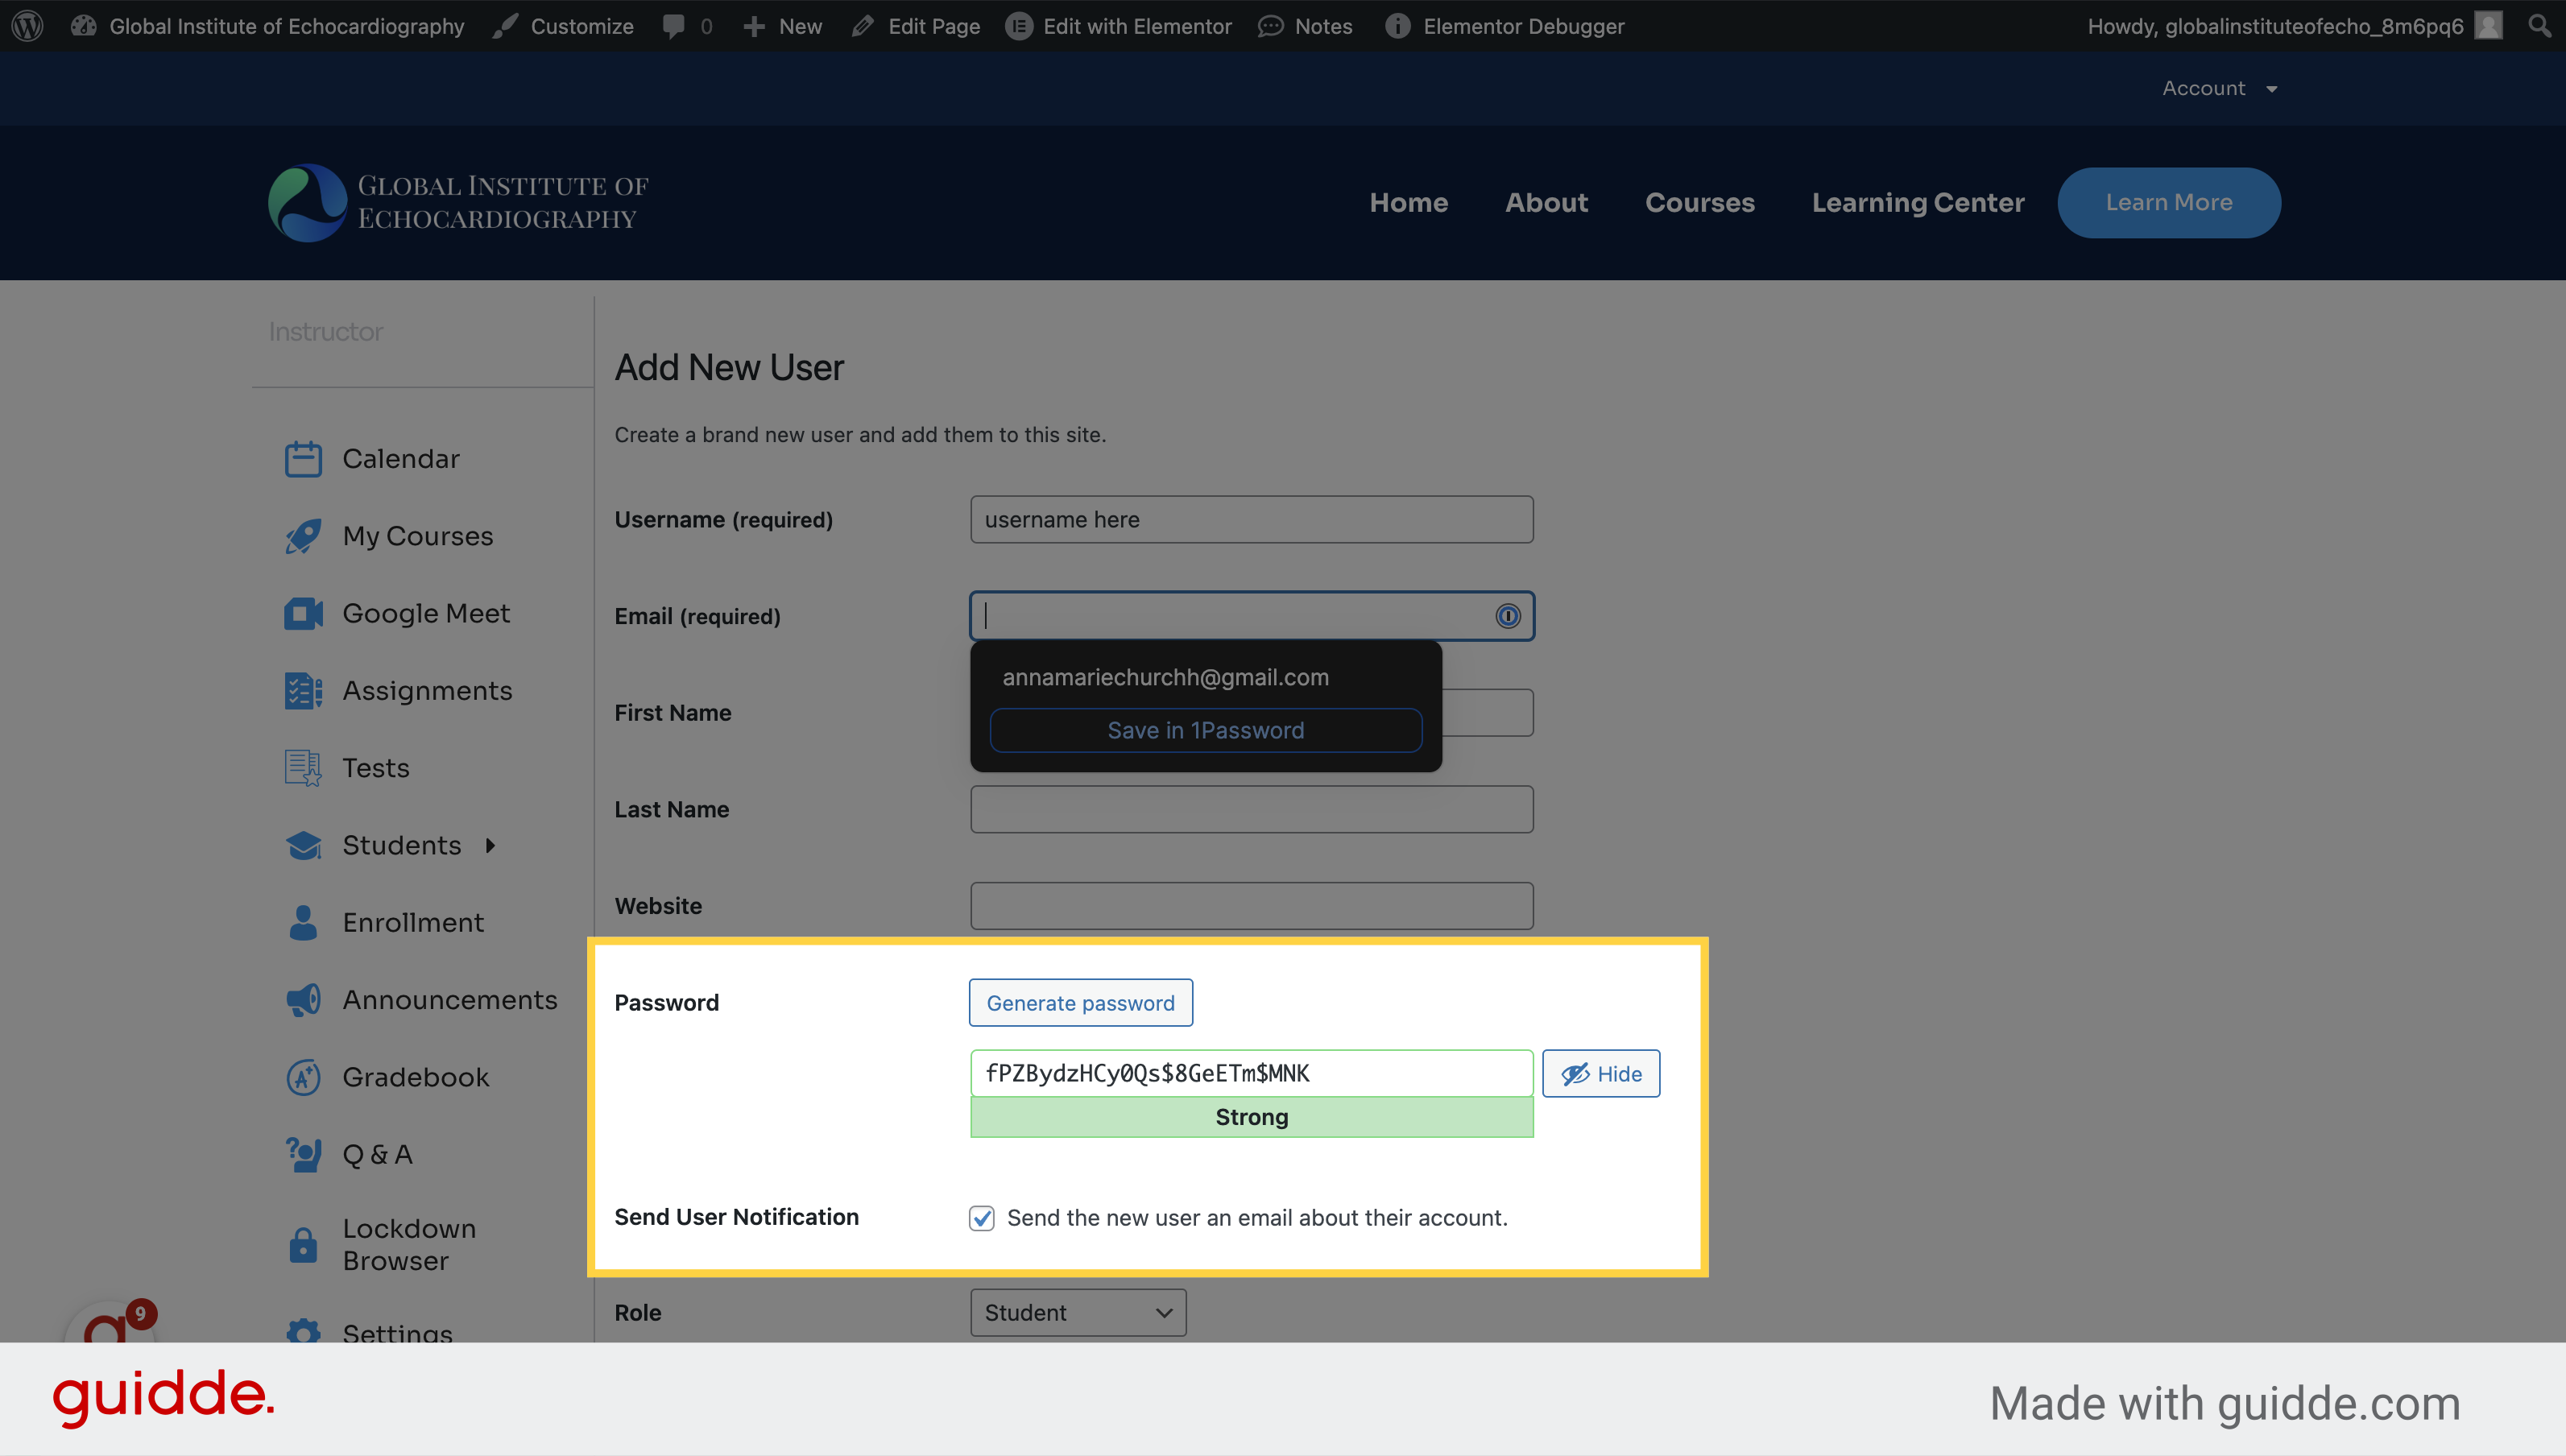
4. A password will be automatically generated. Make sure that 'Send User Notification' is checked
Enter the username for the new student.
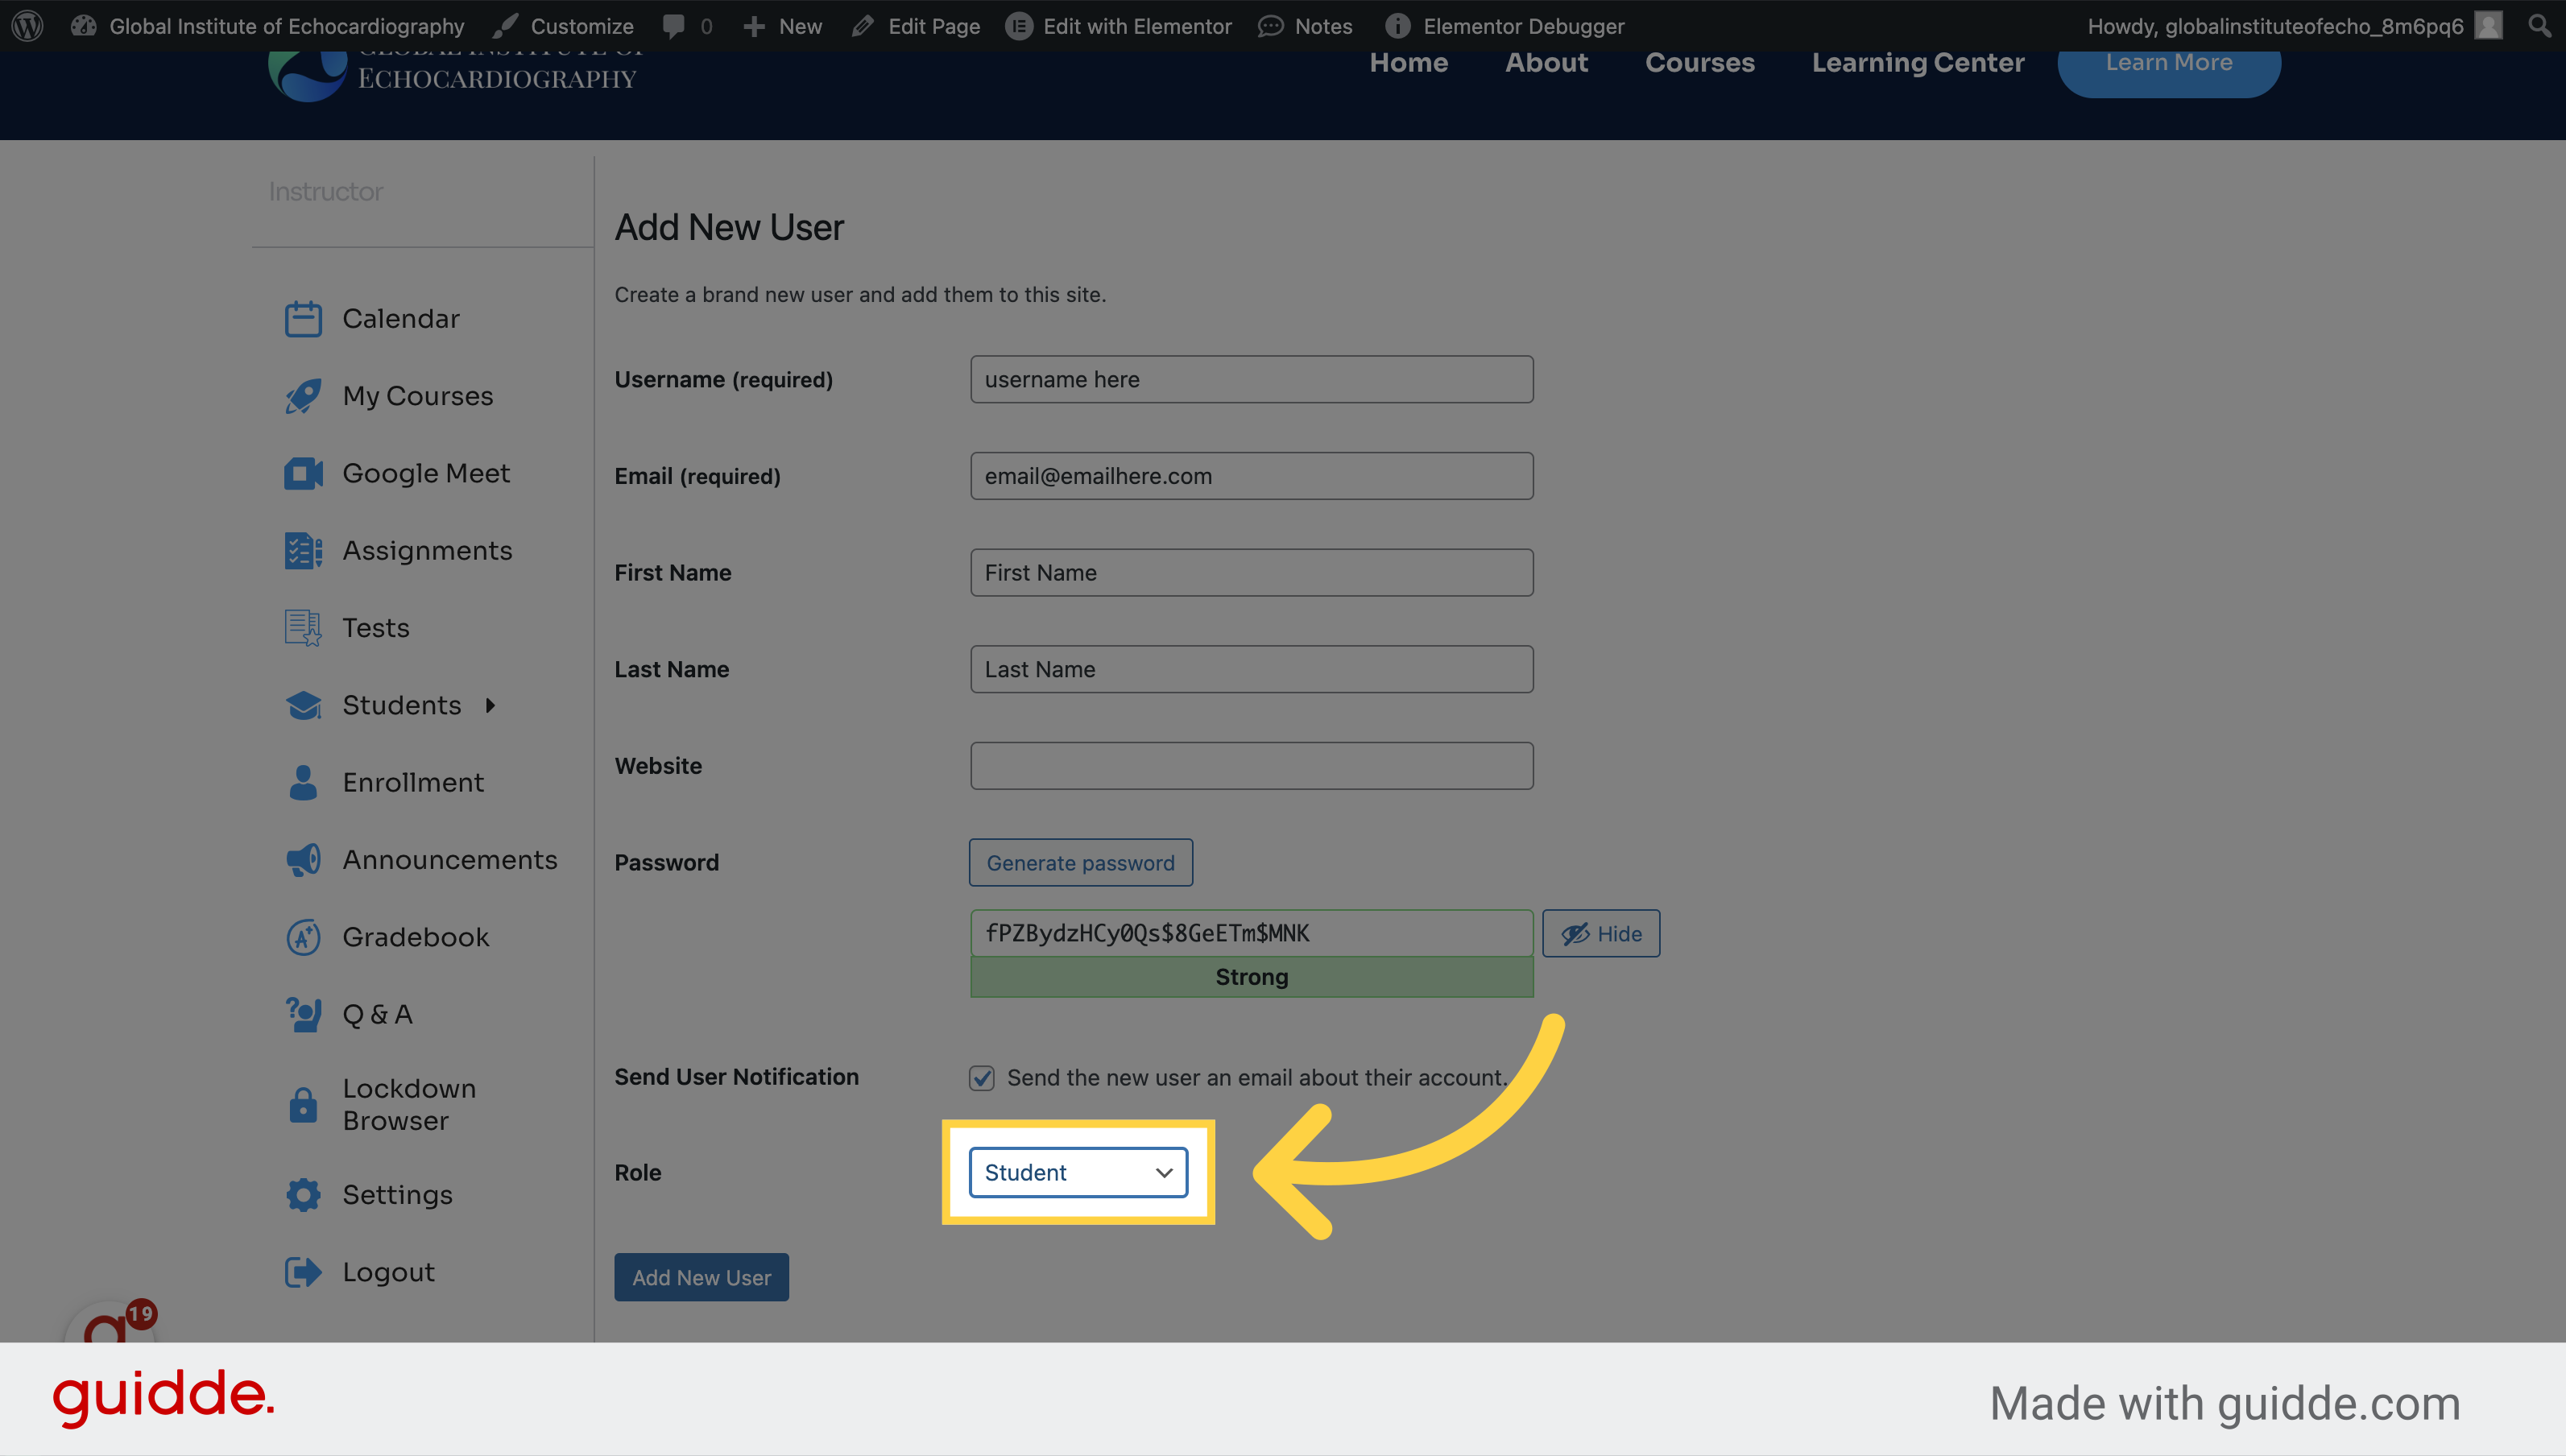
5. Check that 'Student' is the Role selected (it should be automatically selected)
Select the role for the new student from the available options.
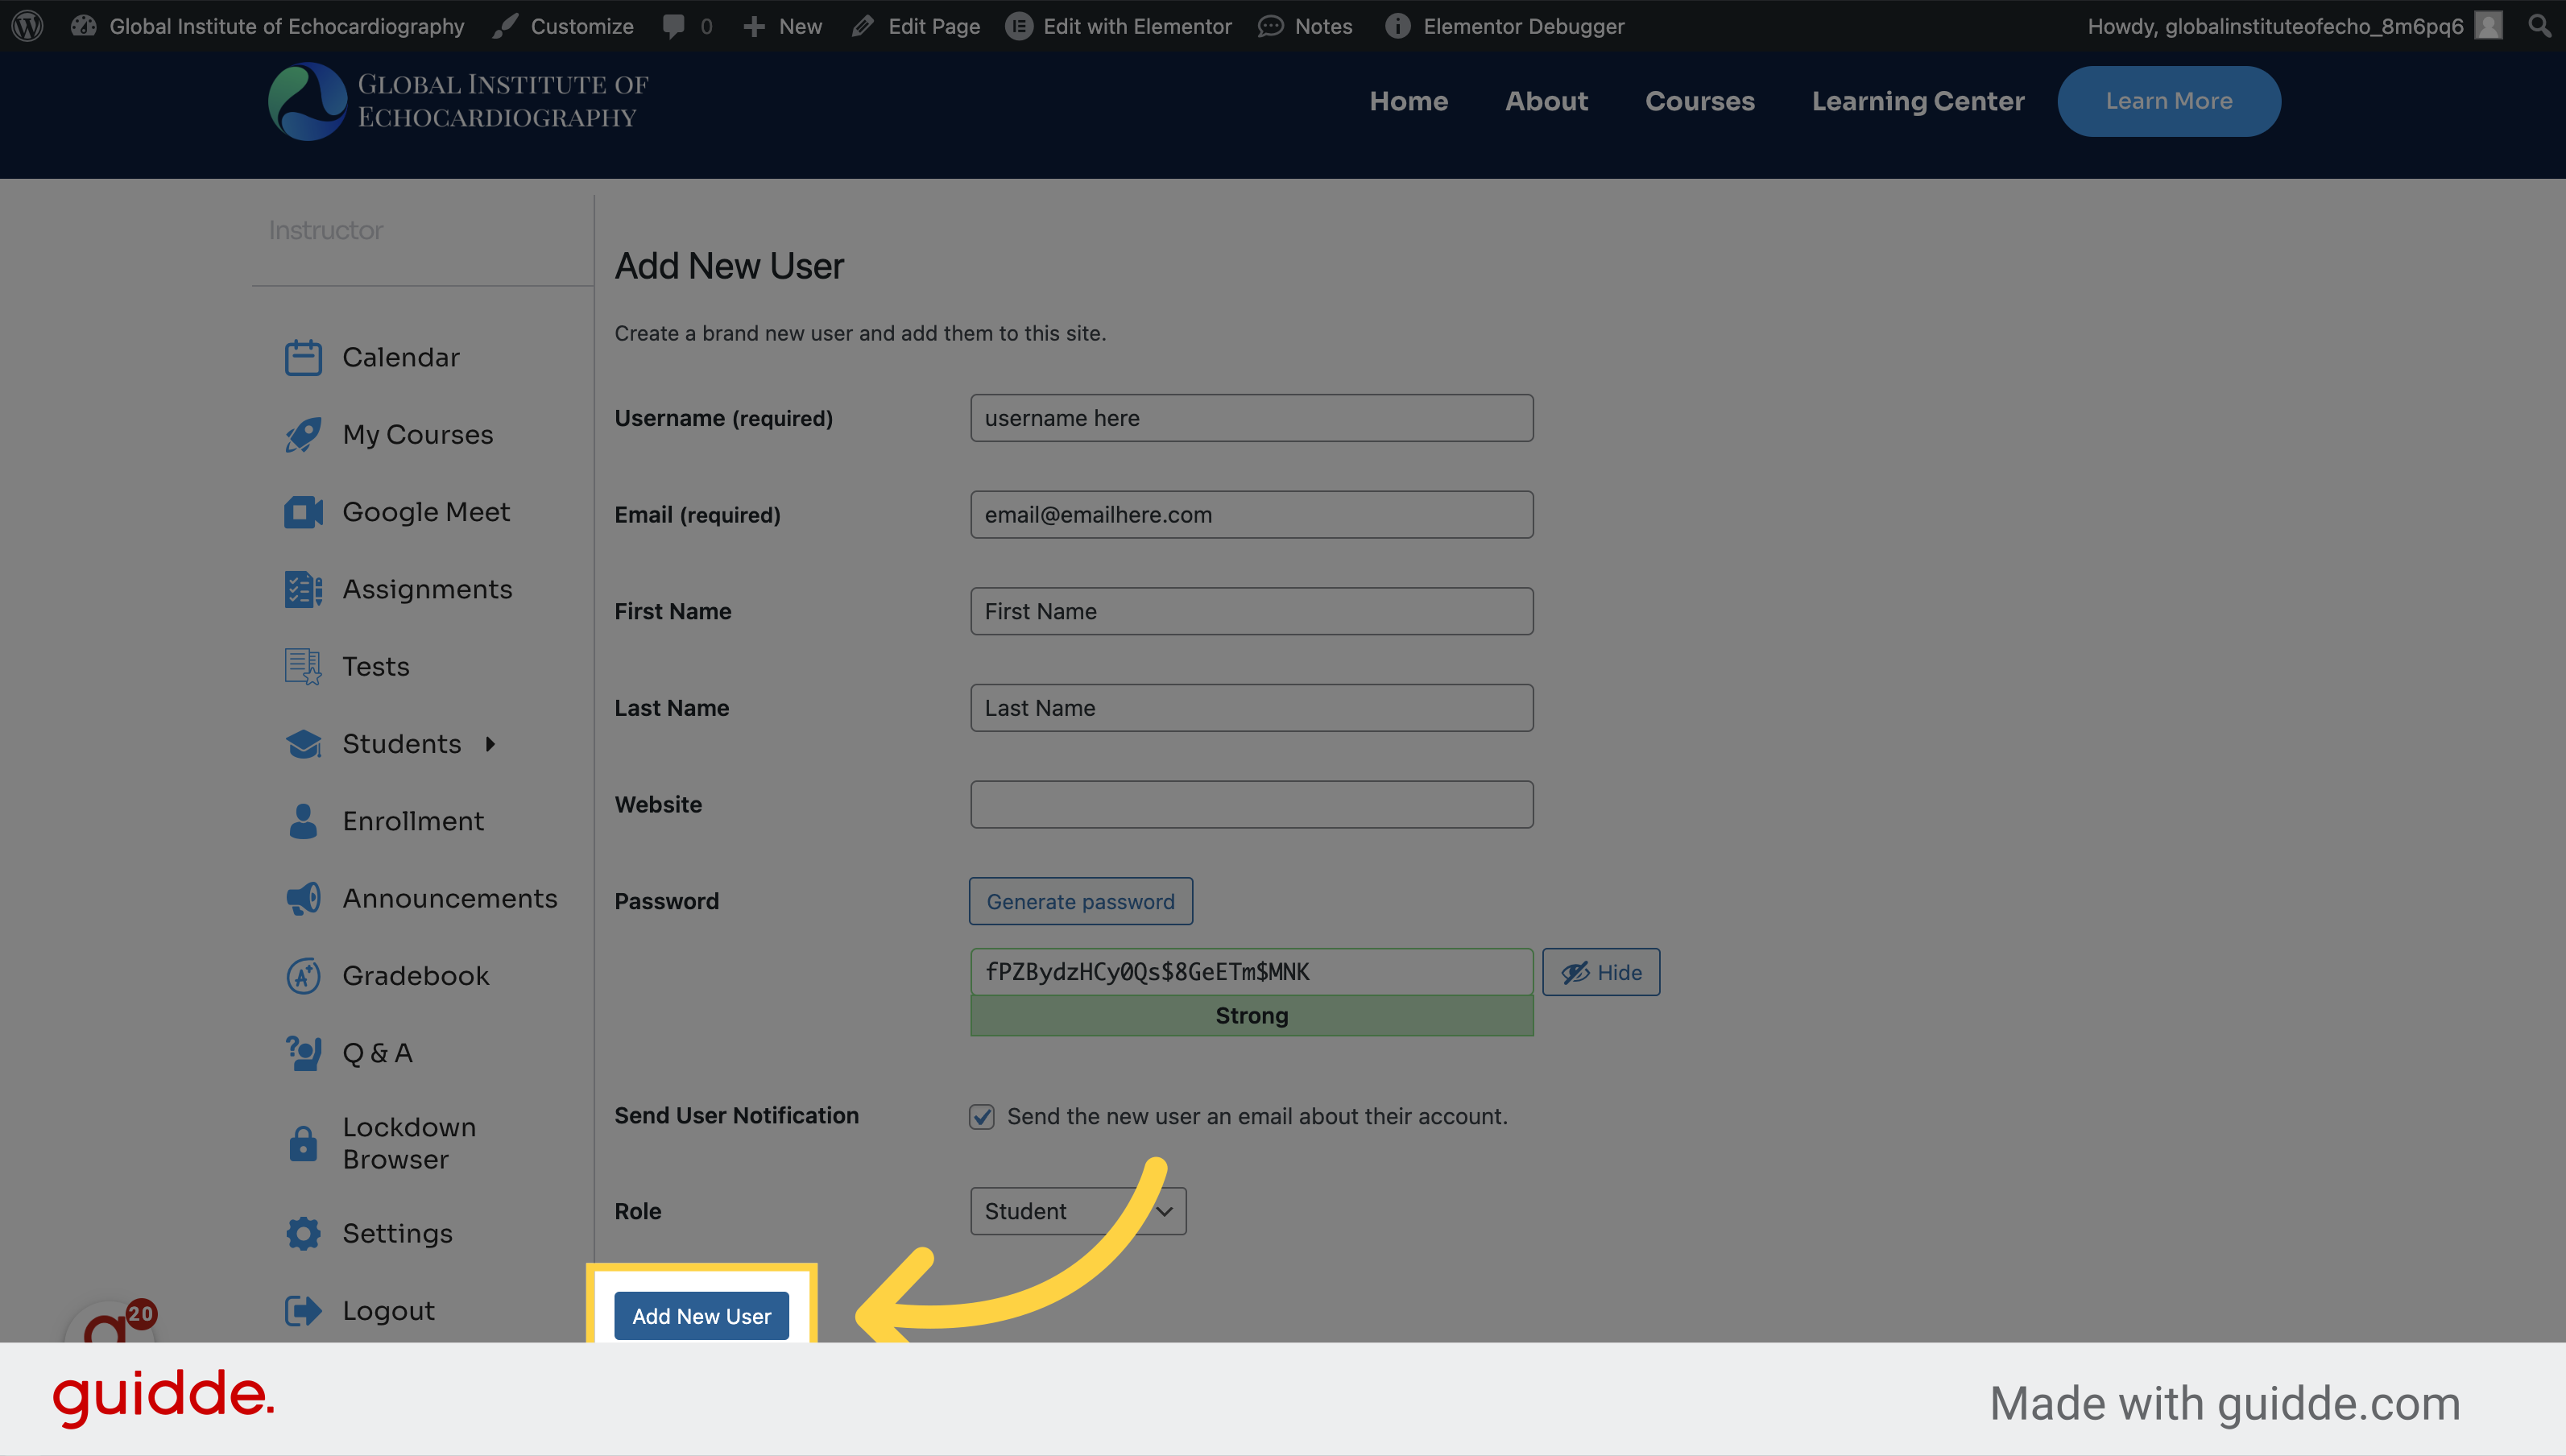
6. Click "Add New User"
Finalize and add the new student to the system.
This guide covered the process of adding a student.
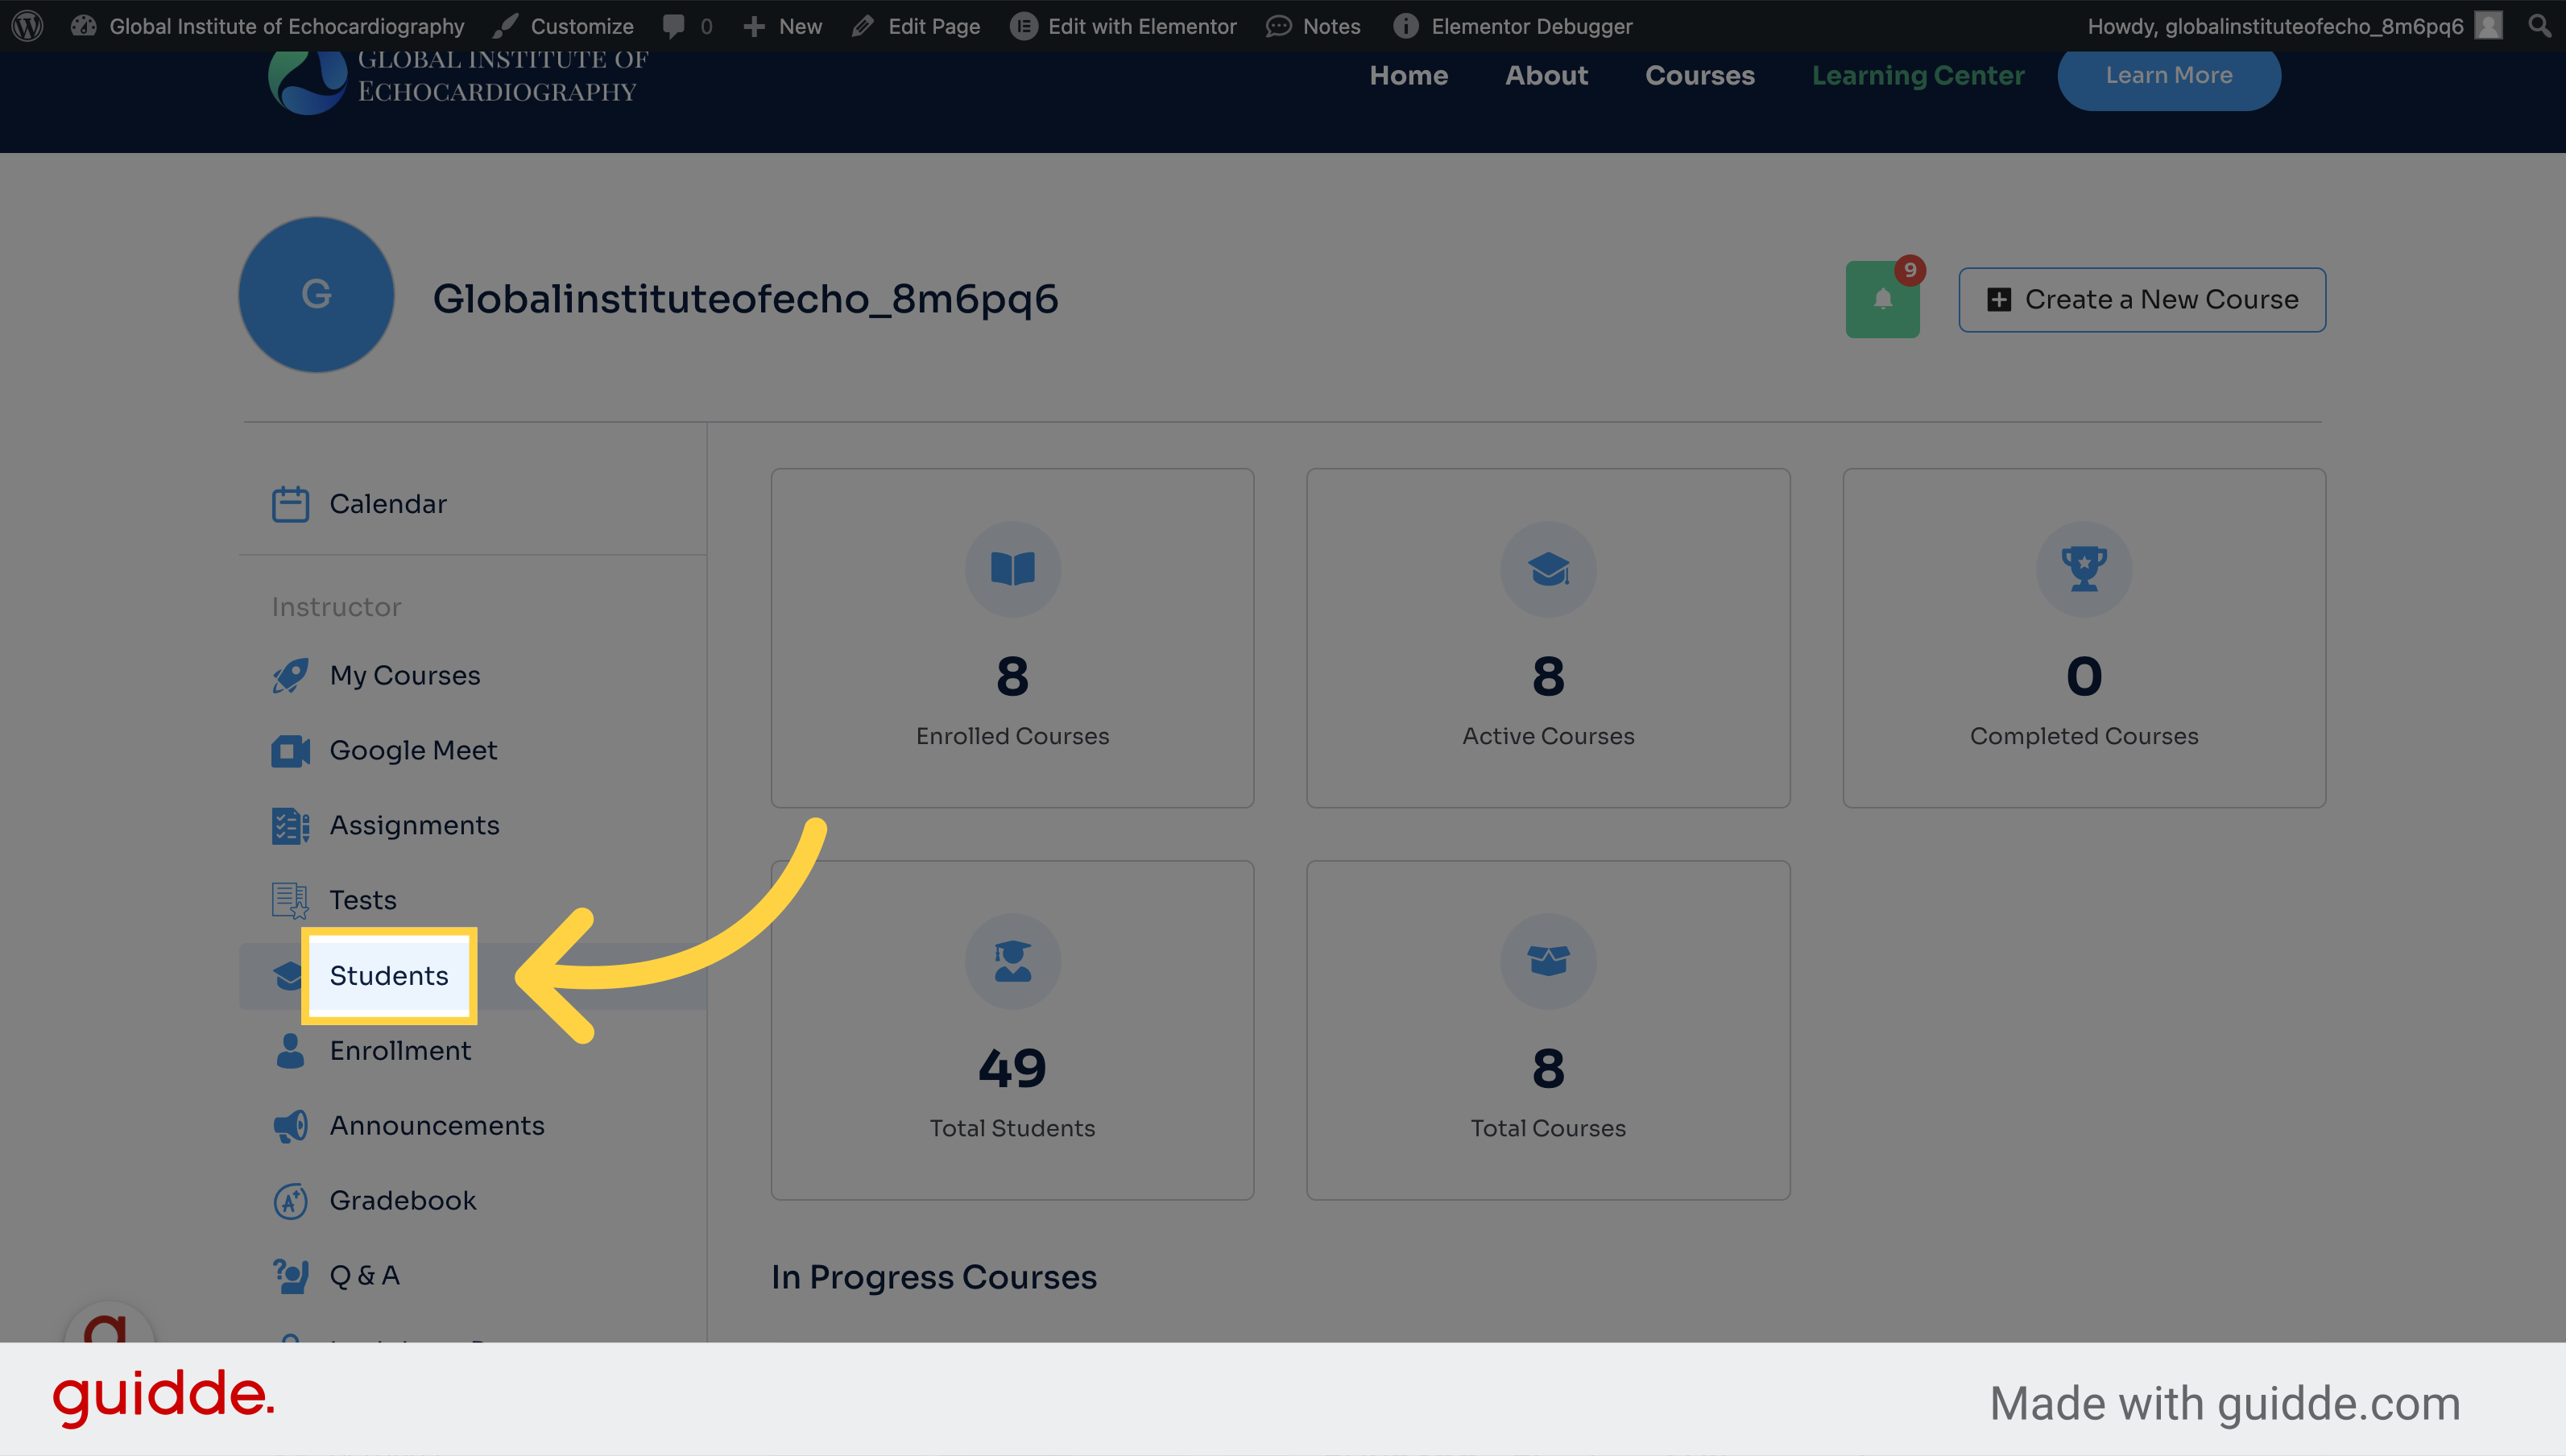
How to View Students and Their Progress
This guide will show you how to efficiently view student information in the application.
1. Click "Students" from the Dashboard
Access the Students section.
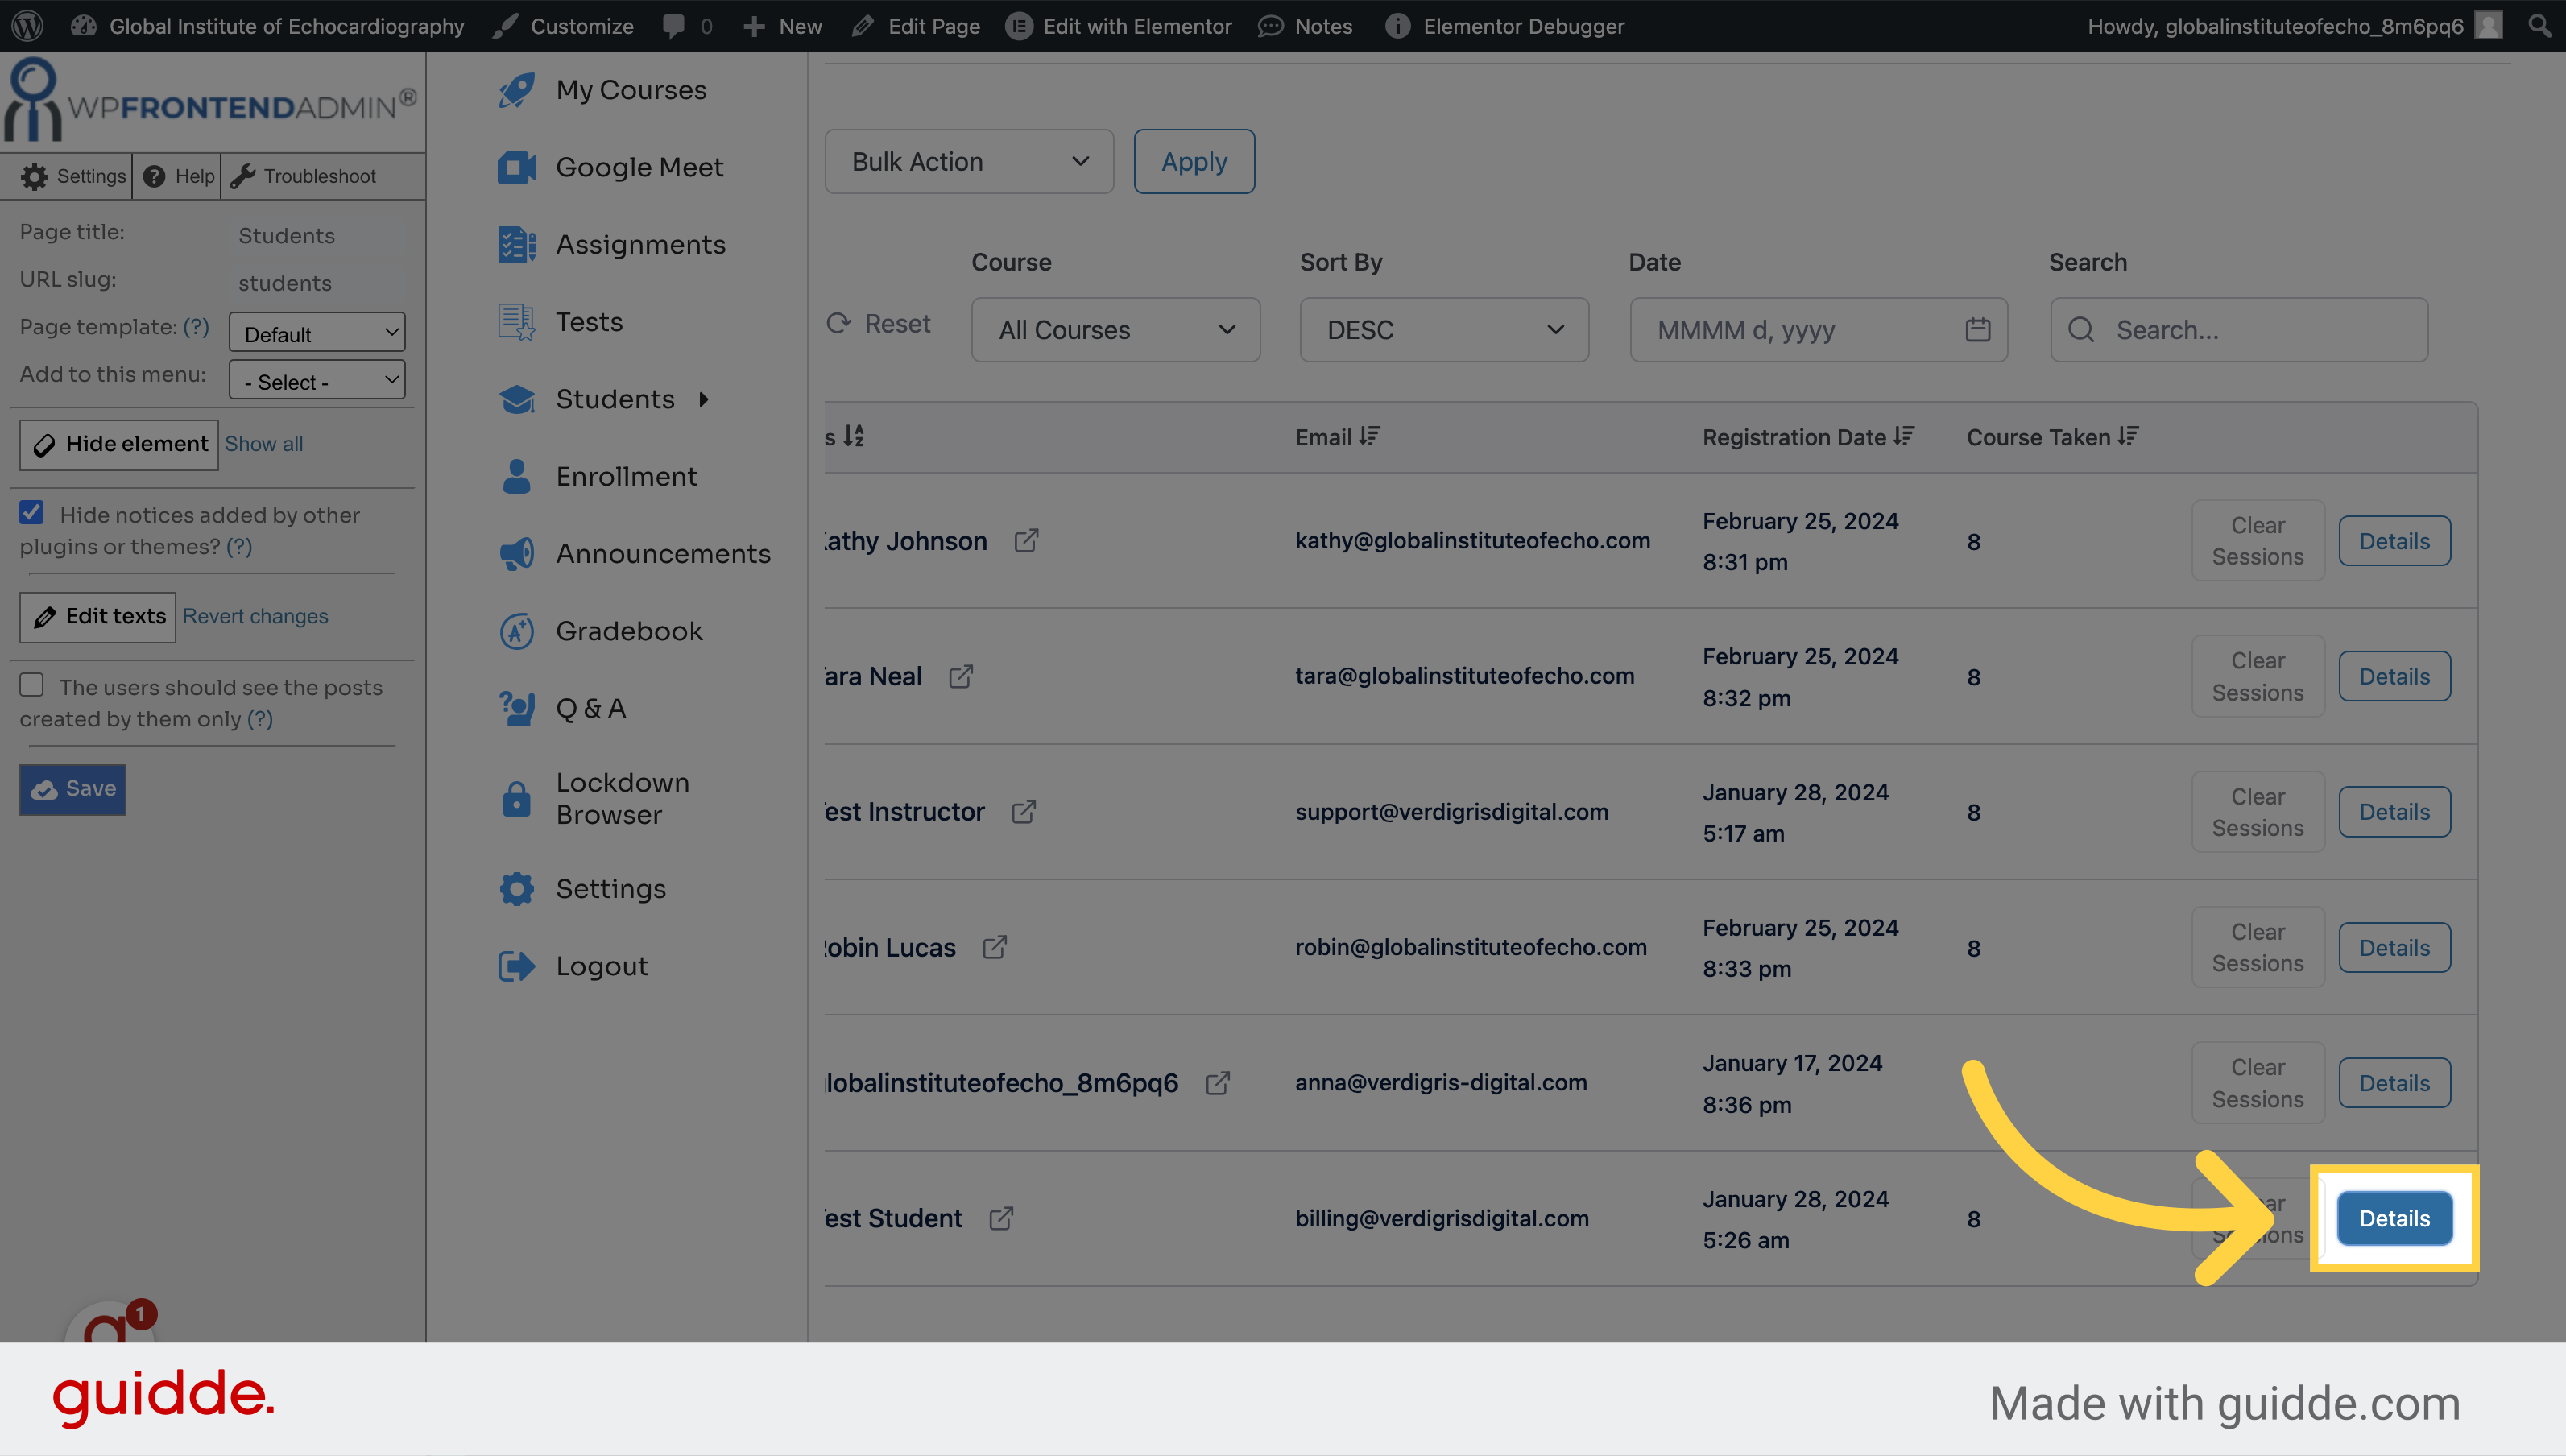
2. Click "Details" next to the student you want to view
Navigate to the Details page.
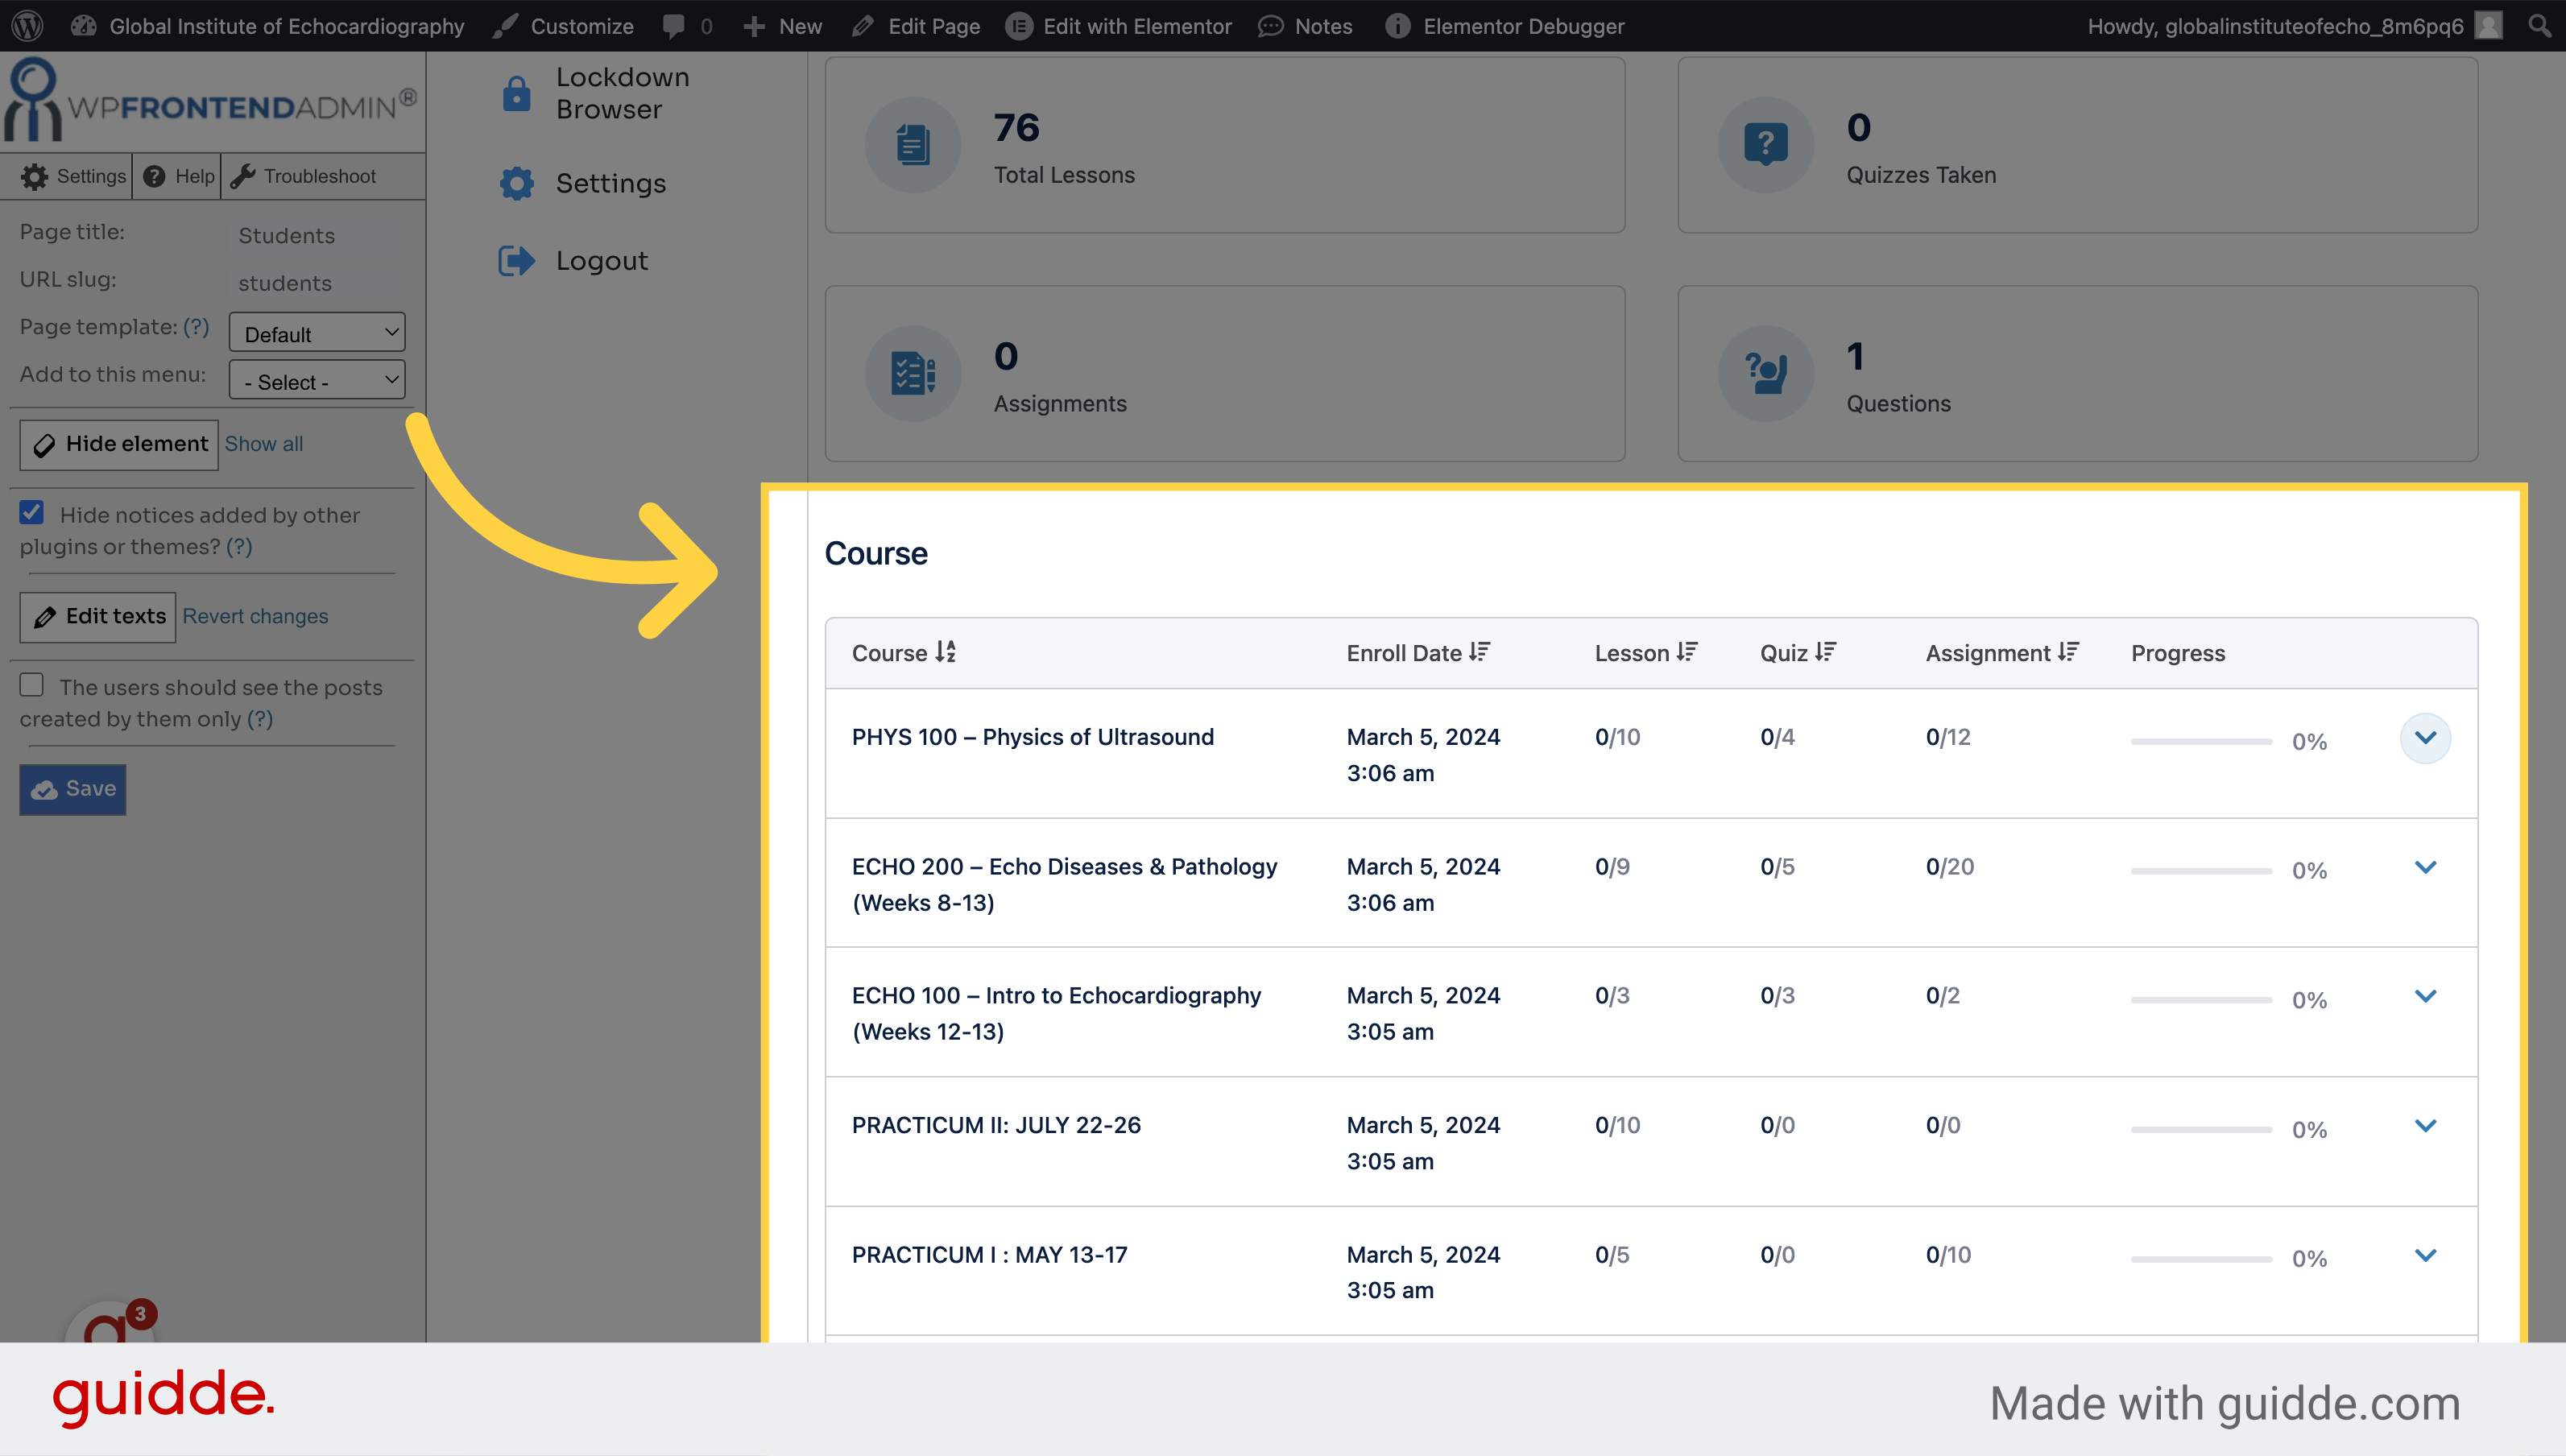
3. Scroll down to view their course progress and click the arrow to expand the details
Click the selected button
4. View Student contact info here
Access detailed student information.
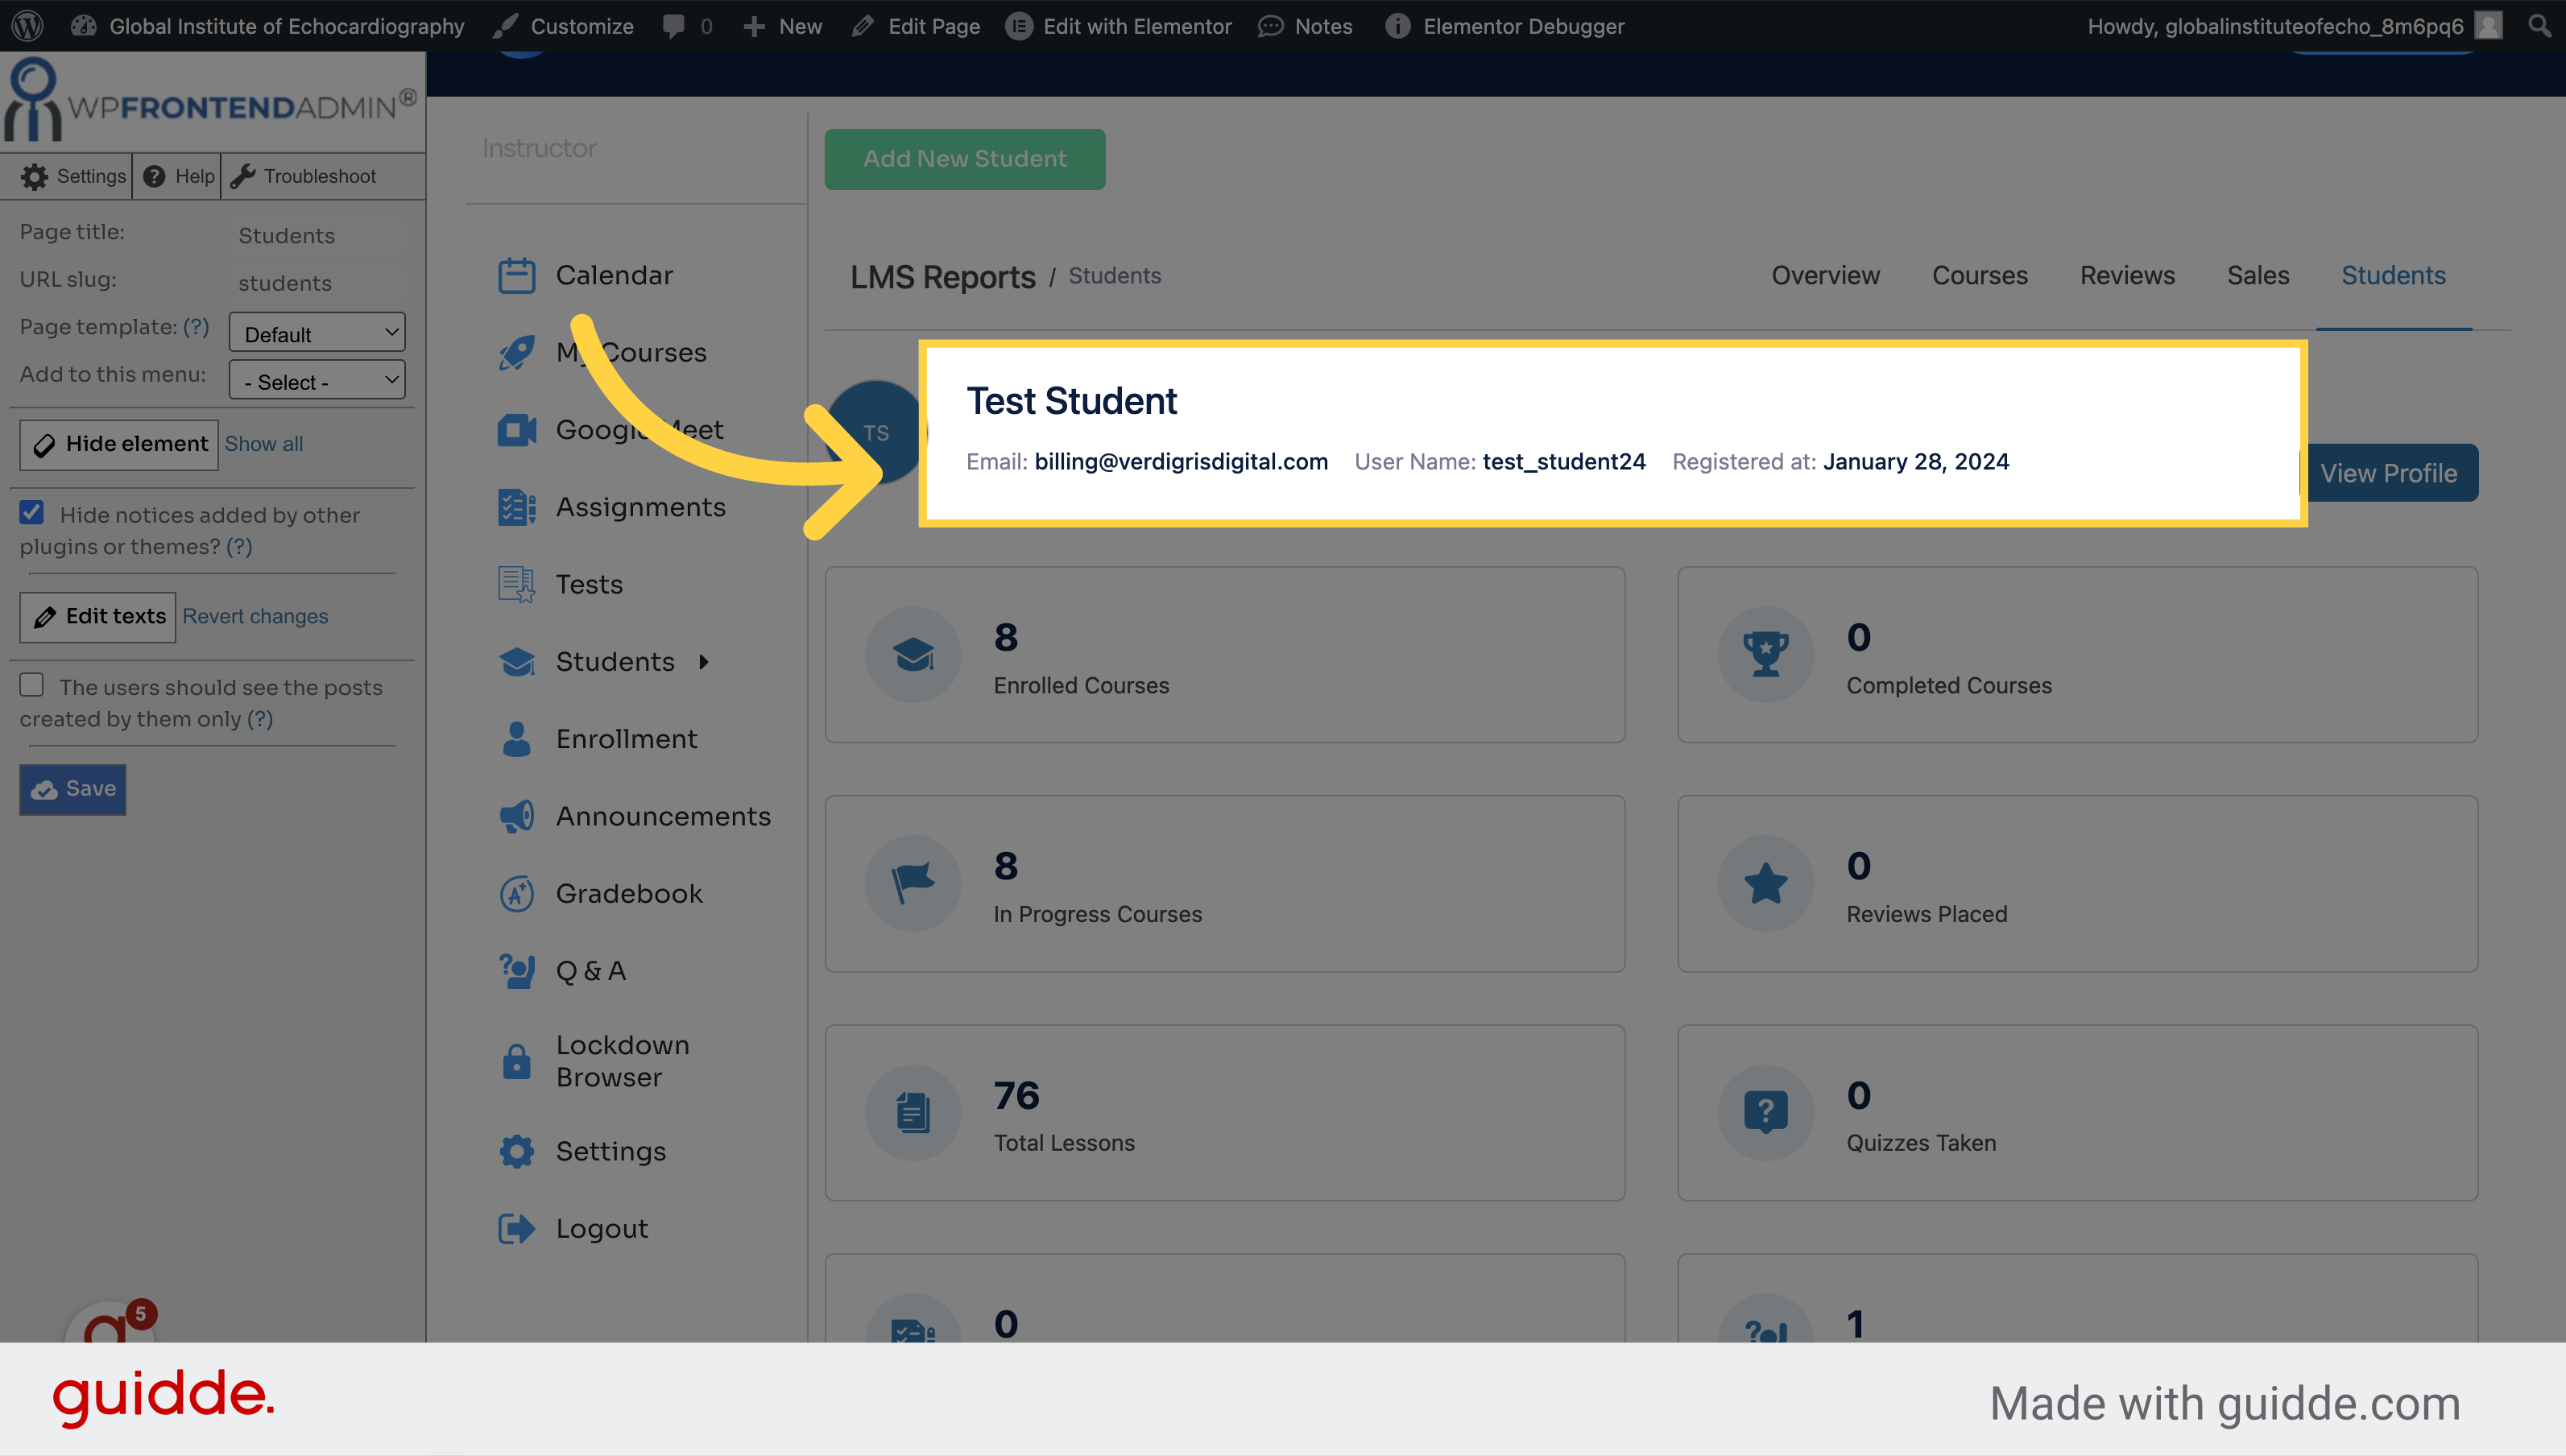
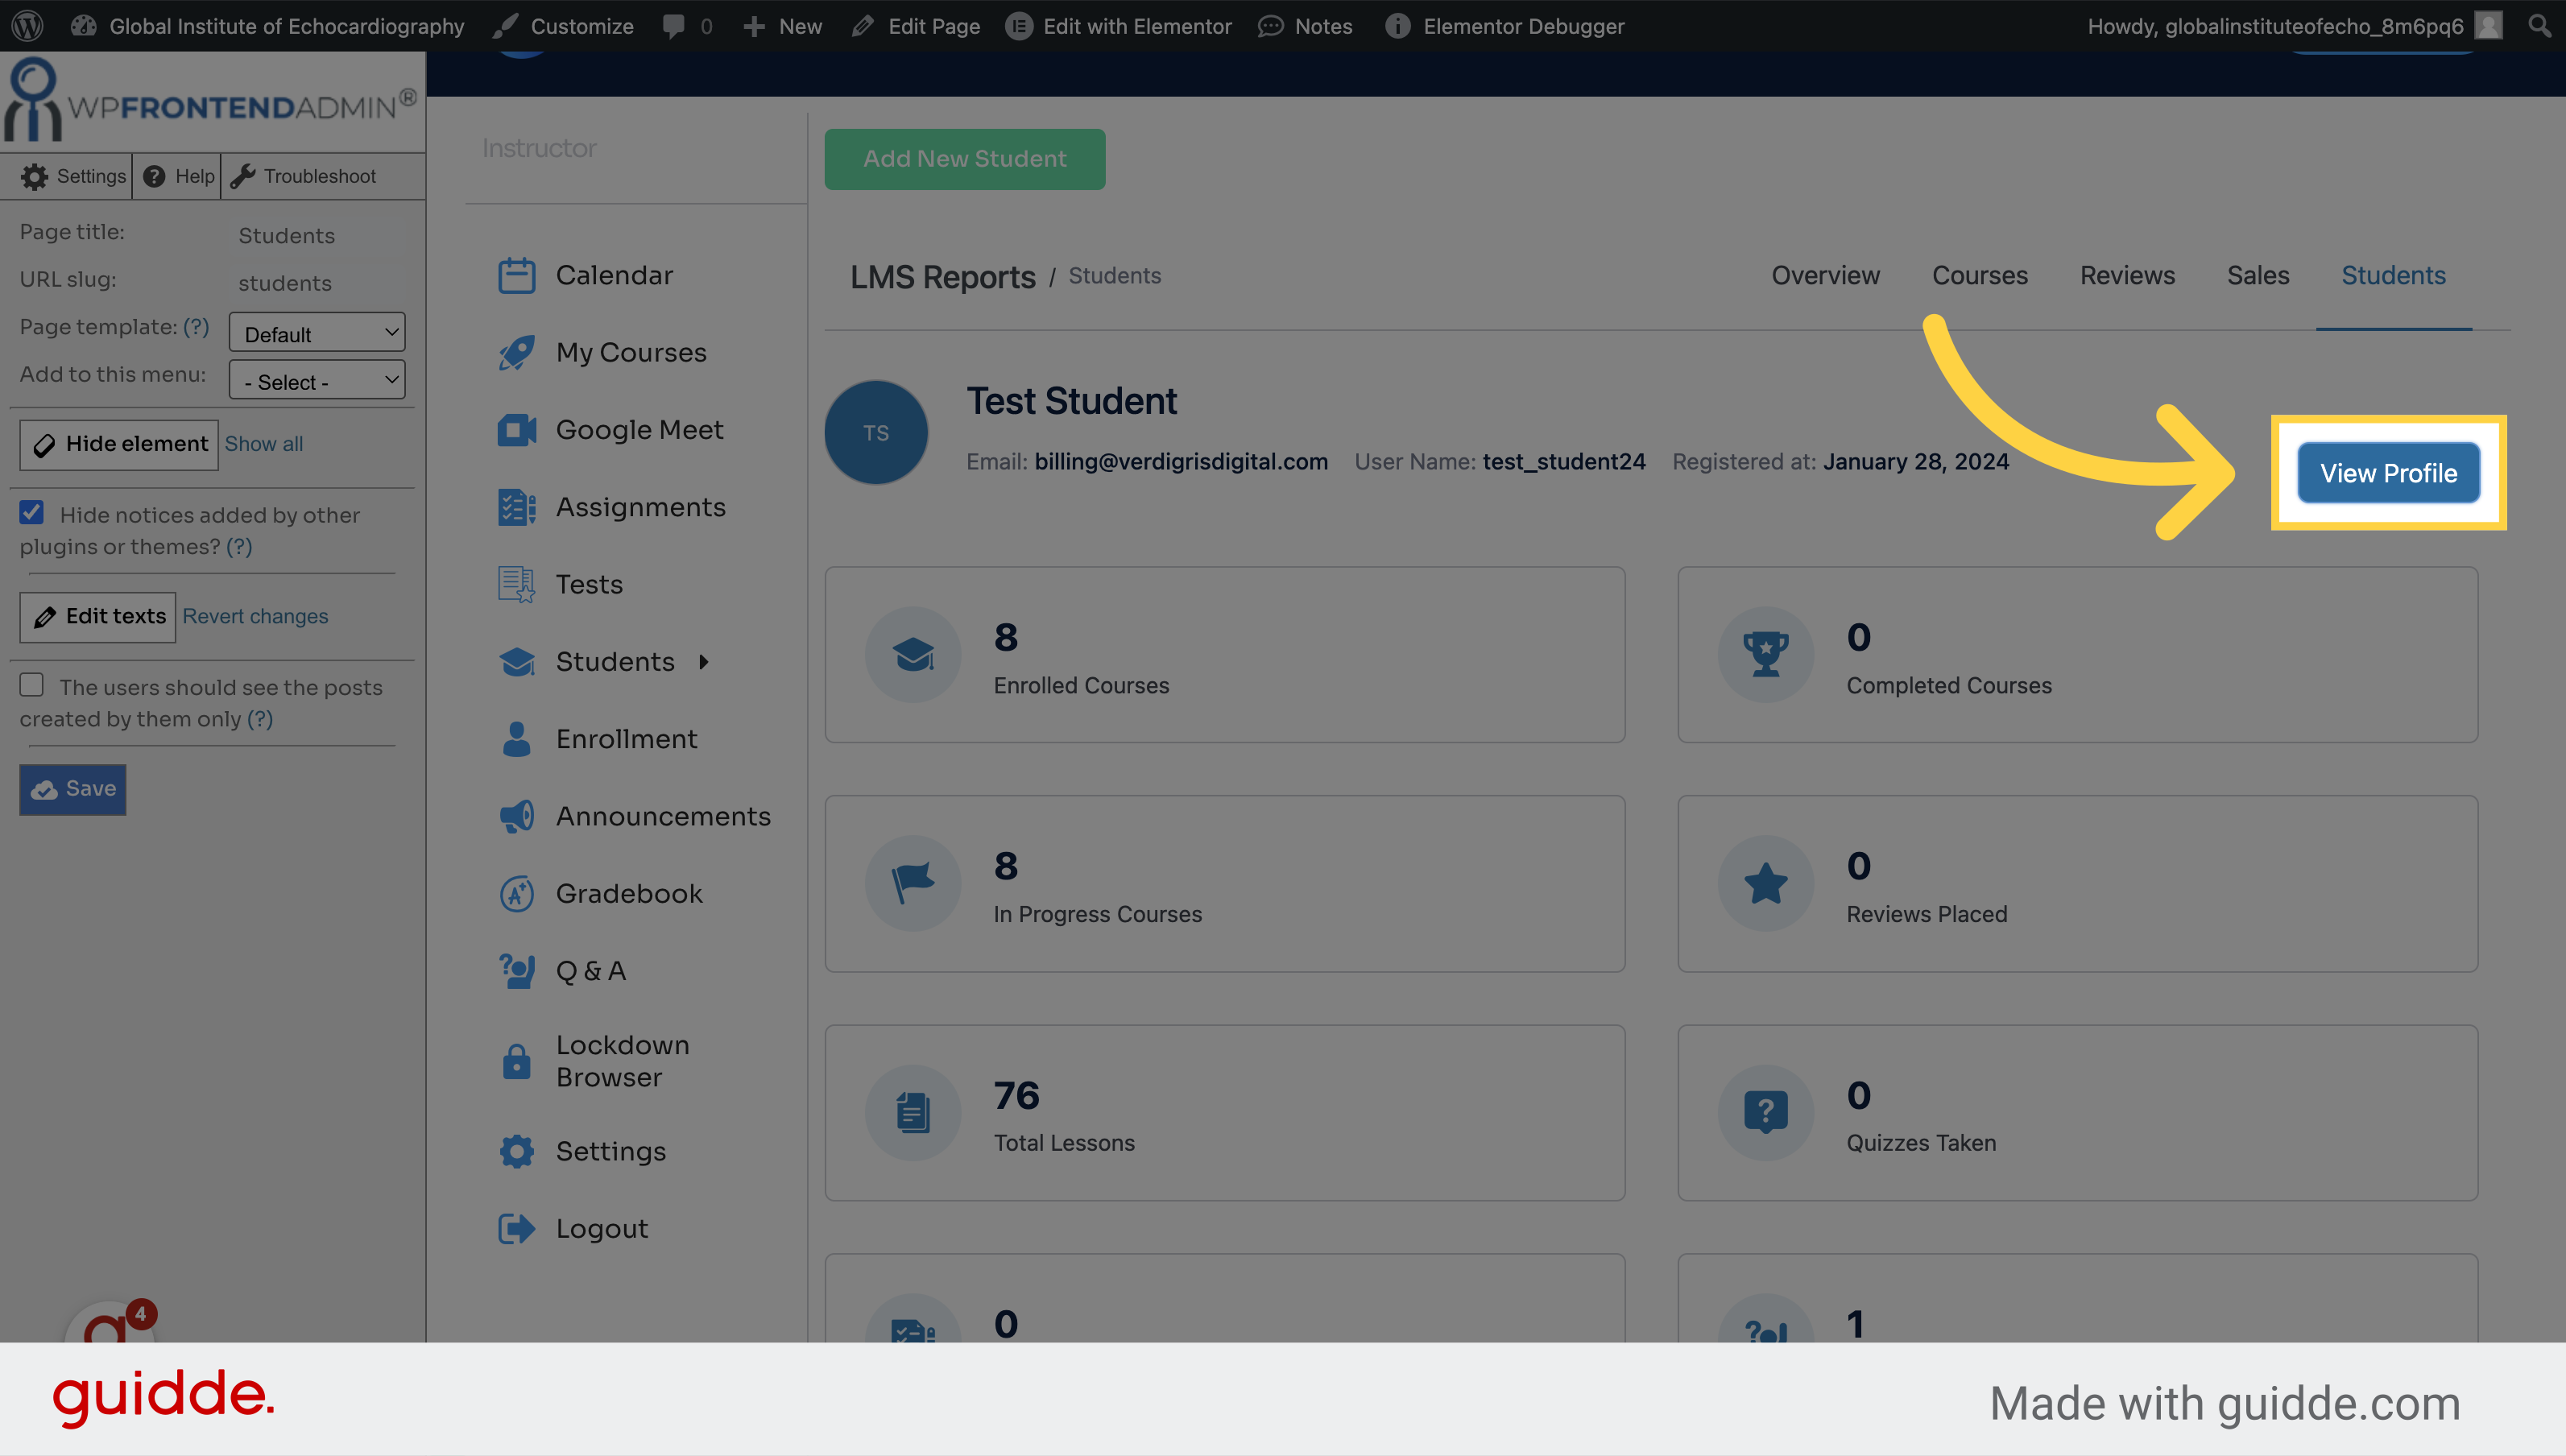
5. Click "View Profile" to view more info
Open the View Profile option.
This guide covered accessing the Students section, navigating to Details, and viewing student profiles with precision.
How to Manually Enroll a Student
Learn how to manually enroll a student in the system. Follow these precise instructions to successfully add a student to a course and complete the enrollment process.
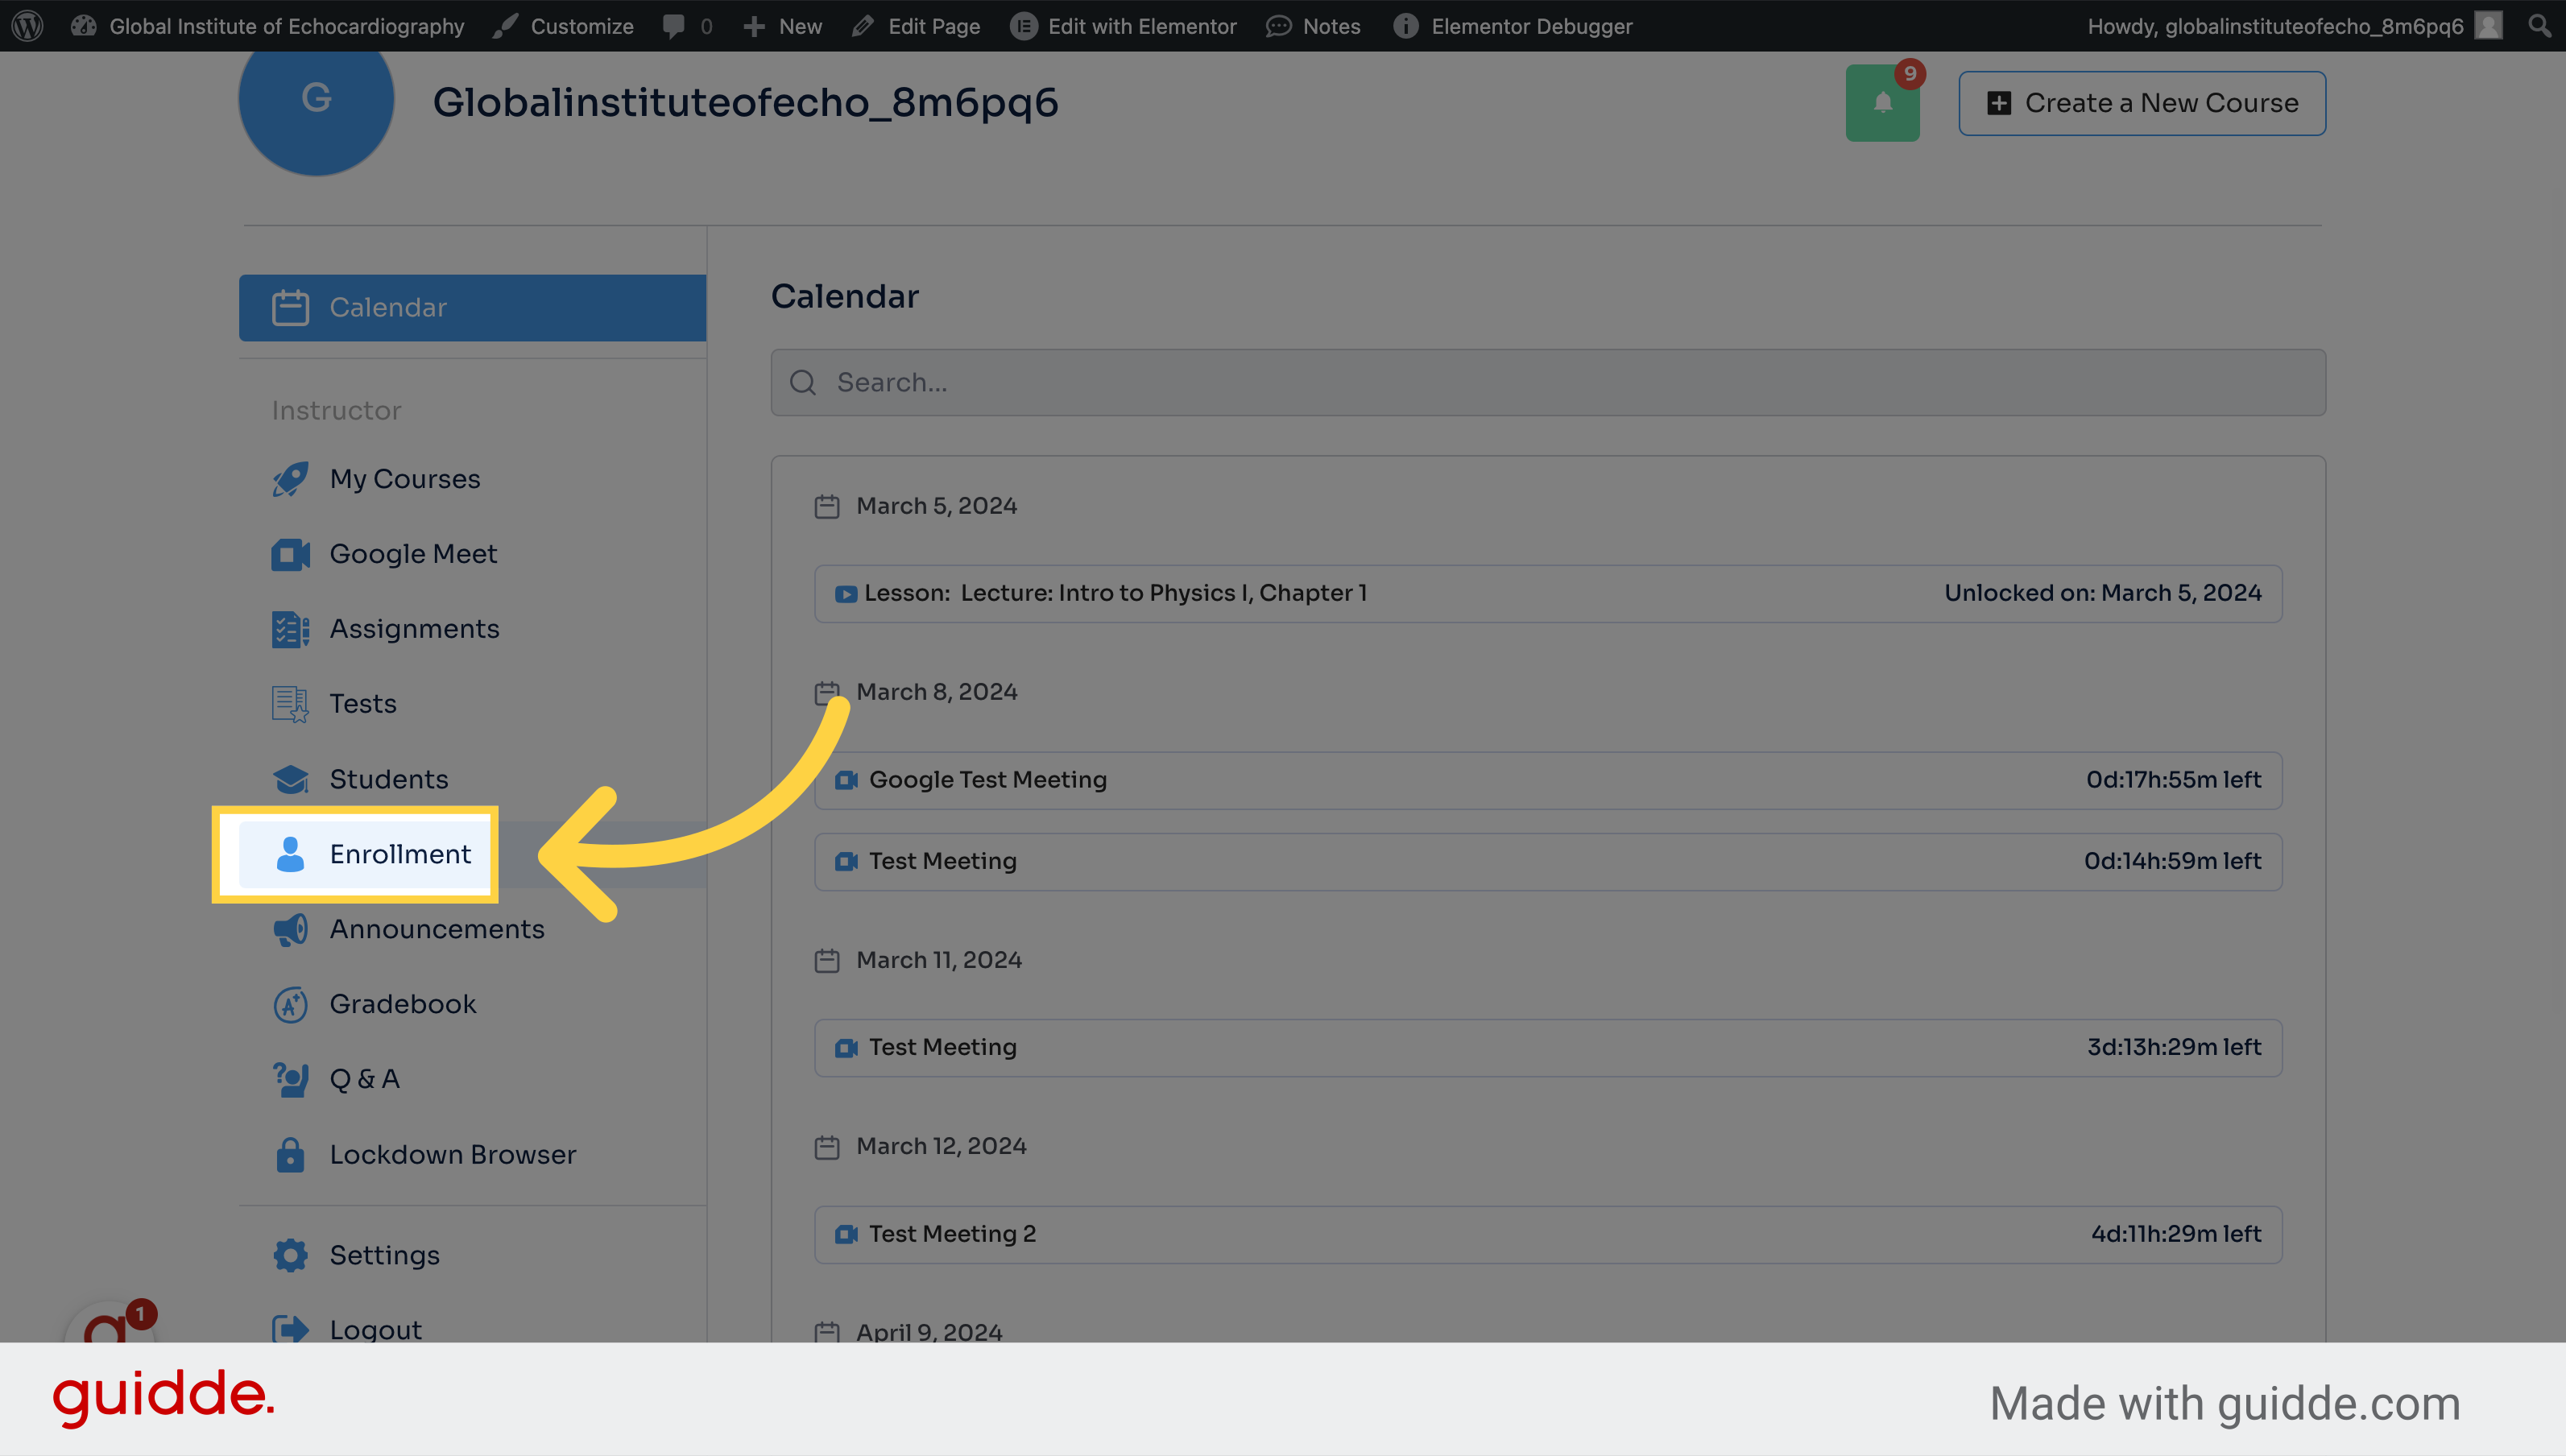
1. Click "Enrollment" from the dashboard
Access the "Enrollment" page.
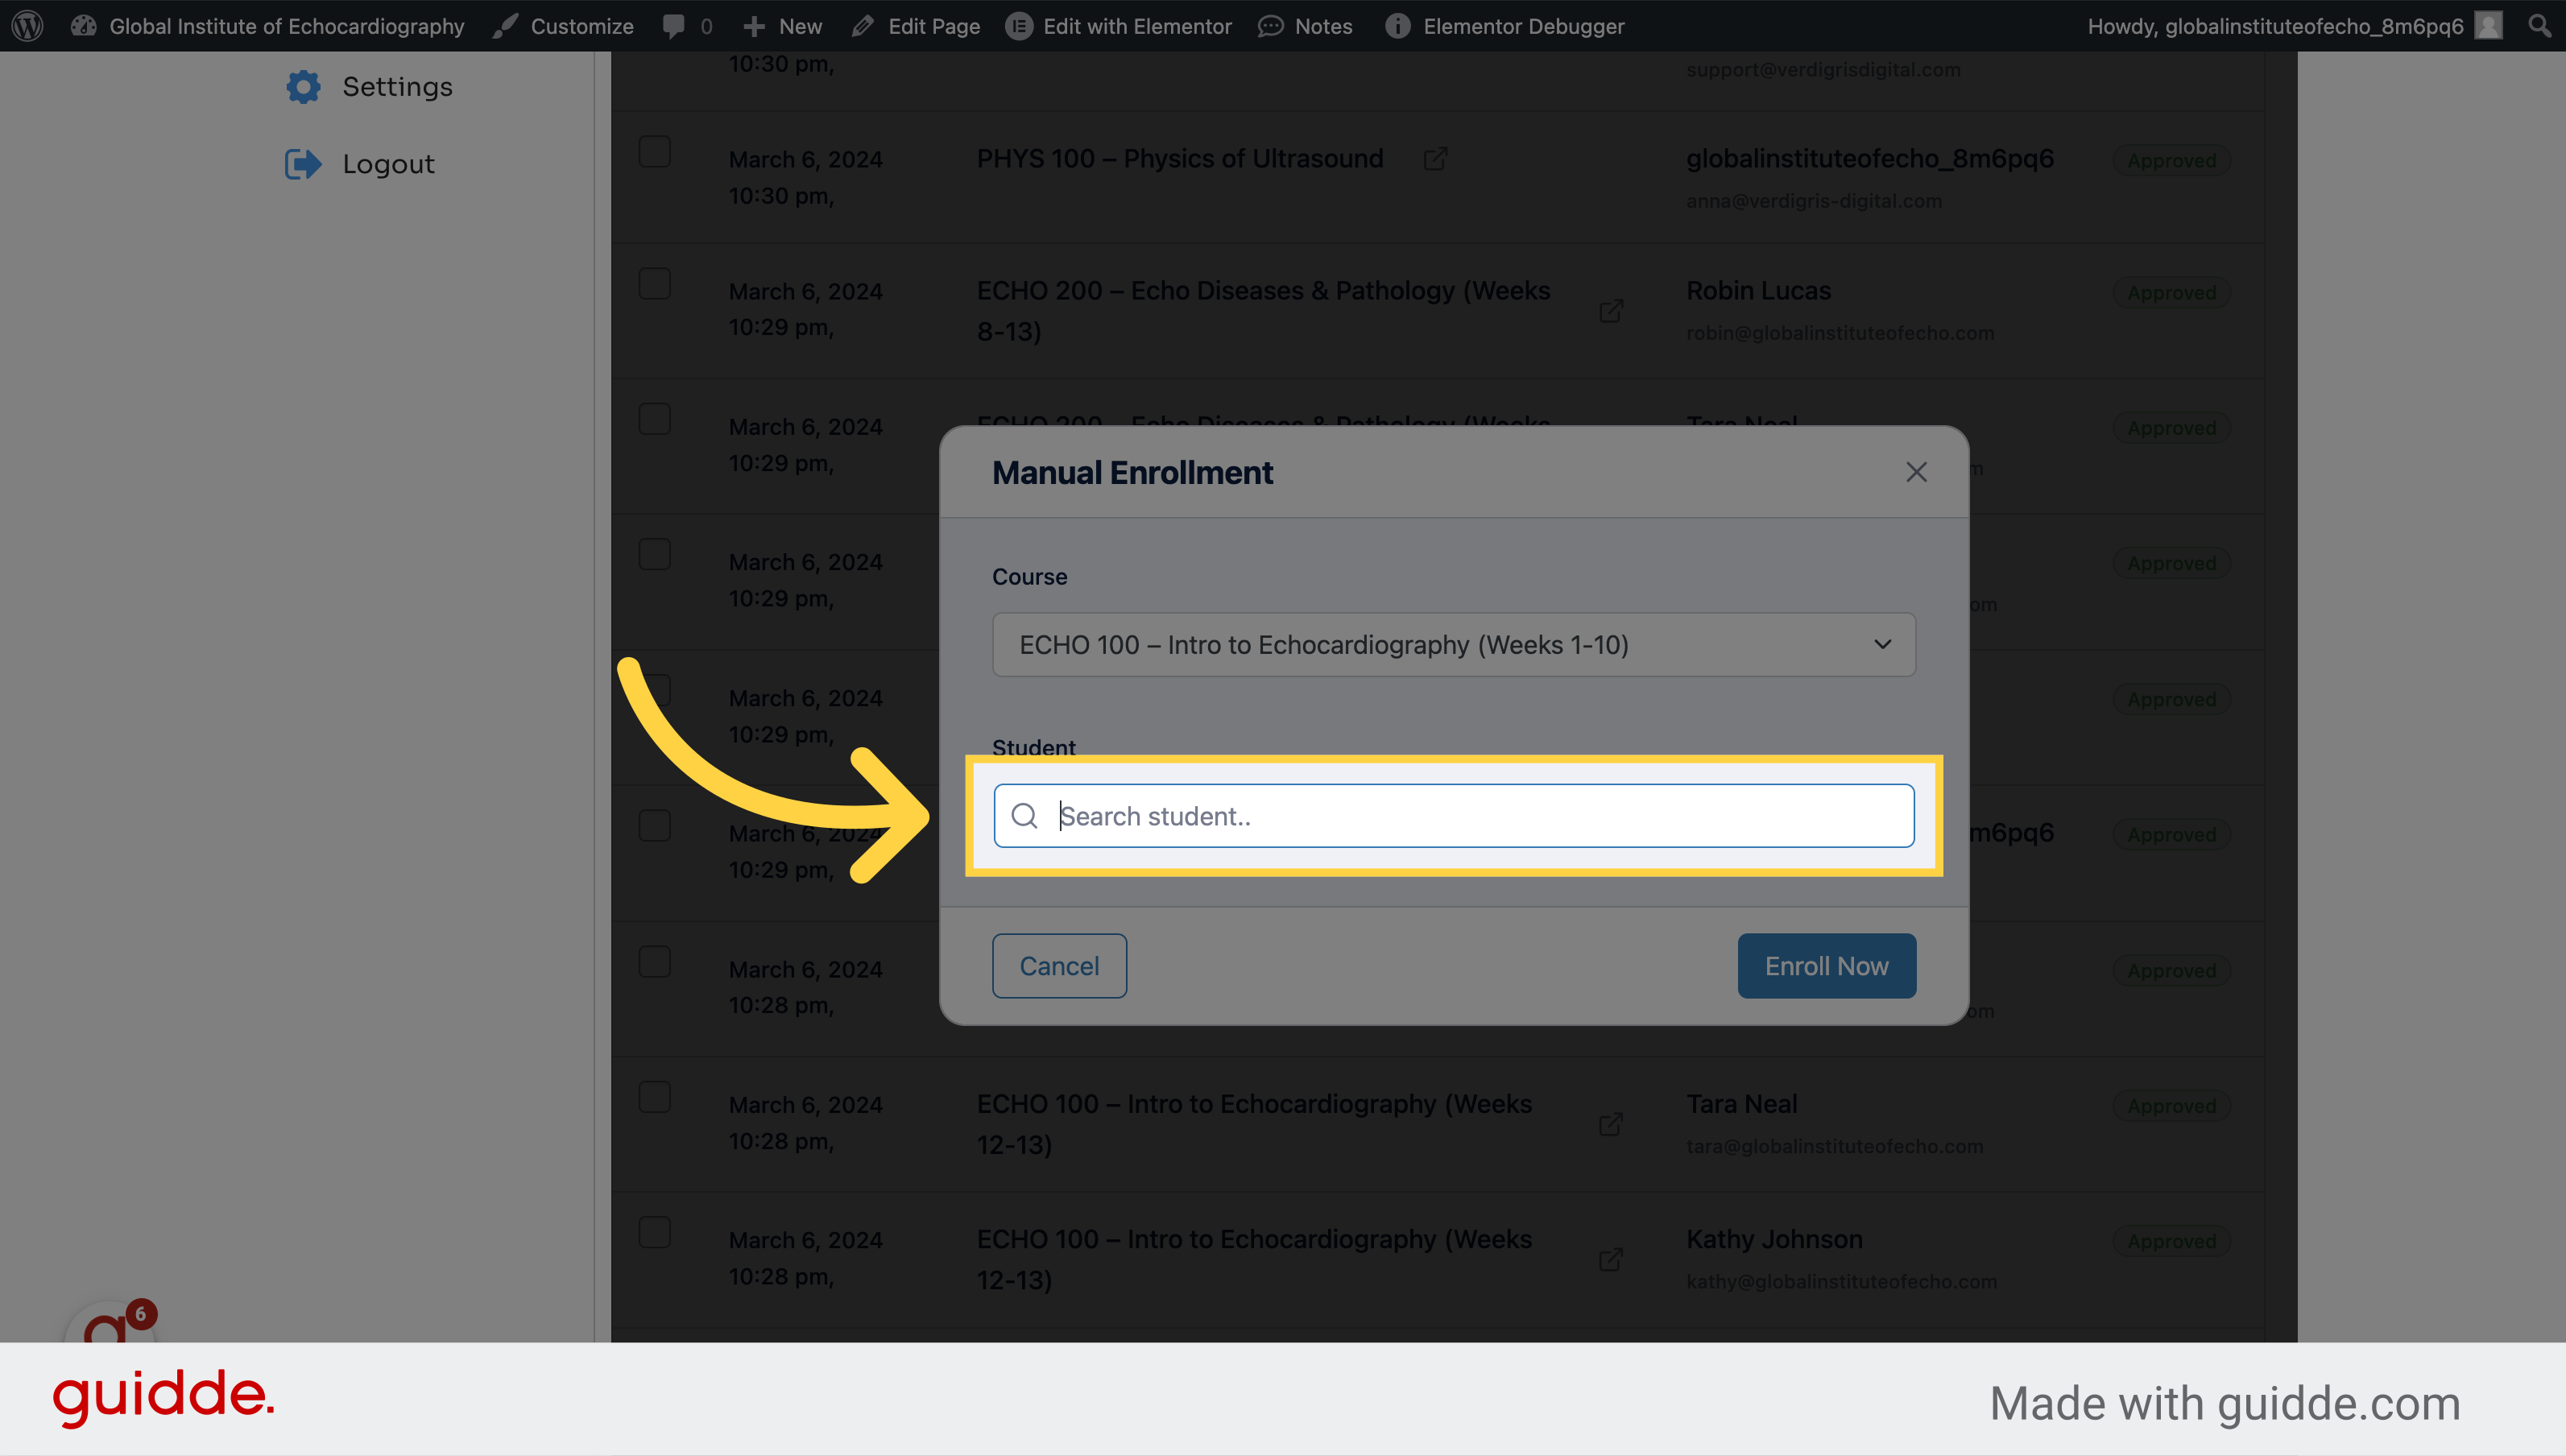
2. Click "+Enroll a student"
Select the add option.
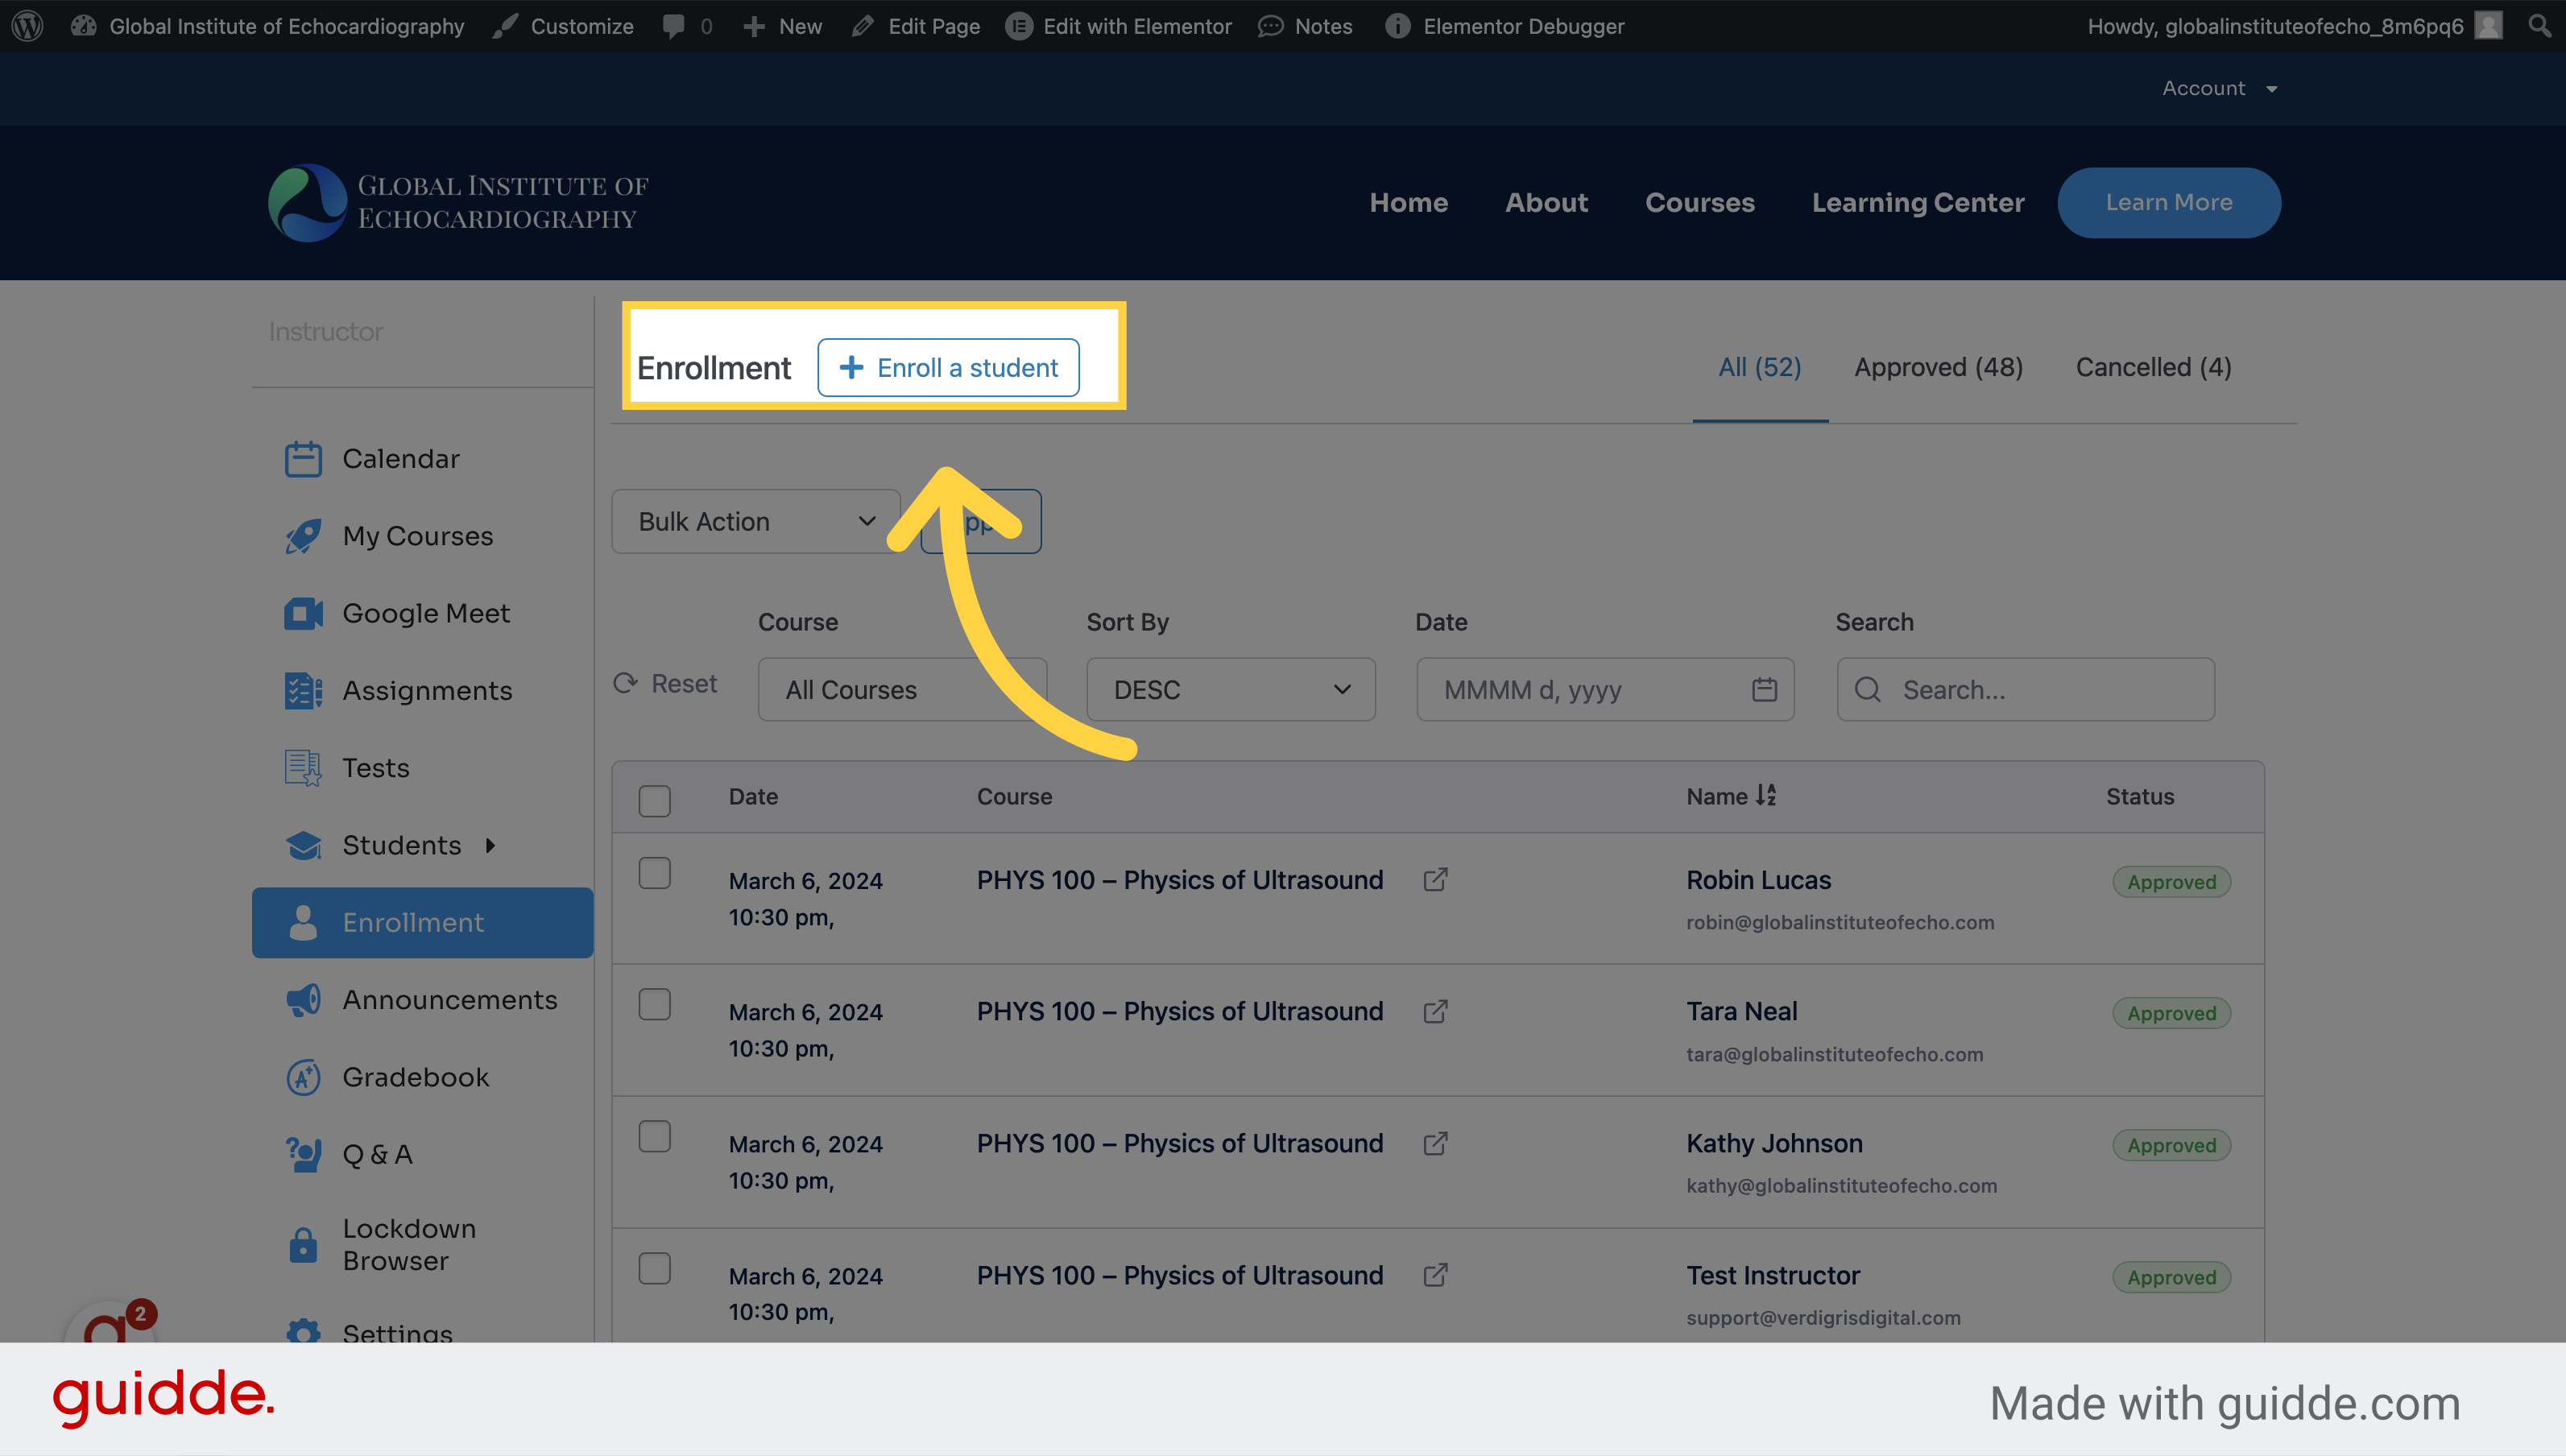
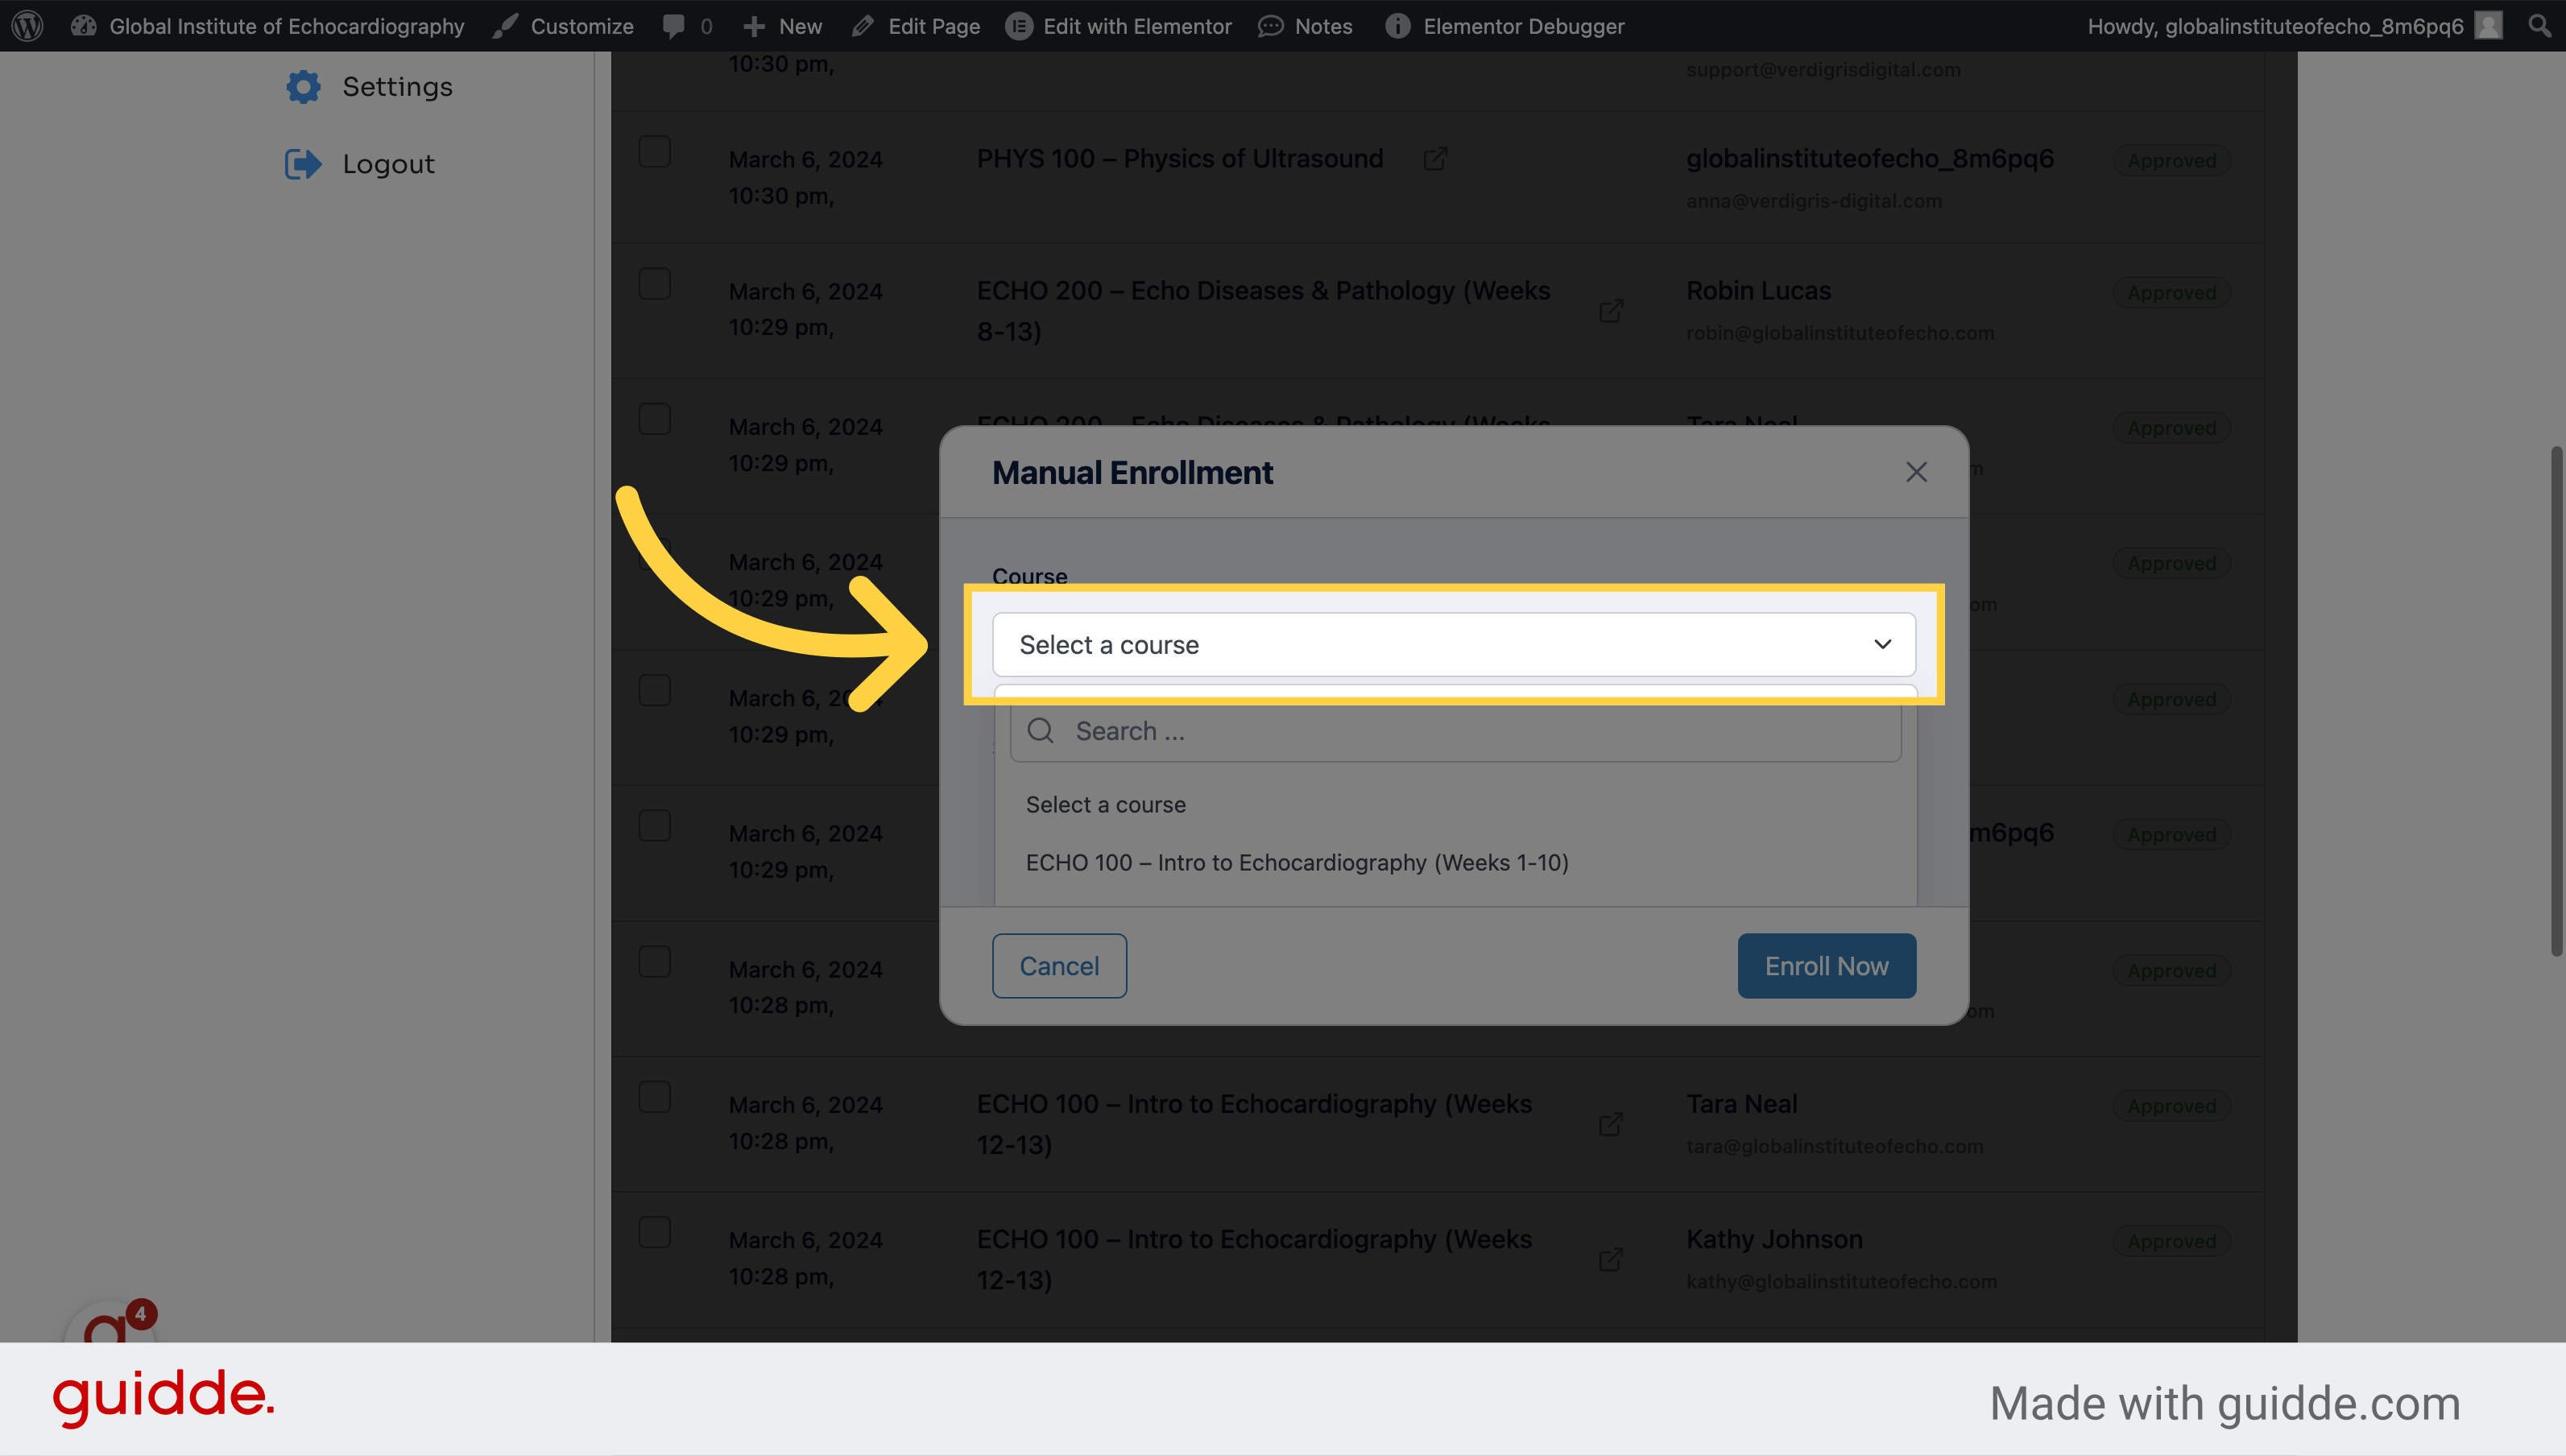
3. Scroll down and select the course you wish to enroll the student in
Select the course "ECHO 100 – Intro to Echocardiography (Weeks 1-10).
4. Type the name of the student here
Initiate a search for the student.
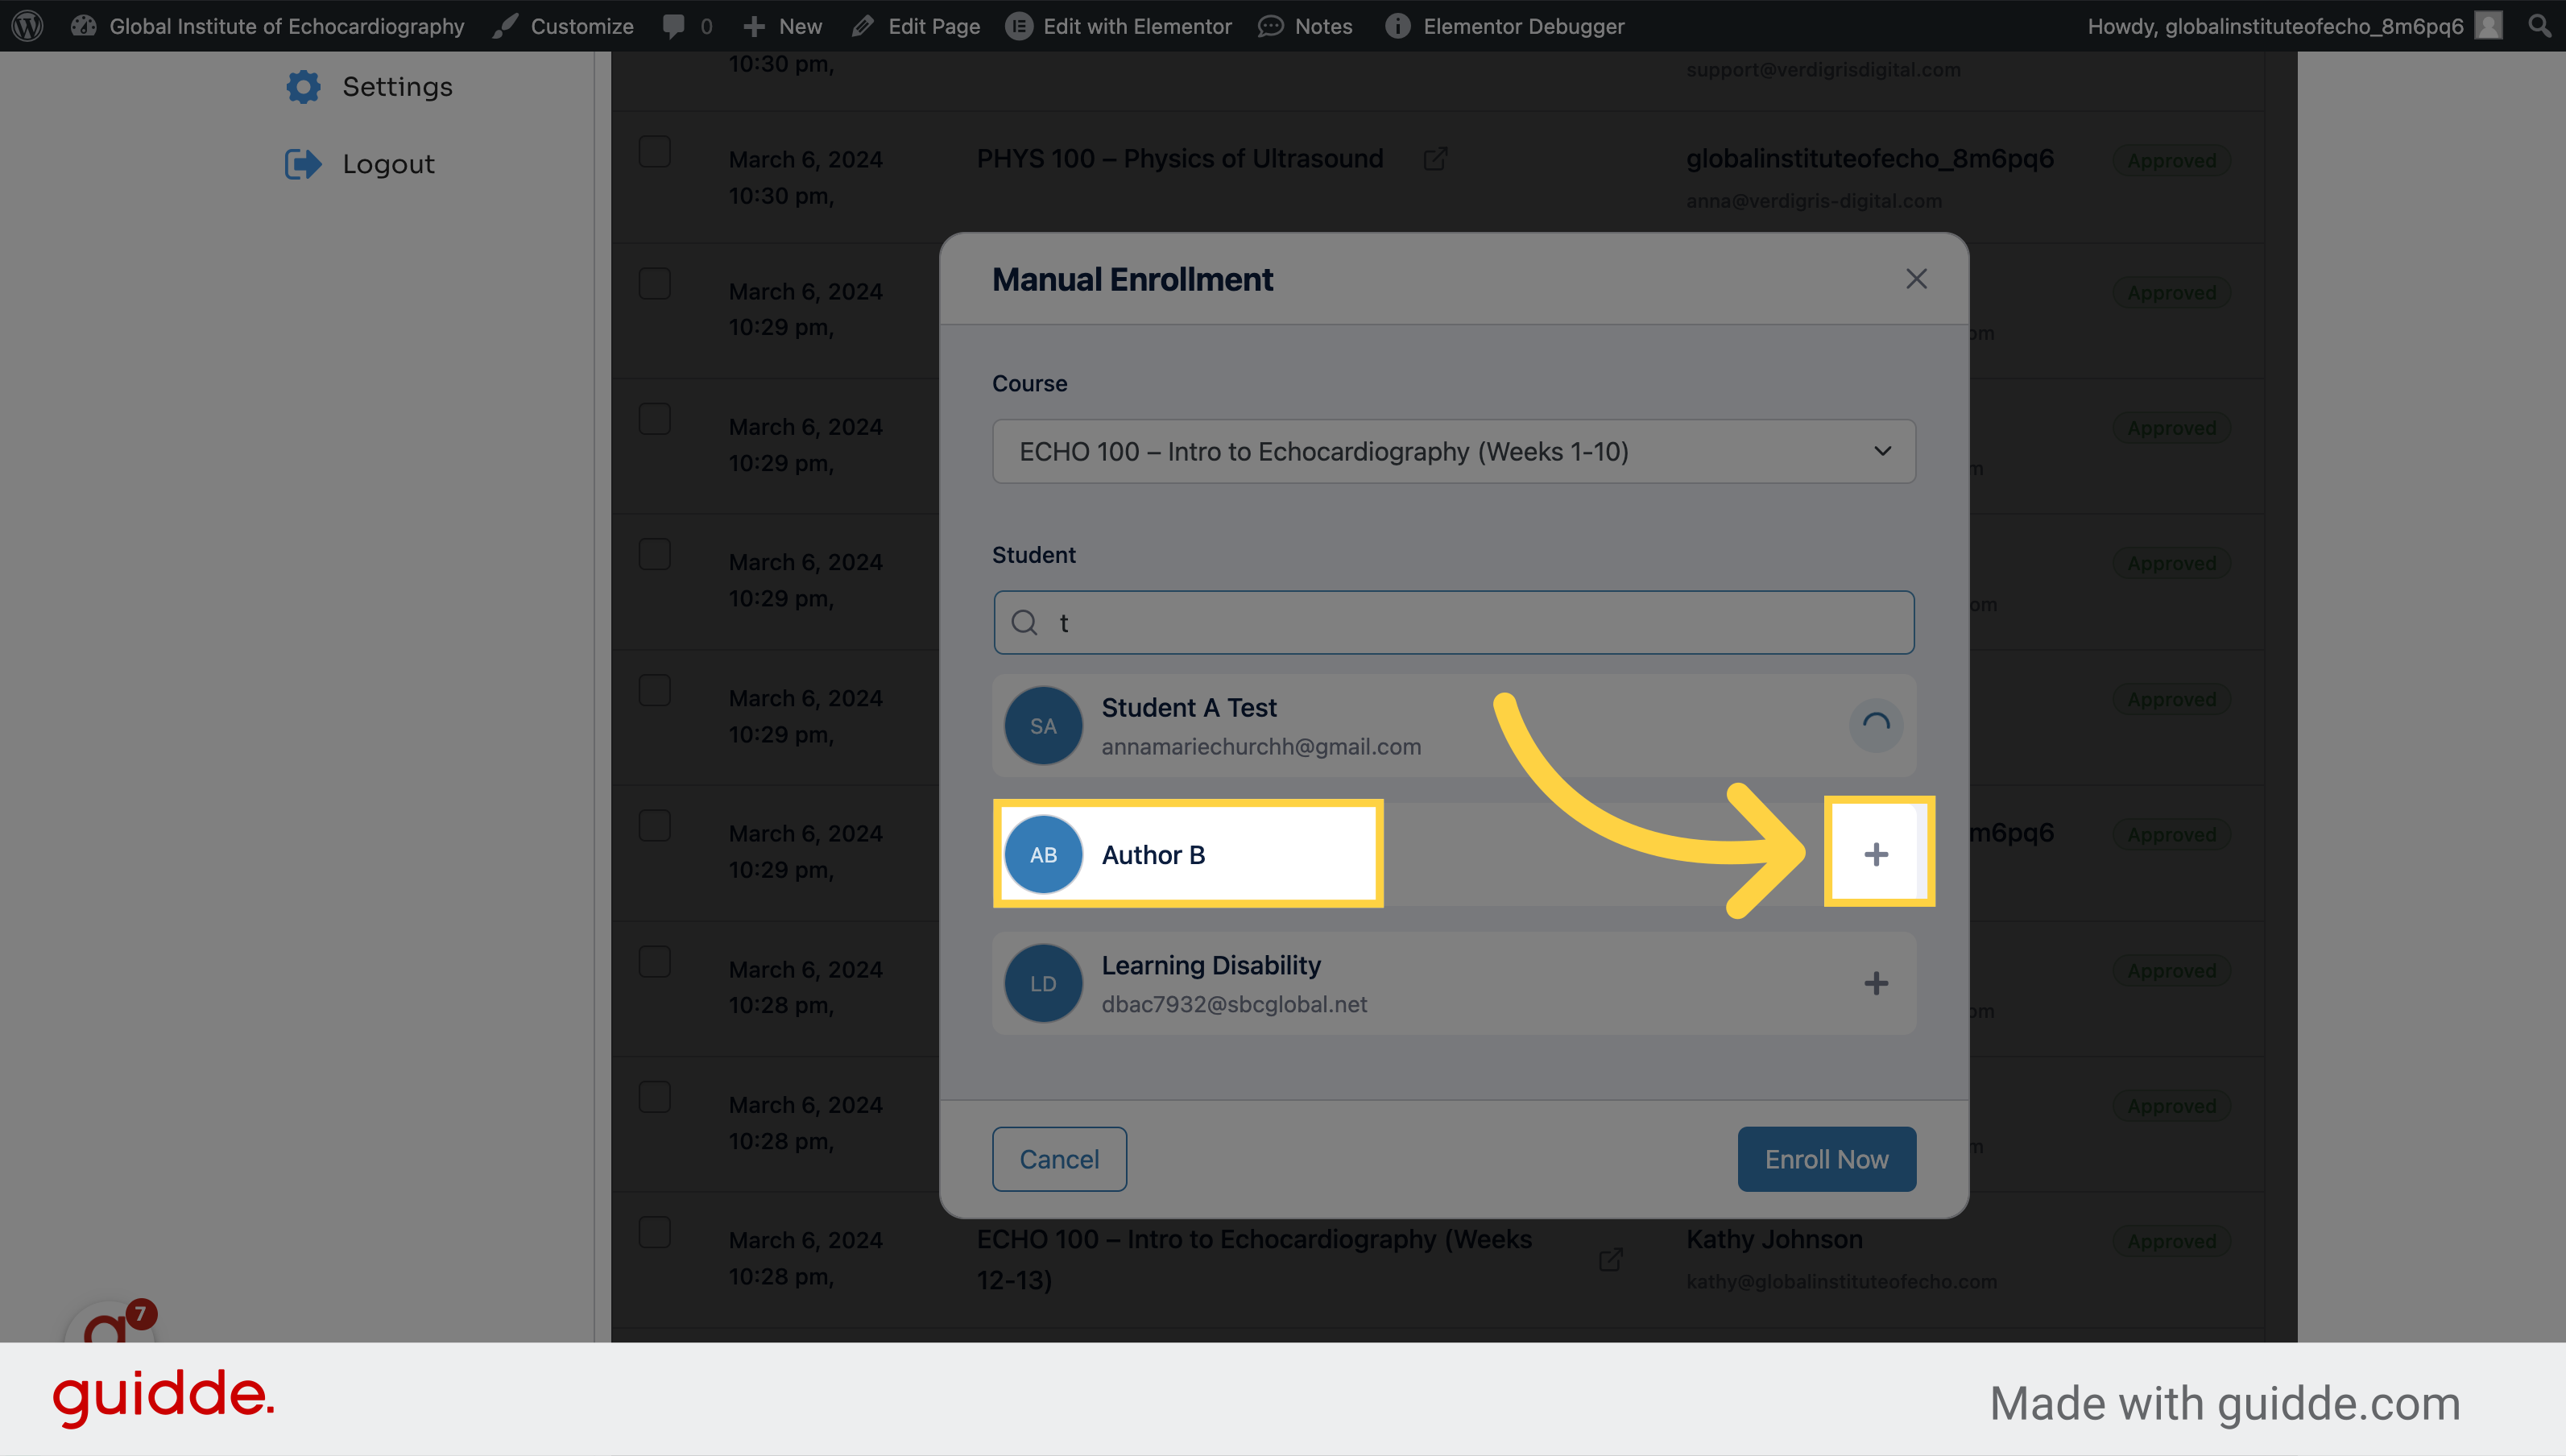
5. Click " + " to add the student to the course
Click here
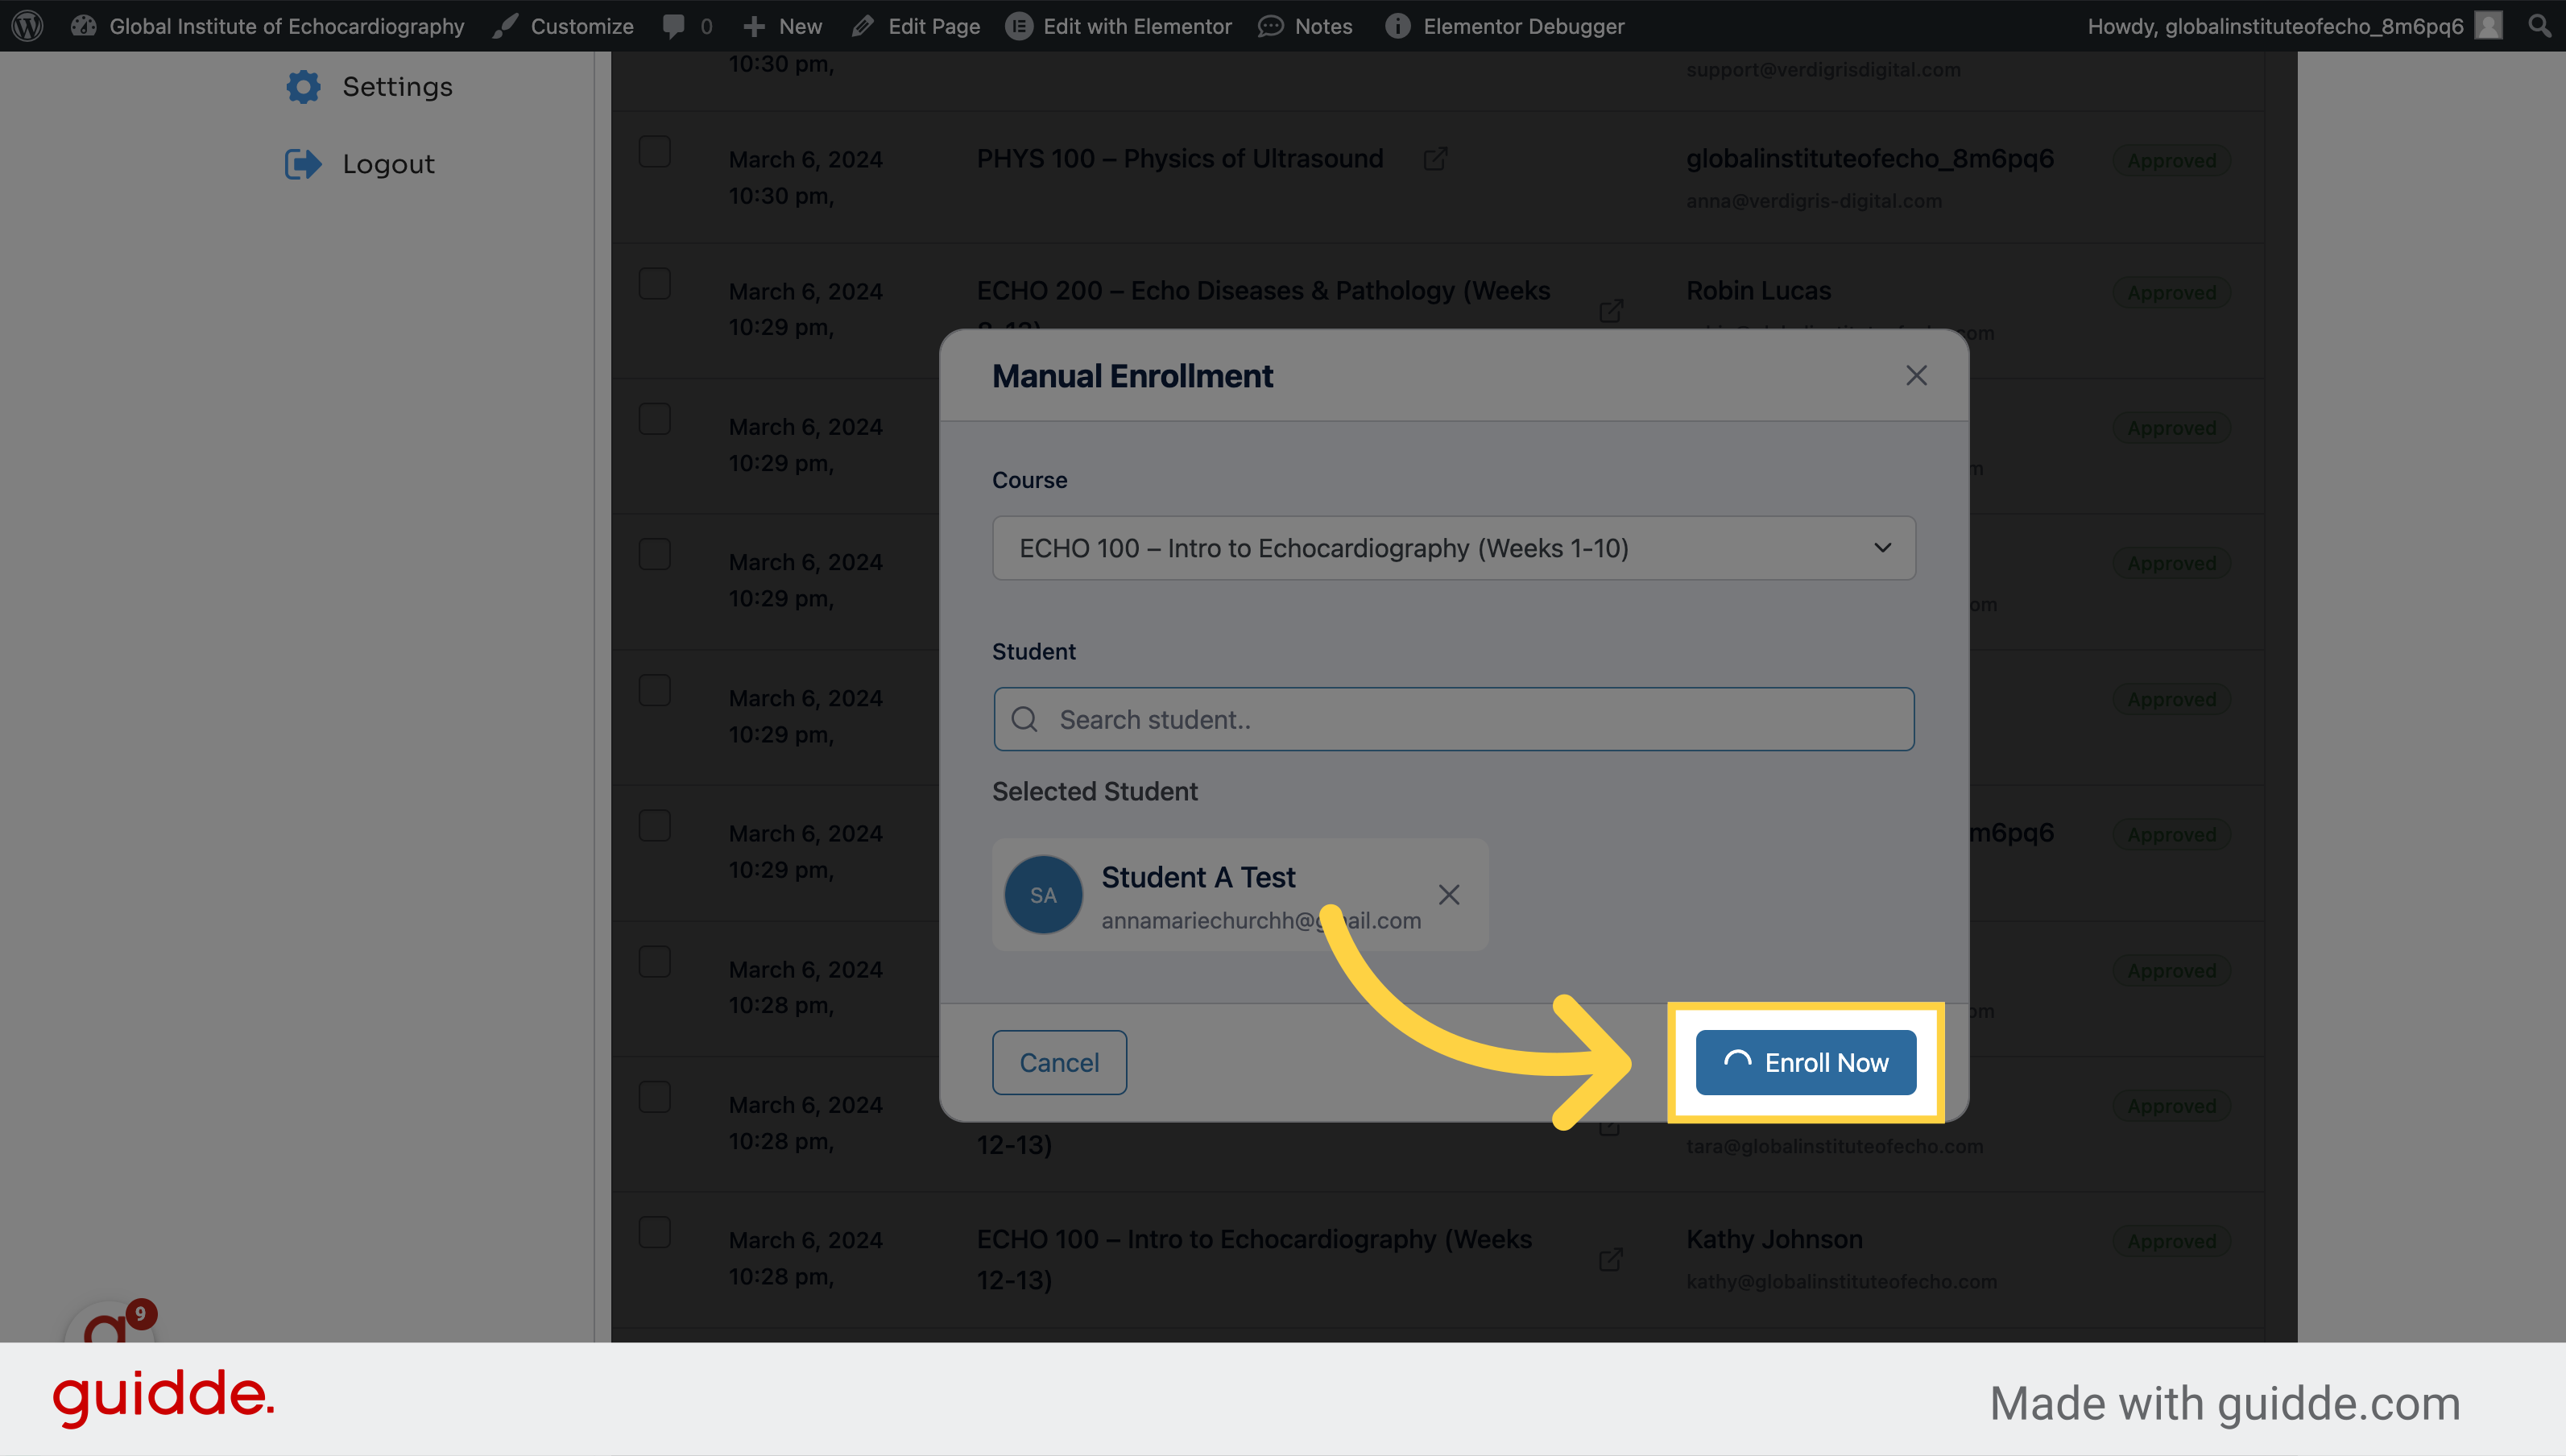
6. Click "Enroll Now"
Enroll the student.
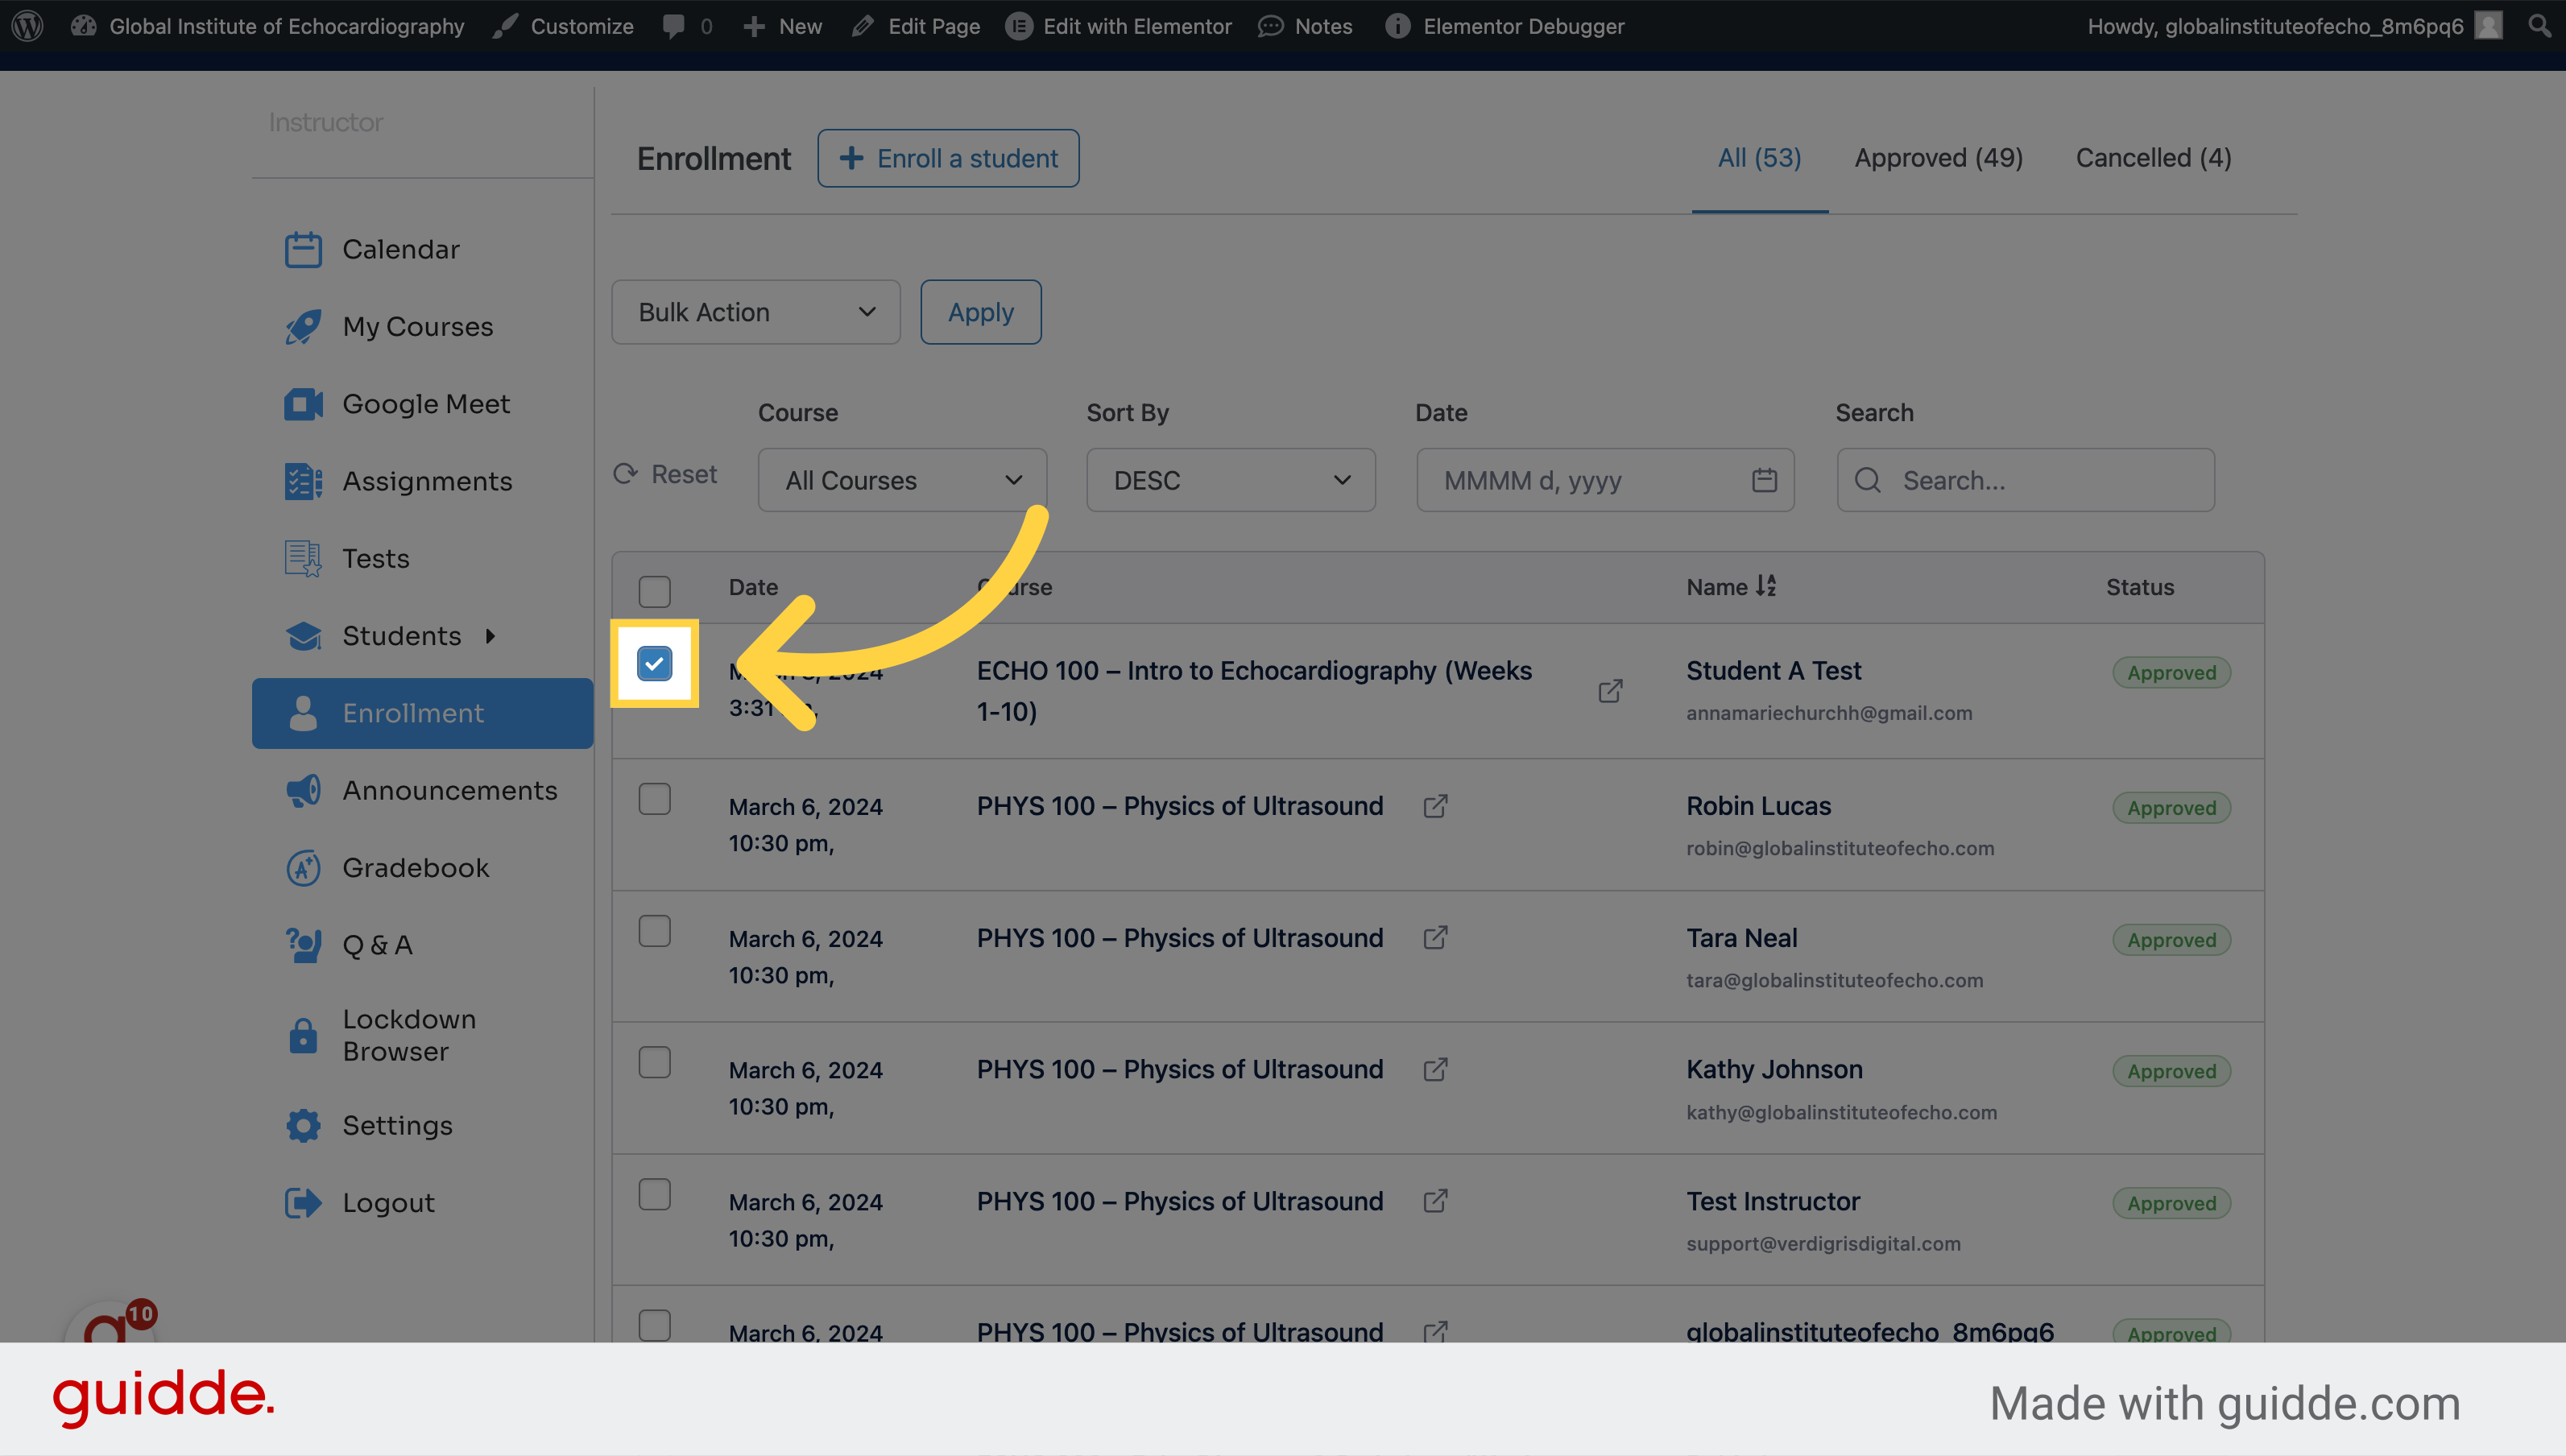
7. To remove a student, click the check box next to their name
Select the student's ID.
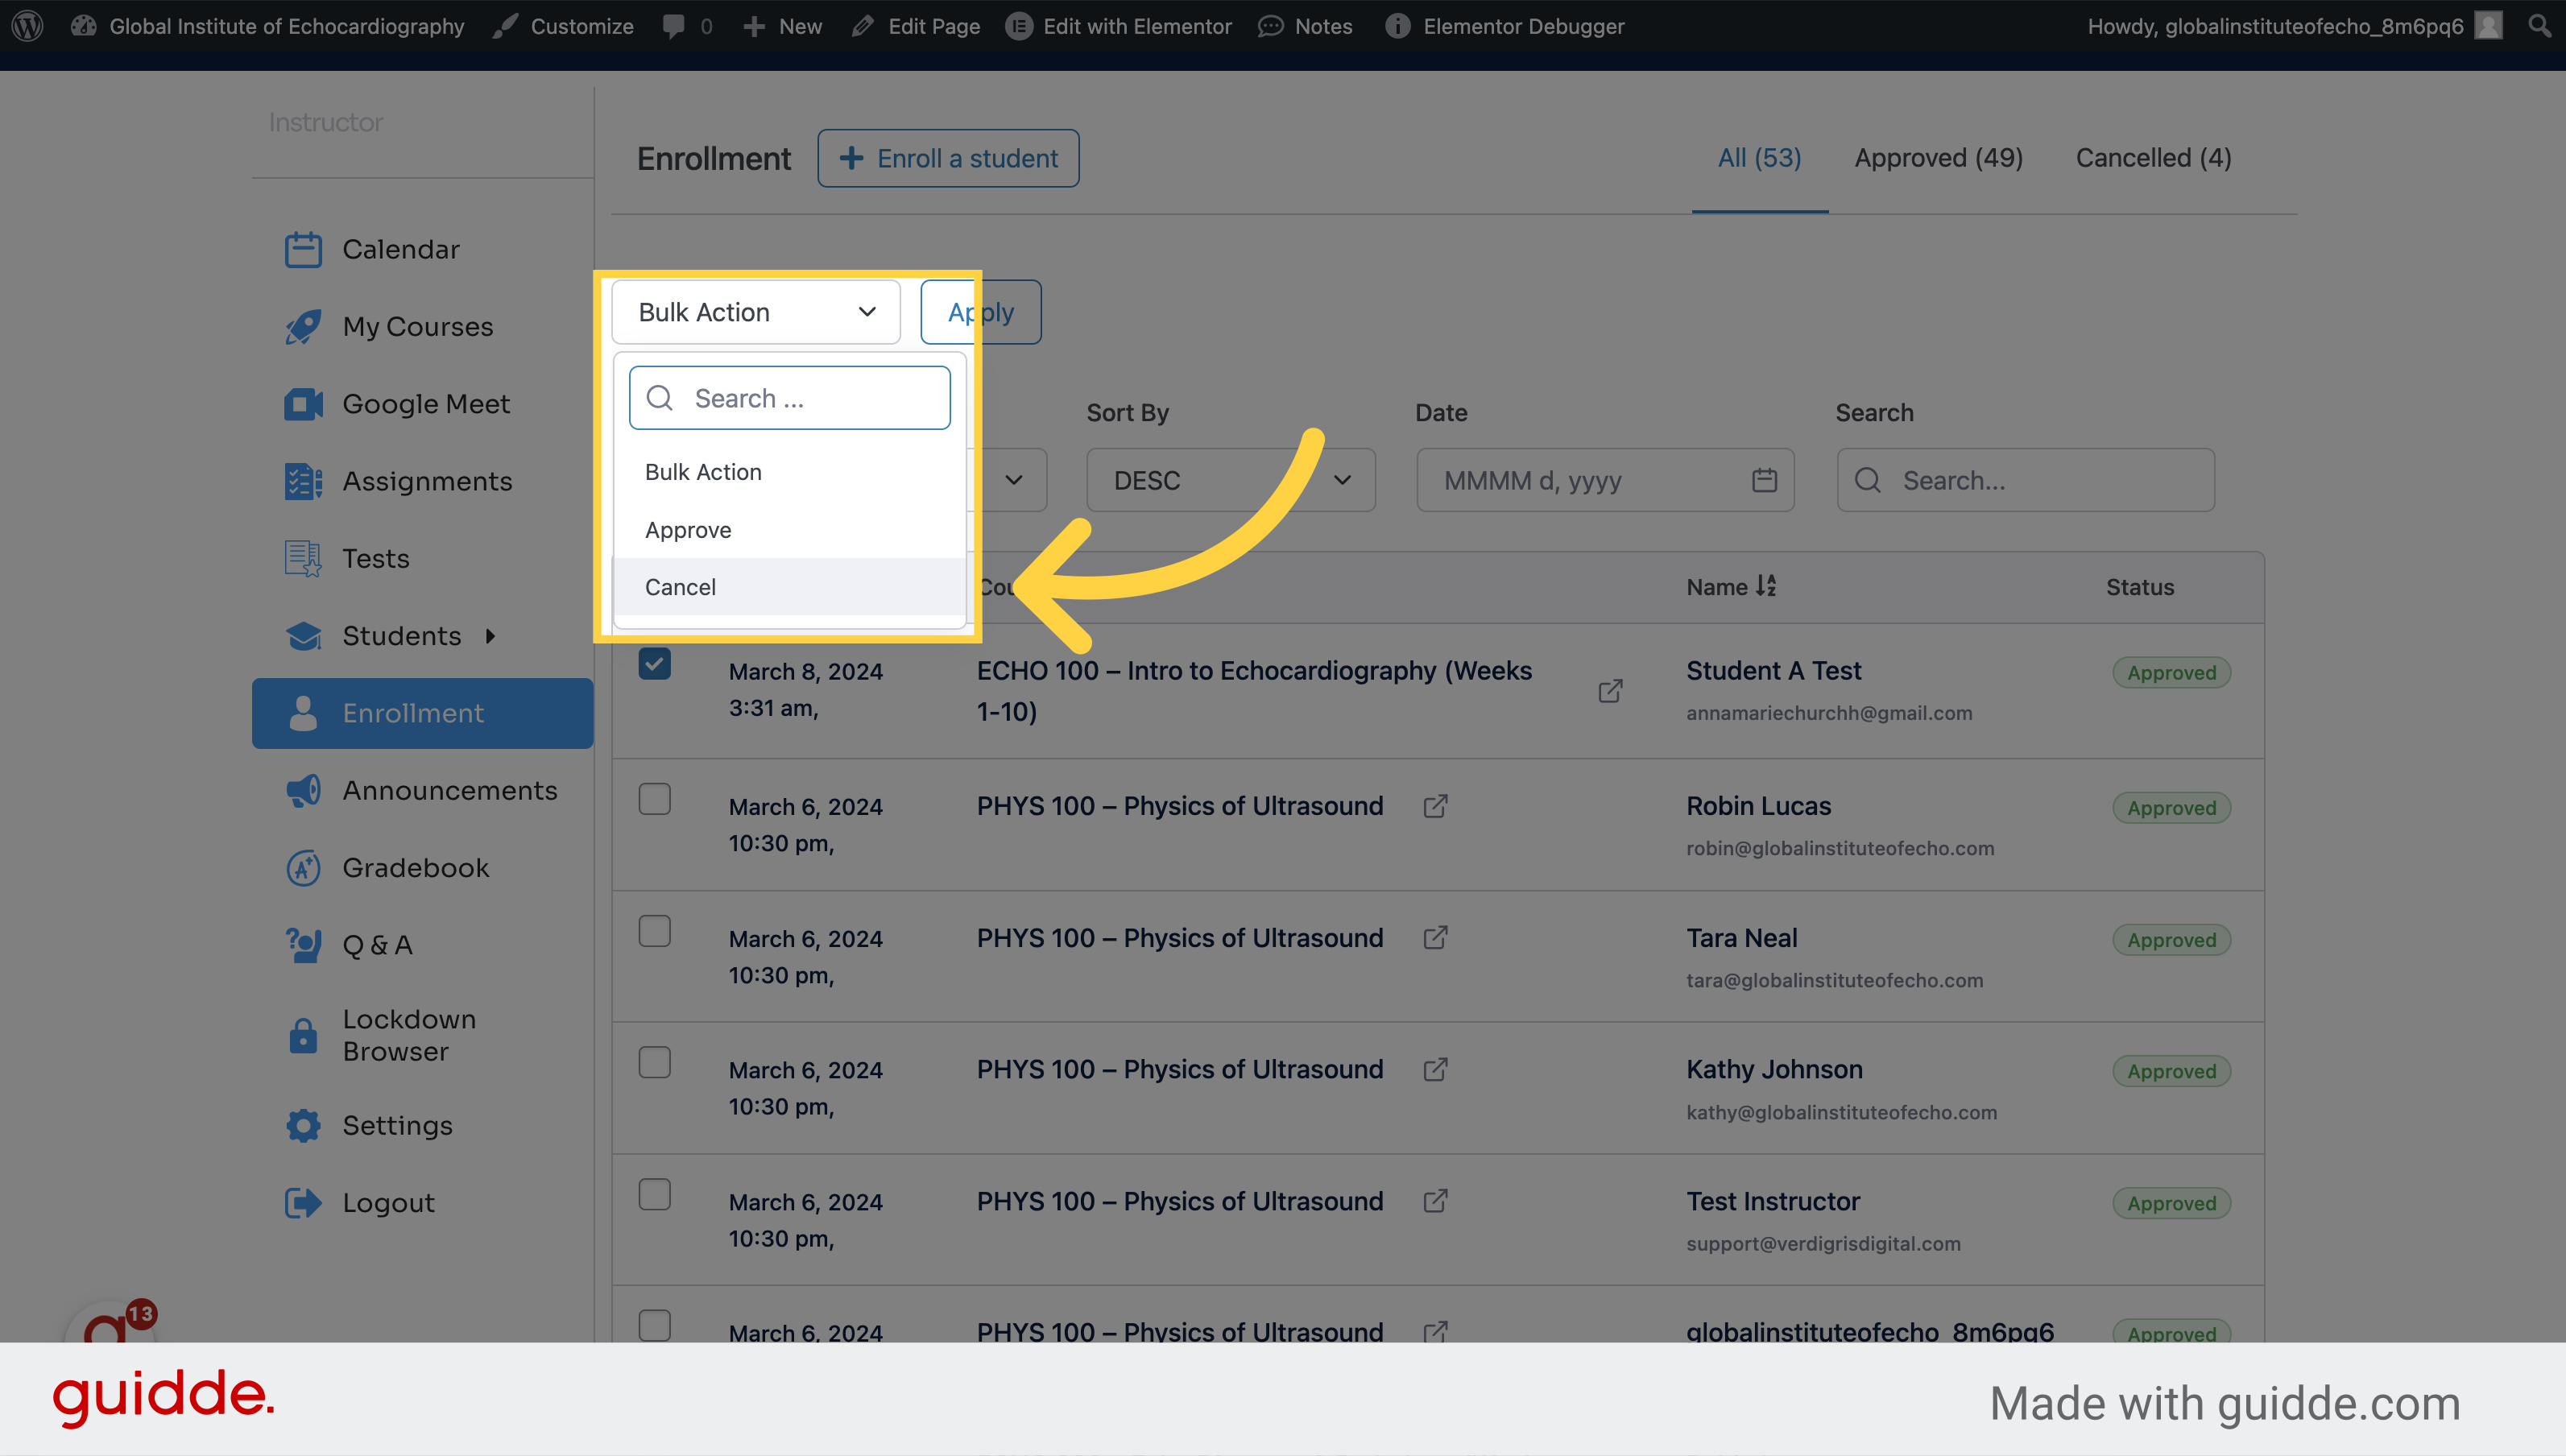
8. Click "Cancel" from the dropdown list
Select "Cancel.
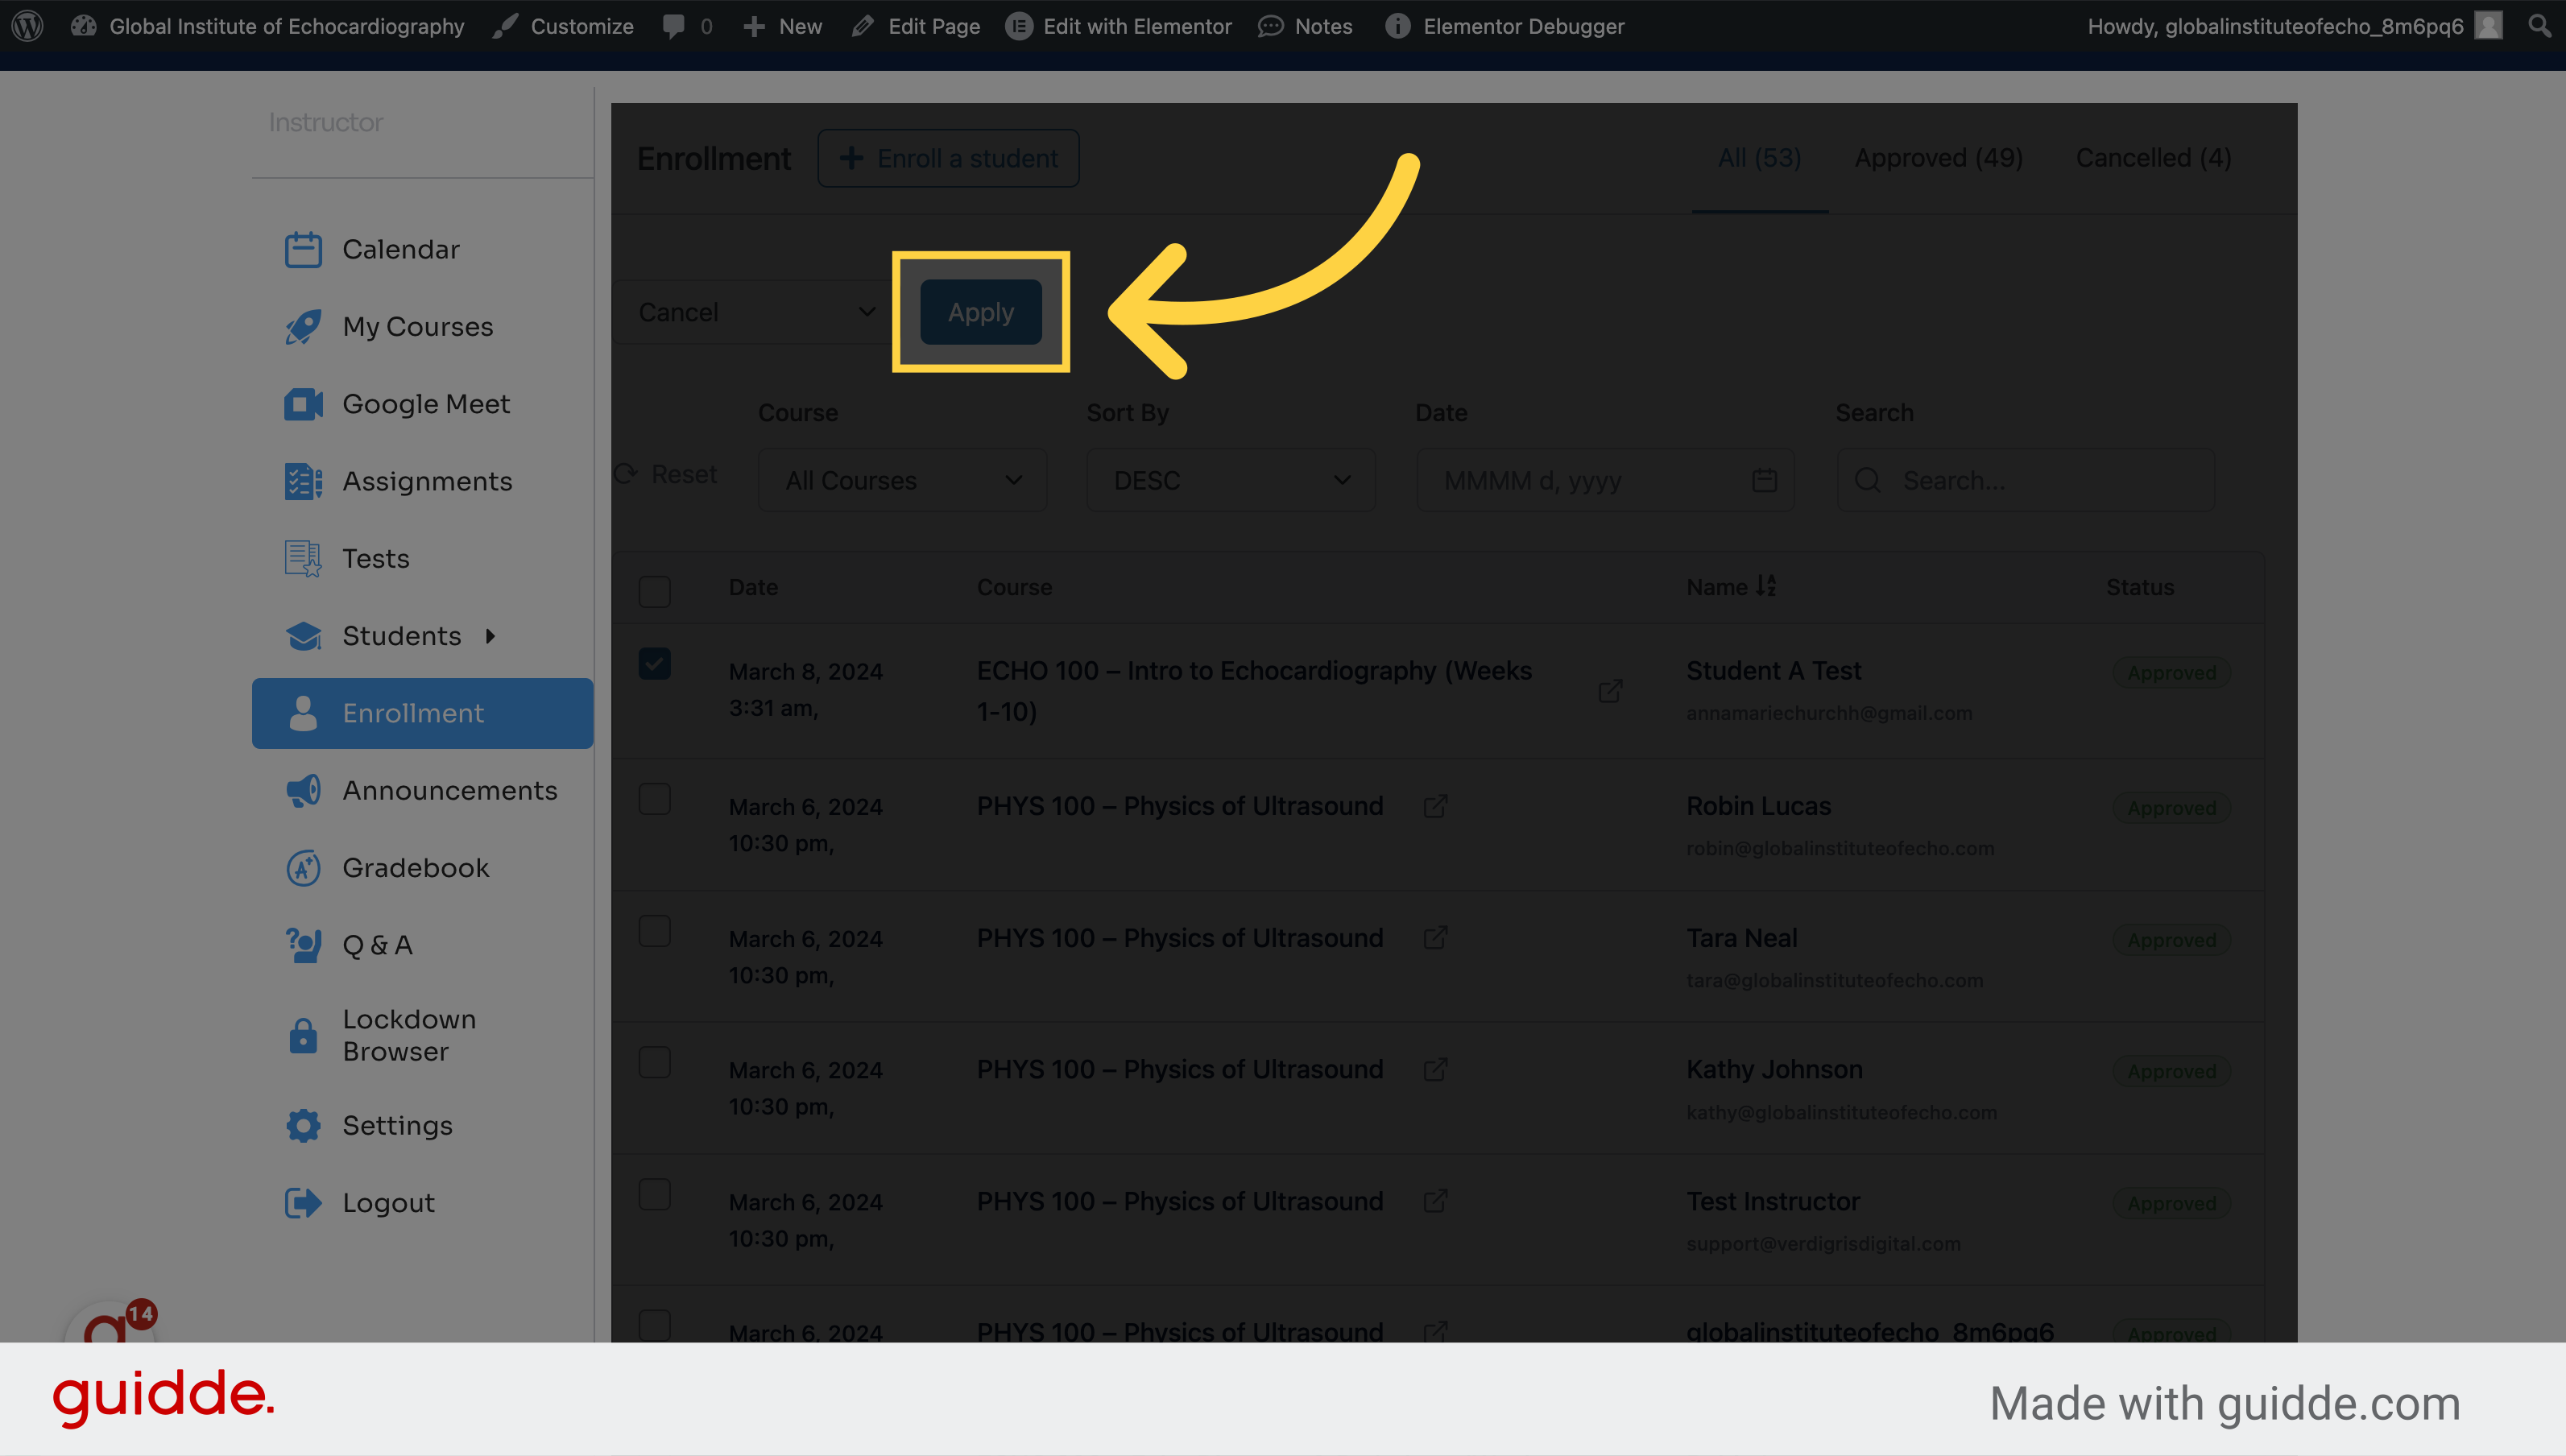
9. Click "Apply"
Apply the changes.
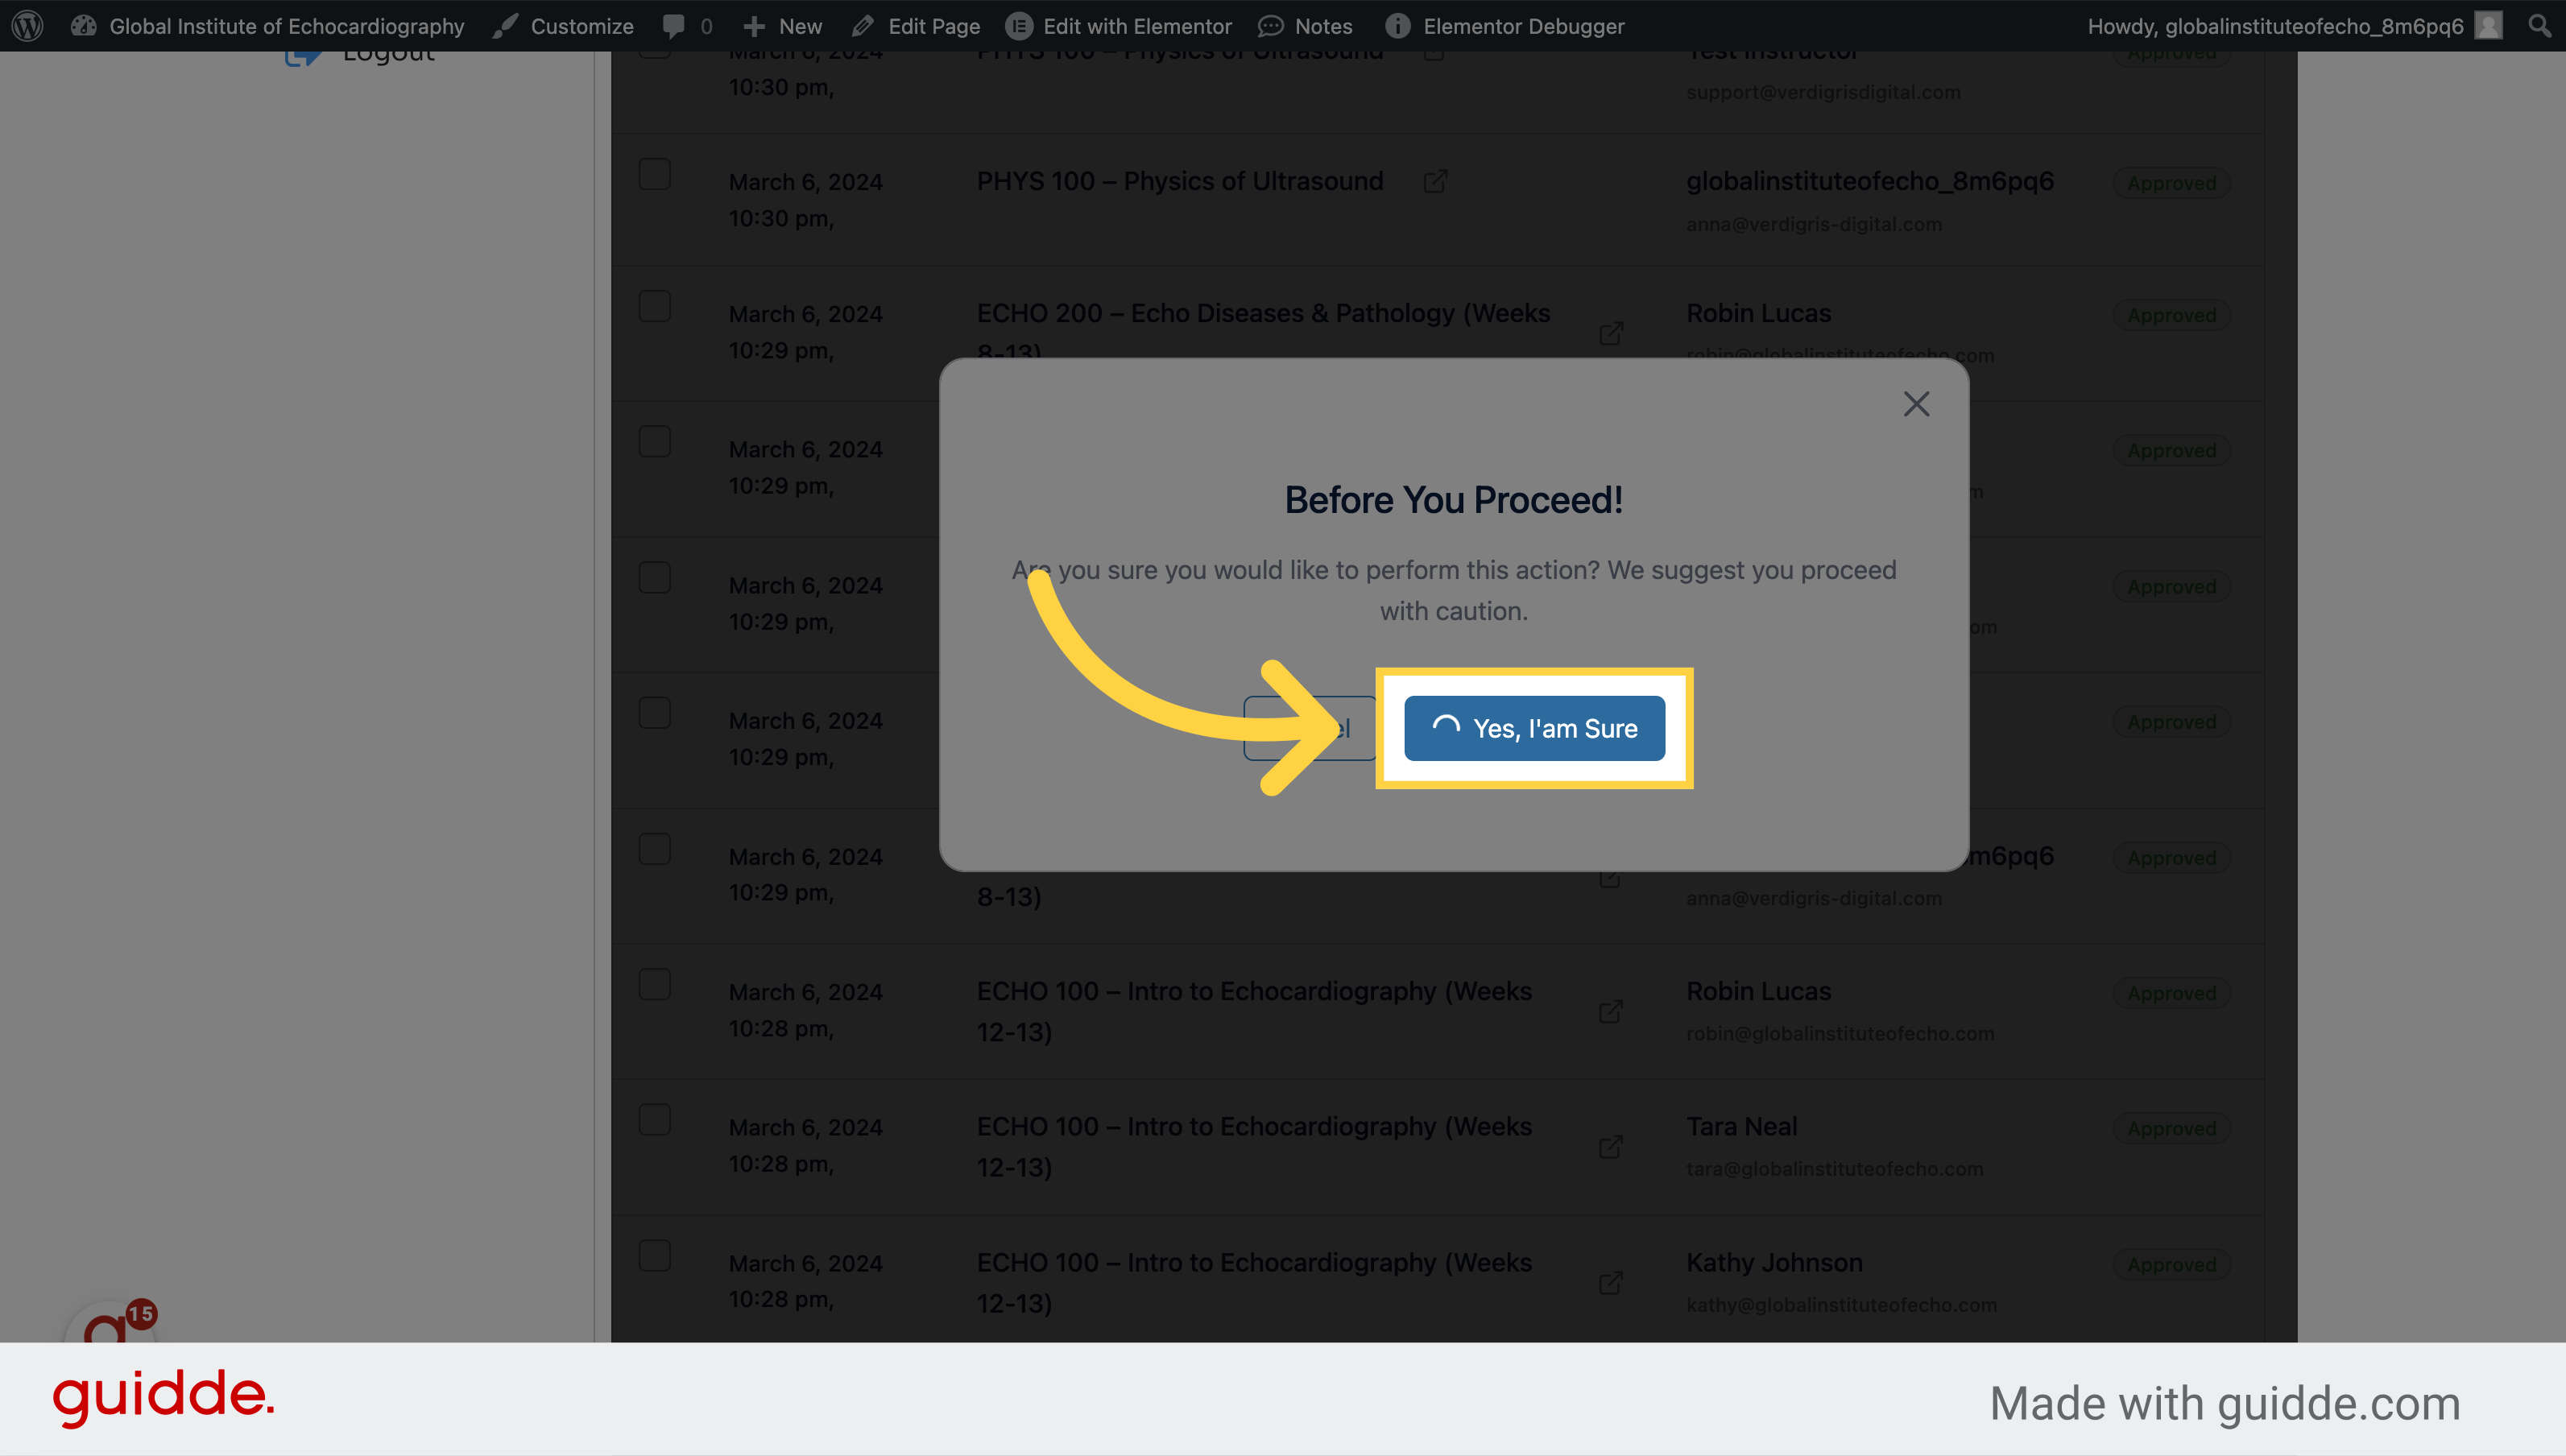
10. Click "Yes, I'am Sure"
Confirm the action.
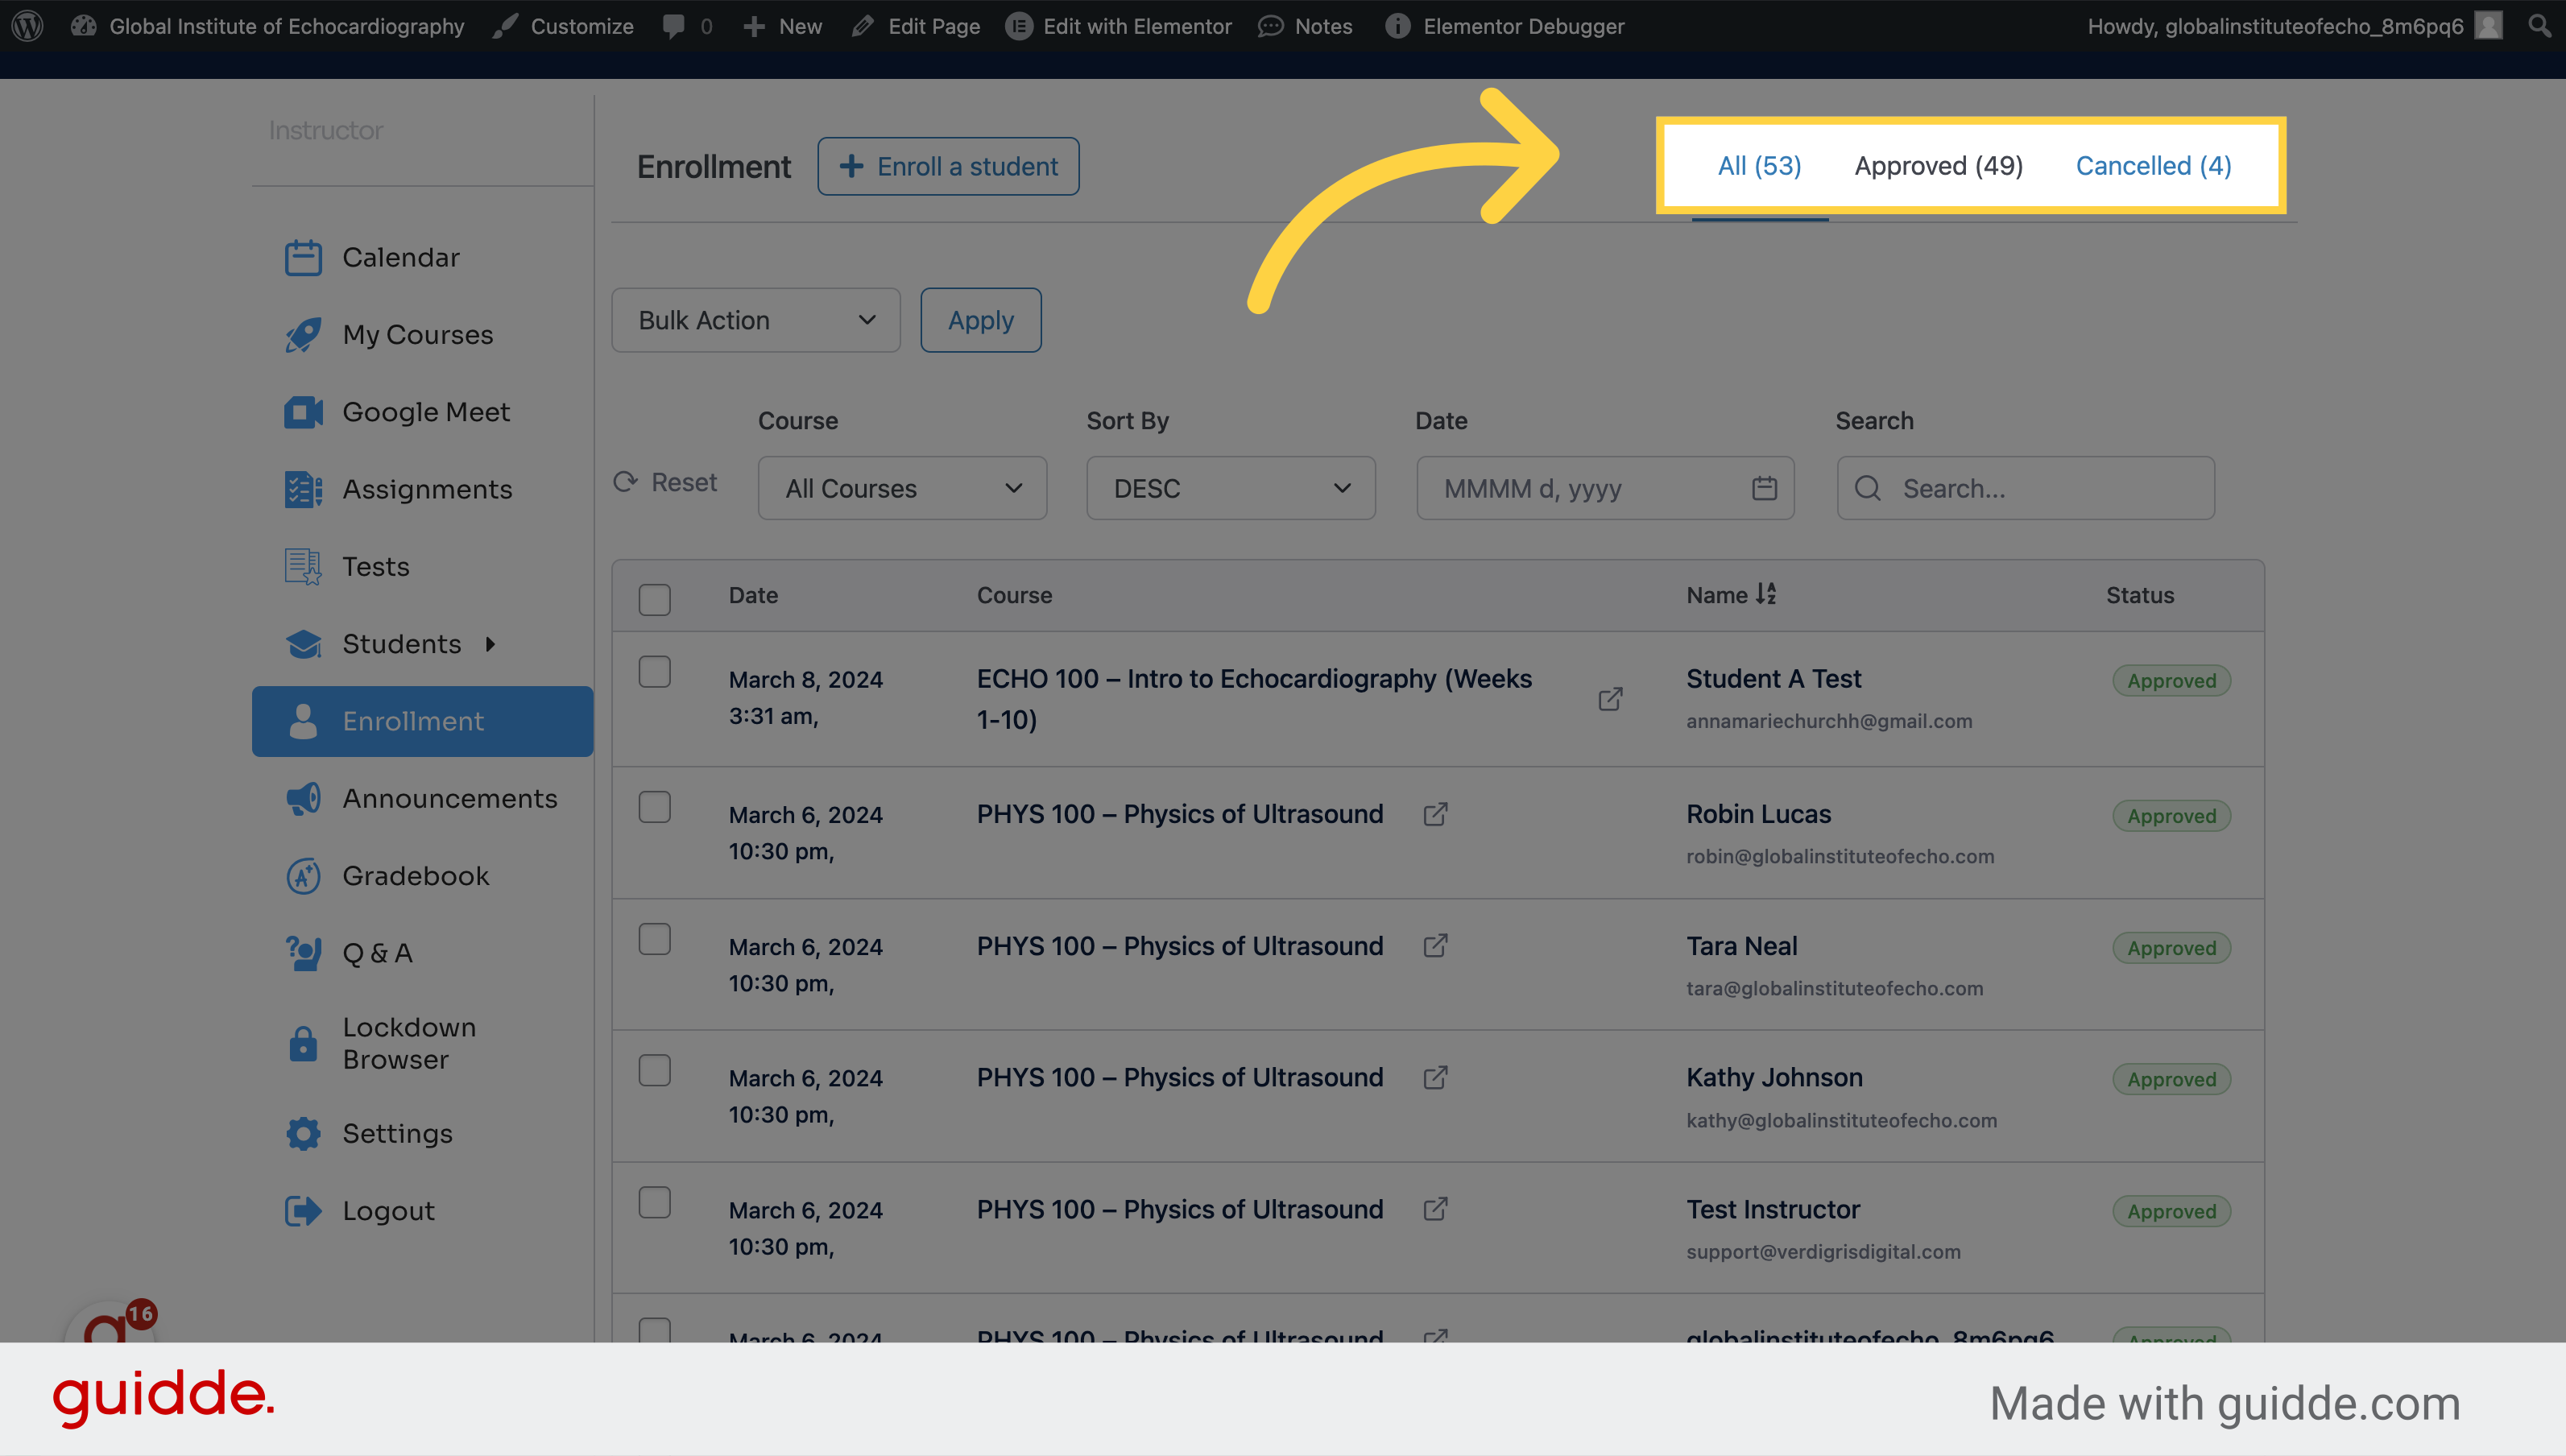
11. Click "Cancelled" to see the students who's enrollment has been cancelled at the top of the page
Verify the student is now canceled.
This guide detailed the process of manually enrolling a student in the system. From navigating to selecting courses to confirming actions, each step was outlined to ensure a successful enrollment.
How to Make an Announcement
Learn how to efficiently create and publish announcements with the following instructions. Each step will guide you through the process of making an announcement using the Verdigris-staging application.
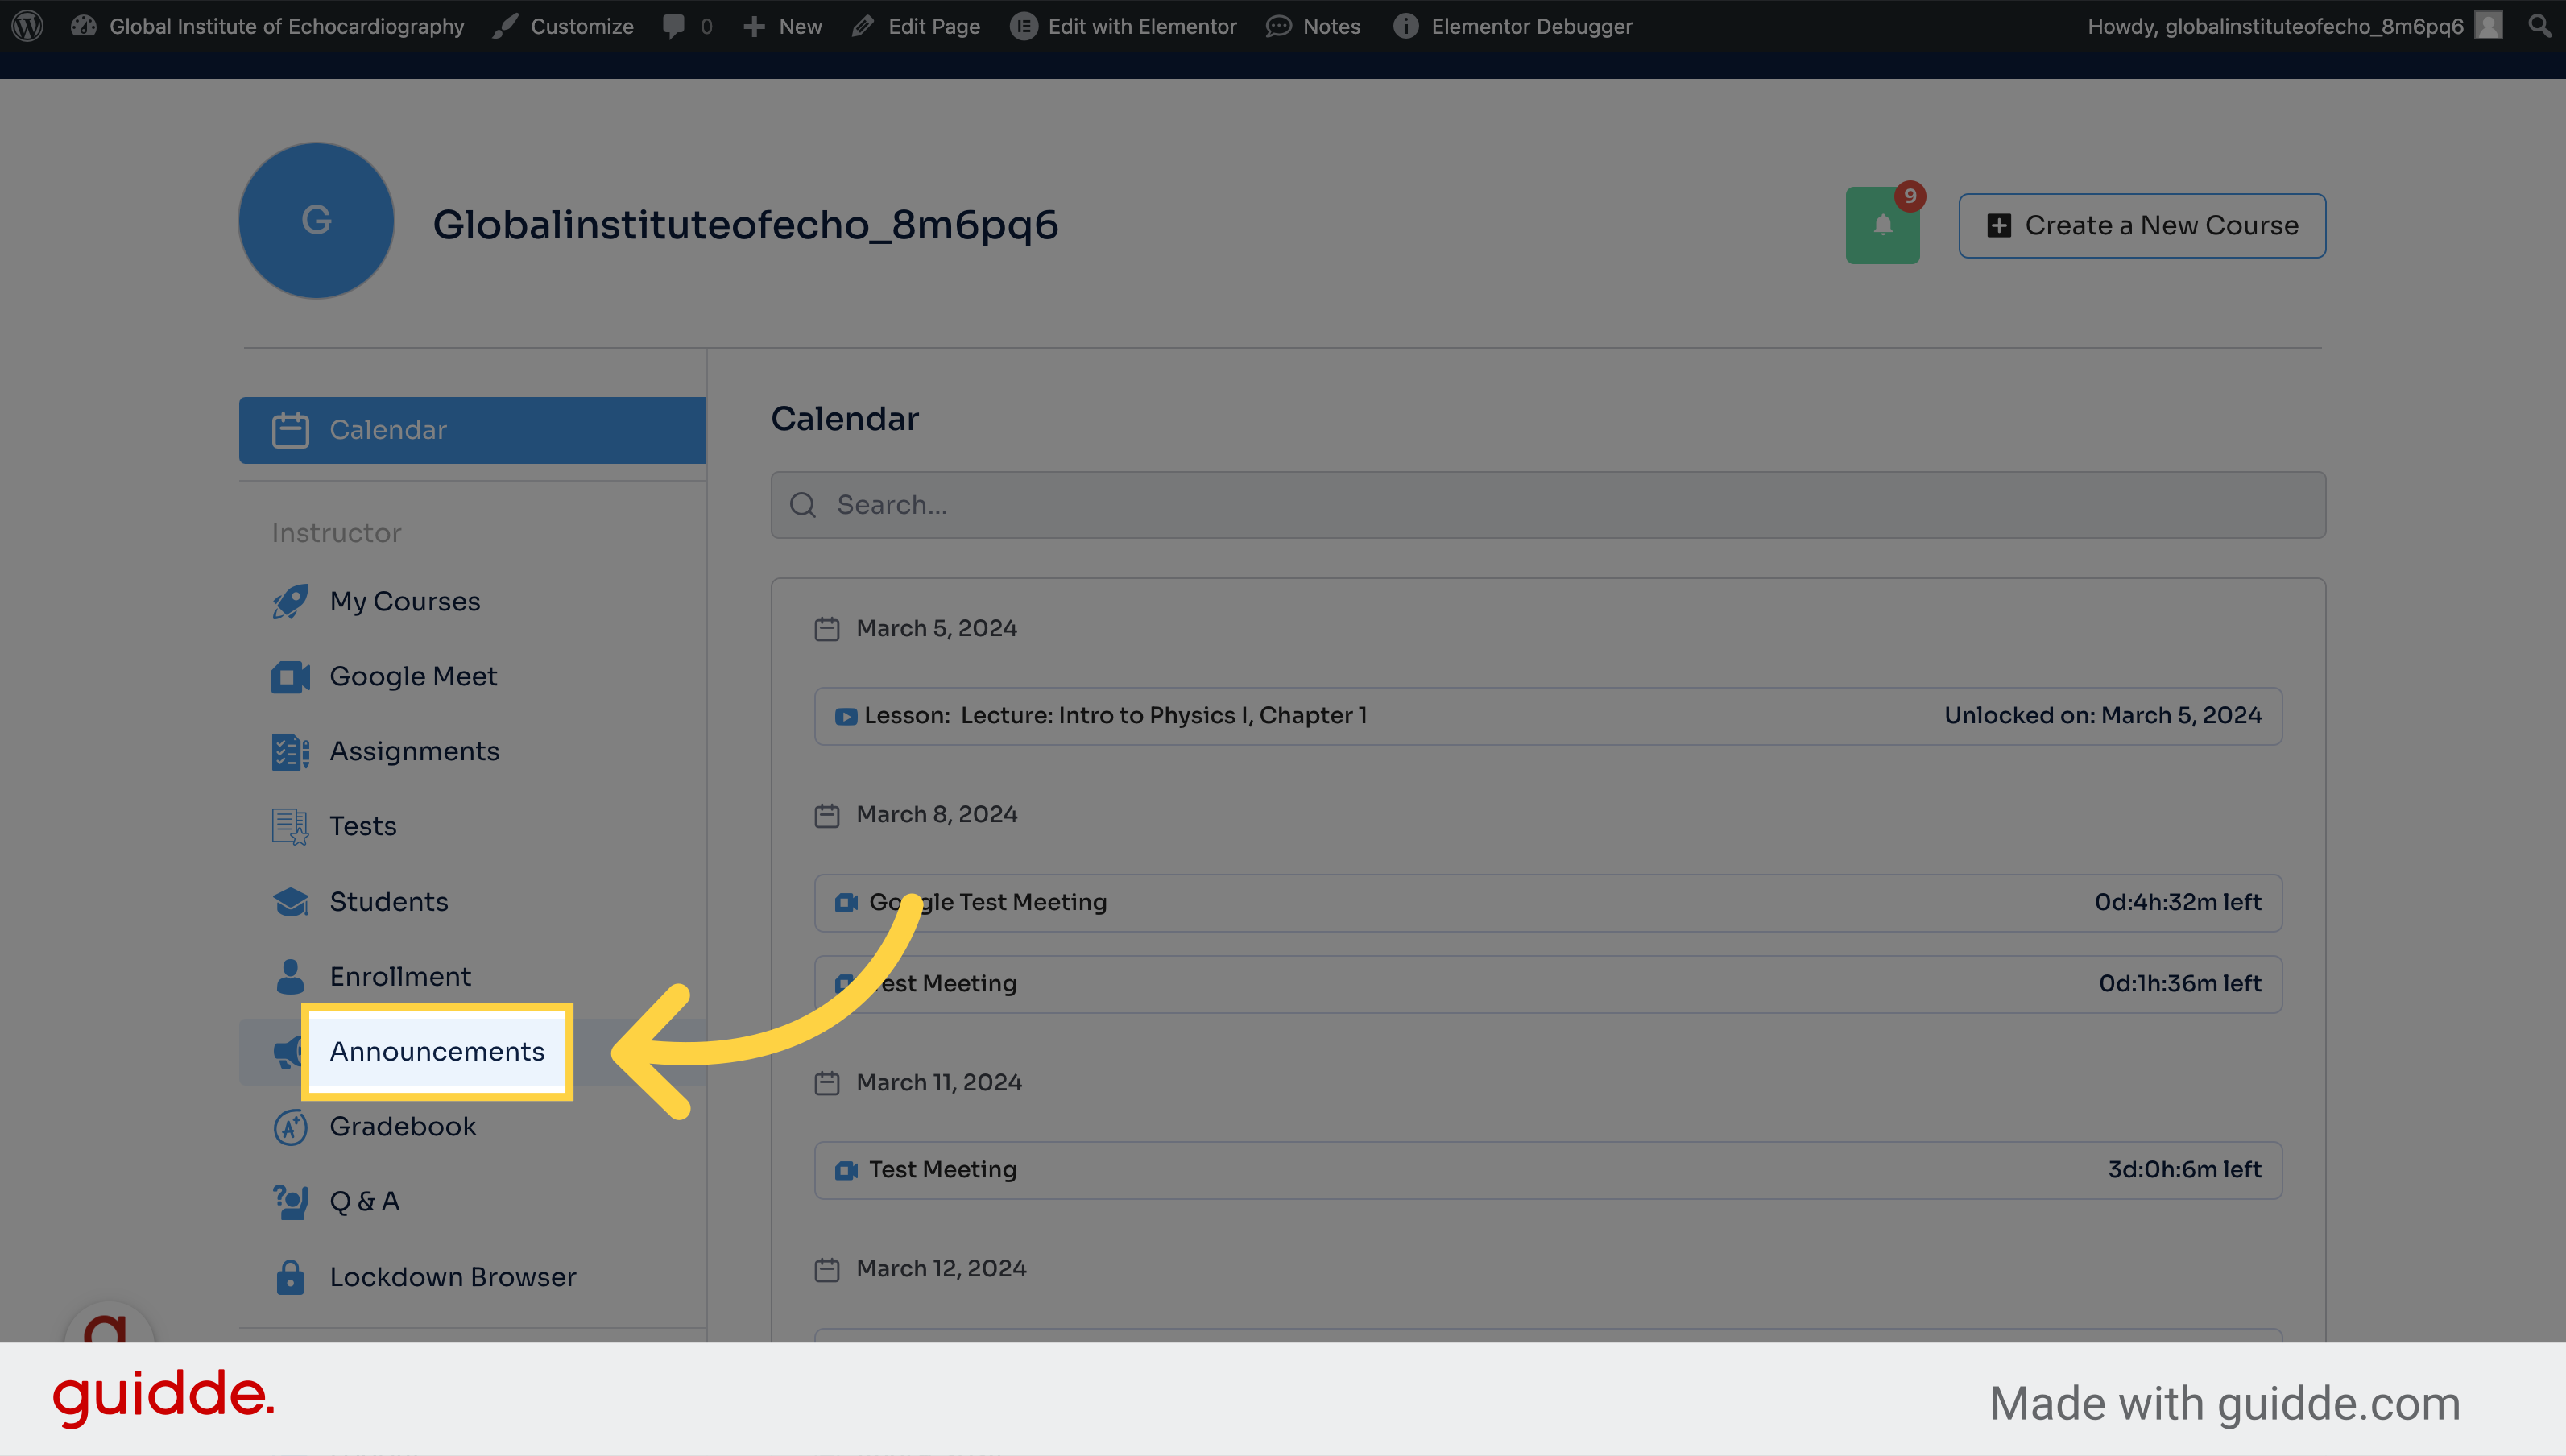
1. Click "Announcements" from the dashboard
Access the Announcements section.
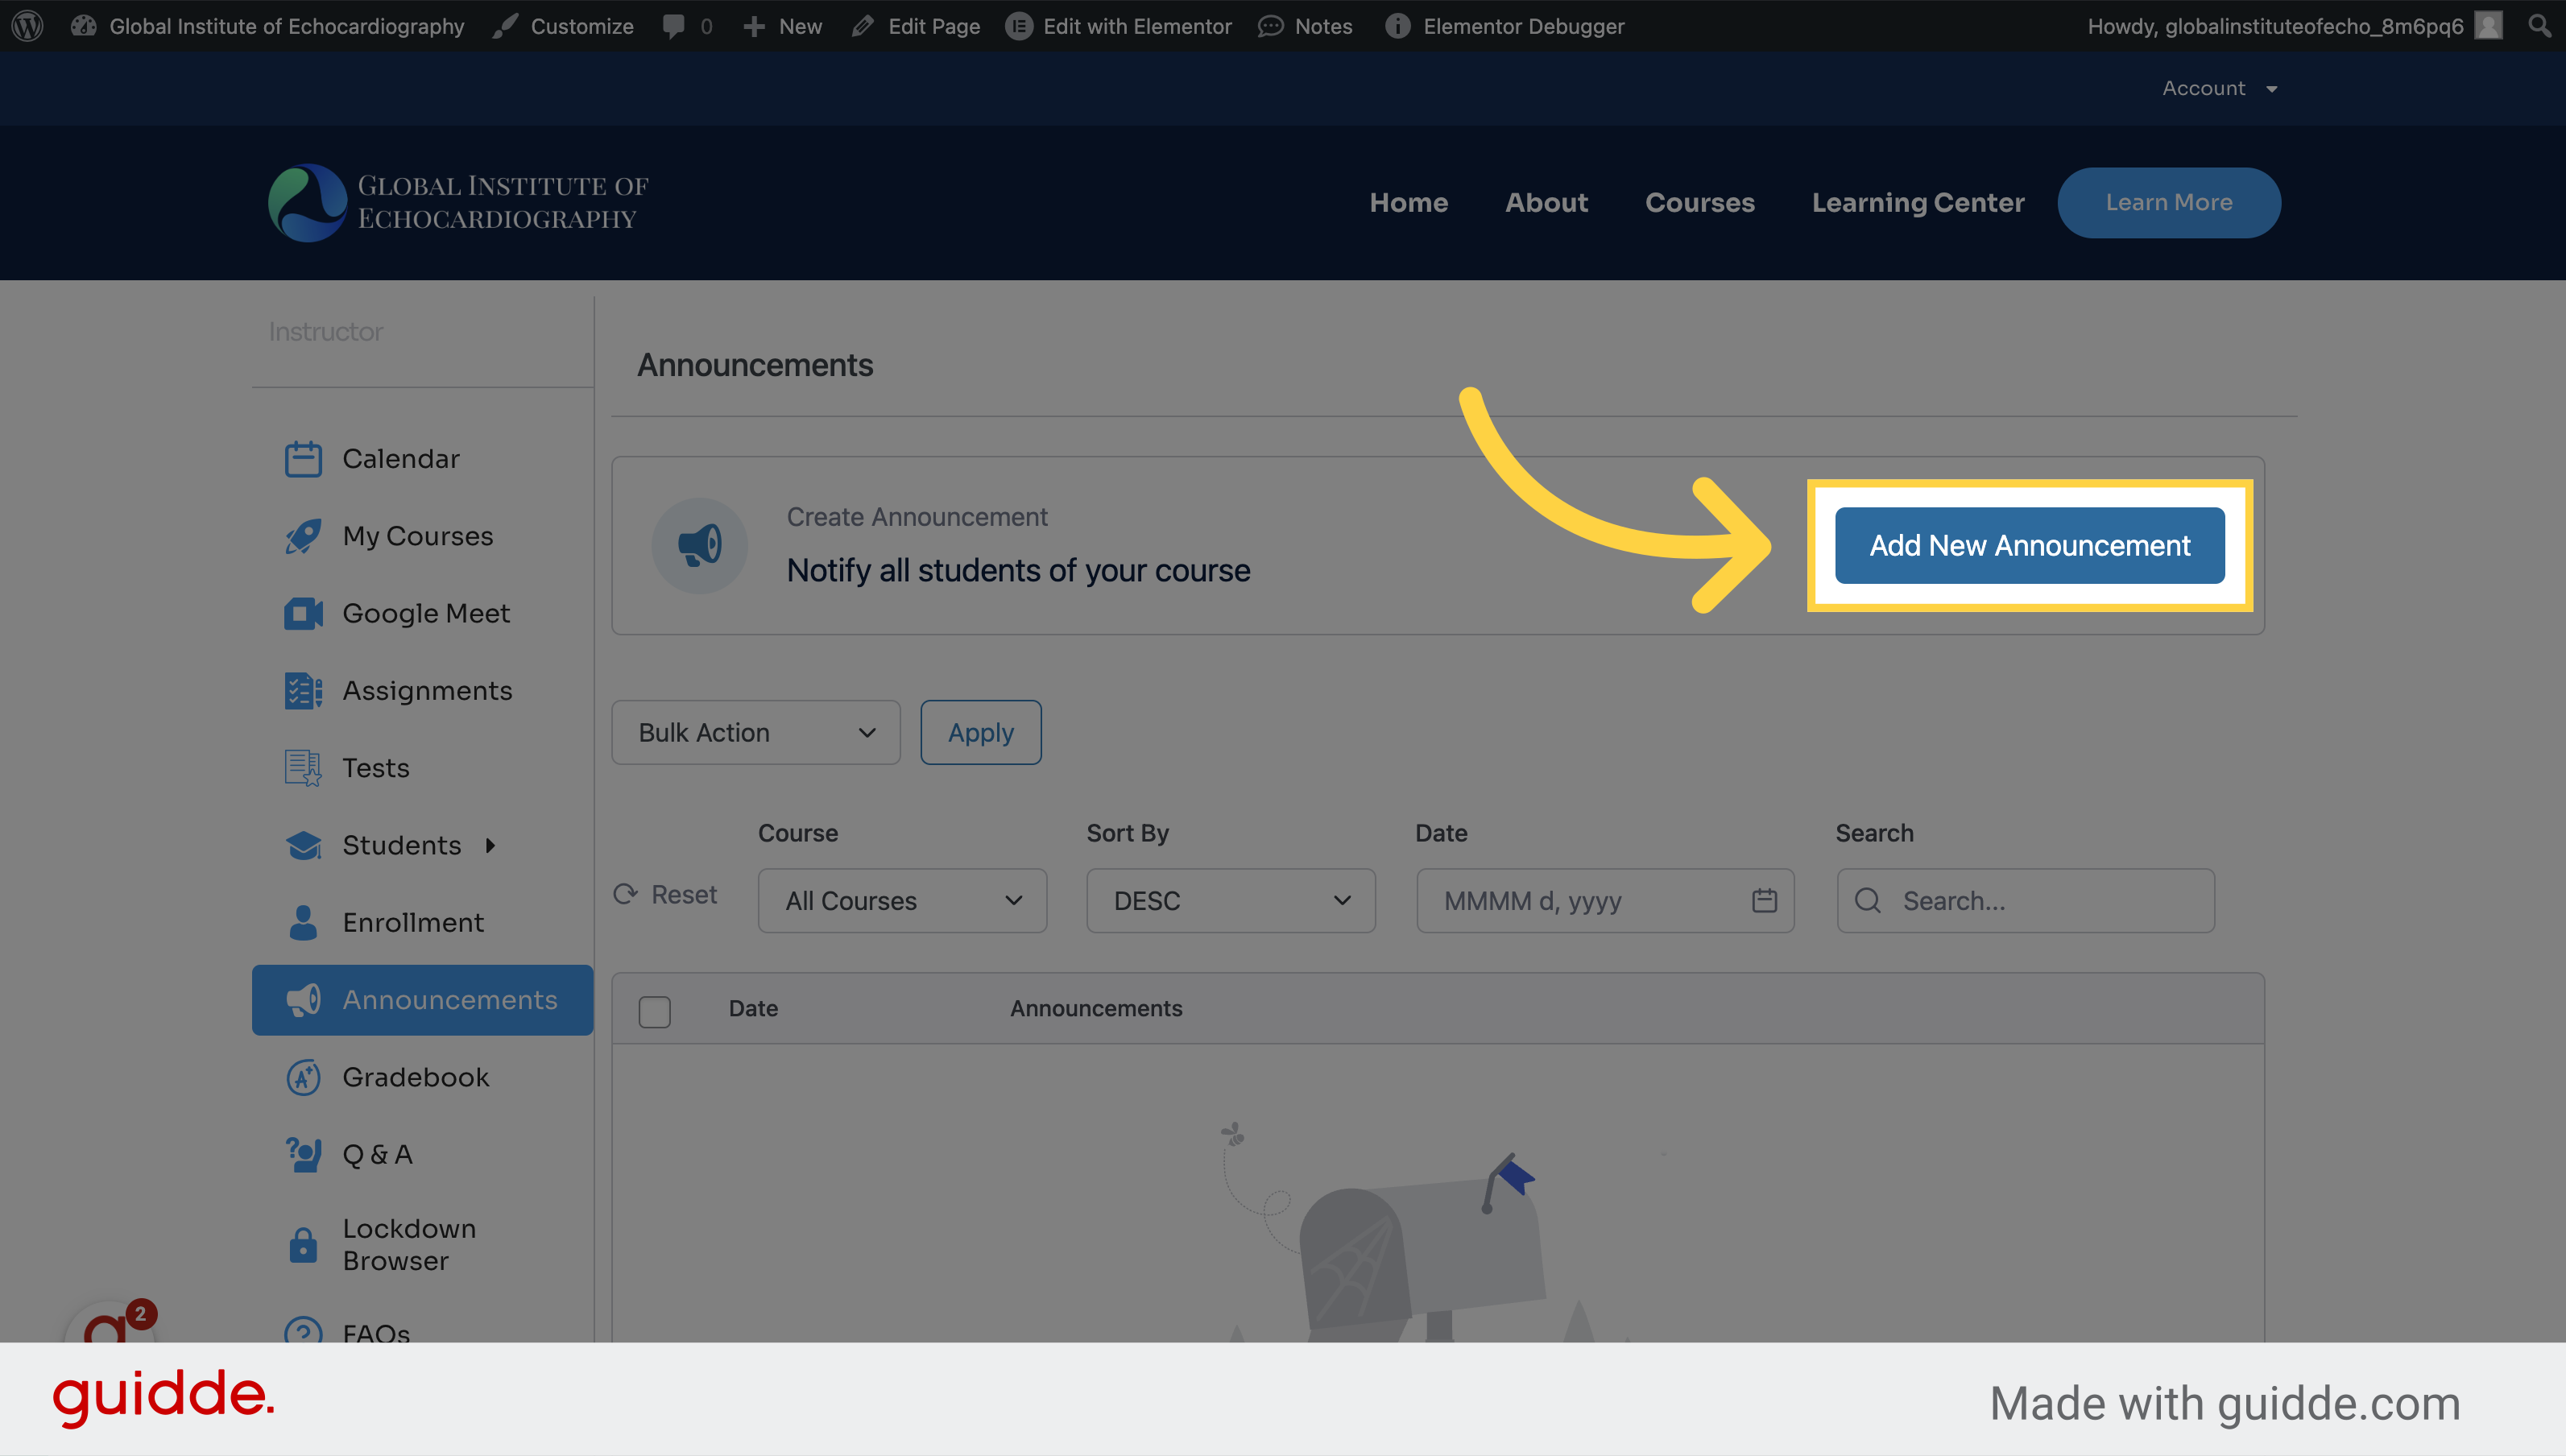
2. Click "Add New Announcement"
Initiate the process of creating a new announcement.
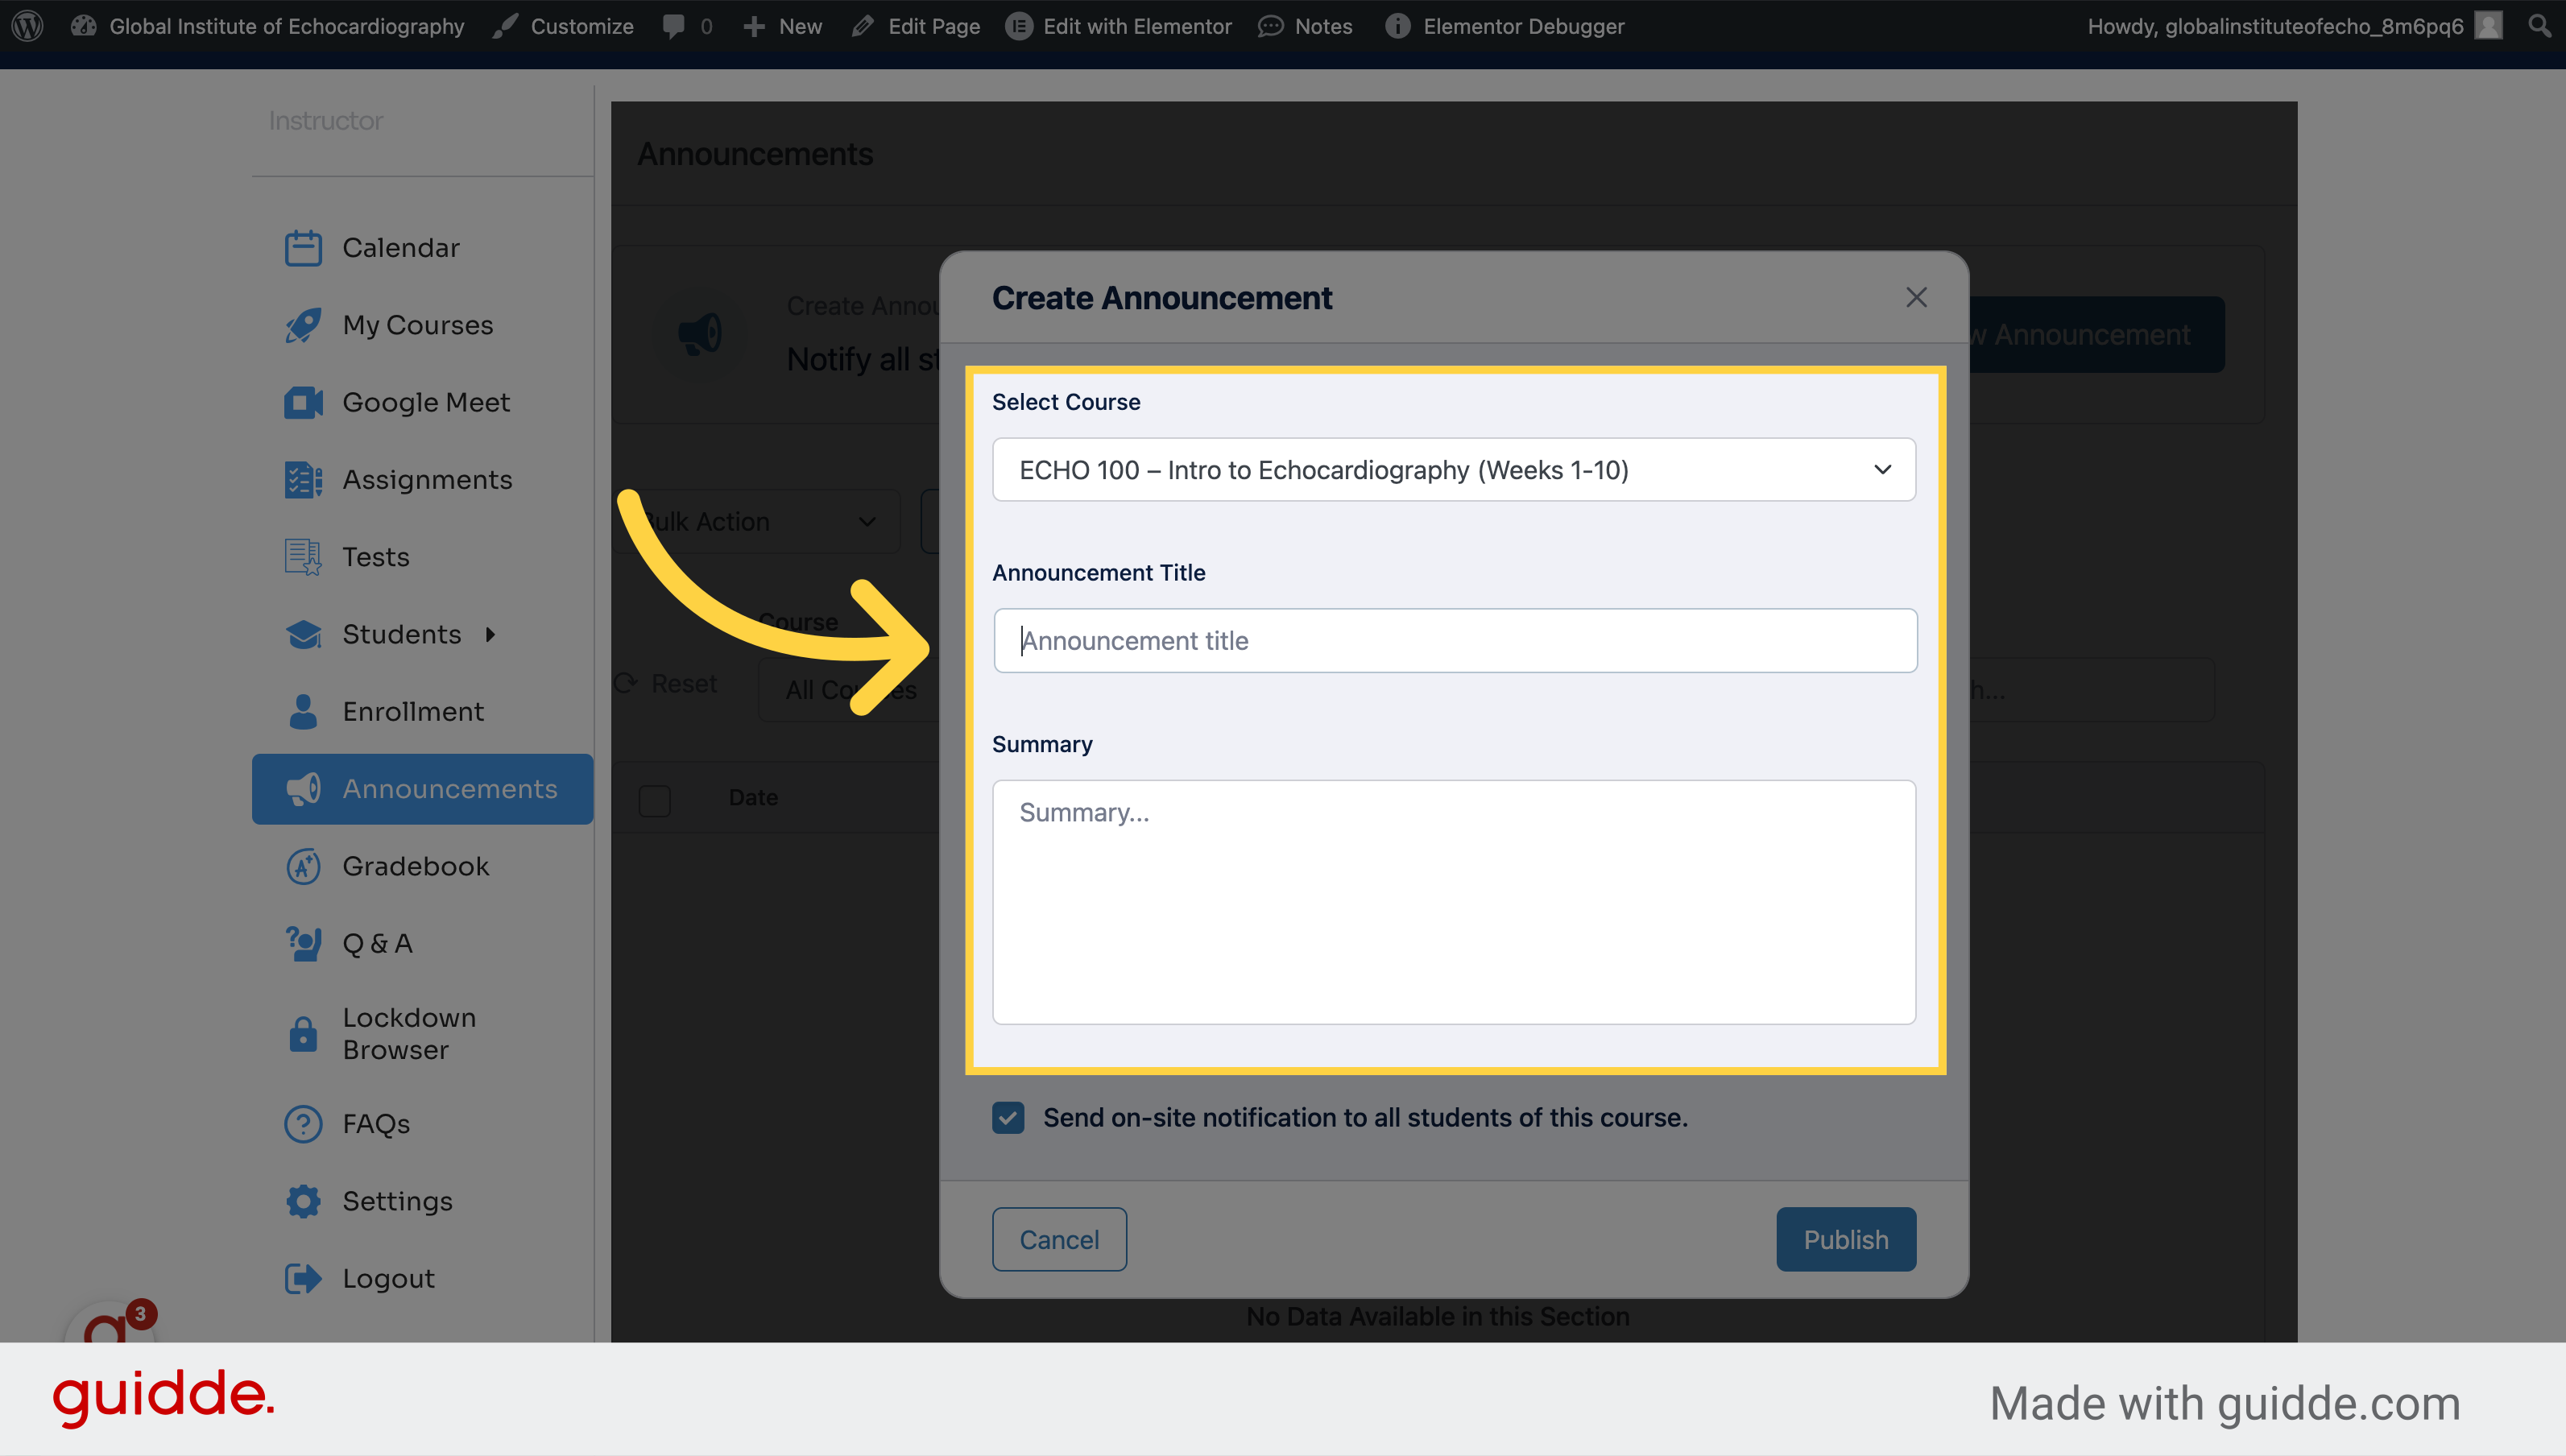
3. Choose the course to make the announcement to, type the title (which will also be the email subject), and type the summary
Select the field to input the title of the announcement.
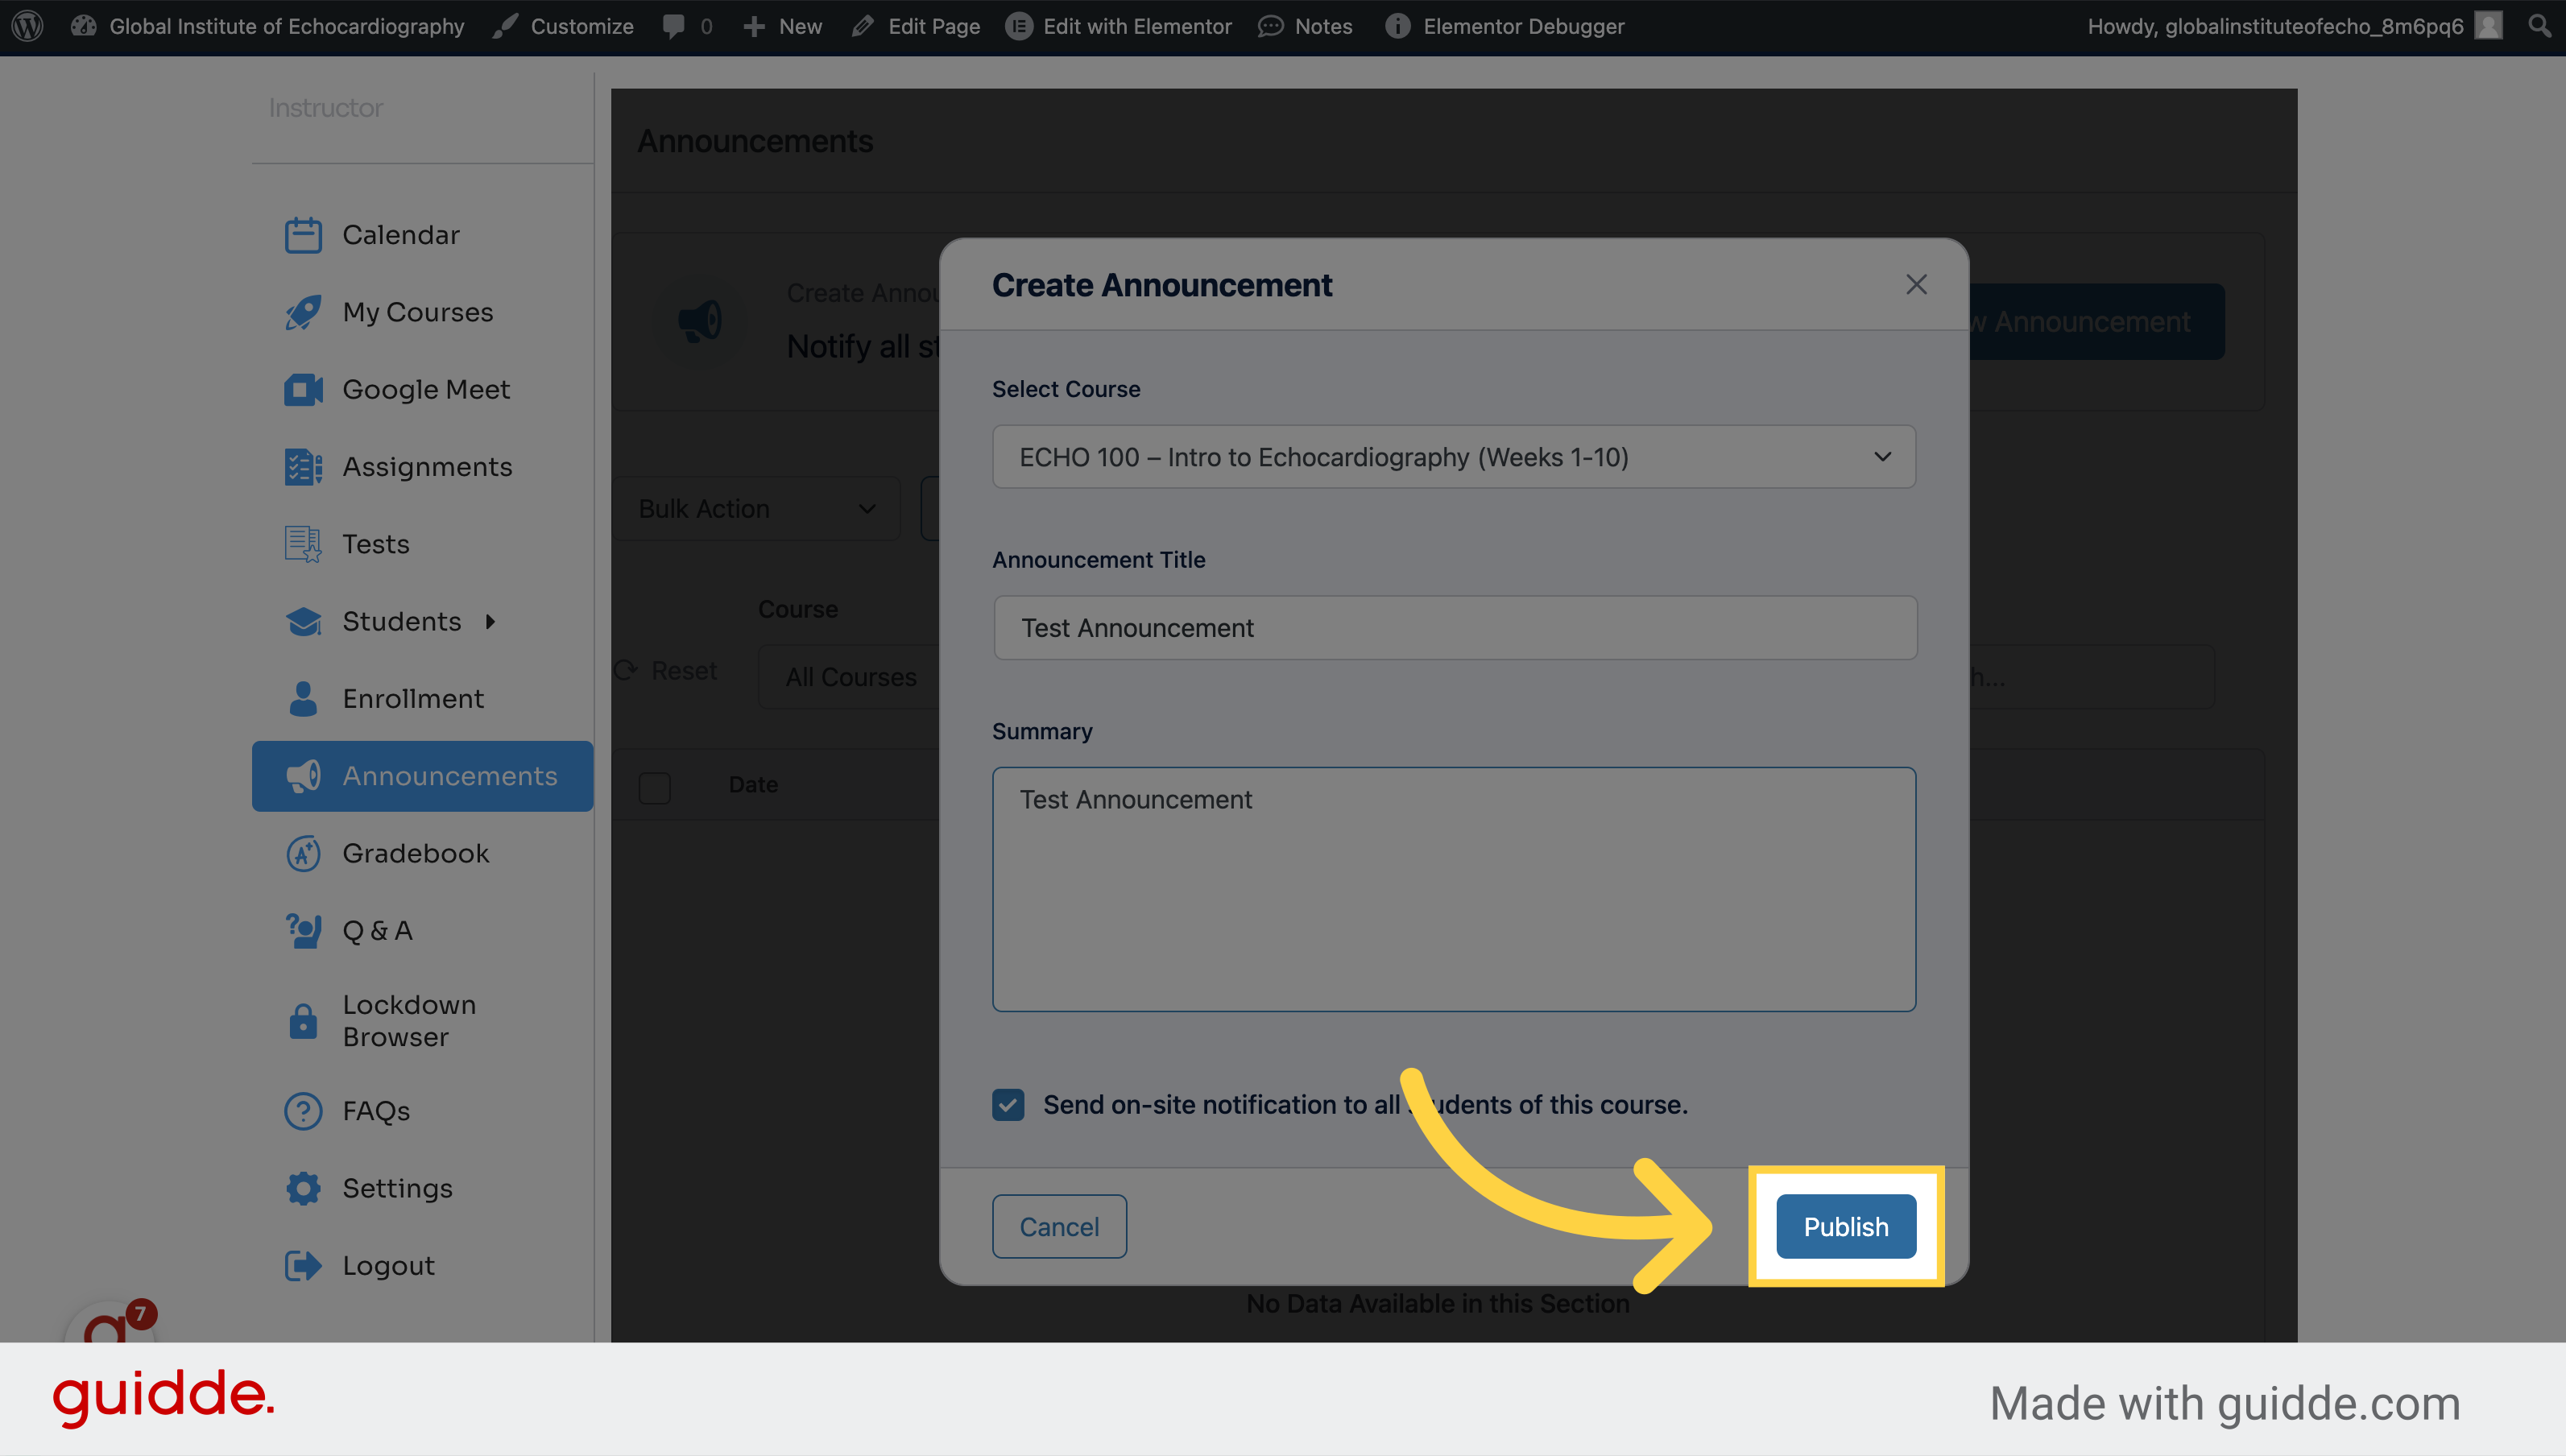
4. Click "Publish" to send announcement
Publish the announcement.
This guide covered the essential steps to create and publish announcements using Verdigris-staging, from accessing the Announcements section to editing and publishing the announcement with ease.
Gradebook
This guide will walk you through essential actions in the Gradebook feature of Verdigris-staging, ensuring seamless navigation and utilization of key functions.
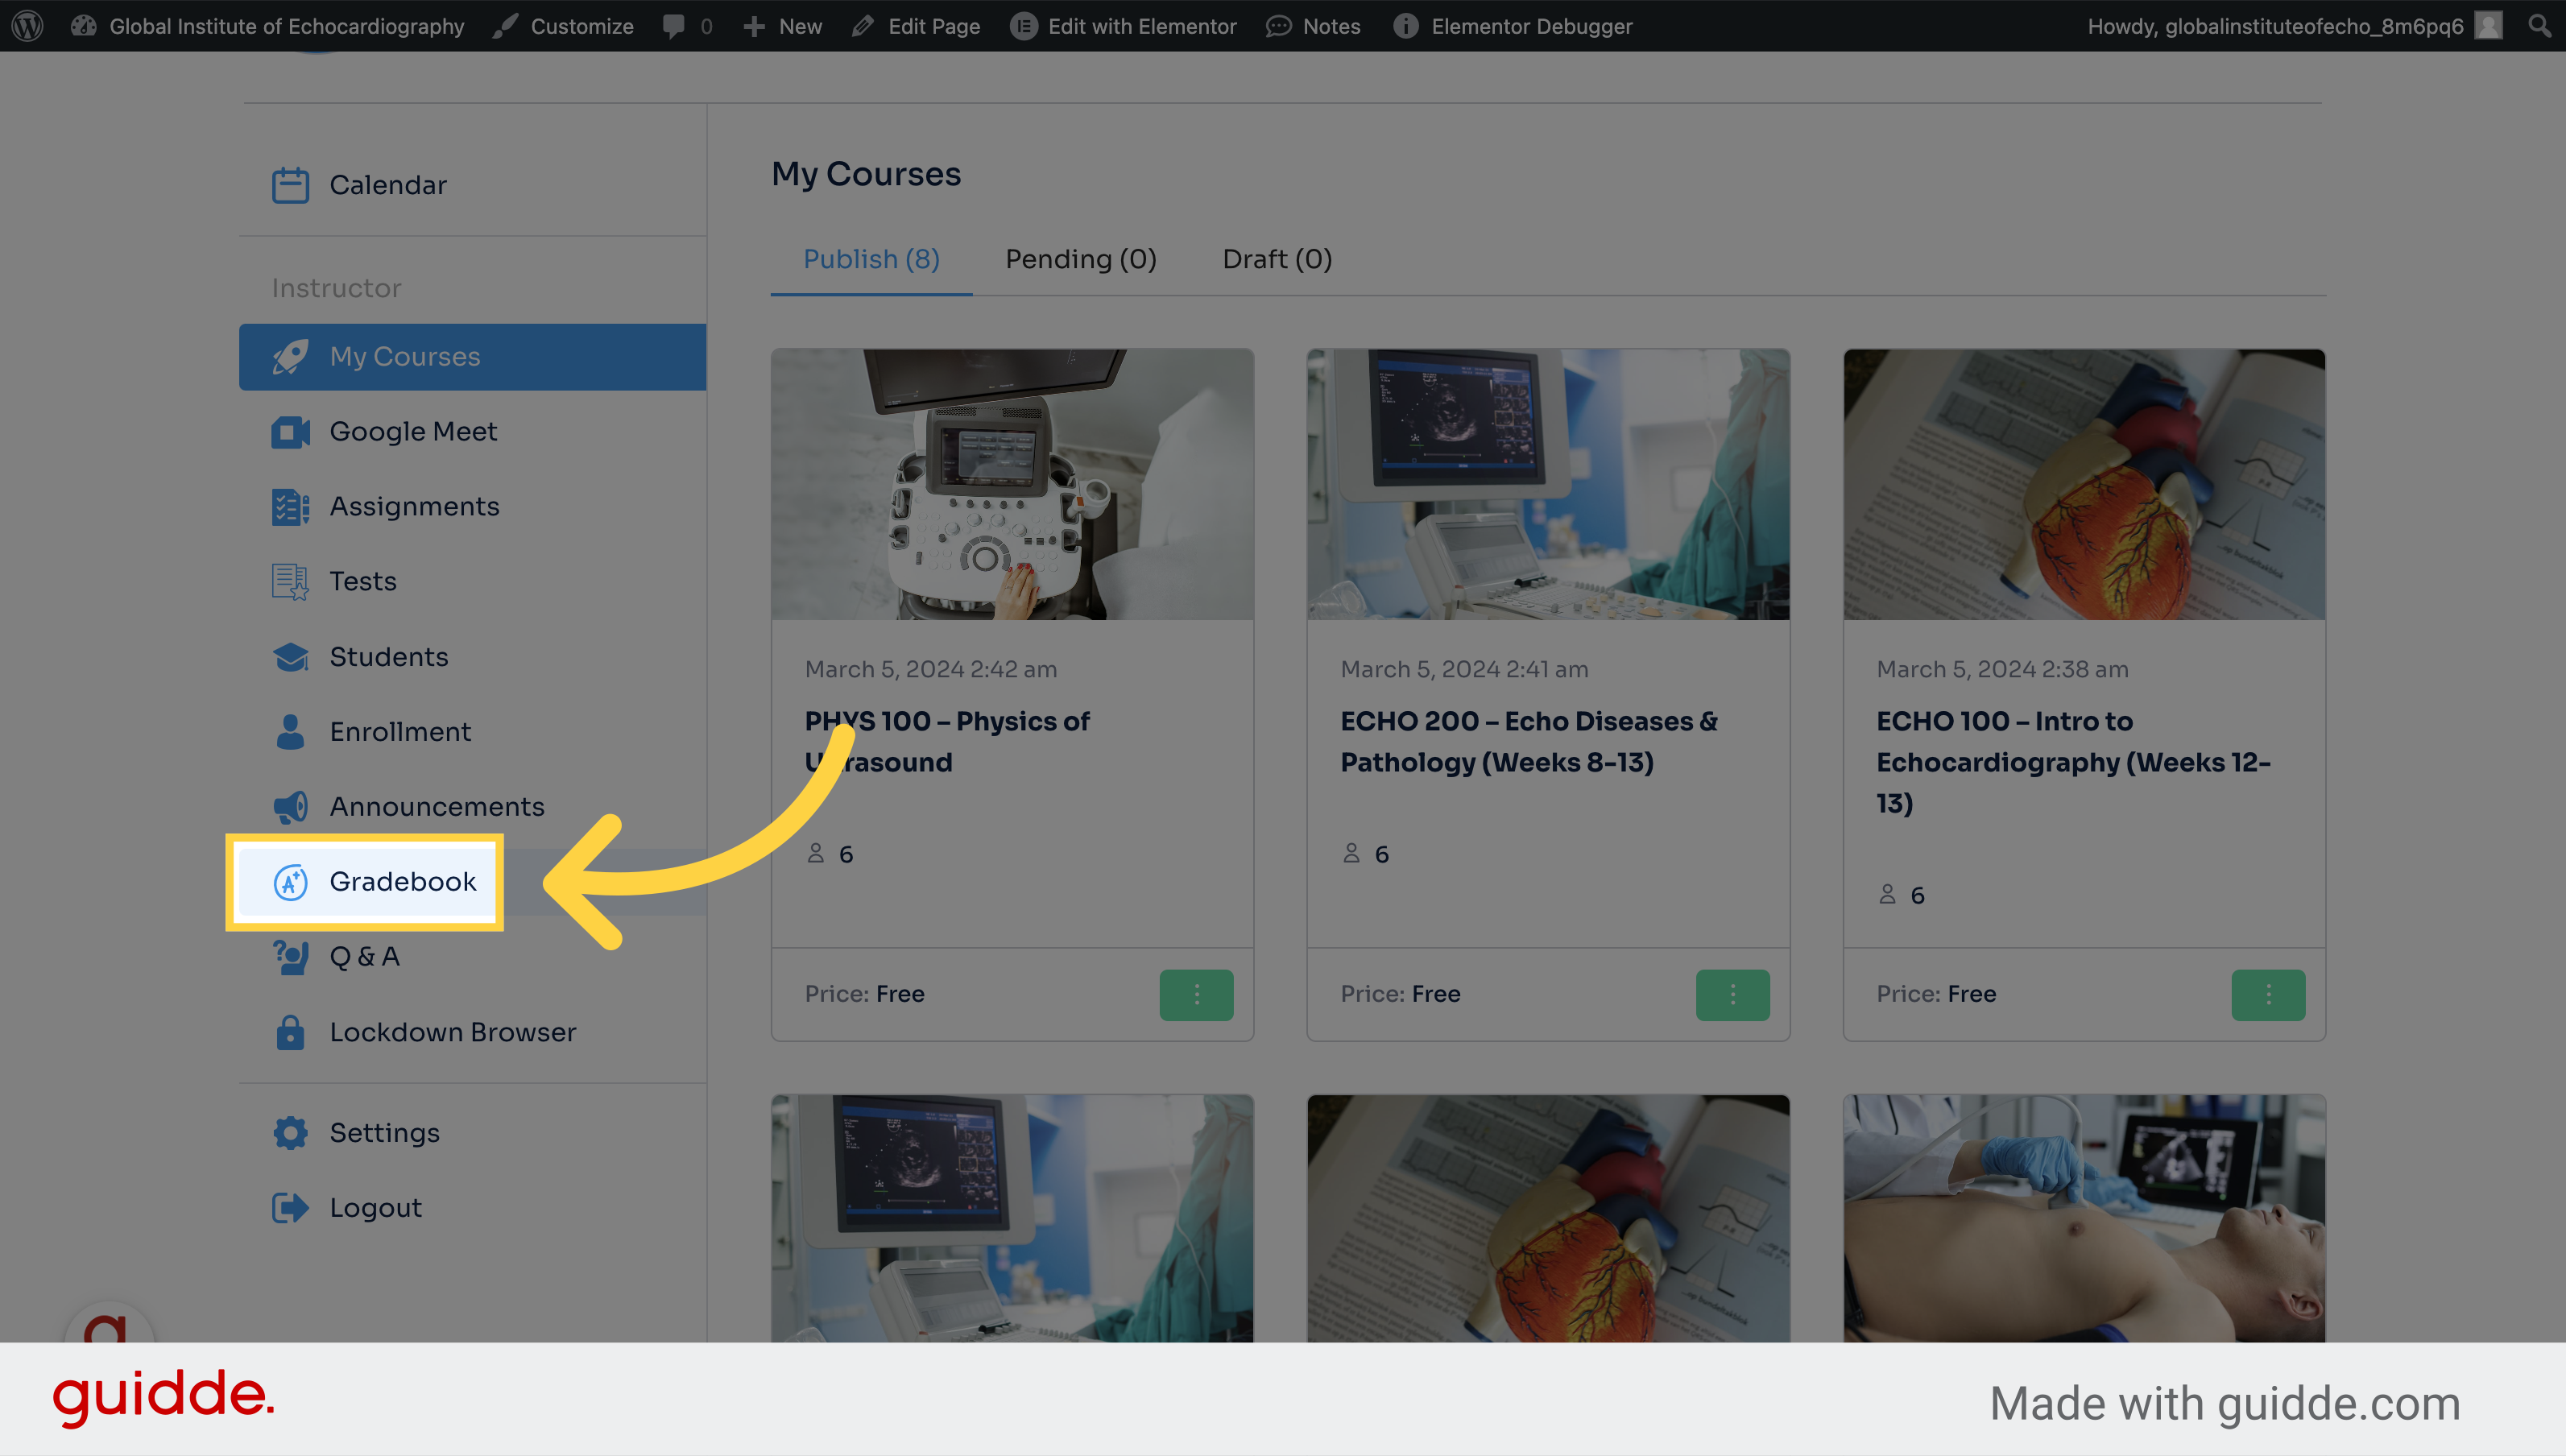
1. Click "Gradebook" from the dashboard
Access the Gradebook feature.
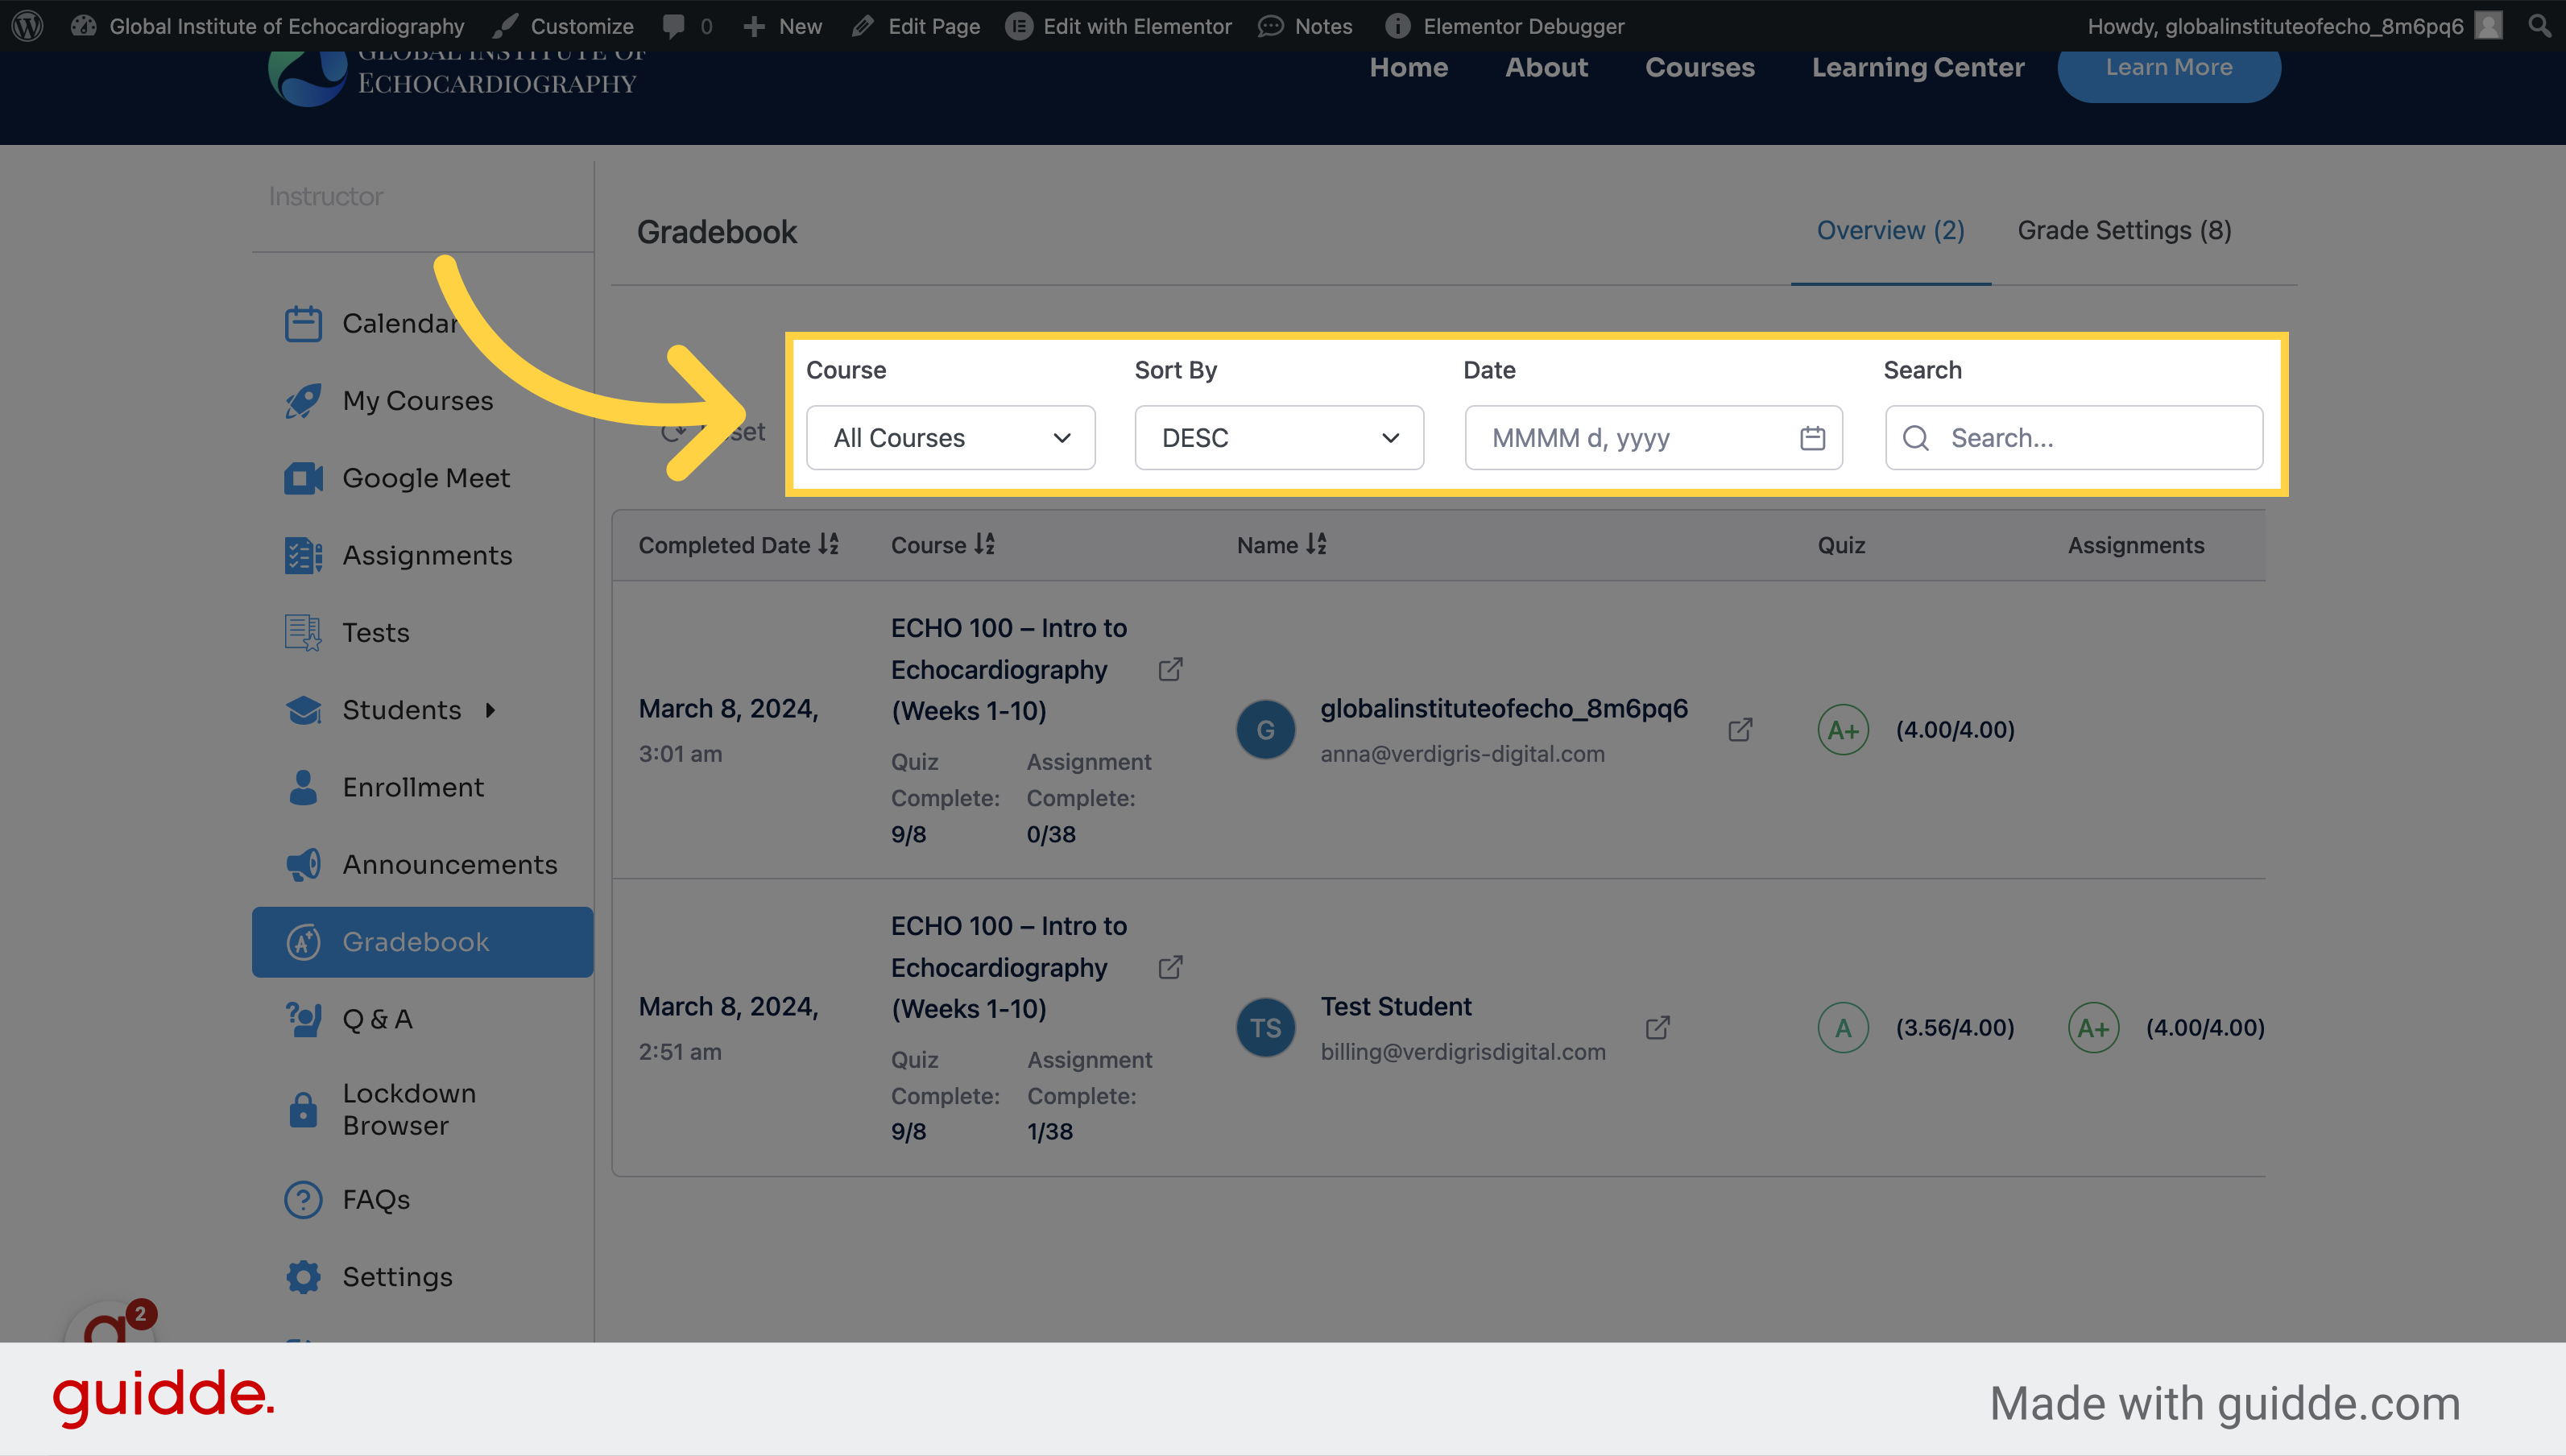
2. Sort options to find the student you're looking for
Navigate to the specific course.
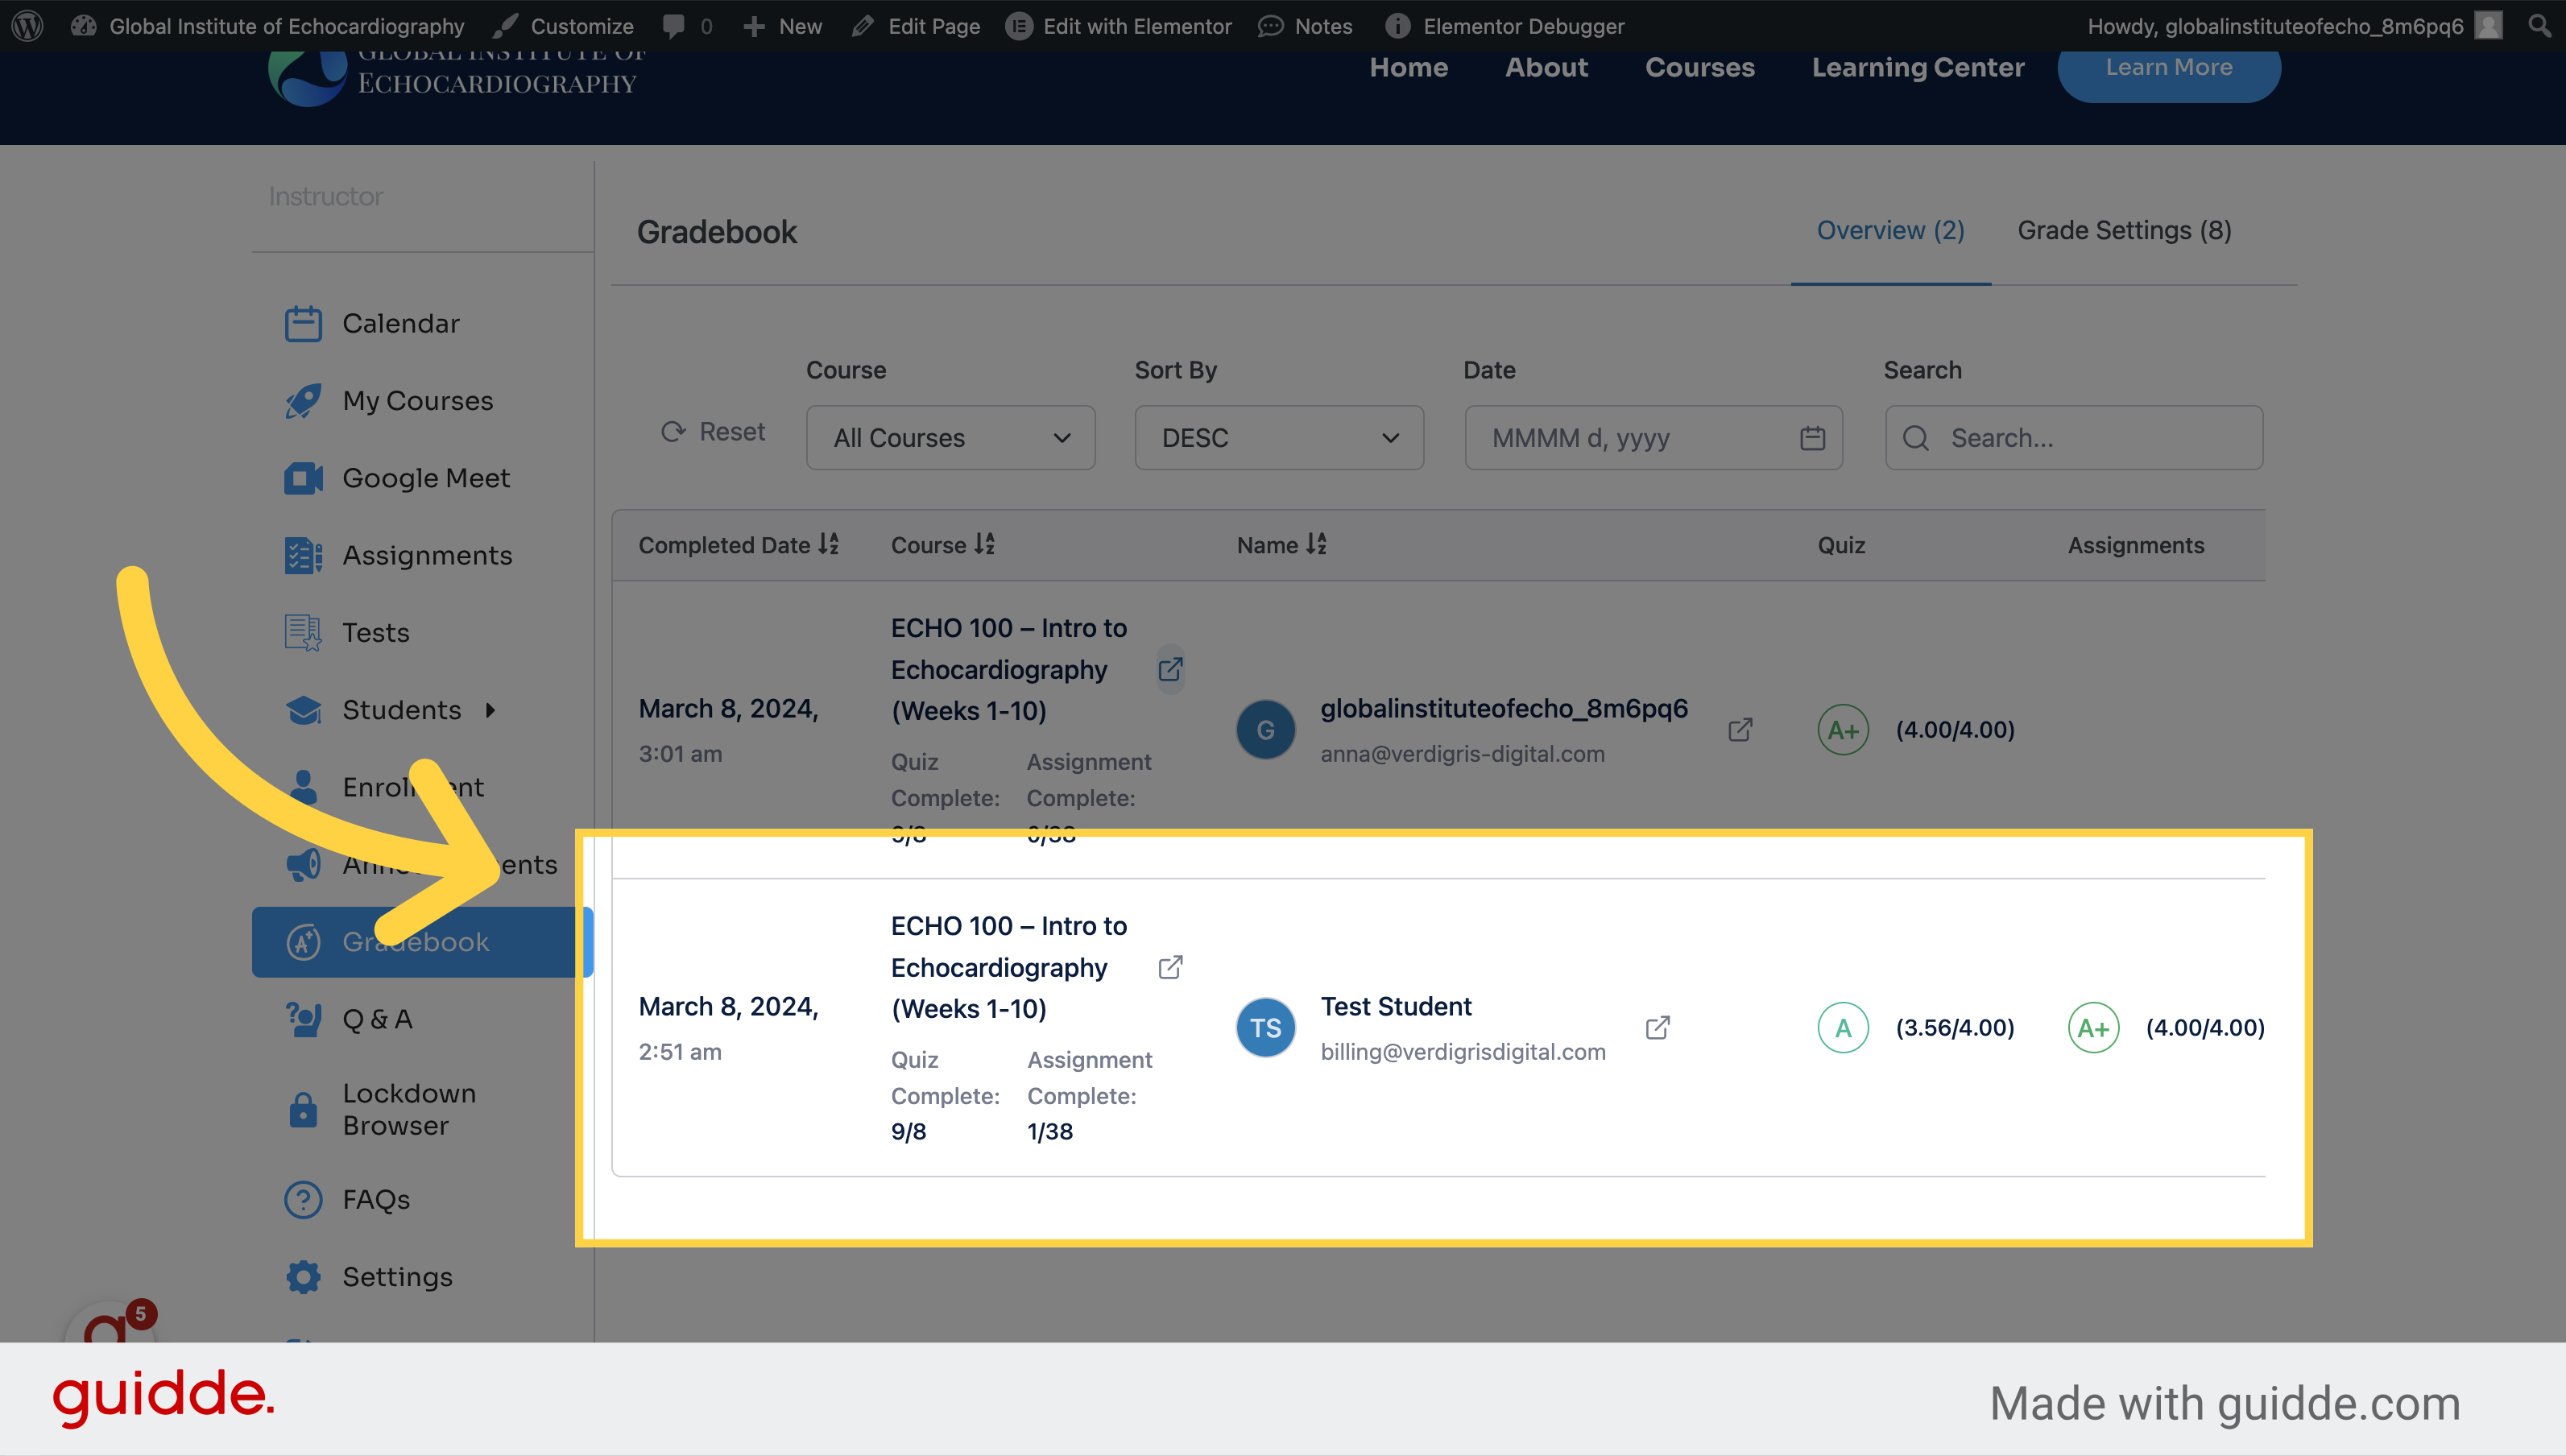
3. Here you can see the grades for students from (tests)quizzes and assignments
View specific date and time.
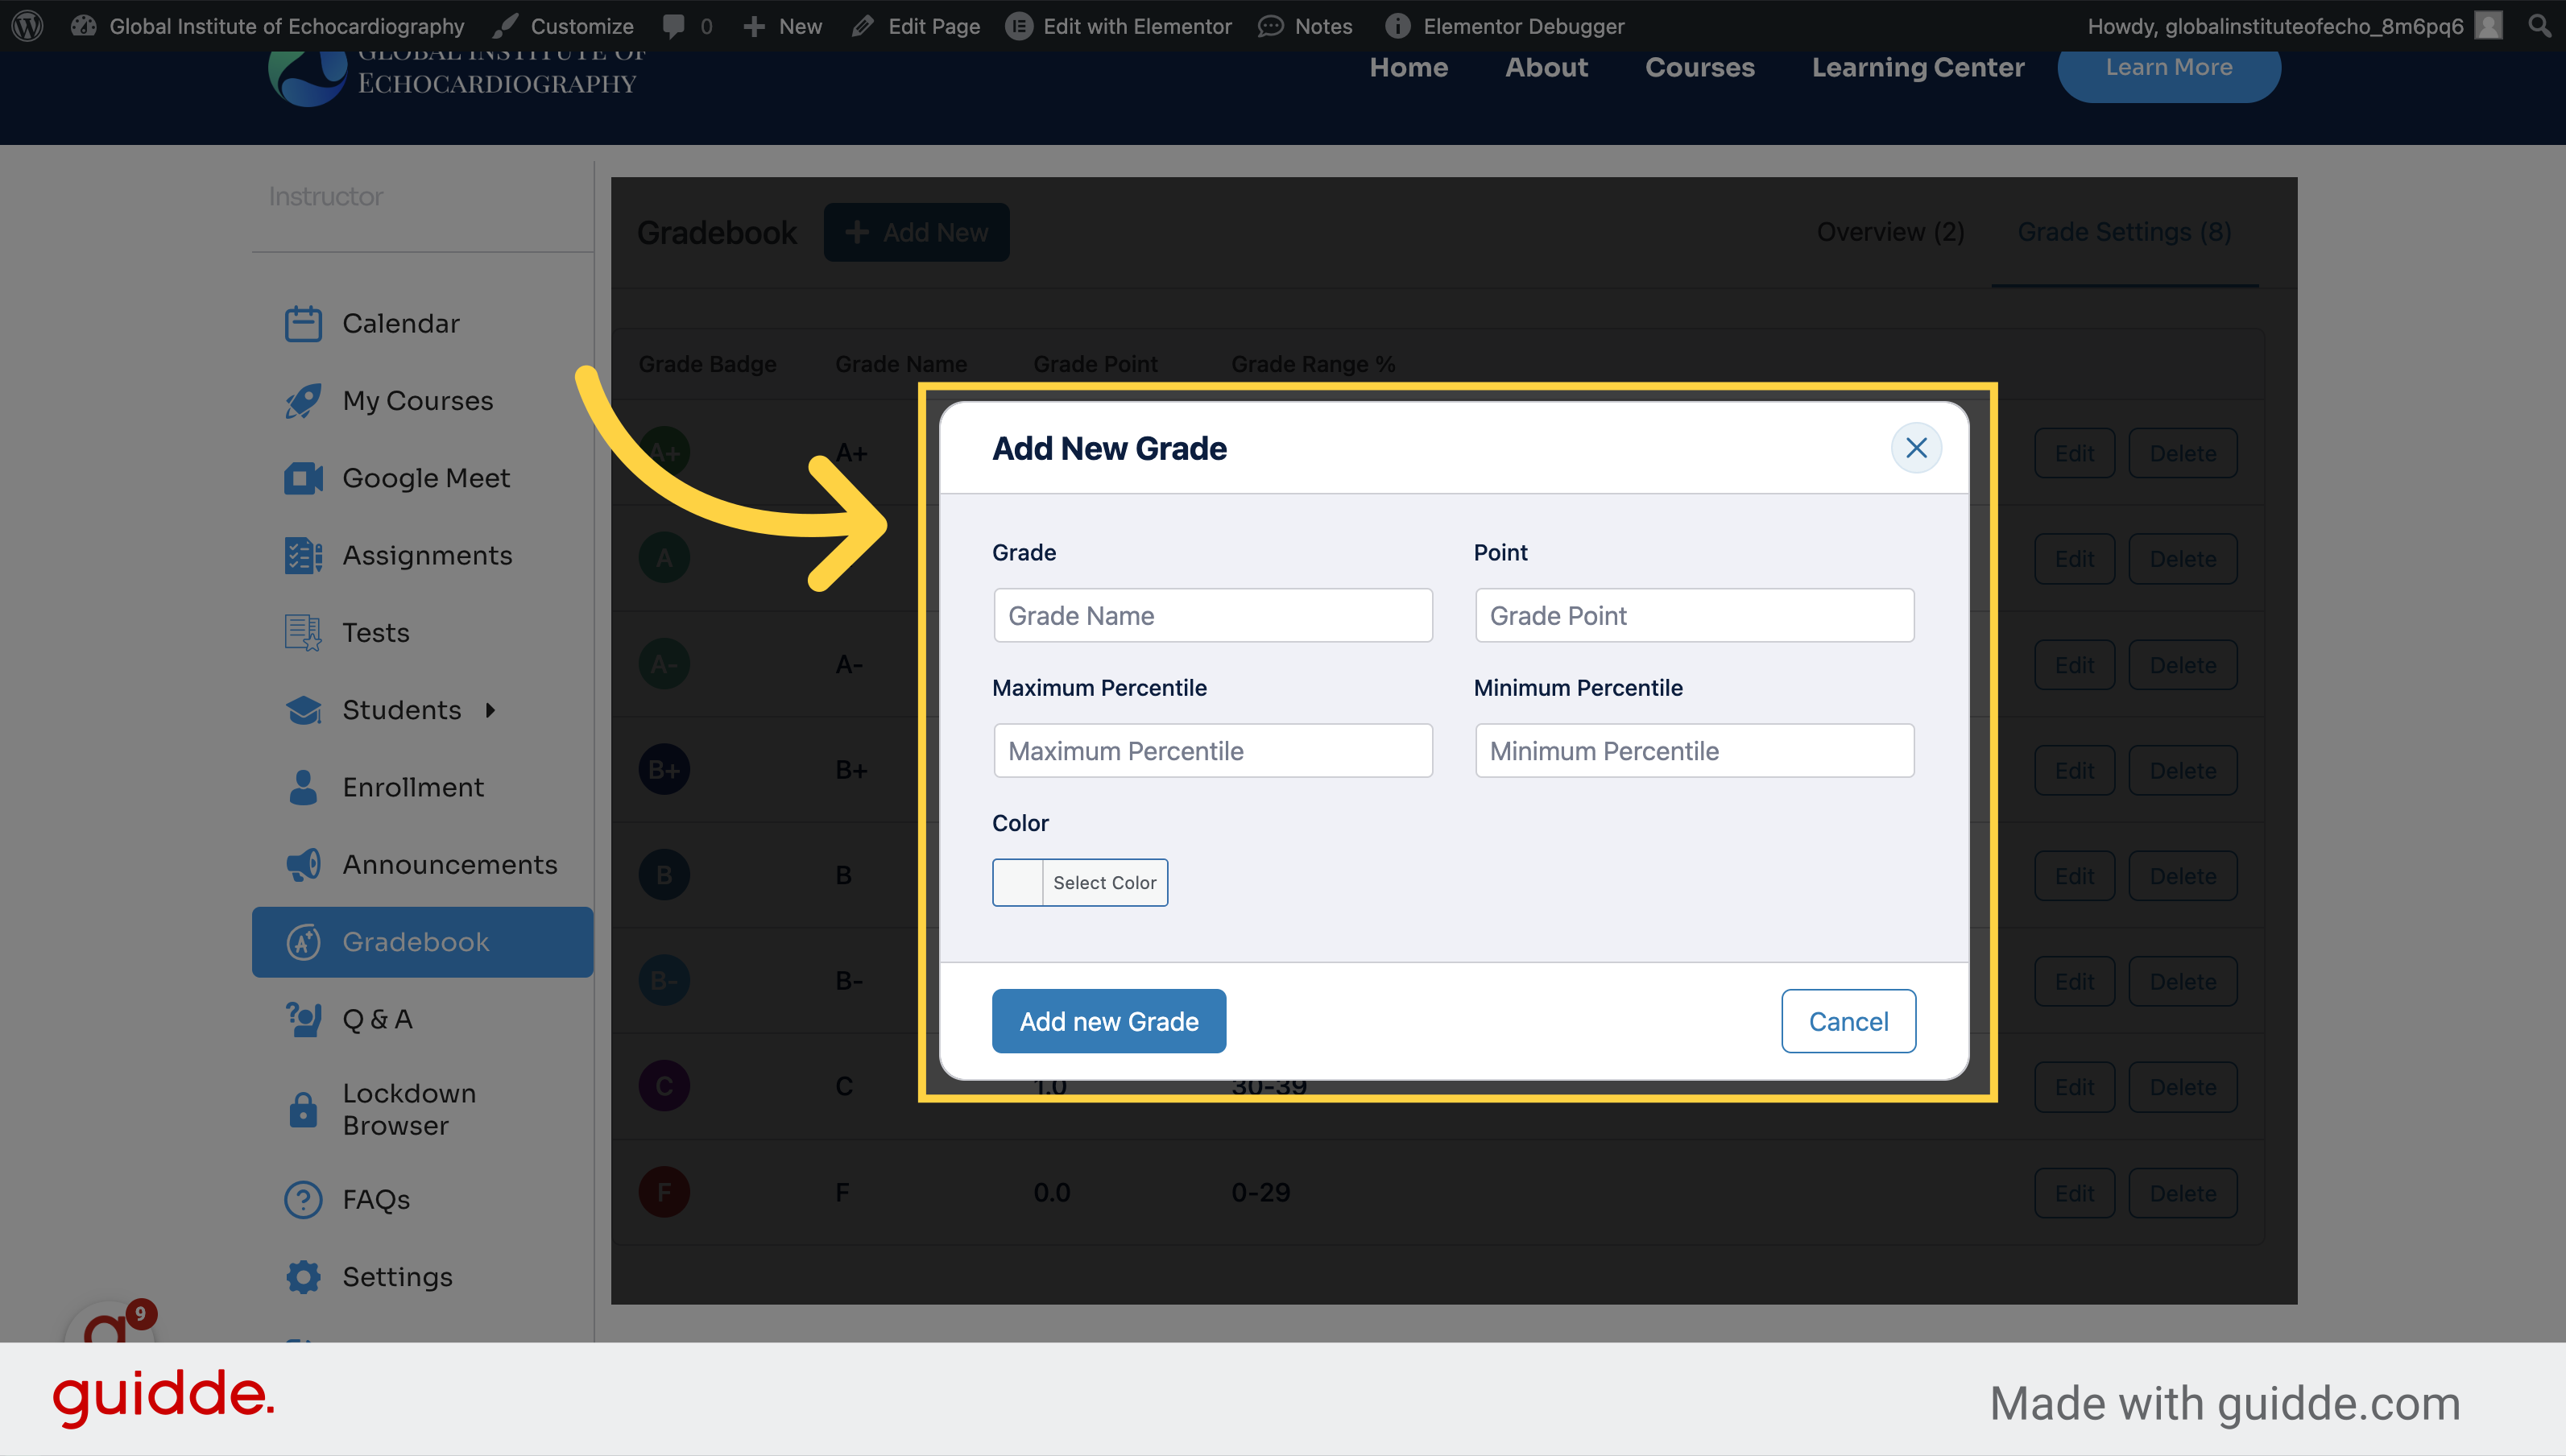
4. Click "Grade Settings"
Access the Grade Settings menu.

5. Click "Add New" to add, or edit
Add a new entry.
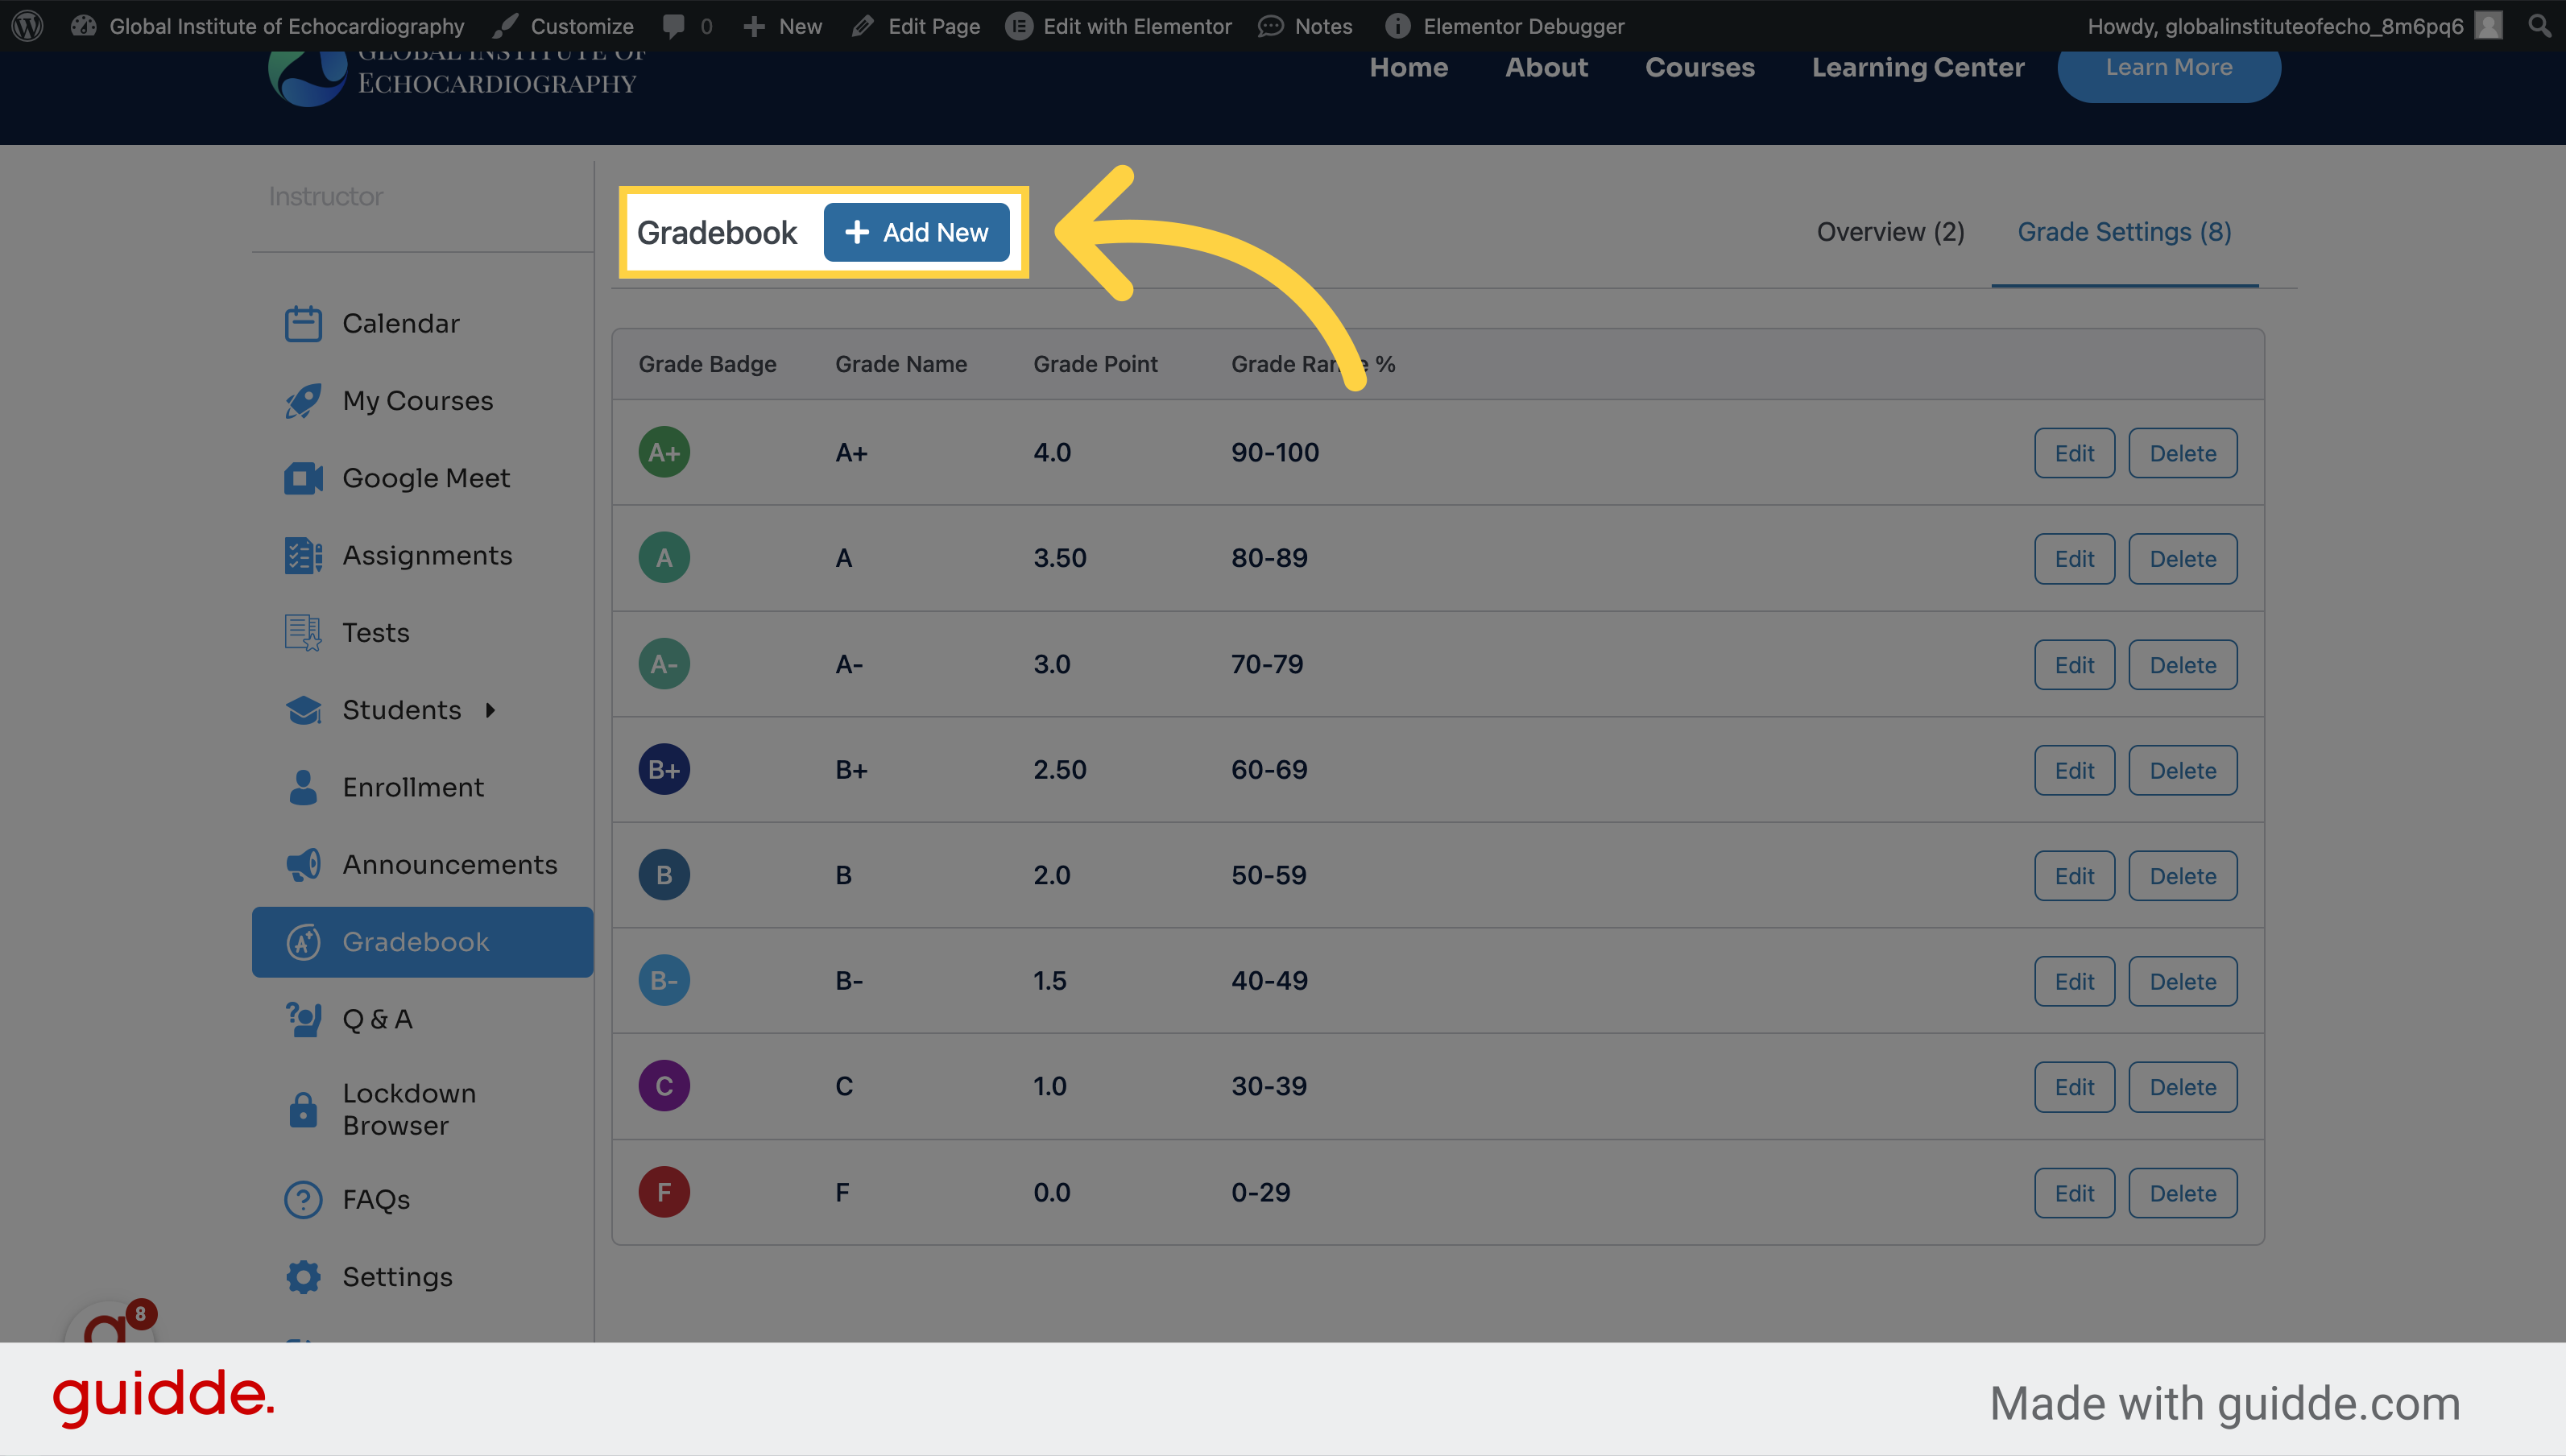
6. Define your new grade
Click the selected button
The guide covered actions such as accessing Gradebook, navigating to specific courses, selecting students, and managing grade settings in Verdigris-staging.